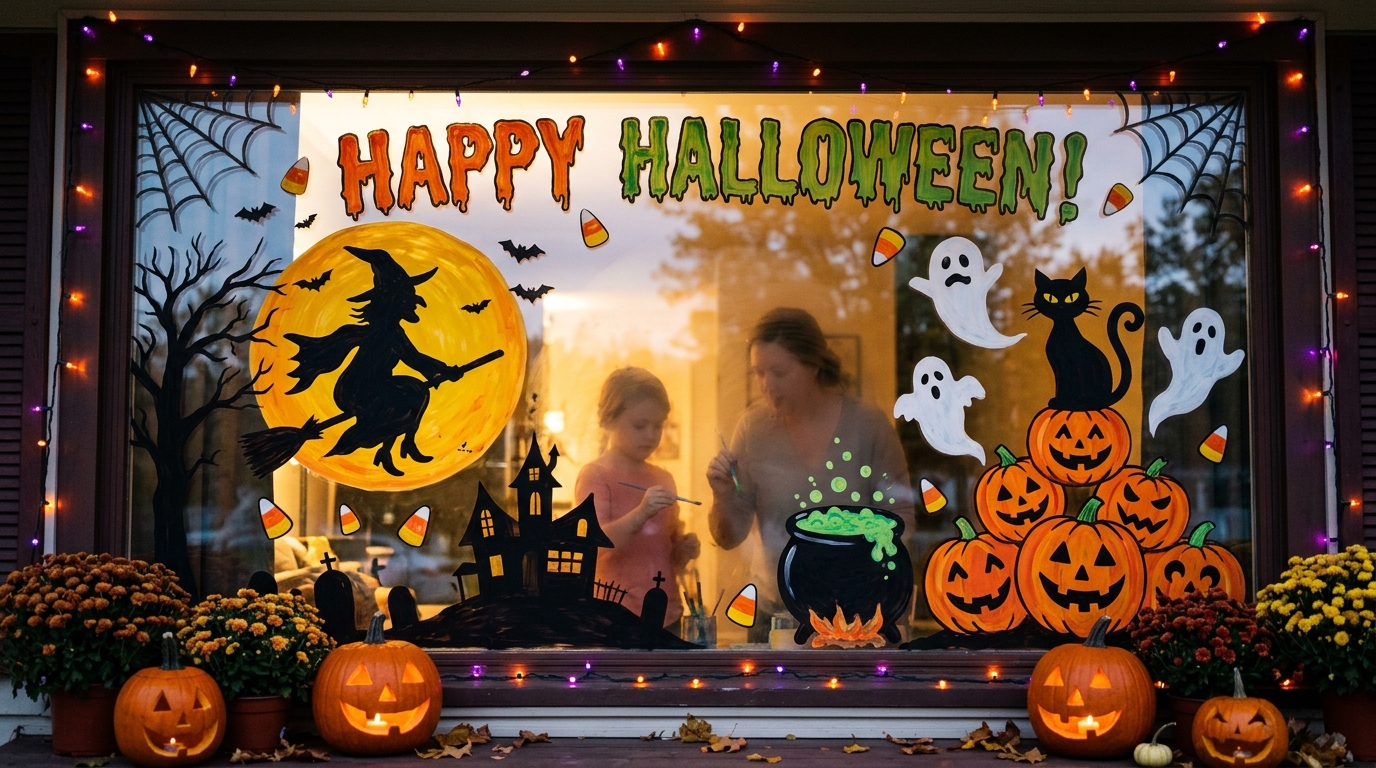
13 Spooky Halloween Window Painting Ideas For You
Halloween window painting is an easy way to give my home a spooky seasonal look without filling every room with decorations. I can use simple shapes, playful characters, and creepy silhouettes to turn ordinary windows into eye-catching displays for trick-or-treaters, guests, and neighbors.
When I plan Halloween window art, I like to think about the mood I want to create. Some designs are cute enough for a family-friendly celebration, while others feature witches, spiders, and eerie characters for a scarier effect. With washable window paint, a few brushes, and a little planning, I can create a festive display that suits my style and budget.
These 13 spooky Halloween window painting ideas offer inspiration for decorating glass with everything from Pennywise and black cats to friendly ghosts, pumpkins, bats, and witches. I can choose a simple design for a quick afternoon project or combine several Halloween symbols to create a more detailed window display.
Save this for later
Table of Contents
For the best results, I recommend planning the design before painting, using products made for glass, and testing the paint on a small area first. I also consider how the artwork will look from outside, especially if my goal is to create a welcoming display for trick-or-treaters.
Key Takeaways
- I can choose between cute, elegant, creepy, and traditional Halloween window painting styles.
- Washable window paint or glass-safe craft paint makes cleanup easier when the season ends.
- Simple outlines and large shapes are helpful when I want a design that is easy to paint.
- Combining ghosts, pumpkins, bats, and spiderwebs creates a coordinated Halloween display.
- I get the best results by cleaning the glass, sketching the design, and allowing each paint layer to dry.
- I always check product instructions and avoid painting over window hardware, emergency exits, or areas where visibility is important.
Related article: 13 Spooky Halloween Table Decorations For You
Pennywise

If I want a Halloween window painting that looks genuinely frightening, Pennywise from IT is a striking choice. The character’s pale face, bright red details, and unsettling smile can create a dramatic focal point that catches people’s attention from the street.
I would start with a simple outline of the face before adding the eyes, nose, mouth, and hair. Working with a limited palette of white, red, black, and orange helps me keep the design recognizable without making the painting unnecessarily complicated.
For a more dramatic display, I could paint Pennywise peeking around one side of the window rather than placing the entire face in the center. This gives the impression that the character is watching from behind the glass.
Pro Tip: I use a printed reference or a light pencil sketch on paper to plan the proportions before painting. If I am decorating a window that receives direct sunlight, I check that the paint is suitable for glass and follow its drying instructions.
Black Cat And More

Black cats are a classic Halloween symbol, and I find them especially useful when I want a design that is spooky without being too frightening for young children. Their simple silhouettes are easy to recognize, even when viewed from across the street.
I could paint a sitting cat with an arched back, a cat with glowing-looking eyes, or several cats lined up along the bottom of the window. Adding a crescent moon, tiny stars, or a few flying bats helps turn a basic cat painting into a complete Halloween scene.
For a balanced look, I would keep the largest cat near the center or in one corner and use smaller details to fill the surrounding space. White or yellow accents can make the eyes stand out against the dark silhouette.
Pro Tip: I draw the cat’s outline on paper first and pay particular attention to the ears, tail, and curved back. These features help make the shape recognizable without requiring lots of small details.
Spooky Window

A spooky window design works well when I want something atmospheric rather than a single large character. I can use dark silhouettes, bare tree branches, a crooked fence, and a few small ghosts to create the feeling of a haunted scene.
I would begin by painting the main shapes near the bottom and sides of the glass. This leaves enough open space for smaller details, such as bats flying across the sky or a pale moon hanging above a haunted house.
The overall effect depends on contrast. Black silhouettes against a lighter background create a strong visual impression, while white outlines and muted colors can soften the scene without taking away its Halloween character.
Pro Tip: I keep the design simple if the window has several panes or decorative frames. Working with the existing divisions in the glass can make the artwork look organized and intentional.
Cute Pumpkins

Cute pumpkins are a good option when I want Halloween decorations that feel cheerful rather than frightening. I can paint smiling jack-o’-lanterns, tiny pumpkins with rosy cheeks, or a row of different-sized pumpkins along the bottom of the window.
Orange is the obvious starting color, but I can add green stems, yellow highlights, and black facial features to give each pumpkin its own personality. Mixing happy, surprised, and sleepy expressions makes the display more interesting without adding much extra work.
I also like the idea of using pumpkins of different sizes. A large pumpkin in the middle, surrounded by smaller ones, creates a natural focal point and helps the design feel balanced.
Pro Tip: I sketch the pumpkin shapes as simple ovals before adding their faces. This makes it easier to keep the spacing even and prevents the expressions from becoming crowded.
Witchy Window

A witch-themed window can bring together several familiar Halloween details in one design. I could paint a pointed hat, a broomstick, a bubbling cauldron, or a witch flying across a crescent moon.
For a more detailed display, I would add a few stars and swirling lines to suggest movement through the night sky. A black silhouette with purple, green, or orange accents creates a traditional Halloween look without requiring a complicated painting technique.
I can also choose a friendlier style by drawing a smiling witch with a colorful hat. This works well when I want the window to feel festive for children and visitors of all ages.
Pro Tip: I paint the largest shapes first and add smaller details only after the main layer has dried. This helps prevent smudges and makes the finished artwork easier to read from a distance.
Boo!

Sometimes, a few words are all I need to create a fun Halloween window. A large “BOO!” surrounded by little ghosts, stars, or bats gives the glass a playful look without requiring advanced painting skills.
I would use bold lettering so the message remains easy to read from outside. White letters can stand out against a dark background, while orange or purple accents help tie the design into the rest of my Halloween decorations.
If I want a softer look, I can paint the letters in a rounded style and place a smiling ghost beside them. For a scarier version, I could use uneven lettering and add a few thin spiderwebs around the edges.
Pro Tip: I lightly mark the position of each letter on paper before painting. Keeping the spacing consistent makes the finished message look neat, especially on wide windows.
Also read: 13 Creative Halloween Cubicle Decor Ideas For You
Ghost And Pumpkins

Ghosts and pumpkins make a natural Halloween pairing because they combine a spooky character with a familiar seasonal decoration. I can paint a friendly ghost floating above a group of pumpkins or create a full scene with several ghosts drifting between jack-o’-lanterns.
For a simple version, I would use white for the ghost’s body, black for the eyes and mouth, and orange for the pumpkins. A few green leaves or curved lines can fill empty areas without making the design too busy.
This idea is flexible enough for a small kitchen window or a large living room window. I can adjust the number of characters and their sizes to fit the available space.
Pro Tip: I leave enough clear glass around the main shapes so each element stands out. A little empty space can make a window painting look more polished than filling every corner with decorations.
Welcome Bat

A bat-themed window is a practical choice when I want a design that feels both spooky and welcoming. I could paint one large bat above the word “Welcome” or arrange a small group of bats as though they are flying across the glass.
The shape does not need many details. Pointed wings, small ears, and a compact body are enough to make a bat recognizable. I can use black for a traditional silhouette or add small orange accents to connect it with the rest of my Halloween theme.
For an inviting entrance, I would place the design on a front-facing window where visitors can see it easily. A few stars or a crescent moon can complete the scene without overwhelming the main message.
Pro Tip: I arrange the bats at slightly different angles to suggest movement. Before painting, I check the design from outside so the lettering and shapes appear in the intended position.
Spooky Spider

A spider and its web can turn an ordinary window into a creepy Halloween feature. I like this idea because the web’s fine lines contrast with the spider’s darker shape, creating an interesting design without needing many colors.
I would start by drawing several lines that meet at a central point, then connect them with curved sections to form the web. A large spider hanging from one strand can become the main focus, while a few smaller webs in the corners help tie everything together.
Black and white are enough for a classic look, but I could use orange or purple for a more colorful display. If I prefer a less frightening design, I can give the spider oversized eyes or a friendly expression.
Pro Tip: I use a thin brush for the web and a wider brush for the spider’s body. Testing the lines on paper first helps me control the paint and avoid uneven strokes on the glass.
Chic Halloween

I do not always want Halloween decorations to look dark or frightening. A chic window painting lets me celebrate the season with a cleaner, more understated design using white shapes, simple lettering, and a few carefully placed seasonal details.
I could paint white pumpkins, delicate spiderwebs, tiny stars, or a simple outline of a haunted house. Keeping the color palette limited makes the display feel coordinated and helps it blend with modern or minimalist home décor.
This style works especially well when I want my Halloween decorations to complement the room rather than dominate it. A few well-spaced elements can be just as effective as a large, detailed scene.
Pro Tip: I choose two or three main design elements and repeat them across the window. Consistent shapes and colors help the finished display feel cohesive instead of cluttered.
Creepy Witch

For a darker Halloween theme, I would choose a creepy witch with a pointed hat, a crooked nose, or a dramatic silhouette. This design can stand alone or become part of a larger haunted scene with bats, a full moon, and twisted tree branches.
I would place the witch toward one side of the window and use smaller details to guide the eye across the rest of the glass. Dark outlines and green or purple accents can create a traditional spooky look without requiring an elaborate background.
If I want the design to appear more mysterious, I could paint the witch in silhouette and leave the facial details out. The outline alone can suggest a character flying through the night or standing beside a haunted house.
Pro Tip: I make the silhouette large enough to remain recognizable from the sidewalk. Before committing to the final design, I step back and check that the hat, body, and broom are easy to distinguish.
Haunted Pumpkins

Haunted pumpkins are a good choice when I want to make a traditional Halloween symbol look more sinister. Instead of cheerful faces, I can paint jagged mouths, narrow eyes, and uneven teeth to give each jack-o’-lantern a more unsettling expression.
I would vary the shapes and expressions so the pumpkins do not all look identical. One could have a wide grin, another could look surprised, and a third could have slanted eyes for a more threatening appearance.
A dark background made from silhouettes of bare branches or a crooked fence can help the pumpkins stand out. I would keep the main faces bright and easy to see, especially if the window will be viewed from outside after sunset.
Pro Tip: I sketch the facial expressions before applying paint. Small changes in the angle of the eyes or the shape of the mouth can make a pumpkin look playful, angry, or spooky.
Charming Ghost And Pumpkin

A charming ghost and pumpkin scene is another way I can decorate a window without making it too frightening. I could paint a little ghost holding a pumpkin, a ghost peeking from behind a jack-o’-lantern, or a pair of characters surrounded by stars.
I would use simple shapes and expressive faces to make the design easy to understand at a glance. White ghosts and orange pumpkins provide enough contrast to stand out, while small green and yellow details can add variety.
This idea is also easy to customize for different window sizes. A single ghost and pumpkin work well on a small pane, while a larger window gives me room to create a whole group of Halloween characters.
Pro Tip: I place the main ghost and pumpkin first, then add small decorative details around them. This helps me avoid overcrowding the glass and keeps the characters as the main focus.
Read this next: 13 Creative Halloween Door Decor Ideas For You To Recreate
Frequently Asked Questions About Halloween Window Painting Ideas
1. What kind of paint should I use for Halloween window painting?
I recommend using washable window paint or glass-safe tempera paint for temporary Halloween decorations. These options are generally easier to remove after the holiday. I always check the product instructions and test a small area before painting the entire window.
2. How do I make Halloween window paintings look good from outside?
I use bold shapes, clear outlines, and contrasting colors so the artwork is easy to see from a distance. Large pumpkins, black cat silhouettes, ghosts, and the word “BOO!” are great choices. I also step outside to check the design as I work.
3. What are some easy Halloween window painting ideas for beginners?
I suggest starting with simple designs such as smiling pumpkins, friendly ghosts, black bats, spiderwebs, or Halloween lettering. These ideas use basic shapes and require fewer details, making them suitable for beginners and family craft sessions.
4. How can I paint Halloween designs on windows without making a mess?
I clean the glass first, protect the windowsill with an old towel or newspaper, and keep my brushes and paint containers nearby. I also sketch the design on paper before painting and use small amounts of paint to reduce drips and splashes.
5. How do I remove Halloween window paint after the holiday?
I follow the paint manufacturer’s removal instructions. Washable window paints can often be removed with water and a soft cloth, while other products may require a suitable glass cleaner. I avoid abrasive tools that could scratch the glass or damage its finish.
6. Can I use Halloween window painting ideas for kids?
Yes, I can choose child-friendly designs such as cute pumpkins, smiling ghosts, stars, and friendly black cats. I use age-appropriate, non-toxic art supplies and supervise children during painting. Younger children can also create paper templates before an adult applies the paint.
7. How can I make my Halloween window painting look more realistic?
I focus on proportions, shading, and small details that match the design. For example, I can add jagged teeth to a haunted pumpkin, fine lines to a spiderweb, or a pale highlight to a creepy character’s face. I build the design gradually and allow each layer to dry according to the paint instructions.
8. How long do Halloween window paintings last?
The lifespan depends on the type of paint, exposure to sunlight, humidity, and whether the window is exposed to rain or condensation. Temporary window paints may last through the Halloween season when used as directed, but I check the product label for durability and removal guidance before starting.
Conclusion
Halloween window painting gives me a creative way to decorate my home without relying entirely on store-bought ornaments. From Pennywise and creepy witches to cute pumpkins, welcoming bats, and friendly ghosts, I can choose a design that matches the atmosphere I want to create.
I get the best results by selecting glass-safe paint, preparing the window properly, and planning the layout before I begin. Whether I prefer a simple “BOO!” message or a detailed haunted scene, a little preparation can help me create Halloween window art that looks festive throughout the season.



4 Comments