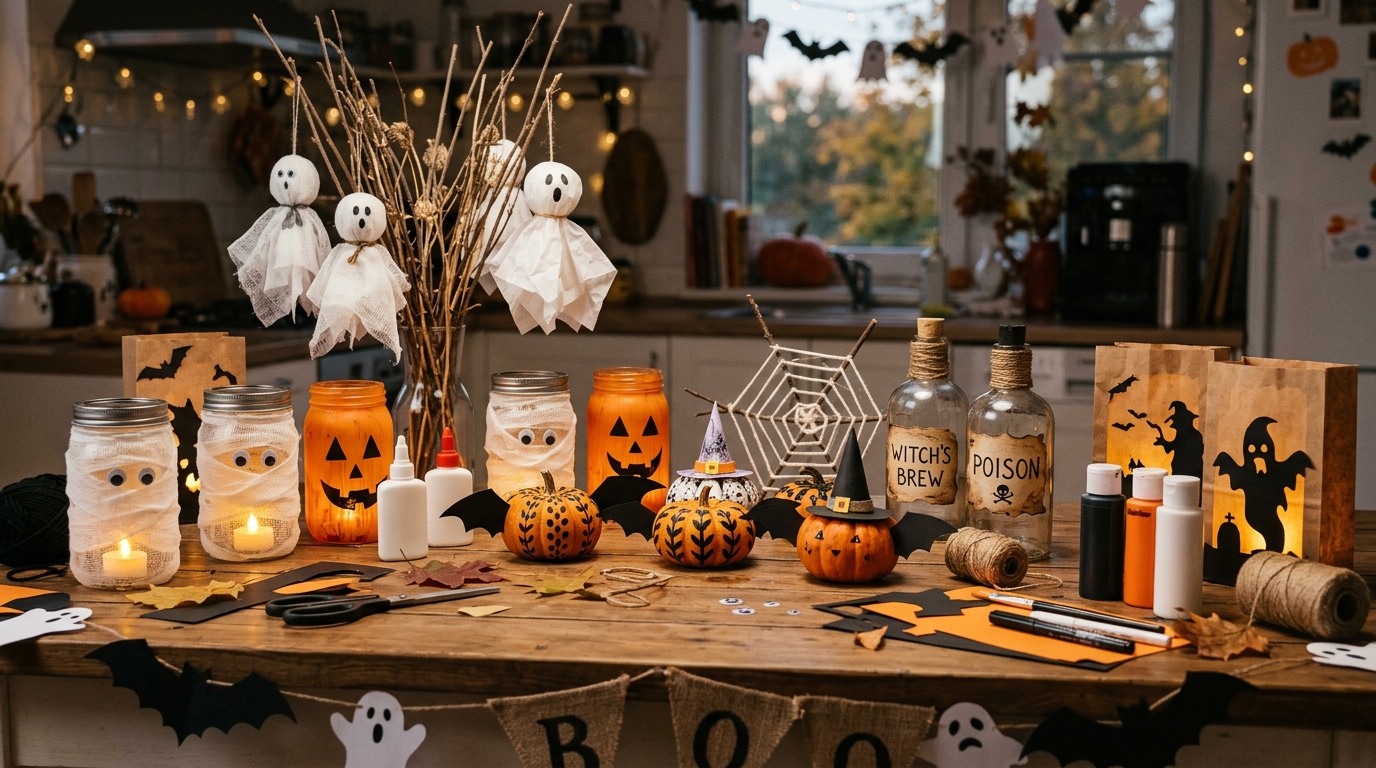
25 DIY Halloween Decoration Ideas (Easy, Cheap & Spooky for 2026)
Halloween decorating does not have to mean filling every room with expensive plastic props. When I decorate, I get better results by choosing a few handmade pieces, repeating a small color palette, and using lighting to connect everything.
I also adapt the projects to the space I actually have. An apartment, family home, covered porch, and front yard each need a different approach. Jars, cardboard, branches, fabric, paper, and leftover craft supplies can become useful Halloween decor without requiring a large shopping trip.
Halloween spending is expected to reach $13.5 billion in the U.S. in 2026, with decorations accounting for about $4.3 billion. The NRF also reports that 78% of Halloween shoppers plan to purchase decorations, while 42% plan to decorate their home or yard.
Those numbers do not change how I decorate. I would still rather make a few pieces that suit my home than buy a large collection of unrelated props. The ideas below cover indoor rooms, doors, porches, yards, pumpkins, tables, lighting, and wreaths, with practical notes for children, pets, renters, and changing weather.
I’ve gathered 25 DIY Halloween decoration ideas for different areas of the home, from simple indoor wall and table decorations to front-door projects, porch accents, outdoor displays, no-carve pumpkins, lighting, and a handmade wreath.
Many of the projects can be made with inexpensive supplies or items I already have. I especially like paper bats, cheesecloth ghosts, painted pumpkins, branch arrangements, jar luminaries, and simple lighting because they can create a Halloween mood without taking over the room.
Indoor and outdoor projects need different planning. Inside, I think about open flames, glass, small craft pieces, hanging decorations, and where children and pets can reach. Outside, I check wind, rain, sunlight, anchoring, electrical ratings, and foot traffic before putting anything in place.
Save this for later
Table of Contents
If I am decorating on a budget, I start with lighting and two or three focal areas rather than trying to decorate every surface. A smaller collection of coordinated pieces usually gives me a cleaner result and makes setup and storage easier.
Key Takeaways
- DIY decorations can help control spending, especially when I reuse materials I already own.
- Lighting can make simple handmade pieces much easier to see after dark.
- Grouping several decorations creates stronger focal points than scattering small items everywhere.
- I use battery-operated LED candles around paper, cardboard, fabric, yarn, and other homemade materials instead of open flames.
- Outdoor decorations need suitable materials, secure anchoring, and attention to wind, rain, sunlight, and foot traffic.
- No-carve pumpkins let me decorate earlier without cutting into the pumpkin.
- Small craft pieces, loose string, glitter, and tools need extra consideration when children or pets are nearby.
- I would rather make five or six coordinated projects than rush through all 25.
Related article: 27 Un-BOO-lievable Halloween Party Favor Ideas
What makes a DIY Halloween decoration look good?
For me, three things make the biggest difference: lighting, placement, and color.
A simple painted pumpkin can look finished when it is grouped with two smaller pumpkins and placed near suitable lighting. The same pumpkin can get lost if it is surrounded by too many unrelated decorations.
I also decide on the mood before I start. Black, white, and soft lighting can give me a quieter look, while orange, purple, green, and playful characters work well for a family-friendly display.
I would not try to make every project on this list. Choosing five or six that suit my space, time, and storage area usually makes more sense than making 25 decorations that compete with each other.
Are DIY Halloween decorations cheaper than store-bought?
They can be, but I do not assume every DIY project will cost less. The savings depend on what I already have, the size of the project, the quality of the materials, and whether I need to buy tools.
These are illustrative planning estimates rather than guaranteed prices. Actual prices vary by store, season, project size, materials, and what I already have at home.
| Decoration | Approximate DIY cost | Main advantage |
|---|---|---|
| Cheesecloth ghost | $8–$15 | Reusable and lightweight |
| Foam tombstone | $5–$15 each | Easy to customize |
| Paper bat display | $3–$6 | Very inexpensive |
| No-carve pumpkin | $0–$10 | No cutting required |
| Jar luminaries | $5–$12 | Works indoors or outdoors |
| Painted branch centerpiece | $5–$10 | Doubles as fall decor |
One of my best budget habits is shopping the house before shopping the store. An old jar, leftover paint, unused ribbon, cardboard, or a fallen branch can eliminate the need to buy another craft supply.
What are the best DIY indoor Halloween decorations?
For indoor spaces, I look for decorations that add atmosphere without making the room difficult to use.
Wall displays, small centerpieces, shelf arrangements, and soft LED lighting work particularly well in apartments and family rooms because they add Halloween character without taking much floor space.
Here are seven projects I would consider first.
1. Floating cheesecloth ghosts
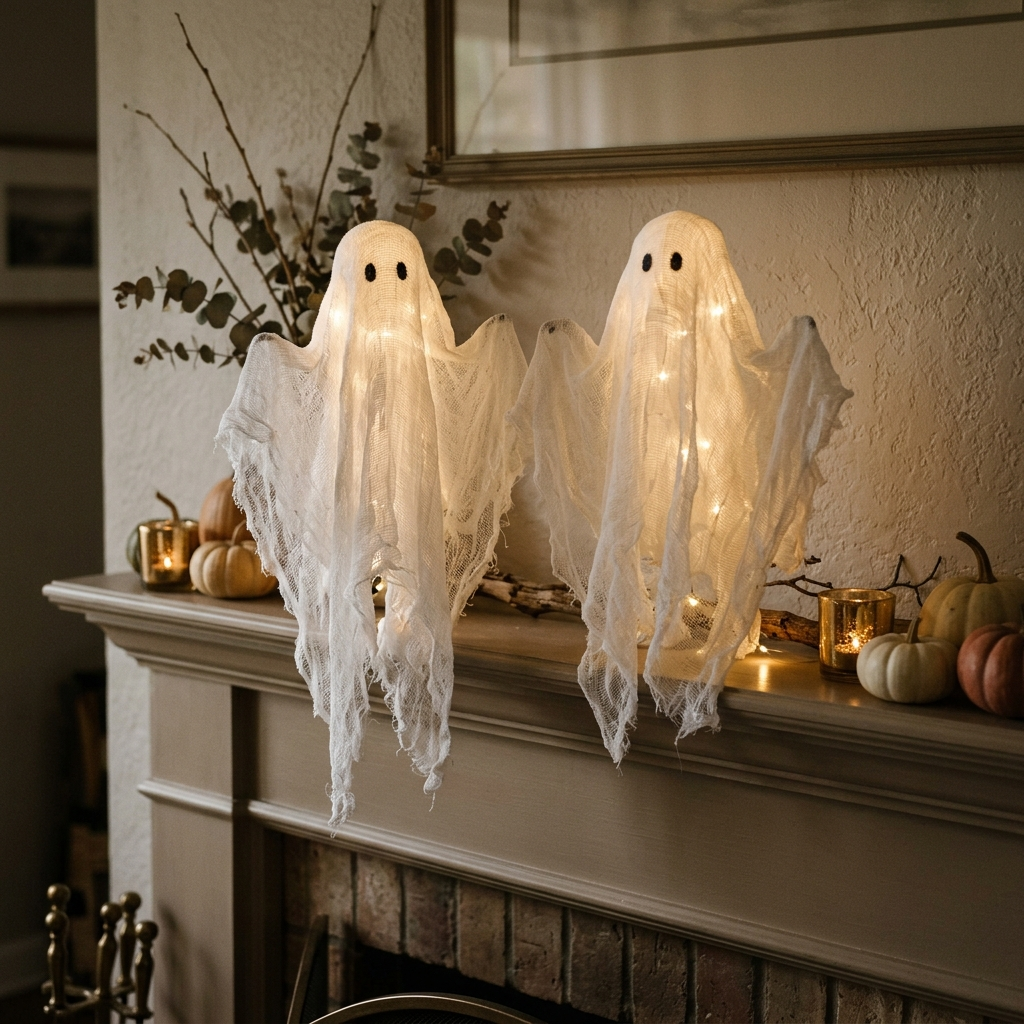
I make these by draping cheesecloth over a lightweight support and shaping it into a loose ghost form. Fabric stiffener or another suitable craft product helps the cloth hold its shape after it dries.
I follow the directions on the specific stiffener or adhesive I am using rather than assuming every product needs the same drying time. Once the fabric is completely dry, I remove the support and add simple eyes if I want a friendly expression.
An LED tea light or small battery-operated light nearby can give the ghost a soft glow. I keep the finished piece indoors or in a protected location because damp conditions can affect stiffened fabric.
Approximate cost: $8–$15, depending on the materials I already have.
Pro Tip: Let the fabric dry completely before moving the ghost. I also place it where it cannot fall into a walkway or get pulled down by children or pets.
Best for: mantels, shelves, covered porches, and family-friendly Halloween decorating.
2. Paper bat wall colony
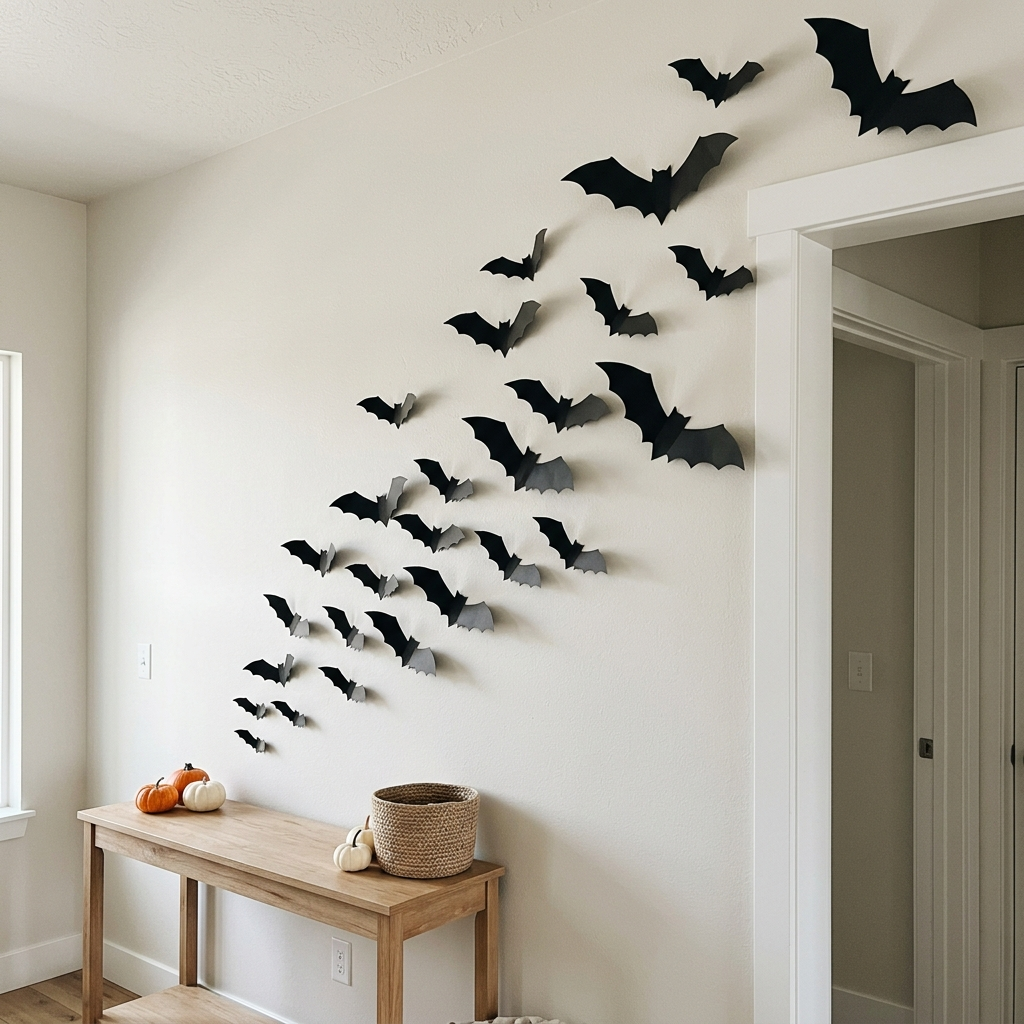
Black cardstock works well for this project because it is inexpensive, easy to cut, and simple to store flat after Halloween.
I make bats in several sizes and fold the wings slightly upward. Then I arrange them so the group appears to move across the wall and upward toward a doorway, window, or ceiling.
For renters, I use an adhesive designed for the particular wall surface and follow its instructions. I do not assume any removable adhesive will be harmless on every paint or finish, so I test it in an inconspicuous spot when needed.
Pro Tip: I make a few larger bats for the front of the arrangement and use smaller ones farther away. The size difference helps the display look less flat.
Best for: feature walls, hallways, stair areas, and inexpensive Halloween party backdrops.
3. Mason jar luminaries
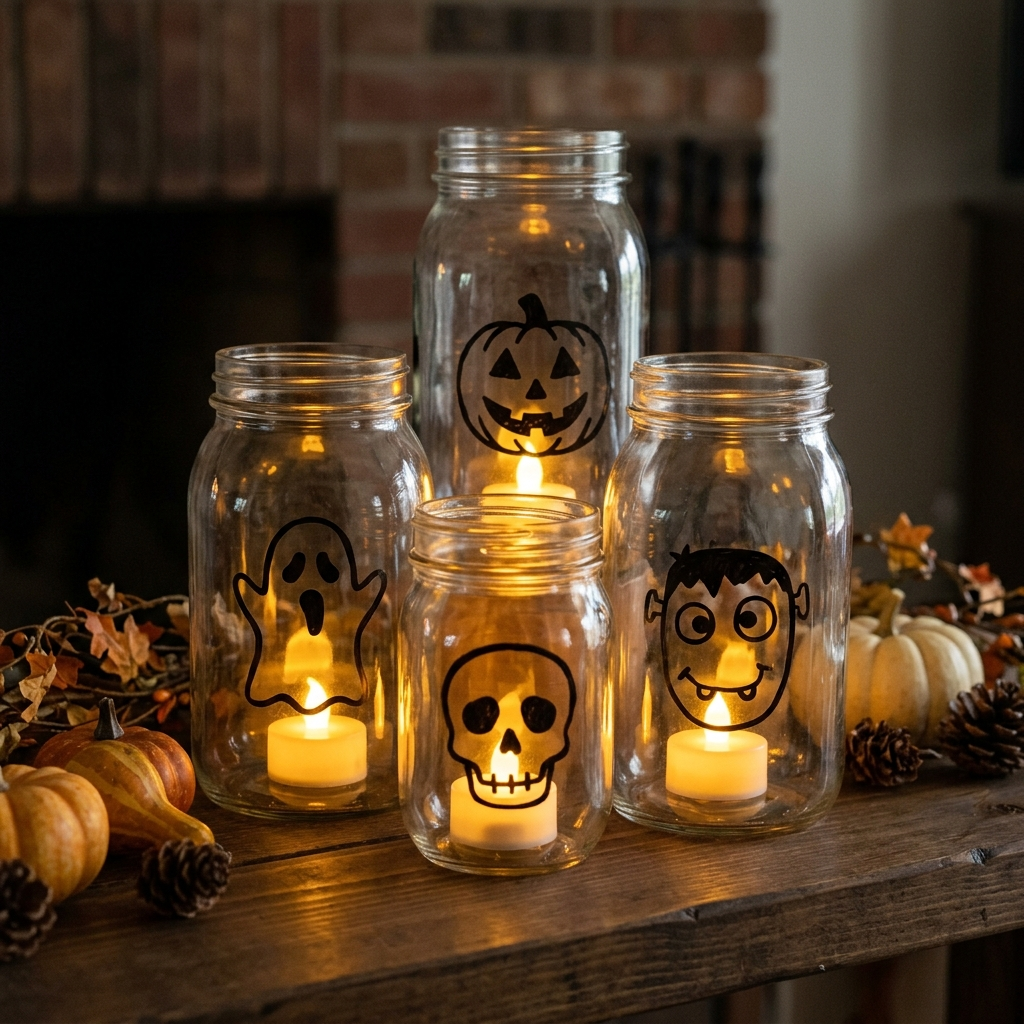
Clean glass jars can become simple Halloween lights. I can cover them with tissue paper, paint simple faces on the outside, or leave the glass mostly clear and let the light provide the effect.
I use battery-operated LED tea lights rather than real candles. A group of three or four jars usually gives me more impact than one jar placed by itself.
Because glass can break, I keep the jars on stable surfaces away from edges and busy walkways. In homes with toddlers or pets that may knock things over, lightweight plastic containers can be a safer alternative.
Best for: mantels, tables, shelves, windowsills, and entry tables.
4. Apothecary potion bottles

Old glass bottles can become decorative potion bottles with a little cleaning and labeling. I remove old labels, wash the containers thoroughly, and make decorative labels for the Halloween display.
For a worn look, I can brush a small amount of diluted brown craft paint around the label edges. I keep the effect simple rather than covering the entire bottle in craft material.
These altered bottles are for decoration only. I would never use a container decorated with craft paint, glue, labels, or other craft products for serving or storing food or drinks.
I also inspect reused bottles for cracks, chips, or other damage before putting them on a shelf.
Best for: bookshelves, mantels, bar carts, and adult Halloween displays.
5. Floating candles
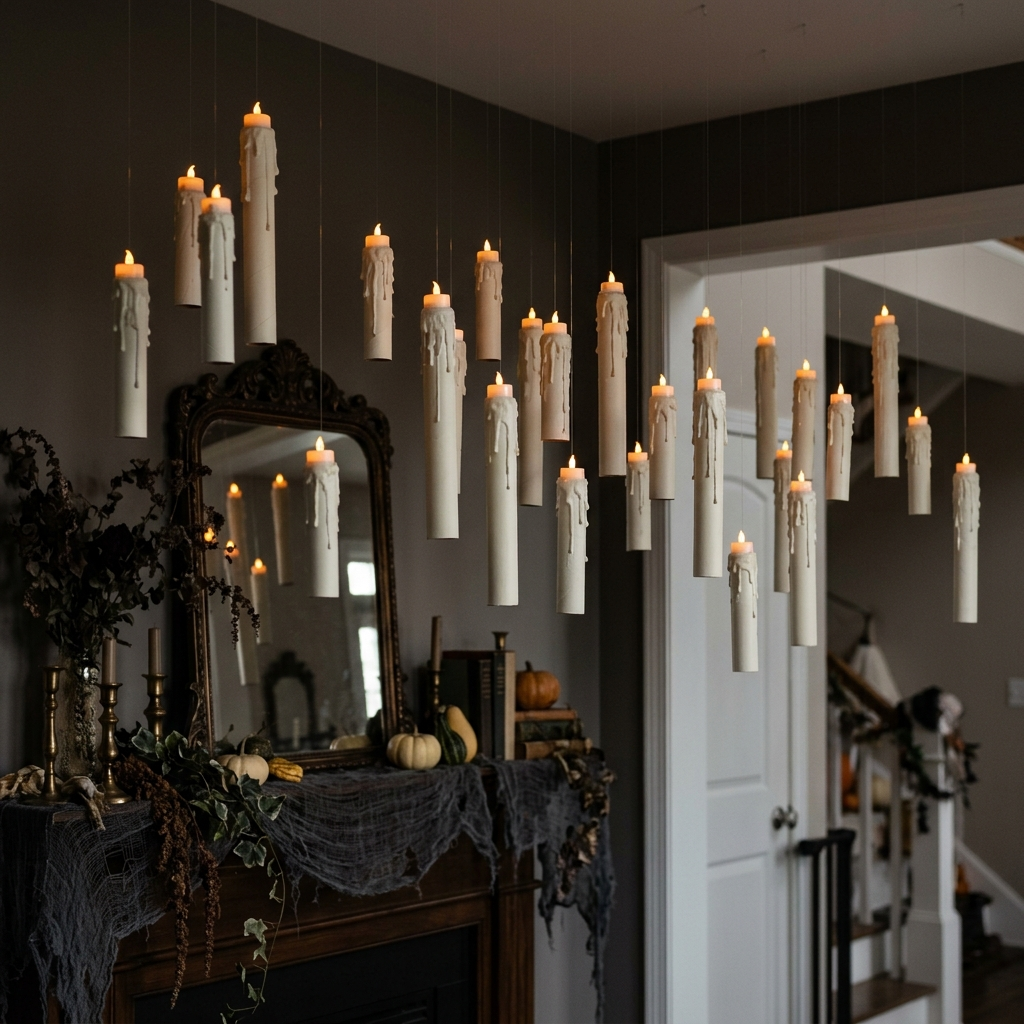
I use lightweight cardboard or craft tubes to create the appearance of old candles. Uneven drips made from a suitable craft material give the tubes a melted-wax effect before I paint them and add battery-operated LED tea lights.
I vary the drips because identical lines can make the project look too manufactured. The goal is an irregular wax effect rather than perfect symmetry.
If I hang the candles, I make sure they are securely attached and well away from curtains, ceiling fans, doorways, walkways, sprinkler heads, heat sources, and anything that could snag the material.
I never use a real flame inside or near paper or cardboard candle decorations.
Best for: mantels, entryways, Halloween party areas, and indoor displays.
6. Yarn ghost garland
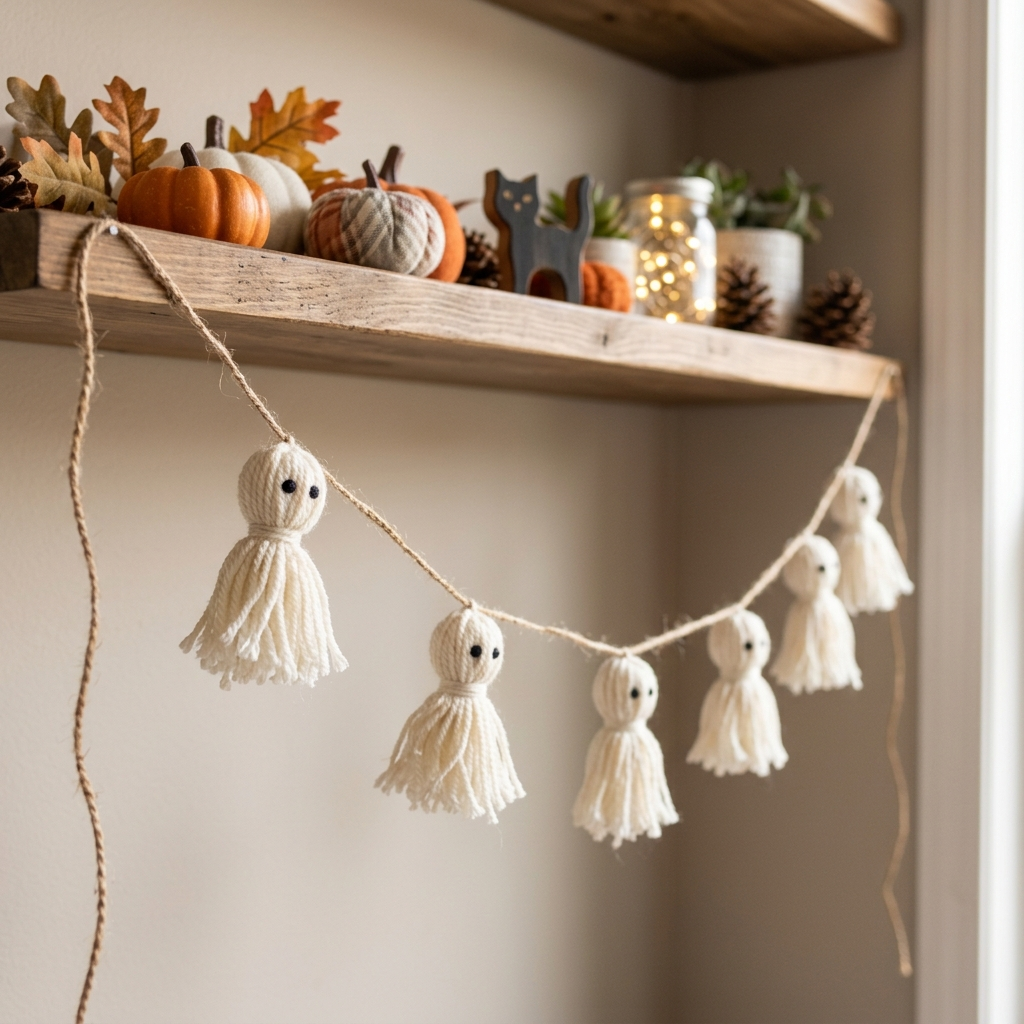
For a simple garland, I wrap white yarn around a piece of cardboard, tie the top, cut the bottom, and shape the yarn into small ghost forms.
Small felt eyes or other lightweight details can be added if appropriate. I keep the garland where loose loops and strands cannot easily be reached by toddlers or pets that might pull or chew on them.
I also make sure the garland is attached securely and does not hang where someone could snag it while walking.
Best for: children’s rooms, party tables, shelves, and family-friendly Halloween decor.
7. Stacked spell books
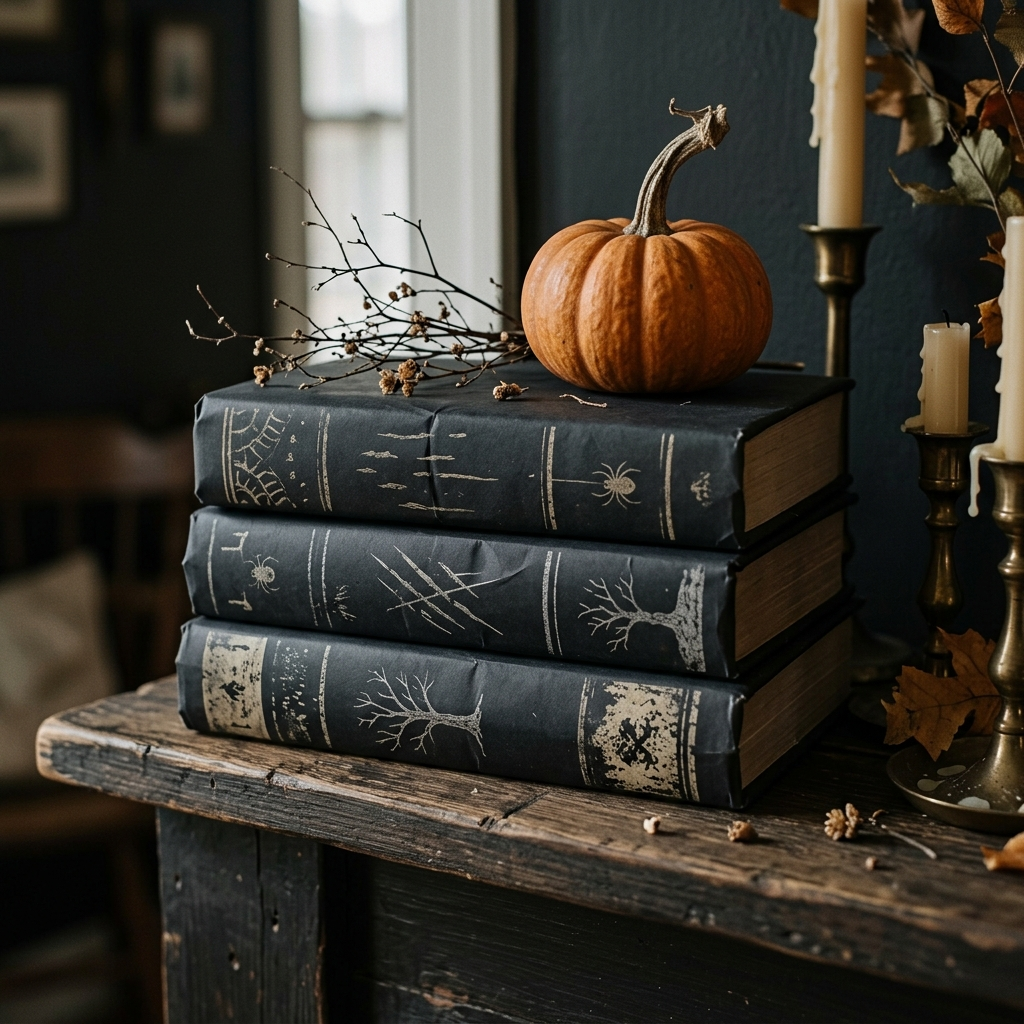
Old books give me an easy base for a Halloween shelf or mantel arrangement. I cover them with removable paper rather than permanently altering books I want to keep.
I add spooky titles to the temporary covers and stack the books with a small pumpkin, branch, or other lightweight decoration on top.
I keep the stack stable and avoid placing it where a child could easily pull the books down. For a rental, removable covers are also useful because I can create the Halloween look without permanently changing anything.
Best for: mantels, bookshelves, side tables, and entry consoles.
How do you decorate a front door and porch for Halloween?
I treat the front entrance as one decorating zone instead of decorating every part separately.
The door, windows, walkway, and porch can work together with just a few pieces. Before adding anything, I make sure guests can open the door normally and walk safely to the entrance.
8. Mummy front door
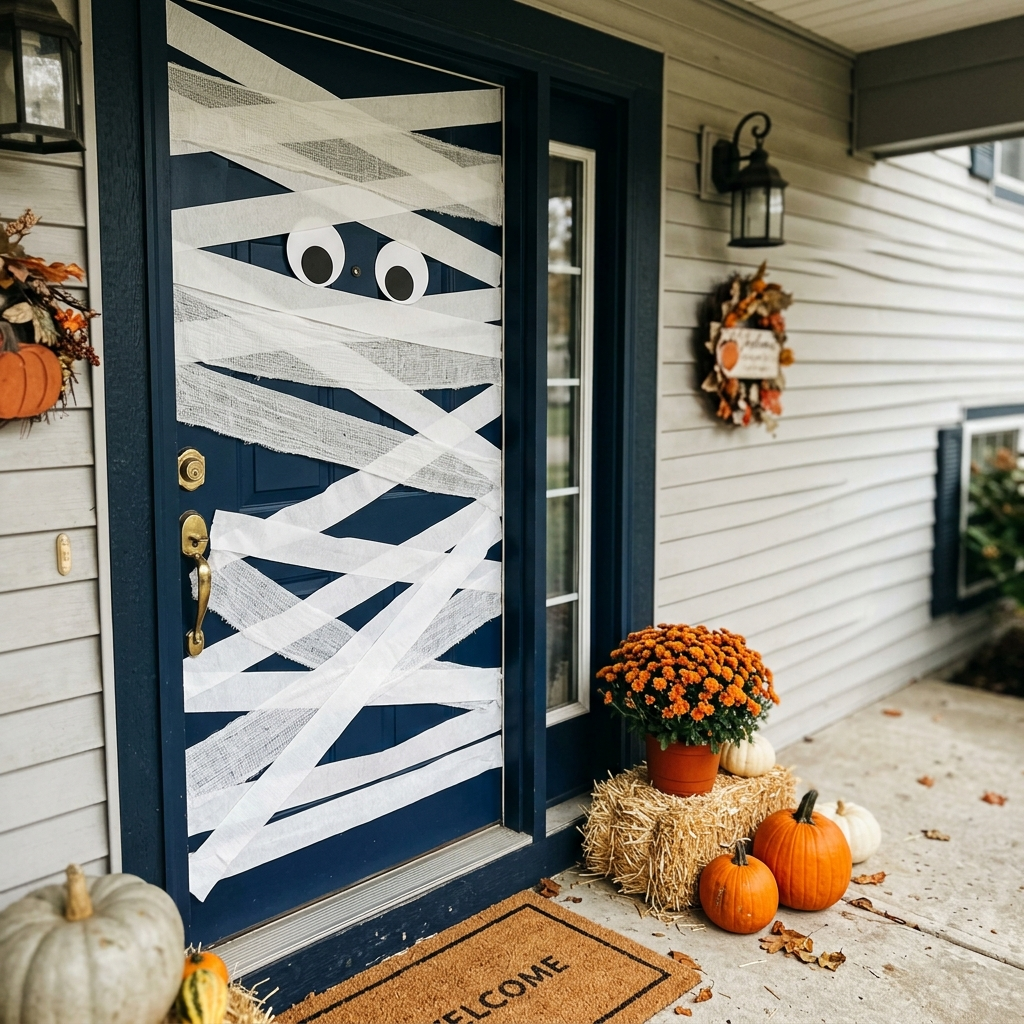
White crepe-paper or fabric strips can turn a plain door into a playful mummy.
I cross the strips in different directions instead of placing them in perfectly straight rows. Two large eyes between the strips finish the look.
I keep the latch, handle, peephole, house numbers, hinges, and emergency access clear. The decoration should never interfere with normal door operation.
For renters, I use removable attachment methods that suit the door surface and test them first when necessary.
Best for: family homes, children’s parties, classrooms, and playful Halloween entrances.
9. Window silhouettes
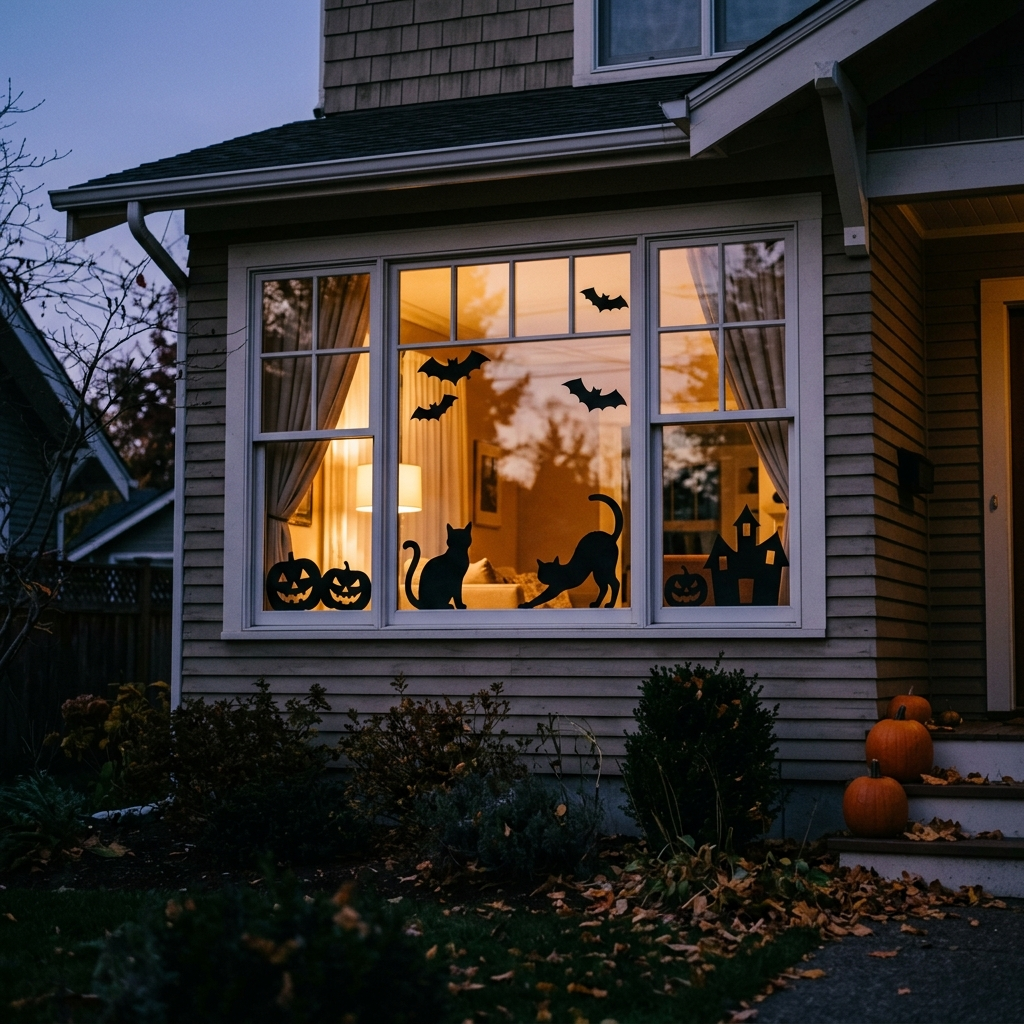
I cut bats, cats, witches, pumpkins, or haunted-house shapes from black poster board and place them on the inside of the window.
At night, the shapes become easier to see when suitable indoor lighting is positioned behind them. I keep the paper away from heat sources and use LED lighting rather than placing a flame near the display.
Pro Tip: I test one silhouette from outside after dark before cutting a whole set. A shape that looks obvious from inside may not read clearly from the street.
Best for: front-facing windows and homes where I want outdoor impact without placing decorations in the yard.
10. Foam-ball spiders and web
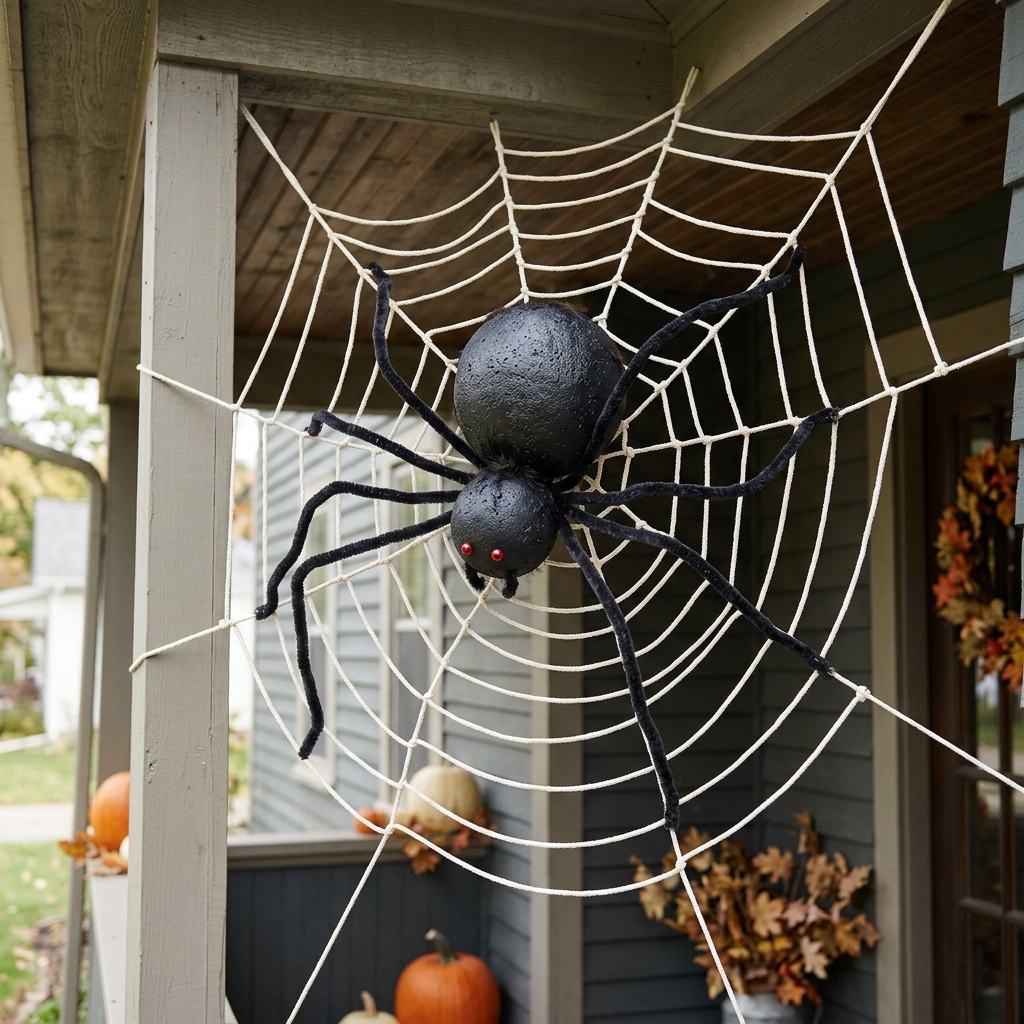
For a large spider, I start with a lightweight foam base and attach flexible craft legs securely. The spider can then sit inside a larger web made from suitable cord or web material.
I make the web large enough to be visible from the approach to the house instead of creating a tiny spider that disappears against the porch.
If I use the project outdoors, I consider the weather and choose materials appropriate for the location. Foam and other lightweight craft materials are not automatically suitable for rain, strong wind, or prolonged sunlight.
Best for: porch corners, entryways, and family-friendly spooky displays.
11. Paper-bag luminaries
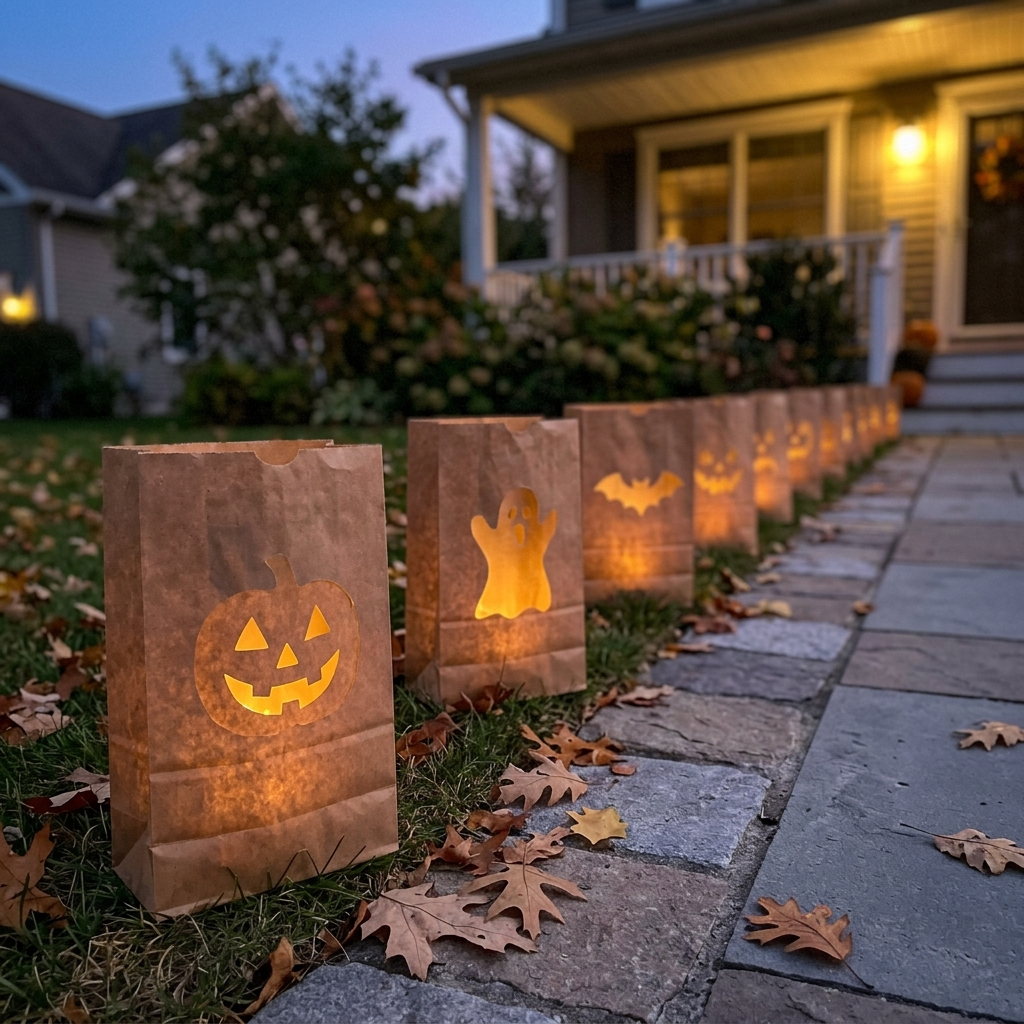
I use plain paper bags, cut a simple Halloween shape into the front, add enough weight to keep each bag stable, and place a battery-operated LED light inside.
I never use a real candle in a paper bag. Paper, dry leaves, fabric, and other nearby materials can catch fire, so an LED light is the safer choice for this type of decoration.
For outdoor use, I check the weather before setting them out and avoid leaving paper bags outside in conditions that could soak or blow them over.
I also leave enough space between bags to keep the walkway clear and reduce the chance of someone kicking or tripping over one.
Best for: walkways, steps, porch edges, and Halloween party entrances.
12. Spiderweb doormat
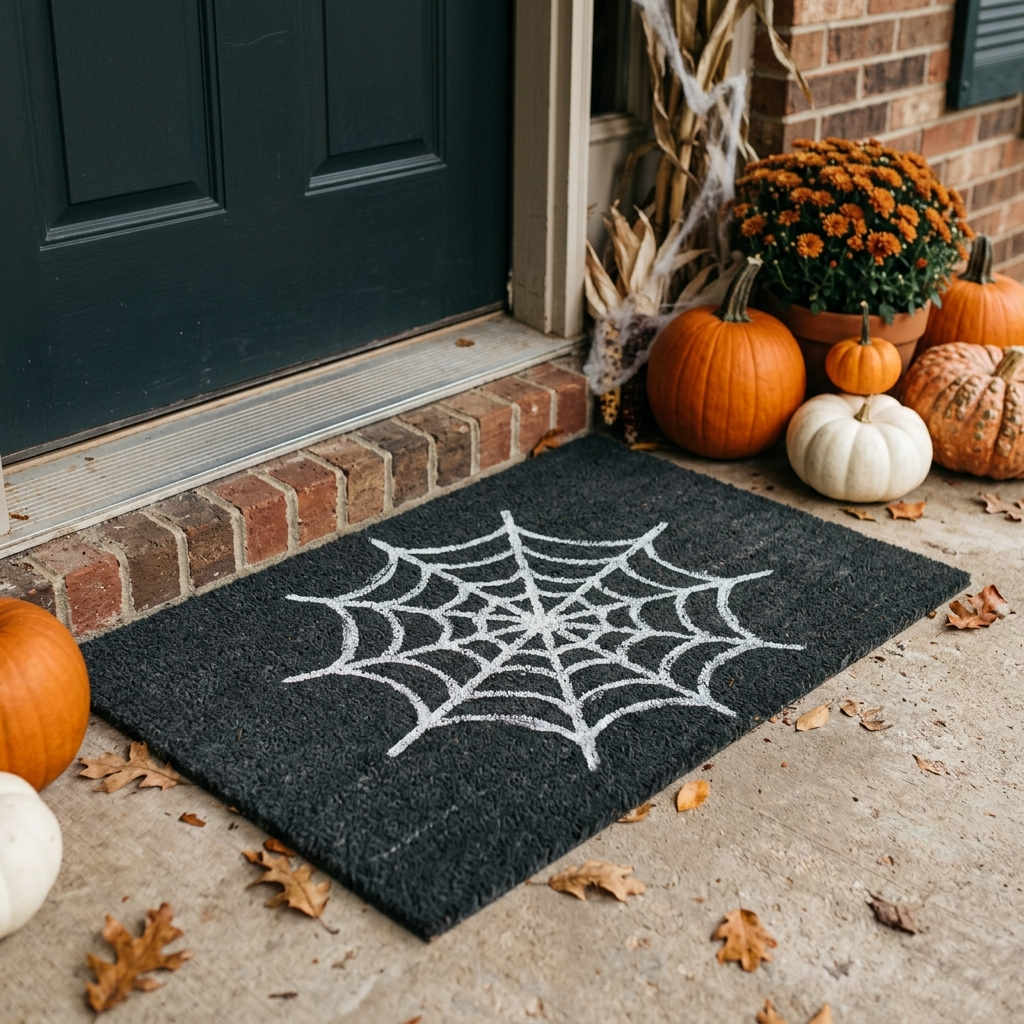
A plain dark doormat gives me an easy surface for a simple spiderweb design.
I use a stencil to keep the web consistent and choose paint that is suitable for the specific doormat material and intended location. I follow the paint manufacturer’s drying and curing instructions before putting the mat back outside.
I do not assume that every acrylic or craft paint becomes weatherproof simply because it is used outdoors. The surface, product, and exposure all matter.
Best for: front doors, covered porches, and subtle Halloween decorating.
What are easy DIY outdoor Halloween decorations?
Outdoor decorations need more planning because wind, rain, sunlight, ground conditions, electrical access, and foot traffic can all affect how a project performs.
I usually get better results by choosing a few larger focal pieces and securing them properly rather than filling the yard with many lightweight decorations.
I also check the forecast before putting delicate homemade pieces outside. A project that works perfectly on a dry, calm evening may not hold up during heavy rain or strong wind.
13. Foam tombstones
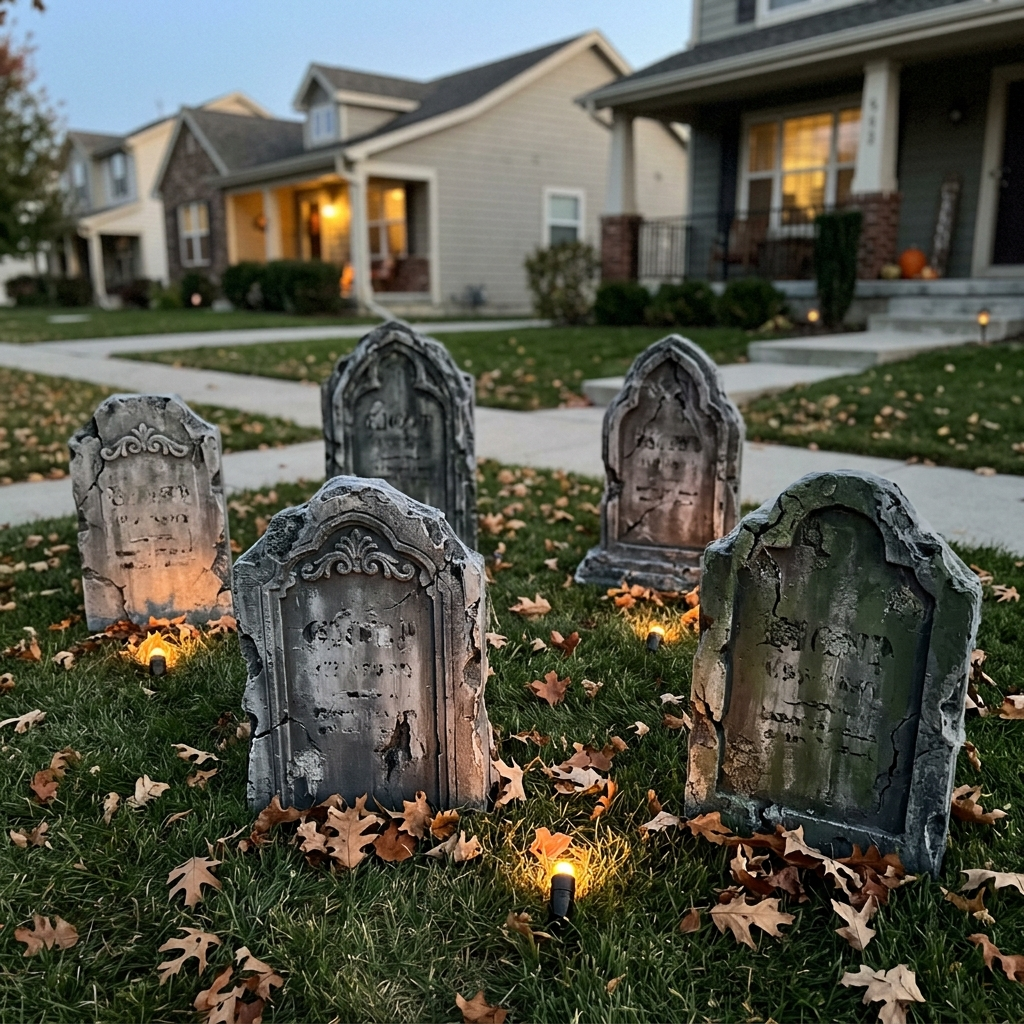
I start by sketching the tombstone shape onto suitable foam board, then carefully cut the outline using the appropriate tool. Rounded edges, cracks, and lettering help give each stone a less uniform appearance before painting.
I use appropriate protective measures and follow the instructions for the cutting tool and material. Foam may look soft, but cutting tools can still cause serious injuries. Children should not use these tools simply because the material is lightweight.
Once the pieces are painted and fully dry, I secure them with suitable stakes or supports. I do not rely on paint or a generic sealer to make foam automatically weatherproof.
If the display is near a sidewalk, property line, shared outdoor area, or rental property, I also check the applicable property rules and keep the decorations out of the walking path.
Best for: front-yard Halloween scenes and larger outdoor displays.
14. Cheesecloth yard ghosts
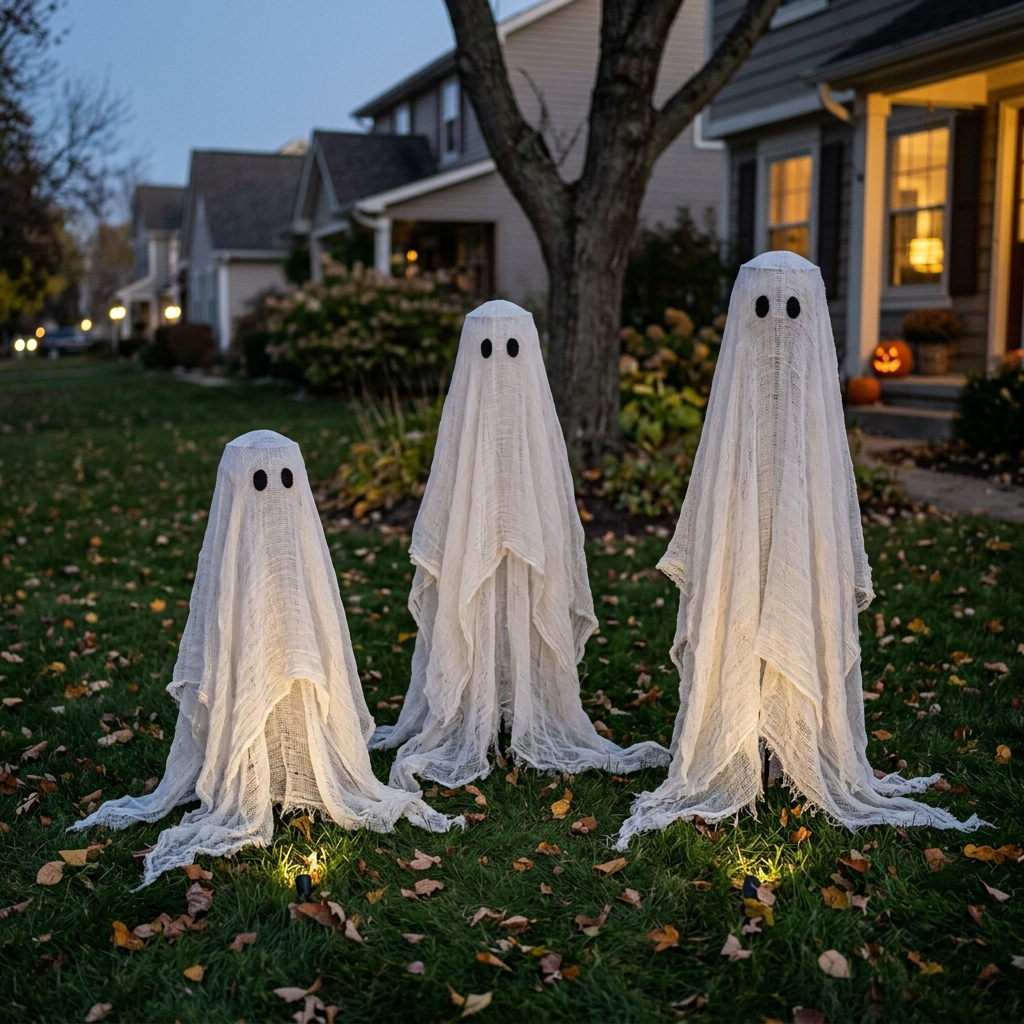
For outdoor ghosts, I use a lightweight frame such as a tomato cage and cover it with cheesecloth.
The frame needs to be stable enough for the location, and I secure the fabric so wind cannot easily pull the entire piece apart. Two or three ghosts at different heights usually create a more natural group.
For lighting, I use products specifically intended for the environment where they will be placed. Indoor-rated electrical equipment should not be exposed to rain simply because it is under a porch.
If the weather turns wet or windy, I bring delicate pieces inside or move them to a protected area when practical.
Best for: lawns, garden areas, and covered outdoor spaces.
Also read: 23 Non-Candy Halloween Treats That Make the Perfect Surprise
15. Hula-hoop spider web
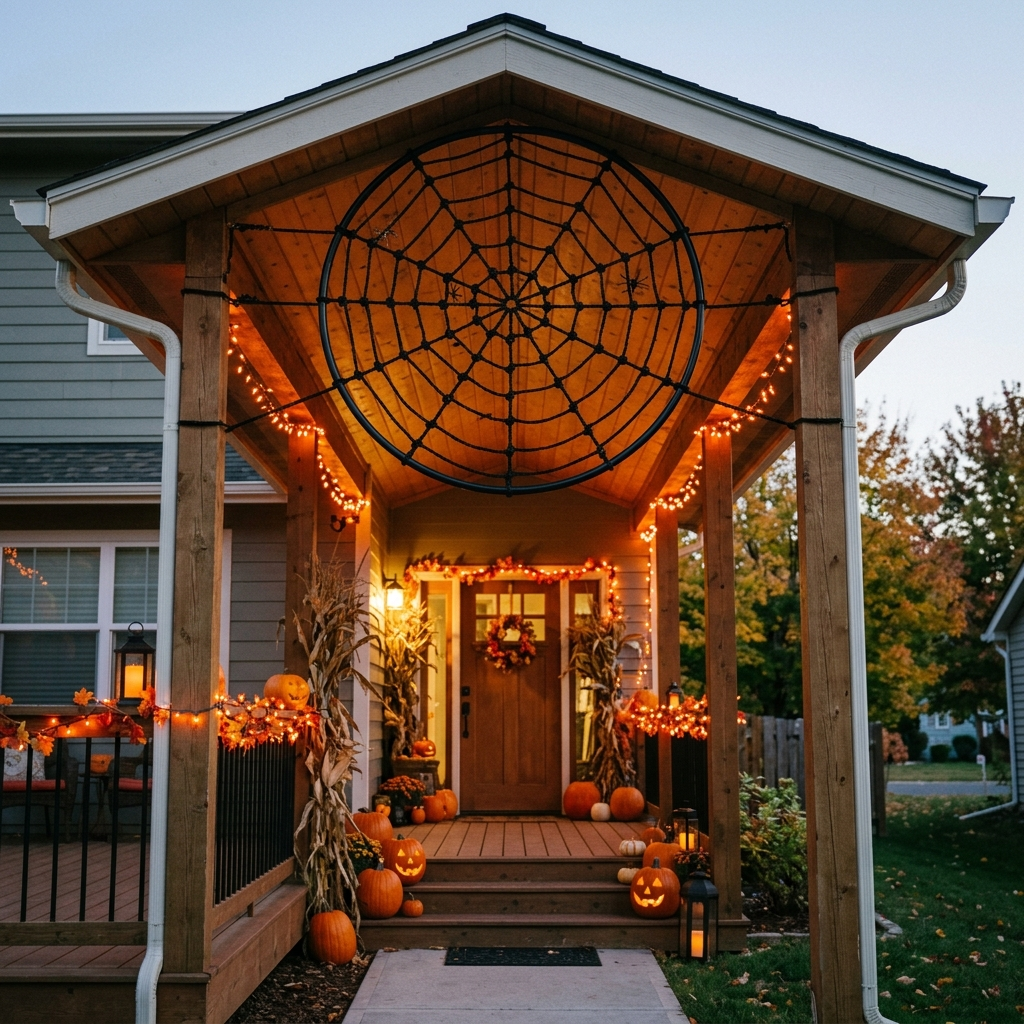
A hula hoop gives me a ready-made circular frame for a large spiderweb.
I attach rope or cord from the outer ring toward the center and then add curved connecting sections. I keep some sections slightly uneven so the finished web feels handmade rather than perfectly geometric.
The web needs a secure attachment point. I also keep it above normal head height and away from walkways, doors, and areas where guests could snag themselves on the cord.
After strong wind, I check the attachment points and structure before leaving it in place.
Best for: porches, fences, covered patios, and large Halloween backdrops.
16. Pumpkin-pail lanterns
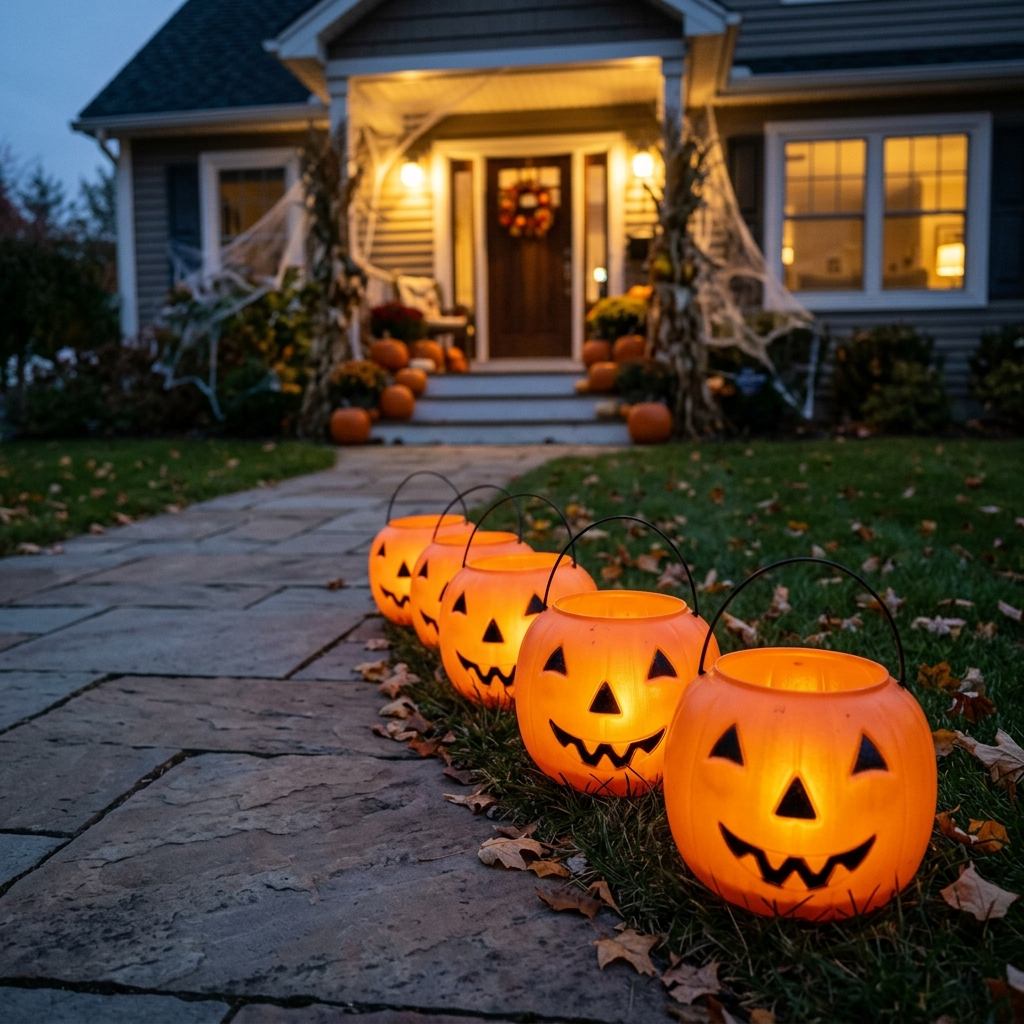
Plastic pumpkin buckets can become simple walkway lights when I place suitable battery-operated or outdoor-rated lights inside them.
I arrange the buckets so they guide the eye without narrowing the walking path. If I use electrical lighting outdoors, I make sure the product is designed for that location and follow its instructions rather than improvising electrical connections.
Battery-operated options are convenient when I do not have an outlet near the walkway.
I also keep cords, if any are necessary, secured and out of areas where guests could trip.
Best for: walkways, porches, patios, and homes where an outlet is not conveniently located.
17. Branch witch’s broom
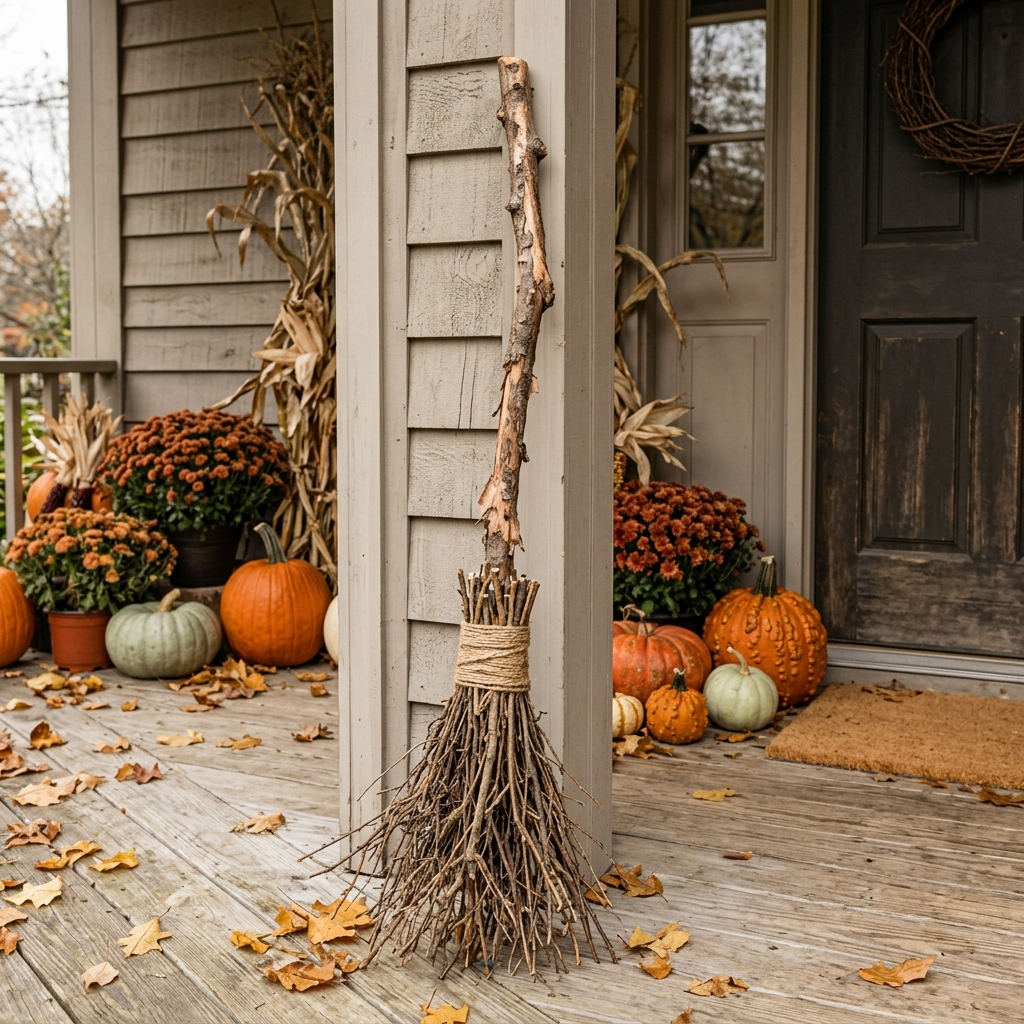
This is one of my favorite nearly-free Halloween accents.
I gather suitable fallen branches, inspect them carefully, and arrange thinner branches around a stronger central stick. Twine holds the bundle together, and I can lean the finished broom beside the door.
Before using branches, I check for insects, rot, sharp points, splintering, or other damage. I also secure the broom so it cannot fall into the walkway or onto guests.
Best for: rustic porches, entryways, garden displays, and fall-themed Halloween decor.
What are the best no-carve pumpkin ideas?
No-carve pumpkins are useful when I want to start decorating early or when children want to participate without handling carving tools.
Instead of cutting into the pumpkin, I decorate the surface with paint, paper, glitter, sequins, or raised details.
I still choose materials and activities according to the child’s age and supervise any project involving glue, scissors, or other tools.
18. Painted pumpkins
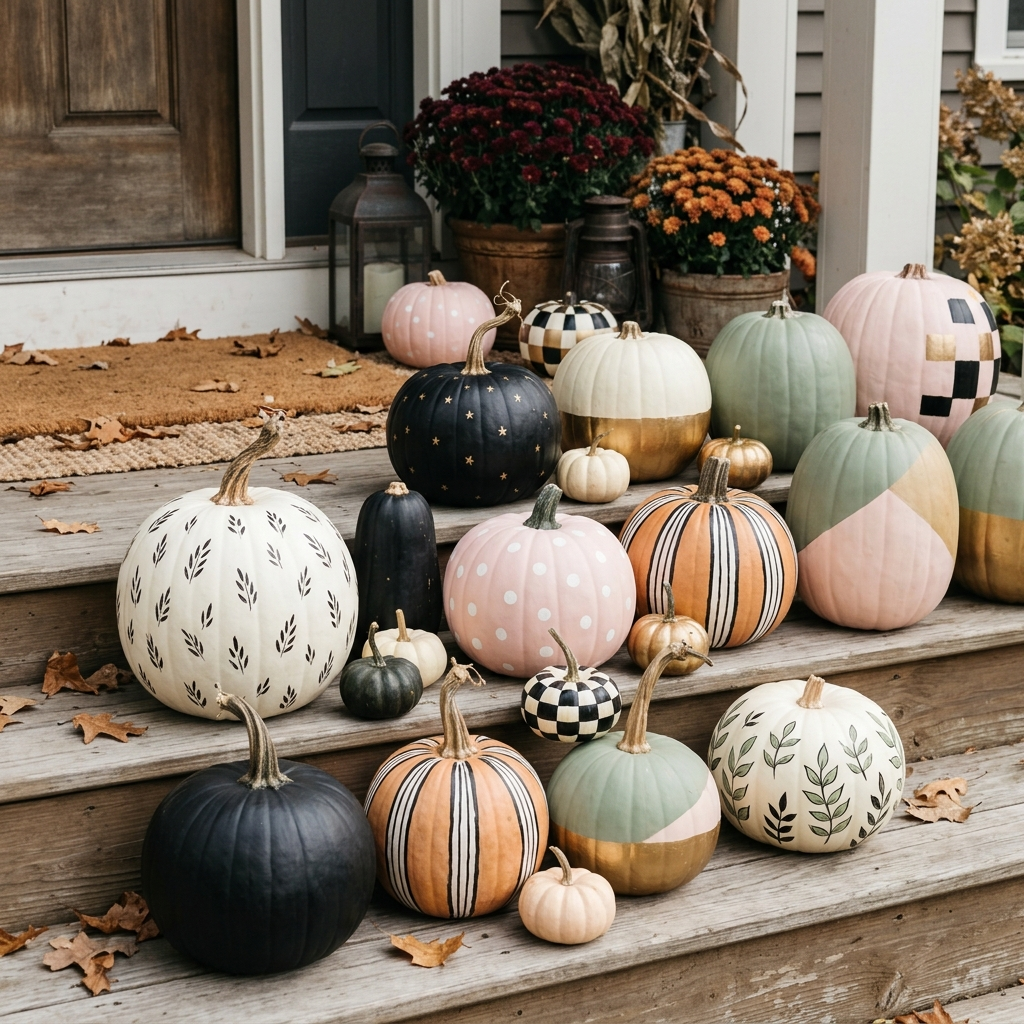
I start by cleaning the pumpkin and allowing the surface to dry before painting.
Soft pastels, white, black, metallic shades, and traditional orange can all work depending on the rest of the display. I sometimes use several colors across a group rather than putting every color on one pumpkin.
For outdoor pumpkins, I choose a paint that is suitable for the pumpkin and the expected conditions and follow the product directions. I do not assume ordinary craft paint will remain intact in rain or prolonged sunlight.
I also keep pumpkins out of walking paths and away from places where guests could trip over them.
Best for: porches, entry tables, shelves, and coordinated pumpkin displays.
19. Decoupage pumpkins
Decoupage lets me add patterns without carving into the pumpkin.
I apply a suitable decoupage medium, place thin paper or fabric over the surface, smooth out wrinkles, and allow each layer to dry before adding more.
I pay attention to moisture because paper and fabric can absorb water. If the pumpkin will sit outside, I only use materials and products that are appropriate for that exposure, and I do not assume decoupage alone makes the pumpkin weatherproof.
Best for: centerpieces, indoor displays, fall tables, and decorative Halloween arrangements.
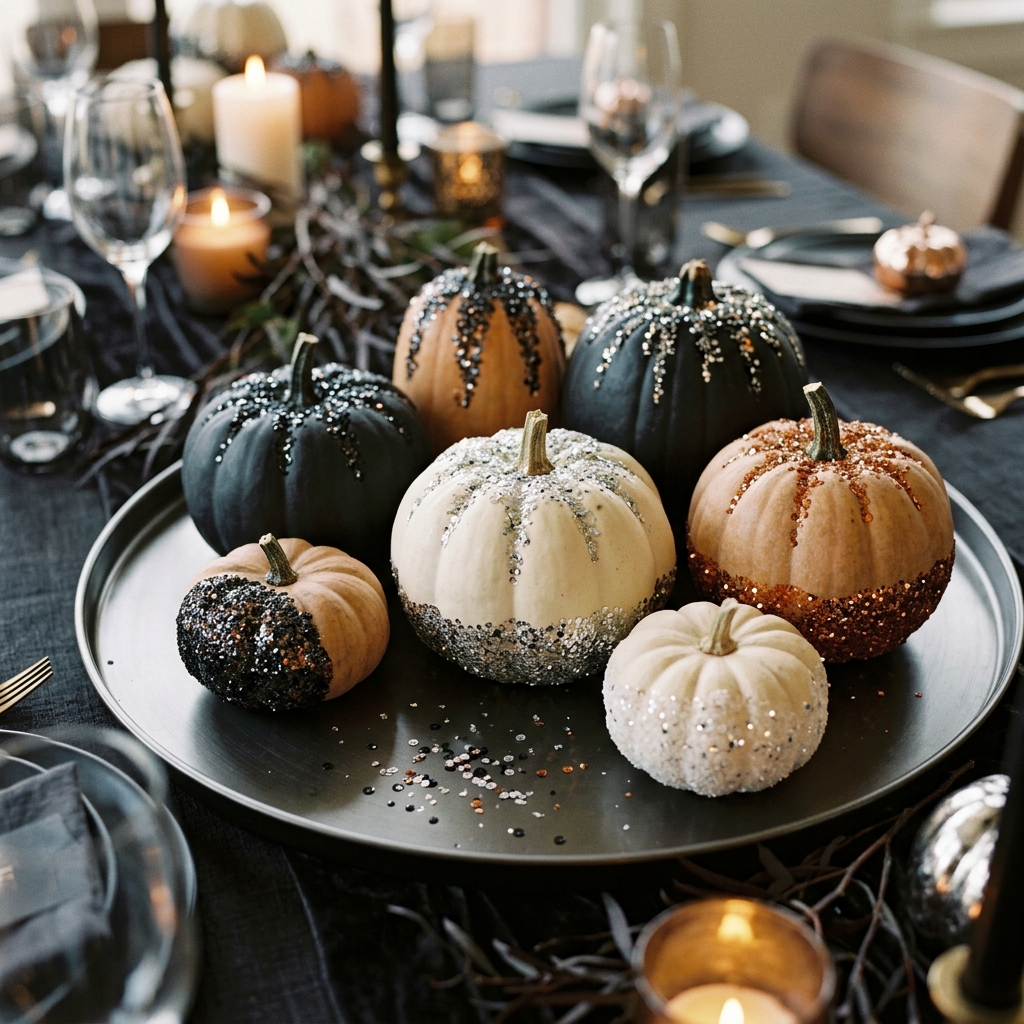
20. Glitter and sequin pumpkins
For a more decorative pumpkin, I can add glitter or sequins to part or all of the surface.
I work over a tray or disposable sheet so loose glitter is easier to collect. When children are helping, I supervise the activity and keep loose glitter and small sequins away from toddlers.
I also avoid leaving loose craft pieces where pets that chew or investigate decorations could reach them.
Best for: party tables, glam Halloween themes, and indoor displays.
21. Drip pumpkins
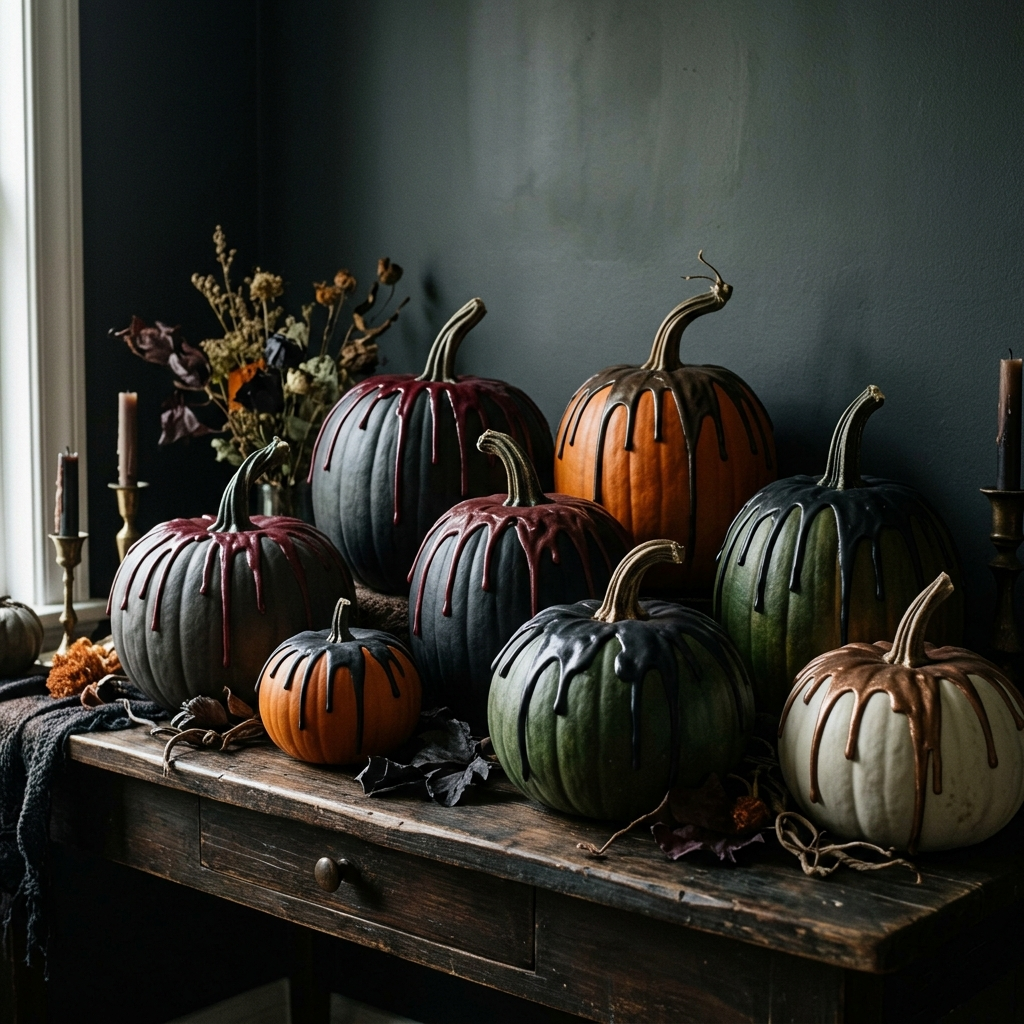
I create a melting effect by adding raised lines around the top of the pumpkin with a suitable craft material and then painting the surface.
The drips look more convincing when I vary their lengths instead of making them form an even fringe. Hot glue is one option, but it is not the only way to create the effect.
If I use hot glue, I keep children away from the glue gun and hot glue and allow the pumpkin to cool completely before moving it. Hot glue can cause burns even during a small craft project.
Best for: modern Halloween displays, shelves, tables, and spooky party decor.
How do you set a Halloween table and light a room?
I find that a Halloween table looks better when I create different heights instead of covering every inch of the surface.
My usual starting point is one taller centerpiece, a few medium-height pieces, and several smaller accents. That leaves enough room for plates, serving dishes, and guests.
Lighting is the finishing layer. It can highlight the decorations without requiring more objects.
22. Spooky tablescape
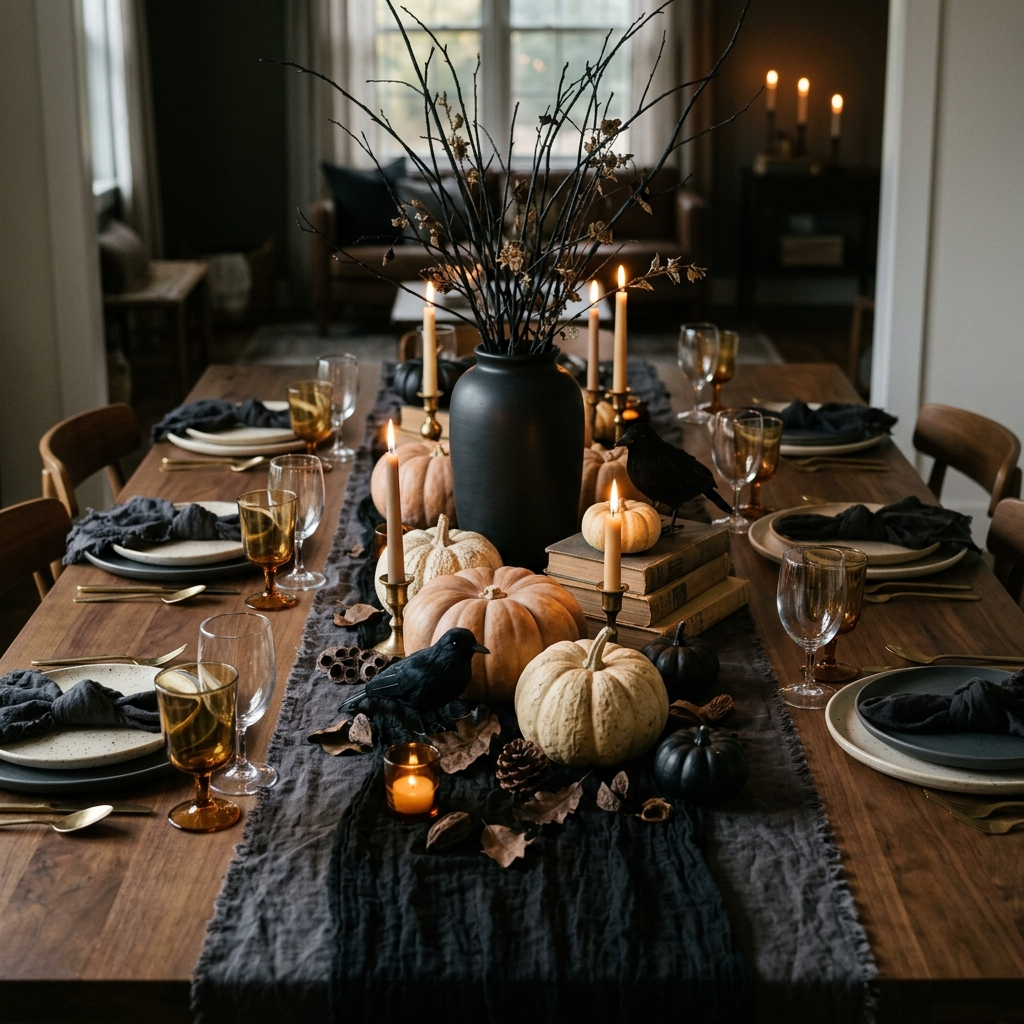
I start with a dark or neutral runner and build the centerpiece from there.
Painted branches, pumpkins, faux crows, fabric, books, and suitable decorative objects can create the theme without filling the table with Halloween-specific products.
If the table is being used for dinner, I leave practical space for serving dishes, plates, glasses, and seating. Decorations should not crowd the food area.
I also keep loose glitter, tiny craft pieces, and materials that shed away from food and serving dishes. Decorative materials belong on the table for visual interest, not mixed into the areas where food is being prepared or served.
Best for: Halloween dinners, family parties, adult gatherings, and seasonal entertaining.
23. Colored uplighting
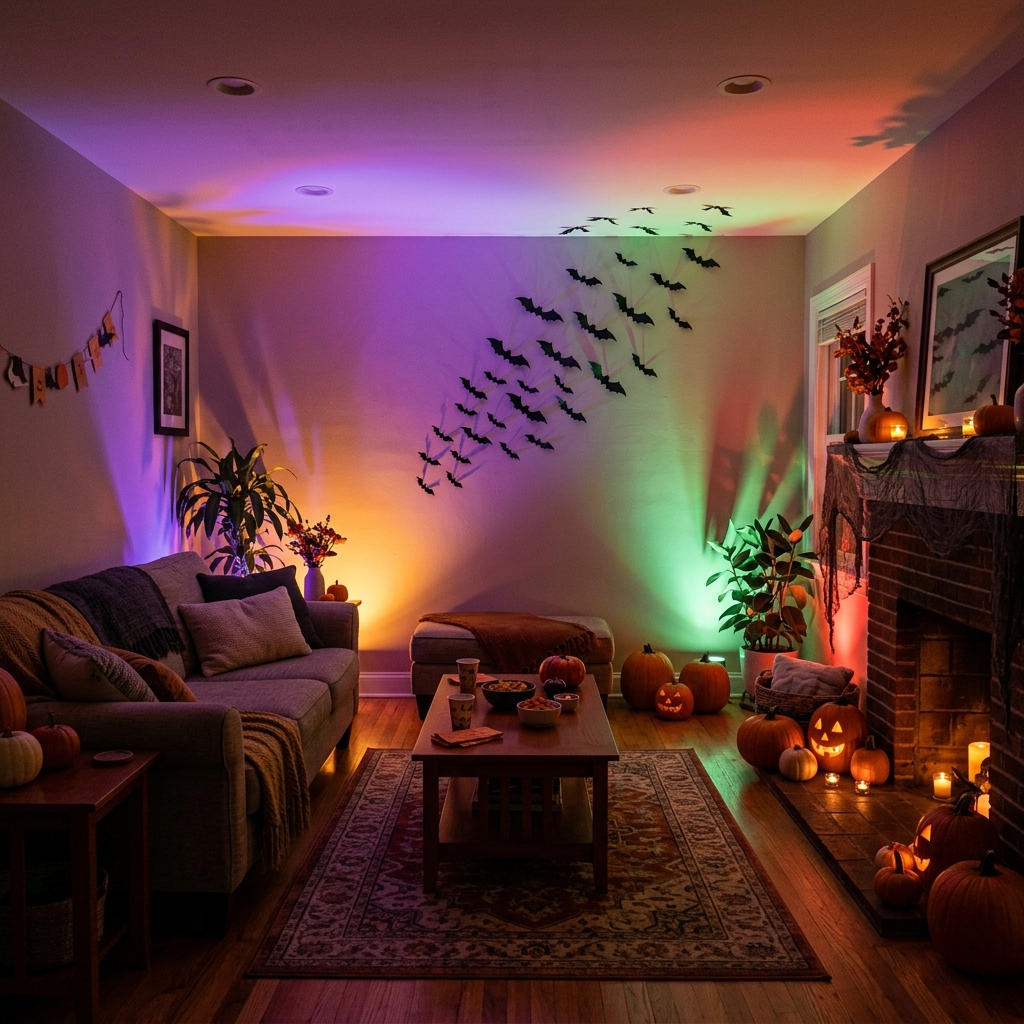
Changing the lighting can alter the mood of a room without changing the furniture or decorations.
I use LED bulbs or fixtures that are appropriate for the specific fitting and location, following the manufacturer’s instructions. Red, purple, green, amber, and cool white can each create a different effect.
I always test the lighting before a party. Colored light can change how food looks, affect skin tones in photographs, and make some decorations harder to see.
For me, this is one of the easiest ways to change the feel of a room without adding another large decoration.
Best for: living rooms, party spaces, entryways, covered patios, and Halloween photo areas.
24. Painted-branch centerpiece
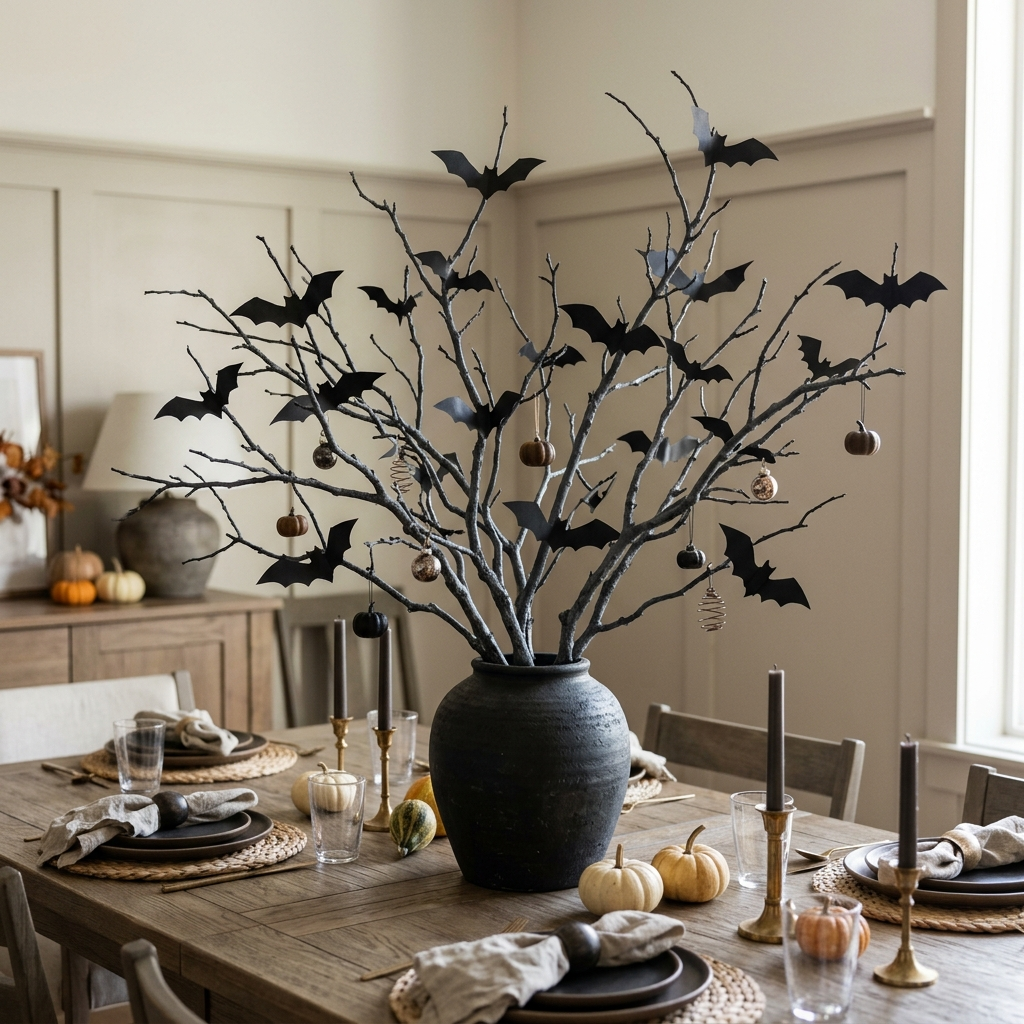
Bare branches can become a simple Halloween centerpiece with very little material.
I place suitable branches in a stable vase and add weight to the base if necessary. Small paper bats, lightweight ornaments, or other decorations can then be attached to the branches.
Before bringing branches indoors, I inspect them for insects, rot, loose bark, sharp points, and other problems. I also keep the arrangement away from face height, unstable furniture, seating areas, and walkways.
The branches should not be positioned where someone can brush against them while sitting down or walking past the table.
Best for: dining tables, consoles, mantels, and entryway furniture.
25. Bat or eyeball wreath
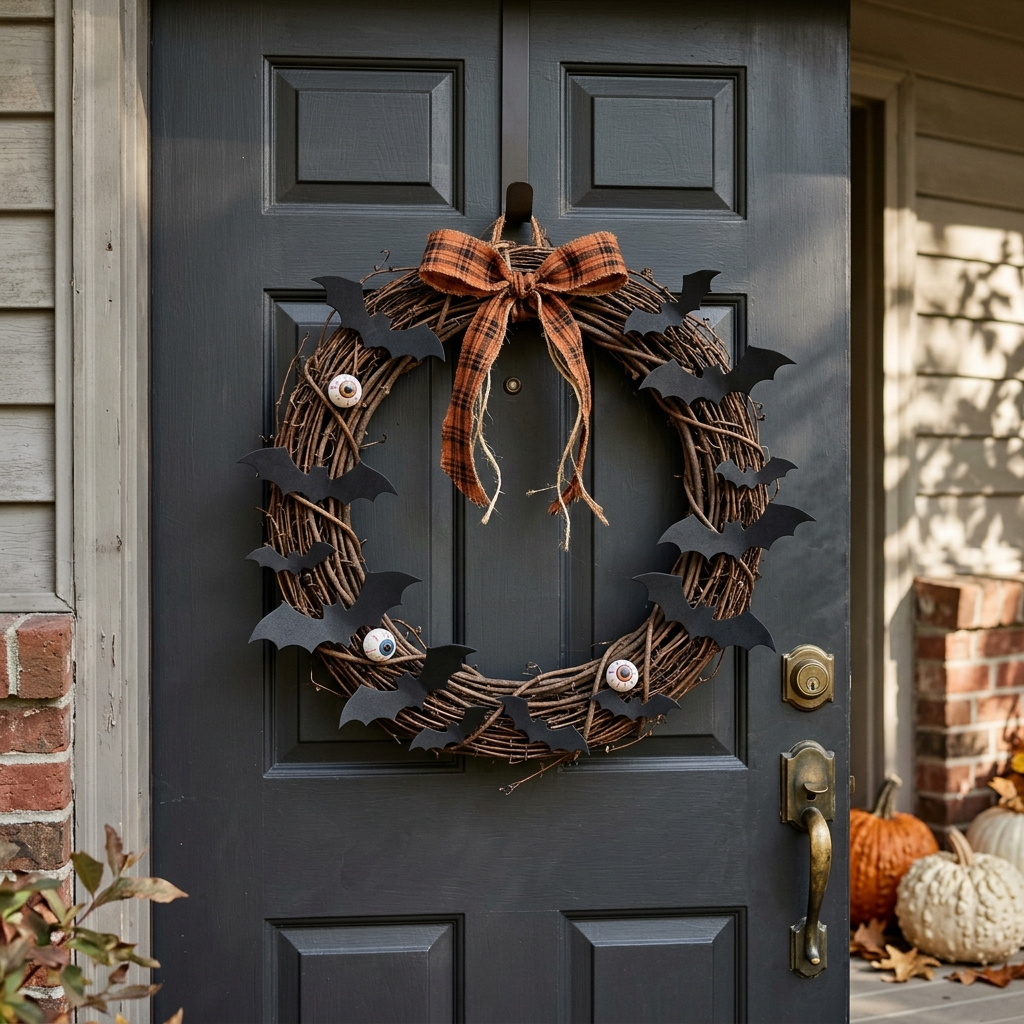
I can make a bat wreath by attaching lightweight craft-foam bats around a grapevine, foam, or other sturdy wreath base.
For an alternative, painted lightweight craft balls can become decorative eyeballs. I secure the pieces well and finish the wreath with ribbon.
Before hanging it, I check the total weight and choose a hanger that is appropriate for the door or wall. If the wreath will be outside, I consider the weather exposure and use materials suitable for that location rather than assuming the entire wreath is weatherproof.
I also make sure the wreath does not interfere with the door’s movement, peephole, handle, or normal access.
Best for: front doors, indoor party backdrops, and Halloween entryways.
How I Keep Halloween Decor Reusable
I get more value from DIY Halloween decorations when I can use them again rather than treating every project as a one-season item.
Neutral pumpkins, painted branches, paper bats, reusable wreath bases, jars, and lighting can work with both fall and Halloween decorating. I can also change the small accents from year to year without rebuilding the entire display.
Storage influences what I make, too. Flat paper bats take very little room, while large outdoor frames require much more storage space. Before starting a large project, I think about where it will live after October.
I also like buying or making pieces that can serve more than one purpose. A dark vase, simple branches, neutral pumpkins, or LED lights can work for fall decorating even after the Halloween decorations come down.
Pro tips after decorating
Light your decorations. A simple decoration becomes easier to notice after dark when I give it suitable lighting. Around paper, cardboard, fabric, yarn, and dried branches, I use battery-operated LED lights rather than open flames.
Create small scenes. I would rather build two or three strong areas than scatter small decorations across every surface. A porch corner, entryway, and table can be enough.
Limit the color palette. Black and orange are classic, while black and white can create a quieter look. Adding one accent color can keep the display coordinated without requiring everything to match.
Shop my home first. Before buying supplies, I check for jars, books, cardboard, branches, fabric, baskets, vases, ribbon, and leftover paint.
Check outdoor conditions. Wind, rain, sunlight, and changing temperatures can affect homemade decorations. I secure lightweight pieces and use products that are actually intended for the outdoor location.
Think about storage before building. If I do not have a practical place to store a large project, I reconsider its size. Foldable, flat, or stackable decorations are much easier to keep.
Keep safety in the plan. I keep small craft pieces away from toddlers and pets, supervise hot glue and cutting tools, secure hanging decorations, and use LED lights around flammable homemade materials.
Common mistakes that flatten a Halloween display
One common mistake is scattering too many small decorations across every surface. I find that a few grouped pieces usually look more intentional than a collection of unrelated objects.
Ignoring lighting is another easy way to lose the effect at night. I test my display after dark because a decoration that looks good during the day may need better placement or illumination once the sun goes down.
Outdoor materials also need more thought. Paper, untreated cardboard, yarn, and some fabrics can absorb moisture or become difficult to manage in wind. I check the forecast and move delicate pieces to a protected location when necessary.
I avoid real candles around homemade decorations. Paper, cardboard, fabric, yarn, dried branches, and similar materials can burn, so LED candles give me the glow without an open flame.
I also try not to spend most of my budget on one large centerpiece. A few smaller DIY scenes can give me more flexibility and are often easier to store.
Finally, I think about storage before I start a project. A decoration that takes up half the closet for eleven months may not be worth making, even if the craft itself is inexpensive.
🎉 Quick Summary
✅ Best for: Creating a handmade Halloween look while working within the space and budget I actually have
💰 Budget: Many small projects can fall around $3–$15, but actual costs vary by materials, size, tools, and supplies already on hand
⏱ Time: Most smaller projects take roughly 15–60 minutes, while larger outdoor pieces can take longer
🌟 Top pick: Colored LED lighting because it can change the atmosphere of an entire room with relatively little effort
📌 Don’t skip: Secure outdoor pieces, keep walkways and doors clear, and use LED lighting around homemade flammable materials
Frequently Asked Questions About DIY Halloween Decorations
How do I decorate my house for Halloween on a budget?
I start with the areas people notice most, such as the front door, entryway, living room, or dining table. Then I choose a few DIY focal pieces rather than buying decorations for every surface.
I also shop my home first for jars, branches, books, cardboard, fabric, and leftover craft supplies. Reusing what I already own is one of the simplest ways to keep the project affordable.
What are the cheapest DIY Halloween decorations?
Paper bats, branch decorations, window silhouettes, and simple jar displays are among the least expensive options.
The final cost depends on what I already have, but these projects are useful because the basic materials are inexpensive and many can be made in groups.
How do I make floating ghosts?
I drape cheesecloth over a lightweight support, shape it into a ghost, and use a suitable fabric stiffener or craft product according to its directions.
Once completely dry, I remove the support and add simple features. An LED light can provide a soft glow, and I keep the finished ghost somewhere dry and away from walkways.
How do I make paper bats for the wall?
I cut bats from black cardstock in several sizes and gently fold the wings upward.
Then I arrange them in a loose flying pattern, usually moving from smaller shapes toward larger ones. For renters, I choose an adhesive appropriate for the wall surface and test it when needed.
What household items can I use for Halloween decorations?
I look for glass jars, old books, cardboard, branches, fabric, paper bags, vases, baskets, ribbon, and leftover paint.
A jar can become a luminary or decorative potion bottle, branches can become a centerpiece, and cardboard can become wall or table decorations. Checking the house first often saves a trip to the craft store.
How do I decorate a Halloween table?
I start with a dark or neutral runner, then add one taller centerpiece, medium-height decorations, and a few small accents.
I leave enough open space for plates, serving dishes, and guests. Loose glitter, tiny craft pieces, and shedding materials should stay away from food and serving areas.
What are easy outdoor Halloween decorations?
Cheesecloth ghosts, foam tombstones, a large spiderweb, pumpkin-pail lights, and a branch broom are all practical starting points.
I pay close attention to wind, rain, sunlight, anchoring, and foot traffic. Outdoor electrical products should be appropriate for the location, and lightweight decorations need to be secured properly.
How do I store DIY Halloween decorations for next year?
I make sure everything is clean and completely dry before storing it.
Flat paper decorations can be kept between pieces of cardboard, fabric ghosts can be stored loosely so they do not get crushed, and small accessories can go into labeled bags or containers.
I also label storage bins by area, such as indoor, porch, pumpkins, or table decor. That makes setup easier the following year.
What is the highest-impact DIY decoration for the least effort?
For me, it is colored LED lighting.
Changing the light can alter the mood of an entire room without requiring another complicated craft. I would add suitable lighting before buying another large decoration, especially if the room already has a few coordinated Halloween pieces.
Read this next: 17 DIY Halloween Wood Crafts That Are Hot Sellers (2026)
Conclusion
DIY Halloween decorating gives me a practical way to create a festive home without depending on a large collection of seasonal products.
Simple materials can become ghosts, bats, pumpkins, wreaths, centerpieces, outdoor displays, and lighting accents. Some projects take only a short amount of time, while larger pieces can become reusable decorations for future Halloweens.
I also find that restraint makes a display stronger. A few coordinated scenes, a limited color palette, and well-placed lighting can make a bigger difference than filling every available surface.
When children and pets are part of the household, I plan the decorations around them. I keep small pieces out of reach, supervise hot glue and cutting tools, use LED lighting around homemade flammable materials, and make sure hanging decorations do not interfere with doors or walkways.
For outdoor decorating, I check the weather, secure lightweight pieces, and use materials and electrical products that are appropriate for the location. Thinking about those details before decorating saves me from fixing problems later.
I would rather make a handful of decorations that suit my home and that I can store and reuse than buy a large amount of seasonal clutter. A thoughtful plan, a few basic supplies, and some good lighting are enough to make Halloween feel special without making decorating unnecessarily complicated.


One Comment