
17 DIY Halloween Wood Crafts That Are Hot Sellers (2026)
I enjoy making Halloween wood crafts because they can work as seasonal home decor and as handmade products for people who want something they can use again next year. I don’t need every project to be complicated. What matters more to me is whether the finished piece looks intentional, is practical to make, and gives a customer a clear idea of where it will fit in their home.
Before I make anything for selling, I look at the wood cost, paint and finishing supplies, production time, packaging, and the amount of space the finished item will take up. A craft that takes four hours to complete needs to be priced very differently from one that takes 30 minutes.
I also pay attention to batch production. If I can sand several blanks together, paint multiple backgrounds in one session, or prepare lettering for several signs at once, I spend less time repeatedly setting up and cleaning my workspace.
For me, the goal isn’t to make the most complicated Halloween decoration. It’s to create something I can finish well, explain clearly, package safely, and price in a way that accounts for the work involved.
This collection includes 17 DIY Halloween wood crafts, ranging from beginner-friendly wood blocks and painted slices to porch signs, personalized family decor, wall art, garlands, a candy crate, a photo frame, and a more advanced wooden pumpkin lantern.
I find pre-cut wood blanks especially useful when I’m starting a new project. They let me concentrate on sanding, painting, lettering, assembly, and finishing without immediately needing a saw or other power tool.
Some projects are particularly suitable for batch production. Wood slice pumpkins, bead garlands, wood blocks, and small ghost cutouts can be prepared several at a time. Larger signs take more space and handling, but they can make useful focal pieces for mantels, entryways, and craft-fair displays.
Personalized and reversible projects require more planning because I have to manage customer information, proofing, two-sided finishing, and production time. That extra work should be reflected in the price rather than treated as free labor.
Save this for later

Table of Contents
When I work out a retail price, I consider the wood, paint, stencils or templates, hardware, adhesives, sealer, packaging, labor, marketplace and payment fees, booth costs when applicable, shipping supplies, and other overhead. Material cost alone doesn’t tell me whether a product is worth making.
Key Takeaways
- I focus on Halloween decor that has a clear display purpose and can be stored for future seasons.
- Pre-cut wood blanks make many of these projects accessible without power tools.
- A restrained color palette can help several handmade pieces look like a coordinated collection.
- Sanding and dust removal are important before painting or finishing.
- I choose the finish based on the intended location instead of assuming one sealer works for every project.
- Reversible and personalized designs can offer additional value, but they also require more planning and labor.
- Batch production helps reduce repeated setup and cleanup when I am making several similar products.
- Labor is a real part of the cost, even when I’m working from home.
- Packaging, marketplace fees, payment processing, and booth expenses can affect the final price.
- Outdoor signs need materials, finishes, and construction appropriate for weather exposure.
- Food-contact projects require more care than ordinary decorative wood crafts.
- I use battery-operated LED lighting for wooden lantern projects rather than treating a handmade wood structure as a candle holder.
Related article: 29 Best Halloween Games for Kids – Fun, Spooky & Easy to Play!
What Makes a DIY Halloween Wood Craft Worth Making?
When I’m deciding whether to make a Halloween wood craft, I start by picturing it in an actual home. Is it something that could sit on a mantel, hang beside a door, decorate an entry table, or fit on a shelf?
Size matters too. A large porch sign might look impressive in a photograph but require more wood, more storage space, more packaging, and more room in my vehicle when I’m taking products to a craft fair. A small piece may be easier to store and ship.
I also compare production time with the amount of detail involved. A complicated design isn’t automatically a better product. If I can make a simpler piece with clean lettering, smooth edges, and a durable finish, it may be a more practical addition to my product line.
Before producing a large batch, I make one sample and time the whole process. I include sanding, painting, drying, assembly, sealing, cleanup, and packaging. That gives me a much more realistic idea of the work involved.
Personalization changes the calculation. A family-name sign may take only a few extra minutes to customize, but proofing, customer messages, and correcting mistakes add time that needs to be considered.
I also think about seasonal storage. If a decoration is sturdy, reasonably compact, and easy for a customer to store after Halloween, I can explain that benefit in the product description without making exaggerated claims about how often it will be reused.
Pro Tip: Before making ten of anything, make one complete sample from raw wood to packaged product. If the finishing, assembly, or packaging takes longer than expected, it is much easier to adjust one prototype than an entire batch.
What Tools Do You Actually Need for Halloween Wood Crafts?
I don’t think a beginner needs to buy a Cricut, laser engraver, scroll saw, or collection of power tools just to start making Halloween wood crafts.
For many of the projects below, I can work with pre-cut or pre-sanded wood blanks and a small group of painting supplies.
| Supply | Rough Planning Cost | Main Use |
|---|---|---|
| 2–3 paint colors | $8–12 | Backgrounds and designs |
| Halloween stencils | $6–10 | Repeatable lettering |
| Foam brushes | $3 | Applying paint |
| 120- and 220-grit sandpaper | $4 | Smoothing and distressing |
| Matte or satin sealer | $5–8 | Protecting the finished surface |
| Pre-cut wood blanks | $1–6 each | Signs, blocks, slices, and shapes |
These are rough planning estimates, not fixed current retail prices. The amount I pay can change based on the store, region, brand, quantity purchased, wood species, sales, and whether I already have some of the supplies.
A pre-cut wood blank can remove the biggest barrier for a beginner: cutting the shape. Once I know which products I actually want to make regularly, I can decide whether investing in a jigsaw or cutting machine makes sense.
I keep safety in mind when working with tools and finishes. Sanding creates dust, so I work in a suitable ventilated area, follow the safety guidance for my tools and products, and avoid rushing through cutting or sanding simply to save a few minutes.
Basic Wood Preparation and Finishing
I use roughly the same preparation sequence for most painted wood projects:
- Inspect the blank for cracks, loose pieces, sharp edges, or major surface defects.
- Sand rough edges and uneven areas with an appropriate grit.
- Remove sanding dust before painting.
- Apply primer or a suitable base coat when the paint and wood require it.
- Allow each coat to dry according to the manufacturer’s instructions.
- Add the lettering, pattern, or decorative elements.
- Lightly distress the surface if the design calls for an aged finish.
- Apply a finish suitable for the intended use.
- Allow the piece to dry and cure properly before handling or packaging.
I don’t rush the curing stage. A surface can feel dry while still being vulnerable to scuffs, sticking, or damage from packaging.
What Are the Best DIY Halloween Wood Crafts to Make and Sell?
1. Halloween Wood Block Sets — Best for: Tiered trays, mantels, tabletop displays

Wood block sets are one of the easiest places for me to start because I can create several small pieces that work together as one display.
I usually think in groups of three to five blocks. One might say “BOO,” another could have a pumpkin face, and others could feature a ghost, bat, or simple number.
The important part is coordination. I don’t want five unrelated designs sitting beside one another. Repeating the same background colors, lettering style, or small decorative details makes the collection feel intentional.
Materials + Costs:
- Unfinished wood blocks: approximately $1–3
- Black, cream or white, and orange paint: approximately $2–4
- Stencils or paint pens: approximately $1–2
- Sealer: a small portion of the container cost
Depending on the blanks I buy and the amount of finishing involved, I might use roughly $5–8 in materials for a small set. An example retail range could be around $20–35, but I would adjust that after calculating my actual labor, packaging, fees, and local market.
I find these particularly easy to batch. I can sand several blocks, paint all the backgrounds, allow them to dry, and then move through the lettering one color at a time.
For photography, I show the complete set on a tiered tray, shelf, or mantel. A styled photograph gives the buyer a better idea of the scale and intended use than a plain image of five blocks.
Pro Tip: Keep a simple production note for each product showing material cost and actual time spent. After making a few batches, I can see which projects are genuinely efficient rather than relying on memory.
2. “Boo” Porch Sign — Best for: Front porches, entryways, front doors
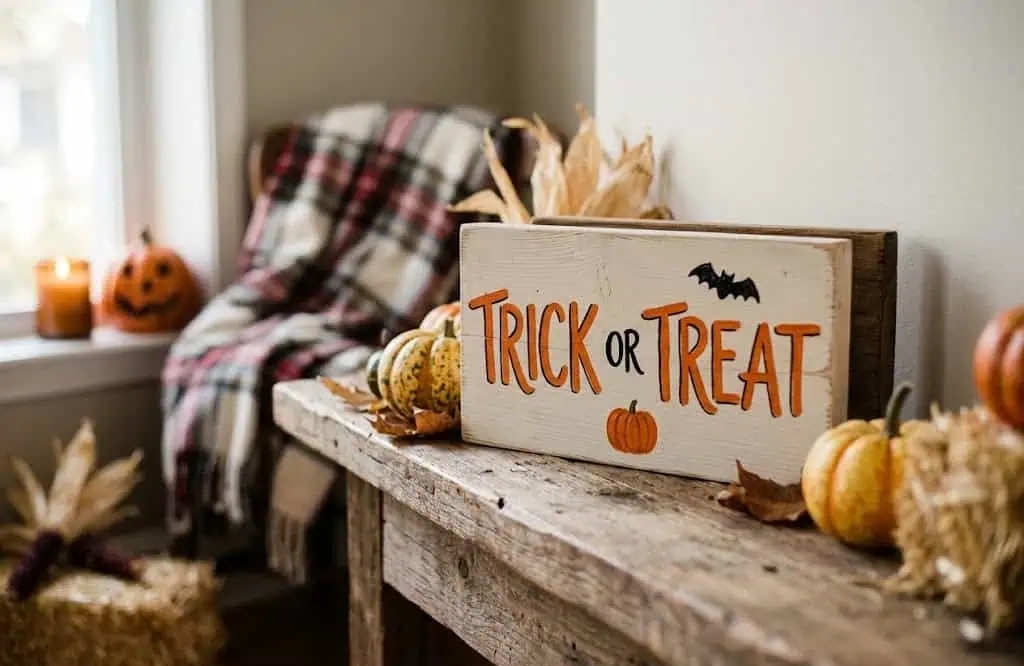
A “Boo” porch sign is straightforward, but I still give the surface preparation plenty of attention. A short word leaves very little room for messy lettering or uneven edges to hide.
For a simple version, I use a suitable wood board, paint the background, add large lettering, and finish it with rope or appropriate hanging hardware.
Materials + Costs:
- Wood board: approximately $4–6
- Black and white or cream paint: approximately $2
- Stencil or lettering materials: approximately $1–2
- Rope or hanging hardware: approximately $0.50–1
After sanding the board, I remove the dust before applying paint. Once the background is dry, I add the lettering and let it dry before lightly distressing the edges if I want an aged appearance.
I prefer a matte or satin finish when I’m going for a rustic look. The right finish depends on the paint, wood, and intended location.
For an outdoor porch sign, I don’t assume that applying a generic sealer makes it weatherproof. Outdoor performance depends on the wood, construction, paint, finish, moisture, sunlight, temperature changes, and how exposed the sign is.
If the product is intended for outdoor use, I state that clearly and choose materials designed for that environment.
3. Reversible Halloween/Thanksgiving Sign — Best for: Budget-conscious buyers who want two seasons in one
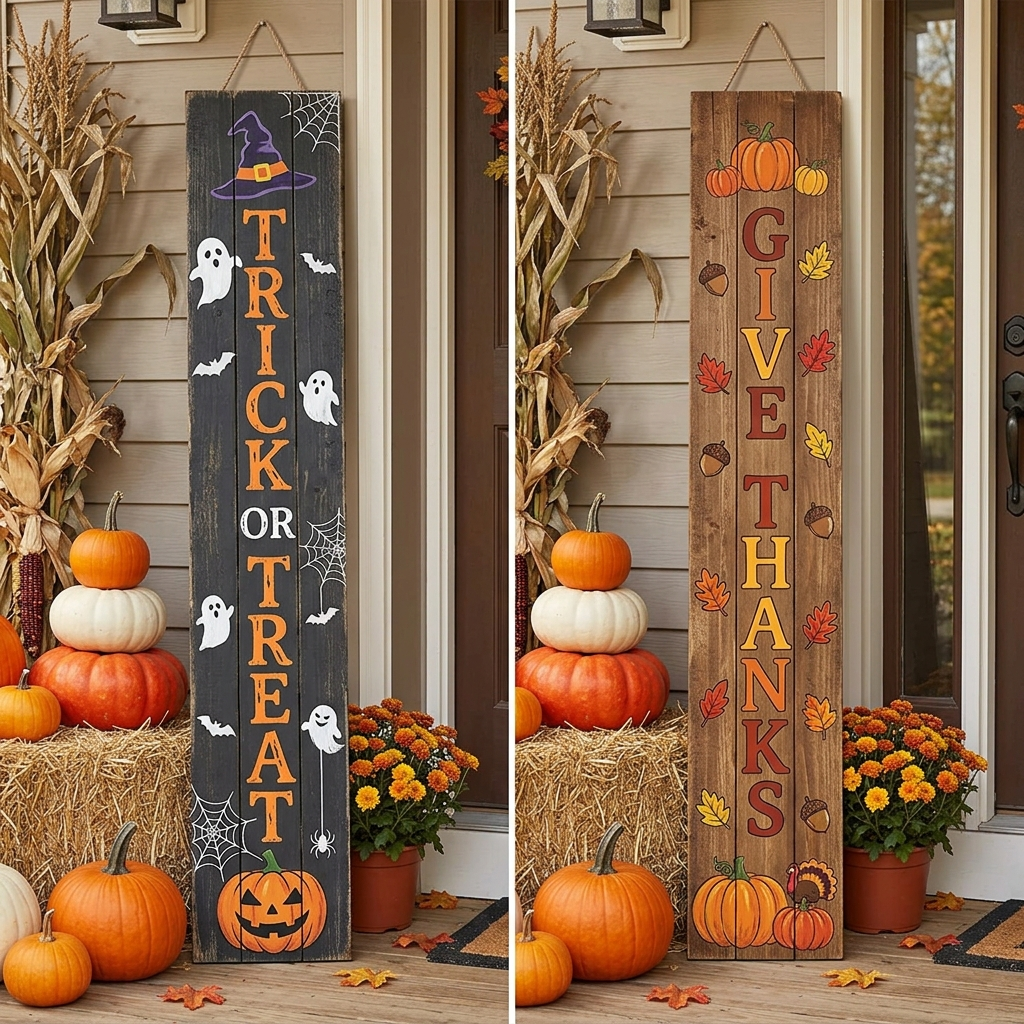
A reversible sign gives me an opportunity to create one physical piece with two seasonal designs. One side can be Halloween-themed while the reverse moves into Thanksgiving or general fall decorating.
I plan the board dimensions before painting either side because the lettering needs enough breathing room on both faces. I also consider where the edges will be handled so I don’t create a thick buildup of paint that makes the sign difficult to flip or display.
Materials + Costs:
- Wood board: approximately $4–6
- Paint in several coordinated colors: approximately $2–4
- Stencils or lettering supplies: approximately $1–2
- Sealer and finishing supplies: additional small cost
An example retail range might be $28–42, but I treat that as a planning range rather than a guaranteed market value.
I finish one side completely before turning my attention to the other. If I need a distressed effect, I keep it controlled so the two sides still look like parts of the same finished piece.
For photography, I take a clear front image of each side and include the overall dimensions. A photo showing both sides or a simple measurement reference can answer questions that a written description may not.
Pro Tip: When photographing a reversible product, label the listing photos clearly as “Halloween side” and “Thanksgiving side.” It saves the customer from guessing which image represents which face of the sign.
4. Wood Slice Pumpkins — Best for: Rustic-natural aesthetic lovers, fall market buyers

Wood slices give me a natural base for Halloween pumpkins because I can leave some of the wood grain visible around the painted design.
I first inspect each slice. Cracks, loose bark, sharp edges, and signs of moisture can create problems later, especially if I’m making several pieces for sale.
Materials + Costs:
- Birch or similar wood slices: approximately $0.60–2 each when purchased in quantity
- Orange, black, cream, and green paint: approximately $1–2 per piece
- Matte sealer: a small portion of the container cost
- Optional twig or dried stem: minimal additional cost
I sand rough areas, remove the dust, and paint the pumpkin face after the base is ready. Using several slice sizes gives me an easy way to build a grouped display.
Batch production works particularly well here. I can paint several backgrounds, let them dry, then add faces and stems to the whole group.
If I add a real twig or dried vine as a stem, I secure it firmly and check that there are no sharp ends or loose pieces.
5. Personalized Haunted House Family Sign — Best for: Etsy, gift buyers, premium market

Personalized Halloween signs require more than just adding a name. I treat the personalization process as part of the production workflow.
For a family haunted-house sign, I might use a distressed wood board with a simple house, moon, or spooky landscape and add the family name as the main personalized detail.
Materials + Costs:
- Wood board: approximately $5–8
- Paint and lettering supplies: approximately $2–4
- Optional vinyl or personalization material: approximately $1–2
- Sealer: additional small cost
An example planning range might be $35–55, depending on size, detail, and labor.
Before I start the final piece, I confirm the spelling of the family name. If capitalization, punctuation, or another personalization detail matters to the design, I confirm that too.
I also make the production timeline clear. Customers should know whether personalization begins immediately after ordering or after a proof or confirmation step.
For online selling, I keep the personalization instructions simple: what information to provide, any character limits, available color choices, and when changes can be made.
Pro Tip: I don’t begin a personalized piece while guessing what the customer meant. A short confirmation step can prevent an expensive remake later.
6. “Happy Haunting” Tiered Wood Sign — Best for: Craft fairs, mantel focal pieces

This project is different from my smaller block sets because the goal is a larger focal piece. I think of it as something that anchors a mantel, entryway, console, or craft-fair display.
I use a wider board and create layered or visually varied lettering so the sign has more presence without needing lots of extra decorations.
Materials + Costs:
- Wide wood board: approximately $5–8
- Paint: approximately $2
- Stencil or lettering supplies: approximately $2
- Sealer and hanging hardware: additional small cost
A planning range of around $32–48 may be appropriate for some versions, but the final price should reflect actual size, materials, labor, and selling expenses.
I measure the board carefully before placing the lettering. With a large sign, uneven spacing becomes much easier to notice.
Size also matters at craft fairs. I need enough room to display the sign safely, transport it without damage, and package it if a customer wants to take it home.
I also consider the customer’s space. A large piece may look impressive in a booth but may not work for someone living in a small apartment.
7. “Witch Please” Wood Sign — Best for: Adult humor market, office decor, Halloween party hosts

I treat humorous Halloween signs as a separate audience from family-oriented decor. A playful phrase may work well at an adult Halloween event or an adult-focused handmade market but may not suit every craft fair.
The design itself can remain simple: a clean background, readable lettering, and perhaps one small decorative element.
Materials + Costs:
- Small wood board: approximately $3–5
- Paint: approximately $1–2
- Lettering supplies: approximately $1–2
- Sealer: a small portion of the container cost
A planning range of roughly $20–32 can be used as a starting point, then adjusted for size, labor, packaging, and selling fees.
I make sure the wording matches the audience and the platform where I intend to sell it. For a family-focused market, I keep the language light and suitable for the setting.
Pro Tip: I let the phrase do most of the work. A clean layout with strong contrast is easier to read from a distance and usually requires less production time than a sign packed with decorations.
8. Halloween Wood Bead Garland — Best for: Small seasonal decor buyers, online gift and home-decor shoppers

Wood bead garlands are useful when I want to offer a smaller seasonal decoration that can sit across a mantel, shelf, tray, or console.
I can alternate black, orange, cream, gray, or natural wood beads depending on the overall collection. I prefer choosing the colors before I begin painting so the finished garland doesn’t look random.
Materials + Costs:
- Unfinished wood beads: approximately $1–3 per garland when purchased in bulk
- Paint: approximately $1–2
- Twine or cord: approximately $0.50–1
- Optional tassel materials: additional small cost
I paint the beads in batches by color and allow them to dry fully before stringing them. Once dry, I arrange the colors in the planned pattern and thread them onto suitable cord.
The knots need to be secure, particularly if the garland will be handled frequently. I check the finished piece by gently testing the ends and looking for loose beads or exposed cord that could affect the presentation.
For tassels, I trim the strands evenly and secure the attachment point rather than relying on a loose decorative knot.
9. Haunted House Silhouette Sign — Best for: Wall art, statement display buyers

A painted haunted-house silhouette can create a dramatic piece without requiring me to cut a complicated shape from wood.
I start with a smooth pre-cut board and create a dark background. The silhouette might include a house, moon, tree, fence, or other simple Halloween elements.
Materials + Costs:
- Plywood or wood board: approximately $5–8
- Stain or paint: approximately $2
- Detail paint: approximately $1–2
- Sealer: additional small cost
I can use a printed template to transfer the outline. For a larger design, I can project an image or trace a scaled template onto the board. Once the outline is transferred, I fill it with paint and clean up the edges with a smaller brush.
I don’t need advanced woodworking skills if the base board is already cut and prepared. Most of the visual work is in the painting and finishing.
For family rooms, children’s spaces, or entryways, I keep the imagery spooky but not excessively frightening unless the product is specifically intended for an adult Halloween audience.
10. Trick-or-Treat Candy Crate — Best for: Functional decor, family buyers

I like functional Halloween decor because the customer can immediately see what the piece is for. A small wood crate labeled “Trick or Treat” can be used as seasonal display storage for individually wrapped treats.
Materials + Costs:
- Small wood crate: approximately $3–5
- Black, orange, or cream paint: approximately $1–2
- Stencil or lettering supplies: approximately $1–2
- Sealer: additional small cost
A planning range of about $22–38 may work for some sizes and finishes, but I would calculate the actual cost before setting the price.
Before painting, I inspect the crate for splinters, rough edges, loose nails, staples, or exposed hardware. I sand or repair those problems before the piece moves into the decorating stage.
I also separate decorative finishing from food-contact requirements. I don’t assume that an ordinary craft sealer is food-safe. If the crate is being used around candy, I recommend keeping treats individually wrapped in their original packaging or placing them inside a suitable food-safe liner or container.
That keeps the decorative wood surface separate from direct food contact.
11. Bat Hanger Wall Art — Best for: Minimalist Halloween decorators
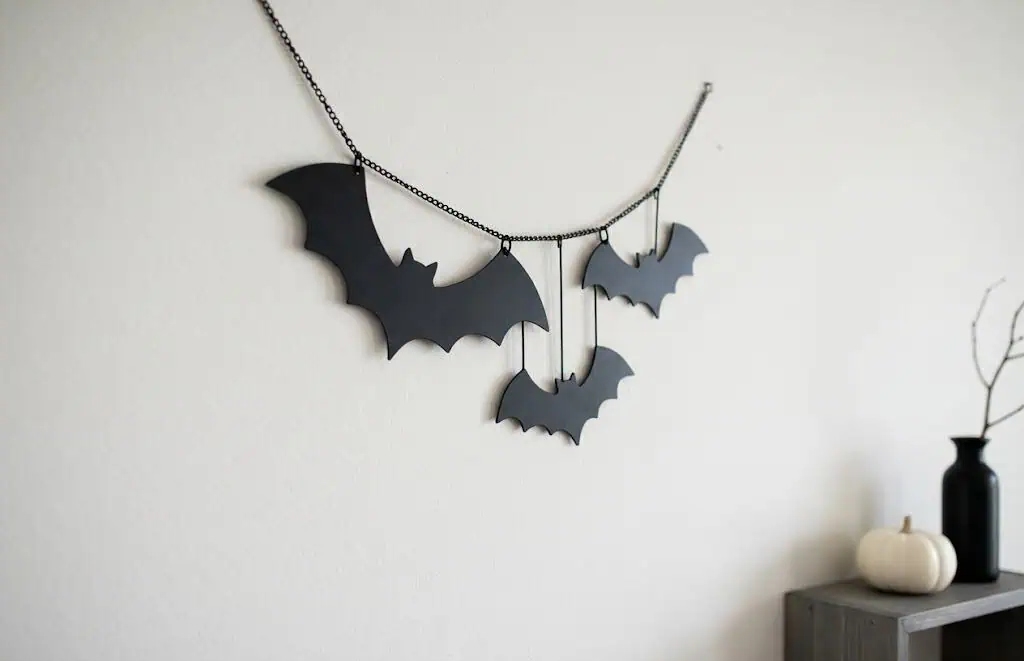
For a simpler Halloween wall display, I can mount several pre-cut wooden bats onto a finished wood plank.
I usually choose a dark stain or matte paint for the plank and keep the bats in a contrasting black or charcoal finish.
Materials + Costs:
- Wood plank: approximately $2–4
- Pre-cut wood bats: approximately $1–2 each
- Paint or stain: approximately $1–2
- Hanging hardware: approximately $1 or more depending on the hardware
A planning range might be around $20–32, depending on dimensions and the number of bats.
I measure and mark the bat positions before attaching them. That keeps the spacing consistent and prevents me from making several unnecessary holes or adhesive marks.
The bats should be attached securely with an adhesive or mechanical fastening method appropriate for the materials and final weight. For the finished wall piece, I choose hanging hardware that can support its weight and suits the wall surface.
Also read: 17 Halloween Minute to Win It Games for Adults (Materials & Rules)
12. “Enter If You Dare” Door Sign — Best for: Front door, Halloween party entrance
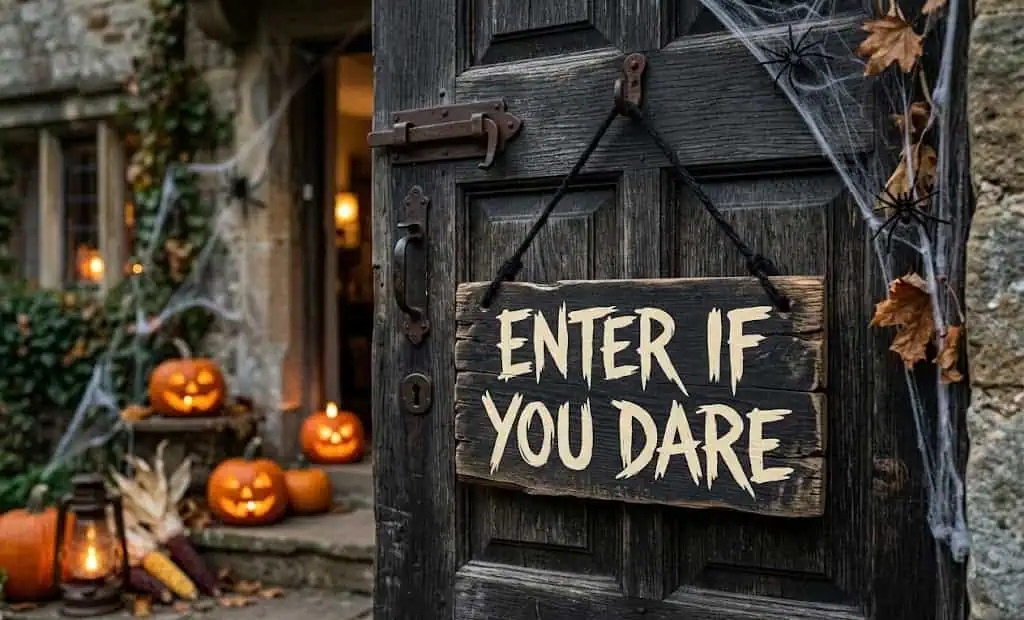
A vertical “Enter If You Dare” sign is useful where a wide horizontal sign would take up too much room.
I give “ENTER” the largest lettering and place the smaller phrase beneath it. A suitable rope, chain, or hanging hardware can finish the design.
Materials + Costs:
- Vertical wood board: approximately $4–6
- Paint: approximately $1–2
- Lettering supplies: approximately $1–2
- Hanging hardware: approximately $1
A planning range of around $22–35 may be suitable for some versions.
Before finalizing the design, I measure the intended door, gate, or entry area. I don’t want the finished sign to block a handle, cover a house number, interfere with the walkway, or create a sightline problem.
For outdoor placement, I use materials and finishes appropriate to the exposure. Sun, rain, humidity, and temperature changes can affect wood and painted surfaces, so I don’t label an item “weatherproof” simply because I applied a sealer.
13. Stacked Witch Hat Wood Decor — Best for: Shelf displays, mantel focal pieces

A stacked witch hat gives me a three-dimensional project rather than another flat sign.
I can purchase pre-cut circles or other shapes, or cut suitable pieces if I already have the tools and experience. For a beginner, purchasing prepared shapes is the easier route.
I sand the pieces, paint them, allow them to dry, and then layer and attach them to create the hat silhouette. A contrasting band and buckle can complete the design.
Materials + Costs:
- Wood shapes: approximately $3–5
- Black and accent paint: approximately $1–2
- Suitable adhesive: approximately $1
- Optional decorative details: additional small cost
A planning range of around $20–32 can work for some sizes, but I calculate the actual labor and material cost first.
If I substitute foam discs or another lightweight material for wood, I describe the product accurately. I don’t call a piece solid wood if some of its components are foam or another material.
14. Wood Pumpkin Lantern — Best for: Porch display, high-end craft fair buyers

This is one of the projects I consider more advanced because it involves building or adapting a lantern structure rather than simply painting a wood blank.
For a beginner, a pre-made wooden lantern base can reduce the construction work. From there, I can add a pumpkin-inspired painted panel, decorative details, and an appropriate lighting component.
Materials + Costs:
- Pre-made lantern or wood components: approximately $8–12
- Paint and decorative supplies: approximately $2–4
- Battery-operated LED light: additional cost
- Sealer: additional small cost
A finished price needs to account for the construction, finishing, lighting component, packaging, and labor rather than being based only on the wood cost.
For wooden lanterns, I strongly prefer battery-operated LED lighting. Wood is combustible, and I don’t treat an ordinary handmade wooden structure as a candle-safe container.
I would not place an open flame inside a wooden craft unless the product has been specifically designed and appropriately tested for that purpose. For a handmade decorative lantern, an LED light gives me the warm glow I want without introducing an open flame into the wood structure.
15. Halloween Photo Frame — Best for: Gift buyers, family-focused Halloween shoppers

A Halloween photo frame is another project where I can keep the base simple and add seasonal details around the edges.
I might stain the frame dark and add small bats, moons, pumpkins, or spiderweb details while leaving the photo opening clear.
Materials + Costs:
- Wooden frame: approximately $4–7
- Stain or paint: approximately $1–2
- Decorative paint: small additional cost
- Ribbon or gift packaging: approximately $0.50–1 or more
A planning range around $16–28 may be appropriate depending on size and customization.
I sand rough edges before finishing and make sure paint or decorative details don’t interfere with the glass, photo opening, stand, or moving parts of the frame.
If I’m selling the frame as a gift item, I include packaging in my pricing calculation. Ribbon, tissue paper, boxes, protective wrap, and labels are small expenses individually but can become significant when I prepare multiple orders.
16. Ghost Trio Wood Cutouts — Best for: Shelf, mantel, tiered tray buyers

I like using three ghost shapes at different heights because the pieces can create a complete display without requiring a complicated design.
I keep the faces simple and use white or cream paint. Small black eyes and mouths are enough to give each ghost personality.
Materials + Costs:
- Three wood ghost shapes: approximately $3–5
- White or cream and black paint: approximately $1–2
- Sealer: small portion of container cost
- Optional bases or stands: additional cost
A planning range around $18–28 may work for some versions, depending on size and construction.
I sand the edges before painting and, when practical, paint the individual pieces before attaching their bases. This makes it easier to reach the edges without accidentally coating the stand or neighboring piece.
If I add bases, I make sure the ghosts sit level and don’t wobble easily. For a shelf or mantel product, stability is part of the finished quality.
I prefer selling these as a coordinated trio when the design is intended to be displayed together. The customer receives a complete arrangement rather than having to work out the grouping themselves.
17. Halloween Wood Block Sign Set (Pillar Message Board Style) — Best for: Etsy premium, gift buyers
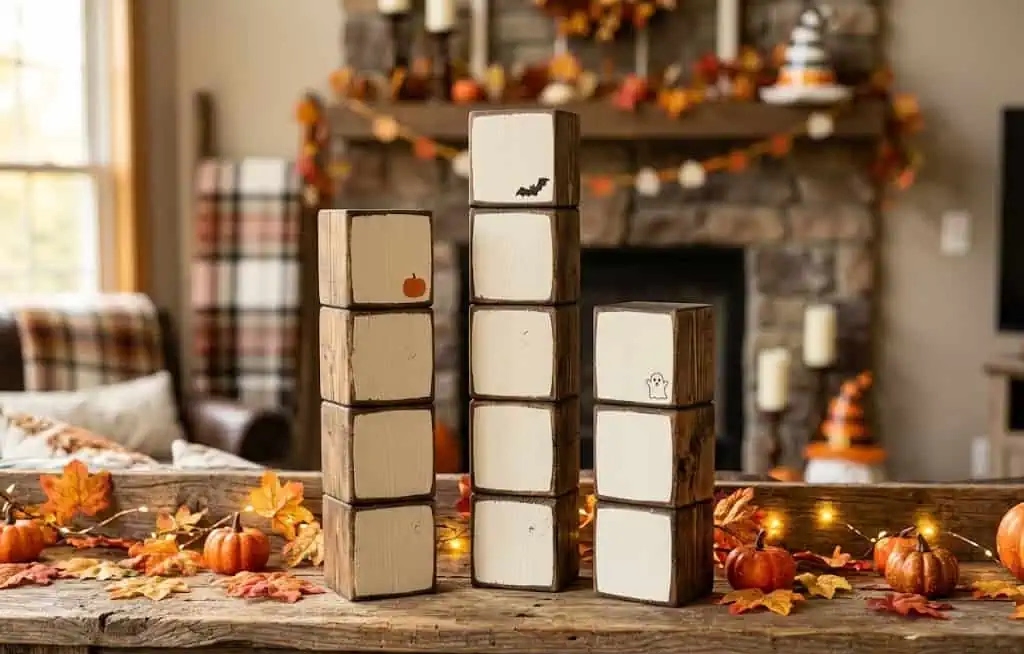
This project is different from the smaller wood block set because I use narrow planks as the structure and make the lettering the main feature.
I can arrange the planks vertically like a pillar or create a narrow message-board style piece that works on a mantel, console, shelf, or entry table.
Materials + Costs:
- Narrow wood planks: approximately $5–8
- Paint or stain: approximately $2
- Lettering materials: approximately $1–2
- Sealer and finishing supplies: additional small cost
A planning range of around $32–50 may work for certain sizes and finishes, but I would calculate the full production cost before setting a retail price.
I particularly like neutral Halloween palettes here. Black, cream, muted green, beige, or natural wood can create a seasonal piece that works with existing home decor without relying entirely on bright orange.
Pro Tip: Photograph the sign in a real shelf, mantel, or console setting and include at least one image showing its full dimensions. A customer should be able to judge both the style and scale before ordering.
🎉 Quick Summary
Good beginner choices: Halloween wood block sets, wood slice pumpkins, simple photo frames, ghost cutouts, and small phrase signs.
Projects with more customization: Personalized haunted house signs and reversible Halloween/Thanksgiving signs require extra proofing and production planning.
Fast-production possibilities: Bead garlands, wood slices, and small block sets can be efficient when I batch similar steps together.
Larger focal decor: The “Happy Haunting” sign, haunted house silhouette, porch signs, and pumpkin lantern need more attention to size, transport, storage, and finishing.
Useful value angle: A reversible piece gives the customer two seasonal display options, while personalization gives a product a more individual feel.
Important finishing step: I don’t skip sanding, dust removal, appropriate sealing, and curing. A handmade product needs to survive handling and storage, not just look good when I first finish it.
Pricing Guidance for Handmade Halloween Wood Crafts
I don’t use one universal pricing formula for every product. A small wood slice and a large personalized sign have very different labor and overhead.
For each product, I make a simple cost list that includes:
- Wood or unfinished blanks
- Paint and primer
- Stencils, templates, or vinyl
- Sandpaper
- Adhesive
- Hardware
- Sealer or finish
- Lighting components when applicable
- Packaging
- Shipping materials
- Labor
- Marketplace and payment-processing fees
- Craft-fair booth fees when applicable
- Tool or equipment costs when they are directly related to production
- General overhead
- Desired profit
The material prices shown in this article are illustrative planning ranges, not guaranteed retail or selling prices. My local costs may be higher or lower, and the amount a customer is willing to pay depends on the product, design, size, finish, audience, and selling channel.
I also avoid treating my labor as free. If a sign takes two hours to make, that time belongs in my pricing calculation even if I am making it in my home studio.
At a craft fair, I consider booth costs and transportation. For online orders, I consider packaging, payment fees, marketplace fees, shipping materials, and the time required to prepare the order.
Instead of asking only, “What did the wood cost?” I ask, “What did it actually cost me to produce and sell this finished item?”
Selling DIY Halloween Wood Crafts
I don’t rely on one selling channel. Depending on the type of product, I can use Etsy, local craft fairs, seasonal markets, community marketplaces, social selling, or local boutiques.
Online listings need accurate information. I include the actual dimensions, materials, color choices, personalization instructions, production timeline, and what the customer will receive.
For personalized products, I explain exactly how the buyer should submit their name or other details. If I use an approval step, I explain that before production begins.
Craft fairs give me a different opportunity. I can watch which pieces people pick up, what sizes they ask about, and which price points generate questions. That doesn’t guarantee future sales, but it gives me useful feedback when deciding what to make next.
I also create several price points when possible. A shopper may not want a large $40 sign, but a smaller $15–20 decoration may fit their budget.
Local boutiques can be another option, although I calculate wholesale or consignment arrangements carefully because the amount I receive per item may be different from direct retail selling.
Product Photography for Halloween Wood Crafts
I don’t need expensive photography equipment to show handmade products clearly. Natural light, a clean background, and a few well-planned angles can be enough.
For each product, I try to show:
- The complete product
- A realistic home setting
- A close-up of the finish
- The approximate scale
- Front and back views when relevant
- Personalization examples when offered
- Packaging when it affects the buying decision
For reversible signs, I photograph both sides. For wall art, I show the entire piece rather than only a close-up. For small decorations, I include a styled shelf or tray so the customer can understand the scale.
I also avoid making the product look larger through photography than it really is. Accurate dimensions belong in the listing, but a useful scale reference can prevent misunderstandings.
Batch Production Tips
Batch production is one of the easiest ways I can organize handmade Halloween decor.
Instead of completing one product from beginning to end before starting another, I group similar tasks:
- Sand several wood blanks together.
- Paint several backgrounds in one session.
- Prepare lettering for multiple signs.
- Paint beads by color before assembling garlands.
- Apply finish to several compatible pieces together.
- Package similar products using the same materials.
The advantage is that I don’t have to repeatedly stop, clean, change tools, and set everything up again.
I still make sure each piece gets individual inspection at the end. Batch production shouldn’t mean sending out a product with an uneven edge, loose hardware, missed paint spot, or damaged finish.
Material and Finishing Safety
I keep safety practical and product-specific.
When sanding wood, I work in a suitable ventilated area and follow the safety instructions for my equipment and materials. I inspect wood for splinters and sharp edges before painting or assembly.
Paints, adhesives, stains, and sealers can have different ventilation, drying, curing, and handling requirements. I follow the manufacturer’s instructions rather than assuming every product behaves the same way.
I also inspect hanging hardware and attachments before packaging. A beautiful wall decoration still needs a secure way to hang or stand.
For food-related decor, such as the candy crate, I keep decorative finishes separate from direct food contact unless a product is specifically suitable for that use.
For lighting projects, I use battery-operated LED lights in wooden lanterns and avoid introducing an open flame into a handmade wood structure.
Outdoor Projects: What I Consider Before Selling Them
A porch or door sign has different requirements from an indoor shelf decoration.
Before describing a product as suitable for outdoor use, I consider:
- Wood type
- Construction
- Paint
- Sealer or exterior finish
- Moisture exposure
- Direct sunlight
- Temperature changes
- Placement under cover or in the open
- How the item should be stored between seasons
I don’t call something weatherproof simply because I brushed sealer over it. Outdoor performance depends on the entire construction and the conditions where the customer uses it.
If a piece is better suited to a covered porch or sheltered entryway, I say that clearly rather than making a broad weather-resistance claim.
Frequently Asked Questions About DIY Halloween Wood Crafts
What are the best Halloween wood crafts to make and sell?
I would start with projects that fit my skill level and have a clear use, such as wood block sets, wood slice pumpkins, simple signs, ghost sets, or photo frames.
For more experienced makers, personalized signs and reversible pieces offer additional opportunities to charge for customization and extra production work. None of these is guaranteed to sell, so I test designs and track the actual cost and response before making large quantities.
What wood is best for beginner Halloween crafts?
Pre-cut pine boards, unfinished wood blocks, birch slices, and ready-made craft shapes are convenient starting points because they reduce the need for cutting equipment.
I look for pieces with reasonably smooth surfaces and no major cracks or loose sections. For outdoor products, I choose materials based on the intended exposure rather than automatically using whatever blank is cheapest.
Do I need a Cricut to make Halloween wood crafts?
No. Stencils, printed templates, paint pens, and hand lettering can handle many Halloween designs.
A Cricut or other cutting machine can become useful when I need repeated custom lettering, names, or detailed shapes. I prefer buying equipment after I know it solves a production problem rather than purchasing it before I have established a workflow.
How much should I charge for handmade Halloween wood signs?
There isn’t one correct price for every sign. I consider the wood, paint, finishing supplies, hardware, labor, packaging, fees, overhead, and the size and complexity of the finished product.
The example prices in this article are planning ranges only. I use my actual costs and selling environment to determine the final retail price.
How long does it take to make a Halloween wood craft?
A small painted wood slice or simple block may require relatively little active work, while a personalized or reversible sign can take considerably longer.
I time the complete process rather than just the painting. Sanding, setup, drying, assembly, sealing, cleanup, customer communication, and packaging all take time.
Where can I sell DIY Halloween wood crafts?
I can use Etsy, craft fairs, seasonal markets, local boutiques, community marketplaces, and social selling channels.
The right option depends on the product and audience. Online selling requires strong descriptions, dimensions, photographs, packaging, and shipping planning. Craft fairs let me display products physically and learn from customer reactions.
How should I price handmade Halloween crafts?
I start by calculating the complete cost rather than multiplying the wood price by a fixed number.
My calculation includes materials, labor, packaging, selling fees, shipping supplies, booth costs when applicable, overhead, and the profit I need from the product. A pricing method should help me cover the real cost of producing and selling the item.
What is the most popular Halloween wood craft in 2026?
I don’t treat one product as a guaranteed number-one seller. Popularity can change based on marketplace, audience, design, price, personalization, product quality, and the time of year.
Instead of chasing a supposed single best seller, I would test a small collection with different sizes and price points. That gives me more useful information about what fits my particular customers.
Read this next: 30 Halloween Party Games for Adults That Are Actually Fun
Final Thoughts on DIY Halloween Wood Crafts
I don’t think I need expensive equipment to get started with DIY Halloween wood crafts. Pre-cut blanks can take care of much of the woodworking, allowing me to concentrate on sanding, painting, lettering, assembly, and finishing.
If I were starting with a small budget, I would begin with wood blocks, wood slice pumpkins, ghost cutouts, or another project that lets me practice the basics without a large material investment.
Once I was comfortable with the finishing process, I could move toward personalized family signs, reversible Halloween/Thanksgiving signs, or larger focal pieces. Those projects require more planning, but they also give me more ways to add customization and useful design details.
For a craft fair, I like having multiple price points rather than filling my entire table with large products. Smaller decorations can provide accessible options while larger signs give the display some visual height.
I also keep track of my actual labor. A product isn’t inexpensive to make just because the wood was inexpensive. Sanding, painting, drying, sealing, assembling, photographing, packaging, and communicating with customers all take time.
My biggest lesson with handmade decor is to make a smaller, coordinated collection well rather than producing dozens of unrelated designs. When the materials, colors, finishing style, and display ideas work together, I can build a product line that feels intentional while keeping my production process manageable.
Halloween wood crafts don’t have to be complicated to be useful. A smooth surface, thoughtful design, appropriate materials, secure construction, and careful finishing can take a basic wood blank a long way.


One Comment