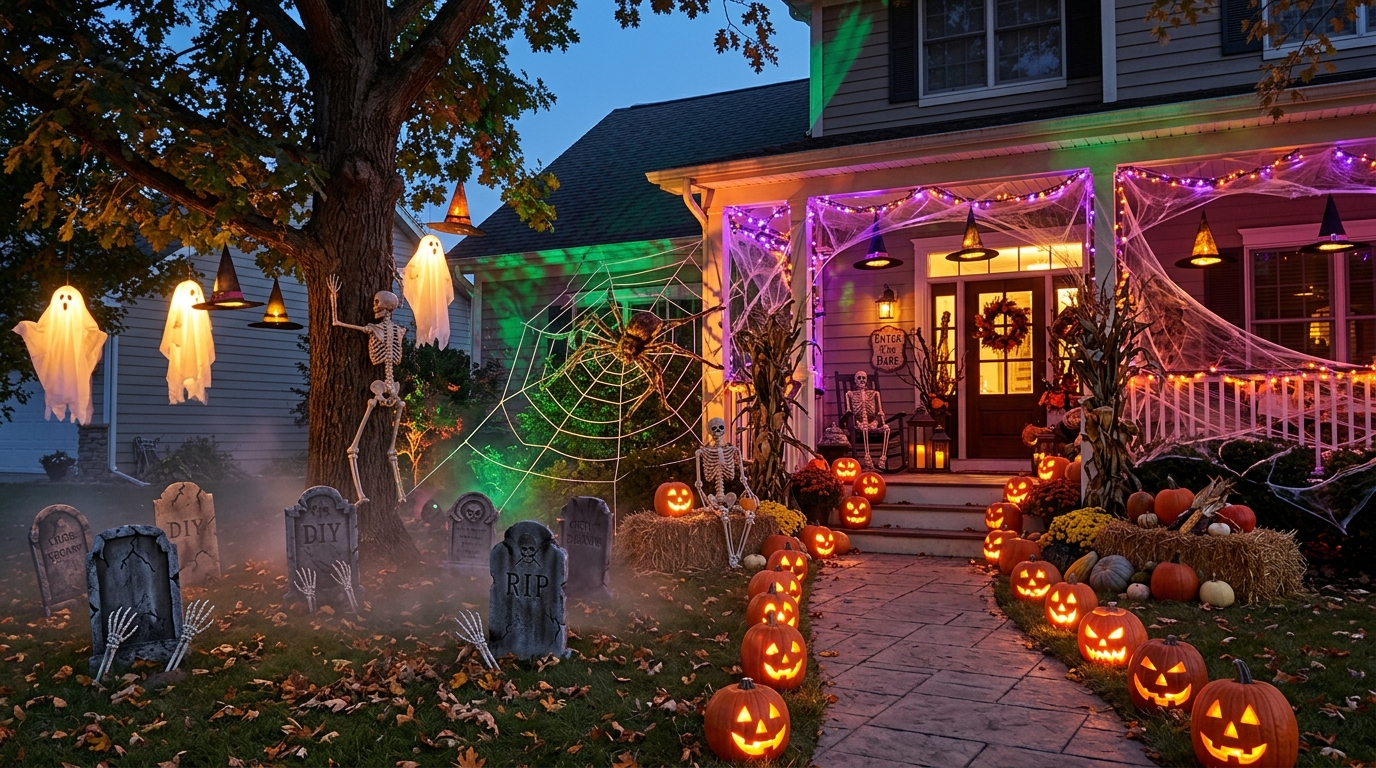
16 Scary Good Halloween Outdoor Decoration Ideas
I have always found that the scariest Halloween yards are not necessarily the ones with the biggest or most expensive props. A simple scene can look much better when I pay attention to lighting, shadows, placement, and what people see as they walk toward the house.
My usual approach is simple: one main scene, two or three supporting decorations, and lighting that connects everything. I would rather build one convincing graveyard or ghost scene than scatter decorations across every part of the lawn.
There is plenty of interest in Halloween decorating, too. According to the National Retail Federation’s 2026 Halloween survey, 42% of consumers plan to decorate their home or yard, and decorations are expected to account for about $4.3 billion in Halloween spending.
That spending does not mean a good display has to be expensive. I can get a lot of impact from foam board, old fabric, cardboard, reusable decorations, and a few well-placed LED lights.
The other thing I consider before setting anything up is how the display works after dark. A decoration that looks great in the afternoon may disappear completely at night, while a small prop can become much more noticeable when it is partially hidden and lit from the right direction.
These scary outdoor Halloween decorations cover the pieces I use most often when building a spooky yard: graveyards, oversized spiders, hanging ghosts, skeleton scenes, pumpkins, glowing eyes, pathway lighting, and fog.
I start by choosing one focal point. From there, I add two or three smaller decorations that support the same look rather than competing with it. Finally, I use outdoor-rated lighting to make the important shapes visible after sunset.
For a budget-friendly display, I would begin with materials I already own. Suitable rigid foam board can become tombstones, old fabric can become ghosts, cardboard can become signs or simple props, and reusable plastic or coroplast can work for decorations that need more weather resistance.
I also walk to the sidewalk and look back at the yard before I consider the display finished. Details that seem obvious up close can disappear from a distance, especially after dark.
Save this for later
Table of Contents
Safety stays part of the design. I keep walkways, steps, thresholds, and changes in ground level visible; secure lightweight decorations; protect electrical connections from moisture; and use LED lighting wherever practical. If rain, strong wind, or severe weather is expected, I bring vulnerable decorations and electronics inside.
Key Takeaways
- One strong Halloween scene can have more visual impact than a crowded yard.
- Foam board, cardboard, cheesecloth, old clothing, and reusable materials can become useful DIY decorations when the material suits the outdoor conditions.
- Lighting and shadows can make simple props much more noticeable after dark.
- Outdoor-rated electrical equipment matters whenever I use powered lighting or effects outside.
- Lightweight decorations need suitable stakes, weights, ties, or other secure attachment methods.
- LED lighting is my preference around fabric, leaves, costumes, webbing, and homemade decorations.
- Delicate decorations should be installed with the weather in mind rather than left outside through every storm.
- A family-friendly display can use ghosts, pumpkins, spiders, skeletons, fog, and shadows without relying on graphic imagery.
- Small loose pieces, cords, webbing, batteries, and other decorations need extra attention when toddlers or pets may be nearby.
Related article: 25 DIY Halloween Decoration Ideas (Easy, Cheap & Spooky for 2026)
What makes outdoor Halloween decorations scary?
For me, partial visibility is one of the easiest ways to make a yard feel spooky. I do not need to show every detail. A pair of eyes partly hidden in a shrub or a skeleton that is only visible between two tombstones gives visitors something to notice as they approach.
I build that effect with darkness, directional lighting, strong silhouettes, and unexpected details. The important distinction is that atmospheric darkness should not become unsafe darkness.
I keep the actual walking route visible, including steps, thresholds, curbs, changes in ground level, and anything guests might need to avoid. The darker areas can stay around the edges of the display.
Viewing distance also changes how I decorate. Large shapes and strong contrast work better from the sidewalk, while smaller details are more useful closer to the porch where visitors can actually see them.
For a family-friendly Halloween yard, I can get plenty of atmosphere from ghosts, skeletons, pumpkins, spiders, fog, and shadows. I do not assume every family or neighborhood has the same comfort level, so I adjust the level of fright to the people I expect to visit.
Are DIY outdoor decorations cheaper than store-bought?
DIY can be less expensive, but I would not automatically assume that it always is. The final cost depends on where I live, the size of the project, the materials I already have, and whether I need to buy tools or specialty supplies.
The bigger advantage for me is control. I can make a tombstone the exact height I need, adjust a ghost to fit a particular tree, or build a sign that matches the size of my porch.
Here are the approximate planning ranges I would use for the projects below:
| Decoration | Approx. DIY cost | Typical time | Scare rating |
|---|---|---|---|
| Graveyard scene | $25–$45 | 1.5–2 hours | High |
| Giant spider and web | $10–$20 | 45 minutes | High |
| Hanging ghosts | $10–$20 | 45–60 minutes | Medium–High |
| Glowing eyes | $3–$8 | 20 minutes | High for the cost |
| Posed skeleton | $20–$40 | 30 minutes | Medium–High |
These are planning estimates, not guaranteed prices. Project size, local prices, material quality, and what I already have at home can change the total considerably.
How do you build a Halloween graveyard in your yard?
I start a Halloween graveyard with tombstones in several shapes and heights rather than making every piece identical.
For the stones, I use suitable rigid foam board or another material appropriate for the conditions where the display will sit. I paint the pieces in layered gray, black, and brown tones, then add simple cracks, worn edges, and darker areas to make them look aged.
After the tombstones are positioned, I add a few low details such as skeleton hands, faux leaves, or small pieces of appropriate outdoor decor. Low lighting aimed toward the stones brings the whole arrangement together after dark.
I leave enough space between the decorations for people to walk safely. A cemetery scene should frame the path, not turn the path itself into an obstacle course.
1. Rising graveyard scene
A rising graveyard is the project I would choose when I want one strong centerpiece for the front yard.
I cut several tombstone shapes from suitable rigid foam board, making some tall and narrow and others shorter and wider. I use gray and black paint in uneven layers, then add cracks and rough edges instead of trying to make every stone look perfectly finished.
The approximate material cost is $25–$45, with about 1.5–2 hours of work for a basic scene. I treat both numbers as planning estimates because the size of the graveyard and the materials I already have can change the total.
I secure the tombstones with suitable stakes positioned behind or within the pieces so they stay upright. I make sure the stakes or supports cannot become exposed sharp hazards in an area where people walk.
After sunset, I use outdoor-rated lights positioned low and aimed upward toward the stones. The shadows across the faces make a much bigger difference than simply adding more tombstones.
Best for: A front-yard centerpiece.
Pro Tip: I always check the graveyard from the sidewalk. If all the stones blend into one dark shape, I move a few forward, change their heights, or adjust the lighting rather than adding more decorations.
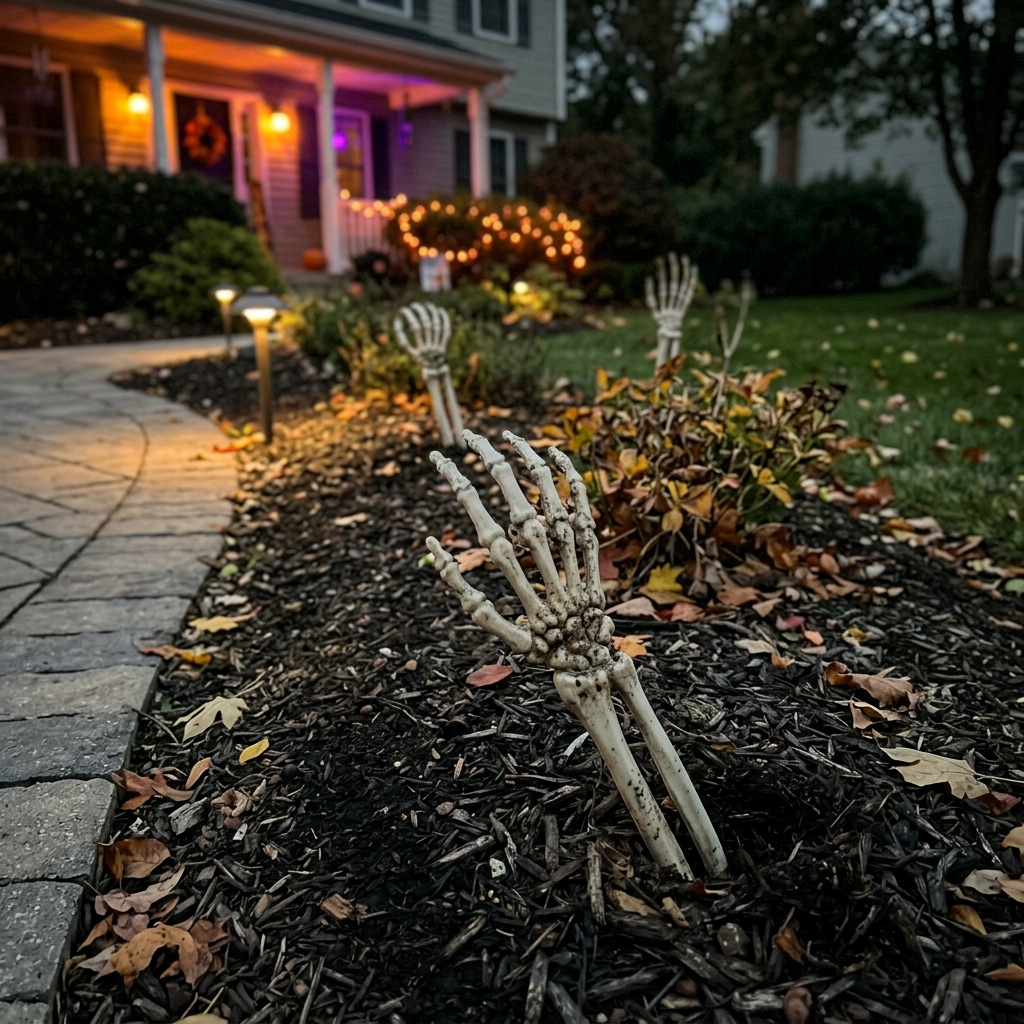
2. Skeleton hands clawing from the ground
Skeleton hands work well when I want a small detail that visitors notice as they move closer to the house.
I place the hands partly into garden beds, mulch, or suitable soil so only part of each hand or forearm appears above the surface. That partial view makes the decoration look as though something is emerging rather than simply lying on the ground.
A basic group may cost around $8–$15 and take about 30 minutes to arrange. The actual cost depends on the type of hands I use and whether I already have suitable garden materials.
I usually place several hands at different points instead of putting every one together. The first may be beside the path, with another farther ahead near a flower bed.
Best for: Garden beds, mulch areas, and lawn edges.
Pro Tip: I never put rigid stakes, exposed wire, or hard pieces where someone could step or fall onto them. If a hand comes with a stake, I keep the support fully secured and away from the walking route.
What scary creatures can you DIY for the yard?
When I make outdoor Halloween creatures, I focus on oversized shapes that people can recognize from the sidewalk. Small details tend to disappear at a distance, while a large spider or group of bats can establish the theme immediately.
I also choose the material based on how long the decoration will stay outside. Untreated paper and cardboard are generally poor choices for prolonged exposure to moisture, while coroplast, suitable plastic, or another material designed for the intended conditions may hold up better.
I do not treat any material as automatically weatherproof. Rain, sunlight, wind, temperature, and the specific product all matter.
3. Giant spider lair
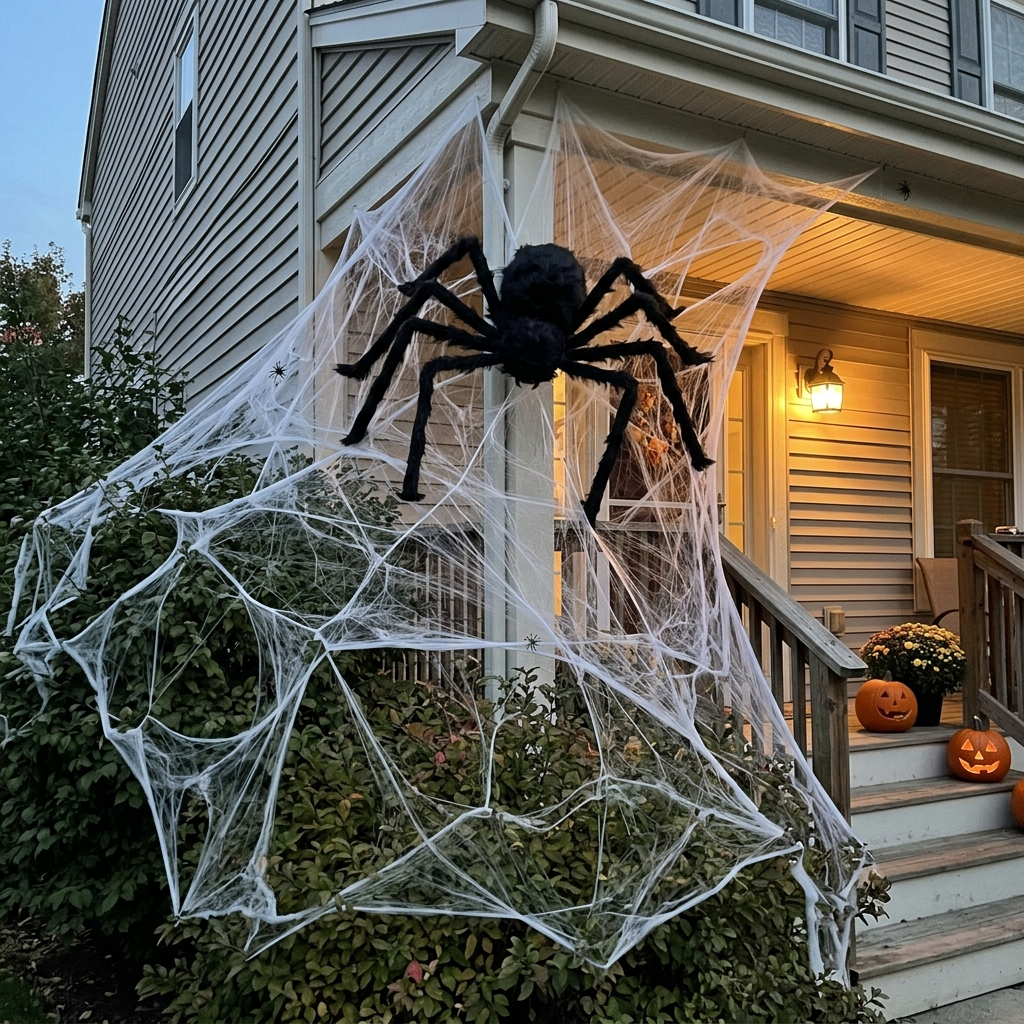
A giant spider lair can turn a porch corner, garage wall, or group of bushes into the main attraction.
I stretch synthetic webbing across the area and pull it thin and uneven rather than leaving it as one thick sheet. Then I add one large spider as the main focal point and smaller spiders only if the space needs them.
The approximate cost is $10–$20, and I allow around 45 minutes for a simple setup. I use multiple attachment points so one loose connection does not bring the entire web down.
Placement matters as much as construction. I keep webbing away from steps, handrails, door handles, walkways, and areas where guests could become tangled. I also avoid putting loose strands around children’s faces or at head level.
Best for: Porches, bushes, railings, and garage walls.
Pro Tip: I make the largest spider easy to see from the sidewalk, then let the webbing fill the surrounding space. One clear focal point usually looks better than dozens of small spiders competing for attention.
4. Hanging bat colony
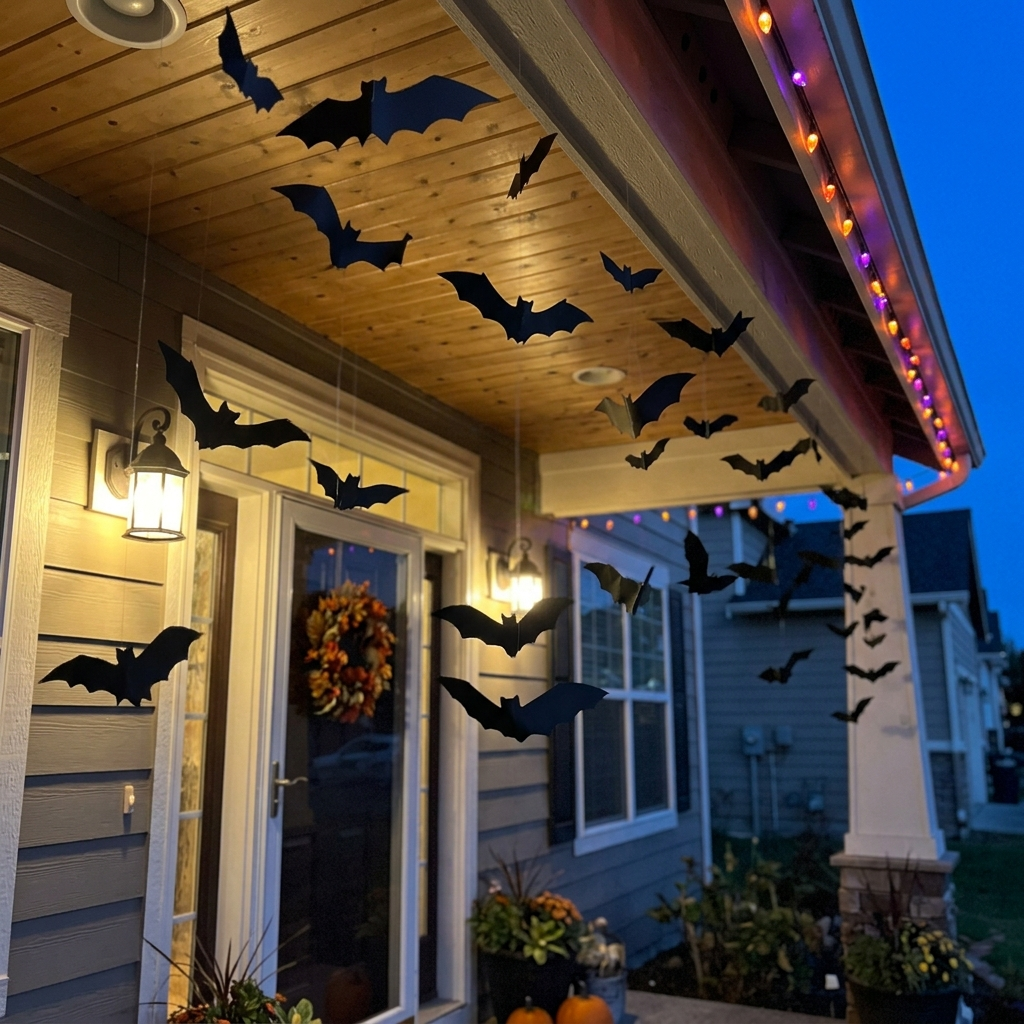
A hanging bat colony gives me a simple way to decorate the space above a porch or doorway.
I cut bat shapes from black coroplast or another material suitable for the intended outdoor conditions. I fold the wings slightly and hang the bats at different heights so they do not look like identical flat cutouts.
Clear line can work for some installations, but I choose the attachment method based on the weight, location, and expected wind. I use suitable hooks or attachment points and keep the bats away from electrical wires and areas where people could snag their heads or clothing.
The approximate cost is $8–$15, and I allow around 45 minutes for a small group.
Best for: Porch eaves, doorways, covered patios, and suitable tree branches.
The movement is part of the effect. A little natural movement from the breeze makes the bats look less static, but I check the attachment points after windy weather.
What outdoor Halloween figures are the scariest?
I get the most from figures that look like they belong in the scene rather than simply standing in an empty lawn.
A scarecrow sitting in a porch chair, a skeleton appearing to dig beside a tombstone, or a figure looking toward a window gives visitors a small story to understand.
The figure does not need to move to work. Sometimes the stillness is what makes it interesting because people notice the pose gradually as they approach.
I use the surrounding decorations to explain what the figure is doing. A skeleton beside a shovel and tombstone tells a clearer story than the same skeleton standing alone.
5. Hanging tree ghosts
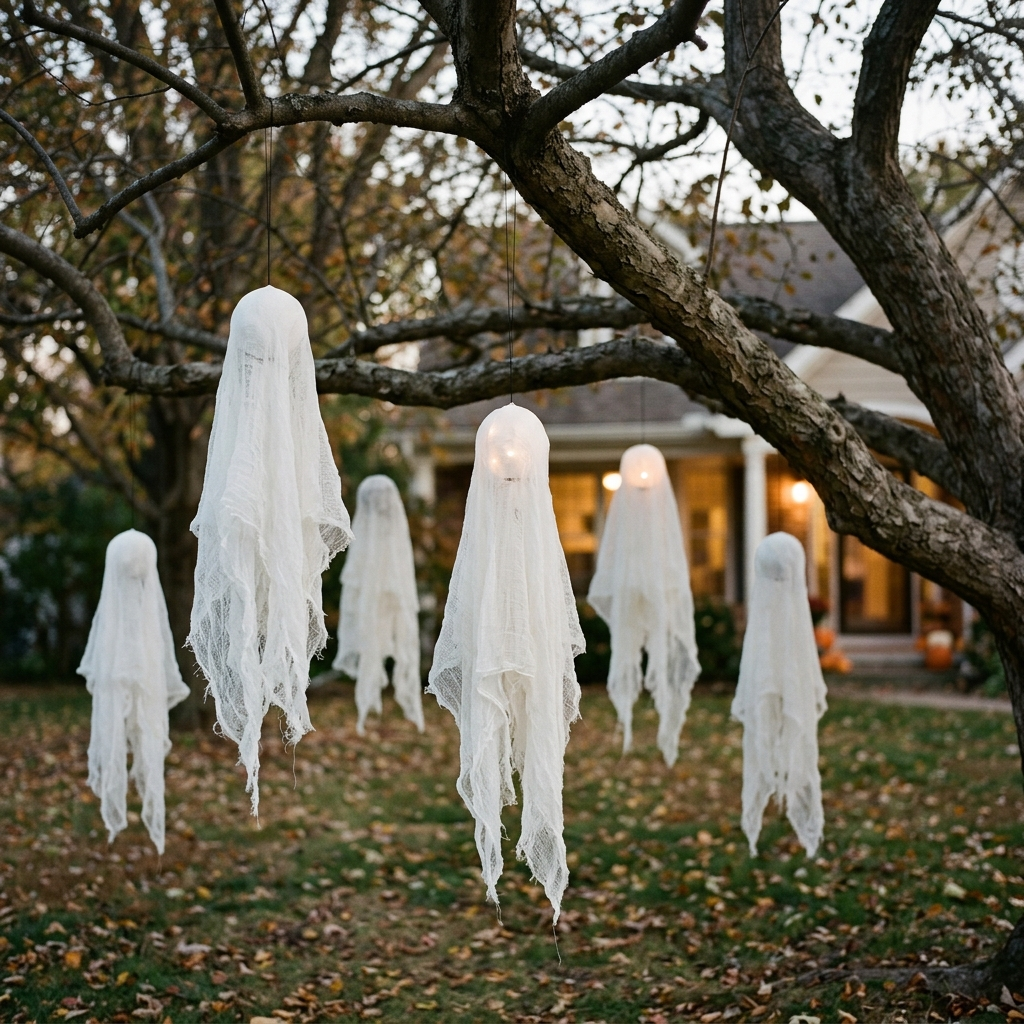
Hanging ghosts are especially useful when I have a suitable tree near the front of the property.
I use white fabric or cheesecloth over a lightweight head shape and can add a small battery-powered LED if I want the ghost to glow. I leave the fabric loose enough to move gently rather than pulling it tight.
The approximate cost is $10–$15, with about 45–60 minutes for a simple version.
Before hanging anything, I inspect the branch and make sure it is strong enough for the weight and conditions. Not every branch is appropriate for supporting a decoration.
I use a suitable attachment method that does not damage the bark, and I keep the ghost away from driveways, paths, doors, and parked vehicles. If severe weather is expected, I take the decoration down rather than leaving it exposed.
Best for: Yards with suitable sturdy trees.
6. Hovering ghost figures
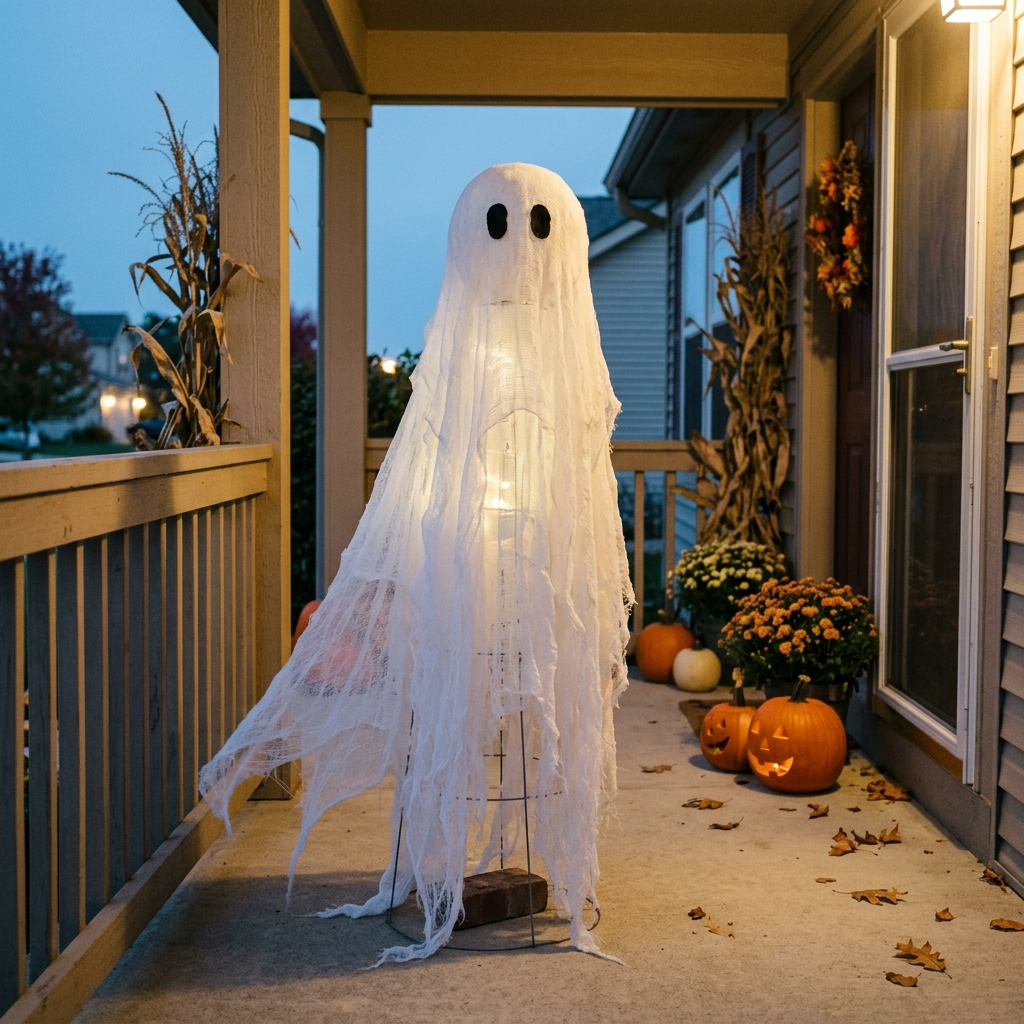
For a hovering ghost, I use an upside-down tomato cage or another lightweight frame to give the fabric its shape.
I cover the frame with cheesecloth or thin fabric and place a battery-powered LED inside if the setup and lighting are suitable. The hidden frame creates the body shape while the loose fabric gives the ghost its floating appearance.
A basic version costs approximately $12–$20 and takes around an hour. I treat that as a planning estimate because the size of the frame and amount of fabric can change the cost.
For an exposed yard, I make sure the frame, fabric, light, and attachment method are all appropriate for the location. In a covered porch, I have more protection from rain, but I still secure the structure.
Best for: A sheltered porch or suitable yard area.
Pro Tip: I stabilize the bottom or base of the frame so the ghost cannot tip into a walkway. A lightweight structure needs more support when it is exposed to wind.
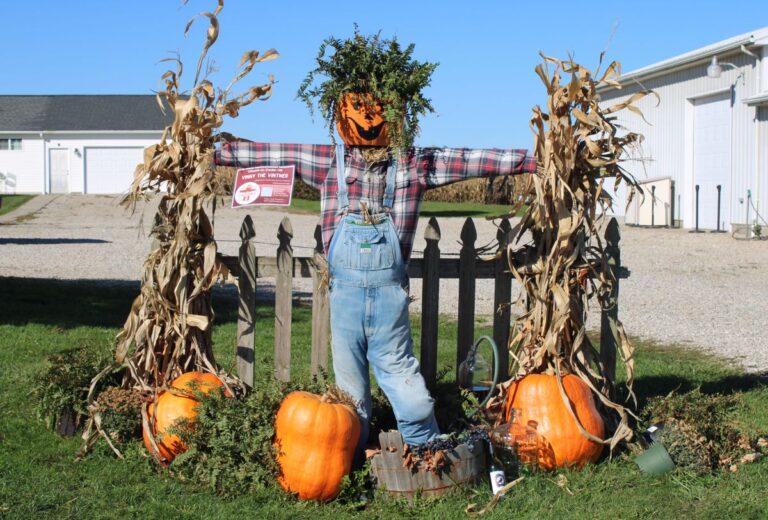
7. Sinister scarecrow
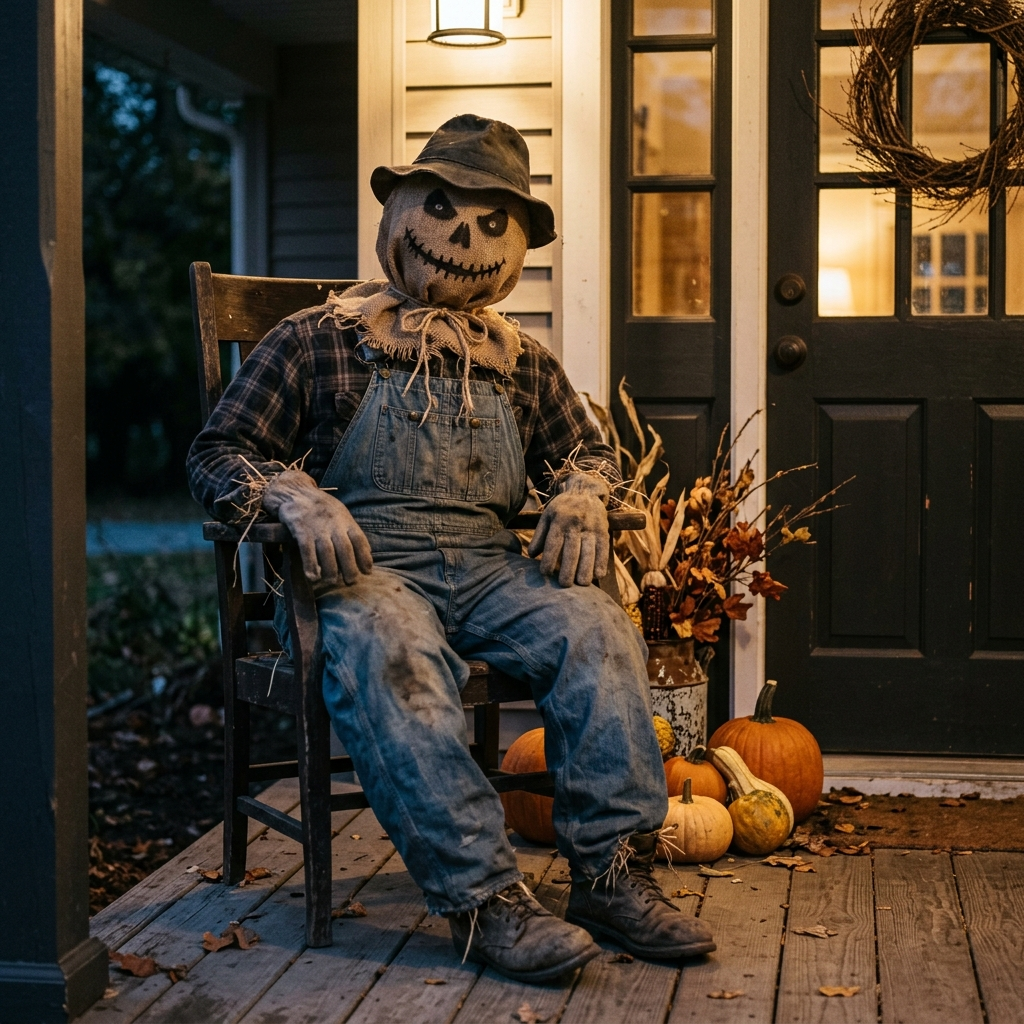
A scarecrow is one of the easier projects to make from things I may already have.
I use old clothing and suitable lightweight stuffing to create the body, then add a burlap or fabric head with a simple painted or securely attached decorative face.
Instead of making it stand perfectly straight, I often use a seated or slightly leaning pose. That makes the figure feel more connected to the porch or garden instead of looking like a generic lawn ornament.
A simple version costs approximately $10–$20 and takes about an hour.
I secure the body and legs so they do not collapse in wind. Any mask, facial piece, or decorative element also needs to be firmly attached and appropriate for outdoor use.
Best for: Porch chairs, garden areas, and yard focal points.
8. Posed skeleton scene
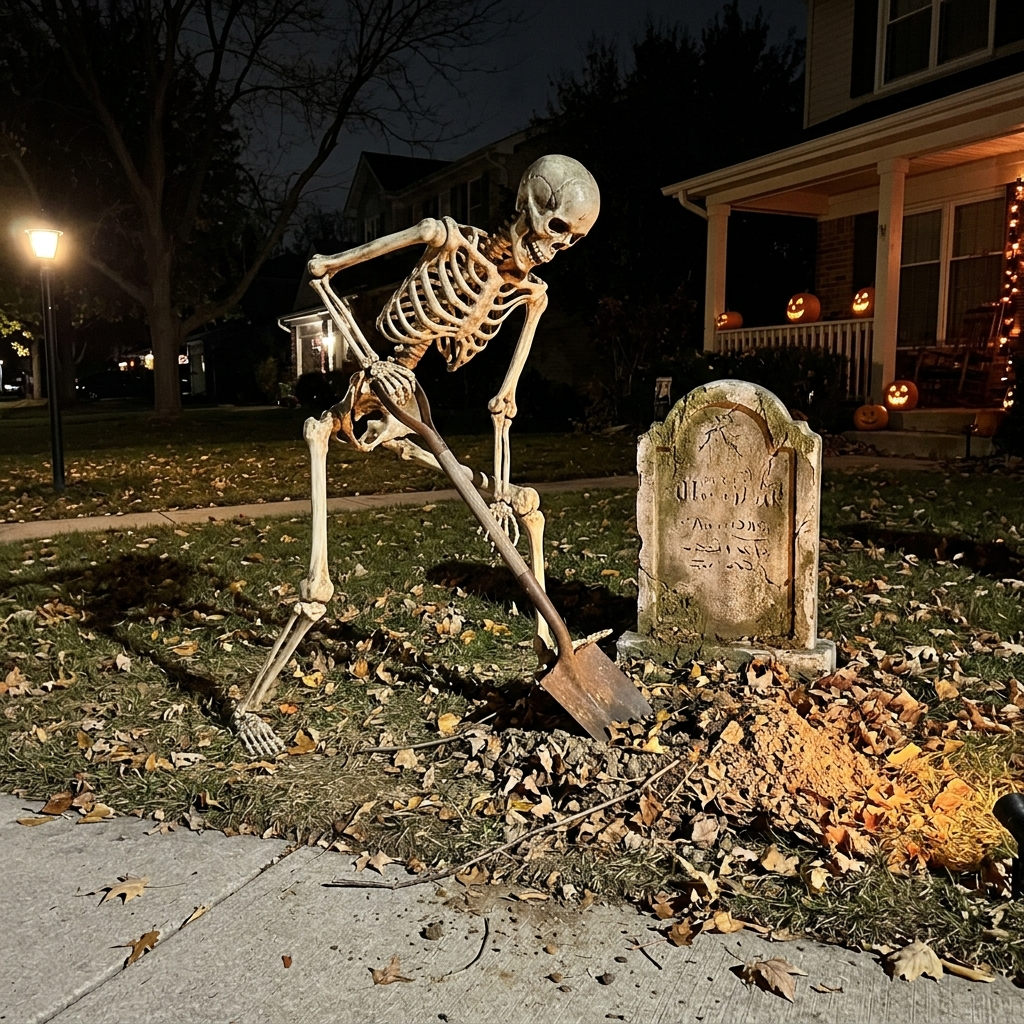
I get more character from a skeleton when I give it a job to do. It can appear to be digging, climbing, looking through a window, or sitting in a chair.
A basic plastic skeleton may cost around $20–$40, and staging it can take about 30 minutes. Those are approximate planning figures rather than fixed prices.
Once the skeleton is posed, I view it from the sidewalk. A pose that looks obvious from five feet away may be impossible to understand from the street.
If I use wire or ties to hold a joint, I make sure the connection is secure and that sharp ends are covered or kept inaccessible. Nothing should stick into a walkway or create a falling hazard.
Best for: A humorous or creepy focal point.
Pro Tip: I take a quick photo from the sidewalk before I finish the scene. The photograph often shows me immediately whether the skeleton is visible enough or needs to be repositioned.
How do you make a scary Halloween porch?
I treat the porch as a working entrance first and a decoration area second.
I begin with the steps and doorway, making sure there is enough clear space for people to approach, wait, and leave. After that, I add pumpkins, ghosts, wrapped columns, signs, or another focal decoration.
Lighting is especially important here. I can create shadows around the edges of the porch without making the steps or threshold completely dark.
A scary porch should still be safely navigable, particularly when children in costumes are approaching after sunset.
9. The “watching” tree
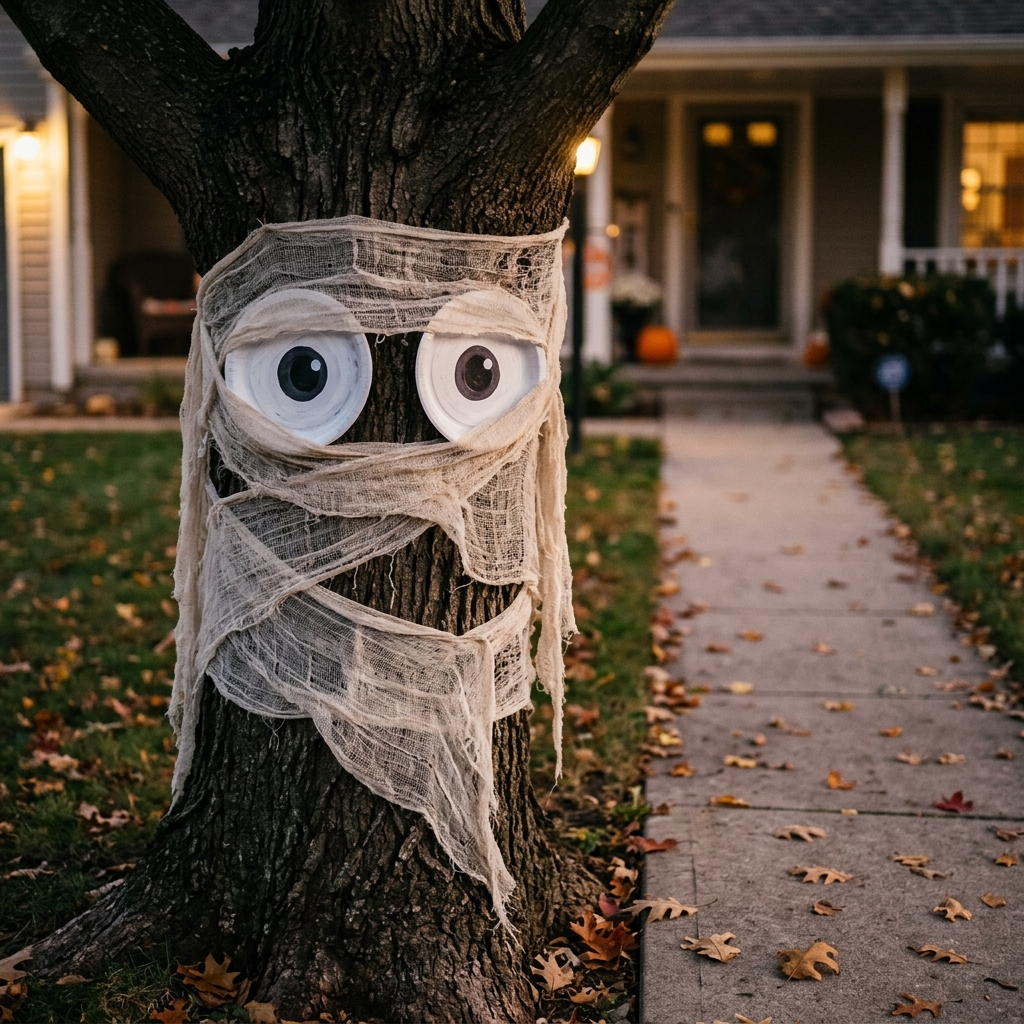
A front-yard tree can become a simple spooky feature with gauze, cheesecloth, and a pair of large eyes.
I loosely wrap part of the trunk and position the eyes around normal eye level so they appear to be watching people as they approach.
The approximate cost is $6–$12, and a basic setup takes around 30 minutes.
For lighting, I use a suitable outdoor-rated light if the product is intended for that location. I never nail or screw decorations into a living tree. Instead, I use an appropriate tie or attachment method that does not damage or constrict the bark.
I also remove decorations before repeated rubbing, wind movement, or tight ties can damage the tree.
Best for: A large tree near the front walkway.
Also read: 27 Un-BOO-lievable Halloween Party Favor Ideas
10. Stacked jack-o’-lantern tower
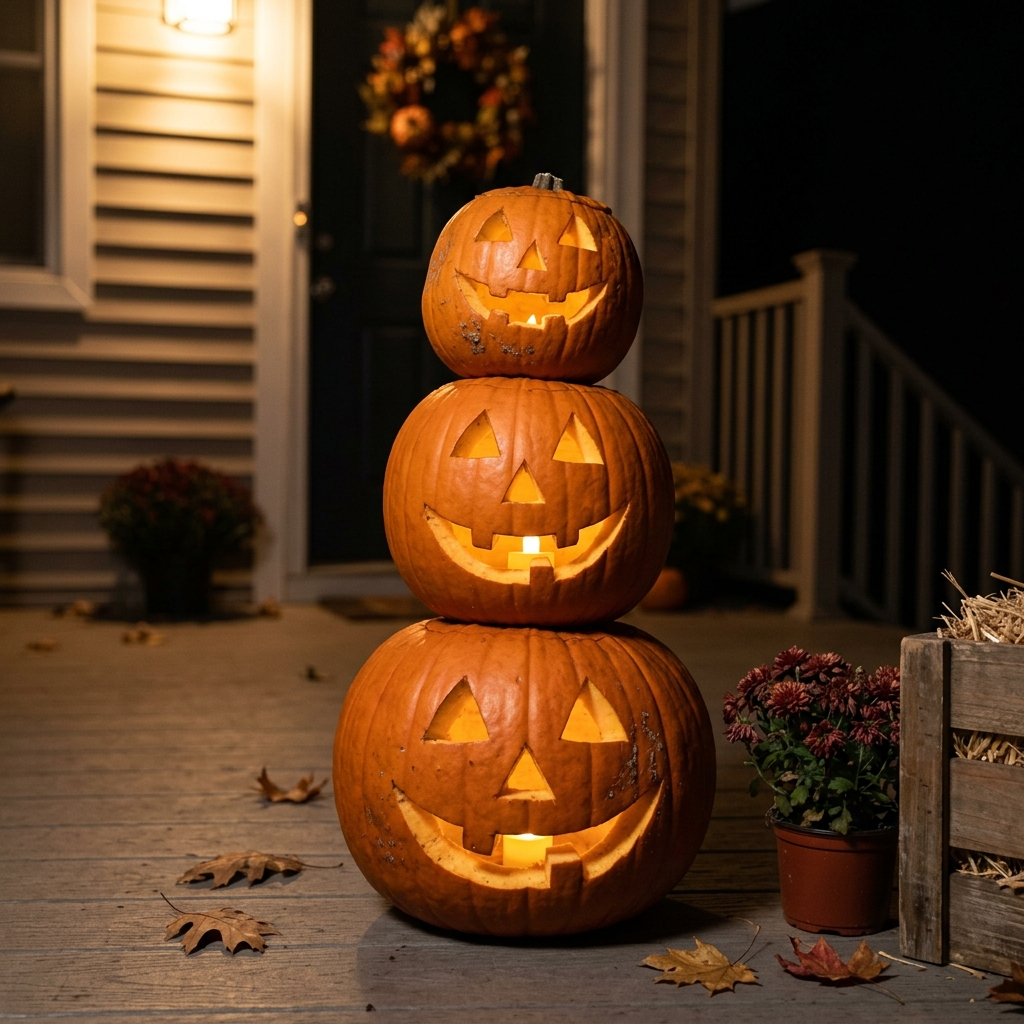
A stacked pumpkin tower gives me height without taking up much porch space.
I use three pumpkins in different sizes, with the largest at the bottom. Real pumpkins work well for shorter displays, while faux pumpkins are useful when I want the arrangement to remain in place for longer.
For lighting, I use battery-operated LED lights rather than candles. That keeps an open flame away from fabric, costumes, dry leaves, webbing, and other homemade decorations.
The approximate budget is $10–$30, depending on whether I use real or faux pumpkins and what I already own.
I make sure a real pumpkin tower has a stable base and is not positioned where guests will brush against it. I may use internal support for a tall faux-pumpkin arrangement when the design needs it, but not every stack requires one.
Best for: Porch steps and entry areas with enough clearance.
11. Mummy-wrapped porch columns
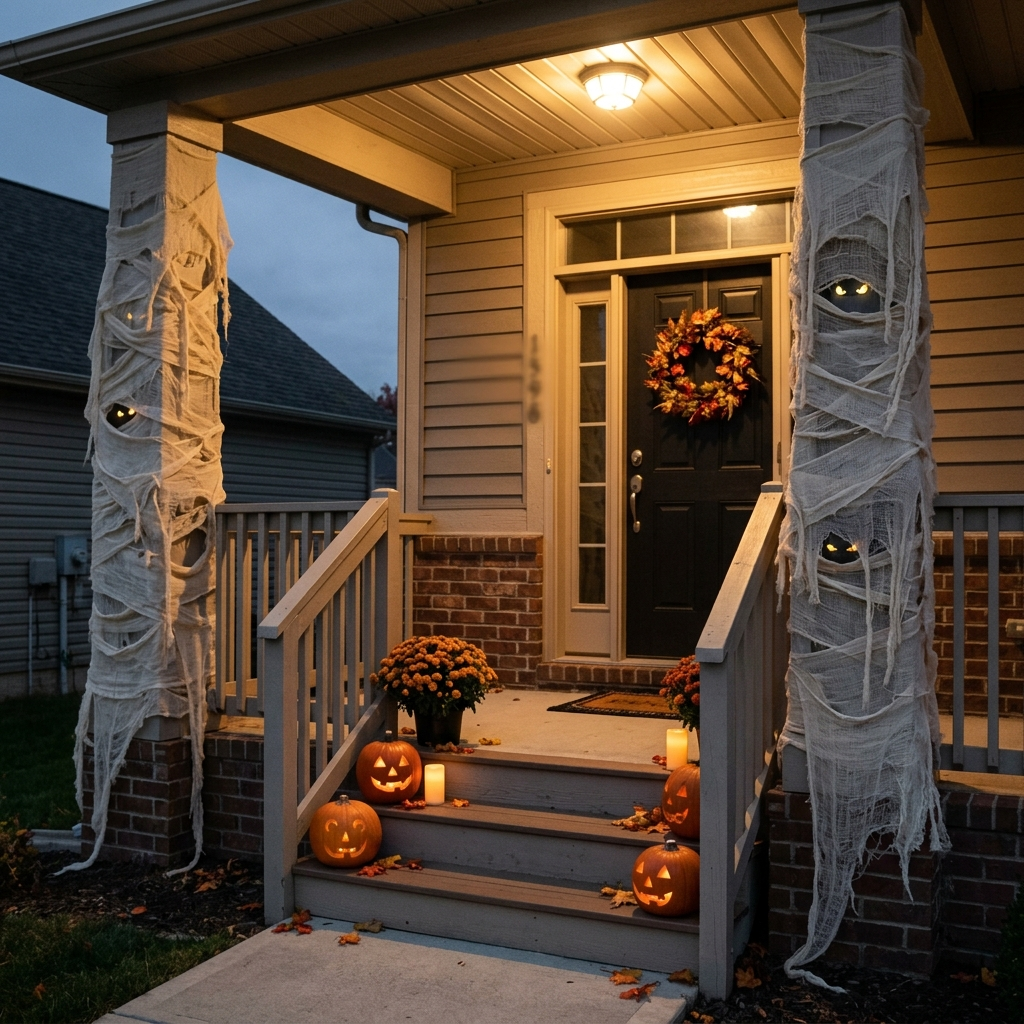
Mummy-wrapped columns are a quick way to change the look of a plain porch.
I loosely wrap cheesecloth or gauze around the posts, leaving a few sections uneven and letting some fabric trail slightly. LED eyes tucked into the layers can make the column look as though something is hiding inside.
The approximate material cost is $6–$10, and the wrapping itself takes about 30 minutes.
I keep the fabric away from heat sources and open flames. I also make sure it does not cover house numbers, interfere with the door, obstruct handrails, or hang into the walking area.
Best for: Porch posts and entry framing.
12. “Beware / Enter if you dare” signs
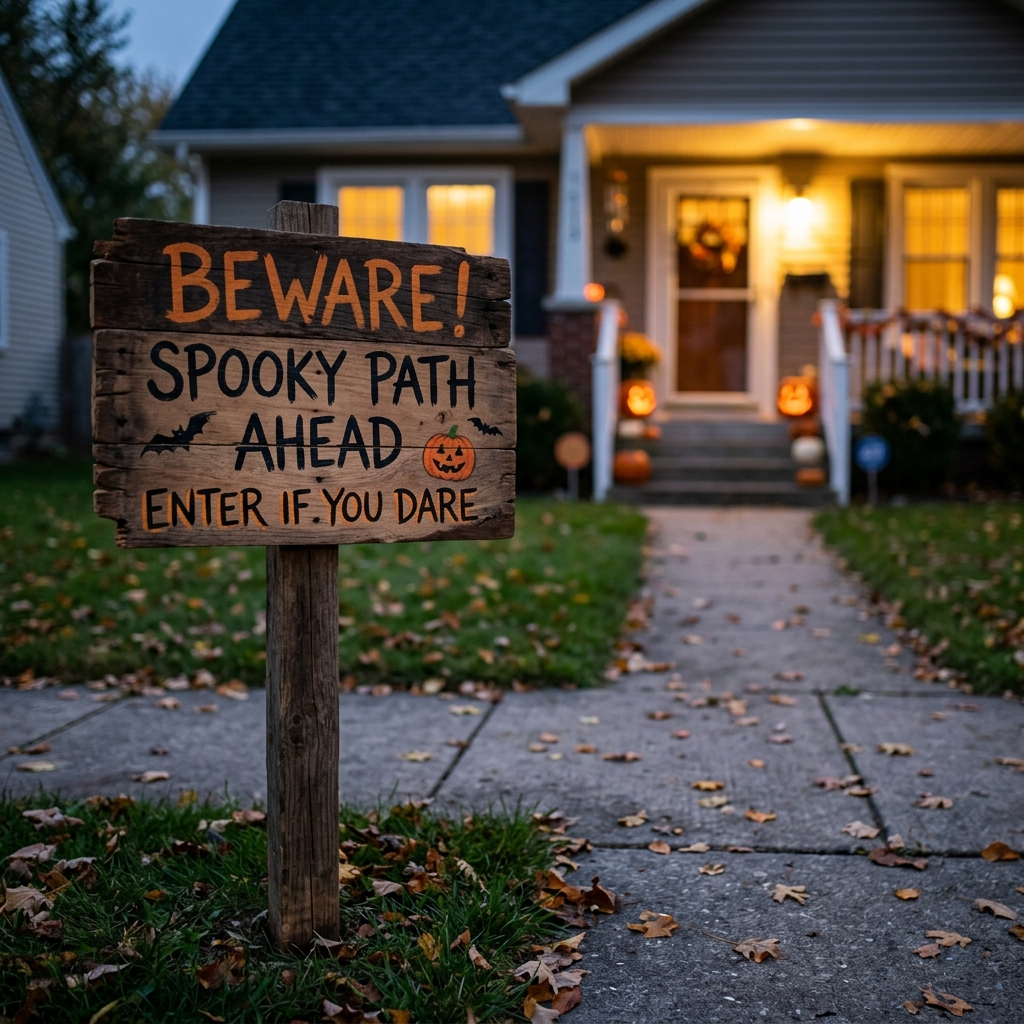
A simple warning sign can establish the mood before visitors even reach the main display.
I can paint the message on scrap wood or another material suitable for the weather and place it near the gate or beginning of the walkway. A short phrase works better than a sign packed with text because people need to read it quickly.
A basic project costs approximately $5–$12 and takes around 30 minutes.
I keep the wording playful when young children are likely to visit. Scary does not have to mean graphic.
I also make sure the sign itself does not block visibility or become a physical obstacle for guests.
Best for: Gates, walkways, and the entrance to the display.
How do you light a scary Halloween yard?
Lighting is one of the most useful tools I have for changing the appearance of a Halloween yard after dark.
I do not illuminate every decoration equally. Instead, I use directional light on the pieces I want people to notice and allow some surrounding areas to remain less brightly lit.
That creates atmosphere without making the entire yard dangerously dark. The walking route still needs enough light for guests to see steps, thresholds, uneven ground, and obstacles.
I use outdoor-rated lighting and electrical equipment where required and follow the manufacturer’s instructions. Battery-operated LEDs are particularly useful for small homemade decorations because they avoid running cords to every prop.
13. Glowing eyes in the bushes
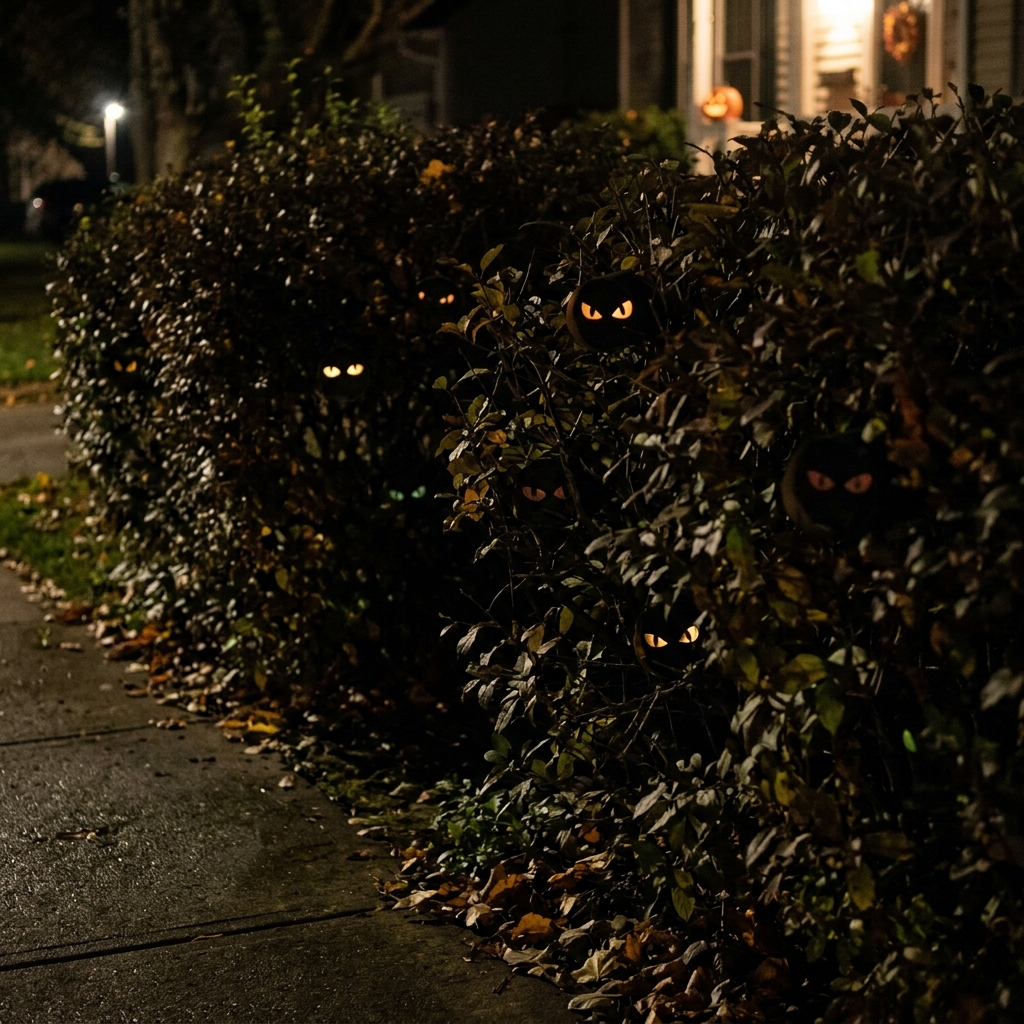
Glowing eyes are one of my favorite low-cost accents because I can make several pairs without using much material.
I cut eye-shaped openings into black cardboard or cardboard tubes and place a small battery-powered LED behind the openings. Then I tuck the housings into the shrubs so the eyes appear to be watching from the darkness.
The approximate cost is $3–$8, and the basic project takes about 20 minutes.
I do not put improvised electrical equipment into foliage. For this project, I stick with battery-powered LED lights in a stable housing designed to keep the light source contained.
I also make sure the pieces cannot easily fall out and become litter, a tripping hazard, or something a toddler or pet could pick up.
Best for: Shrubs, hedges, and darker garden edges.
Pro Tip: I place pairs at different heights and depths instead of making a straight row. From the sidewalk, the uneven placement makes the display feel less predictable.
14. Creepy lighted pathway
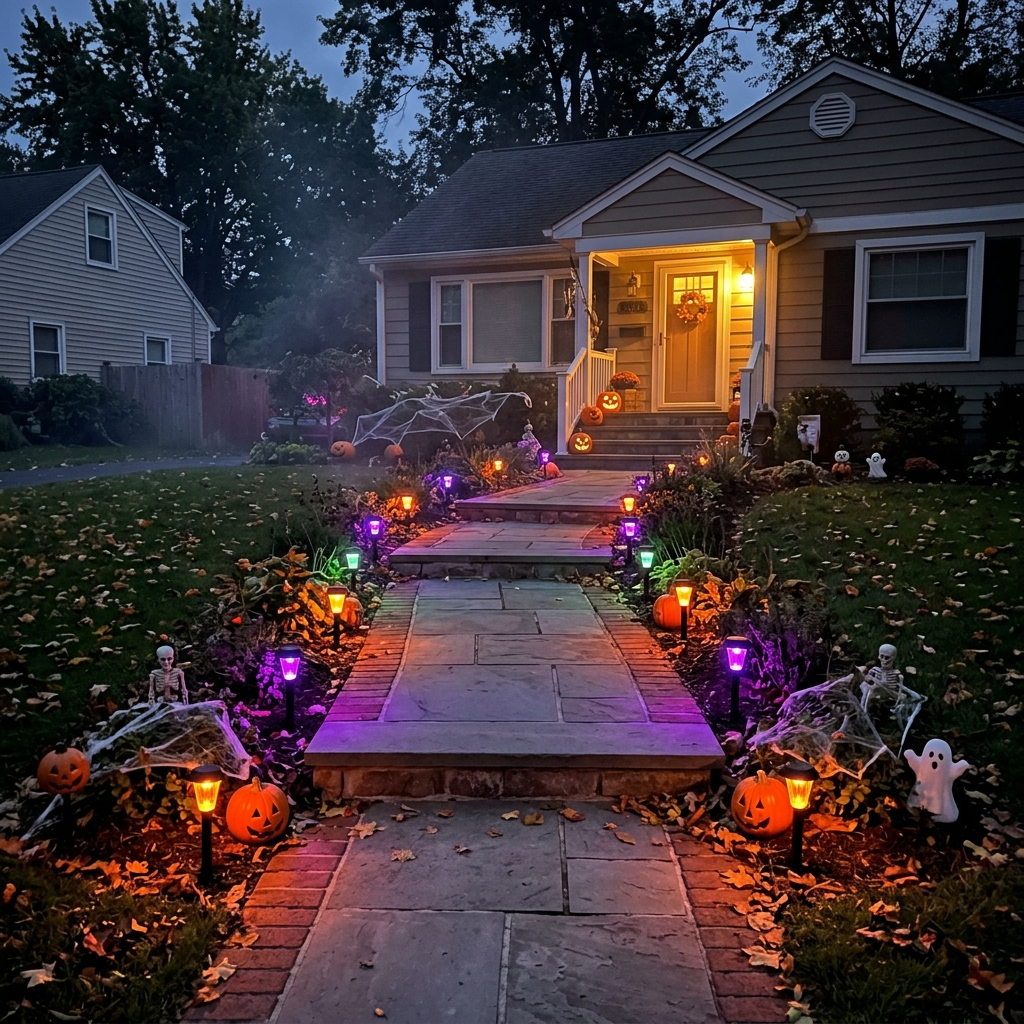
A creepy pathway has to do two jobs: create atmosphere and help people see where they are walking.
I use orange, purple, or green outdoor-rated LED path lights, or suitable battery-operated luminaries, and place them along the edges of the walkway.
I keep cords out of the walking path and secure lights so they cannot easily tip over. I also avoid excessive glare because a very bright light can make nearby steps or changes in elevation harder to see.
The approximate cost is $10–$20 for a basic arrangement, depending on the number and type of lights.
Best for: Walkways leading toward the front door.
Pro Tip: I test the pathway after dark, not just during setup in daylight. That is when I can spot dark patches, glare, loose cords, or decorations that are harder to see than expected.
15. Low-lying fog
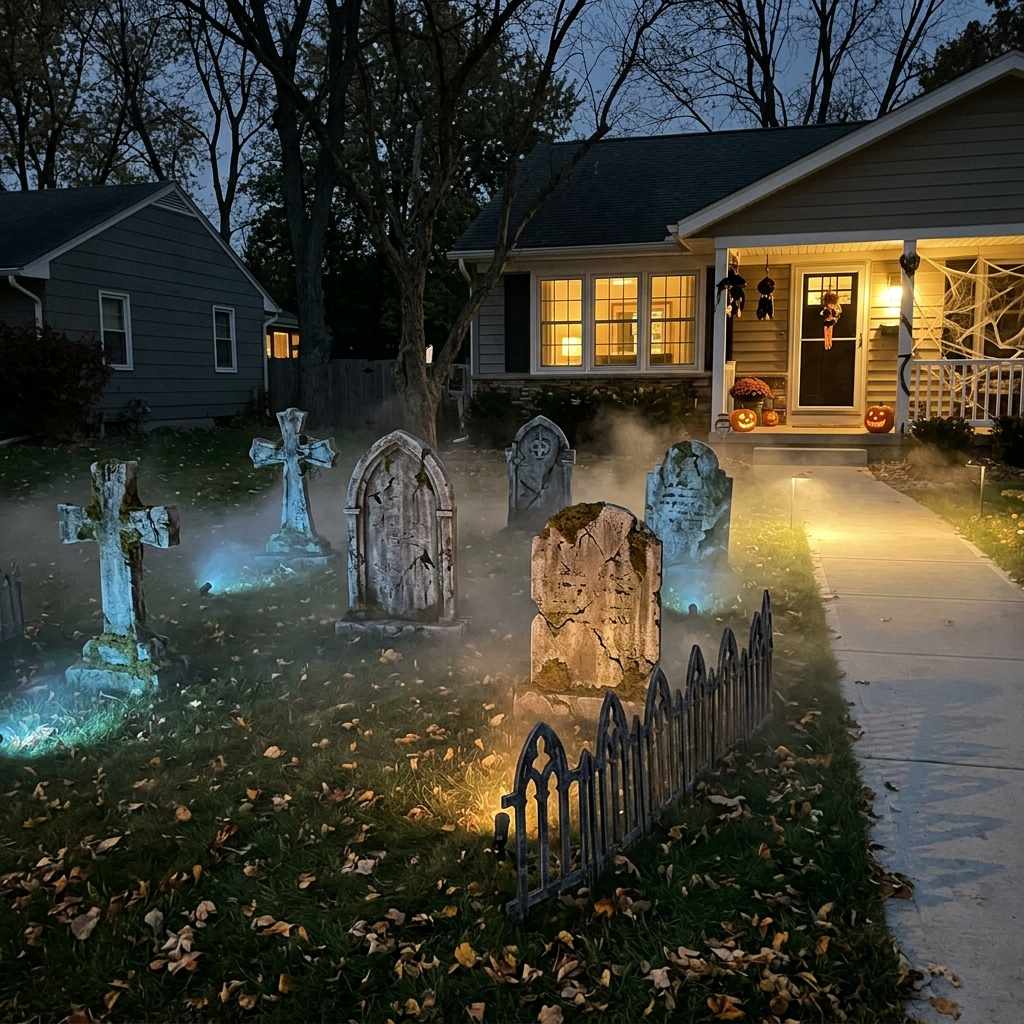
Fog is optional, but it can change the appearance of a graveyard or ghost scene considerably.
I position the fog machine near the display rather than directly in a walking area. I also make sure the fog does not obscure steps, curbs, uneven ground, or other hazards.
A basic fog machine setup may cost approximately $25–$45. The actual price depends on the equipment and fluid required.
I follow the manufacturer’s instructions for placement and use. I do not assume every fog machine is designed for outdoor use, and I keep electrical connections protected from moisture.
If heavy rain, standing water, strong wind, or other unsafe weather is expected, I skip the fog effect and bring vulnerable equipment inside.
Best for: Graveyards, garden scenes, and larger displays.
16. Blacklight, projection, and glow
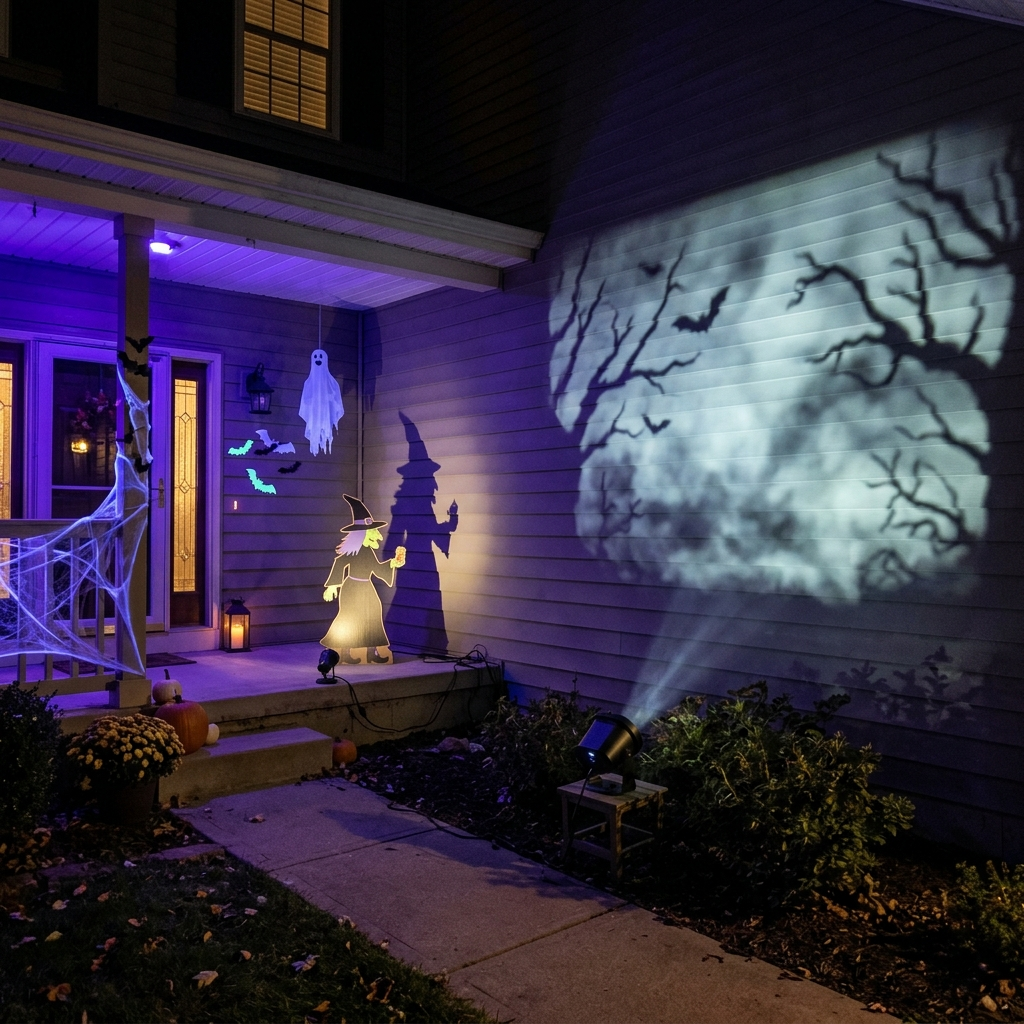
Blacklights and projectors let me change the appearance of a porch or exterior wall without adding a large number of physical props.
A blacklight can highlight suitable white or fluorescent decorations, while a projector can create moving shadows or Halloween imagery on a wall. For a simpler effect, I can use a light and cardboard cutout to create a basic shadow.
A planning range of about $15–$35 works for some basic setups, but equipment prices vary significantly.
I never assume a projector or light designed for indoor use is suitable outside. If I place one outdoors, I use it only according to the manufacturer’s intended rating and instructions, with appropriate protection from weather.
I also test the effect after dark at approximately the time guests will arrive. A projection that looks strong at 6 p.m. may look completely different later in the evening.
Best for: Porches, exterior walls, covered patios, and other suitable surfaces.
How I Build a Scary Outdoor Halloween Scene
I build a scary Halloween yard around one main visual story rather than trying to decorate every available space.
For a graveyard, the tombstones become the focal point and the skeleton hands, lighting, leaves, and fog support them. For a spider scene, the web and oversized spider do the same job.
Posed skeletons work particularly well when they have something to interact with, while projection can add movement without filling the yard with physical props.
I also use partial visibility whenever possible. A ghost behind a tree, eyes inside a hedge, or a skeleton partly hidden by a tombstone gives people something to notice as they approach.
The final test is always the sidewalk. If the main scene is not clear from there, I adjust the scale, spacing, or lighting before adding anything else.
Pro tips after years of decorating outdoors
Light before buying more decorations. If the yard feels flat, I first move an existing light or add a suitable uplight. More props will not necessarily solve a lighting problem.
Use uplighting carefully. A light placed below a figure can create strong shadows, but I position it so it does not shine directly into visitors’ eyes or make nearby steps harder to see.
Keep the walking route clear. I run cords along safe edges rather than across paths and keep webbing, stakes, and loose fabric away from where people walk.
Secure lightweight pieces. Tombstones, bats, signs, ghosts, and other lightweight decorations need suitable stakes, weights, ties, or another secure attachment method when wind is possible.
Choose materials for the exposure. Paper and untreated cardboard are vulnerable to moisture. Fabric can become heavy when wet, and lightweight decorations can blow away. I choose materials according to how exposed the project will be.
Use LED lighting. Battery-powered LEDs are useful for small projects, while outdoor-rated powered lighting should be installed and used according to its instructions. I keep connections away from standing water and use equipment appropriate for outdoor conditions.
Check the display from the sidewalk. This is one of the most useful tests I do. A decoration that looks detailed up close may disappear from the actual viewing distance.
Plan around the weather. I do not leave delicate projects outside simply because I already installed them. Strong wind, heavy rain, and severe weather are good reasons to bring vulnerable decorations and electronics inside.
Common mistakes that flatten a scary yard
The first mistake is adding too many decorations without choosing a focal point. When everything is competing for attention, the yard can look busy rather than scary.
The second is flat lighting. A display can have excellent props and still look ordinary if every piece is illuminated from the same direction.
The third is ignoring the weather. Paper, cardboard, fabric, lightweight signs, hanging pieces, and electronics can all behave differently when exposed to rain and wind.
Another common problem is turning the walking route into part of the decoration. Cords, low webbing, unstable props, and poorly lit steps are not worth the effect.
I also avoid real candles around homemade paper or cardboard decorations, fabric, costumes, dry leaves, webbing, and dried branches. LED candles give me the glow without adding an open flame.
Finally, I test the display from its actual viewing distance. Something that looks perfect while I am standing beside it may be too small, too dark, or hidden when viewed from the sidewalk.
🎉 Quick Summary
✅ Best for: Building a scary outdoor Halloween display without filling the yard with expensive props.
💰 Budget: Roughly $3–$20 for smaller DIY accents and around $25–$50 for many larger scenes, depending on materials and size.
⏱ Time: About 20 minutes for smaller projects and up to 2 hours for a larger graveyard or layered display.
🌟 Top budget pick: Glowing eyes in the bushes because they use very little material and can stand out strongly after dark.
📌 Do not skip: Visible pathways, secure anchors, weather protection, and outdoor-rated electrical equipment.
Frequently Asked Questions About Outdoor Halloween Decorations
How do I decorate my yard for Halloween?
I start with one focal point, such as a graveyard, ghost grouping, spider scene, or posed skeleton. Then I add two or three supporting decorations and use lighting to connect the scene.
Before I finish, I view everything from the sidewalk. That helps me see whether the main display is actually visible from where trick-or-treaters will approach.
What are the scariest outdoor Halloween decorations?
For me, the most effective scary Halloween yard decorations use atmosphere rather than simply adding more props. Glowing eyes, uplit figures, hanging ghosts, skeleton scenes, and partially hidden graveyard pieces all work well.
The strongest effect usually comes from the combination of placement, shadow, and limited visibility.
How do you make a Halloween graveyard in your yard?
I make tombstones from suitable rigid foam board or another material appropriate for the outdoor conditions, then paint them in layered gray, black, and brown tones.
I use different heights and uneven spacing, secure the pieces against wind, and add low lighting. Skeleton hands or other ground-level details can fill the gaps without overcrowding the scene.
How do you make cheap outdoor Halloween decorations?
I start with materials already in the house or garage. Old fabric can become a ghost, cardboard can become a sign, and suitable leftover materials can become tombstones or silhouettes.
Glowing eyes, a painted warning sign, and a few LED lights can establish a Halloween theme before I spend money on larger decorations.
How do you make glowing eyes for the bushes?
I cut eye shapes into black cardboard or a cardboard tube and place a small battery-powered LED behind the openings.
I hide the stable housings inside shrubs at different heights. I keep the pieces away from areas where toddlers or pets could pull them out, chew them, or swallow small parts.
How do you make outdoor Halloween decorations weather-resistant?
I choose materials according to the amount of exposure. Paper and untreated cardboard are more vulnerable to rain, while suitable rigid foam, coroplast, plastic, or other outdoor-appropriate materials may work better for exposed projects.
I also secure lightweight pieces and protect electronics according to the manufacturer’s instructions. If severe weather is coming, I bring delicate decorations inside.
How do you keep outdoor decorations from blowing away?
I use suitable garden stakes, weights, ties, or other secure attachment methods depending on the decoration.
Before Halloween night, I test lightweight props by checking whether they wobble easily. Hanging decorations also need secure attachment points and should be checked again after strong wind.
What lights are best for outdoor Halloween decorations?
I use outdoor-rated LED lights for areas exposed to the weather and battery-operated LEDs for many small DIY decorations.
Colored lighting can create a Halloween mood, while an uplight below a skeleton, tombstone, or scarecrow can create stronger shadows. I still keep enough light on paths and steps for safe movement.
How can I make outdoor Halloween decorations spooky but family-friendly?
I use ghosts, skeletons, pumpkins, spiders, glowing eyes, shadows, and fog instead of graphic scenes.
If young children will be visiting, I keep walkways visible, avoid unstable props and exposed sharp supports, keep webbing away from faces and paths, and avoid startling people directly at the doorway.
Read this next: 17 DIY Halloween Wood Crafts That Are Hot Sellers (2026)
Conclusion
A scary outdoor Halloween display does not have to be expensive. I can build the foundation with one simple scene, then use lighting, shadows, and a few supporting decorations to make it work after dark.
The space itself should guide the design. A small porch may need one strong pumpkin or ghost arrangement, while a larger yard can support a graveyard, creature scene, or several connected areas.
I also think about the people who will actually visit. A family neighborhood may call for a different level of fright than an adults-only Halloween party, and I can make either style work without filling the yard with graphic decorations.
My best approach is to create the scene before shopping. I look at the yard from the sidewalk, decide what I want people to notice first, and then buy or make only the pieces that support that idea.
With inexpensive materials, suitable outdoor construction, secure placement, weather awareness, and thoughtful lighting, I can create scary Halloween yard decorations that feel intentional without turning the property into a cluttered display.





2 Comments