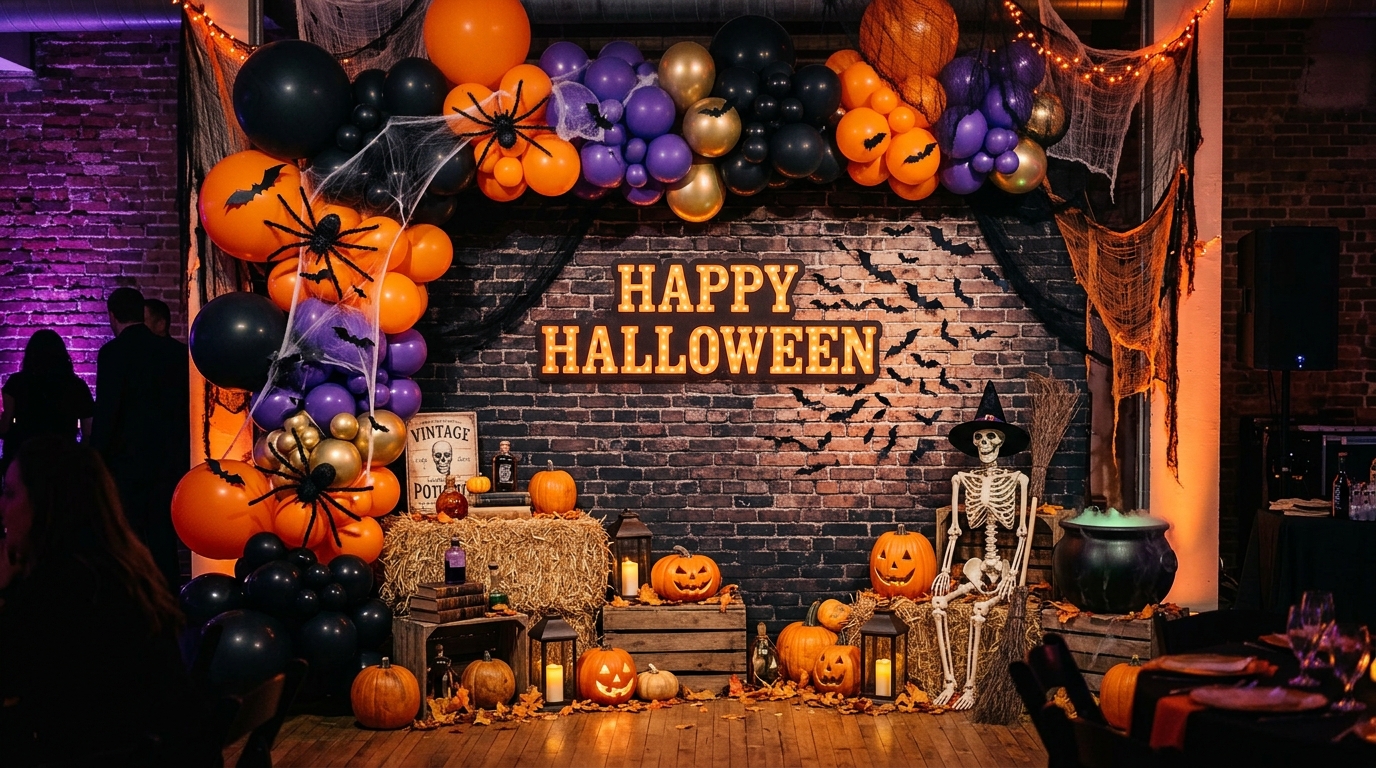
29 Halloween Backdrop Ideas for Parties & Photos (DIY Tips Included)
Before choosing a design, I consider the party theme, available space, budget, and ages of the guests. A dark balloon garland might suit an adult Halloween party, while smiling ghosts and pastel decorations are better for a family gathering. I also think about how the backdrop will look in photographs and how securely I can attach it to the wall.
These 29 Halloween backdrop ideas include balloon arches, fringe curtains, paper decorations, haunted scenes, illuminated walls, friendly ghost displays, and interactive photo booths. Many simple DIY options can be assembled for an estimated $5–$30, although larger displays and specialty materials may cost more. Depending on the design, setup can take approximately 15 minutes to several hours.
Save this for later
Table of Contents
My main recommendation is to choose one focal area, coordinate the colors, and check the lighting before the party starts. A carefully arranged backdrop can work in a living room, apartment, school party, or larger event space without requiring expensive decorations.
Key Takeaways
- Best budget option: A black plastic tablecloth with paper bats or other lightweight decorations.
- Best quick setup: BOO letter balloons or a black fringe curtain.
- Best statement design: A black-and-orange balloon arch.
- Best for children: Friendly ghost balloons, googly-eye decorations, and pumpkin displays.
- Best for small spaces: A decorated doorway or hanging selfie corner.
- Best photography tip: Check the camera frame and make sure faces are clearly visible.
- Best renter-friendly approach: Choose suitable removable attachments and test them before decorating.
- Important safety detail: Secure heavy displays, keep cables out of walking paths, and remove broken balloon pieces promptly.
Related article: 16 Scary Good Halloween Outdoor Decoration Ideas
What Makes a Good Halloween Party Backdrop?
A good Halloween backdrop should suit the photos I want to take, rather than simply fill a wall with decorations. For standing group pictures, I allow extra width so guests can fit comfortably inside the frame. For individual portraits or seated photos, a smaller arrangement may be enough.
Color is another important consideration. Black and orange create a traditional Halloween look, while black and gold feel more elegant. Purple, green, and burgundy can add a darker atmosphere, and pastel shades with smiling ghosts work well for family celebrations.
Lighting helps the decorations show up clearly. A backdrop placed in a dark corner may look attractive in person but appear dull in photographs. I check the area with my phone camera and adjust the lamps or backdrop position before finishing the setup.
I also consider the wall surface, the weight of the decorations, and the available attachment points. Removable hooks, suitable tape, or a tension rod may work for lightweight displays, but heavier installations need support rated for their weight. I keep decorations away from doorways, exits, and walking paths.
Is It Cheaper to DIY a Halloween Backdrop?
Making a Halloween backdrop at home can be less expensive than buying a complete photo-booth set. Paper, streamers, fabric, and reusable decorations offer plenty of options for a limited budget.
The figures below are approximate planning estimates, not verified current prices. Costs vary with location, backdrop size, material quality, and the supplies or tools already available.
| Backdrop type | Estimated cost | Setup time | Difficulty | Best use |
|---|---|---|---|---|
| Balloon | $10–$30 | 15–90 minutes | Easy to moderate | Statement photo walls |
| Fabric or streamer | $3–$25 | 15–30 minutes | Easy | Quick photo areas |
| Paper | $5–$18 | 30–60 minutes | Easy to moderate | Custom shapes and scenes |
| Lighting | $10–$40 | 10–20 minutes | Easy | Evening photos and atmosphere |
The lower end of each range generally suits a simple display using basic supplies. Larger installations, specialty lights, additional supports, or more elaborate decorations can increase both the cost and preparation time.
Pro Tip: Measure the available wall before shopping. A quick sketch showing the backdrop width, decorations, and space for guests helps me estimate supplies and avoid buying more than I need.
What Are the Best Halloween Balloon Backdrops?
Balloon backdrops create a bold focal point without requiring a complicated structure. Mixing two or three balloon sizes adds visual depth, while a limited color palette keeps the display coordinated.
The five ideas below range from quick letter balloons to a fuller decorative garland. Their final cost and setup time depend on the size of the display and how much preparation is needed.
1. Black & Orange Balloon Arch
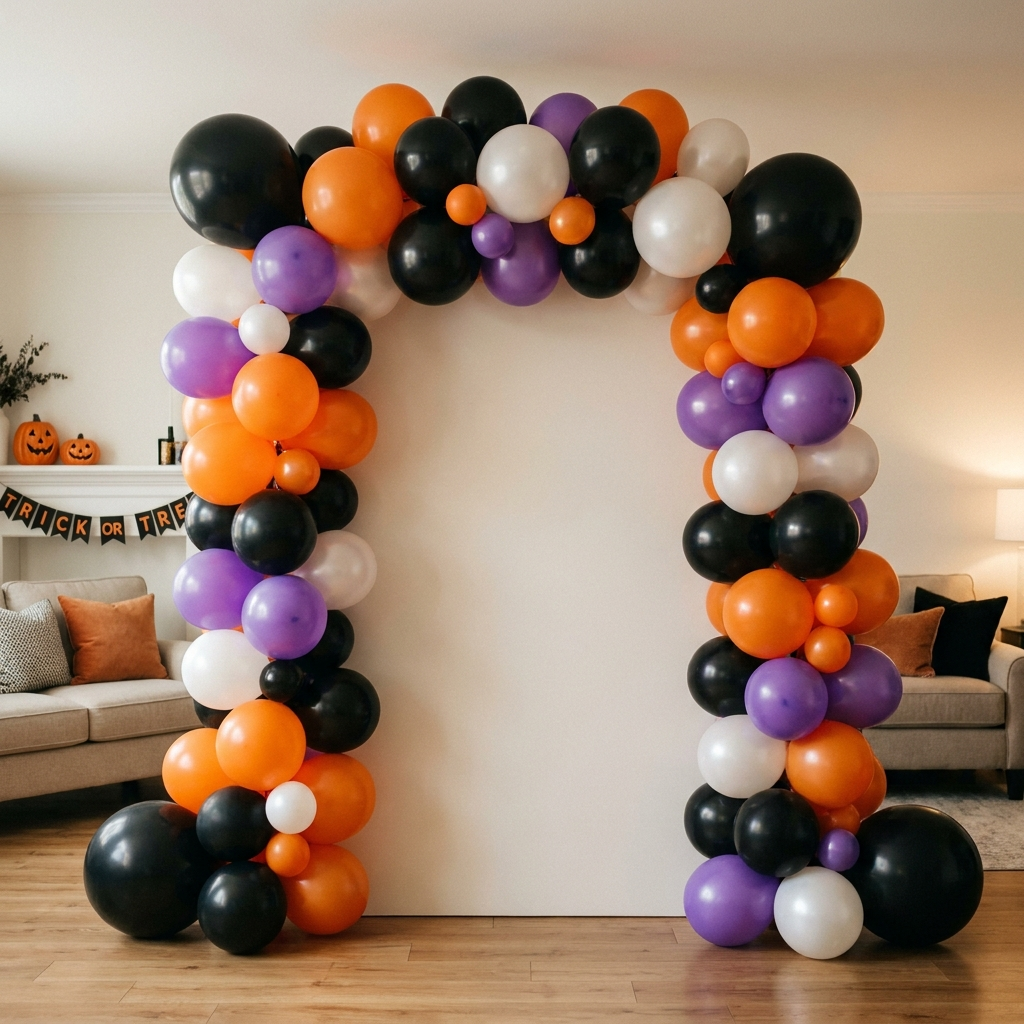
A black-and-orange balloon arch is a classic choice for a Halloween photo area. I can introduce a little purple or white for contrast, but the traditional colors should remain the main feature.
For a medium-sized arch, approximately 60–80 balloons can be a useful starting point. The actual number depends on the arch dimensions, balloon sizes, and desired fullness. I attach the balloons to a decorating strip, then fill obvious gaps with smaller balloons to create a fuller outline.
A medium display may take 60–90 minutes to assemble, with an estimated cost of $15–$25 when using a pump. A smaller arch may require less time and fewer materials.
Best for: A bold photo wall, party entrance, or costume-photo area.
Pro Tip: Secure the arch to a stable support and check that it cannot fall onto guests. Keep it clear of doors, fire exits, and narrow walkways.
2. Ghost Balloon Wall
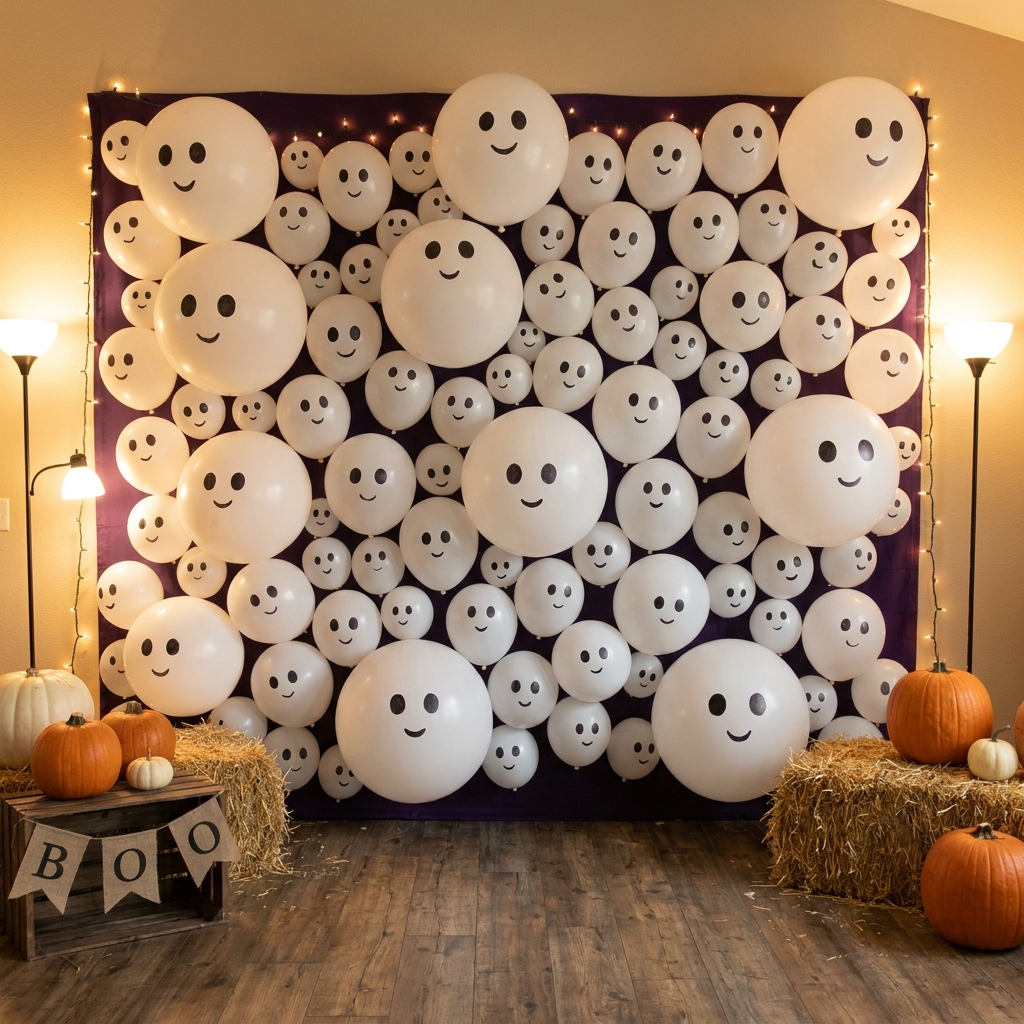
White balloons with simple ghost faces create a friendly Halloween backdrop. They stand out particularly well against a black or deep-purple background, making the design easy to recognize in photos.
I inflate the balloons to a range of sizes, attach them securely, and draw simple eyes and smiling mouths on selected balloons with a suitable marker. Keeping the faces consistent helps the display look coordinated rather than cluttered.
A small wall may cost around $12–$18 and take approximately 30–45 minutes to assemble.
Best for: Children’s Halloween parties, family pictures, and playful costume photos.
Pro Tip: Uninflated balloons and broken balloon pieces pose choking hazards. Keep them away from young children, supervise the setup, and remove damaged balloons and fragments promptly.
3. Pumpkin-Patch Balloon Backdrop
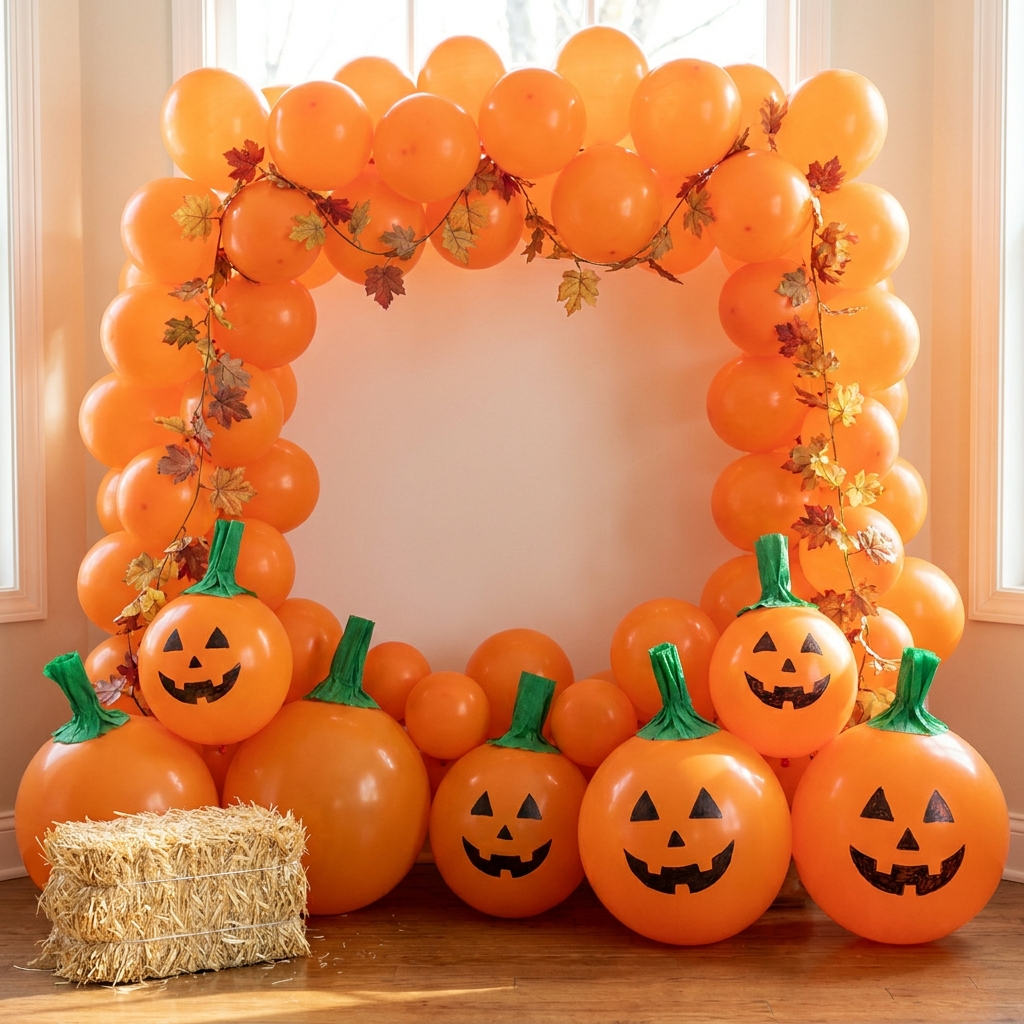
Orange balloons can stand in for pumpkins when I want a seasonal display without purchasing several large decorations. Different balloon sizes, green paper stems, and a few simple jack-o’-lantern faces help create the look of a miniature pumpkin patch.
I arrange the largest balloons near the bottom and use smaller ones to fill the gaps. Faux leaves or a decorative hay bale can complete the autumn scene, provided the props are stable and do not obstruct the photo area.
I estimate $15–$25 for a modest setup, including a few seasonal extras. Allow around an hour for inflation and arrangement.
Best for: Family portraits, harvest celebrations, and Halloween parties that also feature autumn decor.
Pro Tip: Use removable autumn decorations so the display can stay up after Halloween. Keep lightweight pieces secured if the backdrop will be used outdoors.
4. “BOO” Balloon Letters
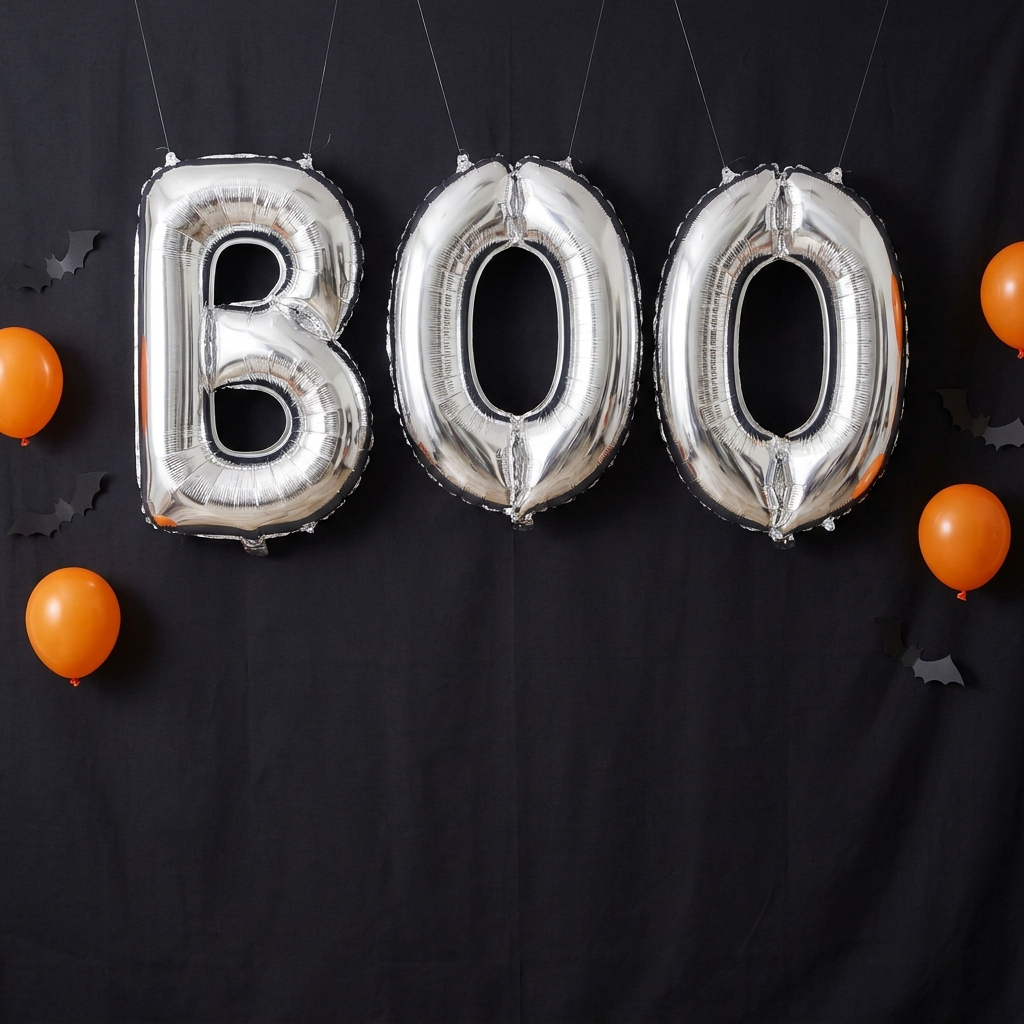
Large foil balloons spelling BOO create an instant Halloween focal point. I can position them above a snack table, against a plain wall, or over a small photo station without constructing a full backdrop.
I choose letters that contrast with the background, such as silver against black or orange against a neutral wall. I follow the package instructions for inflation and secure the balloons using their intended hanging points or suitable supports.
This is one of the quickest options, often taking around 15 minutes to install. An estimated $10–$15 may cover a basic set.
Best for: Last-minute decorating and small party spaces.
Pro Tip: Position the letters high enough to leave room for guests in the photo frame, but not so high that the design disappears above their heads. Check the attachments before guests arrive.
5. Dark Balloon Garland With Spiders
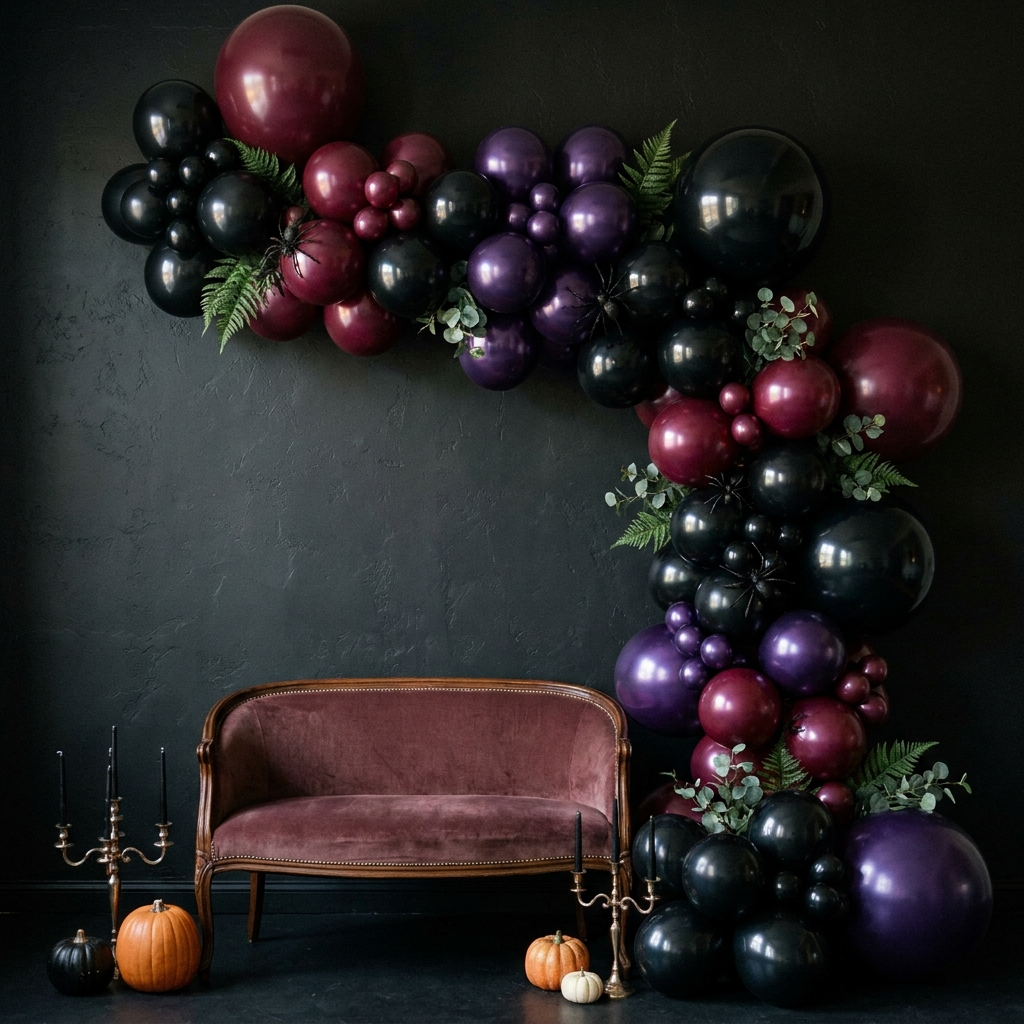
For a gothic Halloween look, I combine black, burgundy, and deep-purple balloons with a few faux spiders and small sections of artificial greenery. The darker palette creates a different effect from the traditional orange-and-black arch.
I arrange the balloons in an uneven pattern to give the garland an organic shape. The spiders become small accents rather than the main feature, and greenery softens the overall design.
A medium garland may take around 60–90 minutes and cost approximately $20–$30, depending on the materials and fullness.
Best for: Elegant adult parties, gothic themes, and evening photo areas.
Pro Tip: Secure the garland properly and keep small decorative spiders away from young children. Keep artificial greenery and balloons clear of hot fixtures and open flames.
What Fabric and Streamer Backdrops Work for Halloween?
Fabric and streamer backdrops are useful when I want to change the appearance of a wall quickly. Reflective fringe adds shine, a dark tablecloth creates a plain base, and crepe-paper streamers introduce movement and color.
Cheesecloth and sequin curtains offer different finishes, so I choose the material according to the party’s theme and lighting conditions.
6. Black Fringe / Tinsel Curtain
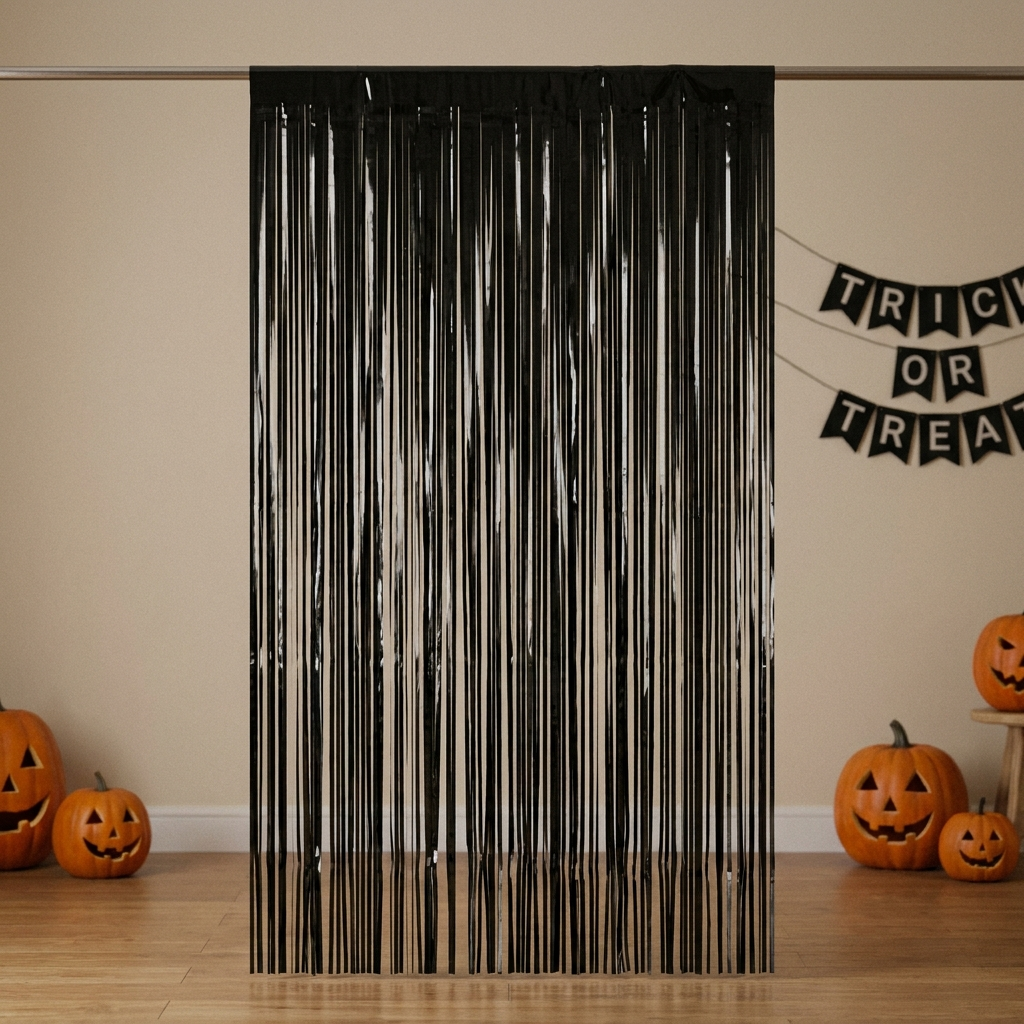
A black foil fringe curtain adds a reflective surface that catches nearby light. I can hang one panel for a narrow photo area or combine multiple panels to cover a wider section of wall.
I attach the curtain to a suitable rod or secure support and smooth out the fringe so it hangs evenly. The shiny strips create movement in photographs and can be reused for other celebrations if they remain in good condition.
A basic display may cost $8–$12 and take around 15 minutes to install.
Best for: Quick photo booths and parties where a little sparkle suits the theme.
Pro Tip: Foil fringe can tear if guests pull on it. Keep it away from flames and hot fixtures, and secure the top edge so the curtain does not fall.
7. Black Plastic Tablecloth Base
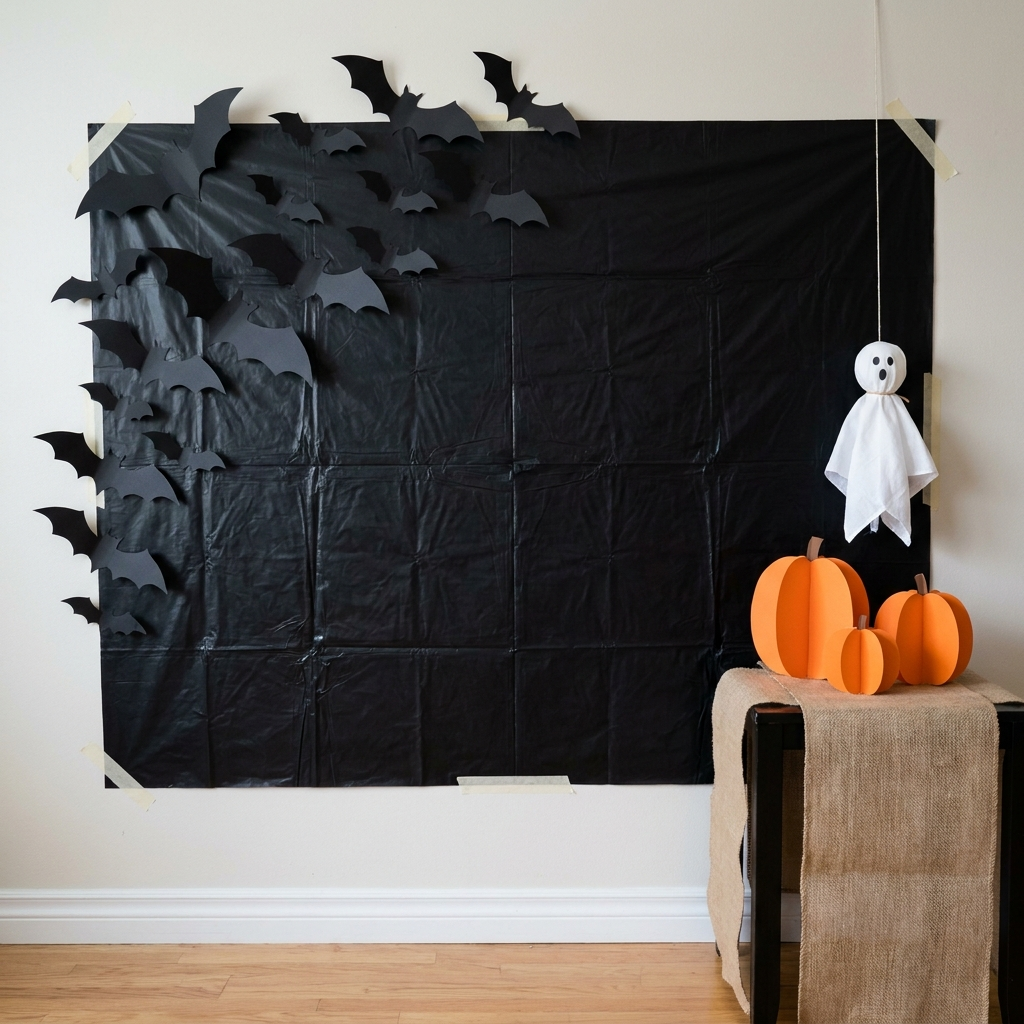
A black plastic tablecloth is an inexpensive way to create a dark background for other decorations. It works especially well behind paper bats, balloon clusters, pumpkin cutouts, and lightweight Halloween signs.
I measure the wall and overlap additional tablecloths slightly if one does not cover the area. Once the base is in place, I can add a few decorations without covering every inch of the surface.
A basic setup may cost $3–$6 and take around 15 minutes.
Best for: Budget decorating and DIY backdrops that need a dark foundation.
Pro Tip: Plastic can be damaged by heat, so keep it away from candles and hot lights. Test the attachment method on an inconspicuous part of the wall before covering a larger area.
8. Streamer Curtain
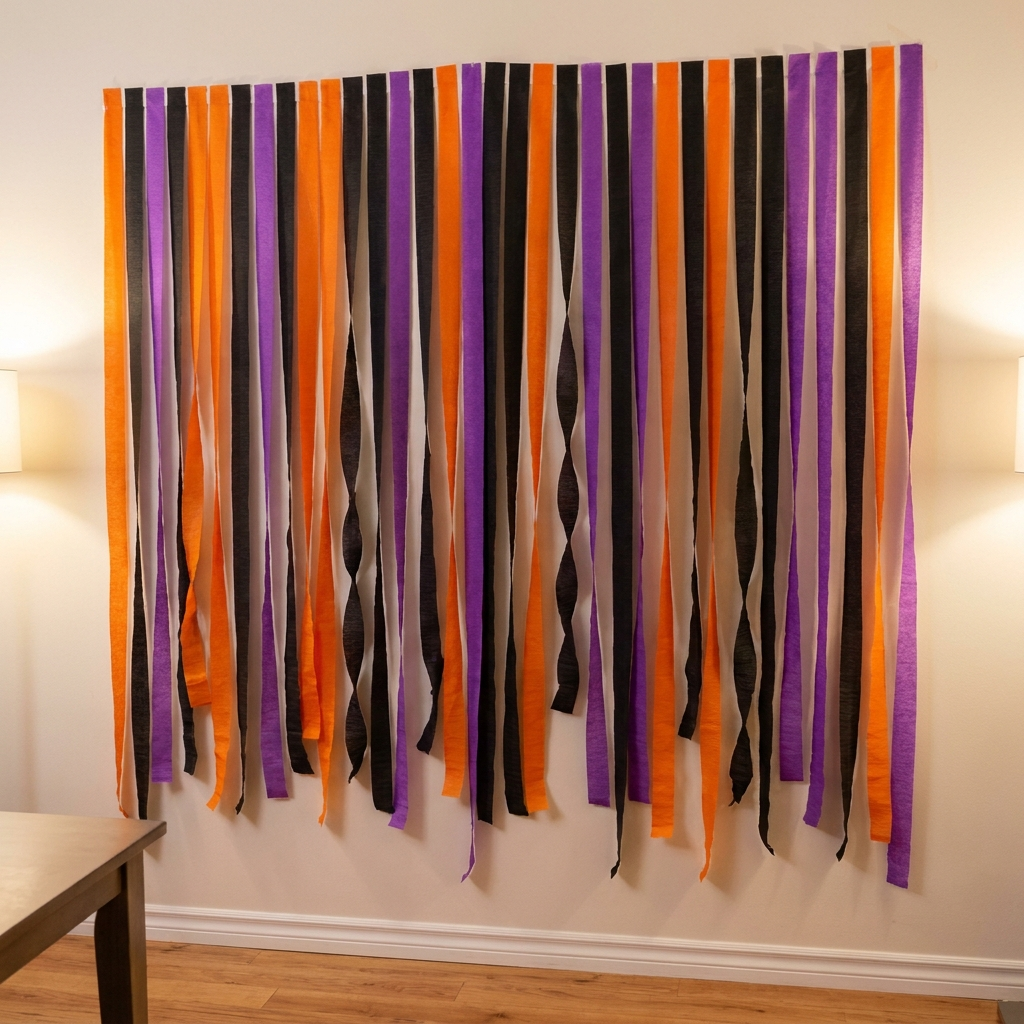
A streamer curtain brings color and movement to a Halloween party. I use orange, black, and purple crepe-paper streamers, arranging them in alternating sections for a clear, coordinated pattern.
I attach the strips along the top of the backdrop, twist selected lengths, and secure their ends so they do not hang unevenly. The twists create a more textured look than straight strips, although a simple vertical arrangement can work for a cleaner design.
I allow approximately 30 minutes and $5–$8 for a basic display.
Best for: Colorful family celebrations and playful Halloween photos.
Pro Tip: Crepe paper tears easily, particularly in damp conditions. Assemble the curtain indoors when possible and keep the strips away from walkways and guests’ faces.
9. Cheesecloth Draped Backdrop
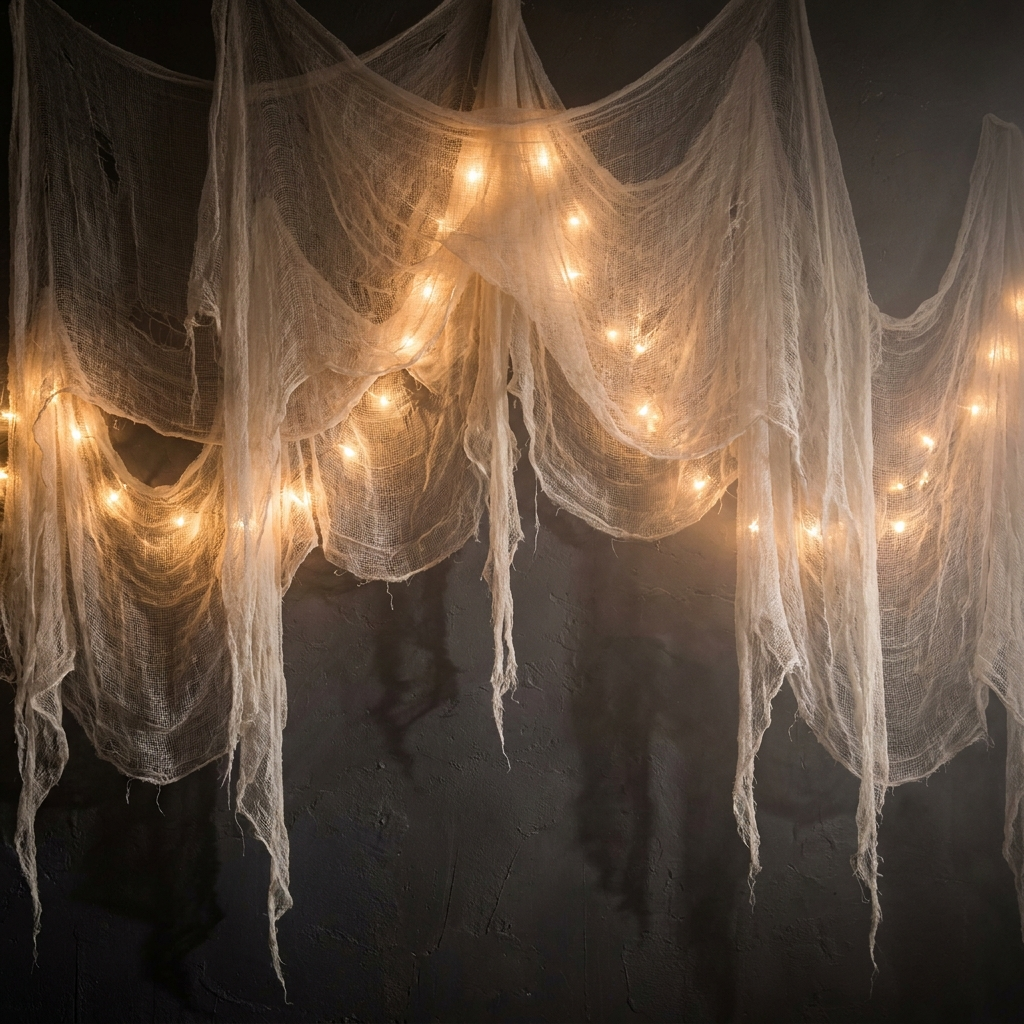
Cheesecloth or gauze creates a loose, ghostly texture that suits haunted house themes. I drape the material over a dark background, allowing some sections to hang lower than others instead of arranging everything in straight lines.
Battery-powered fairy lights placed behind the cloth can create a gentle glow. The fabric softens the light and gives the backdrop more depth without requiring a large number of decorations.
A simple setup may cost $10–$15 and take about 30 minutes.
Best for: Haunted scenes, ghost themes, and atmospheric evening photos.
Pro Tip: Secure the fabric so it cannot fall onto guests, and keep it away from open flames and hot fixtures. Use lighting according to the manufacturer’s instructions.
10. Black-and-Gold Sequin Curtain
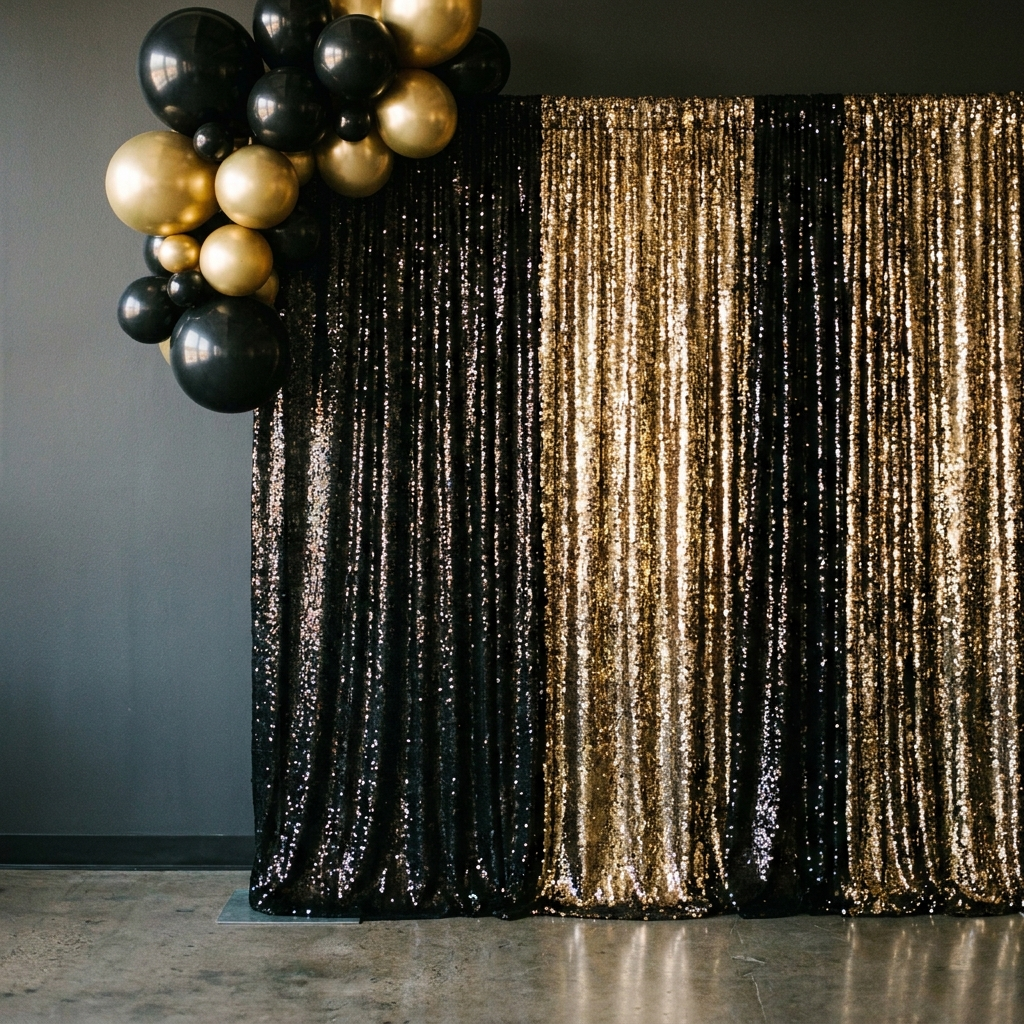
A black-and-gold sequin curtain gives a Halloween backdrop a more polished finish. It suits masquerade costumes, cocktail-style gatherings, and parties with metallic accessories.
I hang the curtain against a plain wall and keep additional decorations minimal. The reflective surface is already visually busy, so a few coordinated balloons or a small sign may be enough.
A basic panel may cost $15–$25 and take around 15 minutes to install.
Best for: Glamorous adult parties and dressed-up Halloween photos.
Pro Tip: Take a test photo before guests arrive. If the sequins create bright reflections, adjust the light position or move the camera slightly to reduce glare.
How Do You Make a Paper Halloween Backdrop?
Paper decorations let me create a custom Halloween scene without buying a printed backdrop. Cardstock, poster board, tissue paper, and construction paper can be shaped into everything from flying bats to oversized vampire fangs.
I plan the design before attaching the pieces so the shapes have enough room to stand out. Most paper decorations also store flat, making them convenient to reuse when handled carefully.
11. Paper Bat Explosion Wall
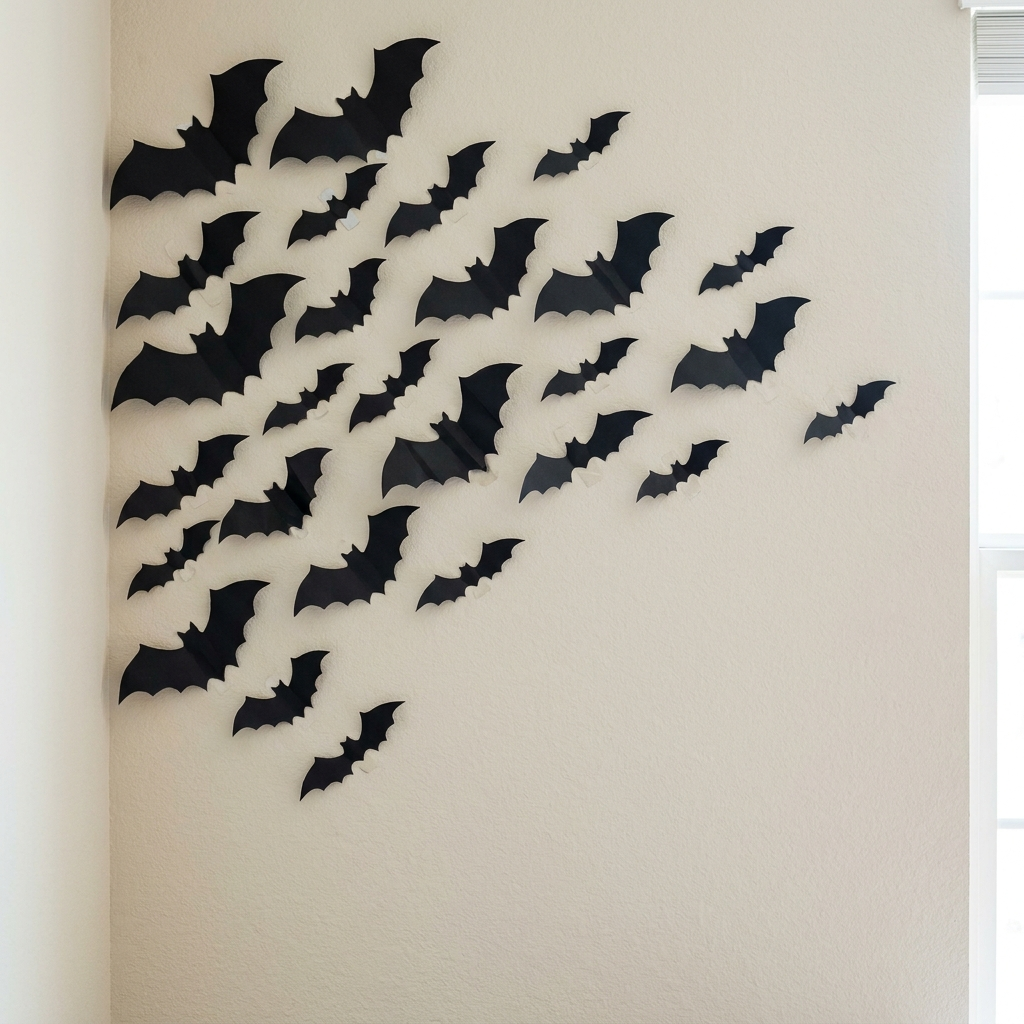
A paper bat wall creates the impression of bats flying across the background. I cut approximately 20–30 bats from black cardstock in different sizes, then fold their wings slightly to add dimension.
I arrange the bats in a dense cluster near one corner and gradually spread them farther apart across the wall. This pattern creates a sense of movement rather than making the bats look like evenly spaced stickers.
A modest display may cost $5–$8 and take around 45 minutes.
Best for: Dramatic photos against a light-colored wall.
Pro Tip: Test the adhesive on a hidden area first, especially on painted or rented walls. Store reusable bats flat between sheets of cardboard.
12. Paper Fan Backdrop
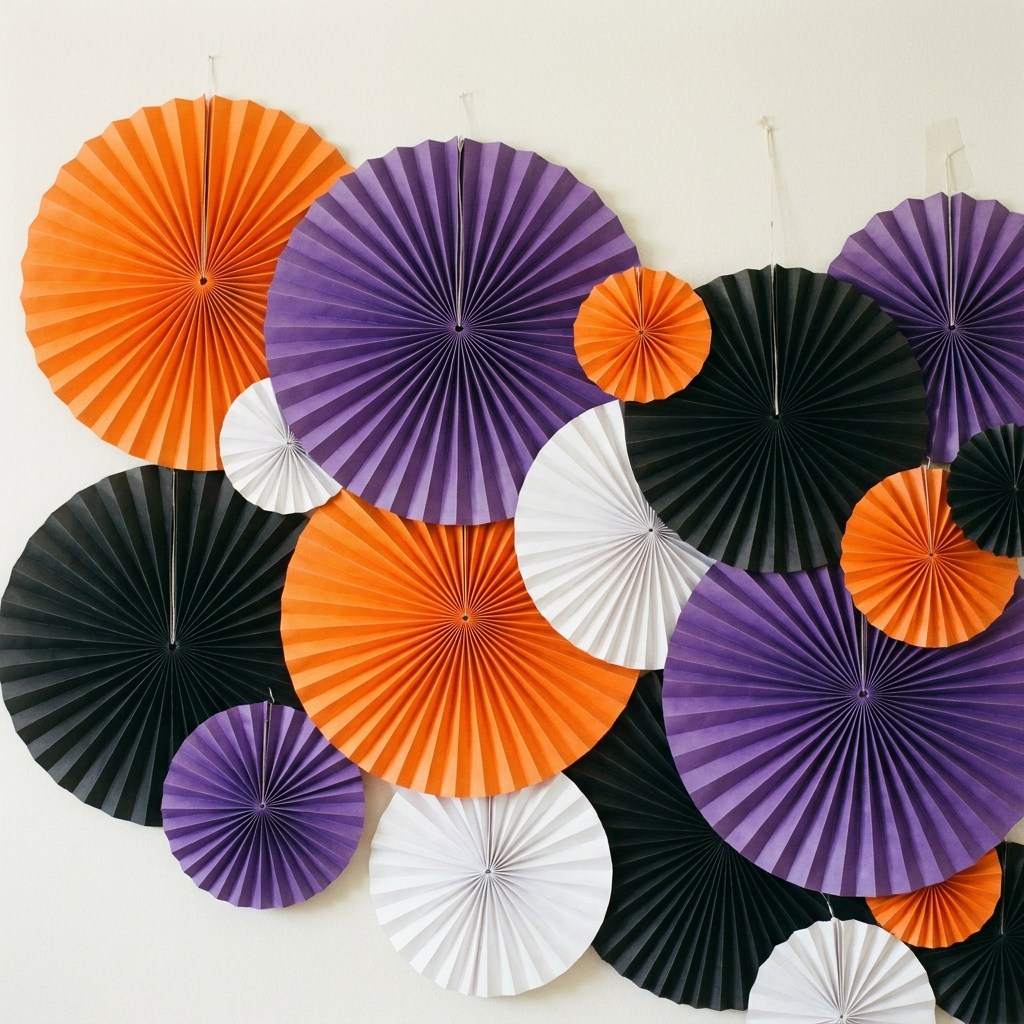
Paper fans create a layered wall with more texture than a simple flat arrangement. I select fans in orange, purple, black, and white, then vary their sizes to make the display feel fuller.
Before attaching them, I arrange the fans on the floor to decide where the colors and overlapping edges should go. A few larger fans can anchor the design, while smaller ones fill the spaces around them.
A basic display may cost $10–$18 and take around 45 minutes.
Best for: Decorative party walls and colorful group photos.
Pro Tip: Follow the fan’s folding and attachment instructions so it opens fully and stays in shape. Keep small fasteners away from young children.
13. Tissue Pom-Pom / Flower Wall
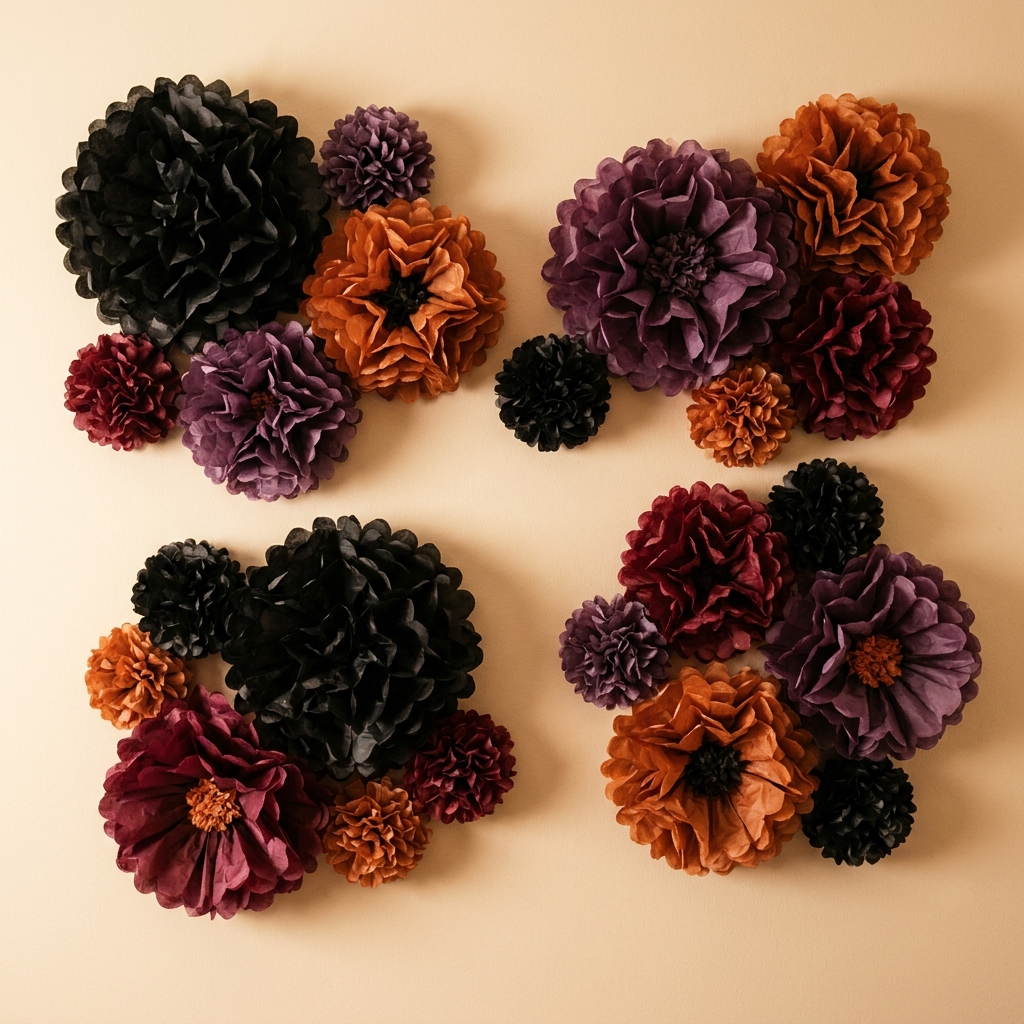
Tissue pom-poms and paper flowers create a soft, decorative backdrop. For Halloween, I can choose black, plum, burgundy, and orange. Pastel shades work better when I want a gentle, family-friendly display.
I arrange the decorations in clusters, mixing larger flowers with smaller pom-poms. Leaving a little space between some clusters helps the wall look balanced and leaves room for guests to stand in front of it.
A modest arrangement may cost $8–$15 and take about an hour.
Best for: Family celebrations, soft Halloween themes, and decorative photo areas.
Pro Tip: Tissue paper can lose its shape in damp conditions, so assemble the wall indoors when possible. Use lightweight attachments and avoid positioning delicate flowers where guests will repeatedly brush against them.
14. Layered Paper Graveyard
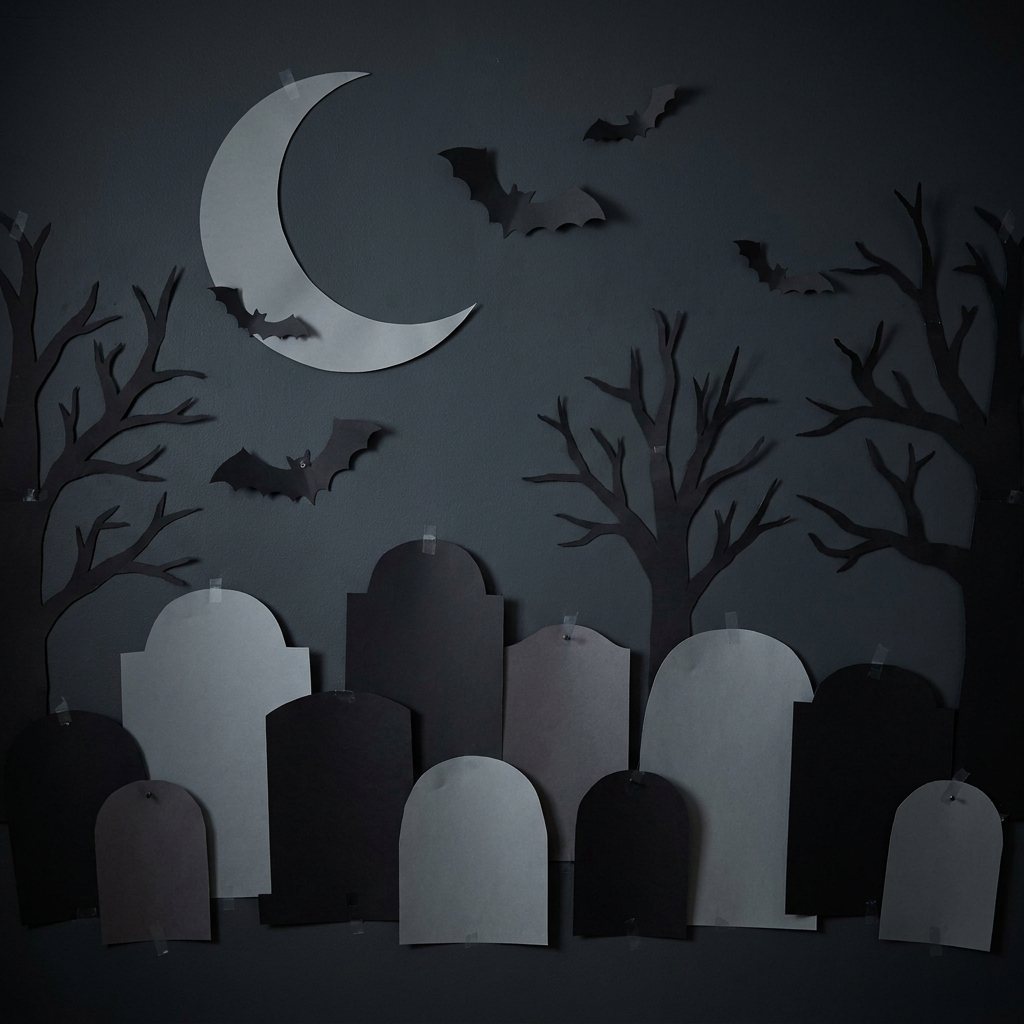
A paper graveyard turns a plain wall into a Halloween scene. I cut tombstones from gray and black poster board, varying their shapes and heights to make the arrangement look less uniform.
I layer the headstones against a dark base and add a paper moon, bats, or bare-tree silhouettes. Lighter and darker grays help separate the shapes, giving the scene more depth without adding bulky props.
A basic version may cost $8–$12 and take around an hour.
Best for: Haunted house themes and spooky photo areas.
Pro Tip: Attach the cutouts securely to a wall or stable display board. Keep cardboard and other props out of walking paths so guests cannot trip over them.
15. Fang / Vampire Wall
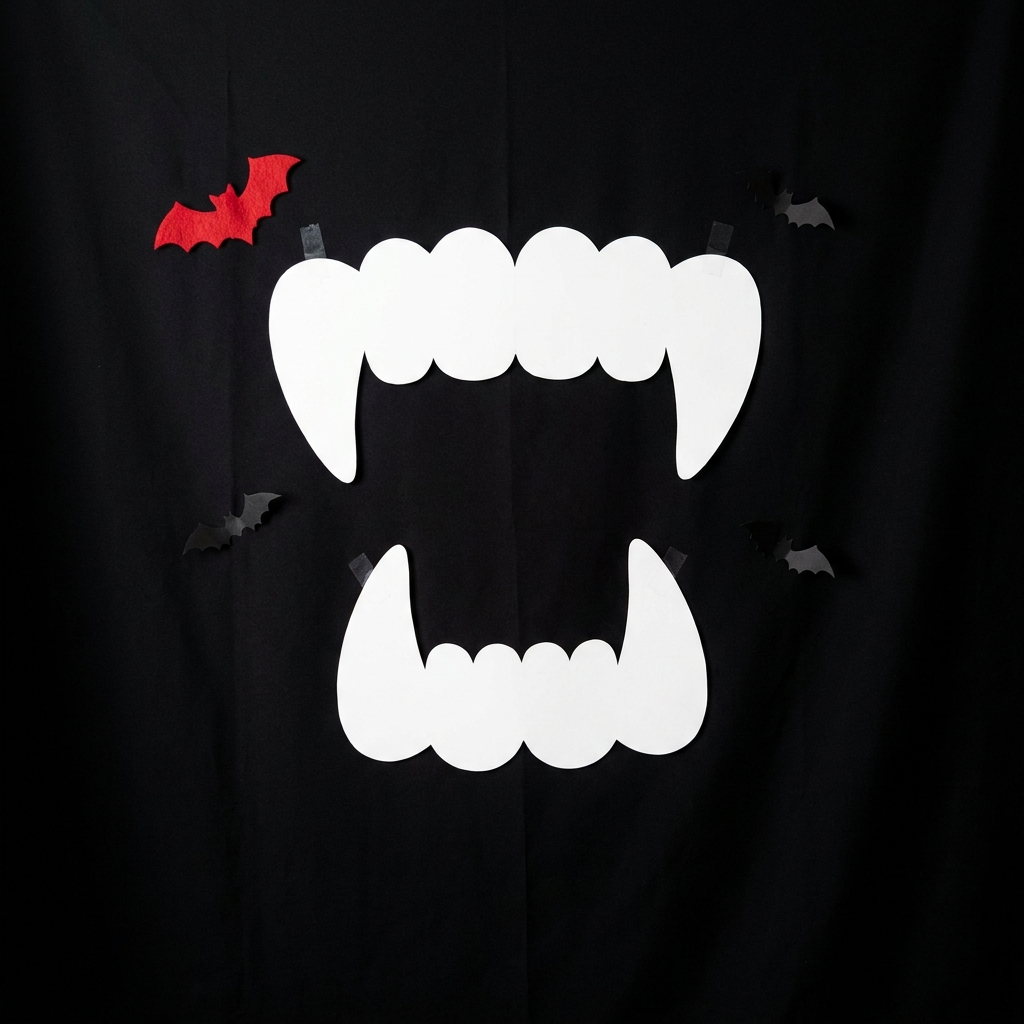
A vampire backdrop uses oversized white fangs against a black curtain to create the appearance of a mouth. I place the fangs near the center of the display so guests can pose as if they are standing inside a cartoon vampire’s grin.
I cut the shapes from lightweight poster board and can add a small red accent or a few bats if the design needs extra detail. The large, simple shapes make the theme easy to recognize in photographs.
A basic setup may cost $8–$12 and take around 30 minutes.
Best for: Vampire costumes and playful spooky portraits.
Pro Tip: Smooth the edges of the cutouts and use lightweight materials. Secure each piece so it cannot fall onto guests.
What Are Good Halloween Scene Backdrops?
Scene backdrops create the appearance of a complete setting rather than a decorated wall. I can make a haunted forest, a witch’s workspace, or a spooky house facade with a combination of silhouettes, props, and lighting.
These projects require more planning than a streamer curtain. The setup times below are estimates, and detailed scenes may take longer if I need to cut, paint, or assemble several large pieces.
16. Haunted Forest
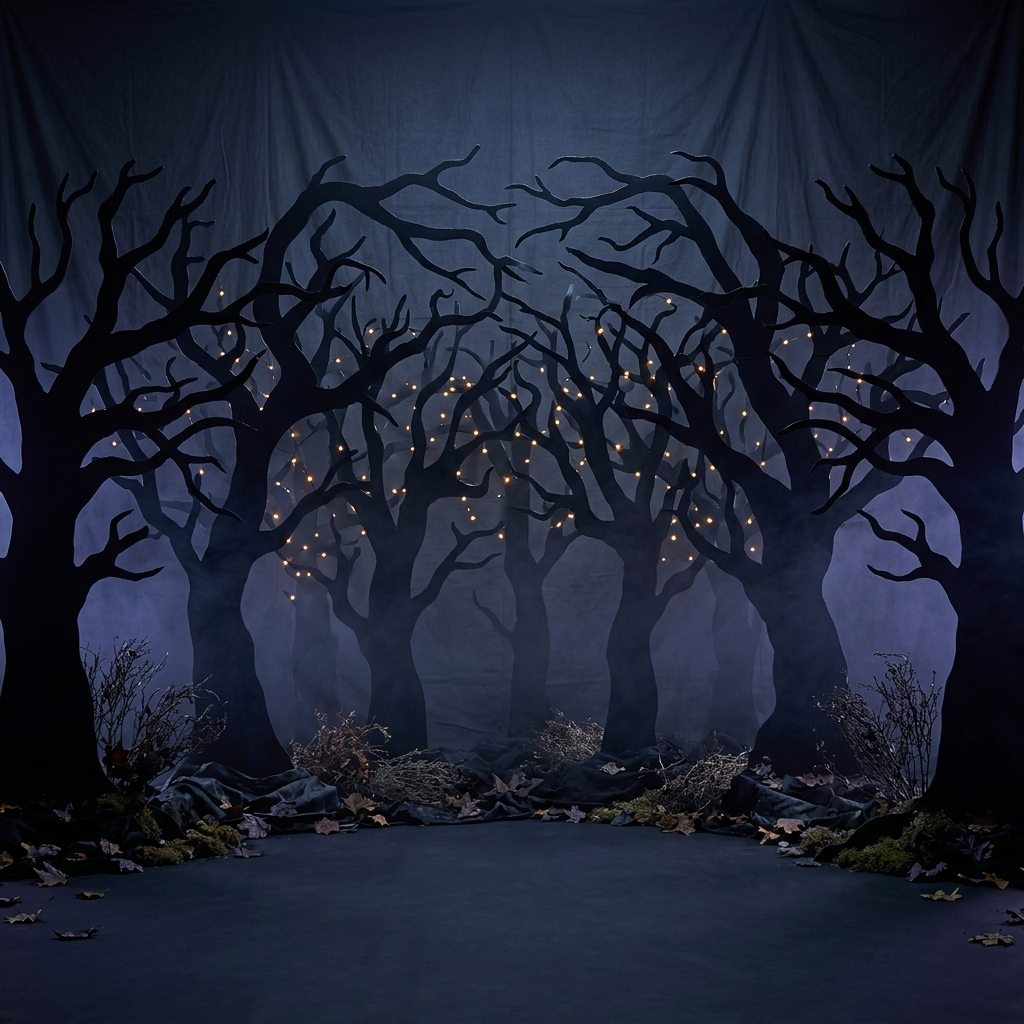
A haunted forest backdrop uses dark tree silhouettes to create the impression of a shadowy woodland. I attach black tree shapes to a dark fabric or board background and vary their heights so the scene has depth rather than looking like a uniform row.
Battery-powered fairy lights can suggest distant light between the trees. A small amount of cotton may be used as a mist-like accent, but I keep it secured and away from heat sources.
A more detailed setup may cost $15–$25 and take around 90 minutes.
Best for: Haunted house parties and dramatic evening photos.
Pro Tip: Use lightweight tree silhouettes and secure them to a stable support. Keep cotton, paper, and fabric away from open flames and hot fixtures.
Also read: 25 DIY Halloween Decoration Ideas (Easy, Cheap & Spooky for 2026)
17. Witch’s Apothecary
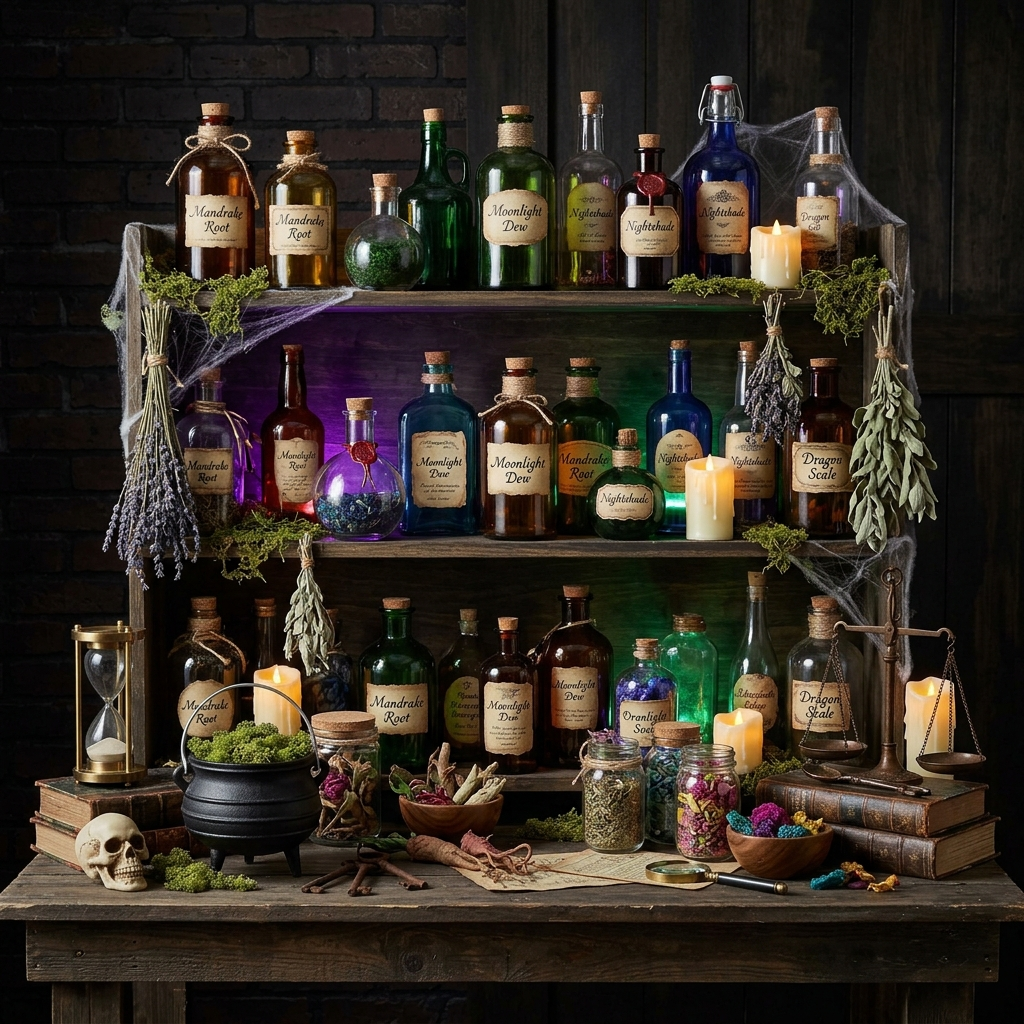
A witch’s apothecary creates a pretend potion-making station using a shelf or table, empty bottles, decorative labels, faux herbs, and a cauldron. I arrange the props at different heights to make the scene feel like a small collection of magical ingredients.
Handmade labels with fictional potion names can give the display character without requiring expensive props. A dark backdrop and a little purple or green lighting can complete the scene.
I allow around two hours and estimate $15–$30 for a modest setup, depending on the props.
Best for: Witch-themed parties and interactive photo areas.
Pro Tip: Use clearly decorative, empty containers rather than unidentified liquids or real chemicals. Avoid open flames, secure the shelf, and keep fragile glass and small props away from young children.
18. Crime Scene / Caution Tape
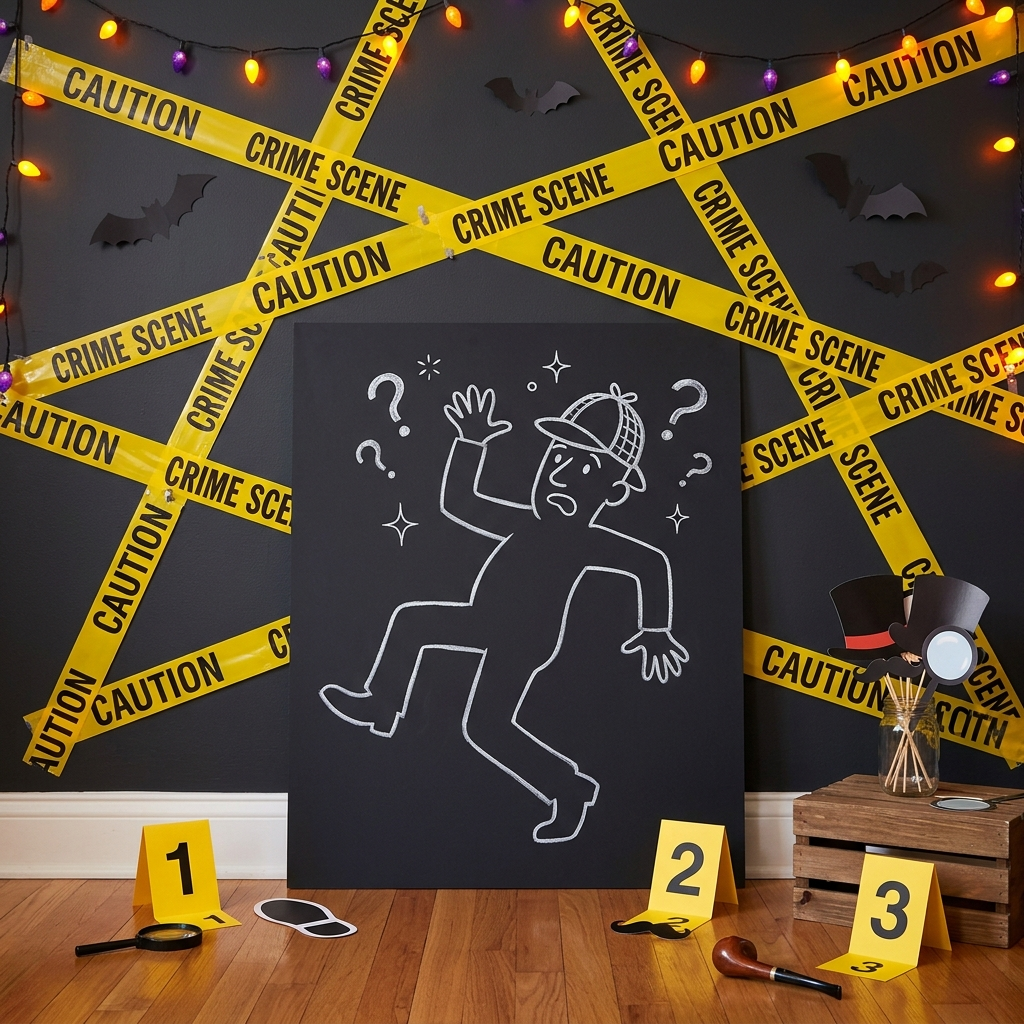
A playful crime-scene backdrop can suit a detective or mystery-themed Halloween party. I crisscross caution-style tape over a wall and add a simple outline made from removable tape, along with a few paper evidence markers.
I keep the design lighthearted rather than graphic, particularly when children will be attending. The aim is to create a recognizable mystery scene for photos without making the display unnecessarily disturbing.
A basic setup may cost $6–$10 and take around 30 minutes.
Best for: Detective costumes, mystery parties, and humorous group photos.
Pro Tip: Keep tape away from exits, stairs, and walking paths. In shared spaces, avoid decorating in a way that could be mistaken for a real emergency scene.
19. Haunted House Facade
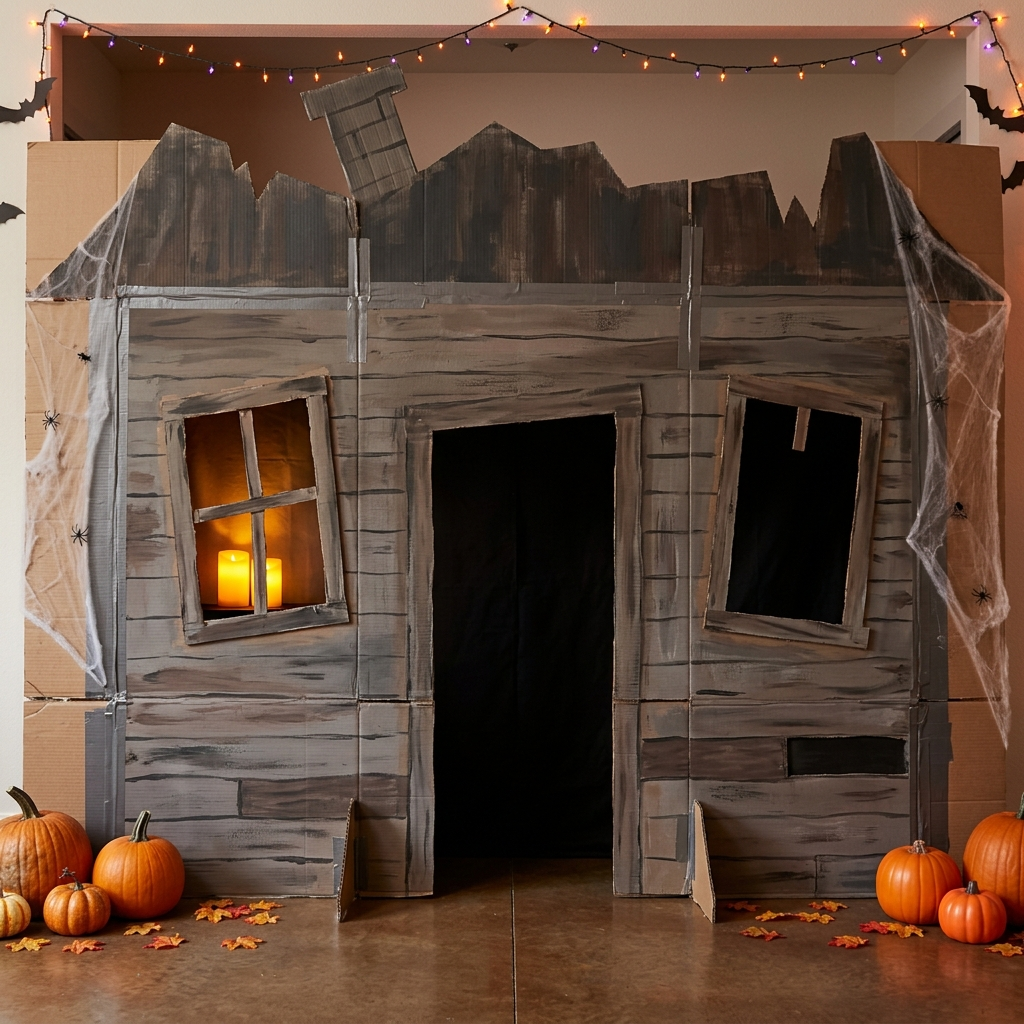
A haunted house facade creates a larger architectural backdrop using cardboard panels. I cut out a doorway and windows, then paint the surface in weathered shades to suggest an old, abandoned house.
I can add crooked window frames, a dark roofline, or a battery-powered light behind one of the windows. Because this is a larger construction project, I plan the support system before decorating the surface.
A modest DIY version may cost $15–$25 and take two hours or more.
Best for: Large party spaces, haunted house themes, and statement photo areas.
Pro Tip: Use lightweight panels and a stable support that prevents the facade from tipping. Smooth the cardboard edges, and keep the entrance and surrounding walking space clear.
20. Spider-Web Wall
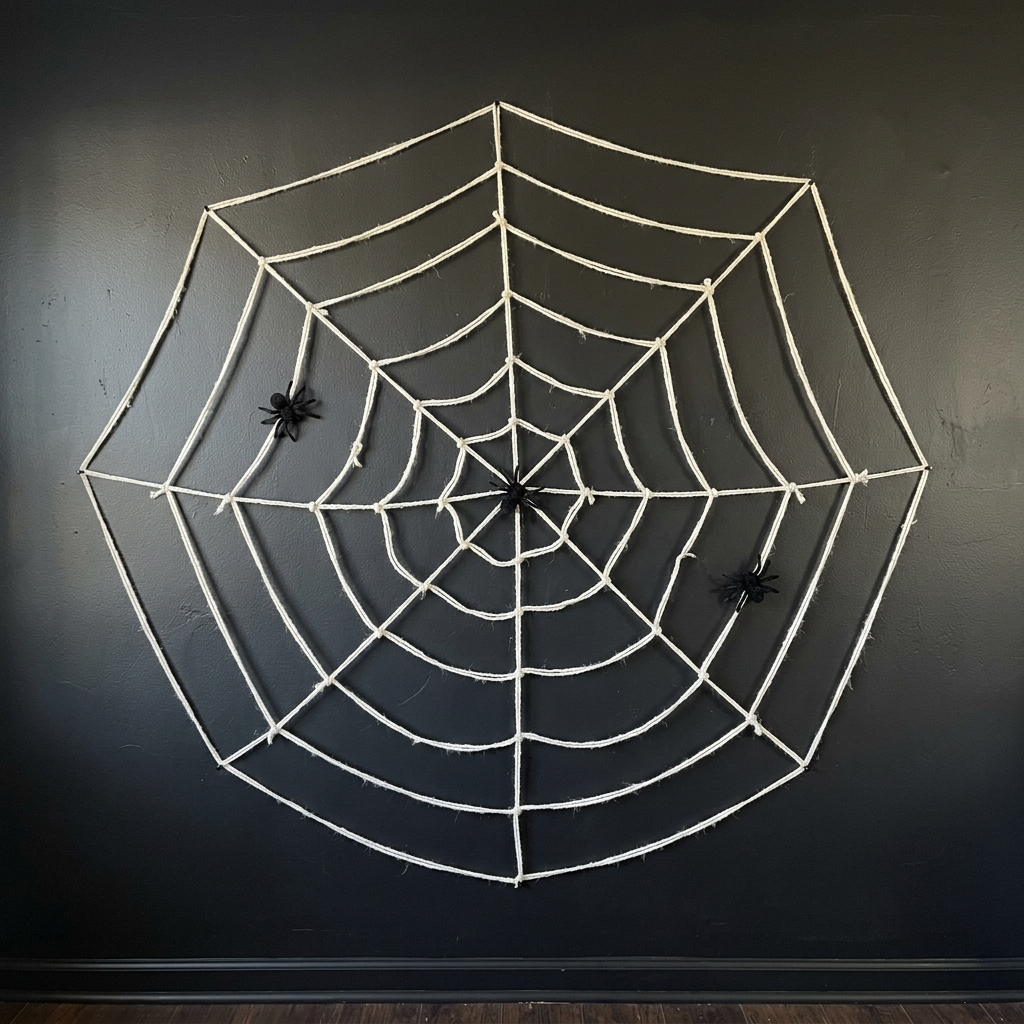
A spider-web wall uses white yarn or cord against a dark background to create a large web pattern. I attach the strands to suitable hooks or a stable support, beginning with lines that spread outward from a central point.
I then connect the main strands with shorter lines and add a few decorative spiders. The web looks more natural when the connecting lines vary slightly rather than forming a perfectly uniform grid.
A basic display may cost $6–$10 and take around 45 minutes.
Best for: Reusable Halloween decorations and spooky photo walls.
Pro Tip: Keep yarn away from children’s necks and faces, and avoid loose loops at head height. Secure the strands so they cannot become tangled around guests or stretch across walkways.
How Do You Make a Halloween Backdrop With Lights?
Lighting can change the appearance of a plain backdrop without requiring a large number of decorations. Fairy lights create a glowing curtain, an LED sign becomes a focal point, a projector adds moving images, and colored uplights transform plain fabric.
Before installing any lighting, I consider the available power source, cable routes, and whether the equipment is suitable for indoor or outdoor use. Simple setups can work well without professional equipment.
21. String-Light / Fairy-Light Curtain
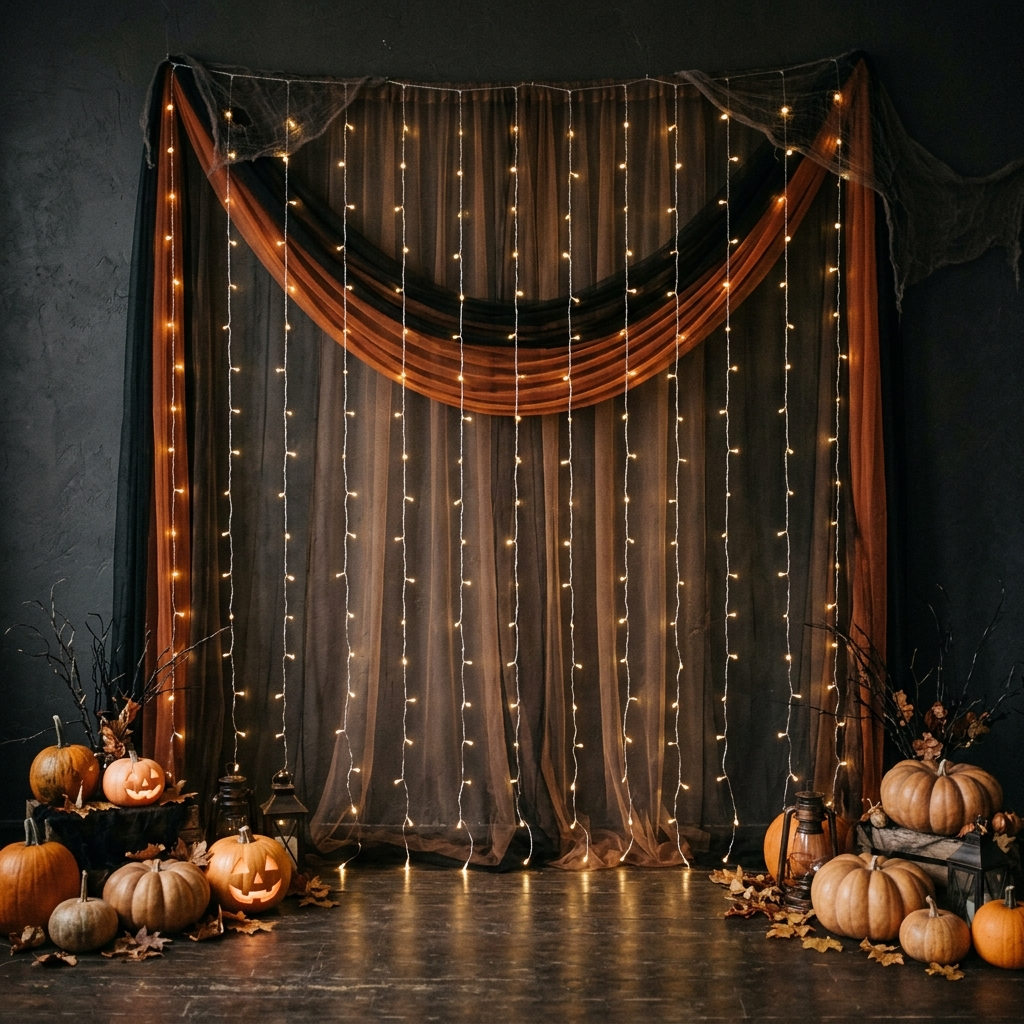
A fairy-light curtain creates a soft background for evening photos. I can hang the lights on their own or place them behind sheer fabric to diffuse the glow.
Warm white lights create a gentle look, while a slightly cooler tone can suit a more modern theme. I space the strands evenly and check that the brightest points do not sit directly behind guests’ heads.
A simple setup may cost $10–$20 and take around 20 minutes.
Best for: Evening parties and softly illuminated photos.
Pro Tip: Use lights suitable for the location and follow the manufacturer’s instructions. Secure cables away from walking paths and keep electrical connections protected from moisture unless they are rated for those conditions.
22. Neon / LED Sign
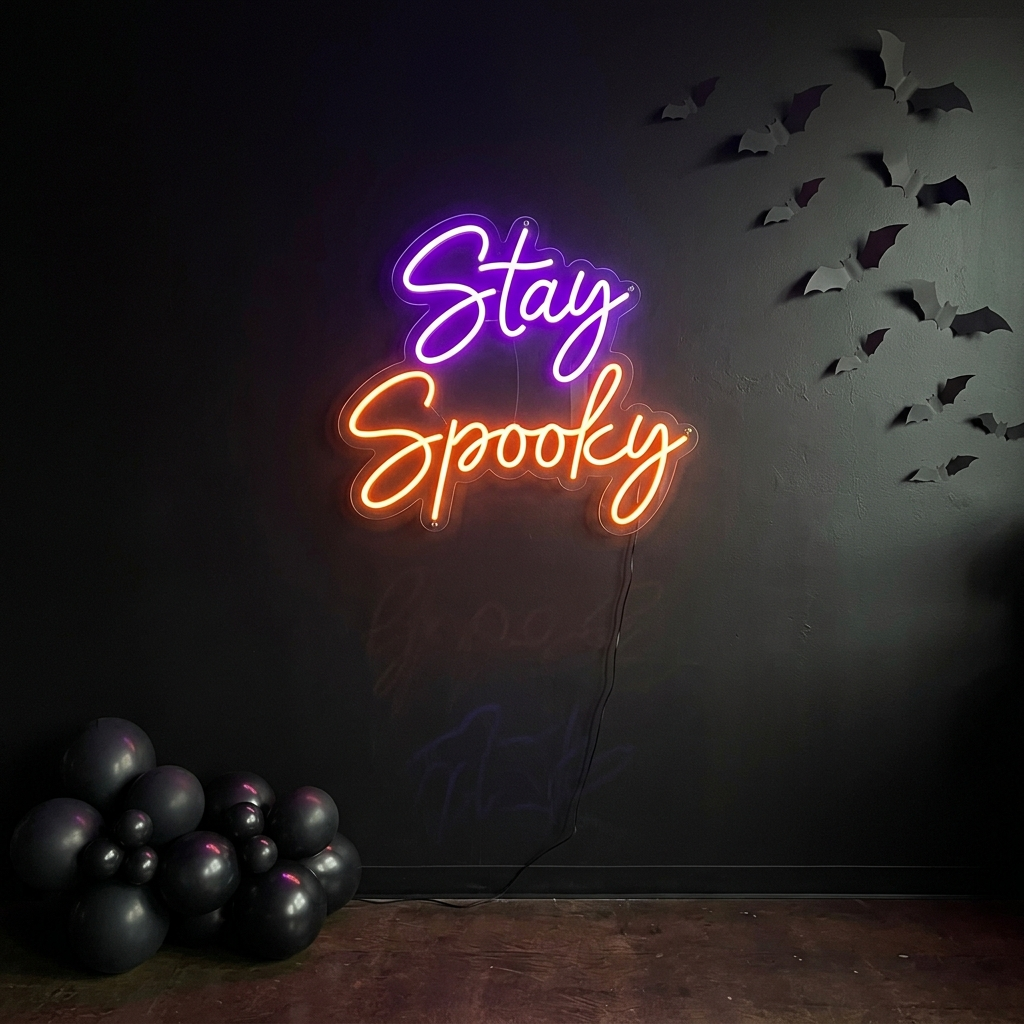
An LED sign with a short message such as “Stay Spooky” or “Boo” can become the main feature of a simple Halloween backdrop. I position it against a plain wall or dark curtain so the lettering remains easy to see.
A few balloons or paper bats can complement the sign, but I avoid crowding the surrounding area with competing decorations. A basic installation may cost $20–$40 and take around 10 minutes if the mounting system is straightforward.
Best for: Modern Halloween parties and reusable photo areas.
Pro Tip: Follow the mounting instructions and use suitable hardware for the sign’s weight. Take a test photo to check that the lettering is readable and not excessively bright.
23. Projected Bats / Ghosts
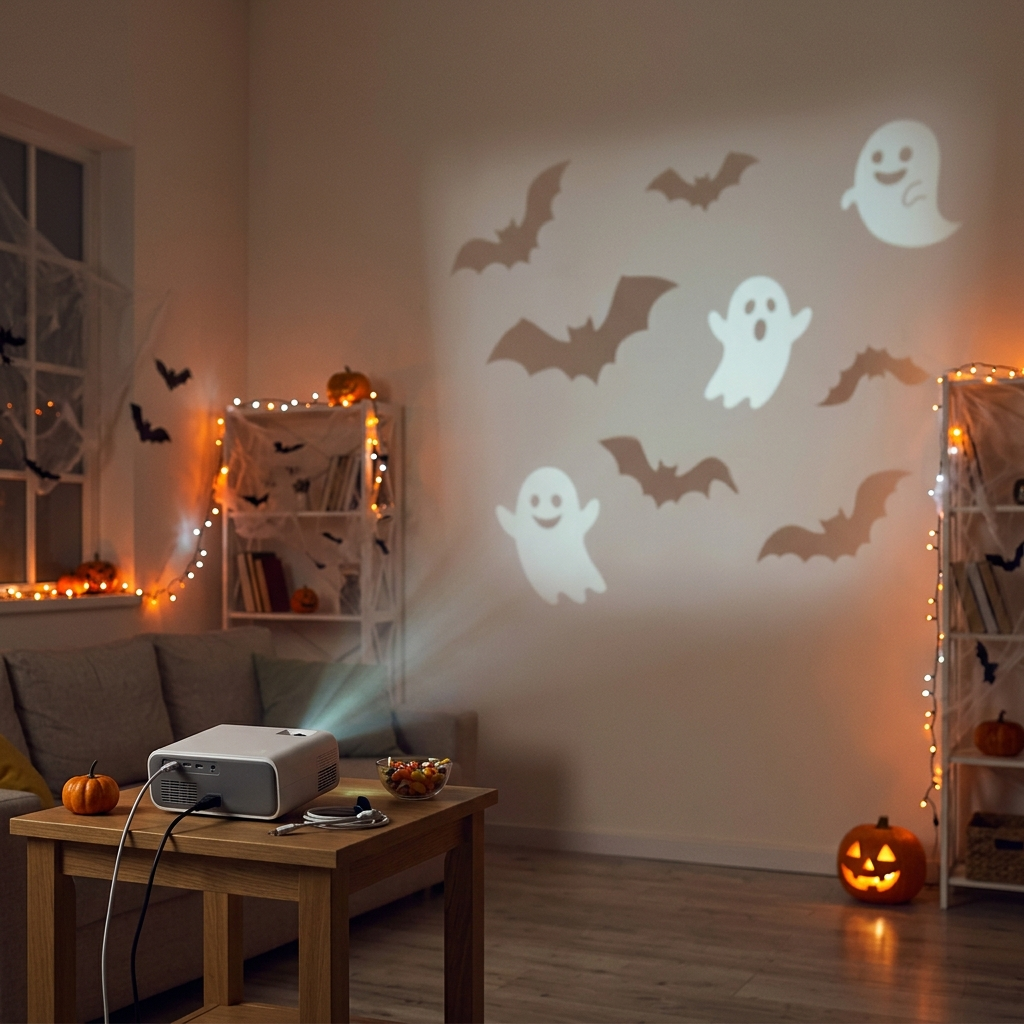
A Halloween projector can display moving bats, ghosts, or cloudy effects on a plain wall. I position it so the image fills the intended photo area and remains visible without shining directly into guests’ eyes.
This option works best in a dim room. If the room is too bright, the projected images may appear faint, so I test the setup before the party begins.
A basic setup may cost $20–$35, depending on the equipment, and take around 15 minutes to position and adjust.
Best for: Evening parties and moving visual effects.
Pro Tip: Secure the projector on a stable surface and route its cables away from guests. Check the focus and image size before the event so the projection does not fall across doorways or other busy areas.
24. Color-Uplit Fabric
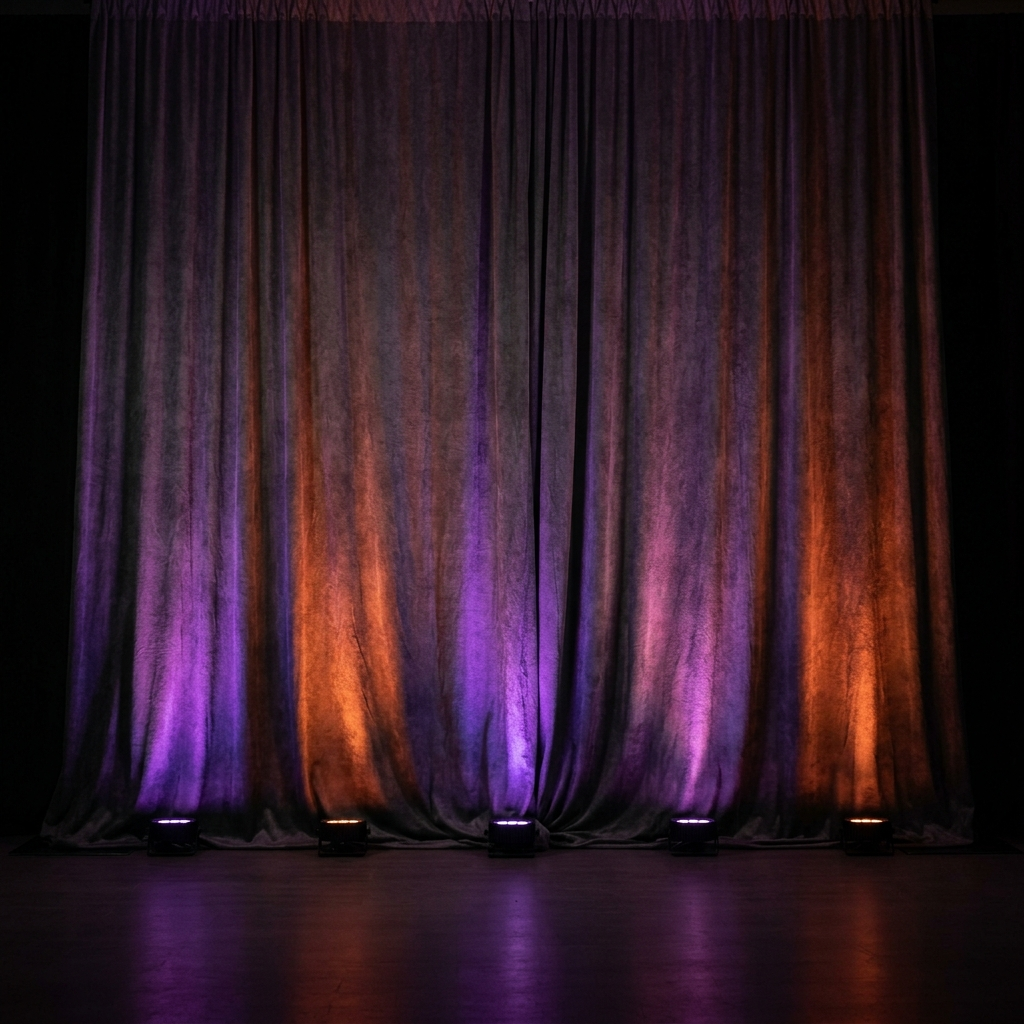
Colored uplights can turn a plain sheet or fabric panel into a Halloween backdrop. I hang the fabric securely and position suitable LED lights near the floor, aiming them upward to create a wash of purple, orange, or green.
I start with one or two colors rather than combining too many at once. The result depends on the fabric color, room lighting, and distance between the lights and the wall.
A simple arrangement may cost $12–$20 and take around 20 minutes.
Best for: Quick transformations and atmospheric party photos.
Pro Tip: Keep fabric away from hot fixtures and open flames. Secure the sheet so it cannot slip, and use lights according to the manufacturer’s instructions.
What Are Cute, Not-Too-Scary Halloween Backdrops?
A Halloween backdrop can feel festive without being frightening. Friendly ghosts, oversized eyes, pastel colors, and autumn leaves are useful choices for family gatherings and parties with younger children.
I focus on cheerful shapes and clear color combinations rather than graphic or frightening decorations. These ideas can also work for school celebrations and seasonal family portraits.
25. Googly-Eye Wall
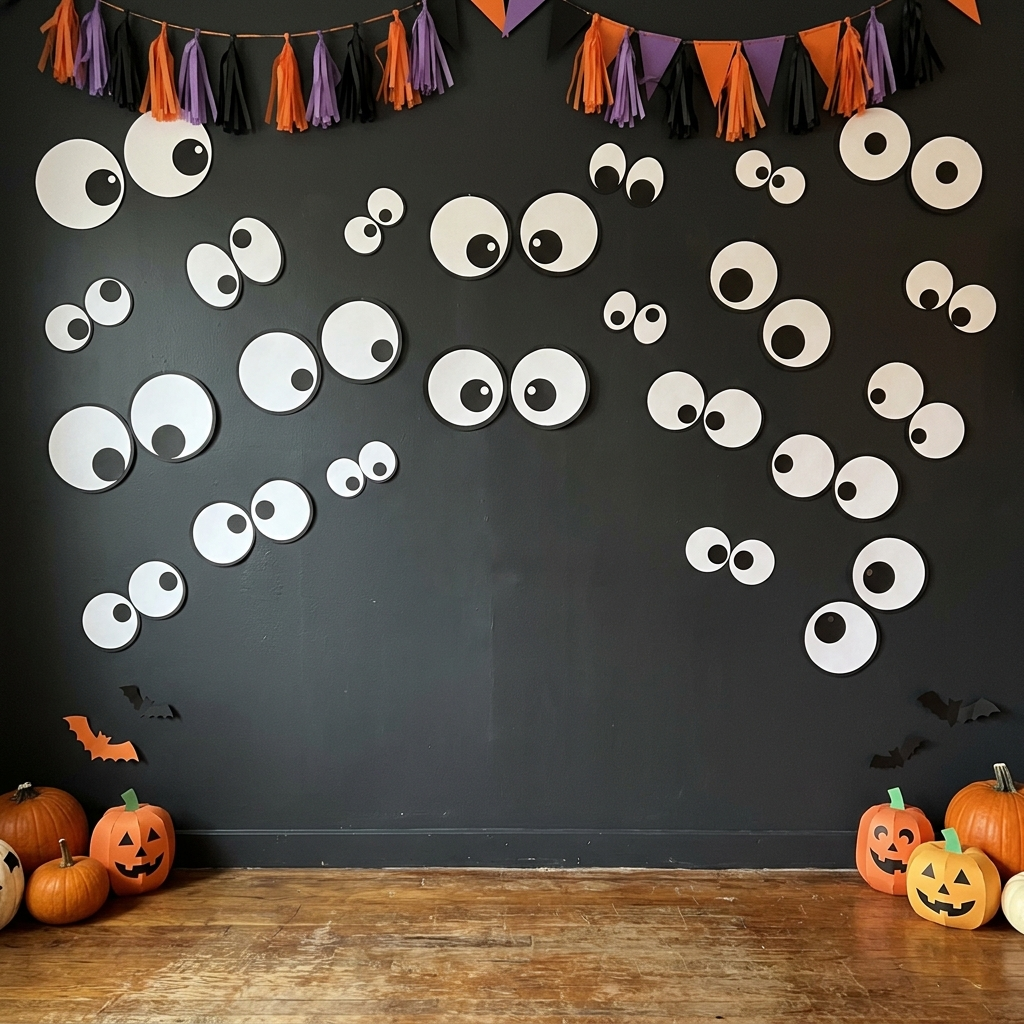
A googly-eye wall turns a plain background into a funny display. I arrange eye shapes of different sizes across a dark base, grouping some together to suggest silly monsters peeking out from behind the wall.
A few oversized eyes can become the main feature, while smaller ones fill the surrounding space. Keeping the rest of the wall simple helps the unusual shapes stand out.
A modest setup may cost $8–$15 and take around 45 minutes.
Best for: Humorous costume photos and playful children’s parties.
Pro Tip: When young children are attending, use large decorative shapes that are securely attached rather than loose small parts. Check the display before the party and remove anything that becomes detached.
26. Friendly Ghost / Pastel Backdrop
Pastel balloons and smiling paper ghosts create a gentle alternative to darker Halloween decorations. I can combine pale pink, cream, mint, and lavender with white ghost shapes for a soft, coordinated display.
I arrange the ghosts at different heights and use balloons to fill the outer edges of the photo area. The main space remains relatively open so guests can stand in front of the decorations without hiding the design.
A basic setup may cost $10–$15 and take around 45 minutes.
Best for: Family celebrations, younger children’s parties, and friendly Halloween photos.
Pro Tip: Keep balloon fragments and small paper accessories away from toddlers. Use securely attached decorations and supervise young children around the photo area.
27. Pumpkin & Fall-Leaf Backdrop
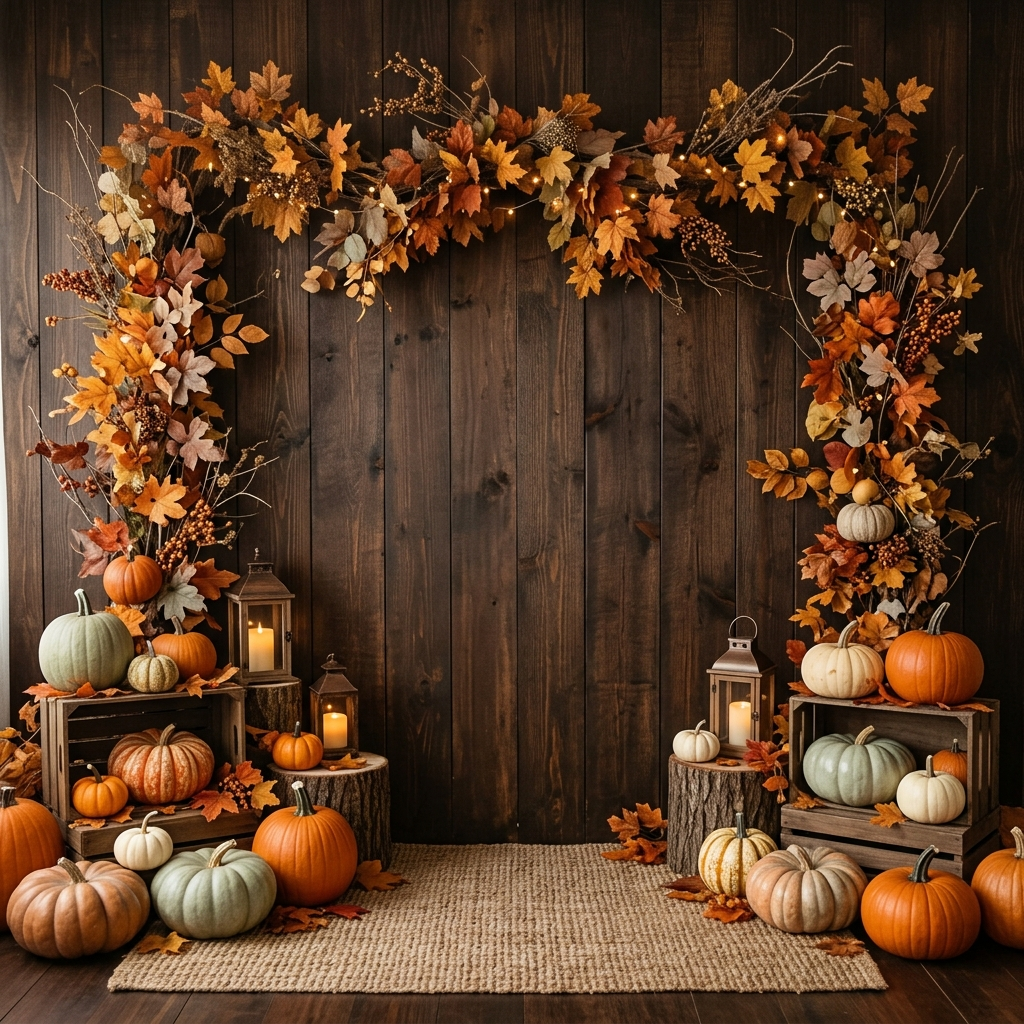
A pumpkin-and-fall-leaf backdrop can stay in place after Halloween, making it useful for autumn gatherings and family photos. I hang faux leaf garlands against a neutral or dark background and arrange a few pumpkins near the bottom.
Different pumpkin sizes and leaf colors add variation without requiring a complicated design. If I want to reuse the display through November, I keep the decorations focused on harvest colors rather than spooky details.
A simple setup may cost $12–$20 and take around 45 minutes.
Best for: Harvest parties, family portraits, and seasonal decorations that last beyond October.
Pro Tip: Keep pumpkins stable and out of walking paths. For outdoor displays, secure lightweight garlands against wind and use decorations suitable for the weather.
How Do You Set Up a Halloween Photo Booth?
A photo booth needs a clear place to stand, a backdrop that fits the intended pictures, and enough light to make faces visible. I also leave room for guests to enter and leave without bumping into props or cables.
A small basket of props gives guests something to hold or wear, making the photo area more interactive. I position the props within easy reach without letting the container block the standing area.
28. Cardboard Photo Frame + Props
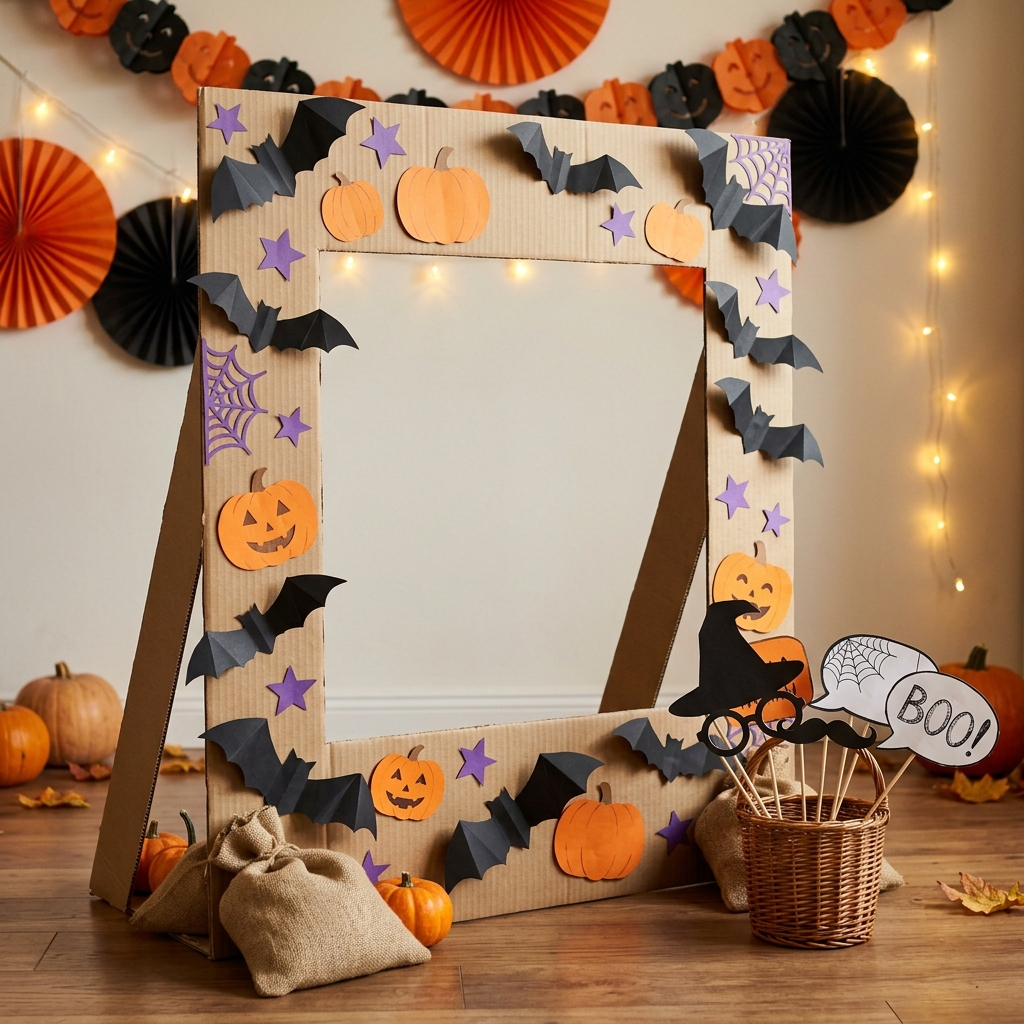
A large cardboard frame creates an interactive photo opportunity. I cut a wide opening in a sturdy cardboard panel, then decorate the border with bats, pumpkins, or other Halloween shapes.
I provide a small selection of props, such as witch hats, paper mustaches, and speech bubbles attached to safe, lightweight handles. Guests can hold the frame or pose behind it, depending on its size and how it is supported.
A basic setup may cost $8–$15 and take around 45 minutes.
Best for: Interactive party photos, costume gatherings, and group pictures.
Pro Tip: Smooth or cover rough cardboard edges and secure the frame against tipping. Avoid exposed wire, sharp handles, and small detachable decorations around young children.
29. Hanging “Selfie Corner”
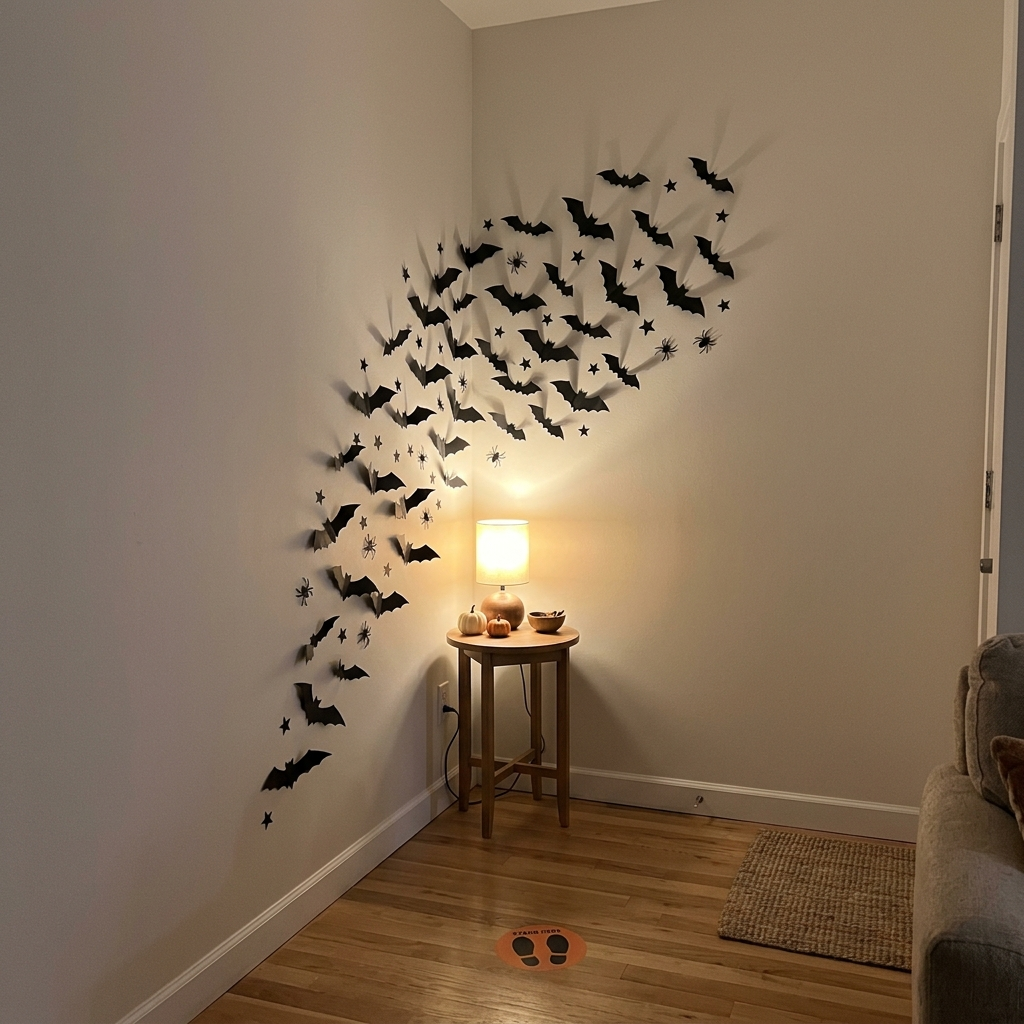
A hanging selfie corner is a practical option when there is not enough room for a full backdrop stand. I decorate one corner with lightweight paper bats, stars, or spiders suspended at different heights to create depth.
I keep the decorations close to the wall and leave a clear area where guests can stand. A small floor marker can show the best photo position, while a nearby lamp can improve the lighting if needed.
A simple setup may cost $8–$12 and take around 30 minutes.
Best for: Apartments, compact living rooms, and parties with limited floor space.
Pro Tip: Avoid long strings or loose loops around face and neck height, especially when children are present. Keep the floor clear of props and cables so guests can enter and leave safely.
What Halloween Backdrop Trends Are Popular for 2026?
For a 2026 Halloween party, several decorating styles are worth considering: balloon installations, moody color palettes, glowing signs, projected effects, celestial details, and friendly pastel designs. These are options to explore rather than a definitive ranking of current trends.
A balloon garland creates a bold focal point, while fairy lights and LED signs add atmosphere without covering the entire wall. Moons, stars, and deep jewel tones can suit an elegant party, while pastel ghosts and cheerful pumpkins create a gentler look.
I recommend choosing one dominant style and coordinating the remaining decorations around it. The size of the room, the party theme, and the people attending should guide the final decision more than any trend.
Practical Tips for Setting Up a Halloween Backdrop
A few planning steps can make a backdrop easier to assemble and more useful on party day.
Check the camera frame. Take a test picture with your phone before finishing the decorations. Make sure the full backdrop fits the frame and that faces remain visible. Move the camera or lights if the image looks too dark or crowded.
Choose suitable dimensions. Roughly 7 feet wide and 7–8 feet tall can be a helpful starting point for standing group photos when space allows. These are planning guidelines, not universal requirements. A smaller backdrop can work well for seated pictures, portraits, and compact rooms.
Adjust the lighting. Place lamps where they illuminate faces without producing harsh shadows. Shiny curtains may reflect light, so change the angle if the photos show bright spots. Keep fairy lights and LED signs from competing with the subjects.
Allow room for posing. Consider how many people will use the backdrop at once. Guests need enough space to stand, hold props, and leave the photo area without knocking into decorations.
Choose the right attachment method. Use suitable hooks, rods, tape, or stands according to the weight and type of material. Test adhesives on an inconspicuous area, particularly on painted or rented walls.
Prepare supplies ahead of time. Cut paper shapes, organize props, inflate balloons, and test lighting before guests arrive. Larger projects may need extra time or a helper, so avoid leaving essential assembly until the last minute.
Common Mistakes That Ruin Backdrop Photos
One common mistake is making the backdrop too small for the intended pictures. If guests extend beyond its edges, uncovered wall sections may appear in the frame. I check the camera view and allow extra width for group shots.
Poor lighting can also weaken an otherwise attractive setup. A backdrop in a dark corner may appear dull, while a shiny curtain can create unwanted reflections. A quick test photo helps identify problems before the party starts.
Another issue is spreading decorations too thinly across a large wall. A concentrated design usually creates a clearer focal point than several small arrangements competing for attention.
Attachment problems can damage walls or cause decorations to fall. I choose supports suitable for the materials and weight instead of relying on ordinary tape for every installation. Freestanding displays need particular attention because they can tip if bumped.
Finally, I leave enough room for guests and props. A photo booth should be easy to use, with clear entry and exit paths, accessible accessories, and no loose cables across the floor.
Halloween Backdrop FAQs
How Do I Make a Halloween Backdrop?
Choose a wall or corner, then select a base such as a dark sheet, black plastic tablecloth, or curtain. Add a few coordinated decorations, such as paper bats, balloons, or fairy lights. Many simple setups may cost around $5–$25 and take 15–90 minutes, depending on their size and materials.
What Can I Use for a Halloween Photo Backdrop?
A black plastic tablecloth, foil fringe curtain, balloon garland, paper decorations, or plain fabric can all work. The right choice depends on your theme, available space, and budget. Choose a background that contrasts with the costumes without becoming so busy that it distracts from the people in the pictures.
What Size Should a Halloween Photo Backdrop Be?
For standing group photos, approximately 7 feet wide and 7–8 feet tall can be a useful starting point when space allows. Smaller displays may work for portraits or seated photos. The ideal size depends on the number of guests, the camera framing, and the available room.
How Do I Hang a Backdrop Without Damaging Walls?
Consider removable adhesive hooks, suitable painter’s tape, or a tension rod, depending on the wall surface and the weight of the decorations. Check the product instructions and test adhesives in a hidden area first. Heavy balloon garlands and fabric panels may need a support system rated for their weight.
How Do I Make a Balloon Backdrop?
For a medium balloon arch, approximately 60–80 balloons may be a useful starting point. Inflate them in two or three sizes, attach the larger balloons to a decorating strip, and fill gaps with smaller balloons. The quantity and setup time depend on the final dimensions and fullness. Secure the finished arrangement to a stable support.
What Is the Cheapest Halloween Backdrop?
A black plastic tablecloth base may cost around $3–$6, while paper bats or a streamer curtain may cost approximately $5–$8. These are estimates that vary with location and available materials. Reusing decorations and focusing on one photo area can help keep the overall cost down.
How Do I Light a Backdrop for Photos?
Start with one or two lamps positioned to illuminate faces without creating harsh shadows. Fairy lights and colored uplights can add atmosphere, but they should not make faces difficult to see. Take a test photo and adjust the lights or camera position if the background looks too dark or reflective.
How Do I Make a Halloween Backdrop That Isn’t Too Scary?
Choose friendly decorations such as smiling ghost balloons, pastel colors, googly-eye shapes, or a pumpkin-and-leaf display. Warm colors and cheerful faces create a welcoming look for family gatherings. When young children are present, keep small parts and balloon fragments out of reach.
Read this next: 27 Un-BOO-lievable Halloween Party Favor Ideas
Conclusion
The best Halloween backdrop is one that suits the party theme, available space, budget, and time. A simple fringe curtain can work for a quick setup, while balloon arrangements, paper scenes, and lighting effects offer more elaborate options.
I recommend choosing one main photo area, checking the camera frame, and securing the decorations before guests arrive. With a little planning, even an ordinary wall or small corner can become a useful spot for Halloween pictures without requiring an expensive photo booth.


2 Comments