
21 Easy Halloween Crafts That Sell Like Crazy (2026 Edition)
Halloween gives me plenty of ideas for handmade decorations, small gifts, and seasonal accessories that people can use in their homes or give to friends. For anyone planning to sell crafts, I think the best place to start is with items that look appealing, are easy to make in batches, and do not require a large investment in supplies.
I would focus on products that solve a simple decorating need, such as a ghost lantern for a mantel, a wreath for the front door, or a reusable tote bag for trick-or-treating. These items are easy to understand at a glance, which helps when customers are browsing a busy craft fair or scrolling through an online shop.
In this guide, I’m sharing 21 Halloween crafts worth considering for craft fairs, Etsy, local markets, and small seasonal businesses. I’ll cover approximate material costs, possible selling prices, production considerations, and practical ways to prepare for the Halloween shopping season.
The best Halloween crafts to sell are often affordable to make, easy to display, and useful as seasonal decorations or gifts. Ghost jar luminaries, wooden welcome signs, spider web wreaths, tiered tray sets, Halloween tote bags, and small gift items are all options worth testing.
Save this for later

Table of Contents
I recommend starting with three to five products instead of making every craft on this list. Calculate your material costs, include labor and selling expenses in your pricing, and test a small batch before investing in larger quantities. For online sales, prepare photographs and listings early enough to reach shoppers before October.
Key Takeaways
- Best crafts to test: Ghost jar luminaries, Halloween welcome signs, tiered tray sets, and spider web wreaths.
- Affordable starting options: Mummy candle holders, paper shadow boxes, black cat keychains, and Halloween goodie bags.
- Products for online shops: Personalized signs, coordinated decor sets, and original digital printables.
- Pricing matters: Materials are only one part of the cost. Remember labor, packaging, selling fees, shipping supplies, and unsold stock.
- Start early: Prepare designs and supplies during summer, and aim to publish listings well before the main September and October shopping period.
- Make products in batches: Repeating the same design can reduce setup time and help keep your inventory consistent.
- Test before scaling: Make a few samples, photograph them, and see which styles attract interest before purchasing materials in bulk.
Related article: 15 Last-Minute Halloween Party Ideas: Throw It Together in 3 Hours (Under $50)
What Makes a Halloween Craft “Sellable”?
I would not choose a craft to sell simply because it looks cute or is enjoyable to make. A product also needs to make sense for the buyer and leave enough room in the price to cover the time and expenses involved.
Before adding a design to my product lineup, I would consider its material cost, production time, durability, packaging requirements, and likely customer. A small item that takes 10 minutes to assemble may be easier to sell profitably than an elaborate decoration that requires several hours of detailed work.
A craft is worth testing if:
- Its materials are affordable relative to the planned selling price.
- The finished product looks attractive in photographs and on a display table.
- It can be packed, transported, and stored without easily breaking.
- It serves a clear purpose, such as decorating a porch, giving as a gift, or preparing for a Halloween party.
- I can make several units with consistent quality.
- The design can be adapted to different colors, sizes, or personalization requests without making production too complicated.
A craft needs more planning if:
- It takes hours to complete but customers expect a low price.
- It uses fragile materials that are expensive to package and ship.
- Its material costs consume too much of the selling price.
- It requires tools or equipment that make small-scale production impractical.
- It involves safety, labeling, or product-compliance requirements that I have not checked.
I would also think about who is likely to buy the item. A parent shopping for trick-or-treating accessories may want something affordable and durable, while someone decorating a farmhouse-style living room may prefer neutral colors and a coordinated display.
The goal is to offer something customers can picture using in their own homes, rather than making a product that looks attractive only on the craft table.
Pro Tip: Before making a large batch, create one finished sample and photograph it in the setting where someone would use it. A ghost lantern on a styled mantel or a wreath on a front door communicates its purpose more clearly than a product sitting against a plain wall.
What Are the Halloween Crafts That Sell Best at Craft Fairs?
1. Ghost Jar Luminaries — Best for: Tabletops, mantels, porch displays

Ghost jar luminaries are a practical starting point because the design is simple, the materials are easy to find, and the finished piece works well in a Halloween display. I would use clean glass jars, a frosted white finish, and a simple ghost face to create a soft, friendly look.
Materials and estimated costs:
- Clean mason jars or similar glass jars: $1–$3 each
- White glass-safe paint or an appropriate frosted coating: $0.50–$1.50 per jar when purchased in batches
- Black craft paint or suitable decorative material for the face: $0.25–$0.75
- Battery-operated LED tea light: $0.25–$1
Estimated material cost: $2–$6 per jar, depending on the supplies and light selected.
Possible selling price: $8–$15 each, or a higher combined price for a coordinated set.
Production: Approximately 20–30 minutes of hands-on work per jar, plus any required drying or curing time.
I would make the ghost faces consistent and keep the finish smooth. A few different jar shapes can add variety without requiring entirely new designs. Sets of three in different heights are also worth testing because they give customers an easy way to create a small display.
For a more polished presentation, I would photograph the jars together on a mantel or tabletop with the lights switched on. The finished arrangement helps customers understand how the pieces will look at home.
Pro Tip: Use battery-operated LED lights instead of open flames, particularly if the jars have painted surfaces, paper decorations, or other materials that may be heat-sensitive. Follow the paint manufacturer’s instructions for glass preparation and curing.
2. Spider Web Wreaths — Best for: Front doors, entryways
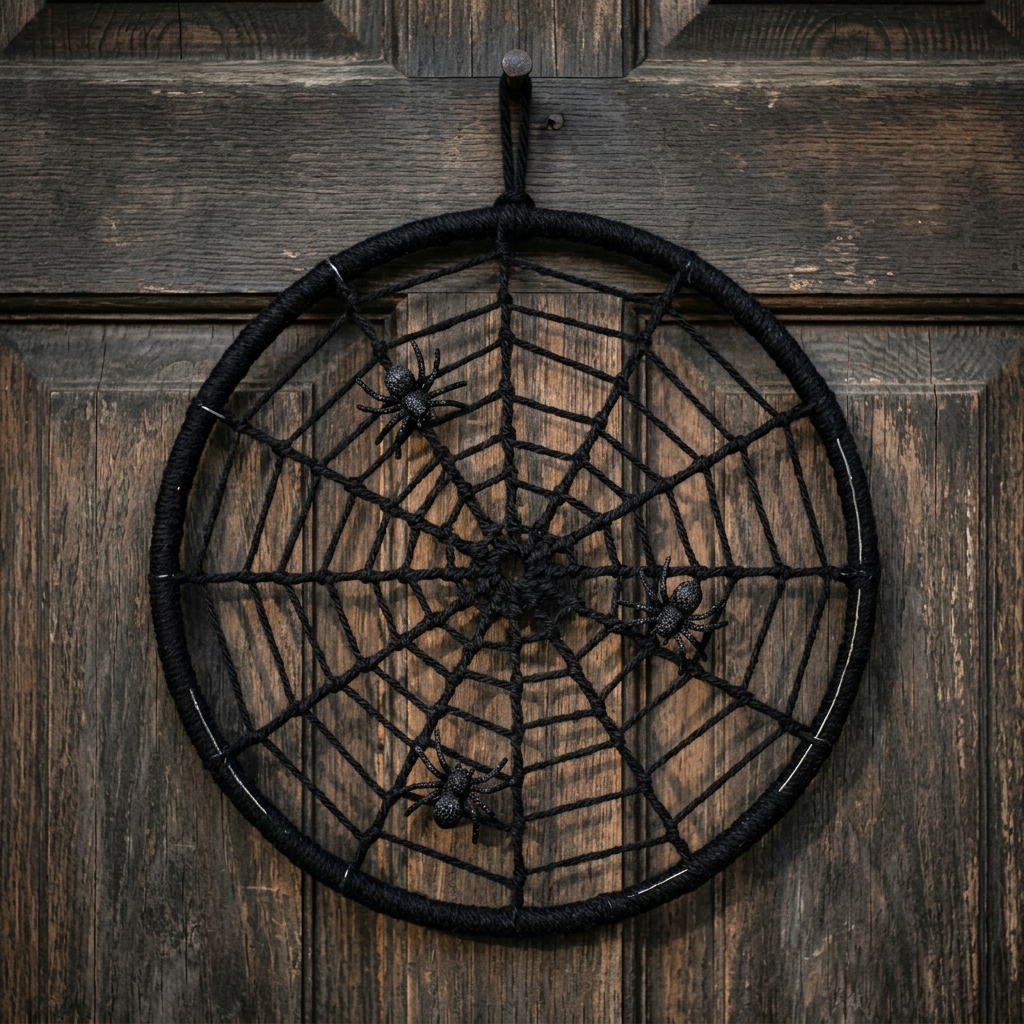
A spider web wreath can suit customers who want Halloween decor that looks a little darker and more understated. I would start with a sturdy wire wreath frame and use black yarn or cord to create a web pattern with clearly defined openings.
Materials and estimated costs:
- Wire wreath frame: $2–$4
- Black yarn or cord: $1–$3
- Decorative plastic spiders: $1–$2
- Adhesive suitable for the materials: $0.50–$1
Estimated material cost: $5–$10 per wreath.
Possible selling price: $18–$30, depending on size and finish.
Production: Approximately 30–60 minutes, depending on the web pattern and amount of decoration.
I would begin by securing the yarn at several points around the frame to create the main spokes. Then I would weave the remaining yarn between those spokes, leaving enough open space for the web to remain recognizable.
Rather than covering every inch with spiders, I would place a few at different points around the wreath. That creates a more deliberate design and keeps the web visible.
For customers who prefer a less traditional Halloween palette, I would test black and ivory yarn with just one or two contrasting details.
Pro Tip: Add a strong hanging loop and check that the wreath keeps its shape when lifted. For outdoor use, choose materials suitable for the expected weather and explain whether the finished product should be displayed in a sheltered area.
3. Halloween Welcome Signs — Best for: Front porches, entryways, mantels

Wooden Halloween signs are worth considering because they can be personalized, offered in different sizes, and styled for a range of decorating preferences. A small sign can suit an apartment entryway, while a taller version may work better beside a porch door.
Materials and estimated costs:
- Unfinished wood board or ready-made sign blank: $3–$7
- Paint and primer, when needed: $1–$3 per sign
- Stencil, vinyl lettering, or suitable transfer materials: $1–$3
- Hanging hardware or display stand: $0.50–$2
Estimated material cost: $6–$12 per sign.
Possible selling price: $22–$40, depending on size, lettering, finish, and personalization.
Production: Approximately 45–90 minutes of hands-on work, plus drying time.
I would keep the wording short enough to read from a few steps away. Phrases such as “Boo,” “Happy Haunting,” and “Witch Way to the Candy” are useful starting points for testing different styles.
For a farmhouse-inspired look, I would use black, cream, and a muted orange or rust accent. A more modern version could use a plain background, simple lettering, and a clean border.
The finish matters just as much as the message. I would sand rough edges, seal the surface when appropriate, and check that the sign can stand or hang securely before offering it for sale.
Pro Tip: Offer a small selection of interchangeable designs rather than dozens of unrelated phrases. This makes production easier and helps customers compare options without feeling overwhelmed.
4. Mummy Candle Holders — Best for: Holiday tables, impulse buys under $15
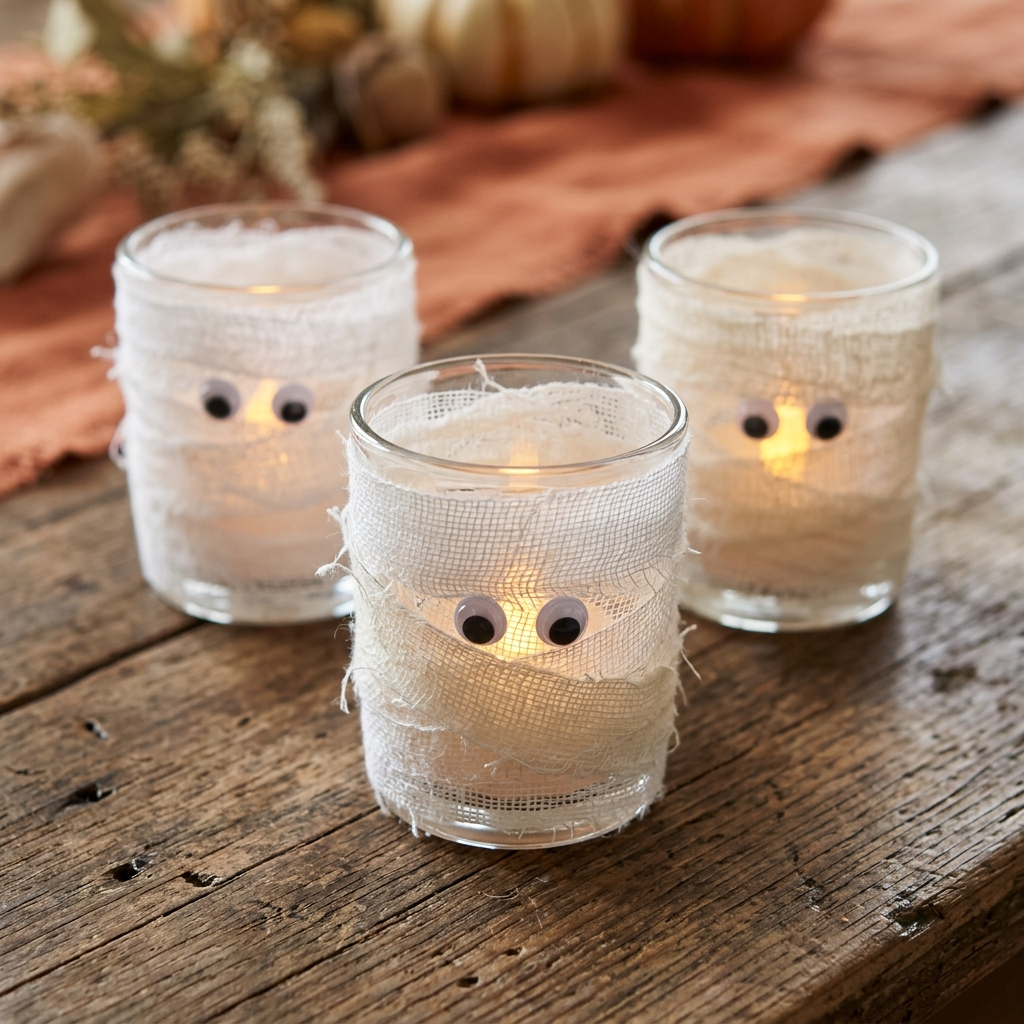
Mummy candle holders are a good option for sellers who want a small, giftable Halloween product. Their appeal comes from a simple combination of white wrapping and a pair of eyes, so I would keep the design recognizable rather than adding too many extra decorations.
Materials and estimated costs:
- Glass votive holder: $1–$2
- White gauze or suitable fabric ribbon: $0.25–$0.75 per holder
- Decorative eyes: $0.10–$0.40 per holder
- Adhesive suitable for glass and fabric: $0.25–$0.75
Estimated material cost: $2–$4 per holder.
Possible selling price: $8–$13 each, or a bundled price for three.
Production: Approximately 10–20 minutes per holder, depending on the wrapping technique.
I would wrap the gauze in slightly uneven layers so the finished piece resembles a mummy. Leaving a few small gaps makes the design more interesting, while two clearly visible eyes keep it playful.
These holders could be displayed as a group on a Halloween table or included in a gift bundle with other small decorations.
If the fabric and adhesive are not rated for the heat of a burning candle, I would use battery-operated LED votives instead. I would also secure small decorative parts firmly and keep them away from young children.
Pro Tip: Prepare the fabric strips and decorative pieces before starting assembly. Having everything ready on the work surface makes it easier to produce several holders in one session.
5. Tiered Tray Halloween Sets — Best for: Home decor enthusiasts, Etsy

Tiered tray sets are appealing because they give buyers several coordinated decorations in one purchase. Instead of searching for matching mini signs, pumpkins, and accessories separately, customers can buy a collection that already shares a color palette and style.
A set might include a miniature pumpkin, a ghost ornament, a small “Boo” sign, a faux floral accent, a mini lantern, and a ribbon decoration.
Materials and estimated costs:
- Miniature signs and ornaments: $3–$5
- Faux pumpkins and floral accents: $2–$4
- Small decorative containers or lanterns: $2–$4
- Ribbon and finishing materials: $0.50–$1.50
Estimated material cost: $8–$15 per set.
Possible selling price: $28–$45, depending on the number of pieces, craftsmanship, and whether the tray itself is included.
Production: Approximately 45–90 minutes to assemble and style a set, excluding any time spent making individual pieces.
I would choose a clear theme before buying supplies. A neutral farmhouse collection might combine cream pumpkins, black lettering, and natural wood, while a colorful set could use purple, orange, and green.
The photographs should show how the items work together. I would arrange the pieces on an actual tiered tray and include a few close-up images so customers can see the size and finish of each item.
If the tray is not included, I would make that clear in the listing and show the individual pieces separately.
Pro Tip: Include a small styling card with a suggested arrangement. It can help customers use the pieces they purchase and adds a thoughtful touch without requiring much additional material.
6. Pumpkin Stack Topiaries — Best for: Porches, entryways, boutique buyers

Pumpkin stack topiaries are taller decorations that can make a seasonal entryway feel finished without requiring a large display. I would use three lightweight artificial pumpkins arranged on a stable base, with a simple stem or support hidden inside the stack.
Materials and estimated costs:
- Artificial pumpkins in three sizes: $4–$8
- Wooden support or suitable internal rod: $1–$2
- Stable pot or base: $1–$3
- Faux foliage and finishing materials: $2–$4
Estimated material cost: $8–$17 per topiary.
Possible selling price: $28–$50, depending on height, materials, and finish.
Production: Approximately 45–90 minutes, plus any drying or assembly time.
I would begin with a stable base and check the balance before adding the finishing details. The pumpkins should be attached securely, and the completed decoration should not tip easily when placed on a level surface.
Traditional orange is an obvious option, but ivory, sage, and muted brown can suit buyers who prefer understated autumn decor. I would test one or two color combinations before making several.
For outdoor displays, I would use weather-appropriate materials and tell buyers whether the topiary is intended for a covered porch or indoor use.
Pro Tip: Photograph the topiary beside a front door or entryway table to give customers a clear sense of its scale. Include the actual height in the product description so buyers know what to expect.
7. Halloween Wax Melts — Best for: Gift buyers, Etsy, non-decor shoppers

Wax melts appeal to people who enjoy seasonal scents but do not necessarily want Halloween decorations around their homes. Pumpkin, apple, vanilla, and autumn-inspired fragrance blends are possible themes, provided the ingredients are suitable for the intended product.
Materials and estimated costs:
- Wax flakes: $0.75–$1.50 per unit
- Suitable fragrance oil: $0.30–$1 per unit
- Wax-melt packaging: $0.15–$0.50 per unit
- Labels and finishing materials: $0.10–$0.40 per unit
Estimated material cost: Approximately $1.30–$3.40 per unit, depending on the recipe and packaging.
Possible selling price: $6–$10 per package.
Production: Allow time for measuring, melting, pouring, cooling, labeling, and cleaning equipment. Actual hands-on time will depend on batch size.
I would begin with a small selection of fragrances rather than purchasing ingredients for many blends. A pumpkin-inspired scent, a warm vanilla blend, and an apple-inspired option would give customers a few clear choices.
Packaging should protect the product and display its scent, weight, and relevant use instructions. I would follow the wax and fragrance suppliers’ guidance for safe formulation, temperature, and fragrance load.
Wax melts should never be presented as edible products, and fragrance ingredients should be kept away from children and pets. Before selling them, I would check the applicable labeling, consumer safety, and business requirements.
Pro Tip: Test a small batch before producing a large quantity. Check the scent after cooling, the packaging in warm conditions, and the product’s performance in an appropriate wax warmer. Do not assume that a strong fragrance in the container guarantees the same result during use.
8. Spider Web Dream Catchers — Best for: Boho-Halloween aesthetic buyers

A spider web-inspired hanging decoration can appeal to customers who enjoy a softer, bohemian approach to Halloween. I would use an embroidery hoop, black or cream yarn, and a simple web pattern to create a lightweight wall accent.
Materials and estimated costs:
- Embroidery hoop: $1–$3
- Yarn or cord: $1–$3
- Decorative spider or small accents: $0.25–$1
- Hanging cord and finishing supplies: $0.50–$1
Estimated material cost: $3–$8 per piece.
Possible selling price: $15–$25.
Production: Approximately 30–60 minutes, depending on the weaving and decorative details.
I would keep the web pattern open and use a limited color palette. A black hoop with cream yarn, for example, can provide contrast without looking overly busy.
If I add feathers, beads, or dangling decorations, I would check that they are firmly attached and do not make the piece difficult to package.
The listing should describe the item as a decorative wall hanging and include its dimensions, hanging method, and care instructions.
Pro Tip: Offer two sizes with the same design. This gives buyers a choice while allowing you to reuse the same basic materials and production method.
9. Halloween Tote Bags — Best for: Trick-or-treating families, teachers, gift buyers
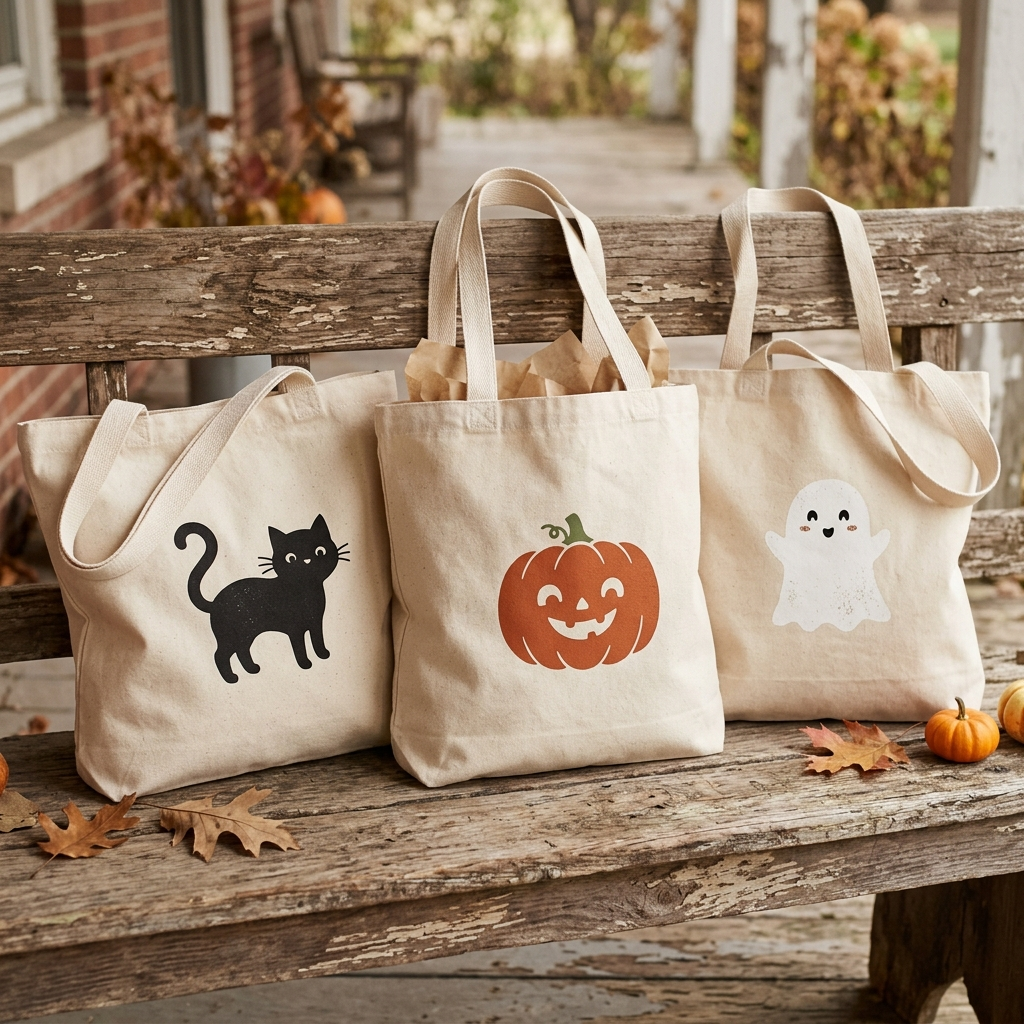
Halloween tote bags combine seasonal designs with a practical use. A reusable canvas bag can carry treats, party supplies, books, or small gifts, which makes it useful beyond a single decoration display.
Materials and estimated costs:
- Plain canvas tote: $2–$4
- Iron-on vinyl or fabric paint: $1–$3
- Transfer or application supplies: $0.25–$1
- Packaging and label: $0.25–$0.75
Estimated material cost: $4–$8 per bag.
Possible selling price: $14–$25, depending on the design and personalization.
Production: Approximately 20–40 minutes per bag, excluding any required curing or cooling time.
I would start with a few simple designs: a friendly ghost, a black cat, a pumpkin, or a short seasonal phrase. Clean artwork is usually easier to reproduce consistently than a design with many tiny details.
Before selling the bags, I would follow the paint or vinyl manufacturer’s application instructions and test the finished design for durability. If the bag is intended for children, I would avoid loose embellishments and long decorative cords.
Pro Tip: Photograph the tote both on its own and filled with a few lightweight items. This gives customers a better idea of its size and everyday usefulness.
10. Frankenstein Mugs — Best for: Gift buyers, coworker gifts, Halloween hostesses

Halloween mugs can work as small seasonal gifts for coworkers, party hosts, and people who enjoy themed drinkware. I would use a plain ceramic mug and a simple monster face, keeping the design easy to recognize.
Materials and estimated costs:
- Plain ceramic mug: $2–$4
- Suitable ceramic paint or paint markers: $1–$3 per mug
- Packaging and protective wrapping: $0.50–$1.50
Estimated material cost: $3.50–$8.50 per mug.
Possible selling price: $12–$22 per mug, depending on the finish and packaging.
Production: Approximately 20–40 minutes of hands-on work, plus any required curing time.
A green face with dark hair and simple facial details would suit a Frankenstein-inspired design. I would keep the features clear and leave enough plain space around the artwork so the mug does not look cluttered.
I would be particularly careful about how the mug is described. Decorative paint is not automatically safe for food contact, dishwashing, or microwave use. I would use only products approved for the intended application and follow the manufacturer’s curing and use instructions.
Pro Tip: If the artwork is not rated for food-contact surfaces, keep it on the exterior and away from the rim and interior. Clearly state any hand-washing or other care requirements, and never claim that a mug is dishwasher-safe unless its finish has been rated for that use.
11. Spooky Shadow Boxes — Best for: Gallery walls, apartment decorators

Shadow boxes offer a way to make Halloween wall art with layers, silhouettes, and a little depth. I would start with a frame, a contrasting background, and a simple cutout design such as a haunted house, a crescent moon, or a black cat.
Materials and estimated costs:
- Frame or shallow display box: $1–$4
- Cardstock or suitable backing material: $0.50–$1.50
- Decorative paper and adhesive: $0.50–$1.50
- Hanging hardware or finishing supplies: $0.25–$1
Estimated material cost: $2–$8 per piece.
Possible selling price: $12–$20 each, or a higher combined price for a coordinated set.
Production: Approximately 20–45 minutes per piece, depending on the number of layers and cutting method.
I would use a strong contrast between the background and the silhouette so the artwork remains clear from a distance. Three matching designs can work well together as a small gallery wall, especially when the frames and colors are consistent.
For shipping, I would protect the corners of the frame and prevent the paper layers from shifting. I would also specify the frame dimensions and whether hanging hardware is included.
Pro Tip: Make a sample with two or three layers before attempting a more complicated scene. A simple design with good spacing often looks cleaner than one packed with too many small shapes.
12. Witch’s Broom Bundles — Best for: Rustic-farmhouse Halloween lovers

Decorative mini broom bundles can suit buyers who prefer natural textures and understated seasonal accents. I would use suitable dried plant material, raffia, or a small decorative broom, then finish it with black twine or a seasonal ribbon.
Materials and estimated costs:
- Small decorative broom or natural fibers: $1–$3
- Twine or ribbon: $0.25–$0.75
- Optional decorative accent: $0.25–$1
- Packaging: $0.25–$0.75
Estimated material cost: $2–$5.50 per bundle.
Possible selling price: $10–$18, depending on size and finish.
Production: Approximately 10–25 minutes per piece.
I would keep the shape neat and secure the fibers so they do not shed excessively during transport. A small ribbon or tag can give the bundle a finished appearance without adding much expense.
These decorations can work as small gifts, shelf accents, or additions to a larger Halloween arrangement. If I include cinnamon sticks or other scented materials, I would describe them accurately rather than promising a strong or long-lasting fragrance.
Pro Tip: Use a consistent length and wrapping style when making a batch. Uniform pieces are easier to arrange in a basket at a craft fair and make the display look more organized.
Also read: 21 Halloween Party Themes for Adults (2026: Decor, Food & Budget Per Theme)
13. Mummy Wine Bottle Wraps — Best for: Hostess gifts, party supply buyers
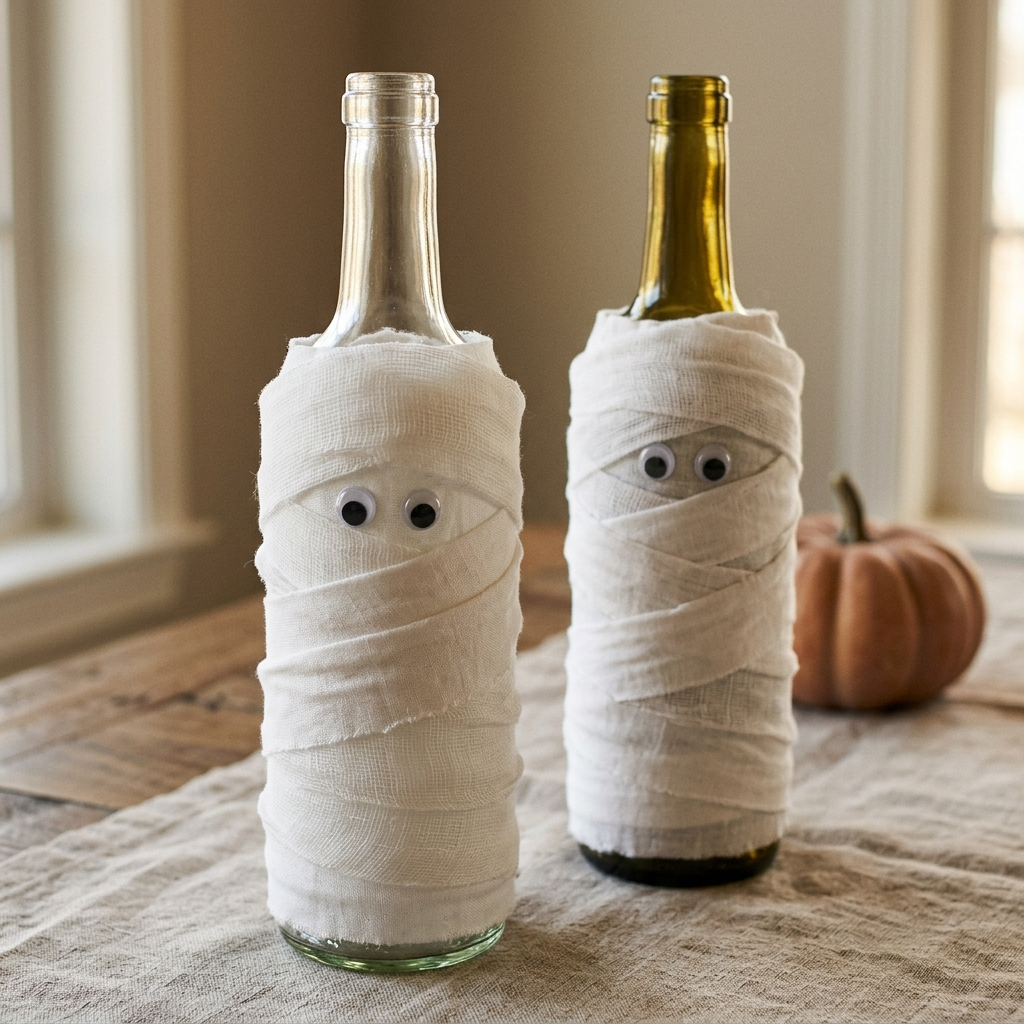
Mummy bottle wraps can be an easy seasonal accessory for Halloween dinner parties and gift baskets. The design uses white gauze or fabric strips wrapped around a bottle-shaped cover, with a pair of eyes as the finishing detail.
Materials and estimated costs:
- Reusable fabric or suitable bottle cover: $1–$3
- Gauze or white fabric strips: $0.25–$0.75
- Decorative eyes and adhesive: $0.25–$0.75
- Packaging: $0.25–$0.75
Estimated material cost: $2–$5 per wrap.
Possible selling price: $8–$14 each.
Production: Approximately 10–20 minutes per wrap, depending on the design.
I would make the cover removable so buyers can use it on a bottle of the appropriate size. A stretchy fabric sleeve may be easier to reuse than gauze permanently glued to a bottle.
For craft fair displays, I would show the wrap on a clean, empty display bottle rather than leaving it folded on the table. This helps customers understand its shape and intended use.
Pro Tip: State the bottle size the cover fits and whether the bottle is included. If the product is intended for gifts, a simple paper tag can explain how to remove and reuse the decoration.
14. Cauldron Candy Bowls — Best for: Seasonal displays, candy station
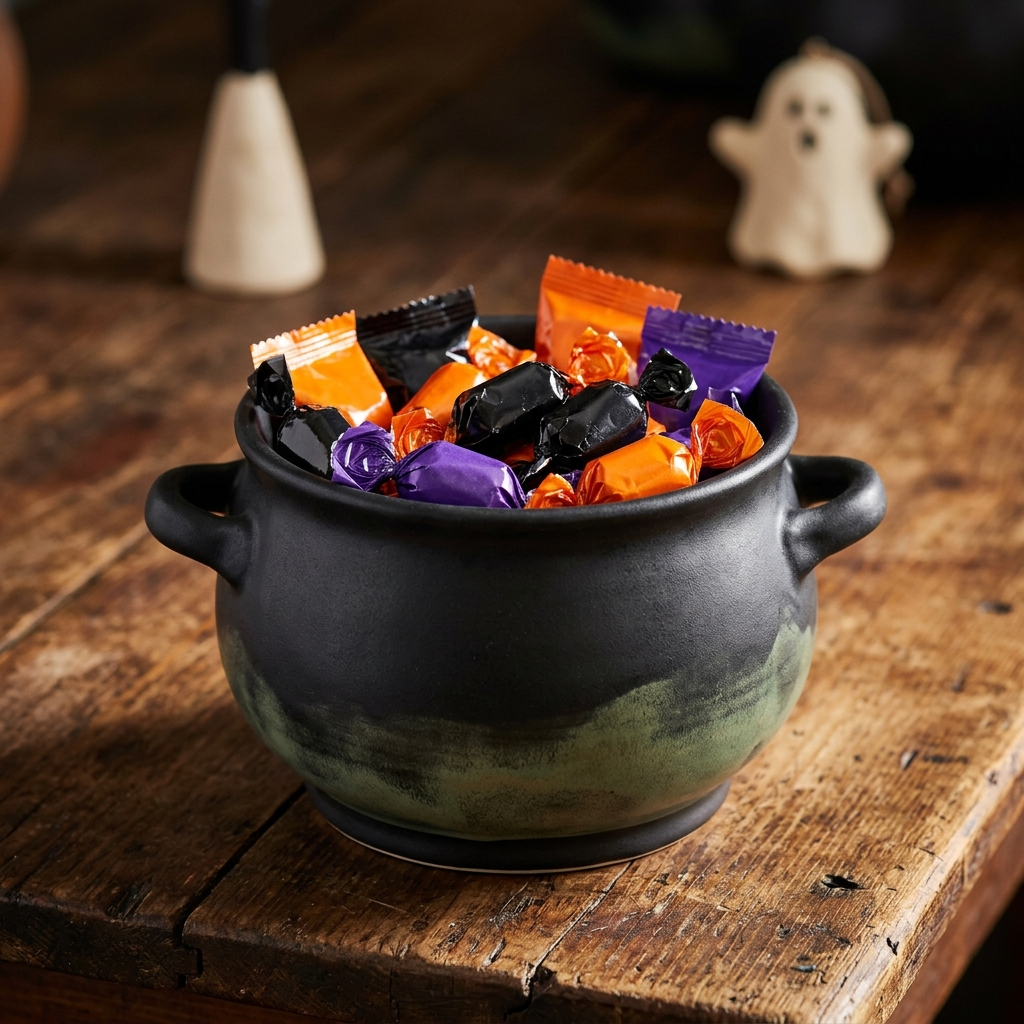
A cauldron candy bowl is a practical Halloween accessory for a party table, entryway, or treat station. I would begin with a suitable bowl or decorative cauldron and focus on a clean finish that can withstand normal handling.
Materials and estimated costs:
- Cauldron-shaped bowl: $2–$4
- Suitable paint, if needed: $0.50–$1.50
- Decorative accents: $0.25–$1
- Protective finish, if appropriate: $0.50–$1
Estimated material cost: $3–$7.50 per bowl.
Possible selling price: $10–$18, depending on size and finish.
Production: Approximately 20–40 minutes, excluding drying or curing time.
I would keep the outside matte black and add a small amount of contrasting decoration around the rim or handles. Too much glitter or extra trim can make the bowl less practical to clean and harder to use.
If the bowl will hold unwrapped candy, I would use a food-safe bowl or place a suitable food-safe liner inside it. Decorative paint and craft finishes should not come into contact with food unless they are approved for that purpose.
Pro Tip: Photograph the bowl with individually wrapped treats to show how it works as a party display. Make sure the listing explains whether the candy is included and whether the bowl is intended for food contact.
15. Black Cat Keychains — Best for: Low-cost impulse buy, kids’ market
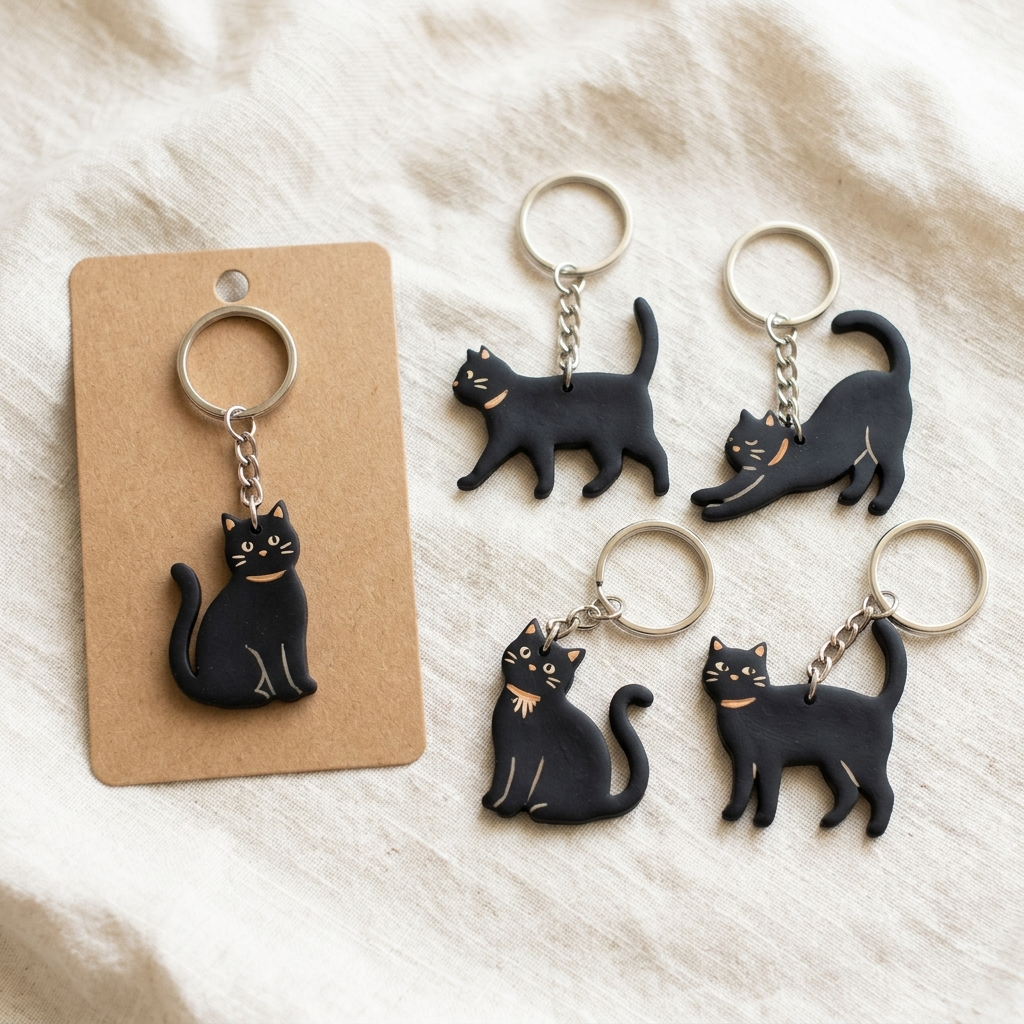
Black cat keychains are small, lightweight items that can fit easily into a basket of lower-priced products. I would use a simple cat silhouette and a sturdy key ring to keep the design recognizable without making production complicated.
Materials and estimated costs:
- Suitable craft material, such as felt or acrylic blanks: $0.50–$1.50
- Key ring and connector: $0.25–$0.75
- Adhesive, paint, or small finishing details: $0.25–$0.75
- Packaging: $0.10–$0.40
Estimated material cost: $1–$3.50 per keychain.
Possible selling price: $5–$10 each.
Production: Approximately 10–20 minutes per piece, depending on the material and design.
I would begin with a basic black cat and test one or two variations, such as a pumpkin accent or a colored bow. Keeping the design simple makes it easier to produce matching items and maintain consistent quality.
The connector is important because a keychain that comes apart during normal use will disappoint customers. I would check each finished item by hand before packaging it.
Pro Tip: Display the keychains on a small rack or in divided compartments, with prices clearly visible. If children are part of the target audience, avoid small detachable decorations that could create a choking hazard.
16. Bat Wall Art Sets — Best for: Minimalist Halloween decorators

Bat wall art can suit customers who want seasonal decorations that are simple, graphic, and easy to remove after Halloween. I would use lightweight cardstock or another suitable material to make a group of bats in different sizes.
Materials and estimated costs:
- Black cardstock or lightweight craft material: $1–$2
- Cutting supplies: $0.25–$0.75 per set
- Suitable removable mounting materials: $1–$2
- Packaging: $0.25–$0.75
Estimated material cost: $2.50–$5.50 per set.
Possible selling price: $14–$24 per set.
Production: Approximately 20–40 minutes per set, depending on the number of bats and cutting method.
I would arrange the bats as if they are flying upward or across a wall rather than placing every piece in a straight line. Including several sizes gives buyers more flexibility when decorating above a sofa, around a doorway, or in a hallway.
The mounting instructions should match the materials supplied. I would not promise that adhesive will work on every painted surface, wallpaper, or textured wall.
Pro Tip: Include a simple placement guide showing one possible arrangement. Explain that customers should test removable adhesive in an inconspicuous area and follow the wall and adhesive manufacturers’ instructions.
17. Halloween Digital Printables (Etsy Passive Income) — Best for: Etsy passive income

Digital Halloween printables can be useful for sellers who want to offer a product without storing physical inventory. I would consider original artwork such as haunted-house illustrations, printable party signs, treat tags, or vintage-inspired Halloween wall decor.
Materials and estimated costs:
- Design software or tools: Free to a recurring subscription cost
- Time spent creating and checking the artwork: A significant part of the initial investment
- Marketplace and payment fees: Dependent on the selling platform
- Optional mockups or listing graphics: Free to a paid cost
Estimated production cost: There is no physical material cost per download, but design time, software, platform fees, and customer support still need to be considered.
Possible selling price: Approximately $3–$10 per digital product, depending on the file type, number of designs, and intended use.
Production: The initial design can take anywhere from under an hour to several hours. Preparing file formats, instructions, and listing images takes additional time.
I would make sure the artwork is original or that I have the appropriate commercial rights to use every font, illustration, and graphic. I would also test the downloaded files before listing them.
For a useful product, I would include clearly labeled files in the sizes and formats promised in the listing. A printable wall-art product, for example, should explain its dimensions, whether it is supplied as a PDF or image file, and whether the customer receives a physical print.
Digital products can be sold repeatedly without making a new physical item, but that does not guarantee passive income. Sellers still need to attract customers, maintain listings, answer questions, and account for platform fees.
Pro Tip: Create a small collection of related designs rather than relying on one listing. Use clear preview images, show the artwork at its intended size, and explain exactly what the buyer will receive before checkout.
18. Halloween Potpourri Bags — Best for: Seasonal gifting, non-decor buyers

Potpourri bags can work as small autumn gifts for customers who enjoy natural-looking decorations and seasonal scents. I would use dried orange slices, whole spices, and other suitable dried botanicals in a breathable fabric bag.
Materials and estimated costs:
- Muslin or breathable fabric bags: $0.25–$0.75 each
- Dried orange slices and other botanicals: $0.75–$1.50 per bag
- Whole spices: $0.25–$1
- Labels and packaging: $0.25–$0.75
Estimated material cost: $1.50–$4 per bag.
Possible selling price: $6–$12, depending on size, ingredients, and packaging.
Production: Approximately 10–20 minutes per bag when the ingredients are already prepared.
I would combine a few complementary ingredients rather than filling each bag with too many different items. Dried citrus, cinnamon sticks, cloves, and star anise can create a warm seasonal appearance.
The ingredients need to be thoroughly dried and stored in clean, dry conditions. Moisture can lead to mold, so I would inspect the materials before packaging them.
I would label the contents clearly and explain that the mixture is for decorative use, not eating. I would also consider fragrance sensitivities and keep the bags away from young children and pets.
Pro Tip: Offer potpourri as a small gift alongside a decorative sign or other seasonal item. Before bundling products, calculate the combined material and packaging costs so the discount does not remove your profit.
19. Pumpkin Face Burlap Pot Covers — Best for: Garden center adjacent buyers

Pumpkin-face pot covers can appeal to gardeners and people who decorate their porches with seasonal plants. I would use burlap or another suitable fabric around an existing pot and add a simple pumpkin face.
Materials and estimated costs:
- Burlap or decorative fabric: $1–$2
- Pot or container, if included: $1–$3
- Fabric paint: $0.50–$1.50
- Twine and finishing materials: $0.25–$0.75
Estimated material cost: $3–$7 per cover, depending on whether the pot is included.
Possible selling price: $12–$22.
Production: Approximately 20–40 minutes per cover, plus drying time.
I would measure the intended pot before cutting the fabric. The cover should fit securely without blocking drainage holes or trapping excess water around the plant container.
A friendly jack-o’-lantern face is easy to recognize, while a neutral fabric with a small orange accent may suit customers who prefer understated autumn decor.
I would also explain whether the item is a decorative sleeve or a waterproof planter. Burlap is not automatically waterproof, and a decorative cover should not be treated as a substitute for a proper plant pot.
Pro Tip: Photograph the cover with a real potted plant and include its dimensions. Make sure the listing states which pot sizes it fits and whether the pot is included.
20. Dracula Wine Glasses — Best for: Halloween party hosts, adult gift buyers
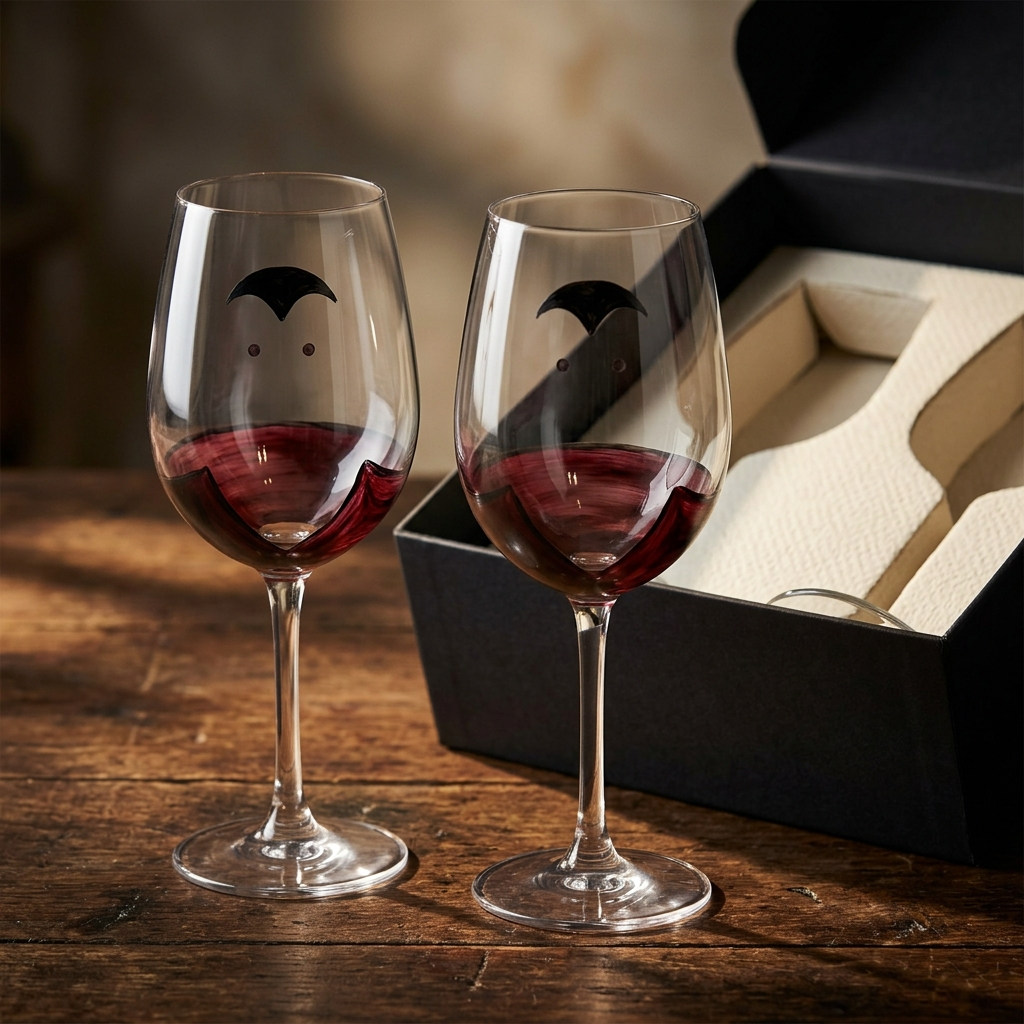
Dracula-inspired wine glasses can work as party favors or gifts for adults who enjoy Halloween entertaining. I would use a simple vampire-inspired design with dark details, avoiding excessive decoration that interferes with the glass’s normal use.
Materials and estimated costs:
- Plain glass: $2–$4 each
- Suitable glass paint or permanent decorative material: $1–$3 per glass
- Protective packaging: $1–$2 per glass, depending on the box
Estimated material cost: Approximately $4–$9 per glass, or $8–$18 for a pair.
Possible selling price: $15–$24 each, or a higher price for a carefully packaged pair.
Production: Approximately 20–40 minutes of hands-on work per glass, plus any required curing time.
I would keep the artwork near the bowl or stem where appropriate, using materials rated for the intended application. Glassware that will hold drinks needs particular care: paint is not automatically food-safe, dishwasher-safe, or suitable for repeated washing.
Before offering the glasses for sale, I would follow the manufacturer’s instructions for curing, cleaning, and use. If the finish is only suitable for decorative use, I would label the product accordingly rather than presenting it as everyday drinkware.
Pro Tip: Package each glass so it cannot knock against another during transport. A set of two can make a thoughtful gift, but only if the combined price covers the additional packaging and handling.
21. Trick-or-Treat Goodie Bag Sets — Best for: Parents, teachers, kids’ party hosts

Halloween goodie bags are a practical product for parents, teachers, and party hosts who need several matching bags at once. I would use kraft paper bags with a simple stamped, stenciled, or printed design.
Materials and estimated costs:
- Kraft paper bags: $0.15–$0.40 each
- Ink, paint, or decorative materials: $0.10–$0.30 each
- Labels or tags: $0.05–$0.20 each
- Packaging for the set: $0.25–$0.75
Estimated material cost: Approximately $0.30–$0.90 per bag before labor, depending on the design and order quantity.
Possible selling price: $4–$8 for a set of six, with larger or personalized sets priced according to their costs.
Production: Approximately 10–20 minutes for a small batch after the design and stamping process have been prepared.
I would offer a few simple designs, such as ghosts, pumpkins, bats, or black cats. A matching set looks more organized than a collection of unrelated prints, and the bags can be used for classroom treats, party favors, or neighborhood gatherings.
Before packing the bags, I would make sure the ink or paint has dried completely. If buyers intend to place food directly inside, I would use bags suitable for that purpose or recommend individually wrapped treats.
Pro Tip: Offer the bags in clearly labeled quantities, such as six or twelve, and state whether personalization is included. This helps customers compare prices and reduces confusion when ordering for a party.
How Much Can You Make Selling Halloween Crafts?
The amount a seller can earn depends on the products, selling channel, production speed, local demand, and pricing. I would avoid assuming that every craft will sell out or that the difference between material cost and retail price is pure profit.
For example, a welcome sign that costs $8 in materials and sells for $28 has a $20 difference before labor and other expenses. If the sign takes an hour to make, and I also spend time photographing it, packing it, and selling it, that time needs to be accounted for.
Here are sample estimates for comparing a few products. These are planning figures, not guaranteed market prices or earnings.
| Craft | Estimated material cost | Example selling price | Difference before other expenses | Estimated hands-on time |
|---|---|---|---|---|
| Ghost jar luminaries | $2–$6 | $10–$15 | $4–$13 | 20–30 min |
| Halloween welcome signs | $6–$12 | $25–$38 | $13–$32 | 45–90 min |
| Tiered tray sets | $8–$15 | $28–$40 | $13–$32 | 45–90 min |
| Wax melts | $1.30–$3.40 | $6–$10 | $2.60–$8.70 | Varies by batch |
| Mummy candle holders | $2–$4 | $8–$13 | $4–$11 | 10–20 min |
| Digital printables | No physical material per sale | $3–$10 | Before fees and design costs | No physical production |
The difference between the selling price and the materials cost is not the same as net profit. To estimate actual earnings, I would also account for packaging, platform fees, payment processing, advertising, booth rental, transportation, damaged stock, and the cost of my time.
A simple calculation can help:
Estimated profit per item = selling price − materials − packaging − selling fees − other variable costs.
For craft fairs, I would also divide fixed event expenses, such as booth rental and travel, across the number of items sold. Unsold products still represent money tied up in inventory.
For instance, selling 40 items at an average price of $15 produces $600 in revenue. If the average material and packaging cost is $5 per item, that leaves $400 before event expenses, selling fees, labor, and any other costs. It is a useful starting calculation, but it is not the amount the seller necessarily takes home.
I would begin with three to five products that share some materials. That approach makes it easier to manage supplies and compare which items produce a reasonable return for the time involved.
When Should You Start Making Halloween Crafts to Sell?
I would start planning Halloween products during the summer rather than waiting until October. This gives me time to test designs, compare material prices, take photographs, prepare listings, and make changes before the busiest shopping weeks.
A practical schedule could look like this:
- June: Research local craft fairs, check vendor application deadlines, and choose a few product ideas.
- July: Make prototypes, calculate costs, test packaging, and begin small-batch production.
- Early August: Photograph finished products, prepare descriptions, and publish online listings.
- Late August and September: Review customer interest, restock popular items, and prepare for local markets.
- October: Focus on selling available inventory, fulfilling orders, and avoiding last-minute production that leaves too little time for quality checks.
The best timing will depend on the selling platform, the local market, and the product. Personalized signs may need longer production and shipping times than small keychains, while digital products can be prepared and delivered without physical shipping.
For craft fairs, I would check the organizer’s schedule well in advance. Some events fill their vendor spaces months before the date, and others require applications, insurance, or specific product categories.
For online shops, I would publish listings early enough to give customers time to discover them and receive their orders before Halloween. However, an early listing does not guarantee a higher ranking or more sales, so I would focus on clear photographs, accurate descriptions, relevant keywords, and reliable customer service.
Pro Tip: Keep a simple inventory sheet with the product name, materials used, cost per unit, production time, selling price, and quantity available. It makes restocking decisions much easier when several products are selling at once.
The Mistake Most Crafters Make With Pricing
One pricing mistake I would avoid is setting a price based only on what the materials cost. A handmade sign might use just a few dollars’ worth of wood and paint, but the maker still needs to pay for preparation, design, assembly, finishing, packaging, and selling.
A useful starting point is to calculate the full cost of making each item. I would then compare that cost with the price customers are likely to accept and adjust the design or production method if the numbers do not work.
For example, suppose a small welcome sign has the following estimated costs:
- Materials: $7
- Packaging: $2
- Labor: $8
- Allocated overhead and selling expenses: $3
The total estimated cost is $20. Selling it for $24 leaves only $4 before any additional expenses or taxes. A higher price may be necessary, or I may need to simplify the design so it takes less time to produce.
A materials-based multiplier can be a useful initial check, but it should not replace full cost calculations. Multiplying materials by three or four may work for some inexpensive crafts, yet it can underprice labor-intensive products or make other items too expensive for their market.
I would also compare similar products, taking care to compare their sizes, materials, personalization, and quality. A mass-produced decoration is not always a useful price comparison for a handmade product, but the market still needs to support the price.
Pro Tip: Before committing to a price, calculate the minimum amount you need to receive after selling expenses. Then check whether that price is reasonable for the product and target customer. If it is not, try reducing production time or choosing a simpler design rather than automatically accepting a lower return.
Quick Summary
- Best for testing at craft fairs: Ghost jar luminaries, Halloween welcome signs, spider web wreaths, and coordinated tiered tray sets.
- Best small gift ideas: Mummy candle holders, black cat keychains, goodie bags, and Halloween tote bags.
- Best products for online listings: Personalized signs, tiered tray collections, shadow boxes, and original digital printables.
- Products worth batching: Goodie bags, keychains, mummy holders, and ghost jars can share a repeatable production process.
- Products needing extra care: Wax melts, painted drinkware, and outdoor decorations require suitable materials, clear instructions, and attention to applicable safety requirements.
- Pricing priority: Calculate materials, labor, packaging, selling fees, and overhead rather than relying on materials alone.
- Planning priority: Prepare designs and listings early, then use actual customer interest to decide what to restock.
My first choice would depend on the tools I already have, the time available, and the customers I want to reach. For a beginner, I would test a small batch of ghost jar luminaries or goodie bags. For a seller with a strong home decor audience, welcome signs and coordinated tray sets may be more suitable.
People Also Ask
Do Halloween crafts sell well on Etsy?
Halloween crafts can appeal to Etsy shoppers looking for seasonal decorations, gifts, and personalized items. I would test products such as welcome signs, tiered tray sets, and original digital printables, while paying close attention to photography, listing details, pricing, and customer demand. Sales are not guaranteed, and results vary by product and competition.
What Halloween crafts have the best profit margin?
Digital printables can avoid per-order material costs, while lightweight crafts and simple decorations may be inexpensive to produce. However, the best margin depends on design time, labor, selling fees, packaging, and the price customers will pay. I would calculate the full cost of each product before deciding which is most profitable.
How do I stand out at a Halloween craft fair?
I would create a neat display with three to five main product types, a consistent color palette, and a few examples of how the products look in a home. Varying the height of the display can help customers see everything, while visible prices and clear product descriptions make shopping easier.
Frequently Asked Questions
Q: What Halloween crafts sell best at craft fairs?
A: I would test welcome signs, ghost jar luminaries, spider web wreaths, and tiered tray sets because they offer recognizable seasonal designs and clear decorating uses. Small products such as mummy candle holders and keychains can also be worth testing as lower-priced purchases. Actual results depend on the local audience, display, price, and product quality.
Q: How much money can you make selling Halloween crafts?
A: Earnings depend on how many items sell, their prices, production costs, and selling expenses. For example, 40 items sold at an average price of $15 generate $600 in revenue, but materials, packaging, labor, booth fees, and other costs must be deducted to estimate profit. I would prepare a budget before setting an income target.
Q: What are the easiest Halloween crafts to make and sell?
A: I would start with simple ghost jar luminaries, mummy candle holders, kraft paper goodie bags, or black cat keychains. These designs can be made with relatively accessible supplies and repeated in batches. Before selling them, I would test the assembly process, check durability, and calculate the time required for each item.
Q: When should I start making Halloween crafts to sell?
A: I would begin planning in June or July, test products during the summer, and aim to have online listings ready by August or early September. Craft fair application deadlines may be much earlier than the event itself, so I would check each organizer’s requirements rather than relying on one universal date.
Q: Where is the best place to sell homemade Halloween crafts?
A: Etsy may suit products that customers can discover through online searches, while local craft fairs and holiday markets allow buyers to see handmade items in person. Community markets, social media, and local boutiques may also be options. I would compare each channel’s fees, audience, requirements, and likely order size before choosing.
Q: Are Halloween crafts profitable in 2026?
A: They can be profitable when buyers are interested in the product and the selling price covers the full cost of making and selling it. Seasonal demand alone does not guarantee a return. I would test a small collection, keep accurate cost records, and use actual sales results to decide whether to expand.
Q: What Halloween crafts sell fastest on Etsy?
A: There is no reliable universal answer because results change with competition, search demand, product quality, and pricing. I would test coordinated decor sets, personalized signs, and original printables, then review listing visits, favorites, orders, and customer questions. I would avoid assuming that a popular-looking category automatically produces the most sales.
Q: How should I price my Halloween crafts?
A: I would include materials, labor, packaging, platform or payment fees, and a share of overhead in my calculations. A materials multiplier can provide an initial estimate, but it should not determine the final price on its own. The final amount also needs to make sense for the customer and the quality of the product.
Q: What supplies do I need to start selling Halloween crafts?
A: A small starter collection might use scissors, measuring tools, suitable adhesives, cardstock, paint, fabric, unfinished wood, and basic packaging materials. I would purchase supplies for two or three tested products first rather than buying everything needed for all 21 ideas. Product-specific materials, such as glass-safe finishes or wax-making supplies, should be selected for their intended use.
Q: What Halloween crafts have the best profit margin?
A: Digital printables, simple personalized signs, and small batch-made decorations are worth comparing because their production costs and time requirements differ. A product with low material costs may still have a poor return if it takes a long time to make or is expensive to sell. I would compare net profit per item and the time required to produce it.
Q: Do handmade Halloween decorations sell better than mass-produced ones?
A: It depends on the customer and selling channel. Some buyers value original designs, handmade details, or personalization, while others prioritize low prices and convenience. I would explain what makes a handmade product different without claiming that it is automatically better than a factory-made alternative.
Q: How do I stand out at a Halloween craft fair?
A: I would use a consistent theme, arrange products at different heights, display one complete seasonal arrangement, and make prices easy to find. I would also keep enough space for customers to browse without handling every item. A tidy booth, durable products, and helpful descriptions can make the shopping experience more comfortable.
Read this next: 19 Vintage Halloween Decoration Ideas to Haunt Your Home
Final Thoughts:
I think the most practical way to start selling Halloween crafts is to choose a few products that match your skills, budget, and available time. Ghost jar luminaries, small goodie bags, and mummy candle holders can be good projects to test on a modest budget, while welcome signs and tiered tray sets may suit sellers who want to focus on home decor.
I would not try to make all 21 ideas at once. Instead, I would create samples, work out the full costs, photograph the finished products, and see which designs attract genuine interest. That approach helps reduce wasted supplies and makes it easier to improve the products before investing in a larger batch.
Planning ahead is useful, but I would let the numbers guide the next step. Track the items that sell, note which ones take too long to make, and adjust the range based on customer feedback. A smaller collection of well-made products can be easier to manage than a table full of unrelated crafts.
If I were starting with one product for a home decor audience, I would consider a coordinated Halloween tiered tray set or a welcome sign. For a simpler first project, I would test ghost jar luminaries. The right choice is the one I can make consistently, price fairly, and present clearly to the people most likely to buy it.



2 Comments