
19 Vintage Halloween Decoration Ideas to Haunt Your Home
I like Halloween decorations that bring back the charm of old-fashioned parties without requiring expensive antiques or a house full of seasonal props. Paper pumpkins, crescent moons, black cat silhouettes, aged-looking banners, and antique-style frames can give a room a nostalgic feel with just a few carefully chosen details.
When I put together a vintage Halloween display, I pay attention to color, texture, and the way each piece works with the others. Faded orange, black, and cream create a familiar Halloween palette, while paper decorations, thrifted glassware, lace, and worn-looking frames add character. Even inexpensive craft supplies can fit this style when the colors and designs complement one another.
These 19 vintage Halloween decoration ideas combine traditional paper ornaments, retro Halloween motifs, secondhand treasures, and simple finishing touches. Many projects use affordable supplies such as cardstock, crepe paper, twine, fabric remnants, and thrifted accessories.
Save this for later
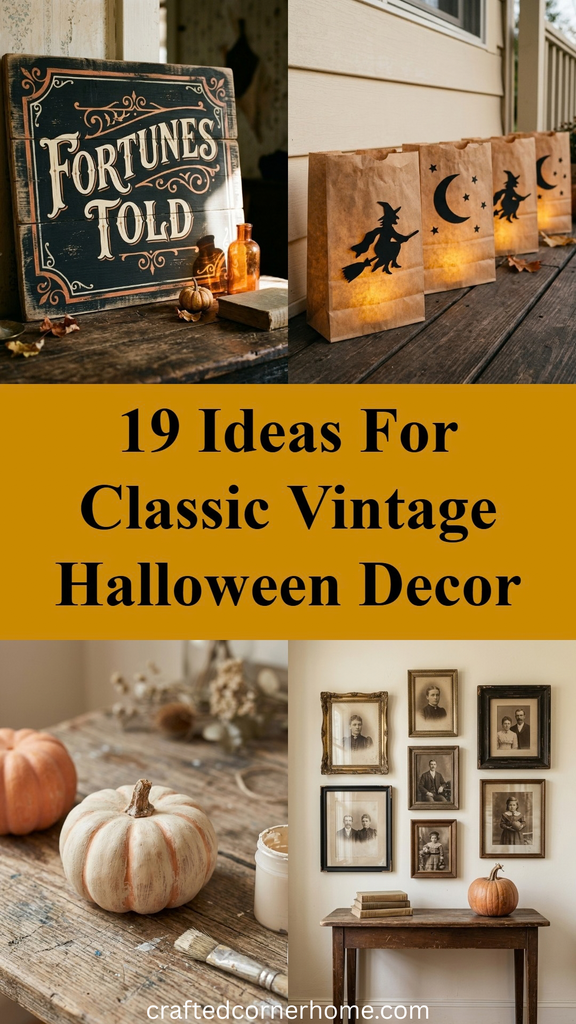
Table of Contents
A starter budget of around $35–$60 may cover a selected group of decorations for a small living room or party area, particularly when I reuse supplies and shop secondhand. That budget does not cover all 19 projects. I would begin with a paper pumpkin centerpiece, a handmade banner, and a few thrifted accessories, then add more decorations as needed.
Key Takeaways
- Use faded orange, black, and cream as a starting palette, with muted gold, brown, or dusty teal for variety.
- Combine handmade paper decorations with thrifted frames, glassware, candlesticks, books, and lace.
- Start with a few affordable projects rather than trying to complete all 19 ideas at once.
- Use battery-operated LED candles around paper and fabric decorations.
- Group decorations on a mantel, entry table, or party backdrop to create a coordinated display.
- Store reusable decorations in a dry place, keeping paper pieces flat and fabric completely dry.
Related article: 15 Indoor Halloween Decoration Ideas That Actually Create Atmosphere (2026)
What Makes Halloween Decor Look Vintage?
I build a vintage-inspired Halloween display around three elements: traditional motifs, a muted color palette, and materials with interesting textures.
Faded orange, black, and cream make a useful foundation. Rust, mustard, brown, and dusty teal can also work, especially when I want a carnival-inspired look. The colors do not need to be perfectly matched; repeating two or three shades throughout the room is usually enough to connect the decorations.
The shapes help establish the theme. Grinning pumpkins, black cats, crescent moons, witches, crows, and old-fashioned carnival signs all suit a nostalgic Halloween display. Honeycomb paper ornaments, crepe streamers, cardstock cutouts, lace, and amber glass add texture without requiring genuine antiques.
I also consider the decorations already in the room. A modern home can work beautifully with vintage-inspired pieces when I group them thoughtfully. Instead of replacing everything, I add a few traditional motifs and repeat their colors in different areas.
Where Do You Find Vintage Halloween Decorations?
I usually start with thrift stores, printable artwork, and craft supplies. These three sources provide plenty of options without making genuine antiques a requirement.
Thrift stores are useful for finding candlesticks, amber glassware, cloth-covered books, doilies, picture frames, and lace remnants. Some smaller items may cost around $1–$6 each, depending on the store, condition, and location. I check secondhand pieces for cracks, sharp edges, loose components, and instability before using them.
For paper decorations, I look for early Halloween postcards, illustrations, and die-cut designs from reputable library archives or other collections with clear usage terms. Some images are in the public domain, while others remain protected by copyright. I check the status of each design before printing or reproducing it.
Craft stores provide cardstock, crepe paper, twine, paper fans, and other basic supplies. Prices vary, but I can often complete small paper projects with inexpensive materials, especially when I already own scissors, paintbrushes, and other tools.
Pro Tip: I check the housewares, glassware, and picture-frame sections of thrift stores throughout the year instead of relying only on seasonal displays. These areas can offer useful decorating pieces at prices that fit a small project budget.
Vintage Halloween Decoration Ideas
I like to build the display in stages. Paper decorations establish the theme, traditional Halloween motifs make it recognizable, and secondhand objects add depth and texture.
The following costs and times are estimates rather than fixed prices. They depend on material quality, local availability, project size, and the supplies I already have. Drying time is additional wherever paint, coffee, or tea needs to dry completely.
Paper Classics
Paper decorations are a practical starting point because they are lightweight, easy to coordinate, and suitable for many party spaces. A few well-placed pieces can make a bigger difference than filling every wall.
1. Honeycomb Pumpkin Centerpieces
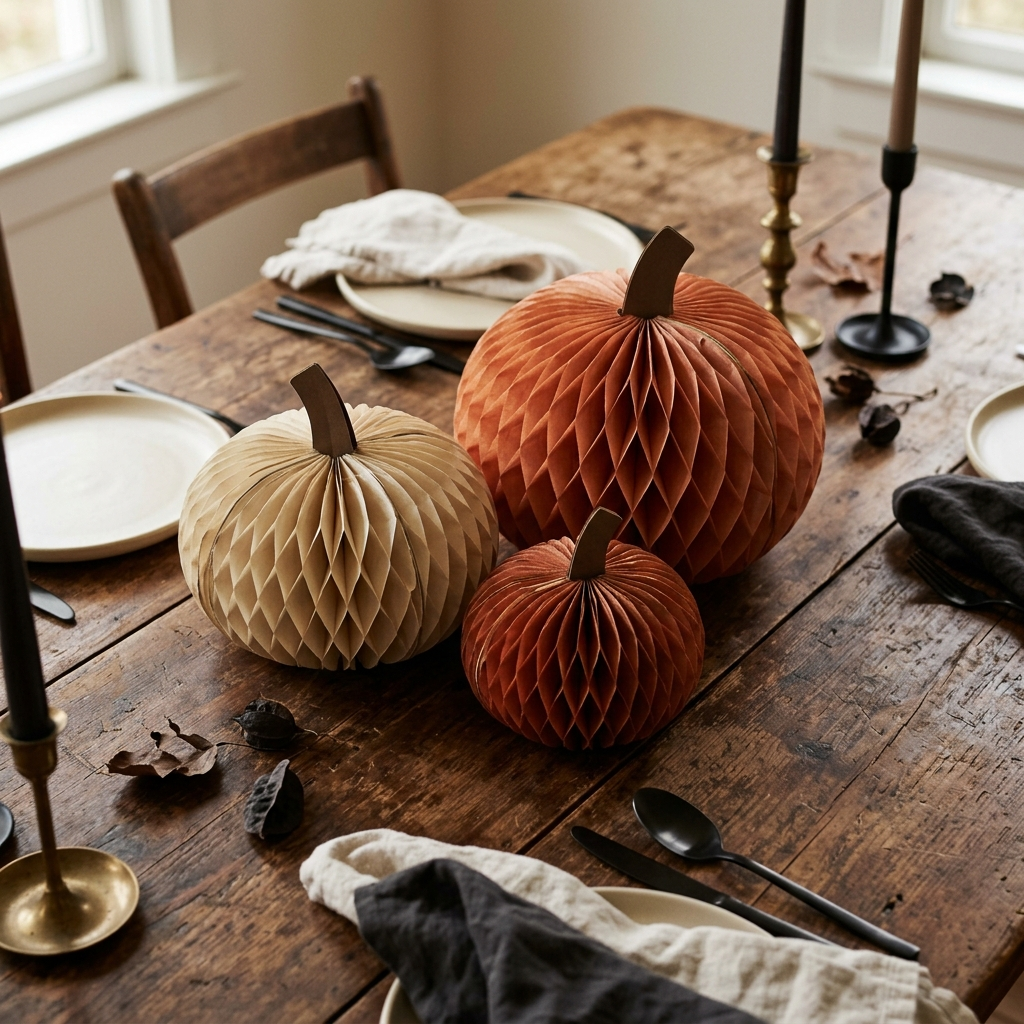
Honeycomb paper pumpkins are an easy way to bring a traditional Halloween look to a dining table, mantel, or buffet. I like arranging three pumpkins in different sizes or repeating the same design along the center of a table.
Depending on their size and construction, ready-made paper pumpkins may cost around $3–$5 each. Setting them out takes about five minutes once the table is ready.
I leave enough space around the pumpkins for serving dishes and plates. If the decorations have small clips or fasteners, I keep them out of reach of young children.
Best for: A quick retro centerpiece that requires little preparation.
2. Die-Cut Reproductions
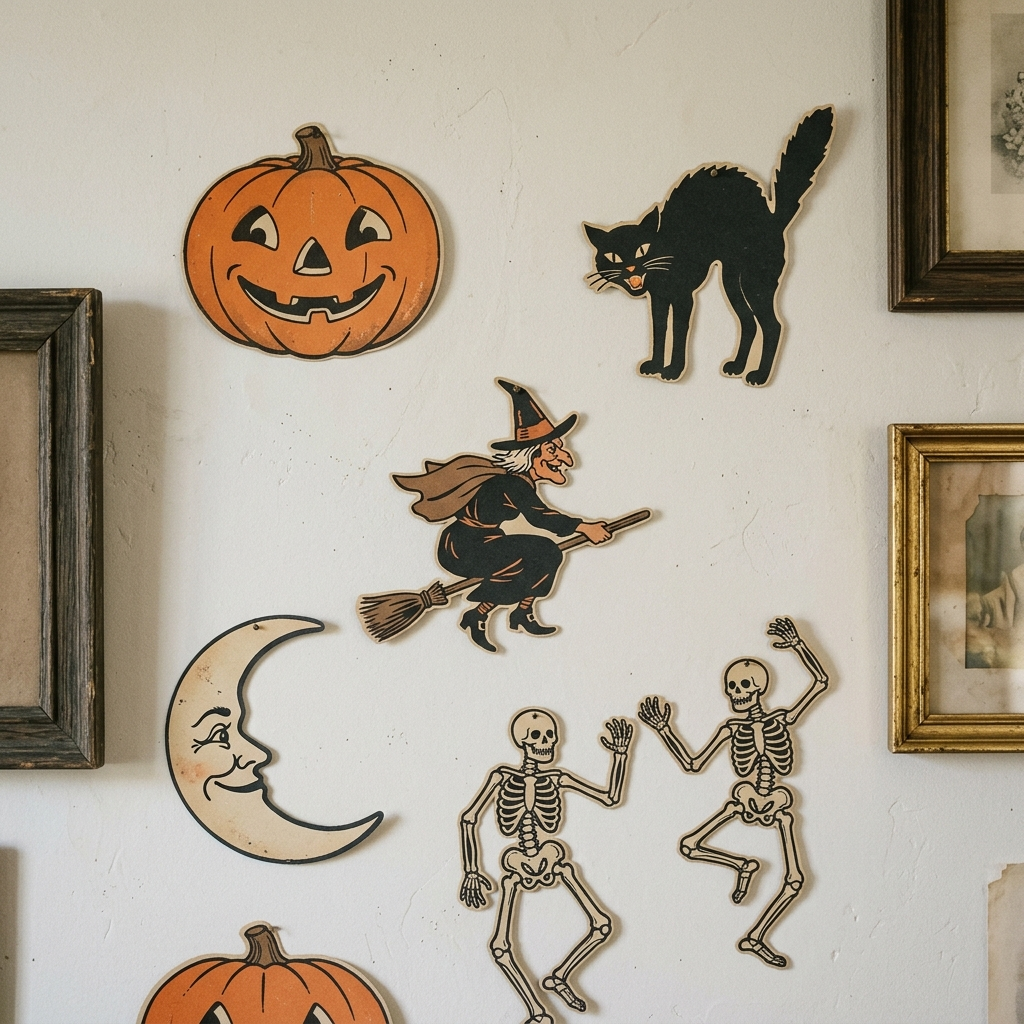
Vintage-style Halloween illustrations can turn a plain wall or window into a nostalgic display. I choose designs featuring grinning moons, dancing skeletons, black cats, witches, or traditional pumpkins.
I print suitable artwork on cardstock, cut around the shapes, and arrange the pieces before attaching them to the wall. A dozen small cutouts might cost around $4 in paper and printing supplies if I already own a printer. Allow approximately 30–45 minutes for printing, cutting, and arranging them.
I keep the designs within a consistent color range so the display looks coordinated. Removable adhesive may work on some surfaces, but I check the manufacturer’s instructions and test an inconspicuous area first.
Best for: Decorating a larger wall without spending much on individual ornaments.
3. Crepe Streamer Twists
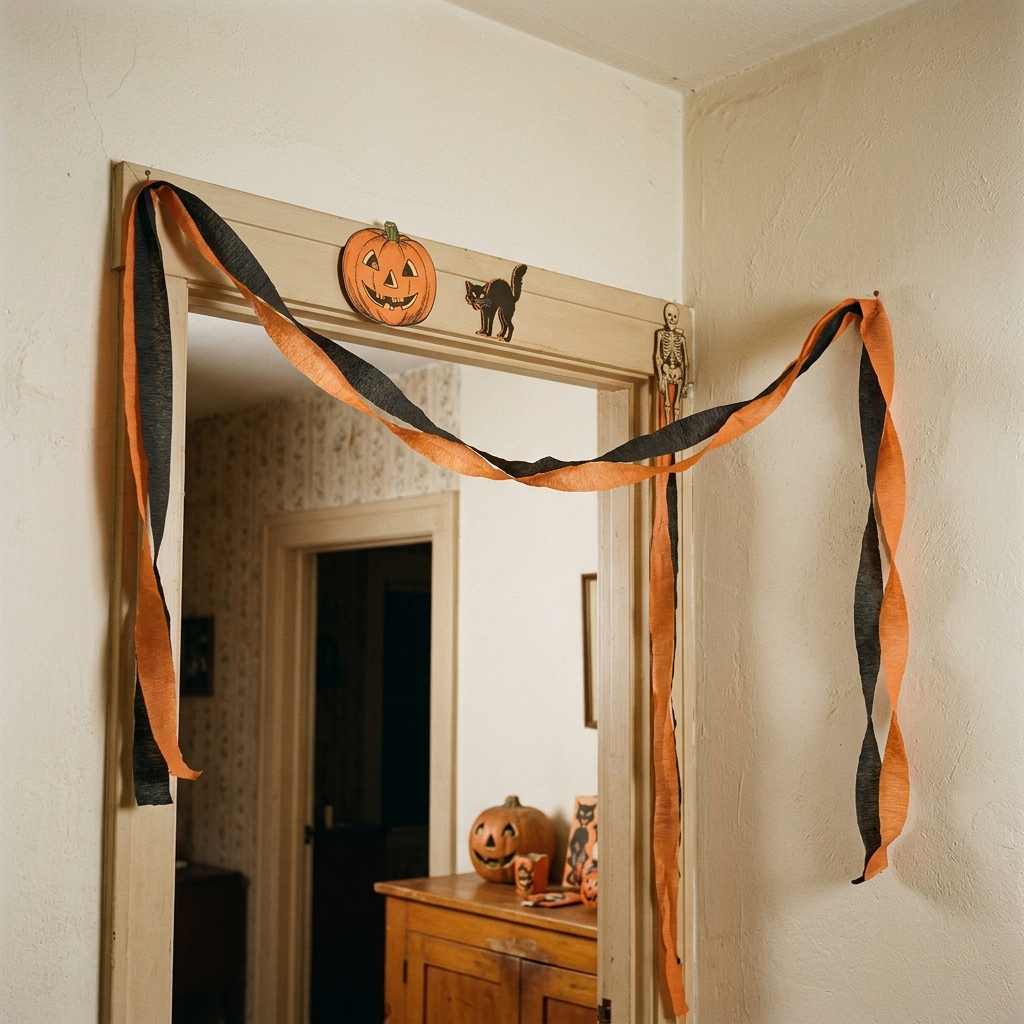
Orange and black crepe streamers create the look of an old-fashioned Halloween party. I twist two colors together loosely and hang them along a doorway, across a wall, or around a designated party backdrop.
Two rolls may cost around $4, although the price depends on the brand and length. A small arrangement generally takes about 20 minutes to hang.
I use removable hooks or suitable attachments and keep the streamers away from light fixtures, heaters, fireplaces, and electrical equipment. I also make sure they cannot hang into doorways or catch on guests as they pass.
Best for: Adding a traditional party detail with minimal crafting.
4. Paper Rosette Fans
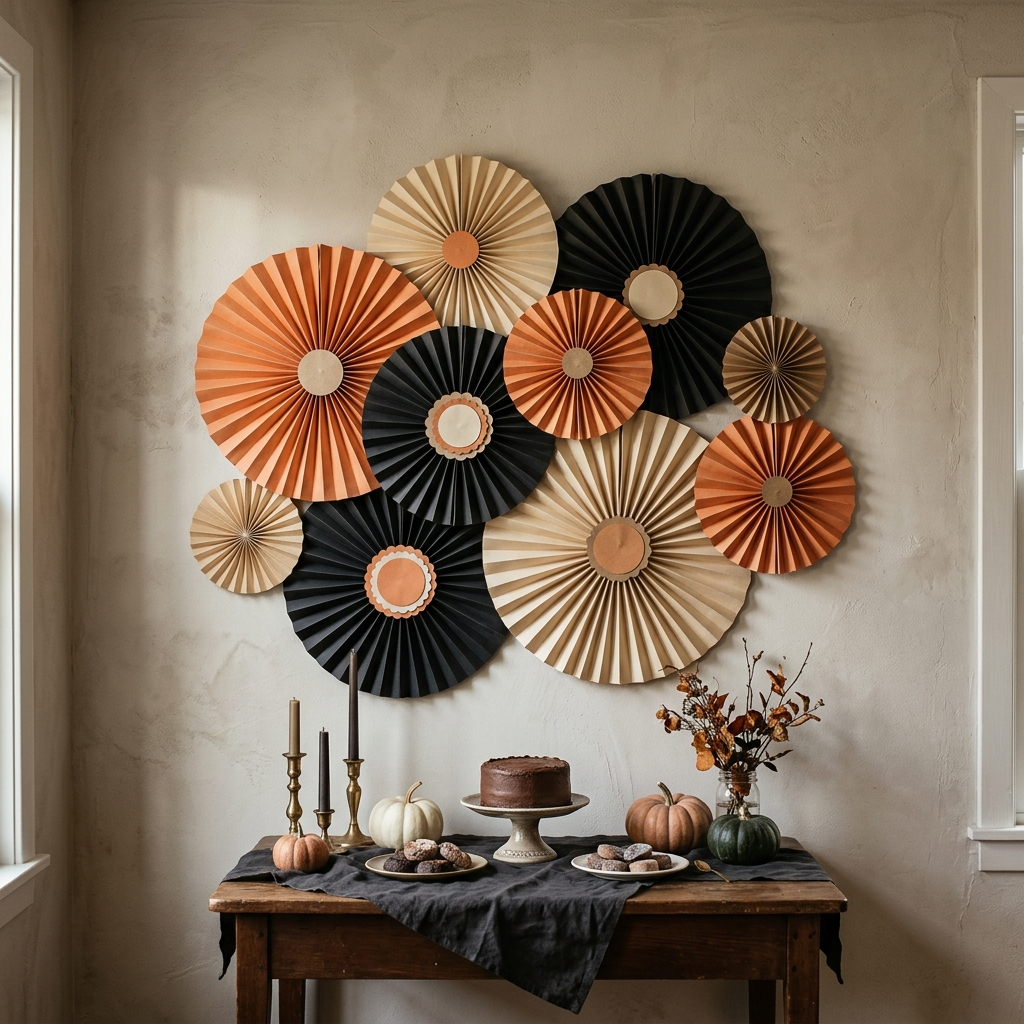
Paper rosette fans add dimension to a Halloween wall, particularly behind a dessert table or buffet. I choose cardstock in faded orange, black, and cream, then combine large and small fans to create a balanced arrangement.
Nine handmade rosettes might cost around $6 if I use basic cardstock and already have the necessary tools. Folding, assembling, and arranging them can take about 45 minutes.
I position the larger pieces first and fill the gaps with smaller ones. This creates a layered look without making the backdrop feel crowded.
Best for: A decorative background that works well in party photographs.
5. Coffee-Stained Banner
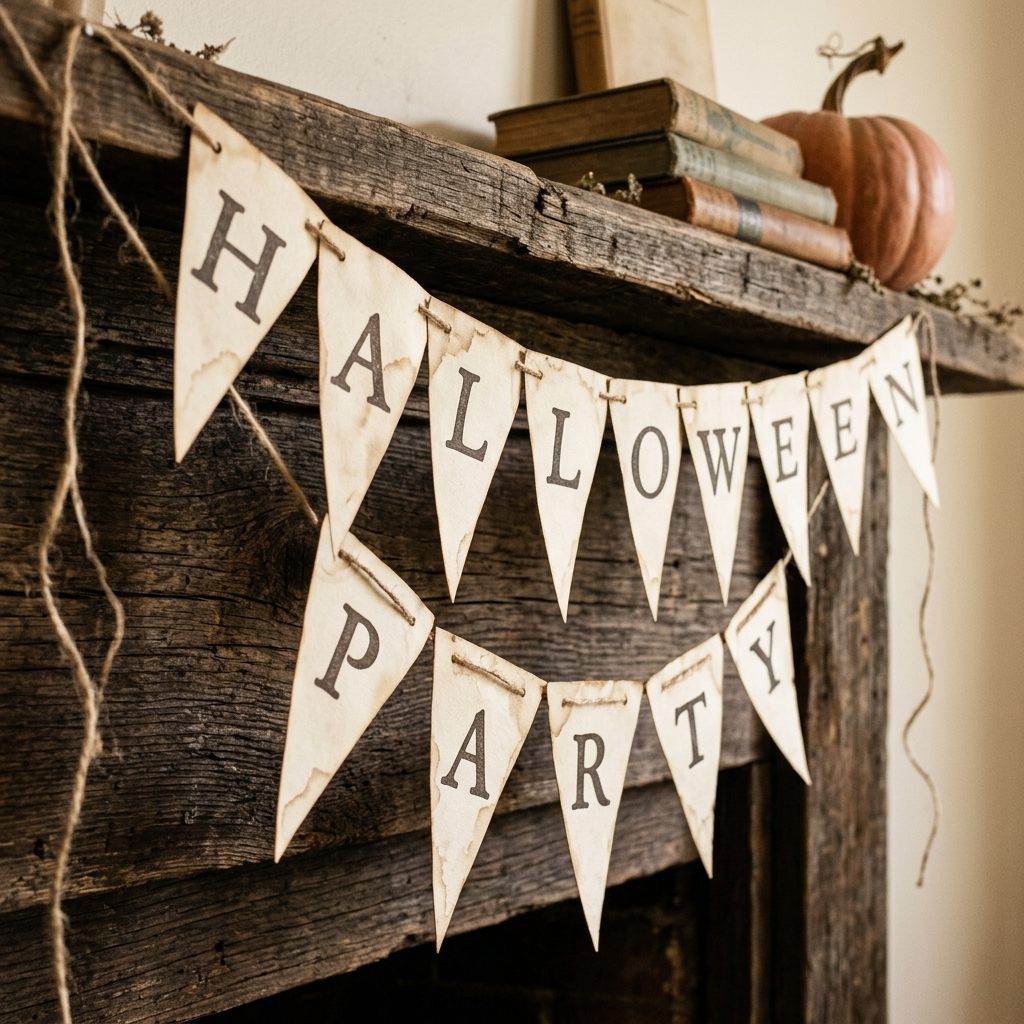
A coffee-stained banner adds an aged finish to a mantel or party table. I print or write a phrase such as “Halloween Party” or “Beware” on cardstock, then use cooled, strongly brewed coffee to create subtle brown marks.
I brush or dab a small amount of coffee onto the paper, concentrating some color around the edges. After blotting away excess liquid, I let the pieces dry completely on a protected, flat surface before attaching them to twine.
The project may cost under $5 if I already own the paper, string, and basic tools. Hands-on work takes around 30 minutes, but complete drying time varies with the amount of liquid and room conditions.
I avoid oven-drying the paper because it can scorch or ignite. Air-drying is a safer choice and helps me control the finished appearance.
Best for: Creating a focal point that establishes the vintage theme.
6. Paper Moon Photo Backdrop
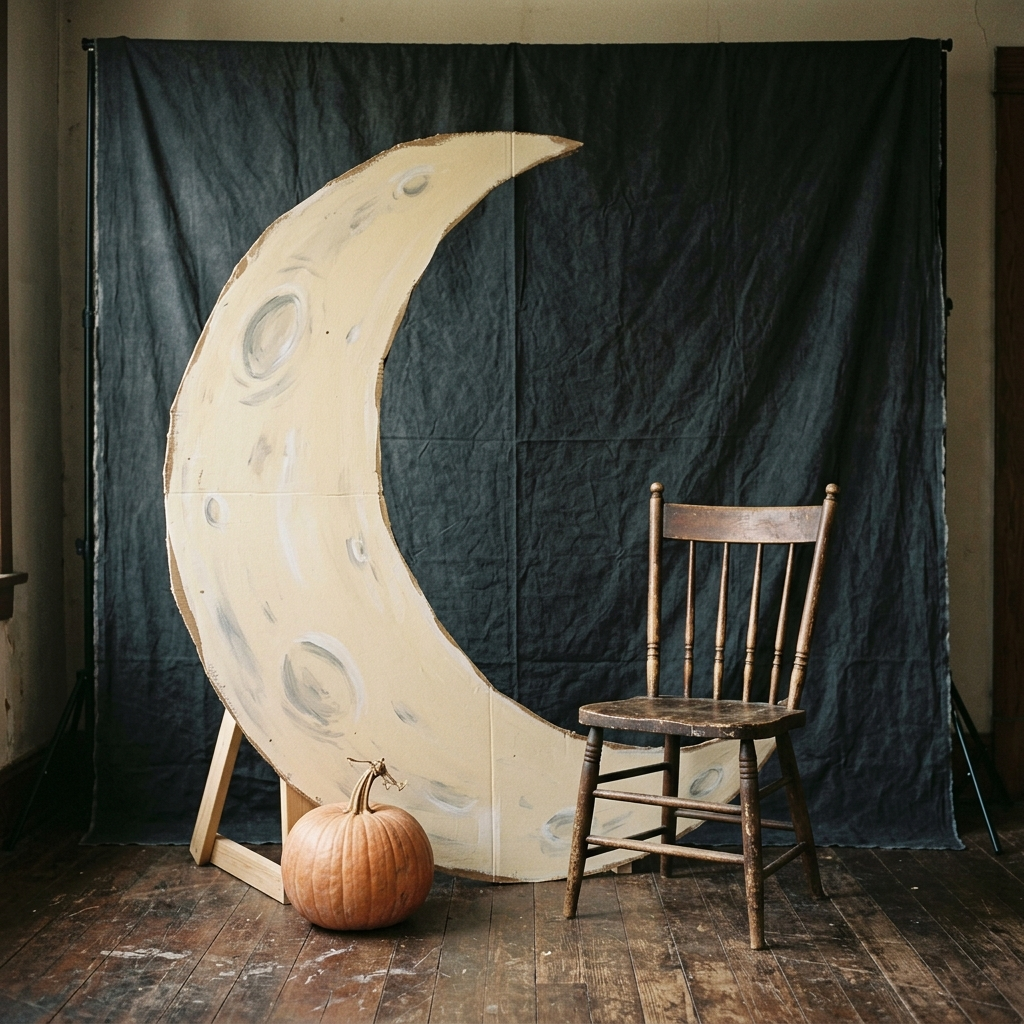
A large crescent moon can turn an ordinary corner into a vintage-inspired photo area. I draw the shape on sturdy cardboard, cut it out, and paint it cream. A few gray details can suggest craters without making the design too complicated.
A moon around three feet tall is large enough to stand out in photographs. I can place it against black fabric or a dark wall and add a simple chair or bench in front.
The project may cost around $8 when I use recycled cardboard and basic craft paint. Cutting, painting, and arranging the display can take about an hour, with additional time for the paint to dry.
For stability, I prefer a freestanding support that keeps the moon upright and prevents it from tipping. If I hang it instead, I use attachment hardware suited to the surface and the finished weight.
Best for: A photo corner with a theatrical, old-fashioned look.
Retro Motif Decor
Traditional Halloween shapes help tie the room together. I use these designs on their own or combine them with the paper decorations above.
7. Black Cat Silhouettes
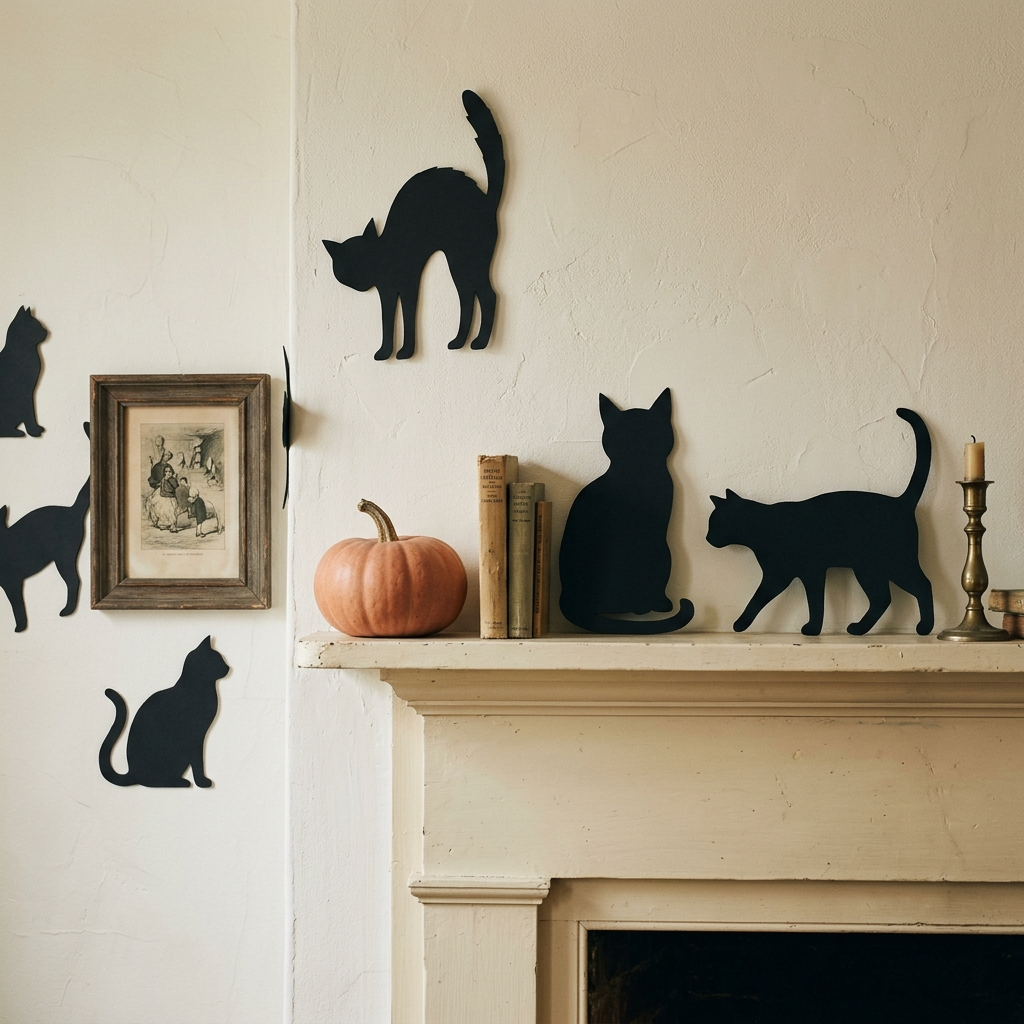
Black cat silhouettes are simple to make and easy to place around the room. I draw or print an arched-back cat, transfer the shape onto black poster board, and cut it out carefully.
A poster-board sheet may cost around $1–$3 and can provide several small silhouettes, depending on their size. Allow about 30 minutes to prepare and arrange a small collection.
I place the cats on a mantel, windowsill, or party display, keeping them clear of window hardware and stairways. Suitable removable adhesive can help attach lightweight shapes to walls without permanent fixtures.
Best for: Adding a recognizable vintage Halloween motif at a low cost.
8. Moon and Stars Garland
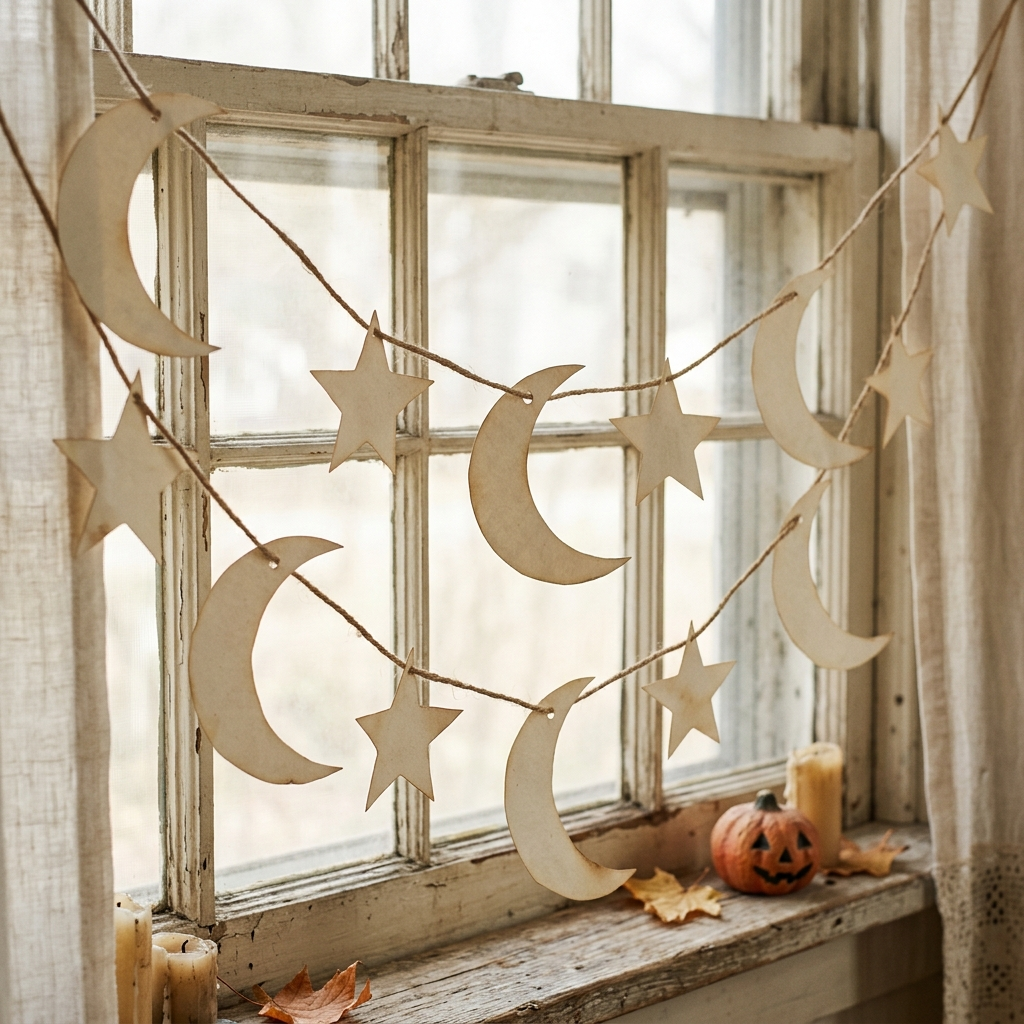
A moon-and-stars garland gives a Halloween display a softer appearance. I cut crescent moons and stars from cream cardstock and thread them onto twine, leaving enough space between the shapes for each one to stand out.
For an aged effect, I can add a light coffee stain before assembling the garland. A small project may cost around $4 if I already have some basic supplies, and preparation generally takes about 40 minutes plus drying time.
I hang the garland across a window, above a doorway, or behind a party table. If I am decorating a rental, I check that the attachment method is suitable for the wall or trim.
Best for: Bringing a subtle, nostalgic detail to a neutral room.
9. Grinning Pumpkin Gallery Wall
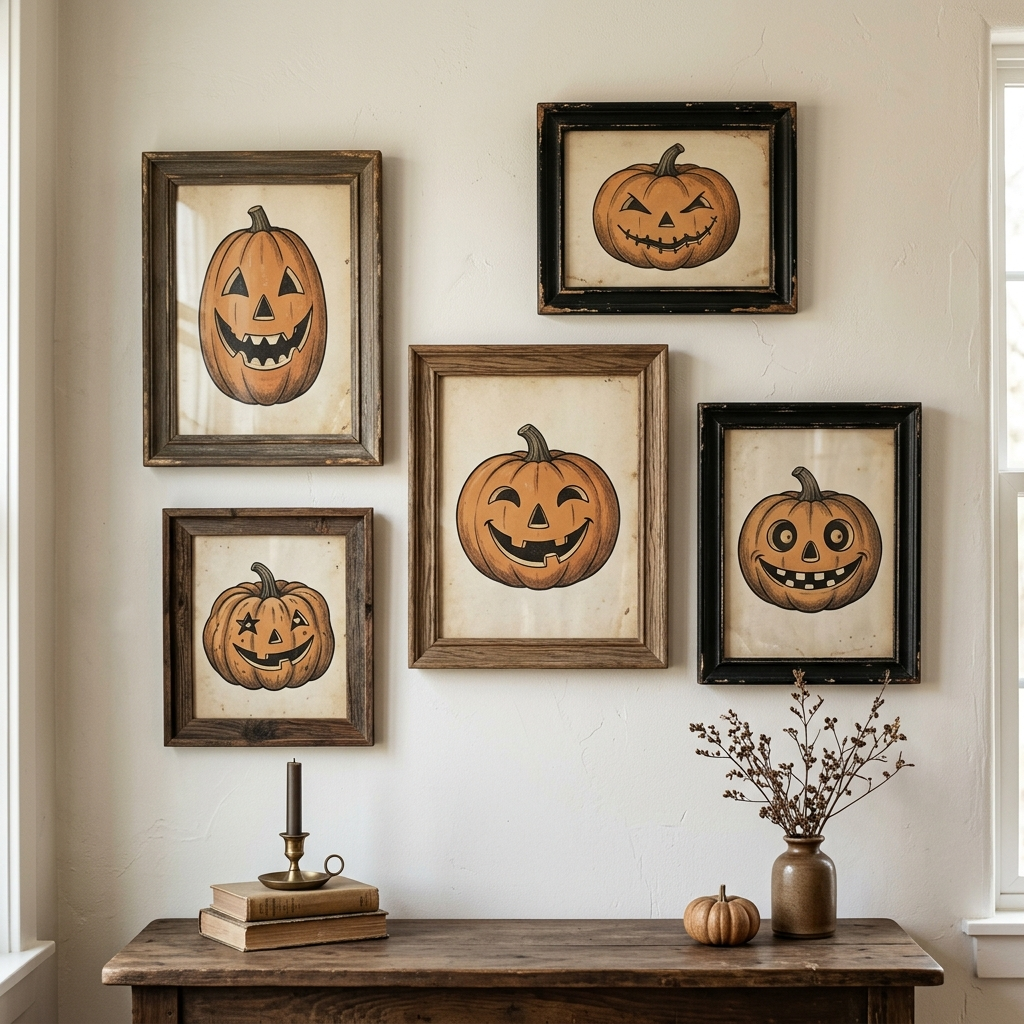
A gallery wall of vintage-style pumpkin illustrations adds Halloween character without requiring large props. I choose three to five prints featuring old-fashioned grins, traditional pumpkin shapes, or muted colors, then place them in thrifted frames.
A small display might cost around $10 if I find affordable frames and use inexpensive printing options. The final cost depends on the number and size of the frames, as well as whether I already own suitable ones.
I arrange the frames on the floor before hanging them so I can check the spacing. If I want a more consistent finish, I can paint suitable frames black and allow the paint to dry fully before putting them back into use.
Best for: A wall display that can return each October without taking up storage space.
10. Witch Silhouette Luminarias
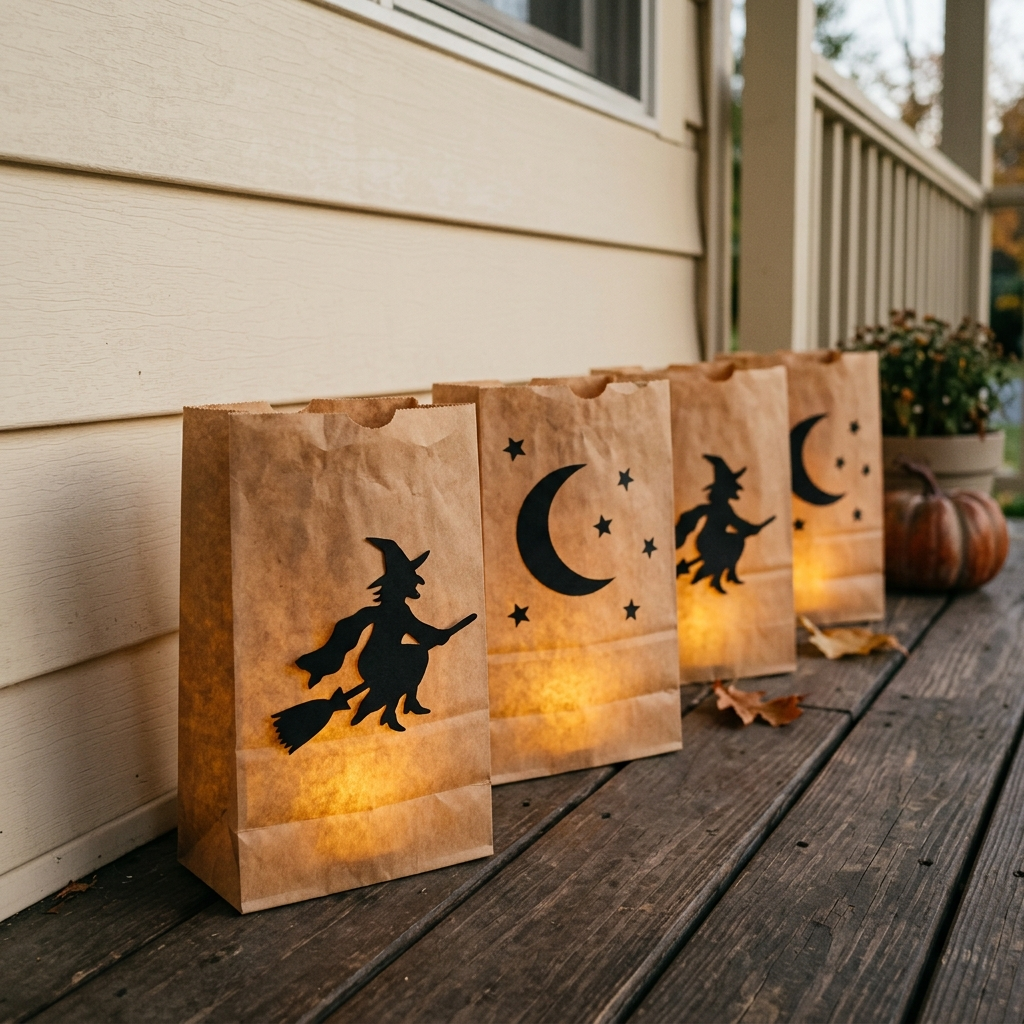
Paper-bag luminarias can add a soft glow to an entryway or covered porch. I decorate the front of each bag with a witch, moon, or star design and place a battery-operated LED tea light inside.
For a simple version, I attach a paper silhouette to the outside of the bag instead of cutting a large opening. A set of ten might cost around $6, depending on the bags and LED lights, and take about 30 minutes to assemble.
I place the bags on a stable surface beside the walkway rather than in the walking path. They should not obstruct steps, doors, or exits, and guests should not have to step around them. Ordinary paper bags are not suitable for wet or windy outdoor conditions.
I use LED lights only and keep the bags away from heaters and other heat sources.
Best for: Creating a gentle Halloween glow along a covered entry or indoor display.
11. Haunted Carnival Sign
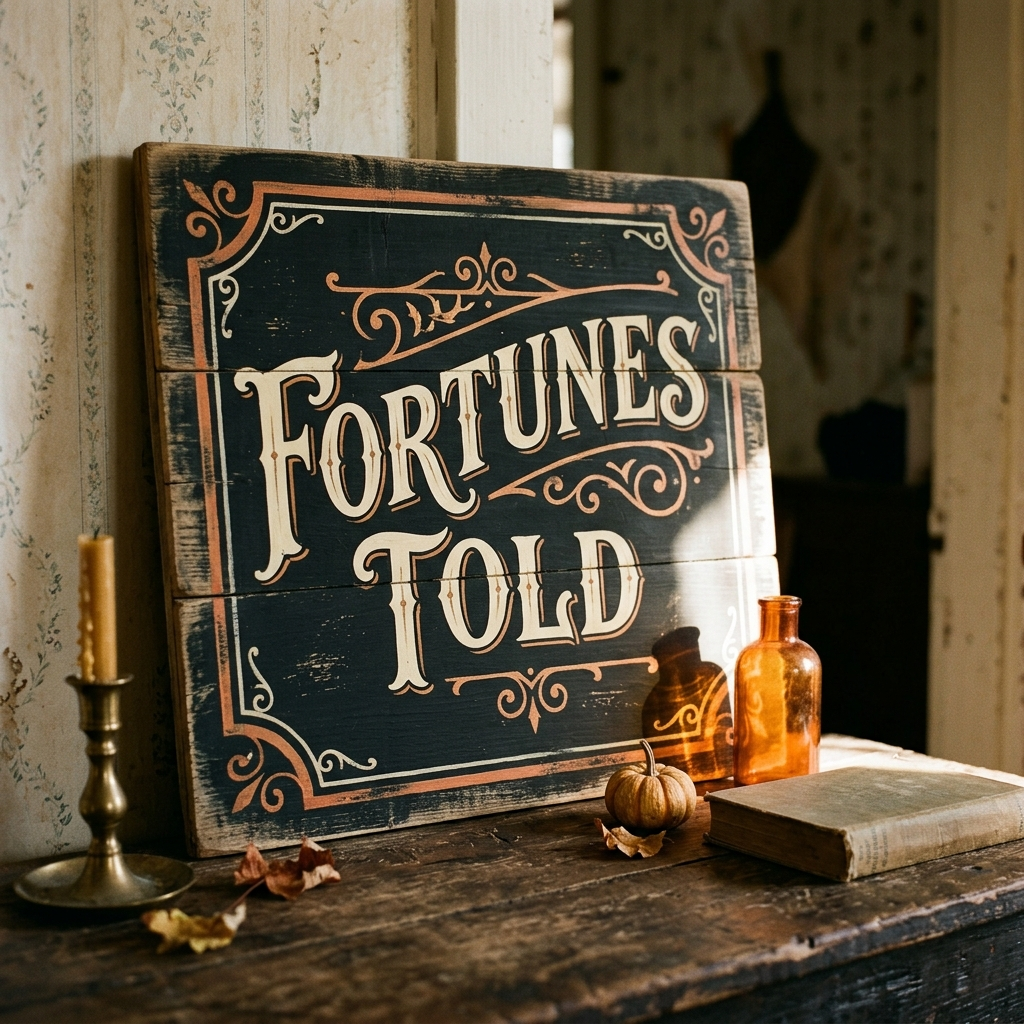
A handmade carnival sign can give a Halloween party an old-fashioned midway feel. I paint a phrase such as “Fortunes Told” or “Tickets” on cardboard or suitable scrap wood, using cream and black for a traditional finish.
I can add a few lightly distressed details after the paint has dried. Materials may cost around $5 if I use recycled cardboard or wood scraps, and the hands-on work takes about 45 minutes, plus drying time.
I choose lettering that suits the theme, such as serif or circus-inspired styles. For outdoor use, I protect the sign from moisture and secure it so it cannot blow over or become a trip hazard.
Best for: An entry table, drinks station, or carnival-themed party corner.
Thrift-Store Treasure
Secondhand pieces add variety because they rarely look exactly alike. I combine them with homemade decorations to create a collected appearance rather than a matching set.
Also read: 29 Halloween Backdrop Ideas for Parties & Photos (DIY Tips Included)
12. Brass Candlestick Collection
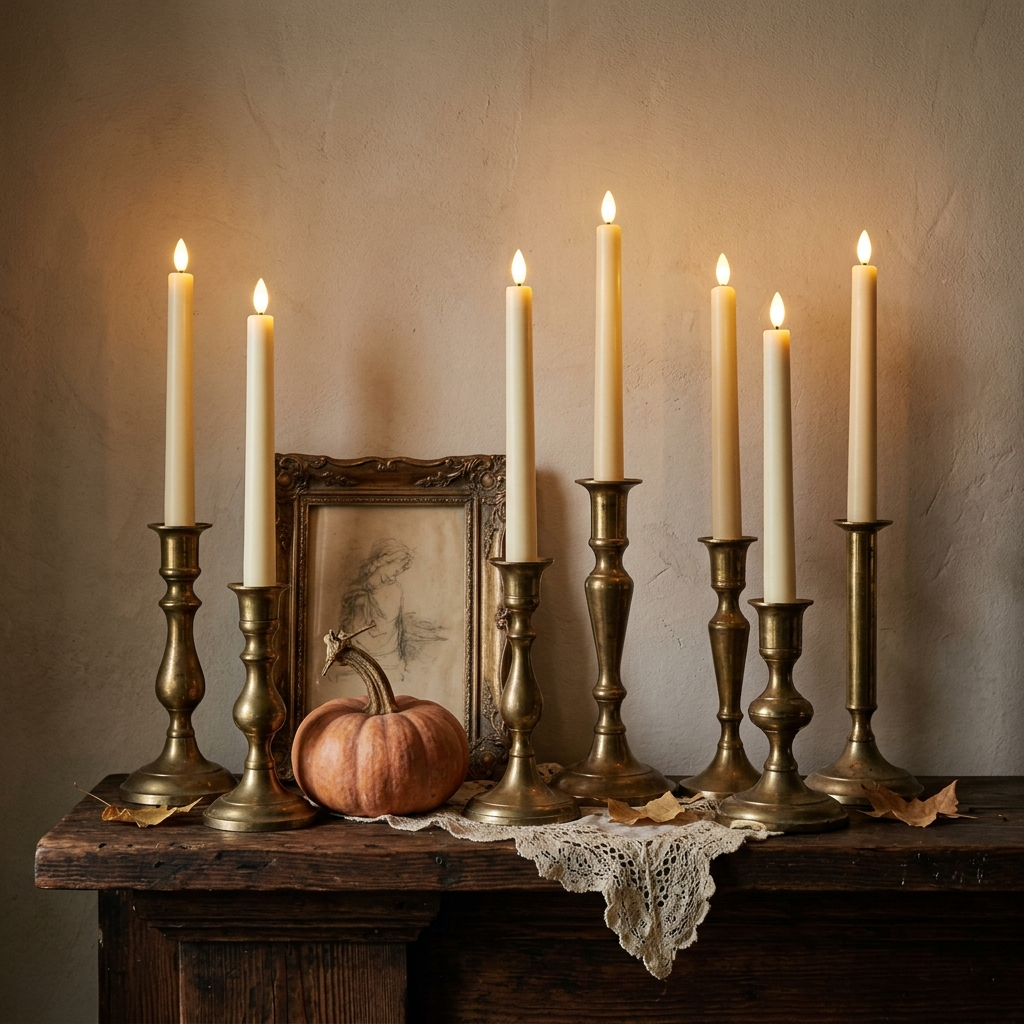
A group of mismatched brass or brass-colored candlesticks can add warm metallic detail to a mantel or dining table. I arrange five or six pieces of different heights and use cream-colored LED candles to complete the display.
Depending on local prices, five or six thrifted candlesticks might cost around $10–$24. Setting them out takes about ten minutes once the pieces have been cleaned and checked.
I make sure every candlestick stands securely on a level surface. I keep them away from table edges and use battery-operated candles around nearby paper, lace, and fabric decorations.
Best for: Adding a warm, collected look to a mantel or centerpiece.
13. Amber Glass Vignette

Amber and smoke-colored glassware works well with faded orange, cream, and dark wood. I group a few pieces on a tray and add a small stack of books or a dried botanical accent to create a simple arrangement.
A modest thrifted collection might cost around $8, depending on what I find. Arranging it takes about ten minutes.
I check each piece for cracks, chips, and sharp edges. Fragile glass belongs on a stable surface away from table edges and busy walkways, particularly when children are attending the party.
Best for: A side table or entryway that needs a little color and texture.
14. Doily Spider Webs
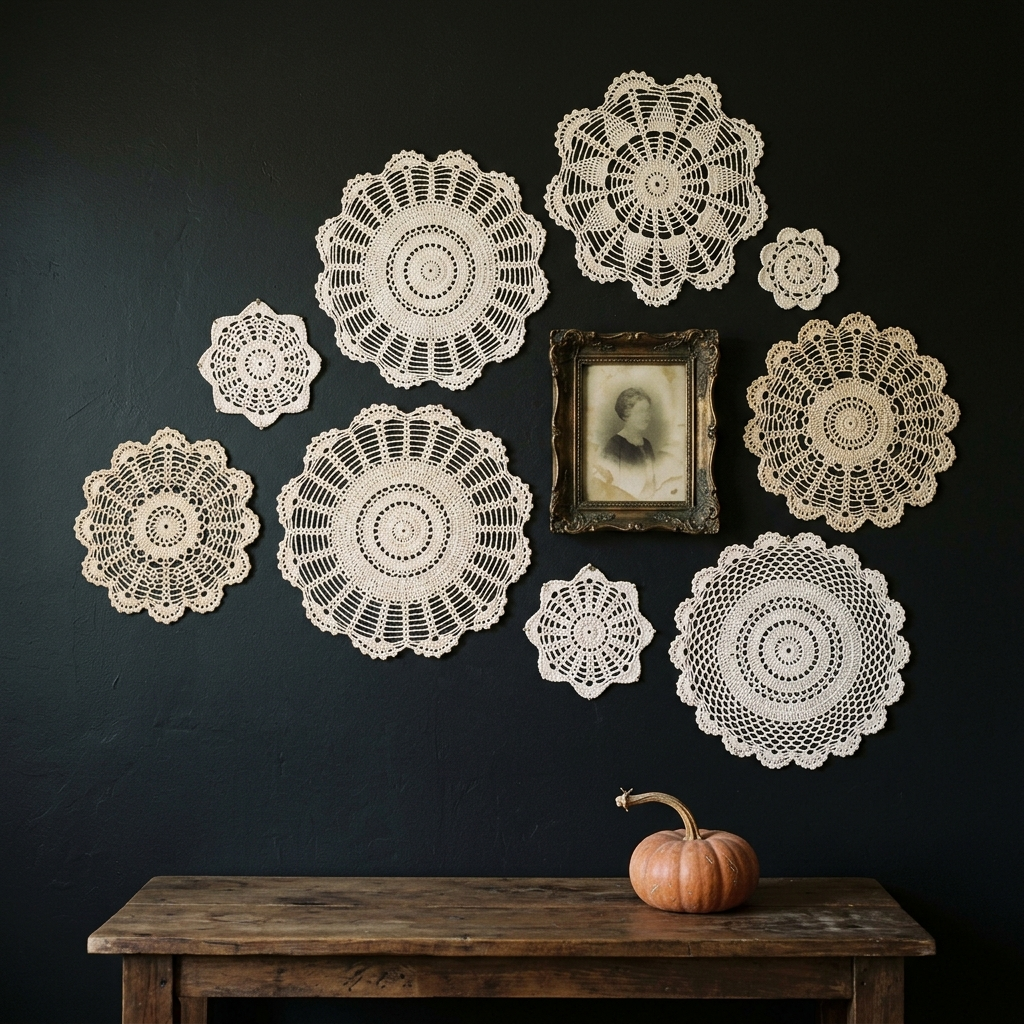
Crocheted doilies can create a delicate, web-like effect when placed against a dark wall. I choose white or cream pieces and arrange them around picture frames or across a designated display area.
Thrifted doilies may cost around $0.50–$1 each, depending on their condition and the shop. Eight pieces could cost approximately $4–$8, and arranging them takes around 15 minutes.
I attach them carefully so the crochet does not stretch or snag. Removable hooks or suitable wall-safe tape may work, depending on the surface and the item’s weight.
Best for: Adding delicate texture without relying on synthetic spiderweb decorations.
15. Old Book and Key Stack
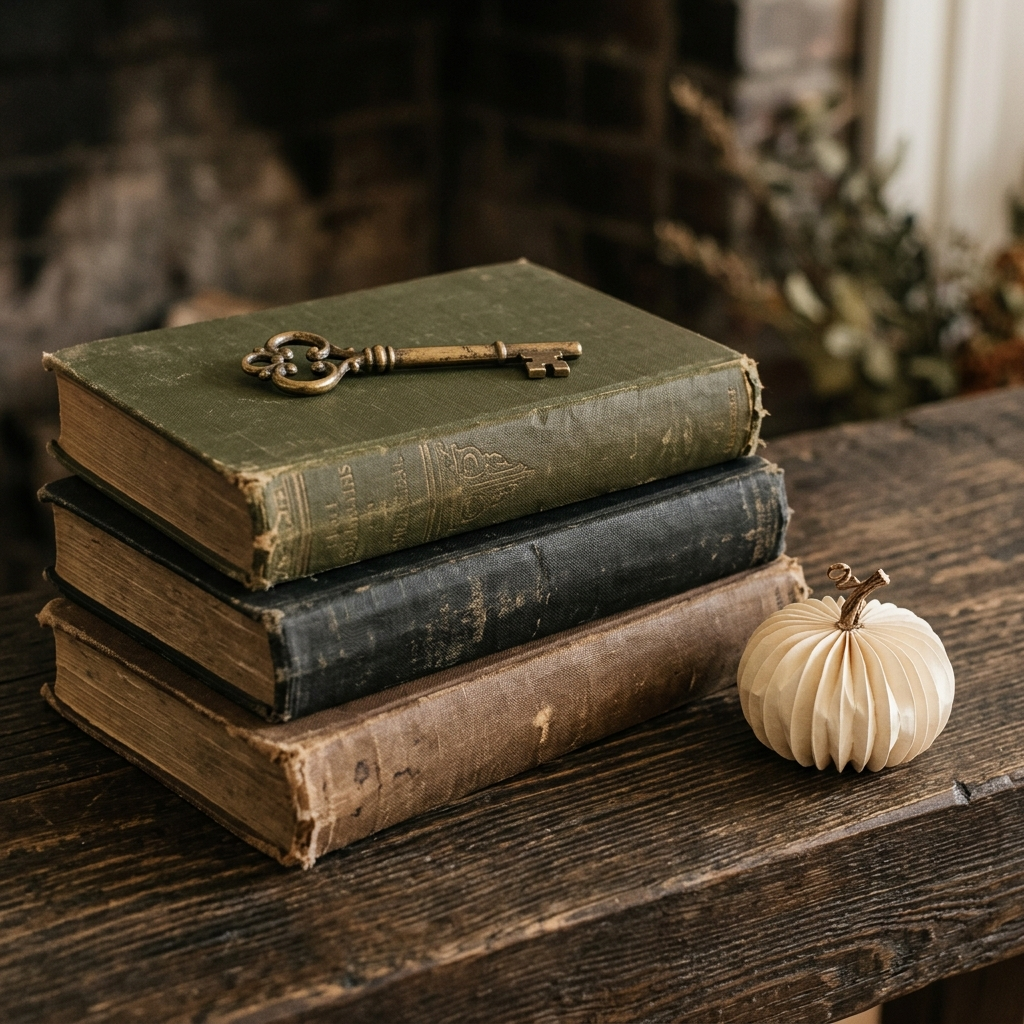
A few old hardcover books can add character to a mantel, shelf, or entry table. I look for cloth-covered books in dark or muted colors and stack three of them with a decorative key or another small accessory on top.
The books and an inexpensive accessory may cost around $6, depending on local thrift-store prices. Assembly takes about five minutes.
Before bringing secondhand books indoors, I check for dampness, mold, loose bindings, and unpleasant odors. I also keep small accessories away from young children and avoid placing a tall or unstable stack where it could fall.
Best for: Filling a small surface with a quiet, old-fashioned detail.
16. Sepia Photo Wall
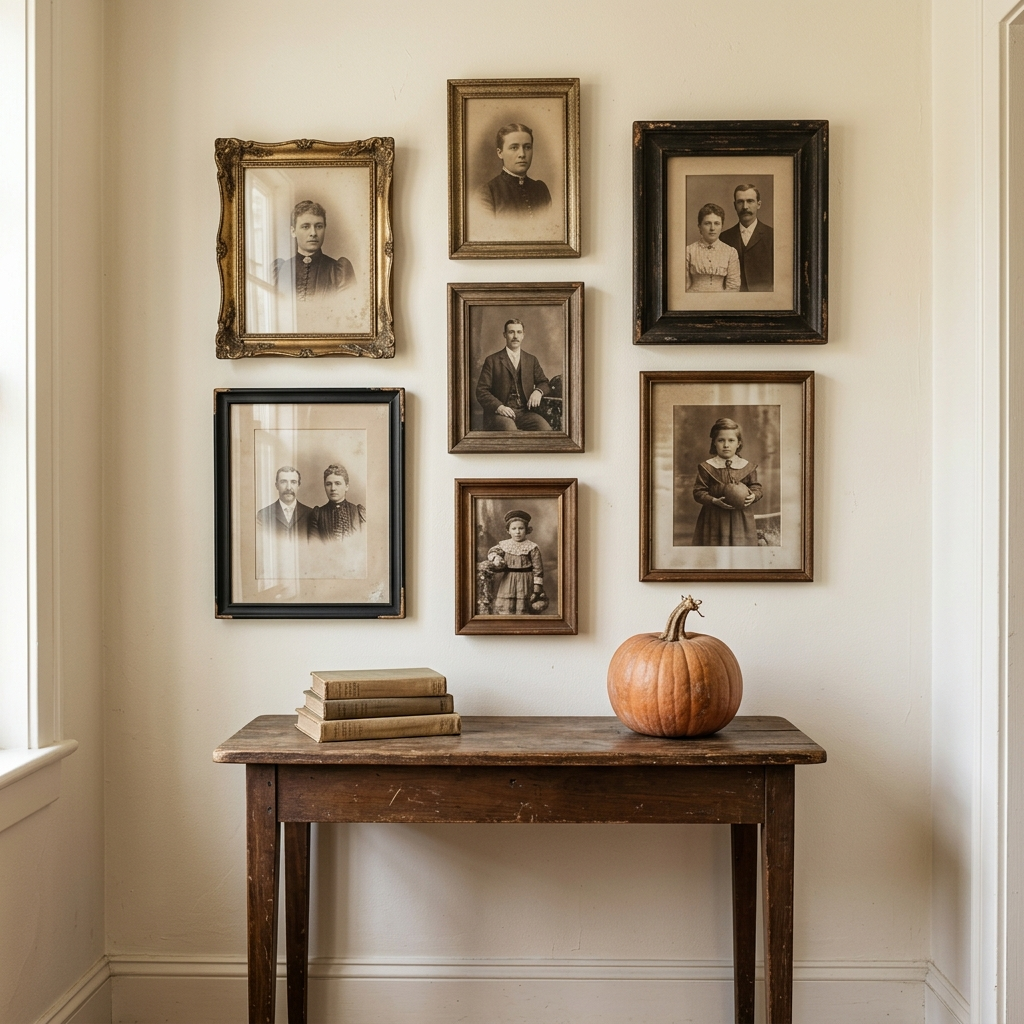
A sepia photo wall can make a Halloween display feel like a collection of old family portraits. I combine family photographs that I have permission to display with vintage portraits or illustrations that are in the public domain or appropriately licensed.
Thrifted frames help give the arrangement a varied appearance. A small collection might cost around $12 if I find affordable frames, but the price will change with frame size, print costs, and the number of photographs.
I arrange the frames before hanging them and use secure hardware suited to each frame’s weight and the wall surface. If children are attending, I choose portraits that feel playful or mysterious rather than disturbing.
Best for: An entryway or hallway where guests can pause to notice the details.
Pro Tip: Cooled, strongly brewed tea can give some papers and fabrics a warmer tone. I test a hidden area first because the color varies by material, then let the item dry fully before placing it with other decorations.
Finishing Touches
The final details help connect the different decorations. I focus on subtle changes in color and texture rather than adding more objects simply to fill empty space.
17. Faded Palette Paint Trick
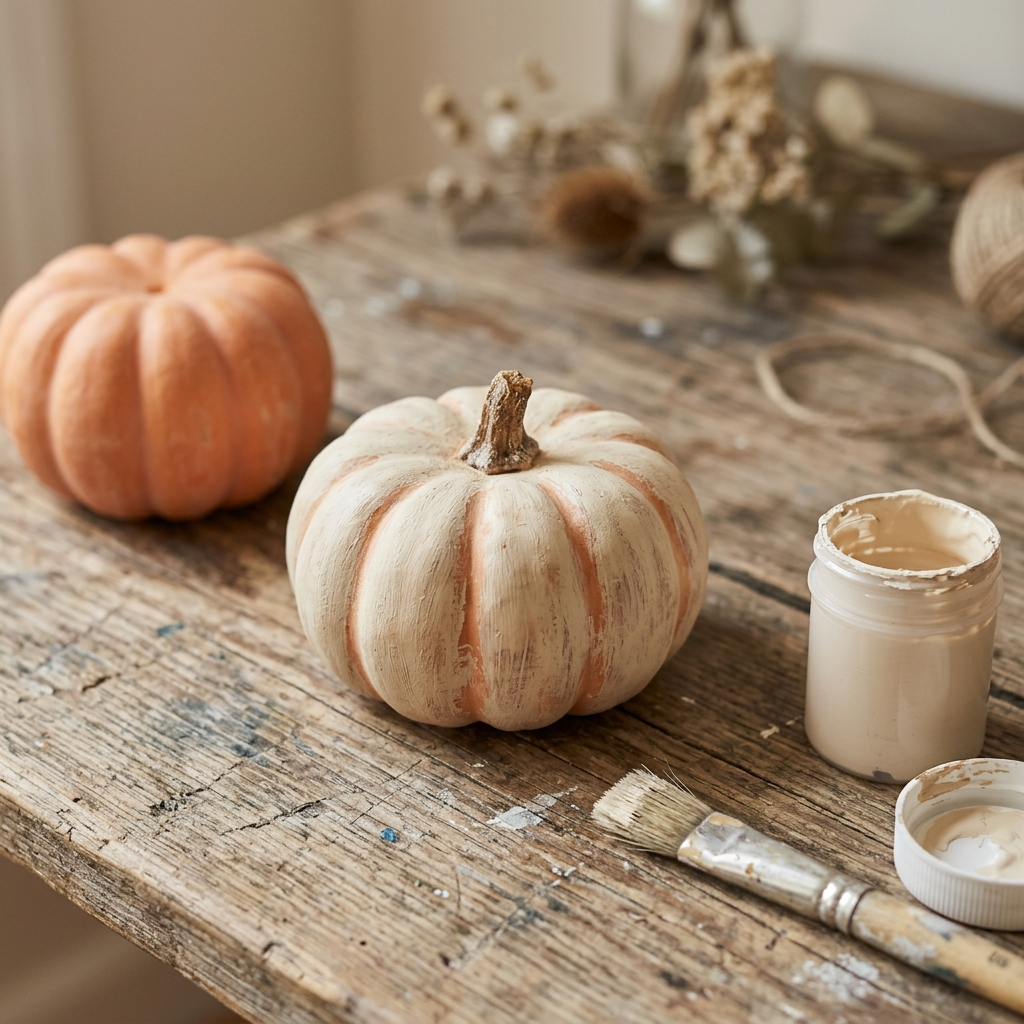
Sometimes a decoration has the right shape but a color that feels too bright for the rest of the display. A light layer of cream craft paint can soften the appearance of suitable foam pumpkins, wooden signs, and other craft items.
I apply a small amount with a nearly dry brush, allowing some of the original color to show through. I test an inconspicuous area first because paint can react differently with foam, plastic, wood, and coated surfaces.
A small amount of paint may cost around $2 if I already have a brush and the item to decorate. The work takes approximately 15 minutes, plus drying time.
I follow the paint manufacturer’s instructions and allow the finish to dry fully before putting the item on display.
Best for: Adapting decorations I already own to a softer, vintage-inspired color scheme.
18. Cheesecloth and Lace Layering
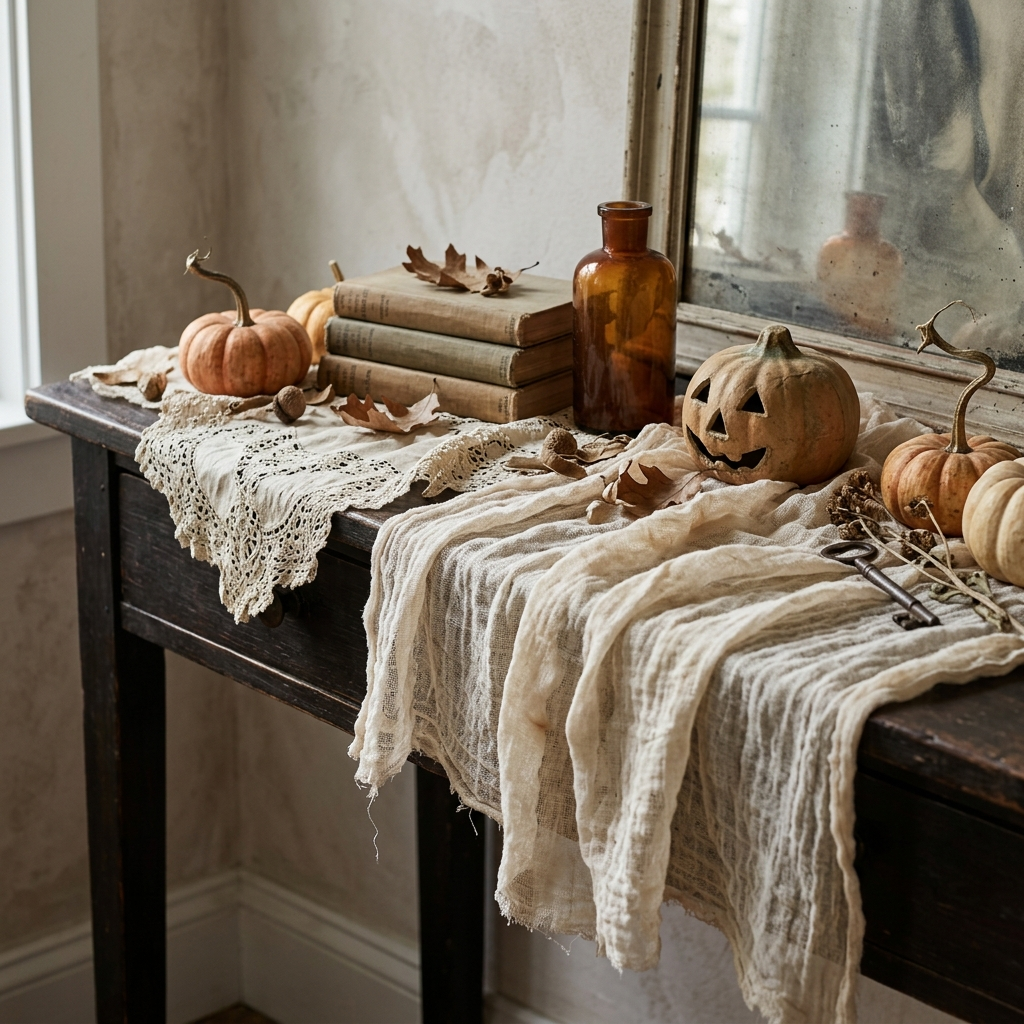
Cheesecloth and lace add softness to a display filled with books, glass, and framed artwork. I drape a small amount over the edge of a table or place lace beneath a tray of decorative objects.
For a warmer, aged tone, I can soak suitable fabric in cooled tea for around 10–20 minutes, then remove it and let it air-dry. The final color depends on the fabric and tea strength, so I test a small piece before treating a larger one.
A few fabric remnants might cost around $5, depending on their size and source. Arranging them takes about ten minutes, with extra time for drying if I stain them.
I keep all fabric away from candles, hot bulbs, heaters, and electrical equipment.
Best for: Adding an aged, layered texture to a table or mantel.
19. Dried Orange and Corn Garland
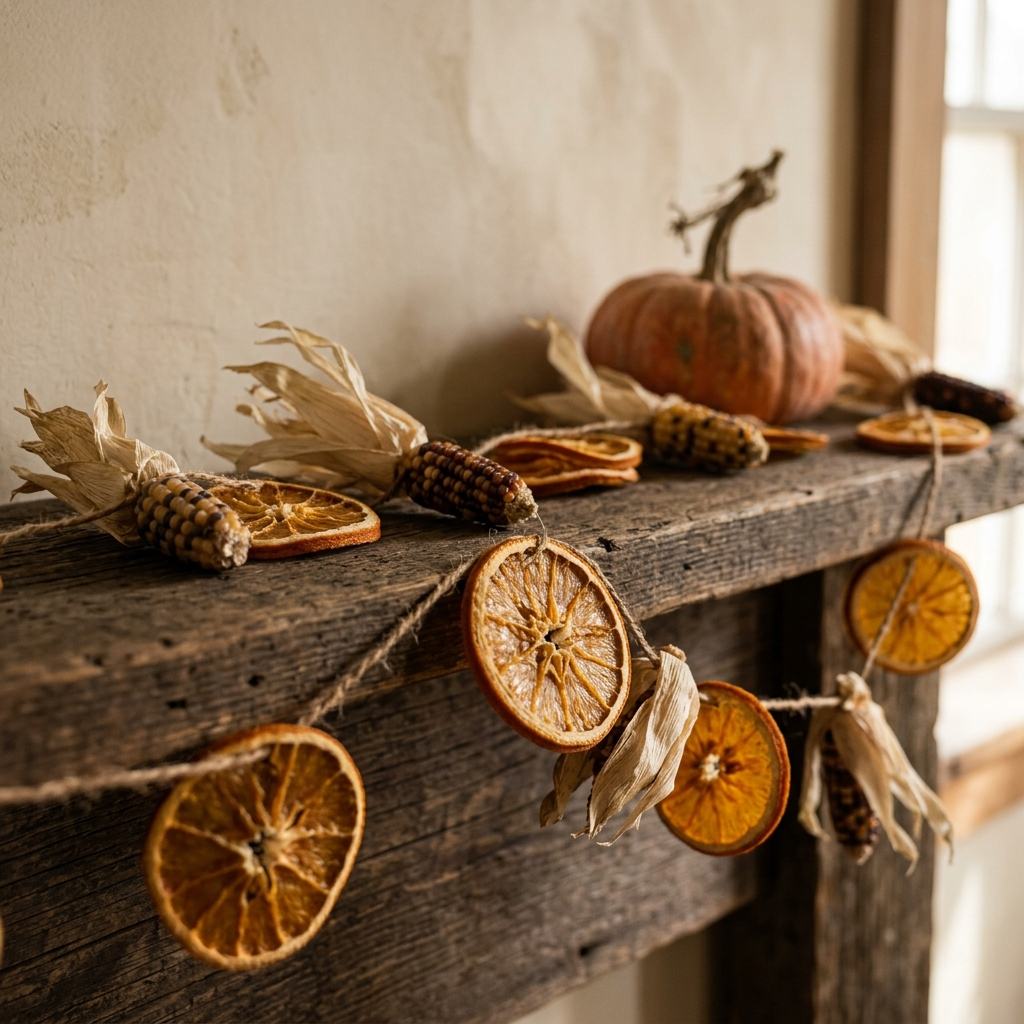
Dried orange slices add natural color to a rustic Halloween display. I slice oranges evenly, arrange the slices in a single layer on a baking tray, and dry them in an oven at a low temperature, around 200°F, checking them regularly.
Drying may take two hours or longer. Slice thickness, fruit moisture, and oven performance all affect the time, so I monitor the oven throughout the process rather than relying on a fixed finish time.
Once the slices are completely dry and cool, I thread them onto twine and add decorative dried corn if I want more texture. The project may cost around $6, depending on the fruit and other materials.
I let the garland cool and dry fully before storing it. Any remaining moisture can encourage mold, so I check the slices before packing them away. The finished garland stays away from flames, hot lights, and damp outdoor conditions.
Best for: A rustic seasonal display that can transition into late autumn decorating.
Thrifted vs. DIY Reproduction vs. New Retro-Style
I compare decorating options by their cost, appearance, and the time they require. These price ranges are approximate and can vary considerably by location and item quality.
| Source | Typical Cost | Appearance | Effort |
|---|---|---|---|
| Thrift-store finds | Around $1–$6 per piece for many small accessories | Older pieces with individual wear and character | Low to moderate; finding suitable pieces takes time |
| DIY reproductions | Around $2–$8 per small project when basic tools are already available | Handmade vintage-inspired designs | Moderate; often 30–60 minutes of hands-on work |
| New retro-style decor | Around $8–$25 per piece | Newly made items designed to look nostalgic | Low; usually ready to display |
| Genuine vintage or antique pieces | Often $30–$200 or more, with wide variation | Original older items, depending on age and condition | Low to moderate; sourcing and checking authenticity may take time |
The price of a genuine vintage or antique item depends on its age, condition, rarity, provenance, and seller. An item that looks old is not necessarily an antique, and a newly manufactured reproduction can still work well for this style.
My practical approach is to mix secondhand accessories with handmade paper decorations. I can use thrifted glassware and frames for variety, then make the pumpkins, moons, and banners myself. This gives me more control over the overall look without requiring an expensive collection.
Common Vintage Decor Mistakes
- Using a bright color that distracts from the rest: A neon decoration may stand out in a muted display. Rather than throwing it away, I can move it to another area or soften its appearance if the material is suitable for painting.
- Relying too heavily on glossy plastic: Some modern pieces can still work, especially when they have a traditional shape. I balance shiny finishes with matte paper, fabric, glass, and metal rather than replacing every modern decoration.
- Choosing lettering that clashes with the theme: Very modern fonts may look different from traditional carnival or postcard lettering. I choose serif, hand-painted, or circus-inspired styles when they suit the design.
- Placing real flames near paper and fabric: Crepe streamers, cardstock, cheesecloth, and lace are flammable. I use battery-operated LED candles and keep decorations away from open flames and heat sources.
- Crowding every surface: Too many small decorations can make the room feel cluttered. I group related pieces on a mantel, entry table, or party table and leave some open space around them.
- Ignoring stability and attachment: Lightweight decor can still fall, snag clothing, or create a trip hazard. I secure wall displays appropriately, stabilize freestanding backdrops, and keep exits and walkways clear.
Vintage Halloween Decorations FAQ
What Is the Vintage Halloween Aesthetic?
The vintage Halloween aesthetic draws on traditional Halloween illustrations and old-fashioned party decor. Common elements include faded orange, black, cream, paper pumpkins, crepe streamers, black cats, crescent moons, and retro lettering.
The look can be playful or slightly eerie, depending on the artwork and lighting. I can create it with modern craft supplies and secondhand accessories without buying genuine antiques.
How Do You Make Paper Look Old for Halloween?
I brush or dab a little cooled, strong coffee or tea onto suitable paper, adding extra color near the edges if I want a more aged appearance. I blot excess liquid and let the paper dry flat and completely before hanging it.
The result varies with the paper and the amount of liquid used. I avoid oven-drying paper because it can scorch or catch fire.
How Can You Decorate for Vintage Halloween on a Small Budget?
I start with a small selection of decorations instead of attempting all 19 projects. A paper pumpkin, a few printed cutouts, crepe streamers, and a handmade banner may fit within a $15 starter budget if I already have some supplies.
For a larger display, a budget of around $35–$60 may cover a selected mix of paper decorations and secondhand accessories. The total depends on local prices, printing costs, and what I already own.
Where Can You Find Vintage Halloween Printables?
I look for early Halloween postcards and illustrations in reputable library archives and public-domain image collections. Before printing or reproducing a design, I check whether it is actually in the public domain or covered by a suitable license.
Cardstock works well for many cutouts, banners, and wall decorations. I can use the artwork as printed or add a light aged finish once I have confirmed the usage terms.
What Colors Work Best for Vintage Halloween Decor?
Faded orange, black, and cream make a useful starting palette. Muted gold, rust, brown, and dusty teal can add variety, especially in a carnival-inspired display.
I repeat a few colors across the room rather than trying to match every piece exactly. This helps thrifted objects and handmade decorations look like part of the same arrangement.
How Do You Make a Paper Moon Backdrop?
I draw a crescent moon on sturdy cardboard, cut it out, and paint it cream. After the paint dries, I add a few gray details and position the moon against a dark background.
A freestanding support is a practical option because it avoids overhead attachment. If I hang the moon, I use hardware suited to the wall or ceiling surface and the weight of the finished decoration.
Are Honeycomb Paper Decorations Reusable?
Many honeycomb decorations can be folded flat and stored for another season if their design includes a reusable closure. I follow the manufacturer’s instructions and avoid forcing the folds, which can tear the paper.
I store paper fans, cutouts, and banners flat in a dry place. Glassware and metal accessories can usually be reused for years when kept clean, dry, and protected from damage.
How Can Renters Hang Halloween Decorations Without Damaging Walls?
I use freestanding decorations and tabletop arrangements wherever possible. For lightweight paper pieces, removable hooks or wall-safe adhesive may work, but I check the product instructions and test an inconspicuous area first.
Adhesives can still damage some paint, wallpaper, or delicate surfaces. I avoid permanent fixtures when my rental agreement does not allow them and keep decorations clear of doors, exits, smoke alarms, and sprinklers.
How Can You Make Vintage Halloween Decor Safer for Children and Pets?
I choose sturdy displays, keep small decorative accessories out of reach, and avoid placing fragile glassware near play areas. I also make sure paper bags, garlands, and other lightweight decorations cannot fall into walking paths.
Battery-operated LED candles are a safer choice around paper and fabric than open flames. I keep cords, loose string, sharp tools, and small parts secured, and I avoid using fragile decorations where pets might knock them over or chew them.
How Do You Store Vintage Halloween Decorations for Next Year?
I store paper decorations flat in a dry container and fold reusable honeycomb ornaments according to their instructions. I keep fabric clean and completely dry before packing it away.
Glassware, frames, and other fragile pieces need enough padding to prevent chips and breakage. I also check dried orange garlands for moisture or mold before storing them and discard any food-based decorations that show signs of spoilage.
Read this next: 16 Scary Good Halloween Outdoor Decoration Ideas
Conclusion
A vintage Halloween display does not require expensive antiques or decorations on every surface. A few paper pumpkins, a handmade banner, traditional silhouettes, and carefully chosen thrift-store finds can create a nostalgic atmosphere without stretching the budget.
I would start with two or three projects, build around a consistent color palette, and add more pieces only when they improve the display. After Halloween, I store reusable decorations properly so I can bring them out again next season.



2 Comments