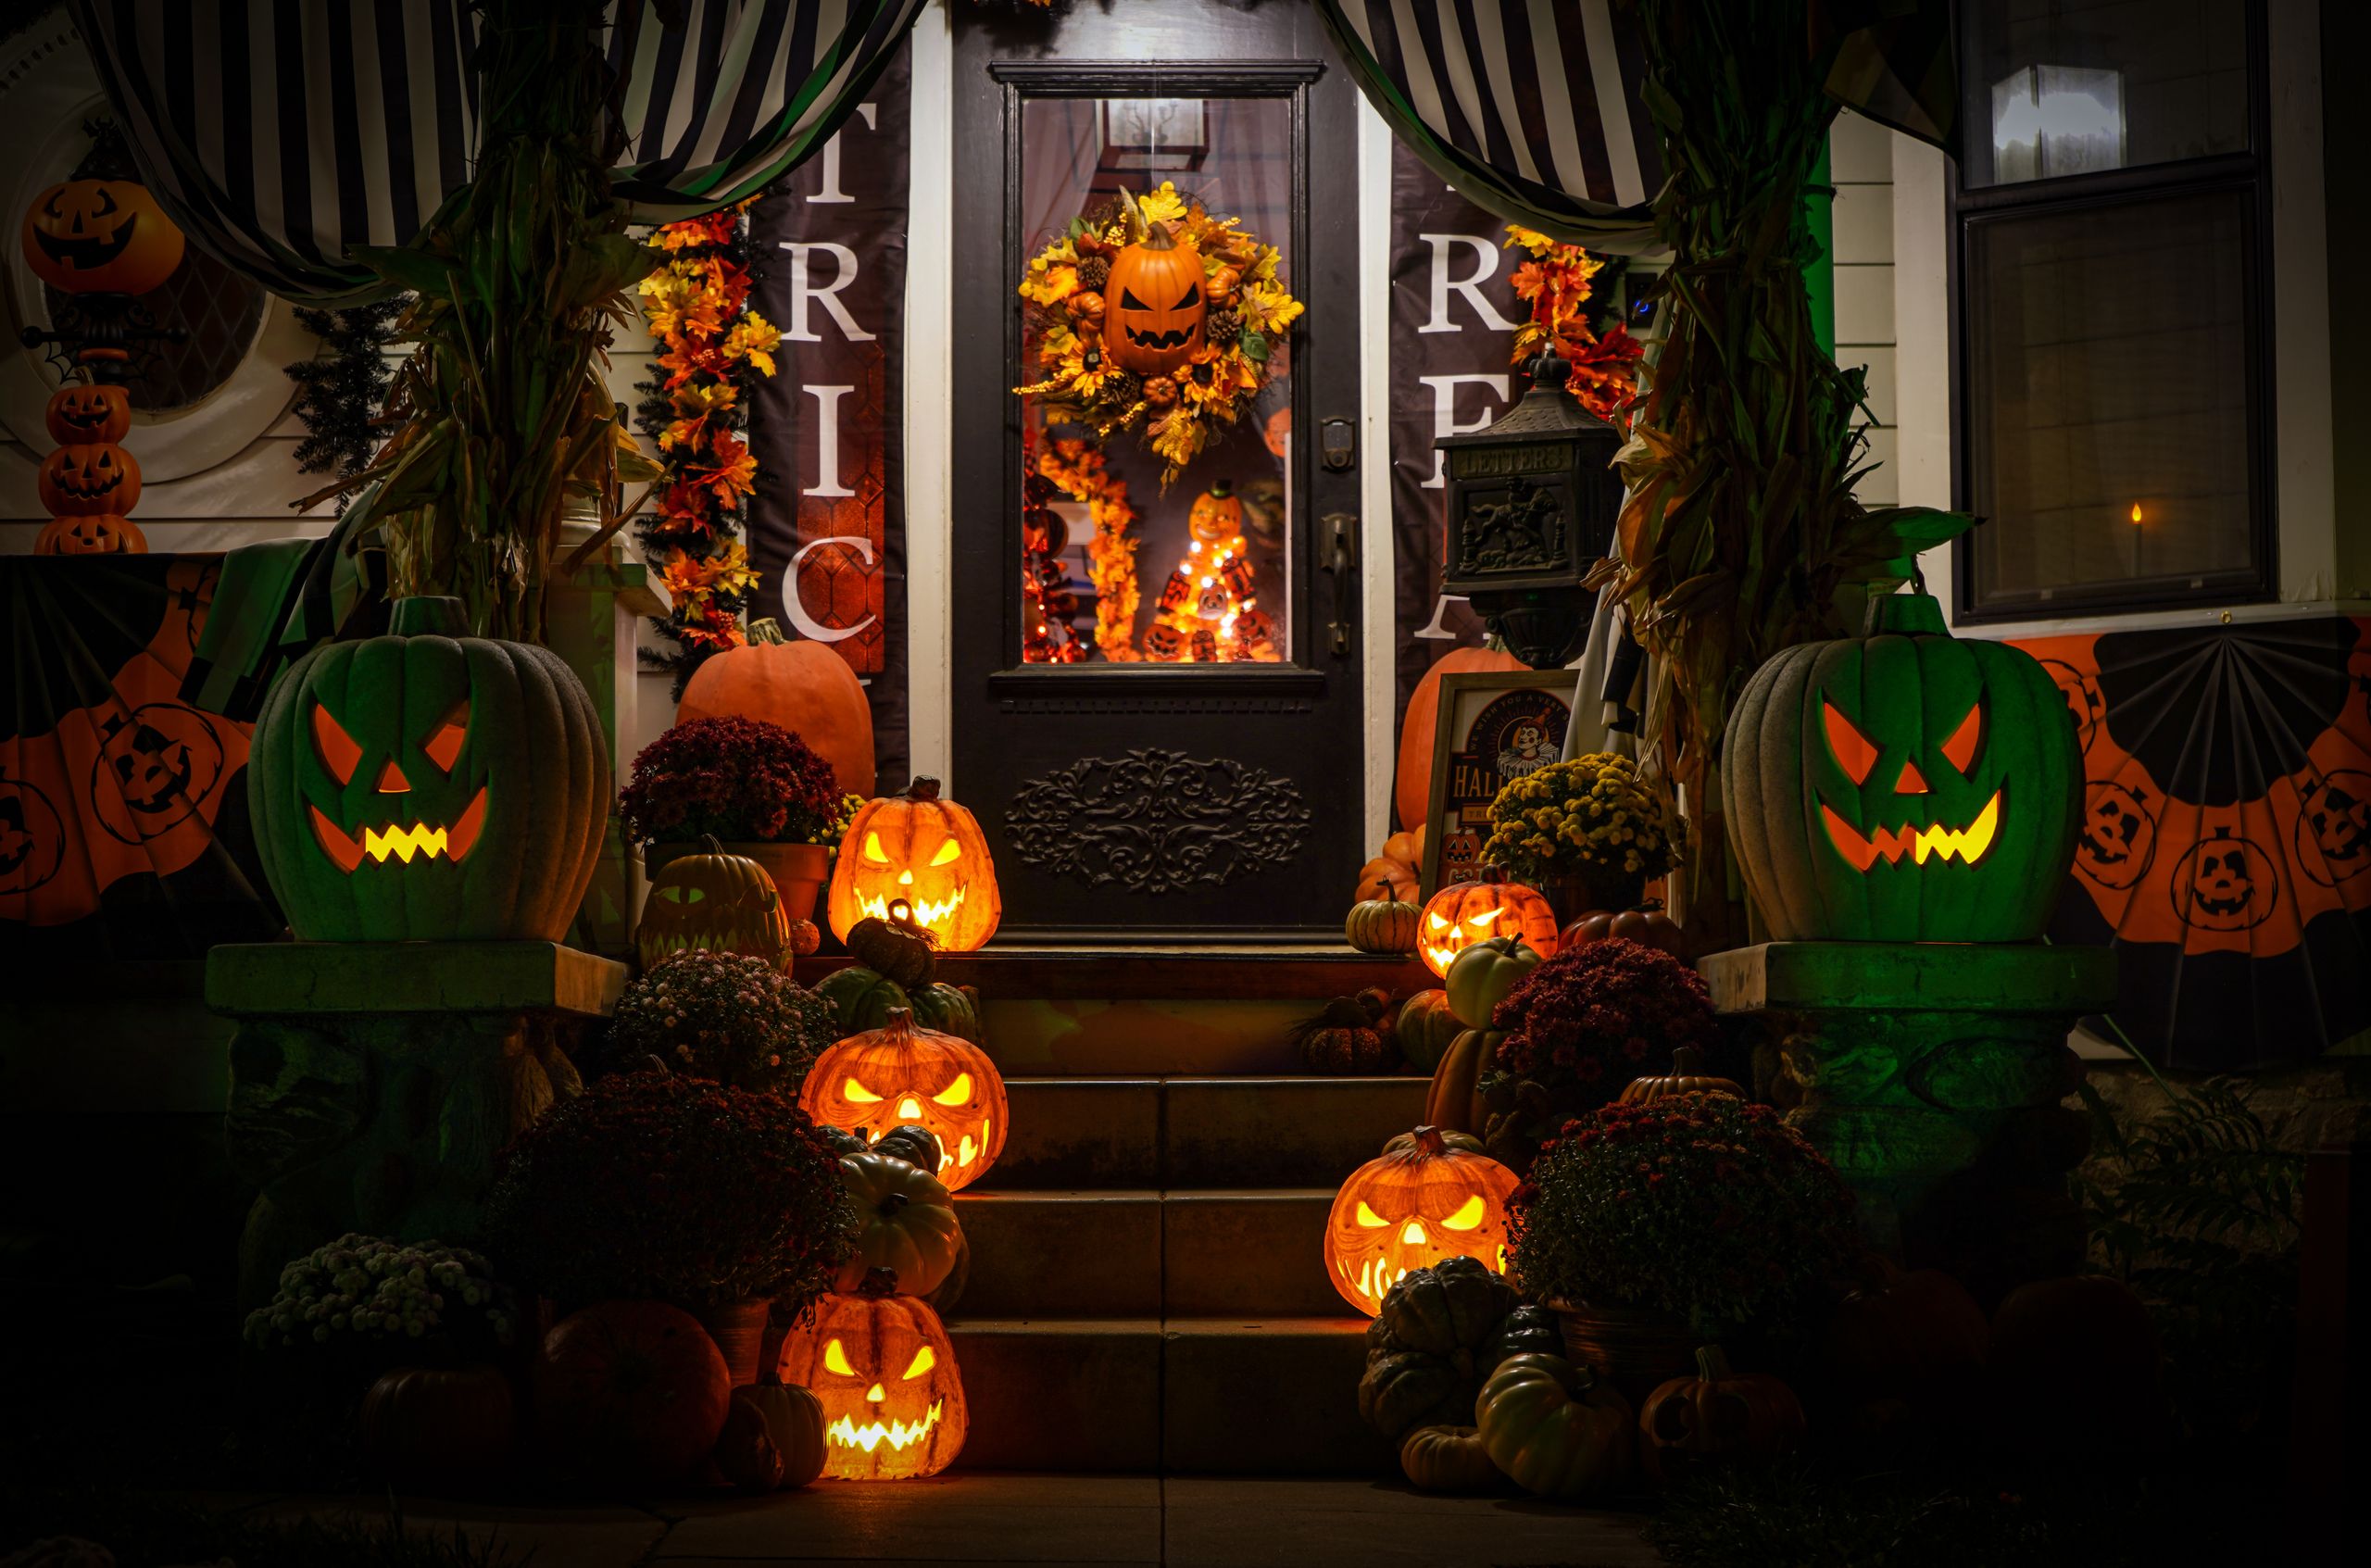
21 Halloween Porch Lighting Ideas
The first time I got my halloween porch lighting ideas right, a neighbor stopped on the sidewalk just to say how warm our house looked. Until then I had relied on a single porch bulb, and every pumpkin and prop disappeared the moment the sun went down.
How I picked and tested these ideas: I tried each one on my own porch over three Octobers, checked how it looked from the sidewalk at night, and kept only the setups that survived wind, rain, and trick-or-treat foot traffic. Every idea below includes cost, time, and the honest downside I found.
Key Takeaways
- Light the path first: safety matters more than spooky effects.
- Warm light flatters pumpkins; colored light is best used as an accent, not everywhere.
- Battery and solar lights beat trailing extension cords across a walkway.
- Test every display from the sidewalk after dark before Halloween night.
My Favorite Halloween Porch Lighting Ideas
1. Glowing Jack-o’-Lantern Row
I carve three pumpkins with different faces, place a battery tea light inside each, and line them along the porch rail. The row glows as one display, and the different faces give trick-or-treaters something to look at while they wait at the door.
My neighbors’ children now count the faces every year and argue about which one is scariest. The downside is carving time: three pumpkins take me over an hour, so I carve one per evening in the week before Halloween rather than all at once.

Pro Tip: Use battery tea lights, never real candles, in pumpkins near a wooden rail or dry leaves.
Cost: $12-$20 for pumpkins and lights / 60-90 minutes / Easy
2. Pumpkin Lantern String Lights
I hang a strand of pumpkin-shaped string lights along the porch beam and let them drape slightly between hooks. They give a soft orange wash over the whole entrance, and they look charming even before the carved pumpkins are lit.
These were the first lights I ever bought for Halloween, and they still work five years later. The downside is that cheap strands tangle badly in storage, so I wind mine around a flat piece of cardboard every November.

Pro Tip: Choose warm orange bulbs over bright white ones for a pumpkin glow rather than a stark glare.
Cost: $10-$16 / 20 minutes / Easy
3. Lantern-Lined Porch Steps
I place one glowing lantern on every other step, alternating sides, so the staircase itself becomes the decoration. The light pools on each tread, which also makes the steps much safer for visitors after dark.
A delivery driver once told me our steps were the easiest to see on the whole street, which felt like a real compliment. The downside is that lanterns on steps get kicked, so I use heavy metal ones and set them tight against the wall.

Pro Tip: Keep the middle of each step clear so visitors always have a safe place to put their feet.
Cost: $20-$35 for lanterns / 25 minutes / Easy
4. Candlelit Pumpkin Still Life
I group a pumpkin, two pillar candles in glass hurricanes, and a few autumn leaves on a small side table by the door. The glass protects the flame from wind, and the arrangement looks elegant rather than cluttered.
This is my favorite setup for a quiet evening when we are not expecting trick-or-treaters. The downside is real flame outdoors: I never leave these burning unattended, and I swap to battery candles on busy nights.

Pro Tip: Glass hurricanes are essential outdoors; an open flame blows out or, worse, tips over.
Cost: $15-$25 / 15 minutes / Easy
5. Witch’s Lantern Walk
I place a tall lantern at each end of the walkway and a smaller one beside the door, creating a little path of light from the gate to the porch. A witch figure beside the middle lantern finishes the scene without blocking the path.
Children love walking the lit path, and it photographs beautifully at dusk. The downside is that tall lanterns topple in strong wind, so I weigh mine down with a bag of stones hidden inside the base.

Pro Tip: Space lanterns about six feet apart so the path reads as a line, not a cluster.
Cost: $25-$40 / 30 minutes / Easy
6. Close-Up Lantern Glow
I hang one large statement lantern beside the front door at eye level, where its glow catches every visitor. A single strong lantern beats five small ones here, because the eye needs one focal point before it takes in the rest of the porch.
Guests always comment on this lantern first, even when the rest of the porch is fully decorated. The downside is that a hanging lantern swings in wind and throws moving shadows, so I secure it with a short chain and a wall hook.

Pro Tip: Hang the lantern at about five feet high so the light falls on faces, not just the floor.
Cost: $15-$30 / 15 minutes / Easy
7. Carve and Light Together
I carve the pumpkin in the afternoon, scoop it clean, and drop in a battery light before dusk so it is glowing when the first children arrive. Carving with the light in mind changes my designs: simple bold faces glow far better than fiddly details.
My son’s first carved face was lopsided, and it glowed so cheerfully that it became our favorite. The downside is that carved pumpkins soften after three or four days, so I carve no earlier than October 28th for Halloween night.

Pro Tip: Cut the opening in the bottom, not the top, so the light sits flat and the lid never singes.
Cost: $5-$10 per pumpkin / 45 minutes / Easy
Related article: Halloween Porch Decor Ideas
8. Foggy Haunted Glow
On still nights I add a small fog machine behind the pumpkins so the light spreads through the mist and the porch looks genuinely haunted. The effect needs very little fog; a short burst every few minutes is far spookier than a constant cloud.
The first foggy night, a neighbor genuinely thought our house had caught fire and knocked to check, which taught me to warn the street. The downside is that fog machines need power and fluid, so I only run this on Halloween night itself.

Pro Tip: Point the fog low and behind the lights, never straight at the walkway where it hides steps.
Cost: $30-$50 for machine and fluid / 20 minutes / Medium
9. Grim Reaper Pathway
I stand a tall grim figure at the corner of the porch with a lantern at its feet, so visitors see a silhouette first and the lit face second. The drama comes from the contrast: everything else stays dim while this one figure glows.
This setup made our shy neighbor jump the first year, and she still laughs about it. The downside is that a tall figure can frighten small children, so on early trick-or-treat hours I turn its lantern down low and keep it friendly.

Pro Tip: Anchor tall figures with tent pegs or a sandbag so a gust cannot topple them onto the path.
Cost: $25-$45 / 30 minutes / Medium
10. Skeleton Crew on the Stairs
I pose two skeletons on the porch stairs, one seated and one leaning on the rail, with a small uplight at their feet. Uplighting makes bones look dramatic, and the skeletons become the first thing visitors notice after dark.
The seated skeleton wears my old scarf every year, a detail the neighborhood kids now look for. The downside is that skeletons fade and crack outdoors, so I bring mine inside on rainy nights and at the end of the season.

Pro Tip: Use a warm uplight, not a colored one, so the skeletons look eerie rather than cartoonish.
Cost: $20-$40 / 30 minutes / Easy
11. Skull and Cobweb Spotlight
I mount a small spotlight above a skull-and-cobweb corner display and let the rest of the porch stay dark. One bright pool of light on one scary detail is more effective than flooding the whole porch, and it saves electricity too.
Visitors always stop at this corner, which tells me the spotlight is doing its job. The downside is glare: a badly aimed spotlight shines straight into visitors’ eyes, so I angle mine downward at about 45 degrees.

Pro Tip: Test the angle from the sidewalk at night, not from the porch during the day.
Cost: $12-$20 for a spotlight / 20 minutes / Easy
12. Skeleton by the Door
I place a skeleton beside the front door, leaning casually against the wall, with a lantern at its feet. It greets every visitor, and because it is lit from below, its grin looks far spookier than it does in daylight.
Our postman now waves at the skeleton every morning, which has become a small October joke. The downside is that door-side props get bumped by bags and elbows, so I tuck mine behind the door swing where it cannot be knocked over.

Pro Tip: Keep at least three feet of clear space around the door so visitors can enter easily.
Cost: $15-$30 / 15 minutes / Easy
13. Spooky Bucket Glow
I set a glowing pumpkin bucket on the porch table as a candy station, with a battery light inside so the bucket itself glows. Children reach into a lit bucket rather than a dark one, which is both friendlier and easier for parents to supervise.
This was my solution to children being nervous about reaching into a dark container, and it worked instantly. The downside is that the bucket empties fast, so I keep a refill bowl just inside the door and top it up every 20 minutes.

Pro Tip: Use a light-colored bucket so the glow shows through, and skip lids that block the light.
Cost: $8-$15 / 10 minutes / Easy
14. Glowing Treasure Chest Corner
I set a small chest spilling with gold coins and a string of fairy lights on the porch bench, guarded by a skeleton figure. The fairy lights inside the chest make it look like treasure glowing in the dark, and children love peeking inside.
This idea came from a pirate-themed year, and it was so popular I kept it even after the theme changed. The downside is that small coins scatter everywhere, so I glue most of them down and leave only a few loose ones on top.

Pro Tip: Battery fairy lights with a timer save you from remembering to switch them off nightly.
Cost: $15-$25 / 25 minutes / Easy
Also read: DIY Halloween Front Porch Ideas
15. String Lights on the Windows
I frame the two front windows with warm string lights, which makes the whole house glow from the street. Window lights are the easiest high-impact change I know, because they need no props and work even if the porch itself is small.
From the end of our street, our windows are now the ones people point at, which still surprises me. The downside is hanging them: I use removable clips rather than nails, and I hang them in daylight the weekend before Halloween.

Pro Tip: Run the wire along the frame, not across the glass, so the windows still open.
Cost: $12-$20 / 30 minutes / Easy
16. Porch and Gazebo String Lights
I wrap string lights around the porch posts and across the beam, then add a second strand along the railing for depth. Two layers of light make the porch look full rather than flat, and the railing strand guides the eye toward the door.
The double layer was an accident the year I bought too many lights, and it turned out to be my best-looking porch yet. The downside is power: two strands plus lanterns can overload one outdoor socket, so I split them across two sockets.

Pro Tip: Use outdoor-rated lights only, and check the rating on the plug before buying.
Cost: $20-$35 / 40 minutes / Easy
17. Warm Lamp Over the Door
I upgraded the single bulb over our door to a warm LED and added a small lantern on the step below it. The layered light flatters the door color, shows the house number clearly, and makes the entrance feel welcoming rather than spooky.
This simple change made our porch feel finished even on nights when I skipped the big decorations. The downside is that warm bulbs attract moths in early October, so I switch the lantern off on nights when we are not expecting visitors.

Pro Tip: Choose 2700K warm white for a welcoming glow; cooler bulbs look harsh on a porch.
Cost: $8-$15 / 10 minutes / Easy
18. Modern Entrance Glow
I use two matching wall lights flanking the door plus a low uplight on a pumpkin display, which gives a modern porch a clean, symmetrical glow. Symmetry suits newer houses, and the uplight adds just enough Halloween drama without clutter.
When we updated our porch, this layout was the one that finally made it look designed rather than decorated. The downside is cost: matching wall lights are pricier than a single strand, so I bought them once and reuse them every year.

Pro Tip: Keep both wall lights the same brightness or the symmetry falls apart at night.
Cost: $40-$70 / 45 minutes / Medium
19. Wooden Door Lantern Light
I hang a lantern on a hook beside our wooden door and set a second one on the ground, framing the entrance in warm light. The wood grain glows beautifully under warm light, and the pair of lanterns makes even a plain door look intentional.
This is the setup I recommend to friends with older houses, because it suits wood and brick so well. The downside is soot on glass if you use real candles, so I use battery candles and wipe the glass once a week.

Pro Tip: Match the lantern finish to your door hardware for a pulled-together look.
Cost: $20-$35 / 15 minutes / Easy
20. Autumn Porch Lamp Post
I wrap the porch lamp post in orange fairy lights and place pumpkins at its base, turning an ordinary post into the centerpiece. The post light does the heavy lifting, and the fairy lights add the Halloween color without any extra fixtures.
Our lamp post is the first thing visitors see from the road, so dressing it changed the whole approach to the house. The downside is that fairy lights on a post tangle in wind, so I wrap them tightly and tape the ends down.

Pro Tip: Start wrapping at the bottom and work upward so the wire end finishes near the lamp.
Cost: $15-$25 / 30 minutes / Easy
21. Full Brick Porch Display
I combine everything on our brick porch: pumpkins on the steps, webs on the rail, lanterns by the door, and string lights overhead. Brick takes warm light beautifully, and the full display reads as one welcoming scene rather than a pile of props.
This is my Halloween night showpiece, and it is the version I photograph every year. The downside is setup time: the full display takes nearly two hours, so I build it over two evenings and never on Halloween day itself.

Pro Tip: Step back to the sidewalk after each layer to check the balance before adding more.
Cost: $40-$60 total / 2 hours / Medium
Comparison Table
| Idea | Best For | Budget | Setup Time |
|---|---|---|---|
| Glowing Jack-o’-Lantern Row | Pumpkin lovers | $12-$20 | 90 min |
| Pumpkin Lantern String Lights | All porches | $10-$16 | 20 min |
| Lantern-Lined Porch Steps | Houses with steps | $20-$35 | 25 min |
| Candlelit Pumpkin Still Life | Small porches | $15-$25 | 15 min |
| Witch’s Lantern Walk | Walkways | $25-$40 | 30 min |
| Close-Up Lantern Glow | Front doors | $15-$30 | 15 min |
| Carve and Light Together | Families | $5-$10 | 45 min |
| Foggy Haunted Glow | Halloween night | $30-$50 | 20 min |
| Grim Reaper Pathway | Spooky fans | $25-$45 | 30 min |
| Skeleton Crew on the Stairs | Stairs | $20-$40 | 30 min |
| Skull and Cobweb Spotlight | Corners | $12-$20 | 20 min |
| Skeleton by the Door | Front doors | $15-$30 | 15 min |
| Spooky Bucket Glow | Trick-or-treat | $8-$15 | 10 min |
| Glowing Treasure Chest Corner | Kids | $15-$25 | 25 min |
| String Lights on the Windows | Small porches | $12-$20 | 30 min |
| Porch and Gazebo String Lights | Large porches | $20-$35 | 40 min |
| Warm Lamp Over the Door | All porches | $8-$15 | 10 min |
| Modern Entrance Glow | Modern homes | $40-$70 | 45 min |
| Wooden Door Lantern Light | Older homes | $20-$35 | 15 min |
| Autumn Porch Lamp Post | Lamp posts | $15-$25 | 30 min |
| Full Brick Porch Display | Showpiece | $40-$60 | 2 hours |
Mistakes I Made (So You Don’t Have To)
I once ran an extension cord across the walkway and watched a visitor trip over it in the dark. Now I use battery and solar lights for anything near a path, and cords only run along walls where nobody walks.
I used to light every decoration in a different color, and the porch looked like a funfair rather than Halloween. Now I use warm white as the base and one accent color only, which looks far more expensive.
I once left real candles burning in pumpkins overnight and woke to a scorched pumpkin and a fright. Now every porch light is battery or LED, and real flames stay indoors where I can watch them.
I forgot to check my display from the sidewalk and discovered the best part was invisible from the street. Now I walk to the curb every time I finish, because the porch is decorated for visitors, not for me.
Frequently Asked Questions
What is the safest Halloween porch lighting?
Battery LED lights, solar lights, and outdoor-rated string lights are the safest choices. They stay cool, need no cords across walkways, and cannot set dry leaves or pumpkins alight the way real candles can.
How do I light my porch without an outdoor socket?
Use battery tea lights in pumpkins, solar stake lights along the path, and battery string lights on rails and windows. I run most of my porch on batteries now, and one set lasts the whole Halloween week.
What color lights work best for Halloween?
Warm white and orange flatter pumpkins and brick, while purple or green work as a single accent color. I avoid mixing more than two colors, because a porch lit in every color looks messy rather than spooky.
How early should I set up Halloween porch lighting?
I hang lights and set out lanterns in the last week of October, and carve pumpkins no earlier than October 28th so they stay firm. The full display takes me two evenings, so I never leave it to Halloween day.
How can I keep porch lights safe for trick-or-treaters?
Light the path and steps clearly, keep cords off walkways, secure tall props, and leave the entrance bright enough to see faces. A well-lit porch is both safer and more inviting than a dark spooky one.
Final Thoughts
Good Halloween porch lighting is not about buying the most lights; it is about lighting the right things. A glowing pumpkin row, a lit path, and one warm light over the door will beat a porch full of random colors every single time.
Start with the path and the door, add one spooky accent you love, and then step out to the sidewalk to see your house the way your visitors will. That view is the real reward for all of it.
Read this next: Scary Good Halloween Outdoor Decoration Ideas