21 DIY Planter Ideas for Your Garden, Porch and Balcony
I have built, broken and rebuilt planters in this house for fourteen years, and I can tell you honestly that the best DIY planter ideas are rarely the prettiest ones in the photo.
These are the ones I have actually made, planted and watered through a long summer, so I know which ones drain properly, which ones rot, and which ones survive a very enthusiastic eight-year-old with a watering can. In this guide I am sharing 21 DIY planter ideas for your garden, porch and balcony, from a simple cedar planter box to a vertical pallet planter that turned a blank fence into a herb wall.
You will find ideas for tiny balconies, wide porches and proper garden beds, with a real cost, a real time and an honest downside for every single one, so you can pick the build that fits your space, your budget and your patience. Most of these builds use cheap, easy materials — cedar boards, old pallets, cinder blocks, tin cans and wooden crates — and the dearest one here is still under $120.
Three rules run through the whole list. Every planter needs drainage holes, or the roots rot. Wooden planters need lining with landscape fabric, never solid plastic. And heavy planters — a half-barrel, a raised bed, a stone spiral — must go in their final spot before you fill them with soil, because you will not move them afterwards.
Table of Contents
- Classic Cedar Planter Box
- Cinder Block Planter Wall
- Raised Garden Bed Planter
- Vertical Pallet Planter
- Half-Barrel Planter
- Tiered Ladder Planter
- Hanging Basket Planters
- Balcony Rail Planters
- Terracotta Pot Tower
- Old Drawer Planter
- Galvanised Trough Planter
- Herb Spiral Planter
- Window Box Planter
- Stacked Stone Planter
- Upcycled Tin Can Herb Planters
- Wooden Crate Planter
- Hanging Shoe Organiser Herb Garden
- Corner Triangular Planter
- Self-Watering Bucket Planter
- Strawberry Tower Planter
- Rolling Planter on Casters
Key Takeaways
- Every planter needs drainage holes — no drainage means root rot, however good the build looks.
- Cedar, redwood and pressure-treated wood last longest outdoors; untreated pine rots in one wet season.
- Line wooden planters with landscape fabric, never solid plastic, so water can still escape.
- Small planters dry out fast — balcony and rail planters may need watering every day in summer.
- Start with one planter, not five, and learn how much sun and water your spot really gets.
- Keep heavy planters low and near a wall — a full soil-filled planter is far heavier than it looks.
- Renter-friendly builds (crates, rail planters, rolling planters) need no drilling and no damage.
1. Classic Cedar Planter Box
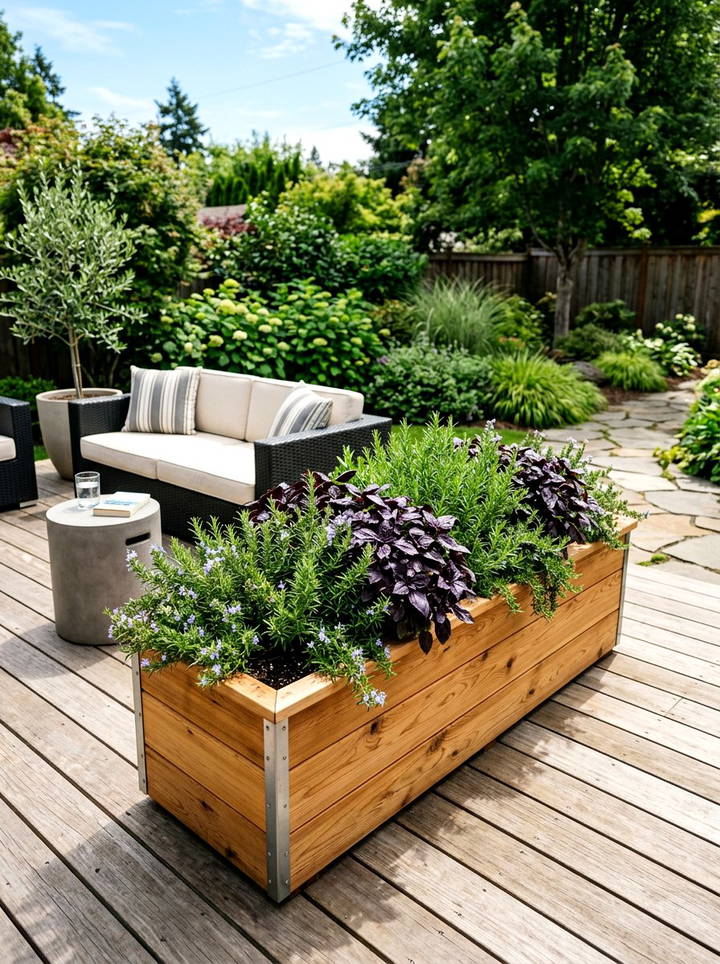
Image credit: Suite101
This is the planter I return to every spring, and the first DIY outdoor planter I ever built properly. I cut four cedar boards to about 90 cm long, screwed them into a simple rectangle, added a base with gaps between the slats, and lined it with landscape fabric.
The honest downside is the cost — cedar is not cheap, and thin boards bow outwards once the soil is wet and heavy, so use boards at least 2 cm thick.
Pro Tip: Drill at least four 12 mm drainage holes in the base, then cover them with a scrap of landscape fabric so soil stays in and water gets out.
Cost: $25–$45 | Time: 2 hours | Difficulty: Easy
2. Cinder Block Planter Wall

Image credit: Suite101
I built this one along the sunny side of our fence when I wanted planting space without digging. I stacked cinder blocks in two staggered rows, filled the hollow cores with soil, and planted herbs in the holes and trailing plants along the top.
The watch-out is weight and permanence — once the blocks are filled with soil you will not move them, and weeds grow up through cores set straight on grass.
Pro Tip: Paint the outside of the blocks with masonry paint if you want them to look less like a building site — one coat makes a surprising difference.
Cost: $15–$35 | Time: 1 hour | Difficulty: Easy
3. Raised Garden Bed Planter
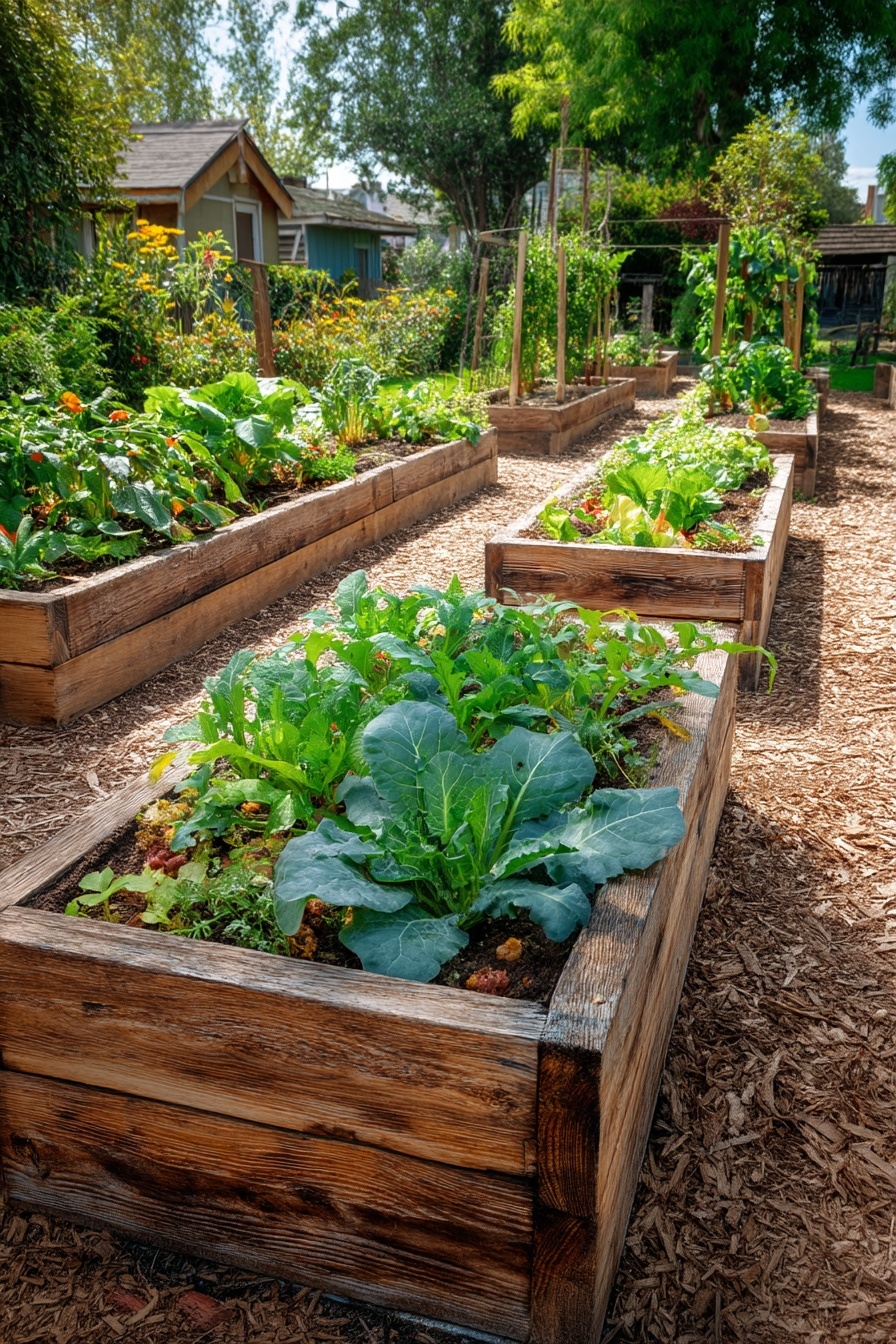
Image credit: FloraNurture
A raised garden bed planter changed how I grow vegetables, because I finally stopped fighting our heavy clay soil. I built a bed 1.2 m by 2.4 m and 30 cm deep from cedar boards, filled it with a mix of topsoil and compost, and planted straight into it.
The downside is the amount of soil it eats — my first bed needed far more bags than I guessed, so buy the soil before you build.
Pro Tip: Line the bottom with cardboard before you add soil — it smothers the grass underneath and rots away by itself.
Cost: $60–$120 | Time: 3 hours | Difficulty: Moderate
4. Vertical Pallet Planter
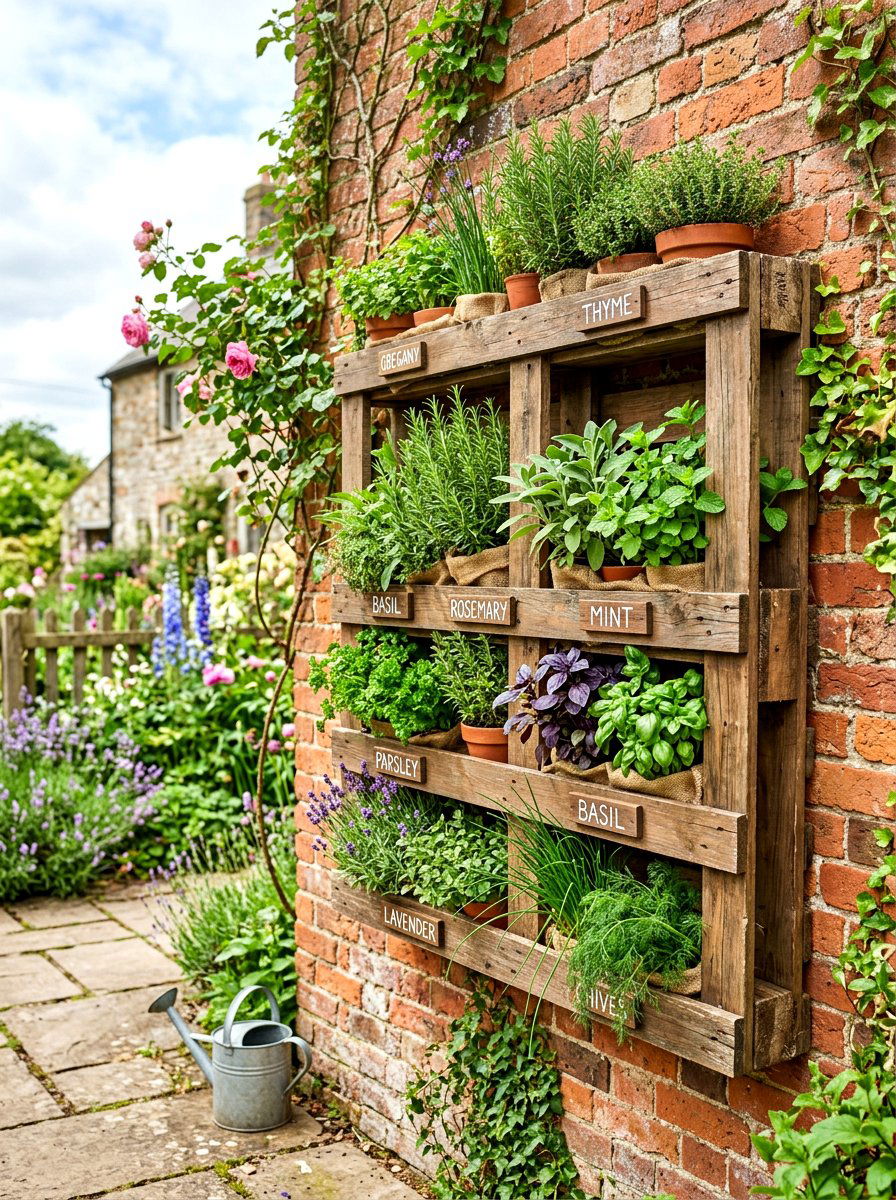
Image credit: Suite101
This vertical pallet planter turned a blank, shady fence into the herb wall I use every time I cook. I found a clean, heat-treated pallet (look for the HT stamp, never a chemically treated one), sanded the rough edges, stapled landscape fabric across the back and bottom of each slat pocket, and filled the pockets with soil and herbs.
The honest catch is watering — the top pockets dry out in a day while the bottom ones stay damp, so water the top slowly every morning in hot weather.
Pro Tip: Mount the pallet with two screws into the fence or wall — a soil-filled pallet is heavy, and leaning alone is not safe in wind.
Cost: $0–$20 | Time: 2 hours | Difficulty: Easy
5. Half-Barrel Planter

Image credit: Garden.eco
A half wine barrel is my favourite big planter, because it looks good on day one and only gets better with age. I bought a used oak half-barrel, drilled six drainage holes in the bottom, filled the bottom third with broken pots for drainage, and planted it with a small blueberry bush.
The downside is weight — a half-barrel full of wet soil is far too heavy to drag, so place it first and fill it second.
Pro Tip: Raise the barrel on three small bricks so water drains freely underneath and the wood does not sit in a puddle.
Cost: $30–$60 | Time: 45 minutes | Difficulty: Easy
6. Tiered Ladder Planter

Image credit: We Love Home Blog
I made this one from an old wooden step ladder that was too wobbly to climb but too good to throw away. I screwed a shallow wooden tray onto each step, lined the trays with fabric, and filled them with trailing plants on top and herbs below.
The watch-out is tipping — my first ladder was top-heavy and a strong gust sent the top tray sliding off, so screw every tray down.
Pro Tip: Put the plants that need the most sun on the top step and the shade-lovers at the bottom, where the steps above shelter them.
Cost: $10–$30 | Time: 1.5 hours | Difficulty: Easy
7. Hanging Basket Planters

Image credit: PlusMood
Hanging baskets are the quickest way I know to make a plain porch feel finished. I use coir-lined wire baskets, fill them with a light potting mix, and plant trailing lobelia and petunias around the edges with something upright in the centre.
The honest downside is how fast they dry out — in July my baskets needed water every morning, and one missed day left the petunias wilted flat.
Pro Tip: Hang a basket over a bucket when you water it, and let it drip for ten minutes before you hang it back up — your porch floor will thank you.
Cost: $8–$20 each | Time: 30 minutes | Difficulty: Easy
8. Balcony Rail Planters
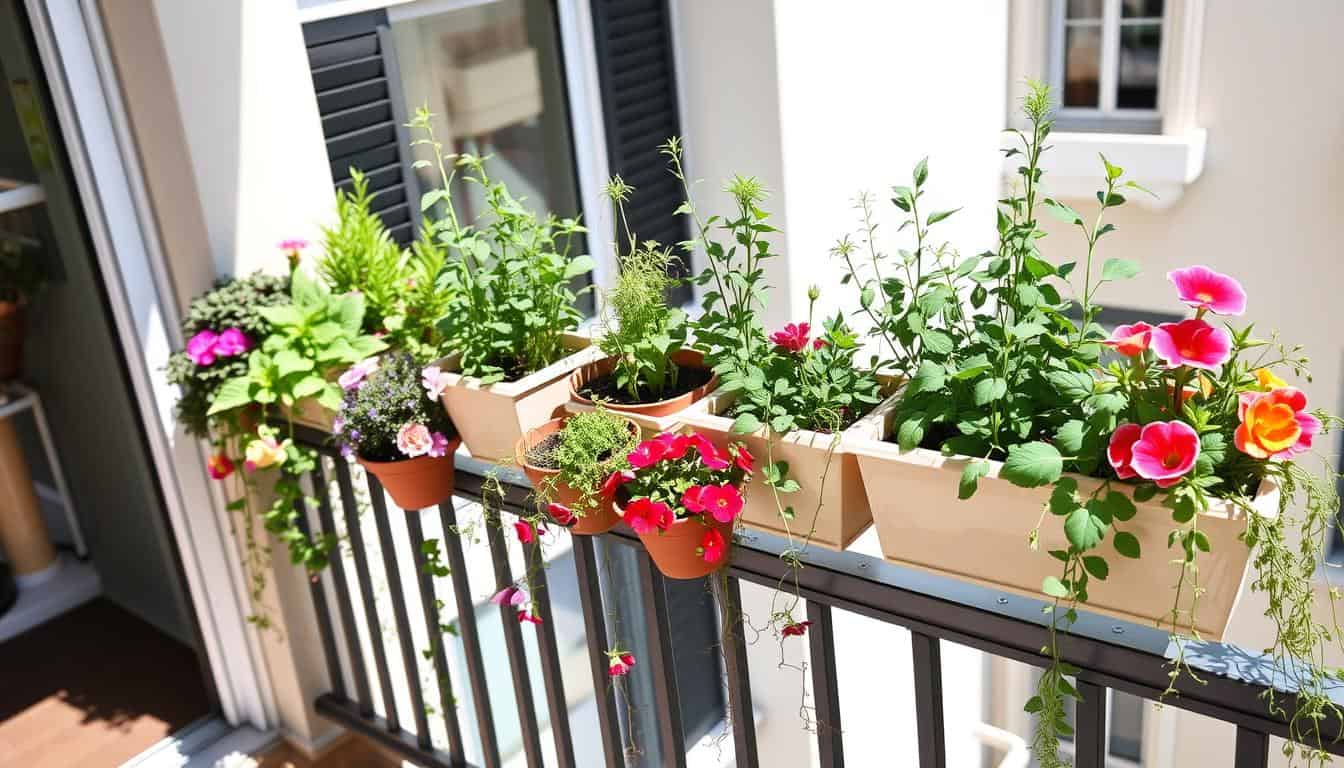
Image credit: Miafolio
When we had a tiny balcony, rail planters were the only way to grow anything without losing the one chair we owned. I bought two metal rail planters with adjustable brackets, hooked them over the railing, and planted herbs in one and trailing flowers in the other.
The downside is the wind — a balcony is windier than a garden, and my first rail planter nearly blew off in a storm, so use screw-tightening brackets.
Pro Tip: Check your building rules first — some flats ban anything on the outside of the railing, and a planter on the inside of the rail is the safe, renter-friendly answer.
Cost: $12–$30 each | Time: 20 minutes | Difficulty: Easy
9. Terracotta Pot Tower
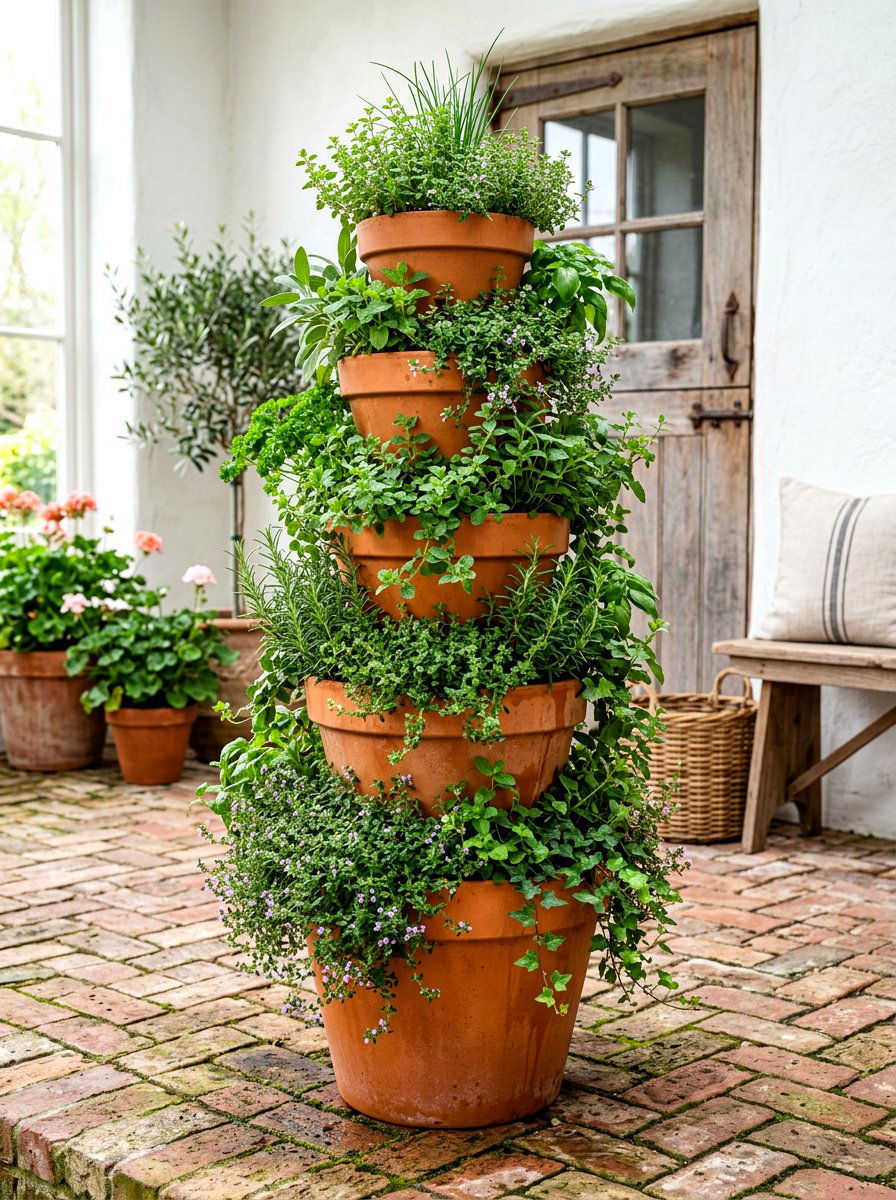
Image credit: Suite101
This one is pure fun, and my children built most of it with me. I stacked terracotta pots in decreasing sizes, threading them onto a central metal rod driven into the ground, and planted a different herb in each layer.
The catch is that terracotta dries out fast and chips easily — I dropped one pot while stacking it and the whole tower leaned for a week.
Pro Tip: Soak new terracotta pots in water for an hour before planting, or they will steal the moisture straight out of your soil.
Cost: $15–$35 | Time: 45 minutes | Difficulty: Easy
10. Old Drawer Planter

Image credit: Pines and Paint
I rescued a drawer from a chest of drawers that was heading for the bin, and it became one of my favourite planters. I sanded it lightly, painted the outside with exterior paint, drilled drainage holes in the bottom, added four short legs, and filled it with lettuces.
The honest downside is rot — a drawer is not made for wet soil, and my first one softened at the corners after one wet winter.
Pro Tip: Keep drawer planters shallow-planted only — deep-rooted plants will struggle, and the extra soil weight speeds up the rot.
Cost: $0–$15 | Time: 1 hour | Difficulty: Easy
11. Galvanised Trough Planter

Image credit: Casolia
A galvanised metal trough gives a garden a clean, modern look, and mine has held herbs by the back door for four years. I bought a second-hand animal trough, drilled drainage holes in the base, added a layer of gravel, and filled it with soil.
The watch-out is heat — in full summer sun the metal sides get hot enough to dry the soil at the edges, so give it morning sun and afternoon shade.
Pro Tip: Never use a trough that once held chemicals or old paint — buy food-safe or animal-safe, and wash it well before you plant anything edible.
Cost: $25–$70 | Time: 45 minutes | Difficulty: Easy
12. Herb Spiral Planter
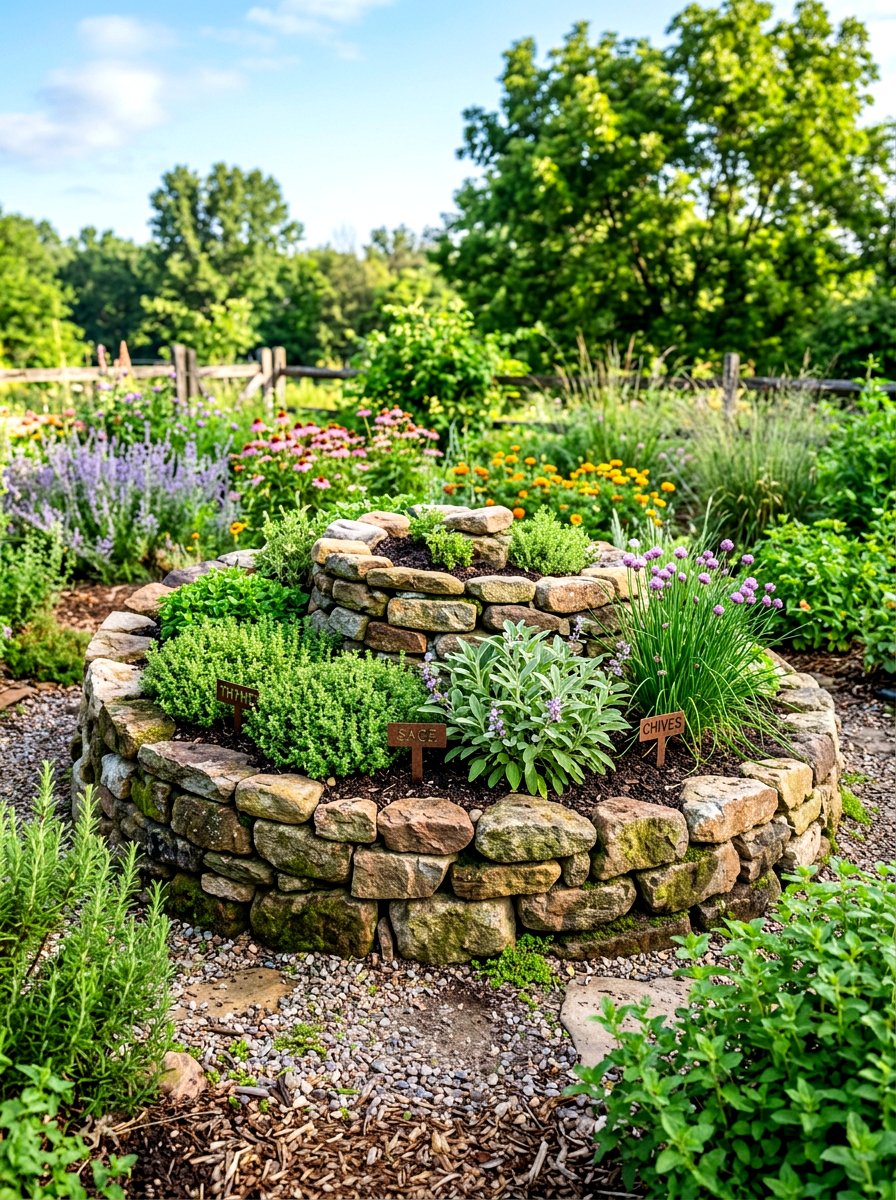
Image credit: Suite101
A herb spiral is a small stone spiral, about a metre across and knee-high, that I built in a sunny corner with old bricks. I filled the centre with soil and planted Mediterranean herbs like rosemary and thyme at the top, where it is driest and sunniest, and mint and parsley at the bottom, where it stays damp.
The downside is the build time — stacking the stones level took a whole afternoon, and my first spiral leaned because I rushed the base.
Pro Tip: Do not plant mint in a spiral with other herbs unless it is in its own pot sunk into the soil — mint will take over the whole spiral in one season.
Cost: $20–$50 | Time: 4 hours | Difficulty: Moderate
13. Window Box Planter
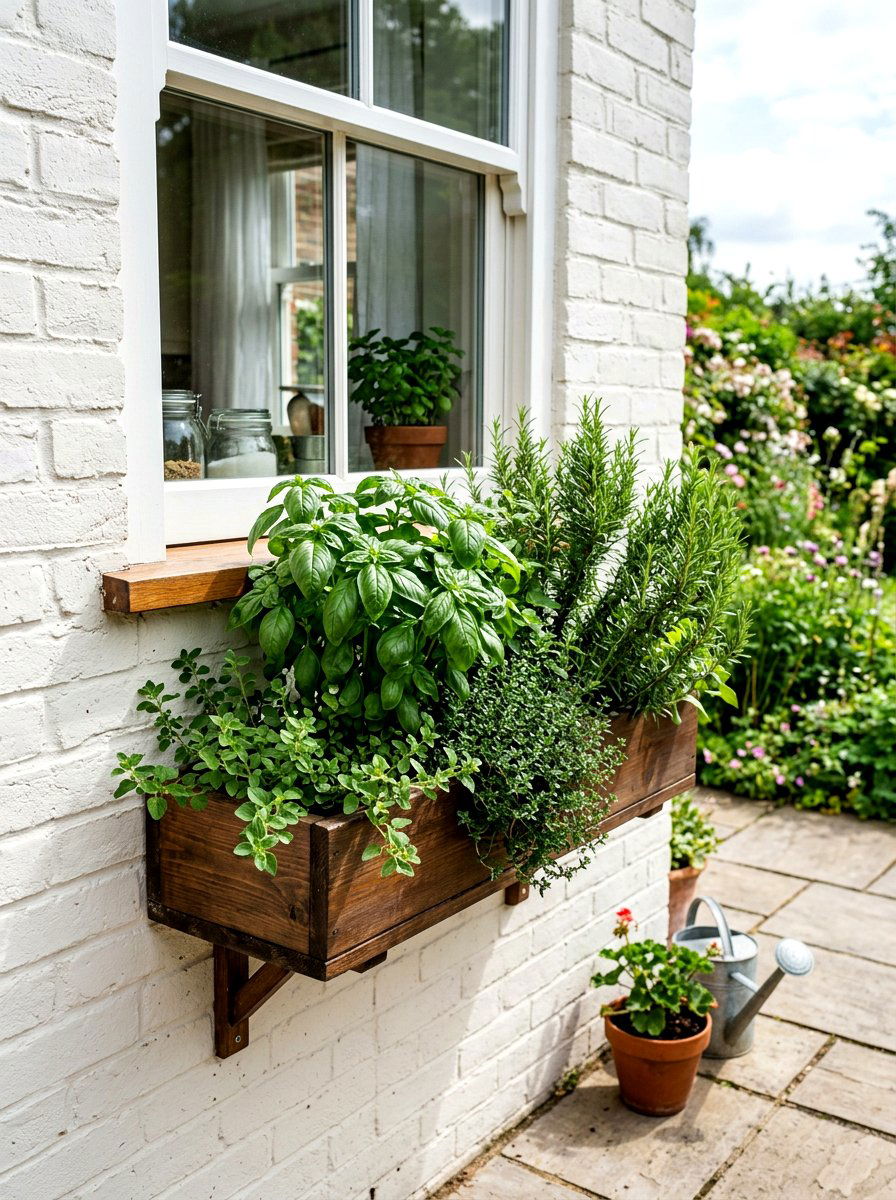
Image credit: Suite101
A window box is the smallest planter on this list and, pound for pound, the one I enjoy most. I fixed a wooden window box under our kitchen window with proper brackets, filled it with herbs, and now I pick basil while I am cooking without stepping outside.
The honest catch is the watering — a shallow box in full sun dries out by lunchtime in summer, and one hot weekend away cost me a whole row of chives.
Pro Tip: Screw the brackets into the wall studs or solid brick, not just into render — a soil-filled window box is heavy, and a falling one is dangerous.
Cost: $15–$40 | Time: 1 hour | Difficulty: Easy
14. Stacked Stone Planter

Image credit: Kopalnia Jenków
I built this low, round planter from flat stones left over from a path project, stacking them in a circle without mortar and filling the middle with soil. It looks like it has always been there, it suits cottage-style planting, and it costs nothing if you already have the stones.
The downside is that a dry-stacked wall shifts — mine settled after the first heavy rain and one stone slipped out of place.
Pro Tip: Put a layer of landscape fabric inside the stone ring before you add soil, or soil will wash out through the gaps every time it rains.
Cost: $0–$30 | Time: 2 hours | Difficulty: Moderate
15. Upcycled Tin Can Herb Planters

Image credit: Garden.eco
These are the planters my children ask to make every year. We wash out large tin cans, punch drainage holes in the bottom with a nail, paint the outside with exterior paint, and plant one herb in each.
The watch-out is rust — my first cans rusted through at the bottom after one season outdoors, so use them indoors or under cover only.
Pro Tip: Label each can with the herb name and the date you planted it — small cans all look alike once the herbs are young, and the labels save a lot of guessing.
Cost: $0–$5 | Time: 30 minutes | Difficulty: Easy
16. Wooden Crate Planter

Image credit: WholeMade Homestead
A wooden crate is the fastest planter I own. I lined an old apple crate with landscape fabric, filled it with soil, and planted it with salad leaves.
The honest downside is lifespan — a thin crate rots in one wet winter, and mine fell apart when I lifted it by the handles while full of wet soil.
Pro Tip: Put a crate on bricks, not directly on the ground, so air can circulate underneath and the base stays dry.
Cost: $0–$15 | Time: 20 minutes | Difficulty: Easy
17. Hanging Shoe Organiser Herb Garden
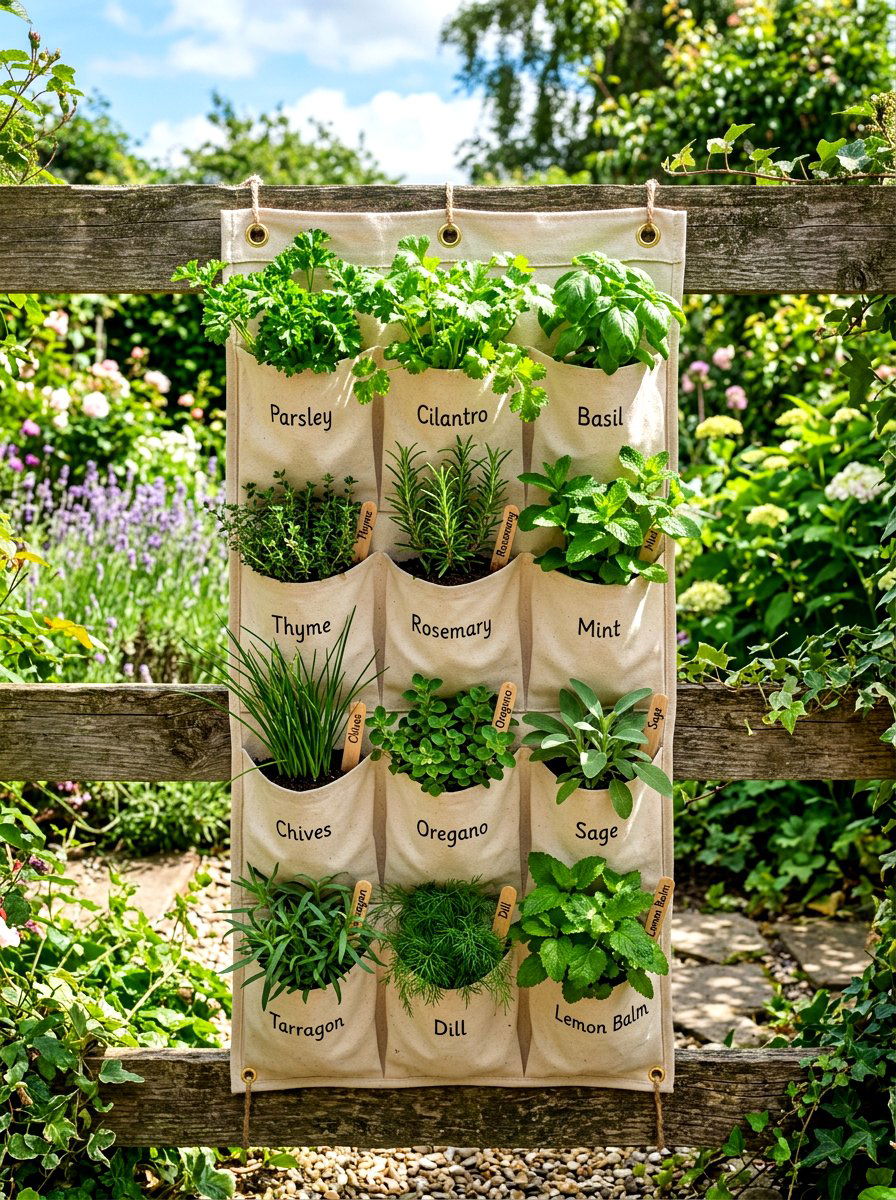
Image credit: Suite101
This sounds odd, and it works brilliantly on a small balcony. I hung a fabric shoe organiser with clear pockets on a sunny wall, filled each pocket with a little soil and one small herb plant, and watered them with a jug.
The catch is drainage — the pockets have no holes, so my first planting drowned the bottom row; cut a small slit in every pocket.
Pro Tip: Use this for herbs and small lettuces only — anything with deep roots will outgrow a pocket in weeks.
Cost: $8–$15 | Time: 30 minutes | Difficulty: Easy
18. Corner Triangular Planter

Image credit: DIY Craftsy
Corners are wasted space in most gardens, and this triangular planter fixed ours. I built a simple triangle from three cedar boards to fit snugly into the corner of our patio, added a base with drainage holes, and planted it with a small shrub and trailing flowers.
The downside is the fiddly cutting — getting three boards to meet neatly took two attempts, and my first version had a gap you could see daylight through.
Pro Tip: Make the planter no deeper than 45 cm, or you will not be able to reach the back corner to weed or water it.
Cost: $20–$40 | Time: 2 hours | Difficulty: Moderate
19. Self-Watering Bucket Planter

Image credit: Mothers Always Right
This is my answer for anyone who forgets to water, because I am that person in July. I made a self-watering planter from two buckets: the top bucket holds soil and the plant, the bottom bucket holds a water reservoir, and a wick carries water up into the soil.
The honest downside is the build — it is fiddlier than it looks, and my first attempt leaked because the seal between the buckets was not tight.
Pro Tip: Add a small overflow hole in the reservoir bucket, about 5 cm below the top, so heavy rain cannot flood the soil from below.
Cost: $10–$20 | Time: 1 hour | Difficulty: Moderate
20. Strawberry Tower Planter
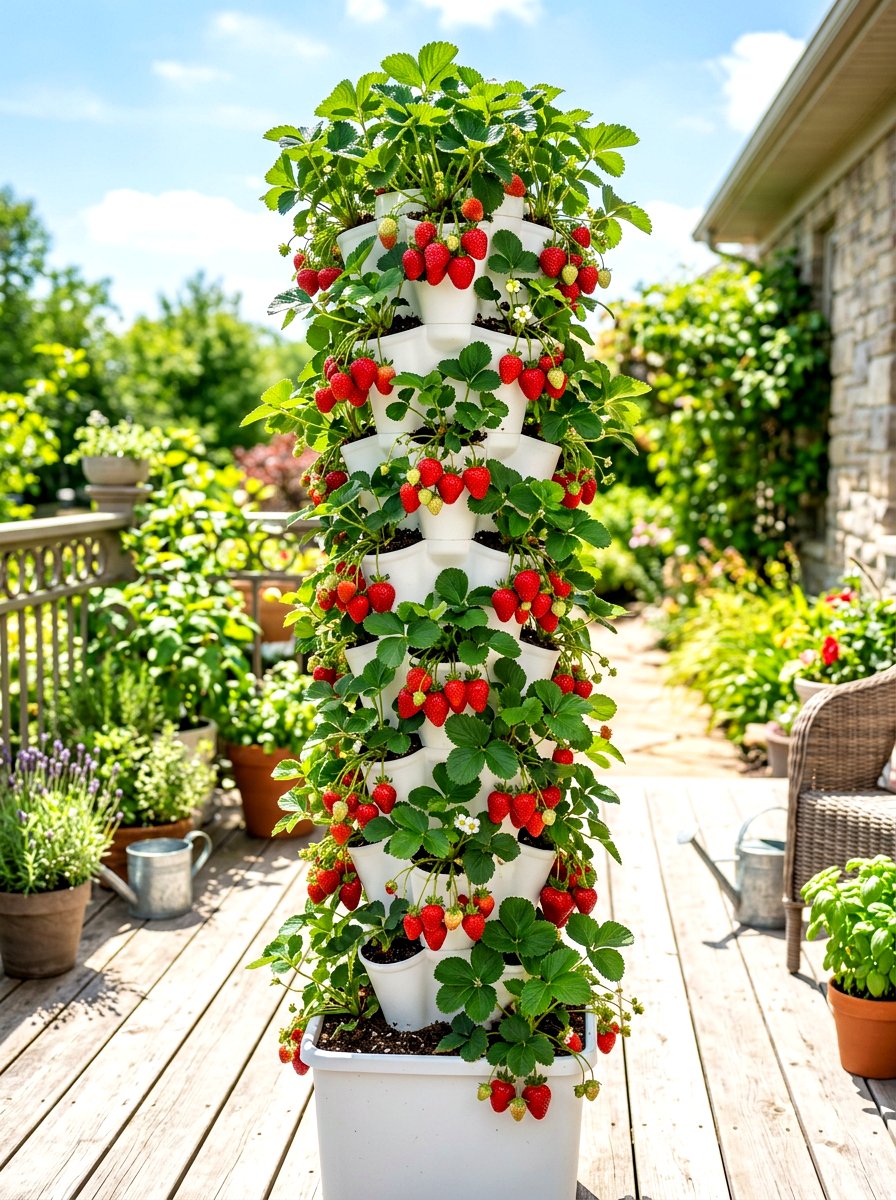
Image credit: Suite101
A strawberry tower is a vertical stack of pots with holes in the sides, and it is the best way I have found to grow a lot of strawberries in a tiny space. I bought a ready-made tower, filled it with soil, and planted one strawberry plant in each pocket.
The catch is watering — the top dries out while the bottom stays wet, so water slowly from the top and then water the middle pockets directly.
Pro Tip: Net the tower once the fruit starts to ripen, or the birds will eat every strawberry the day before you planned to pick it.
Cost: $20–$45 | Time: 45 minutes | Difficulty: Easy
21. Rolling Planter on Casters

Image credit: Suite101
This is the planter I wish I had built first. I built a simple cedar box, screwed four sturdy locking casters underneath, and now I can roll my herbs into the sun in the morning and back under cover when a storm comes.
The downside is the casters — cheap ones seized up after one winter outside and the planter would not roll at all, so buy outdoor-rated casters.
Pro Tip: Choose casters that lock, and test them with the planter full of wet soil before you trust them on a slope — a rolling planter on a slope is a runaway planter.
Cost: $30–$55 | Time: 2 hours | Difficulty: Easy
Mistakes I Made (So You Don’t Have To)
Skipping drainage holes. My very first planter had a solid base, and I lost a whole row of herbs to root rot in three weeks.
Using untreated pine outdoors. It looked lovely in May and was soft, black and crumbling by October.
Filling a planter before moving it. I have done this twice, and both times the planter stayed in the wrong spot all summer because it was too heavy to move.
Planting mint in open soil. Mint took over a whole raised bed in one summer and choked out everything else.
Which DIY Planter Should You Try First?
| Idea | Best For | Cost | Effort |
|---|---|---|---|
| Classic cedar planter box | Garden, porch, vegetables | $25–$45 | Low |
| Vertical pallet planter | Small spaces, herbs | $0–$20 | Low |
| Raised garden bed planter | Vegetables, serious growing | $60–$120 | Medium |
| Balcony rail planters | Tiny balconies, renters | $12–$30 | Low |
| Half-barrel planter | A feature plant, shrubs | $30–$60 | Low |
| Rolling planter on casters | Renters, moving sun | $30–$55 | Low |
Frequently Asked Questions
What is the easiest DIY planter for a beginner?
A wooden crate planter or a classic cedar planter box. Both take under two hours, need only basic tools, and forgive small mistakes. Start with one, learn how much sun and water your spot gets, and then build a second one. Avoid self-watering builds and herb spirals until you have one simple planter under your belt.
How do I stop a wooden planter rotting?
Use cedar or pressure-treated wood, line the inside with landscape fabric (not solid plastic), drill proper drainage holes, and raise the planter on bricks so the base stays dry. Oil the outside once a year, and bring small wooden planters under cover in winter. Untreated pine will rot in one wet season, however well you paint it.
Do DIY outdoor planters need drainage holes?
Yes, always. Without drainage, water sits at the bottom, roots rot, and plants die — usually in a few weeks. Drill at least four 12 mm holes in the base of a medium planter, cover them with landscape fabric so soil stays in, and check every spring that the holes have not clogged with soil.
What can I plant in a vertical pallet planter?
Herbs are best — basil, parsley, thyme, mint in its own pocket, and trailing plants like strawberries. Avoid anything with deep roots or anything heavy. Water the top pockets slowly and check them daily in summer, because the top dries out far faster than the bottom.
Can I use a cinder block planter for vegetables?
Yes, if the blocks are new and clean, and you line the planting holes with landscape fabric. Cinder blocks are best for herbs, lettuces and flowers.
Final Thoughts
DIY planter ideas work because they let you grow something in exactly the space you have, whether that is a wide garden, a sunny porch or a tiny balcony. A cedar planter box is not just a box, it is the first salad you picked yourself.
Start with one planter — the cedar box, the pallet or the rail planter — drill the drainage holes, fill it with good soil, and plant something you actually like to eat or smell. If your first planter rots or leans, that is not failure, it is your first planter teaching you how the next one should be built.