31 Cute Craft Ideas
When I want a creative project without making a special shopping trip, I usually start by checking what I already have at home. Cardboard tubes, leftover paper, old frames, felt scraps, craft sticks, and even a few rocks can become useful or decorative projects with a little planning.
I also like having crafts that fit different amounts of free time. Some of these ideas can be finished in a short afternoon, while others give me more room to paint, sew, decorate, or build something useful.
This collection brings together 31 cute craft ideas for kids, teens, adults, families, and anyone who enjoys making things by hand. There are seasonal decorations, recycled-material projects, accessories, gifts, art activities, and practical pieces for the home or craft room.
These 31 cute craft ideas include paper crafts, cardboard-tube projects, seasonal decorations, kids’ activities, handmade accessories, home decor, organizers, and small gift ideas. Many use simple materials that may already be in a craft drawer or recycling bin.
The projects vary in effort and skill level, so I can choose something quick for a rainy afternoon or spend more time on a decorative or functional project. Several can also be changed for different holidays, seasons, colors, themes, or ages.
Save this for later
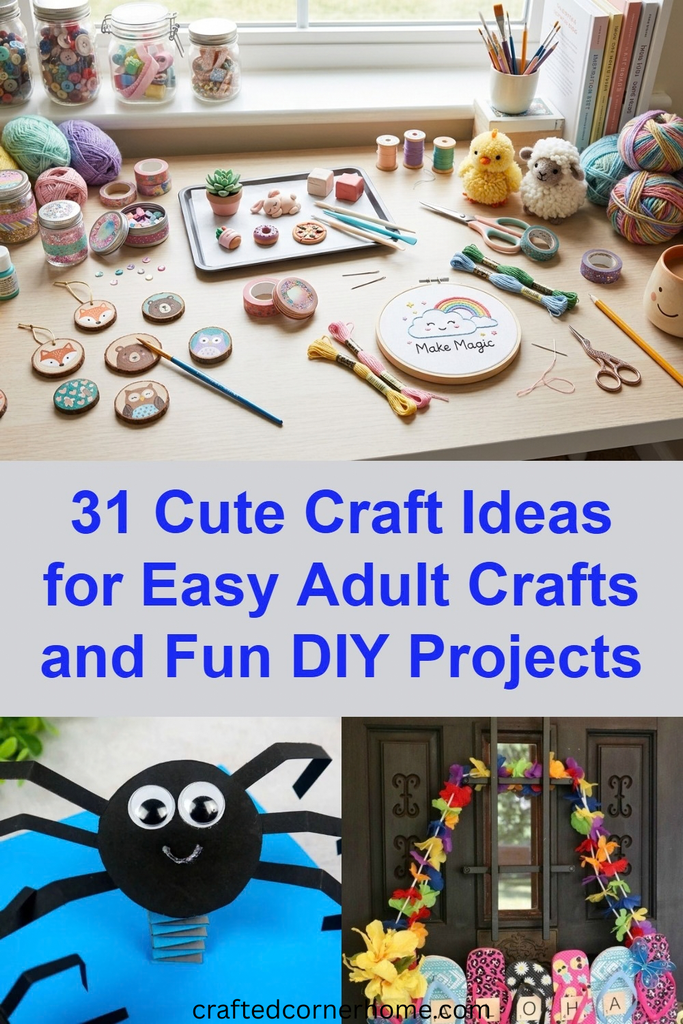
Table of Contents
For family projects, I prepare cutting, gluing, or other difficult steps ahead of time when needed. I also keep small pieces, balloons, magnets, sharp tools, and hot glue away from children who are not ready to handle them safely.
Key Takeaways
- Many of these projects work well with leftover or commonly available craft materials.
- Paper, cardboard tubes, rocks, felt, and craft sticks can be reused in several different ways.
- Seasonal details make many of the projects suitable for holidays, birthdays, classrooms, or home displays.
- Younger children may need adult help with cutting, gluing, or small components.
- Magnets, balloons, sewing pins, hot glue, and other small or sharp materials need appropriate supervision.
- Several ideas can become decorations, gifts, learning activities, or useful household items.
- Changing the colors, size, pattern, or purpose can make a simple craft feel much more personal.
Related article: 25 Dollar Store Halloween Decorations That Look High-End (DIY Hacks)
1. DIY Paper Spider
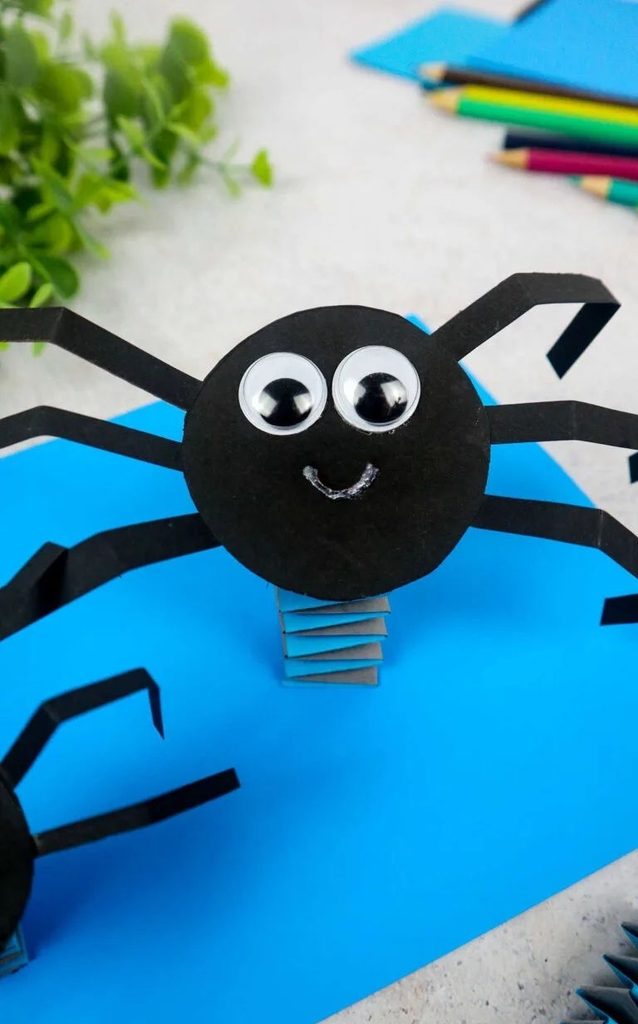
A paper spider is a quick Halloween project that doesn’t require a complicated supply list. I like using card stock because it holds its shape better than very thin paper, especially when the spider needs to be displayed rather than simply used for a short activity.
Black is the obvious Halloween choice, but purple, orange, green, or even patterned paper can give the spider a different look. I can use the finished piece on a greeting card, Halloween display, party table, or children’s craft board.
Pro Tip: Before folding the legs, I lightly score the paper along the bend lines. The folds look neater and are easier to control.
Best for: Halloween crafts and short afternoon activities.
2. Flip Flops Door Hanger
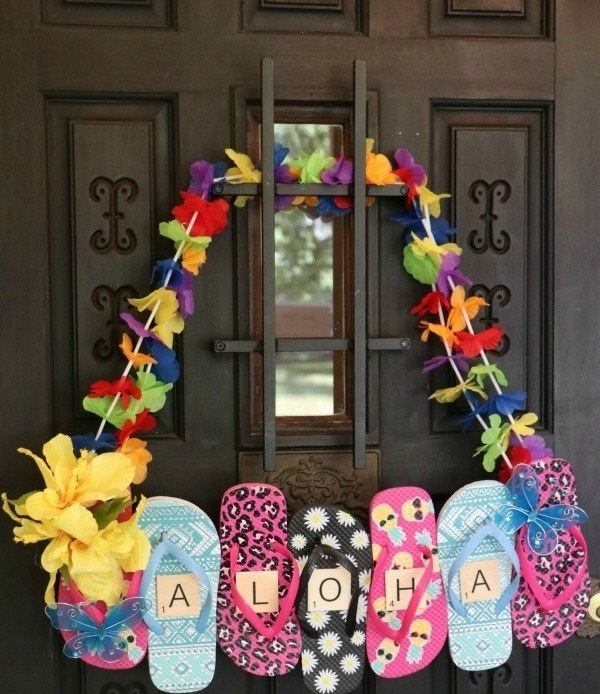
An unused pair of flip-flops can become a playful door decoration instead of taking up space in a closet. I like this idea for summer because the material already suggests a beach or vacation theme.
The pair can be decorated with ribbon, faux flowers, shells, bows, or other lightweight details. For a coastal room, I would keep the colors simple, while a teen’s bedroom could use brighter colors or favorite patterns.
Before hanging it, I check that the finished decoration isn’t too heavy for the hook or door hardware.
3. Stress Ball
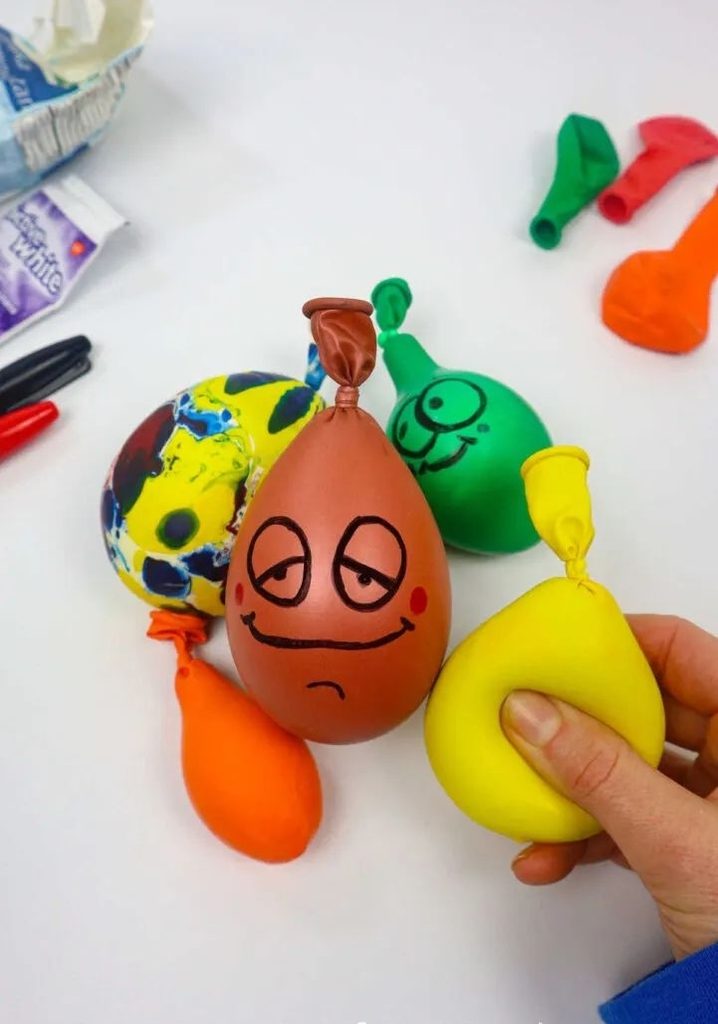
A homemade stress ball is one of the simpler projects here, but the filling makes a noticeable difference in how it feels. A sturdy balloon can be filled with a suitable soft material, leaving enough room for the ball to compress.
I avoid overfilling it because a completely packed balloon has less room to give when squeezed. I also make a small test version first when I’m trying a new filling.
Because balloons and loose fillings can be choking hazards, this isn’t a craft I would give to a young child to handle independently. I keep unfinished materials and completed stress balls away from children who may put them in their mouths.
Pro Tip: Test the filling and texture before making several. It is much easier to adjust one sample than remake an entire batch.
Best for: Teens and adults, or older children with appropriate supervision.
4. Cross Stitch Mason Jar
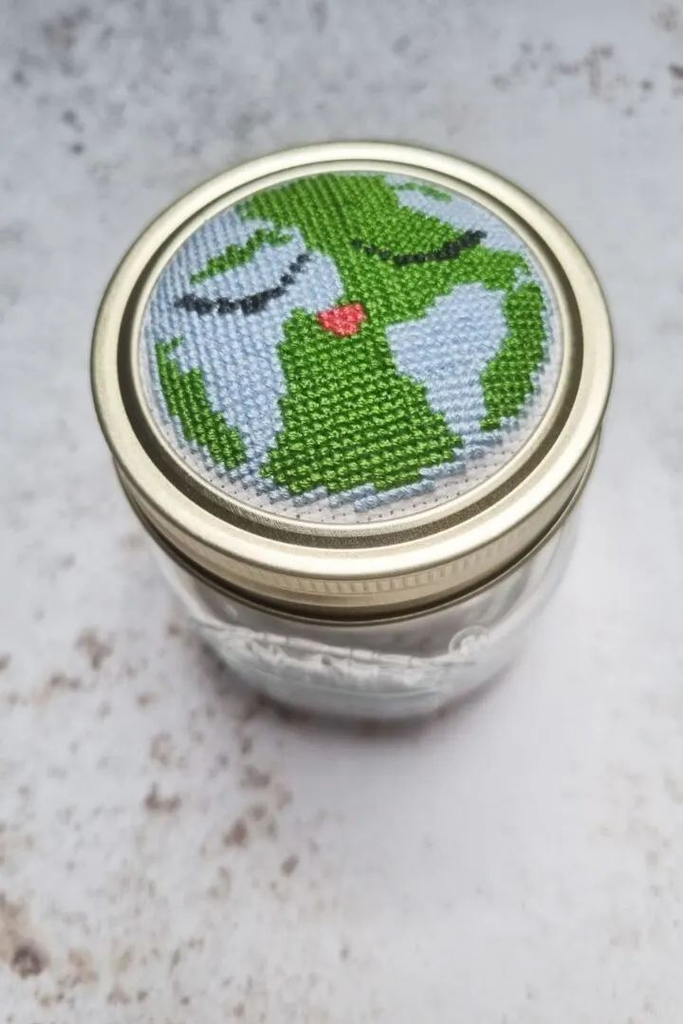
Cross stitch gives a plain mason jar a handmade detail without changing the basic shape of the container. I like using a simple motif such as a flower, initial, seasonal shape, or geometric pattern.
The exact construction depends on the jar and lid style, so I check that the cross-stitched piece fits securely before assembling it. Several jars with coordinating designs can look especially nice together on a shelf or craft-room surface.
I treat decorated jars as decorative storage unless every material and component is specifically suitable for food contact. A craft project should not automatically be assumed to be food-safe.
5. DIY Pedestal Bowl
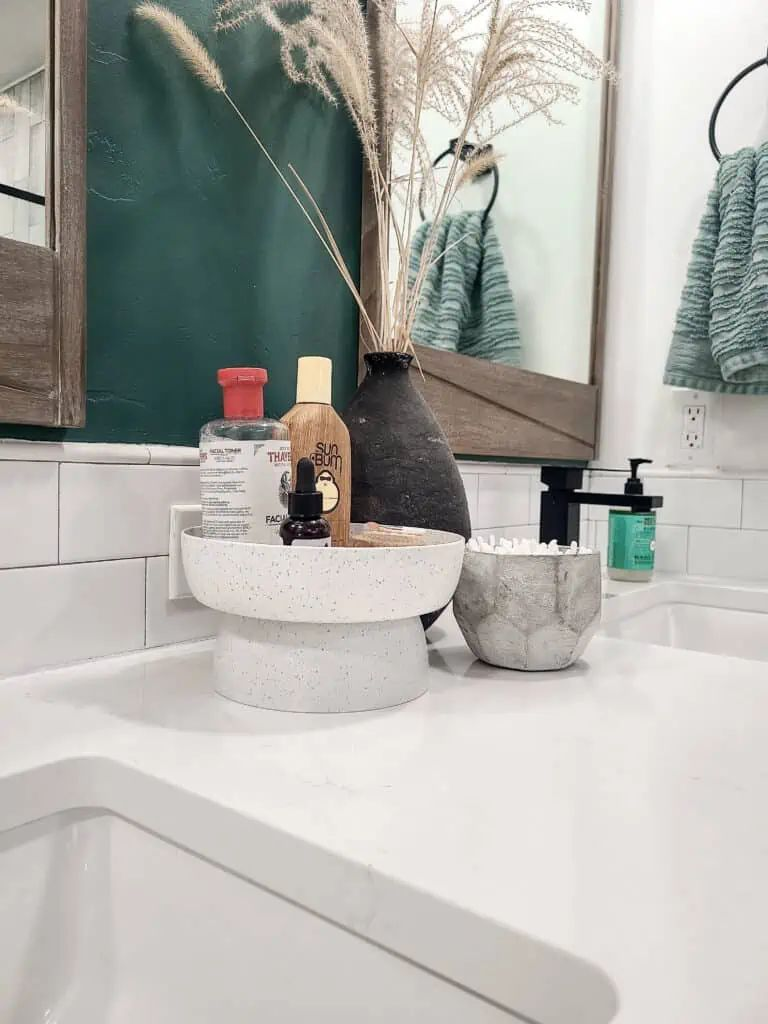
When I want a decorative pedestal bowl without buying another finished home accessory, combining two compatible bowl-shaped pieces can create a simple raised design.
Before attaching anything, I dry-fit the pieces on a level surface and check whether the base is wide enough to keep the bowl stable. I then use an adhesive appropriate for the materials and allow it to cure completely according to the product directions.
For my purposes, I would use this as decorative storage or home decor unless the materials, adhesive, and construction are specifically suitable for food use.
Pro Tip: Test the balance before applying adhesive. Once the pieces are permanently joined, correcting an uneven or unstable base becomes much harder.
6. Ladybug Craft
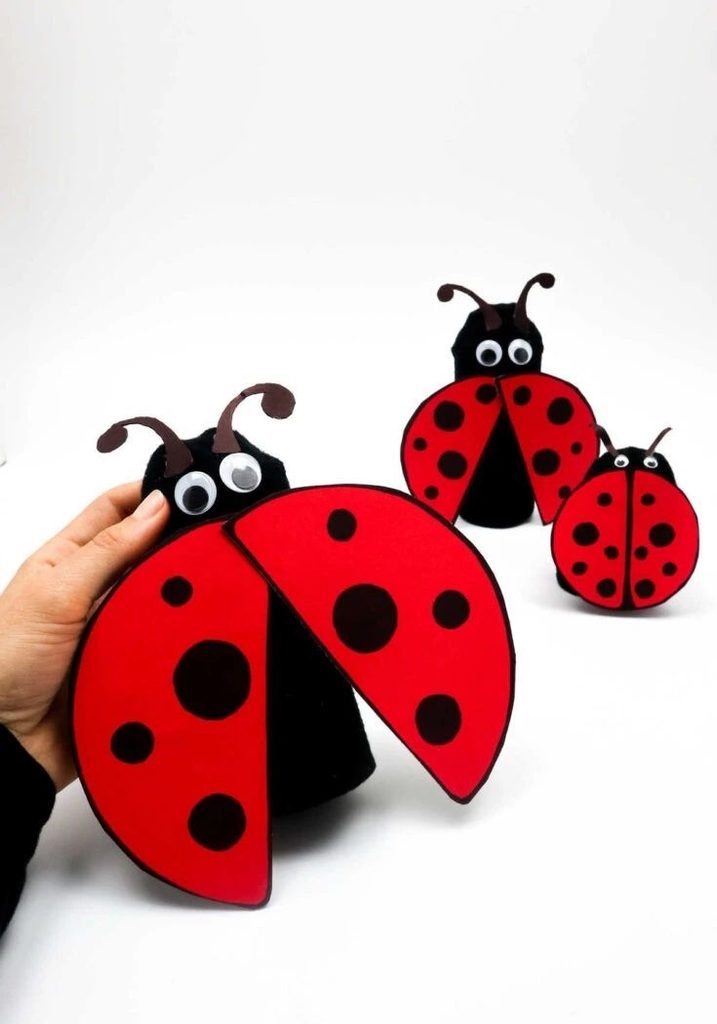
Ladybugs are a fun way to turn an empty toilet paper roll or cut section of a paper towel roll into a recognizable little animal. The basic tube gives children a simple structure to decorate.
I can cover or paint the tube, then add wings, spots, eyes, and other details. Red and black are traditional, but using blue, pink, purple, or mixed patterns gives children more freedom to design their own bugs.
For younger children, I prepare any detailed cutting beforehand and let them concentrate on painting and decorating.
Best for: Simple animal crafts and group children’s activities.
7. Monthly Baby Photos DIY Letterboard
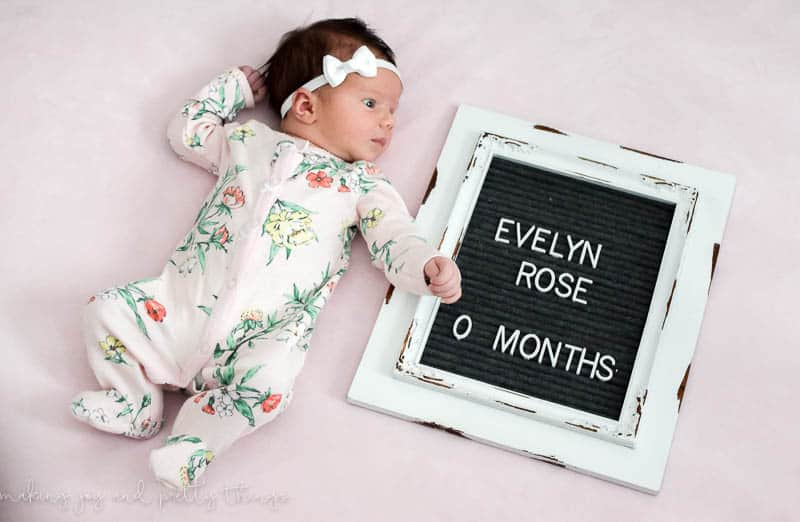
A monthly baby photo board can be made more affordably by starting with a reusable frame instead of buying a completely new display. I like the idea of giving an old frame a fresh coat of paint and adapting it to a nursery or photo theme.
The lettering area should have enough room for different month numbers and short messages. Keeping the design simple also makes it easier to store and reuse.
If the frame will be handled frequently, I prefer finishes that are easy to wipe clean. For a baby photo setup, I also keep the display, loose pieces, and accessories out of the baby’s reach.
Pro Tip: Design the lettering area around the largest number or message you expect to use. That prevents the later months from feeling cramped.
8. Paper Squishies
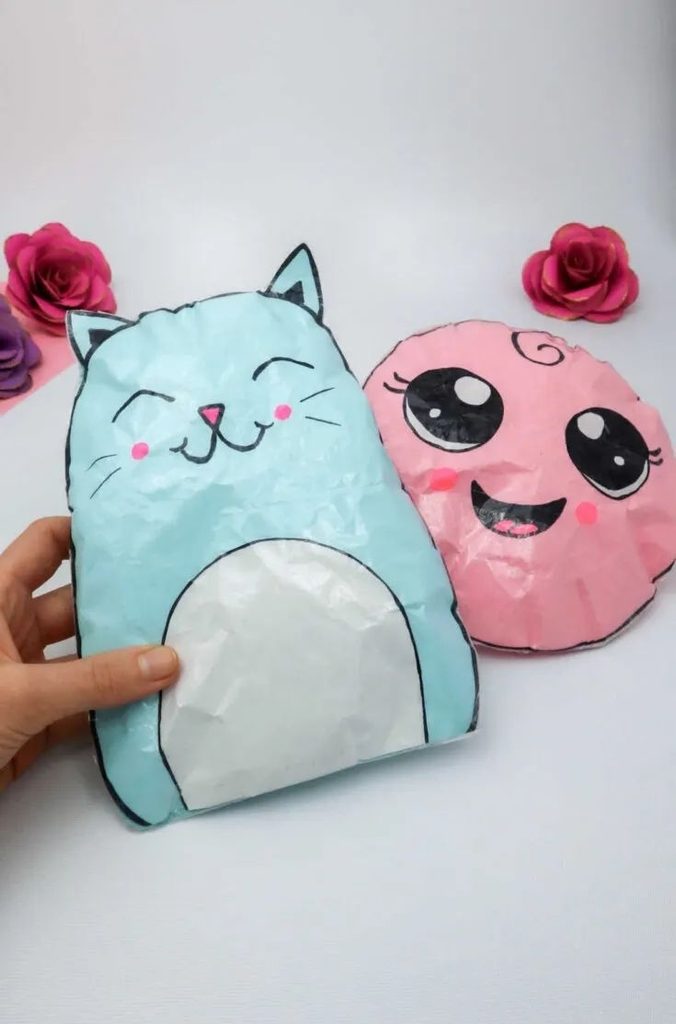
Paper squishies give kids a chance to combine drawing, cutting, and simple construction. I like letting them choose the subject first, whether that is an animal, favorite food, heart, star, or another shape.
A simple outline makes the project easier to assemble, while larger designs are generally more manageable for younger crafters. I prepare the difficult cutting steps when needed and let children take over the decorating.
The finished pieces can be made in a whole collection of different shapes, which makes this a good project for a longer craft session.
Pro Tip: Start with one larger design before attempting tiny squishies. Larger pieces are easier to decorate and handle.
9. DIY Embroidery Hoop Wreath
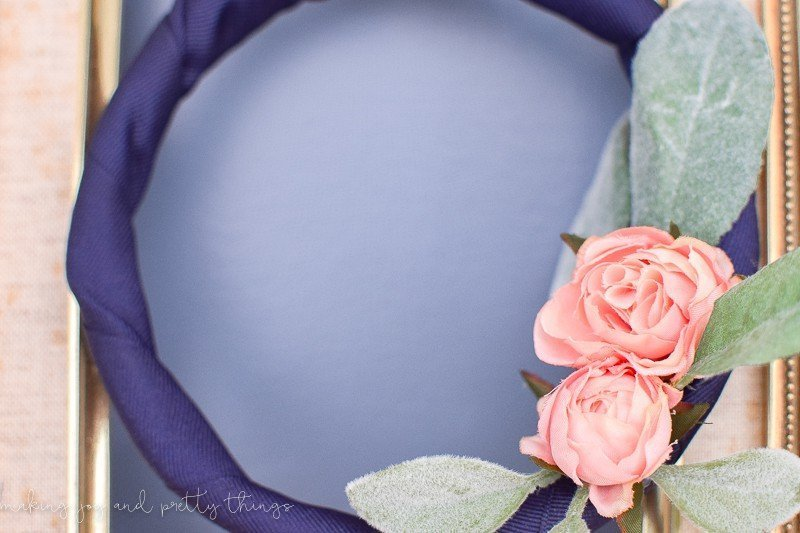
An embroidery hoop makes a convenient frame for a small wreath because I don’t need to construct a circular base from scratch.
Fabric strips, ribbon, faux greenery, paper shapes, yarn, and lightweight seasonal decorations can all change the look of the hoop. A spring flower version, autumn display, or simple year-round design can all use the same basic frame.
I especially like smaller wreaths for interior doors, cabinets, shelves, or narrow wall spaces where a large wreath would overwhelm the area.
Pro Tip: Keep heavier decorations close to the stronger parts of the hoop and check the hanging point before adding more weight.
Best for: Seasonal home decor and beginner-friendly decorating projects.
10. How to Make Hair Bows
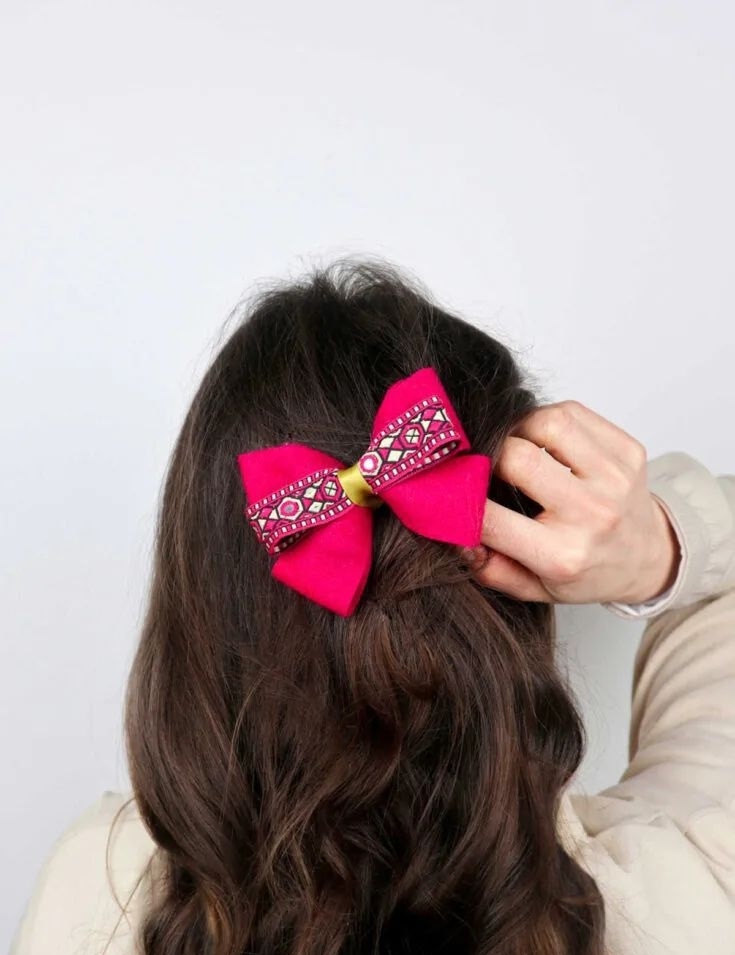
Making hair bows at home gives me more flexibility with colors, patterns, and sizes. I can coordinate them with holiday outfits, school colors, birthdays, or everyday clothing.
Once the basic bow is familiar, the same supplies can be used for clips, headbands, scrunchies, and other simple accessories.
When making these for children, I check every attachment carefully. Small components should be firmly secured, and finished accessories should not be given to a child who is likely to pull apart or mouth the pieces.
11. DIY Stone Monsters
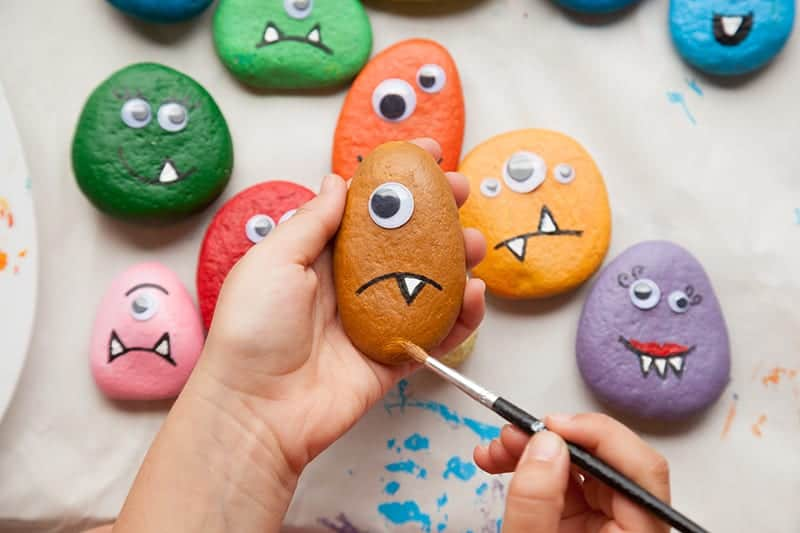
Stone monsters are very different from the rock photo holders later in this list because the goal here is character and imagination rather than function.
I like starting with clean, reasonably smooth stones and letting their shapes influence the characters. A few painted eyes, teeth, spots, horns, or funny expressions can turn each one into a different monster.
After painting or gluing details, I give the stones enough time to dry before moving them. If I’m collecting rocks outdoors, I check them for sharp edges and clean them before bringing them inside.
Pro Tip: A light pencil sketch helps me work out the expression before committing to paint.
Best for: Imaginative play, Halloween projects, and painted-rock displays.
12. Toilet Paper Roll Macaw
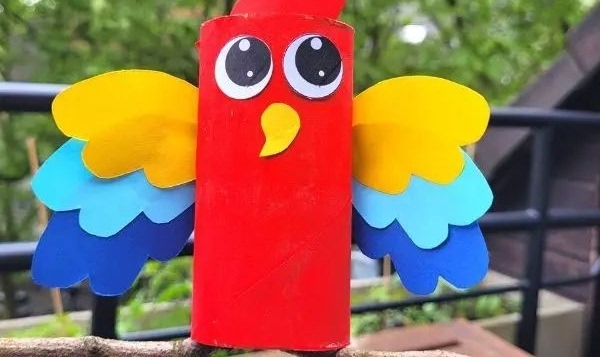
This colorful macaw uses the cardboard tube as a basic body, but the decorating is what makes the project stand out. Bright paper or paint can be layered to create the bird’s colorful feathers.
I find it easier to prepare the major shapes before a children’s craft session. Once those pieces are ready, kids can concentrate on choosing colors and putting the bird together.
For younger children, I use age-appropriate art materials and supervise any cutting or small decorative pieces.
Pro Tip: Use several shades of paper for the feathers instead of one solid color. The layers give the bird more visual detail without making the construction much harder.
13. Unicorn Toilet Roll Craft
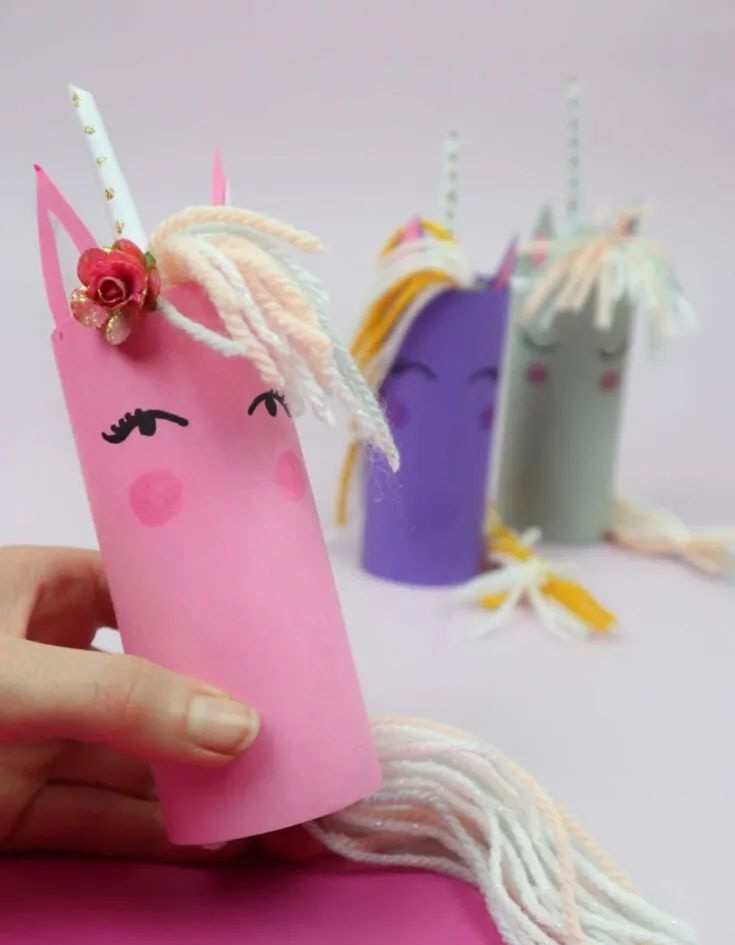
A cardboard tube becomes a completely different character when I turn it into a unicorn. The main details are the mane, horn, ears, and facial features, so I like keeping the basic body simple.
I decorate or paint the tube first and let it dry before attaching the smaller pieces. This prevents wet paint or glue from making the assembly messy.
The mane can be made in one color or several shades of yarn or paper. A pastel palette works well for a traditional unicorn look, but bright colors can make each one feel more personal.
14. Unicorn Tree DIY
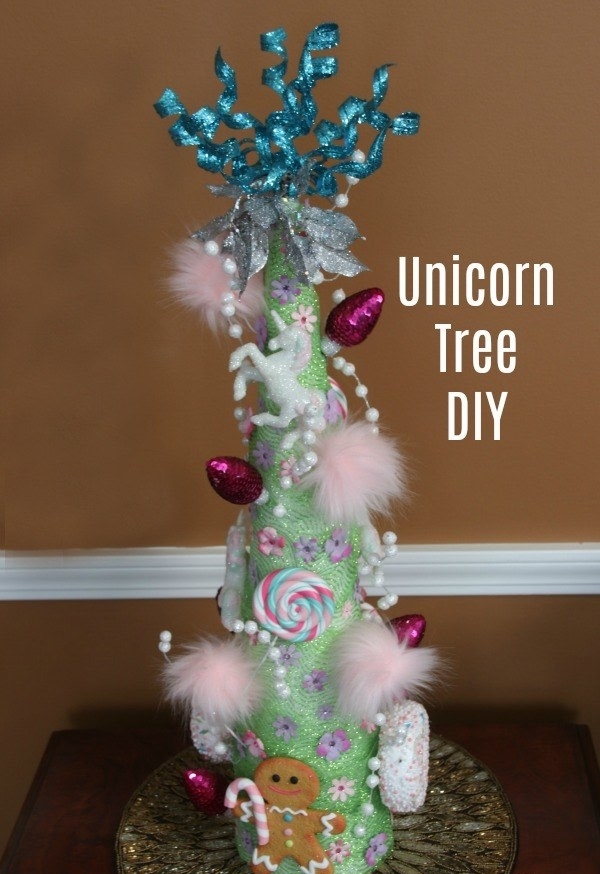
A unicorn tree adds a playful decorative element to a child’s room, craft display, or themed party. A quick paper version can be made by shaping construction paper into a cone, while a sturdier base can be used when I want to keep the decoration for future use.
I like making several sizes rather than one large tree. Placing different heights together gives the display more dimension and makes it easier to work around the size of the available space.
For a party, the colors can match the rest of the decorations instead of adding a completely separate color scheme.
Best for: Unicorn-themed rooms, birthday parties, and whimsical seasonal displays.
15. Fish Craft
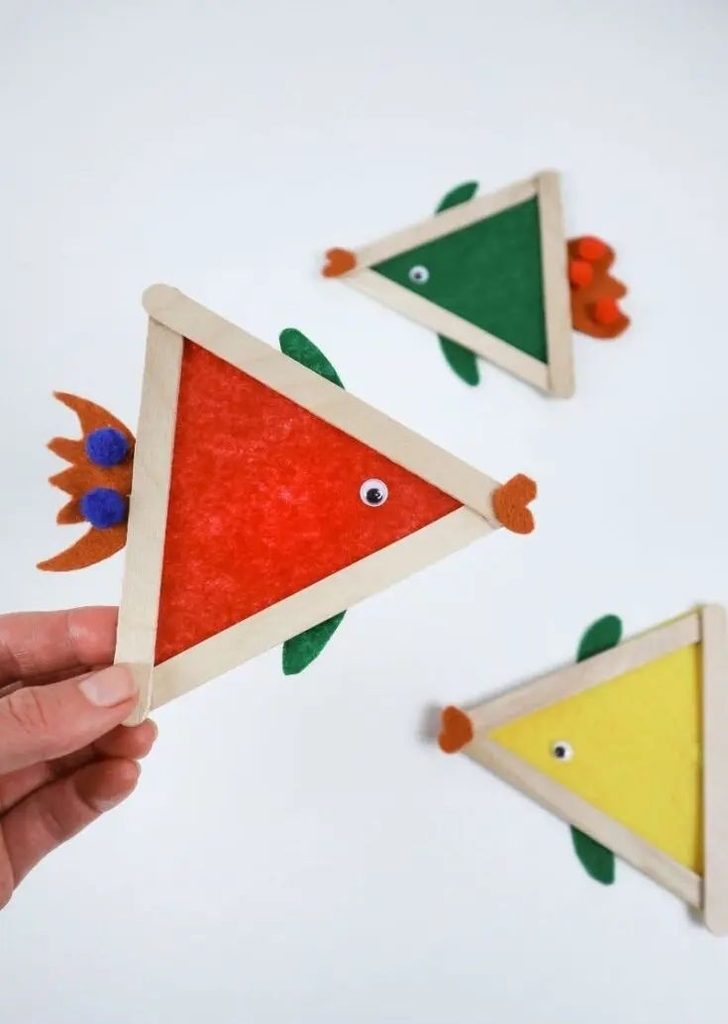
Popsicle-stick fish are simple enough for a basic children’s craft but flexible enough for plenty of decorating. I can arrange the sticks into the body and then add fins, eyes, patterned paper, or painted details.
Instead of making every fish identical, I like creating several patterns to form a small school. Stripes, dots, scales, and contrasting fins make the collection more interesting.
The finished fish can be displayed as wall art or used as part of an underwater-themed project. If I add magnets for refrigerator display, I make sure they are securely attached and keep loose magnets away from young children.
Pro Tip: Sort the craft sticks by size before starting. It makes arranging matching fish much quicker.
16. Pin Cushion Magnetic Saucer
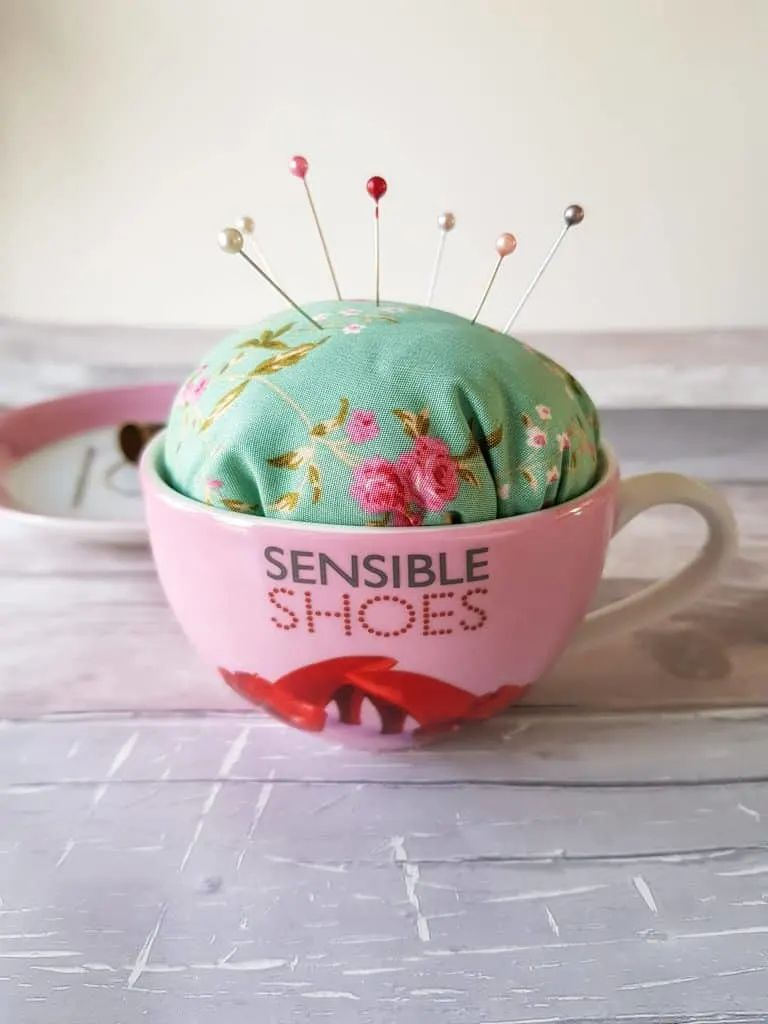
This is one of the more practical ideas in the collection because it combines a pin cushion with a place to collect loose sewing pins.
I like having a designated spot for pins while working because it keeps my sewing surface more organized. The magnetic component can help gather loose metal pins, while the cushion provides a place to store pins during the project.
This is an adult sewing-room project, not a children’s activity. Sewing pins are sharp, and magnetic components should also be kept away from young children.
Pro Tip: Keep the finished saucer in a designated sewing area rather than moving it around the house. A consistent storage spot makes it easier to keep sharp pins contained.
Also read: 17 Pipe Cleaner Crafts for Kids That Are Fun to Twist Together
17. DIY Bookmark
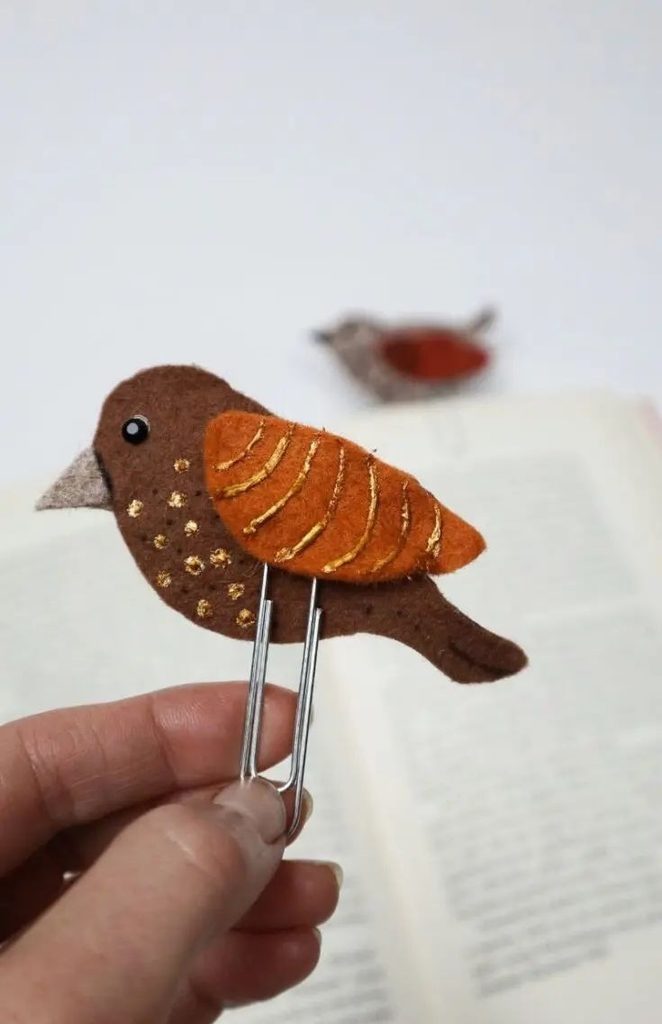
A bookmark is one of the easiest crafts to personalize because the basic shape can be changed in countless ways without making the construction complicated.
I can make an animal, seasonal design, initial, geometric pattern, or illustrated character. Card stock gives a sturdier result than ordinary printer paper, especially when the bookmark will be used regularly.
These also make thoughtful small gifts because the design can be matched to the recipient’s favorite colors, hobbies, or reading style.
Best for: Quick gifts, reading activities, and beginner paper crafts.
18. DIY Rock Photo Holders
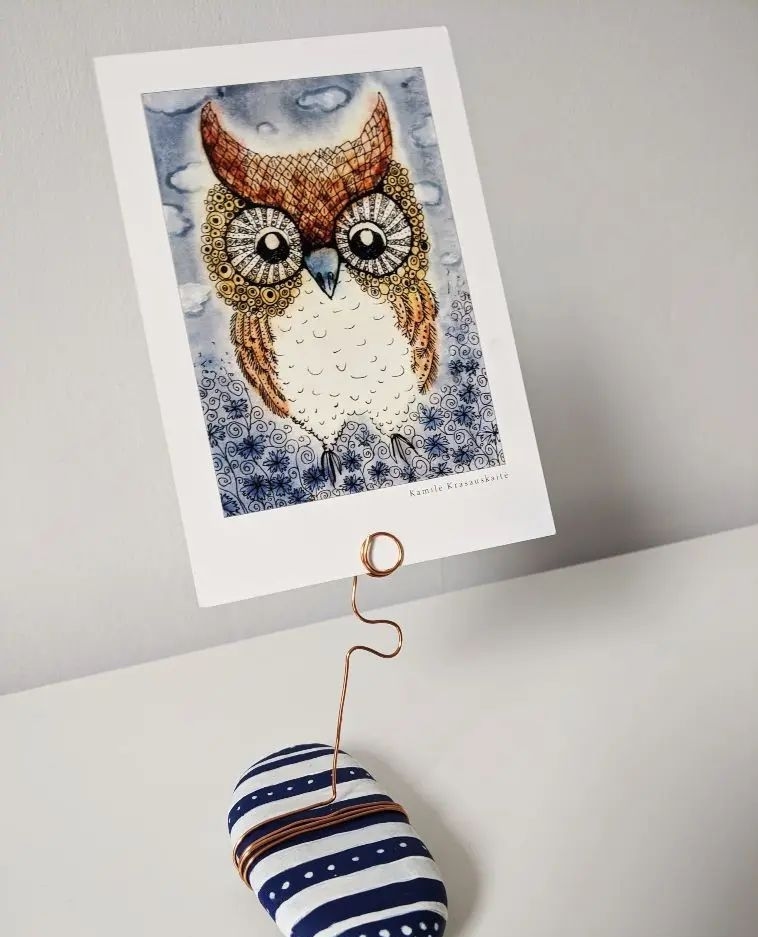
Unlike the painted stone monsters, these rocks have a practical job: holding a photograph or small piece of artwork upright.
I look for stones with a stable base and enough weight to support the wire or holder. Heavier stones are particularly useful when I’m using a taller holder or displaying a larger photograph.
The rocks can be left natural or decorated, but I keep the focus on stability. A beautiful photo holder isn’t useful if it tips over whenever the picture is touched.
Pro Tip: Test the stone with the empty holder before adding a photograph. If it wobbles, choose a wider or heavier base.
19. Suncatcher Craft
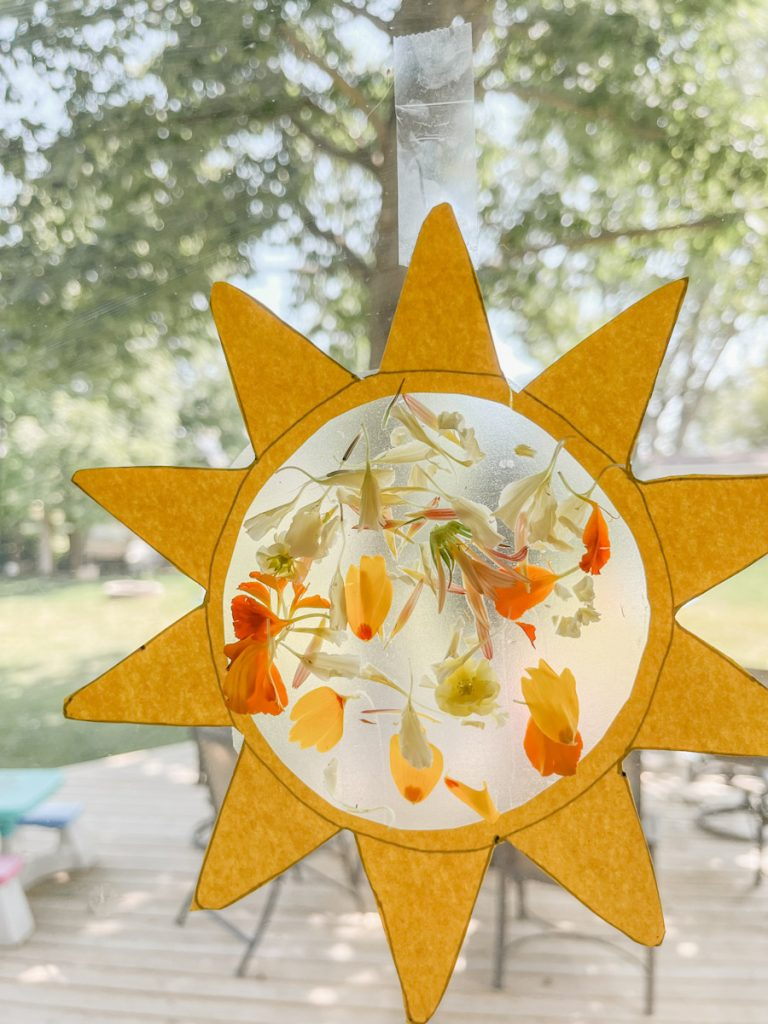
A homemade suncatcher can bring color to a sunny window using lightweight translucent materials that allow light to pass through.
I like experimenting with simple silhouettes such as flowers, leaves, stars, or seasonal shapes. The finished piece can be adjusted to fit a particular window rather than making one size for every space.
For children’s versions, I handle difficult cutting and make sure the finished decoration is securely placed where it will not fall into a walkway or become a hazard.
Pro Tip: Hold your chosen materials up to a window before assembling the suncatcher. This quickly shows whether they let through enough light for the effect you want.
20. Fingerprint Glass Magnets
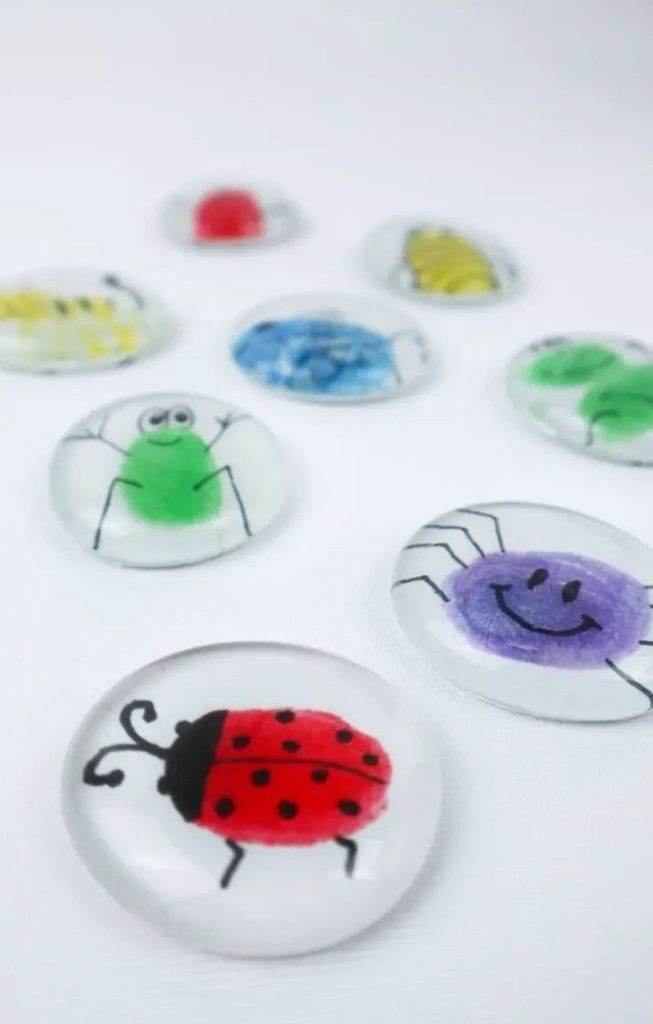
Fingerprint art becomes a useful little keepsake when I turn it into a refrigerator magnet. Children can create the basic fingerprint shapes, while the final design can be finished with drawn details.
Bugs, flowers, animals, seasonal shapes, and simple patterns all work. I like choosing a theme when making several at once so the finished set feels connected.
If the project includes small glass pieces or magnets, I keep those components away from young children and check that everything is securely assembled before the magnets are used.
Safety note: Loose magnets should never be left within reach of young children because swallowing magnets can cause serious injury.
21. Plant Pot Turtle Craft
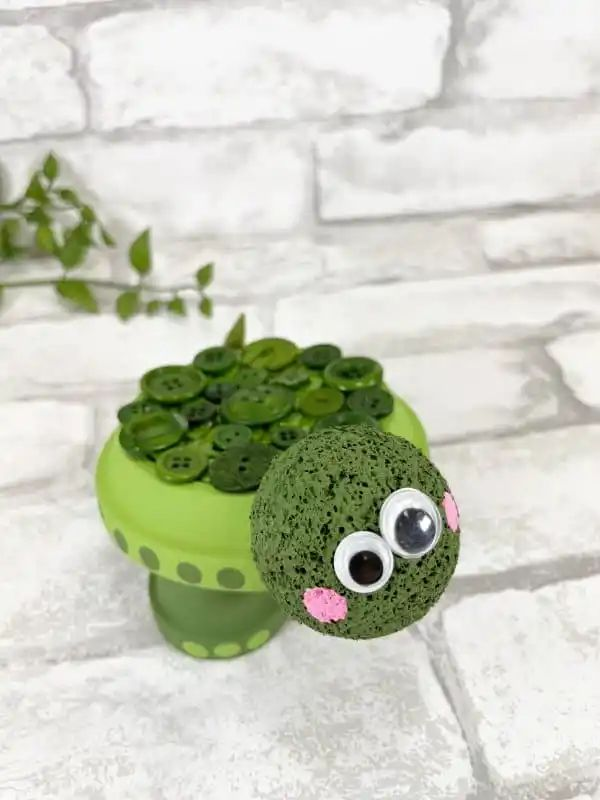
A plain plant pot can become a turtle-shaped decoration while still serving a practical purpose. I like this project because the finished piece can become part of a small indoor or outdoor plant display.
The paint and decorative details can be changed to suit the space. If children are involved, the planting stage can be kept simple so they can focus on decorating the pot.
The important practical point is drainage. If the decorative pot has no drainage hole, I use a suitable inner plant container rather than allowing excess water to sit around the plant’s roots.
Pro Tip: Choose the plant based on the available light and watering needs first, then match the pot decoration to it.
22. How to Draw a Butterfly
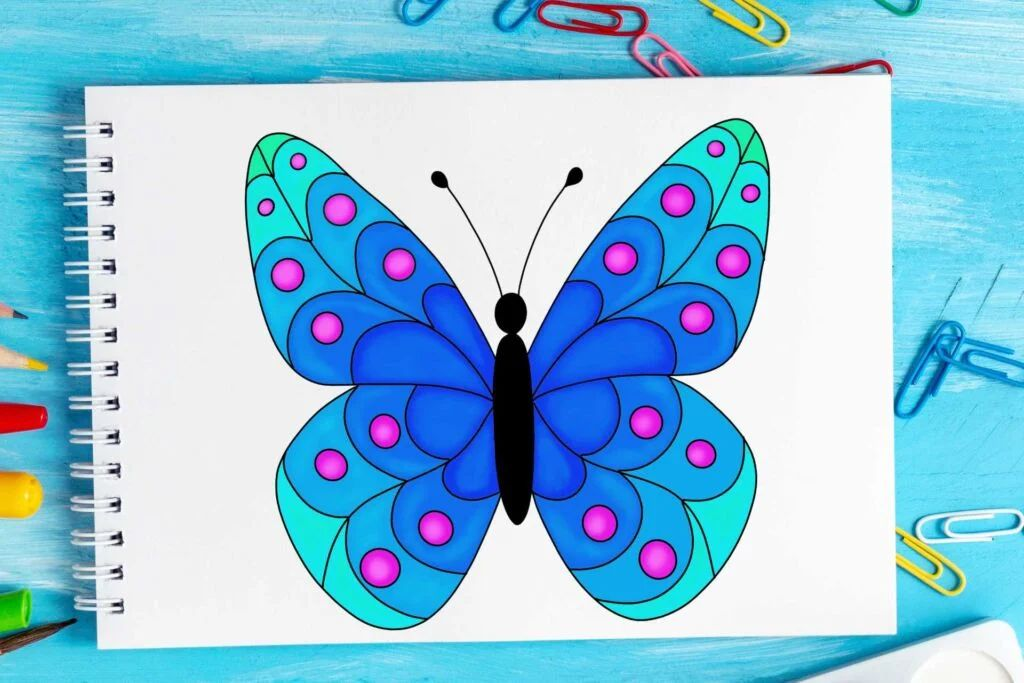
Learning a simple butterfly shape gives me a design I can reuse in cards, bookmarks, wall art, wreaths, and other crafts.
I start with the body and use it as the center point for the two wings. When proportions feel difficult, working on a smaller drawing first can make the shape easier to manage.
For a child who is still learning to draw, a simple tracing outline can provide a starting point without requiring the entire drawing to be copied freehand.
Once the basic butterfly works, I like experimenting with different wing patterns rather than trying to make every drawing identical.
23. Penguin Craft
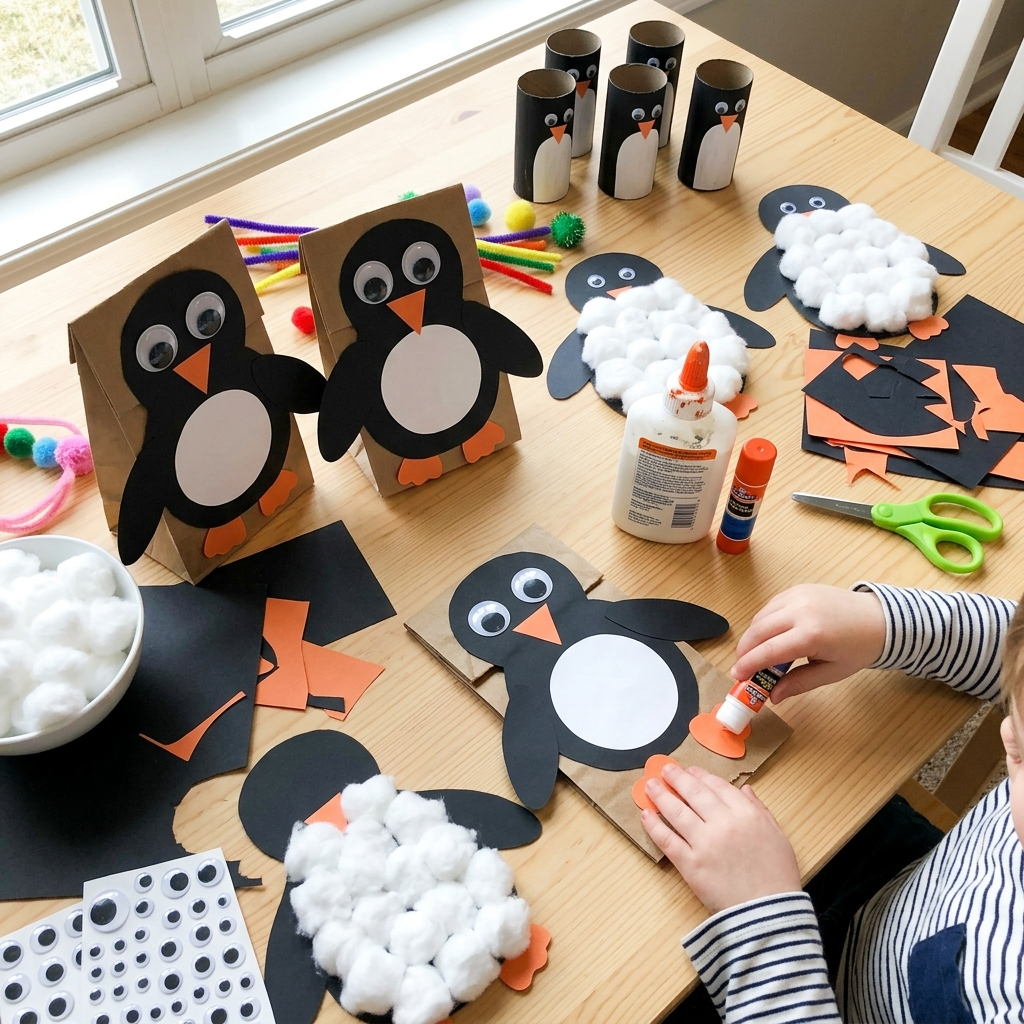
A penguin makes a useful winter craft because its basic black-and-white shape is easy to recognize and simple to customize.
I can add a winter hat, scarf, earmuffs, or other accessories to give each penguin its own personality. A group of them can become a classroom display, winter garland, or seasonal wall project.
For younger children, I keep the shapes larger and avoid making the design dependent on tiny pieces.
Best for: Winter crafts, classroom displays, and children’s art sessions.
24. Sloth Craft
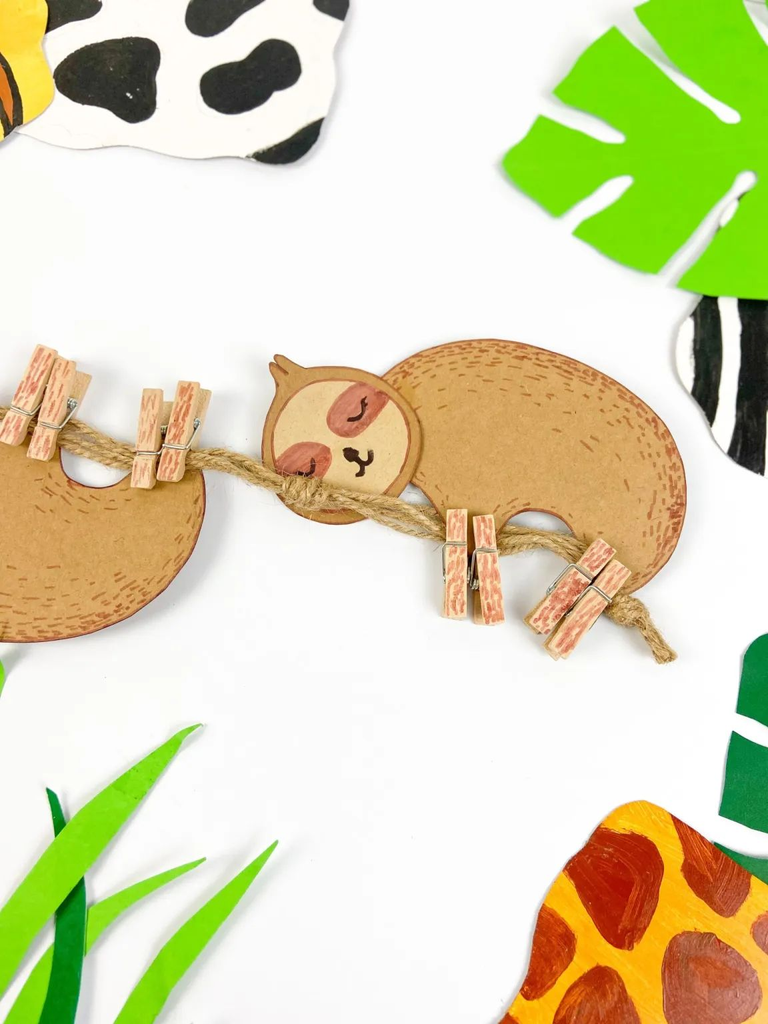
A sloth craft works well for a relaxed afternoon because the basic project combines drawing, cutting, and simple assembly rather than requiring complicated construction.
I can turn the finished sloth into a small display by attaching it to paper vines or using clips to create a hanging scene. This gives the craft a purpose beyond simply making one animal shape.
For younger children, I prepare the harder cutting steps and leave the coloring and decorating to them.
Pro Tip: Use a larger sloth template for a group project. Bigger pieces are easier for small hands to decorate and less frustrating to assemble.
25. Sandpaper T-Shirt
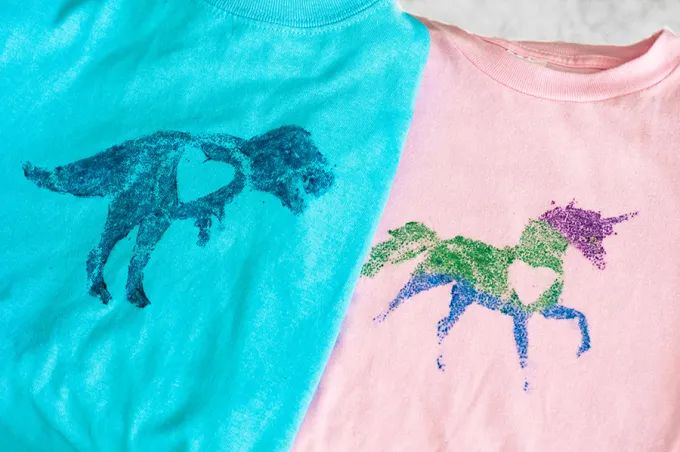
The sandpaper T-shirt project is best treated as an experiment because the result can vary depending on the fabric, paint, design, and transfer method.
I start with a simple silhouette and test the technique on scrap fabric before working on the shirt I actually want to wear. That small test gives me a chance to check the paint coverage and how the fabric responds.
Not every paint is suitable for clothing, so I check the manufacturer’s directions for fabric compatibility, curing time, and washing instructions.
Pro Tip: Keep the first design simple. Large shapes with clear edges are easier to test than detailed artwork.
26. Paper Dinosaur Craft
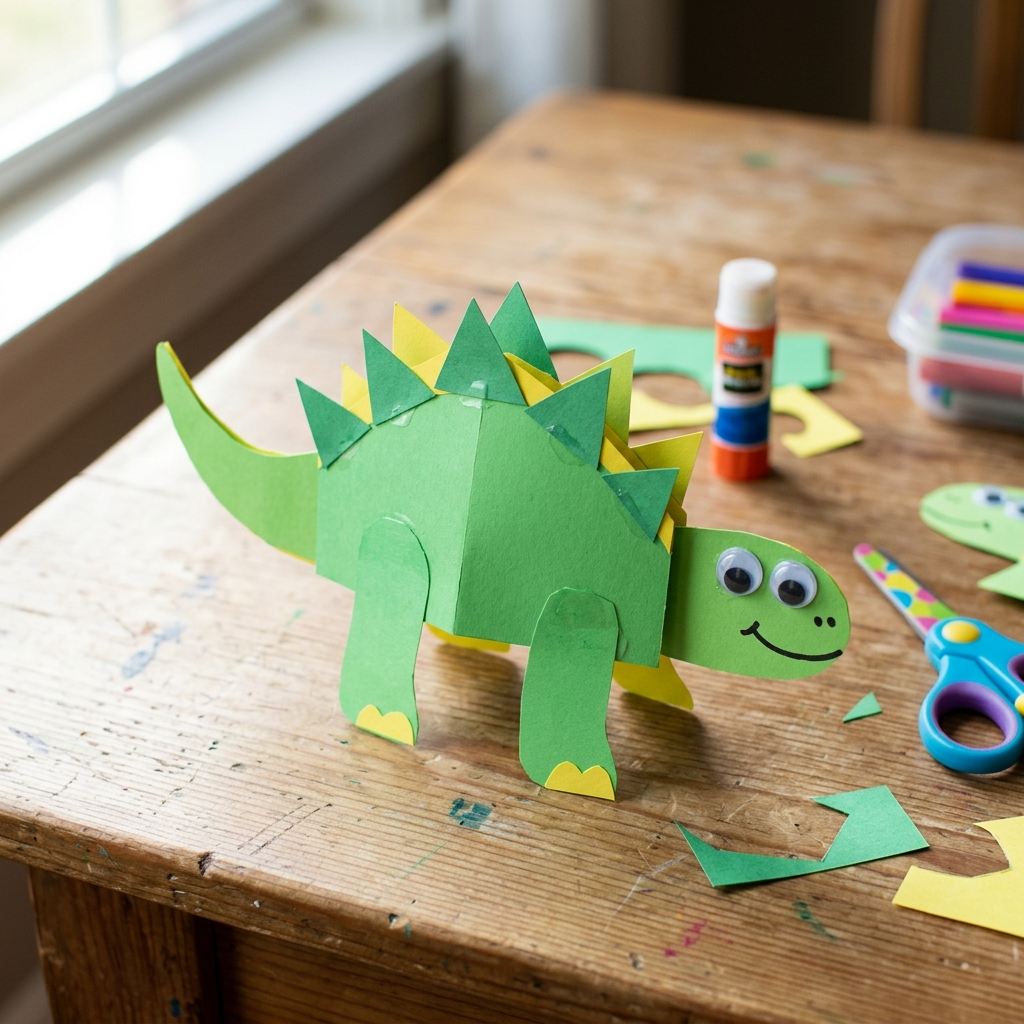
A paper dinosaur is a straightforward project for practicing cutting, decorating, and assembling shapes.
I can use a simple template as a starting point, then turn the finished dinosaur into a card, wall picture, classroom display, or part of a larger prehistoric scene.
When working with younger children, I choose templates with broad shapes and fewer complicated curves. Older children can try more detailed dinosaurs or create their own designs.
Best for: Cutting practice, dinosaur-themed activities, and paper crafts.
27. Straw Flowers
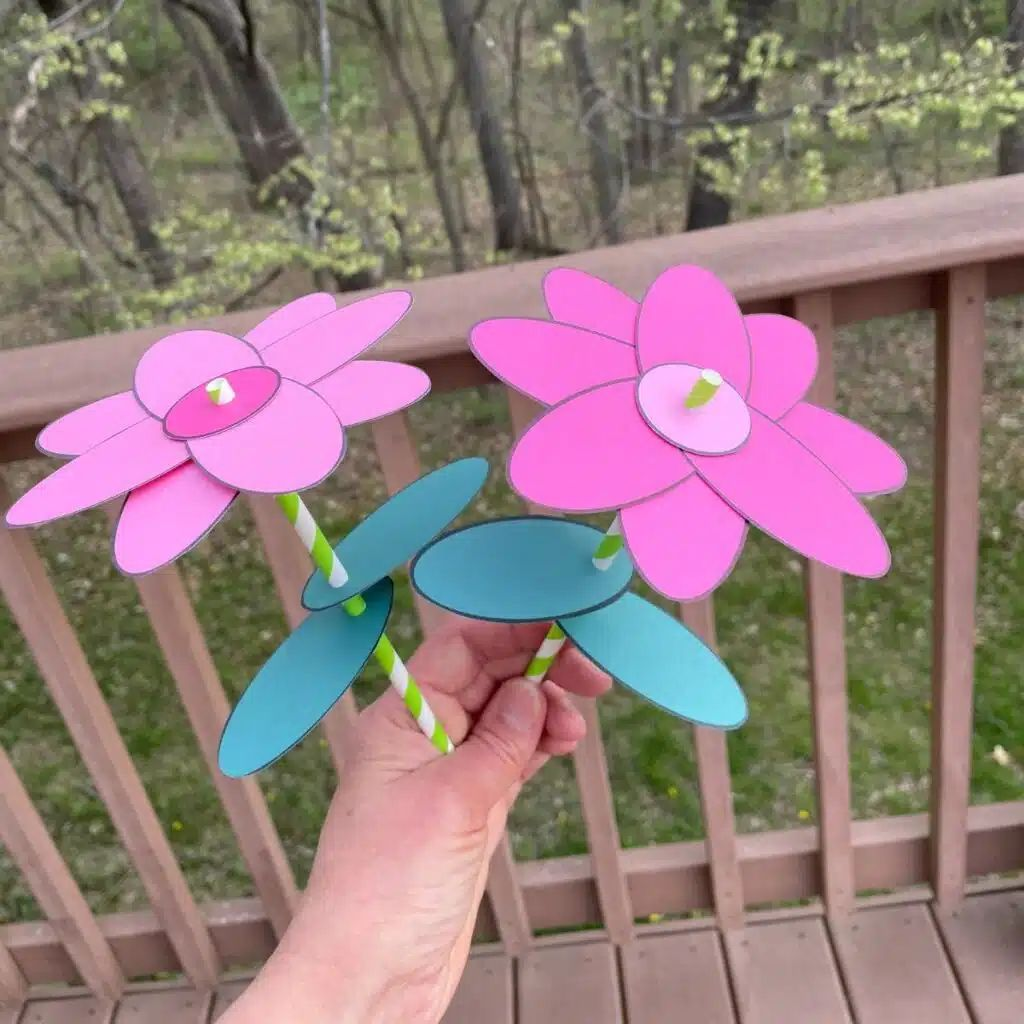
Straw flowers are a colorful way to turn ordinary drinking straws into a small decorative arrangement. I can vary the flower shape and color without changing the basic concept.
For a seasonal display, the colors can shift with the time of year. Pastels work nicely for spring, while stronger colors can make a summer arrangement feel brighter.
I prefer keeping embellishments lightweight so the flowers remain easy to arrange. If children are helping, I handle any cutting steps that require sharper scissors.
Pro Tip: Make several flowers in different sizes instead of cutting every flower to exactly the same dimensions. The finished bouquet looks more varied.
28. Dinosaur Pencil Holder Craft
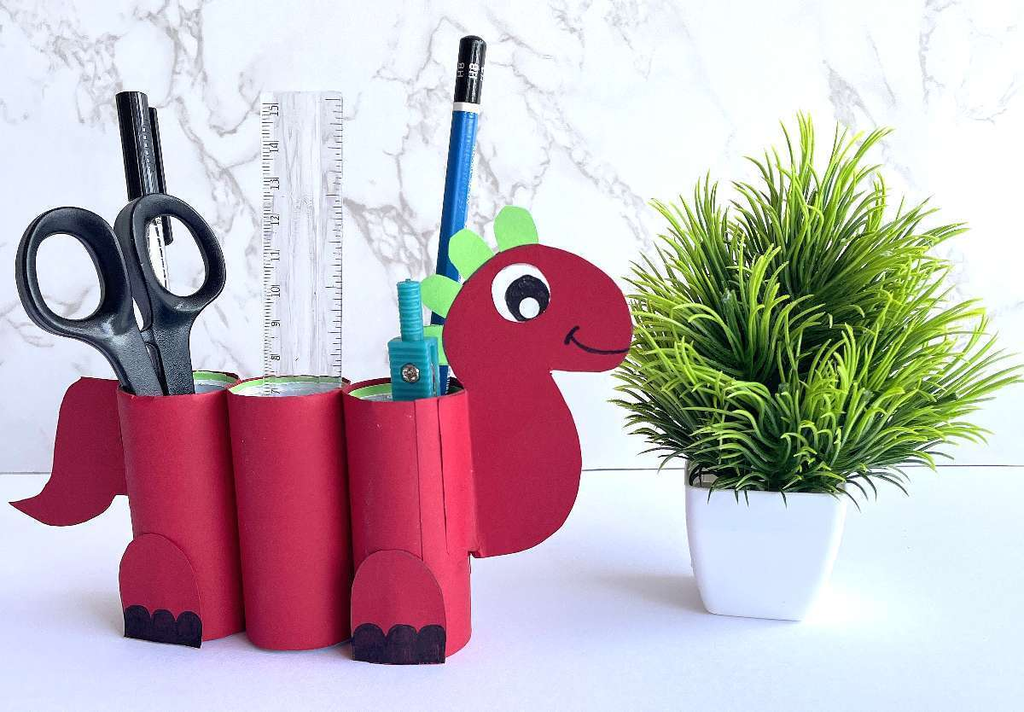
This dinosaur project has a practical purpose that separates it from the other cardboard-tube crafts in the article: it becomes a desk organizer rather than simply a decoration.
I can cover the cardboard tubes with construction paper, decorate them as dinosaur sections, and assemble them into a holder for pencils, markers, glue sticks, or other small supplies.
Before decorating, I make sure the tubes are stable and arranged at useful heights. A slightly taller section can hold pencils, while shorter sections can work for smaller tools.
Pro Tip: Put the tools you use most often beside the unfinished organizer and measure around them before fixing the sections in place. That helps prevent compartments from being too narrow.
29. Craft Tool Organizer
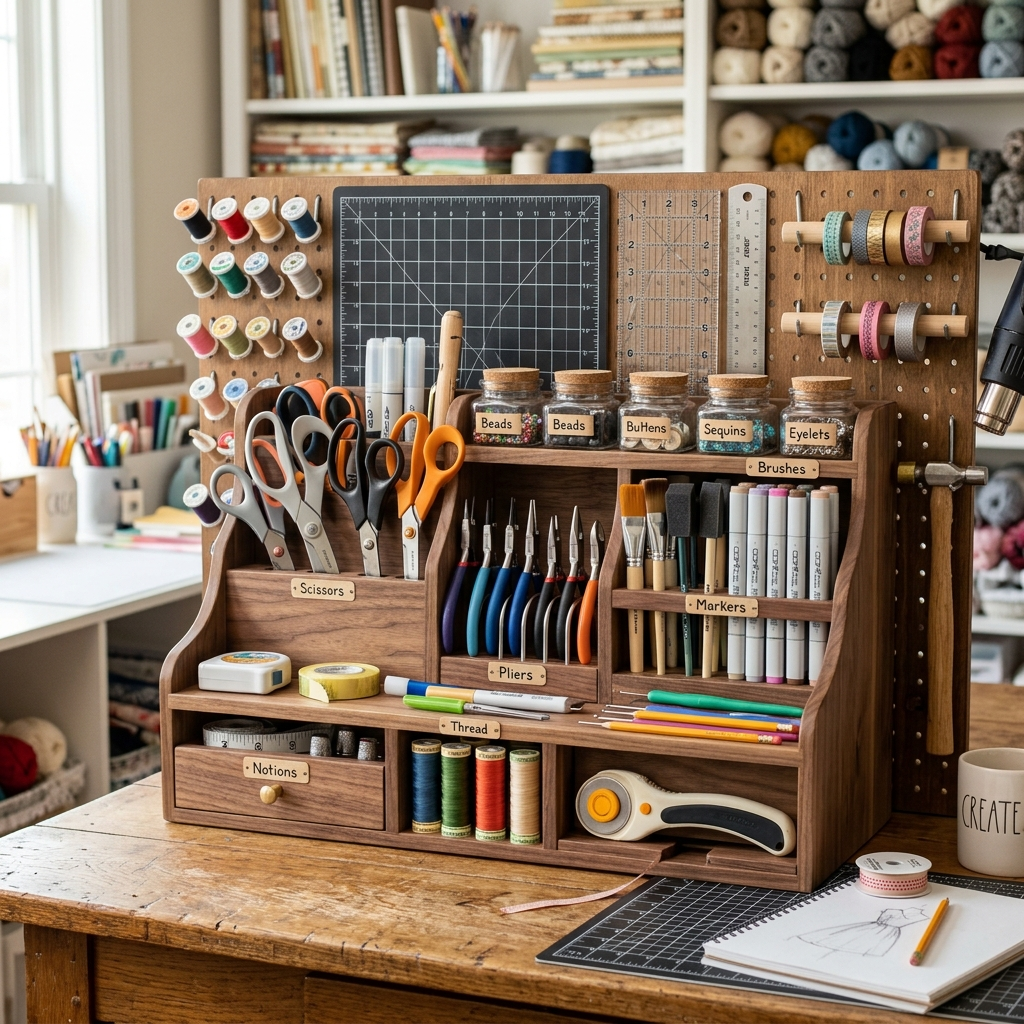
When my craft supplies begin taking over the workspace, a simple cardboard organizer can be more useful than another decorative container.
I can add vertical and horizontal dividers to create spaces for scissors, markers, brushes, rulers, glue, or other frequently used tools. The layout should be based on the actual supplies I use rather than a generic compartment design.
The outside can remain simple or become a decorating project of its own. I like having the storage structure planned first so decoration doesn’t get in the way of everyday use.
Pro Tip: Measure your longest and widest tools before cutting the dividers. A few minutes of measuring can save a lot of frustration later.
30. Felt Apple Pencil Toppers
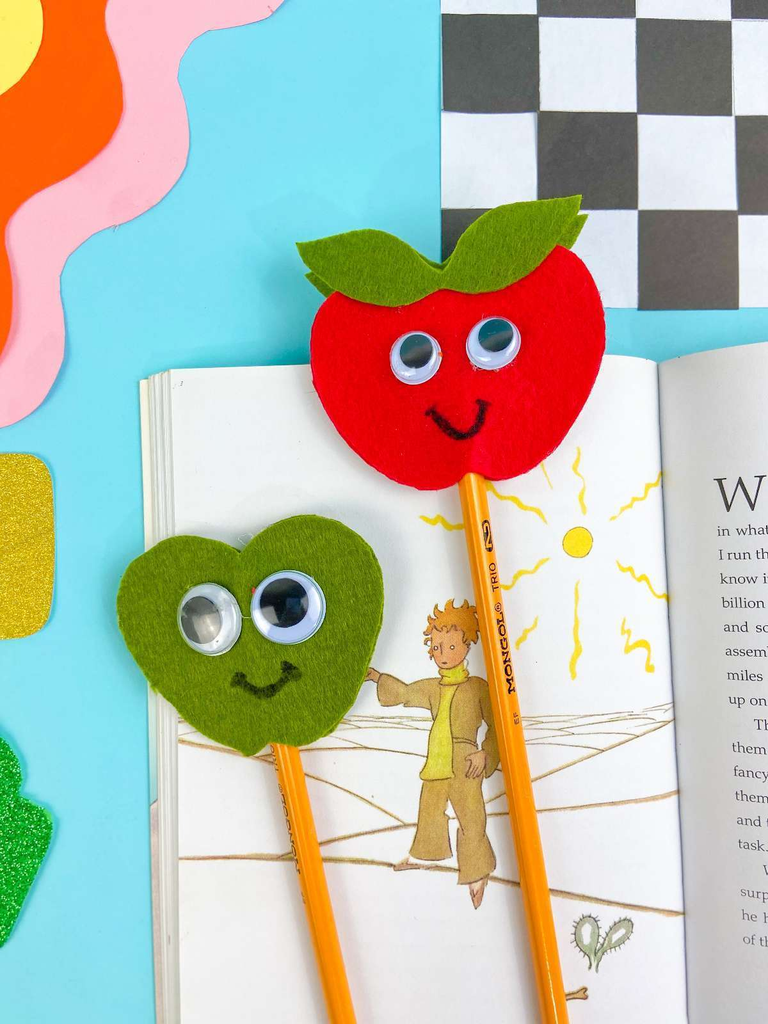
Felt apples make a fun back-to-school project, particularly toward the end of summer when apple-themed decorations and classroom activities become more common.
I like creating a paper template first, then transferring that shape to felt. This makes multiple apples more consistent and reduces wasted material.
Red is an obvious choice, but green and yellow apples can make the finished collection more varied. A small felt leaf or stem adds another detail without requiring a complicated pattern.
For children, I make sure the finished topper fits securely and doesn’t interfere with writing. Small loose pieces should be kept away from young children who may put them in their mouths.
31. Origami Puppy
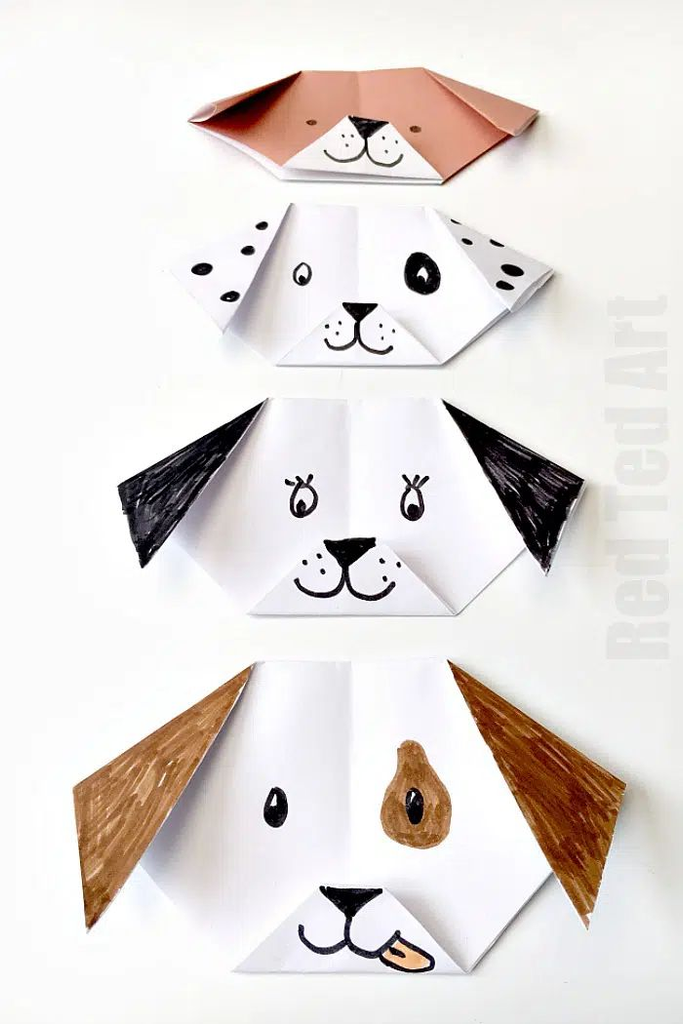
An origami puppy is a simple paper project that rewards careful folding rather than a long list of supplies.
I start with square paper and work through each fold one at a time, pressing the creases firmly. Once the puppy shape is complete, I can add eyes, a nose, spots, a collar, or floppy-ear details with drawing materials.
For younger children, I demonstrate each fold and let them copy one step at a time. Older children can follow a visual folding sequence more independently.
Pro Tip: Use ordinary paper for the first attempt. Once the folds make sense, I switch to decorative origami paper for a cleaner finished version.
Read this next: 21 Cute Summer Crafts for Preschoolers
Conclusion
What I like about these 31 cute craft ideas is that they aren’t all trying to serve the same purpose. Some become seasonal decorations, some are useful around the house, and others are simply enjoyable projects for an afternoon.
When choosing one, I start with the time available and the supplies already on hand. A paper spider or bookmark makes sense when I want something quick, while a wreath, organizer, or fabric project gives me more to work on when I have extra time.
For family crafting, I also match the project to the people making it. Younger children may need prepared pieces or adult help, while older kids, teens, and adults can take on more detailed cutting, sewing, decorating, or construction.
I don’t think these projects need to look exactly like a finished example, either. Changing the colors, patterns, size, or theme is often what makes a simple DIY feel like something that belongs in my home or was made specifically for someone I care about.
Frequently Asked Questions
What are some easy crafts to make at home?
Paper spiders, bookmarks, paper dinosaurs, origami puppies, ladybugs, and simple painted stones are all approachable options. I usually choose based on the materials I already have and how much time I want to spend.
What crafts can kids make with household materials?
Cardboard tubes, paper, craft sticks, rocks, and leftover cardboard can be turned into several of these projects. Younger children may need adults to handle cutting, hot glue, or small components.
What craft supplies are the most versatile?
I find paper, card stock, cardboard tubes, craft sticks, felt, yarn, paint, and basic adhesive especially useful. These materials can support both decorative and functional projects.
Which crafts are suitable for beginners?
Bookmarks, paper animals, painted stones, butterfly drawings, straw flowers, and simple origami are good starting points. More involved projects such as the pedestal bowl or craft organizer require additional planning and construction.
How can I make children’s crafts safer?
I prepare sharp or difficult cutting steps when appropriate, keep hot glue and sewing pins under adult control, and keep balloons, loose magnets, and small pieces away from children who may put them in their mouths. I also check the finished craft before giving it to a child to use.