21 Fun Pinecone Christmas Crafts
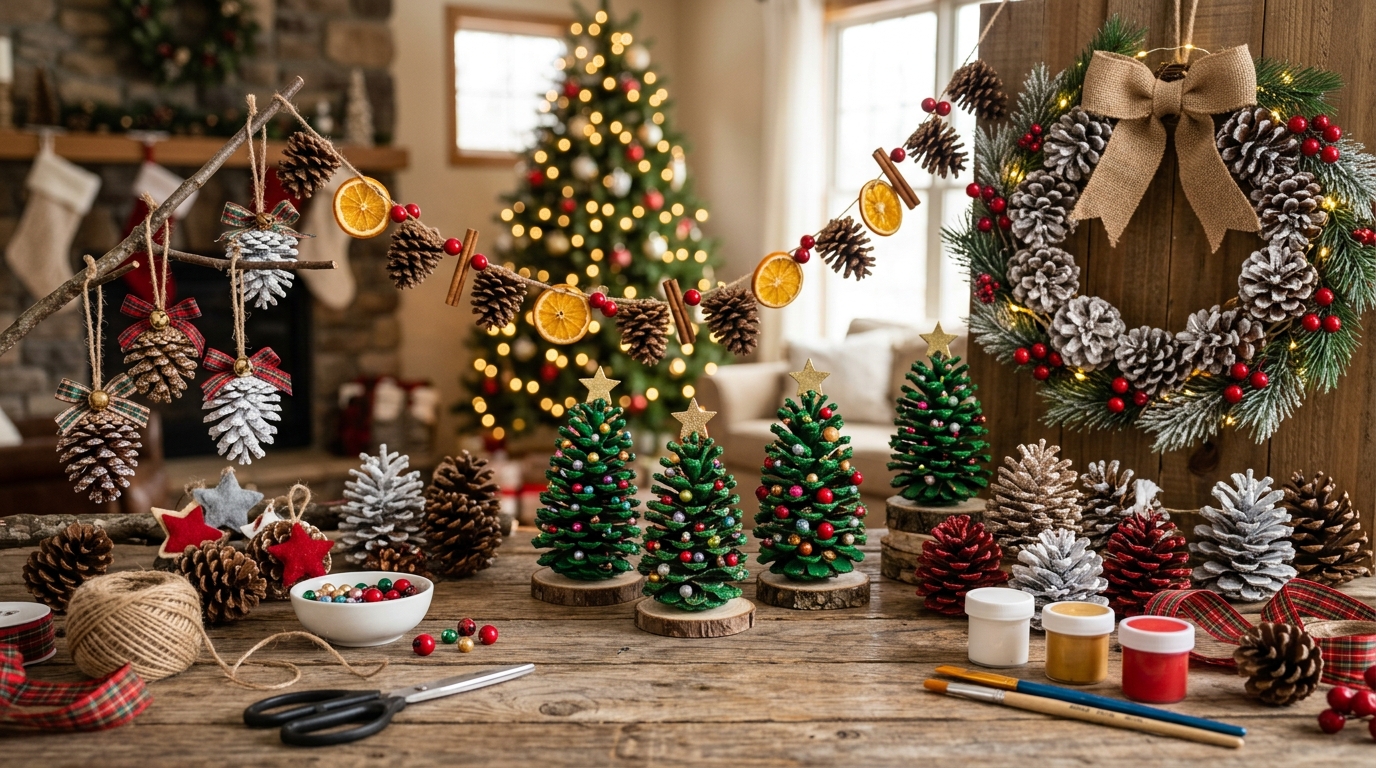
Pinecones are one of my favorite materials for homemade Christmas décor because they already have an interesting shape and can be decorated with supplies I often have on hand. A few pinecones, some paint, ribbon, felt, twine, or pom-poms can become ornaments, mini trees, wreaths, garlands, and holiday characters.
When I collect pinecones outdoors, I inspect them before bringing them inside. I remove loose debris and discard cones that are badly damaged or unsuitable for the project. I also make sure they are completely dry before painting, gluing, or applying a finish.
That preparation makes a noticeable difference when I’m working with natural materials. I protect my work surface when using paint, glitter, adhesives, or finishes and let each product dry or cure according to its directions. Once finished, I store the decorations somewhere dry so they are ready for another holiday season.
These 21 pinecone Christmas crafts show how one inexpensive natural material can be turned into many different types of holiday décor. The collection includes individual Christmas trees, tree ornaments, wreaths, garlands, gnomes, owls, snowmen, angels, scented decorations, and gift embellishments.
Some projects are better suited to a quiet DIY afternoon, while others make good family craft activities. I choose the project based on the pinecone size, the supplies available, where the finished decoration will go, and whether children will be involved.
Save this for later
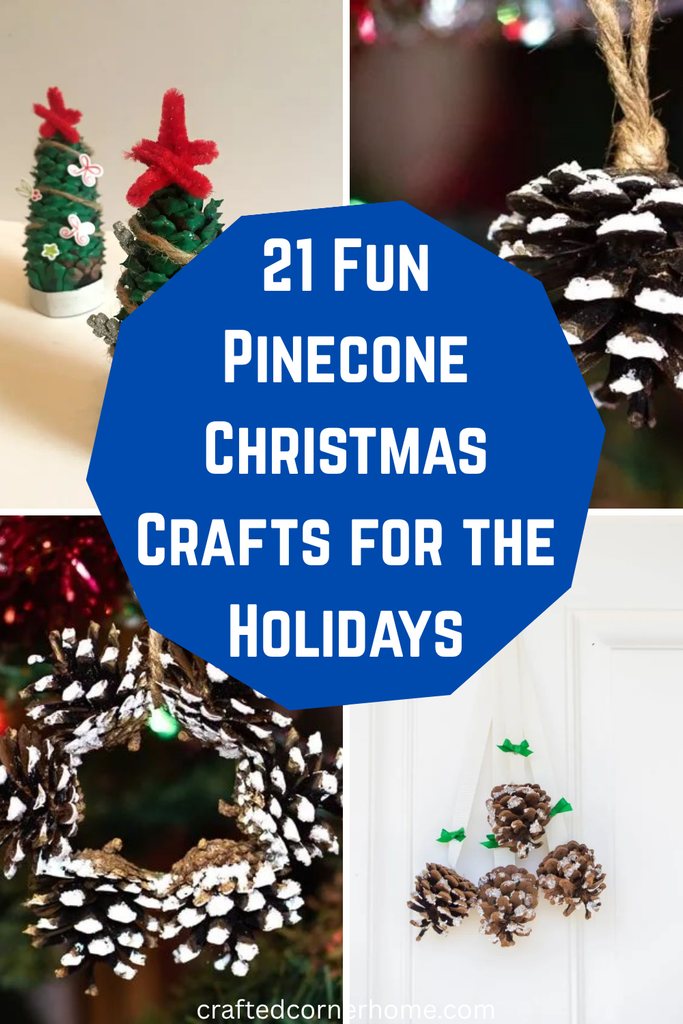
Table of Contents
For children’s projects, I pay particular attention to small pieces such as pom-poms and beads, as well as hot glue and cutting tools. For candle or scented projects, I keep combustible and fragranced materials away from food and open flames and follow the directions for any products I use.
Key Takeaways
- Clean, inspect, and completely dry outdoor pinecones before crafting with them.
- Choose the project according to the pinecone size, display location, and skill level.
- Felt, ribbon, twine, paint, paper, cotton, and pom-poms can change the look of the same basic pinecone.
- Mix natural and decorated pinecones when you want a Christmas display with more texture and less visual clutter.
- Keep small craft pieces away from young children who may put them in their mouths.
- Adults should handle hot glue guns, sharp tools, and open flames.
- Store completed pinecone decorations in a dry place and check them before reusing them each year.
Related article: 20 Fun Crafts for Kids That Will Keep Them Busy
Pine Cone Christmas Crafts
1. Pine Cone Christmas Trees
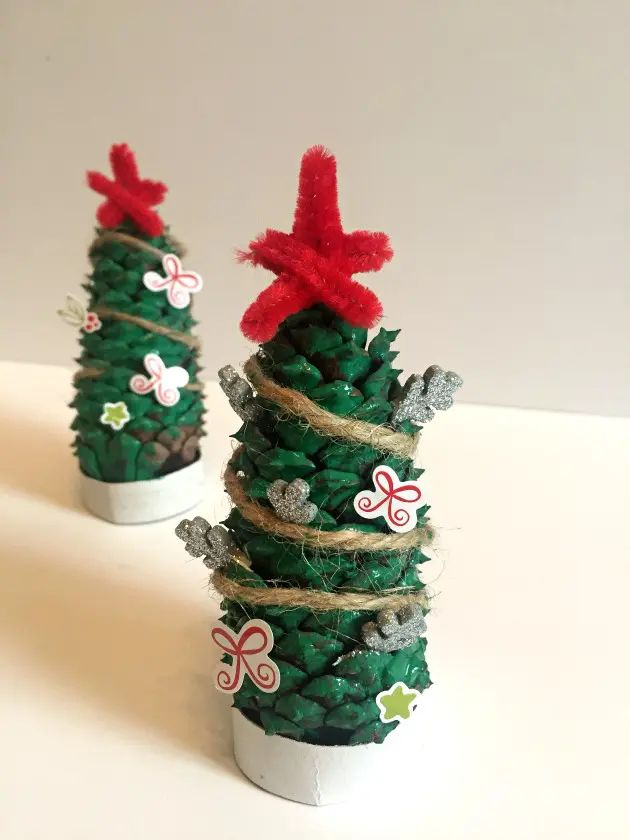
The shape of a pinecone gives me a ready-made starting point for an individual miniature Christmas tree. For a traditional finish, I add green paint and a few tiny decorations, but leaving the cone mostly natural creates a rustic tree that needs very little embellishment.
I like placing these little trees individually on shelves, side tables, or a mantel rather than treating them as one large centerpiece. A small wooden base can help if a cone doesn’t stand securely on its own.
For a more polished finish, I keep the decorations small enough that the scales remain visible. That texture is part of what makes a pinecone tree look handmade.
Pro Tip: Test the pinecone on its intended surface before decorating it. If the base is uneven, attach it to a small, stable base after the paint and decorations have dried.
2. Snowy Pinecone Ornaments
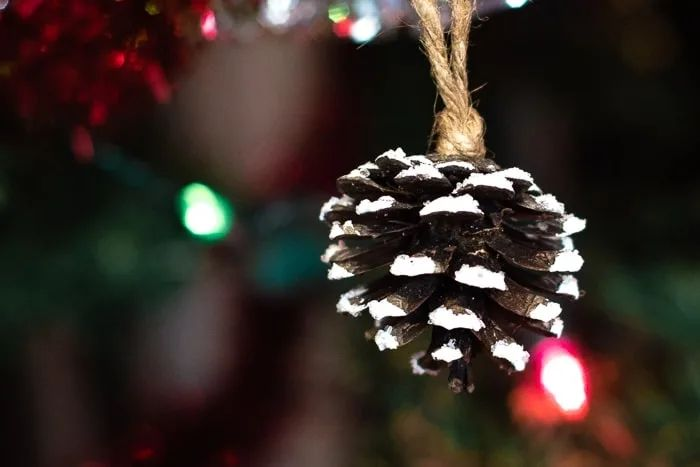
For a winter-style tree, I turn individual pinecones into snowy ornaments by adding white accents to the tips of the scales. I don’t cover the entire cone because leaving some of the original texture visible gives the ornament more depth.
A loop of ribbon or twine makes a simple hanger. I attach it securely and keep the finished ornament lightweight so it doesn’t place unnecessary strain on a tree branch.
These also suit a neutral Christmas decorating scheme, especially when mixed with plain wood, greenery, or other understated ornaments.
3. Miniature Pinecone Wreath Ornaments
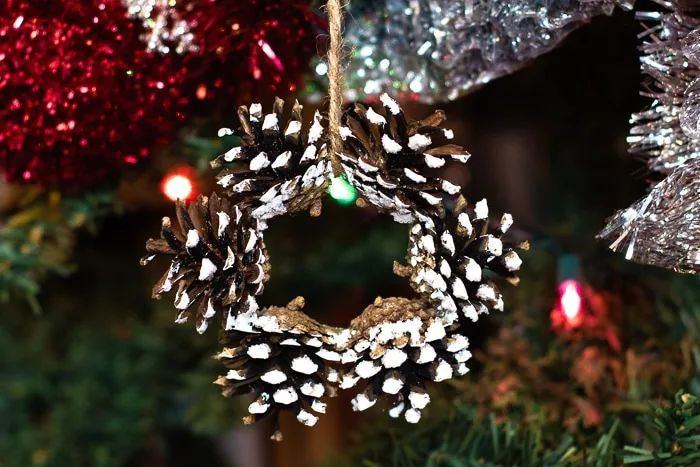
This project uses several small pinecones to create an actual miniature wreath rather than a single decorated cone. I arrange the cones in a circle first, then secure them to a suitable small wreath base.
White paint or another appropriate decorative material can give the tips a frosted appearance. A small ribbon bow finishes the ornament without hiding the pinecones.
These miniature wreaths are especially useful when I want several matching handmade ornaments. Because the cones are arranged around a center opening, the finished shape looks quite different from the single-cone ornaments in the other projects.
Pro Tip: Complete the entire arrangement before applying adhesive. Moving the pinecones around first makes it easier to create an even circle and distribute the weight.
4. Snowy Pinecone Door Hanger
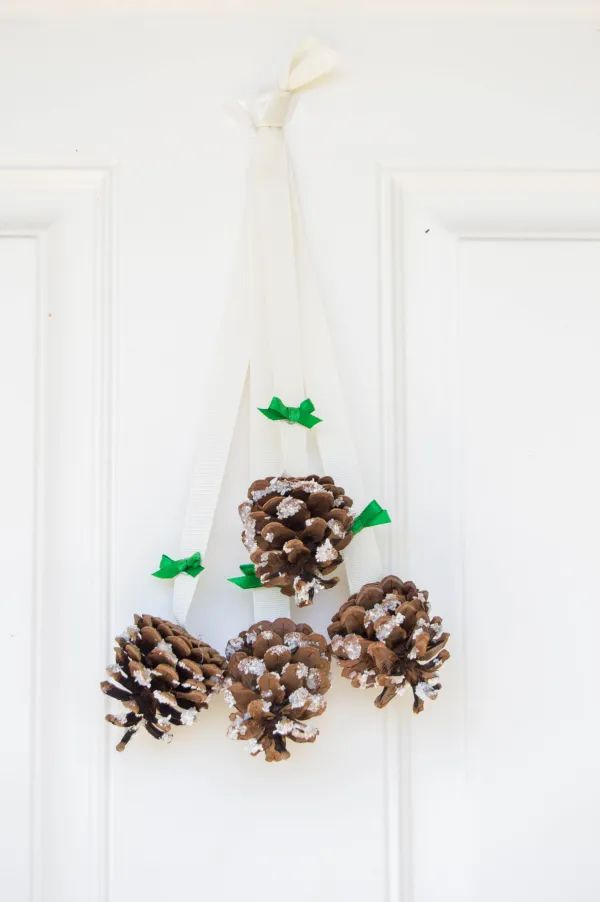
Instead of making a small ornament, I can scale the same natural material into a door decoration. I group pinecones into a larger arrangement and add white accents for a snowy Christmas appearance.
A sturdy backing or suitable wreath-style base gives the decoration more stability than relying on individual glue joints. I also choose a secure hanging point because a larger cluster of pinecones can become surprisingly heavy.
This is a nice choice for a covered porch or sheltered entryway. For a fully exposed door, I consider moisture, wind, temperature, and the durability of every material before leaving the decoration outdoors.
5. Adorable Christmas Gnomes
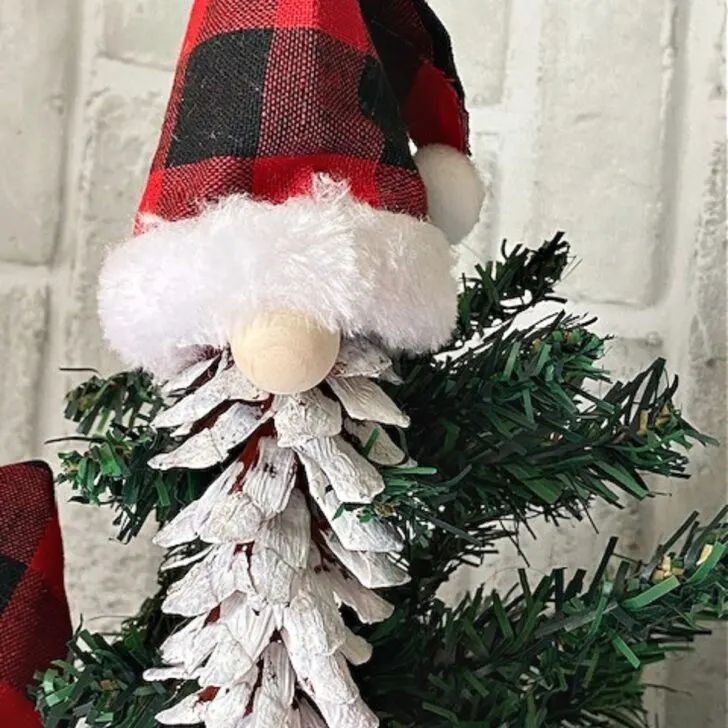
A large pinecone makes a fun body for a Christmas gnome, while its scales can resemble a beard. A fabric or felt hat and a wooden bead or other suitable nose give the character most of its personality.
I enjoy making these in different sizes and giving each one a slightly different hat. They look at home on a mantel, shelf, or holiday tray where their small scale can be appreciated up close.
For a family craft, adults can prepare or attach the pieces that require hot glue while children choose colors and decorate the hats with age-appropriate materials.
6. Pom Pom Pine Cone Ornaments
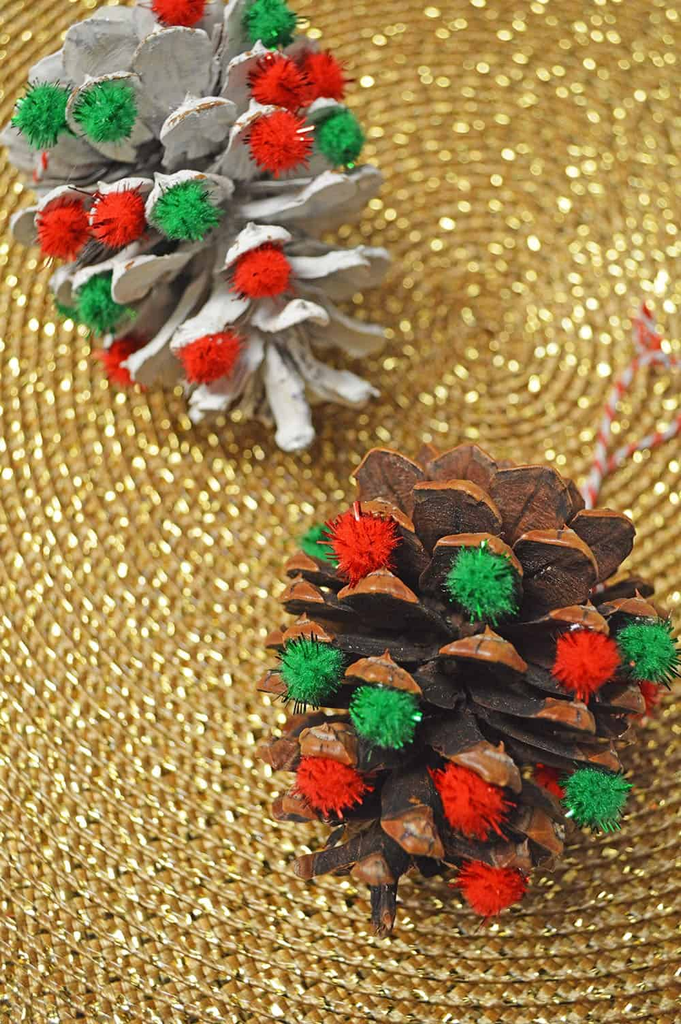
For this ornament, the pinecone itself becomes the decoration. Small pom-poms can be tucked between the scales in red, green, white, or any color combination that matches the tree.
Unlike the snowy ornament, this project has a playful, colorful appearance. It can also be adapted for gift wrapping by attaching one finished cone to a ribbon or package rather than using it only as a tree ornament.
I keep the amount of decoration controlled so the pinecone doesn’t become covered in adhesive or lose its recognizable shape.
Pro Tip: Place the pom-poms before gluing them. Once you know the arrangement, use small amounts of adhesive in the selected spaces instead of filling the scales with glue.
7. Christmas Kissing Ball
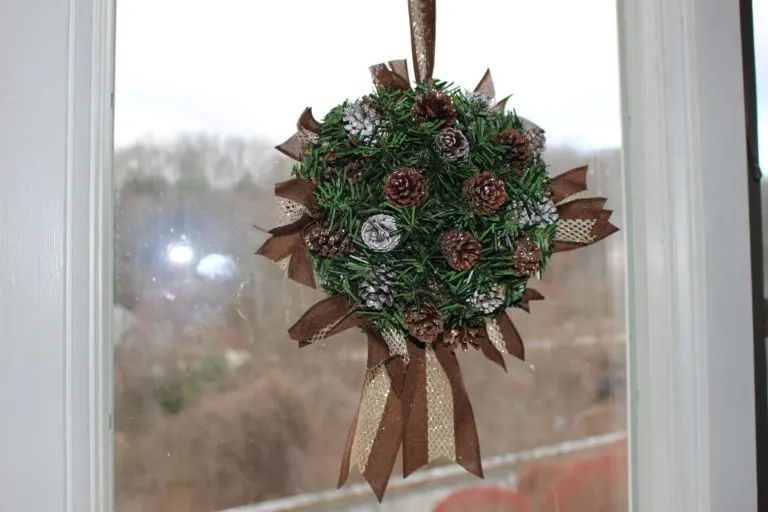
A pinecone kissing ball gives me a larger hanging decoration made from many individual cones. I arrange the pinecones around a suitable round base and vary their orientation so the finished shape has dimension from different viewing angles.
Natural brown cones can be combined with white or metallic accents for a traditional winter look. A ribbon hanger can finish the top and make the decoration easier to display.
Because the completed piece can be heavier than a single ornament, I pay attention to the strength of both the base and hanging point before displaying it overhead.
8. Pinecone Tabletop Christmas Trees
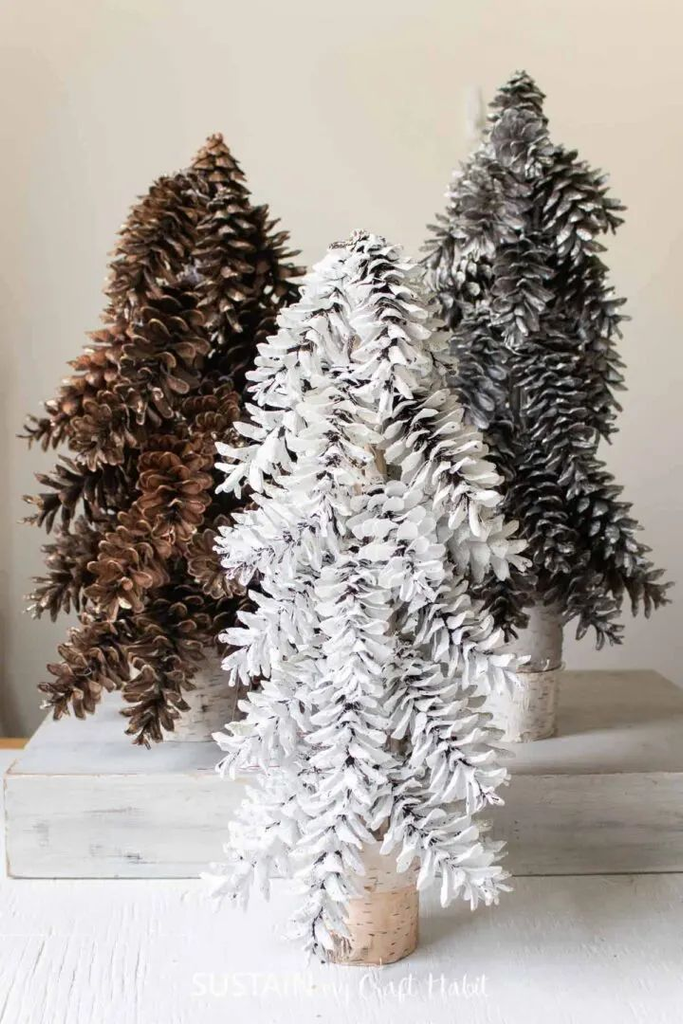
This project is different from making one miniature tree. Instead, I use several pinecones to create a coordinated tabletop display, often keeping their finishes similar so they read as one collection.
A group of natural cones in different sizes can create a Scandinavian-inspired arrangement without needing much color. I might add small white details to just a few of them rather than decorating every piece.
This approach works particularly well on a dining table, console, mantel, or shelf where several small trees can be grouped together.
Pro Tip: Arrange the largest pinecone toward the back and the smaller ones toward the front when creating a tabletop grouping. This helps each piece remain visible without making the display feel crowded.
9. Pine Cone Christmas Tree Crafts
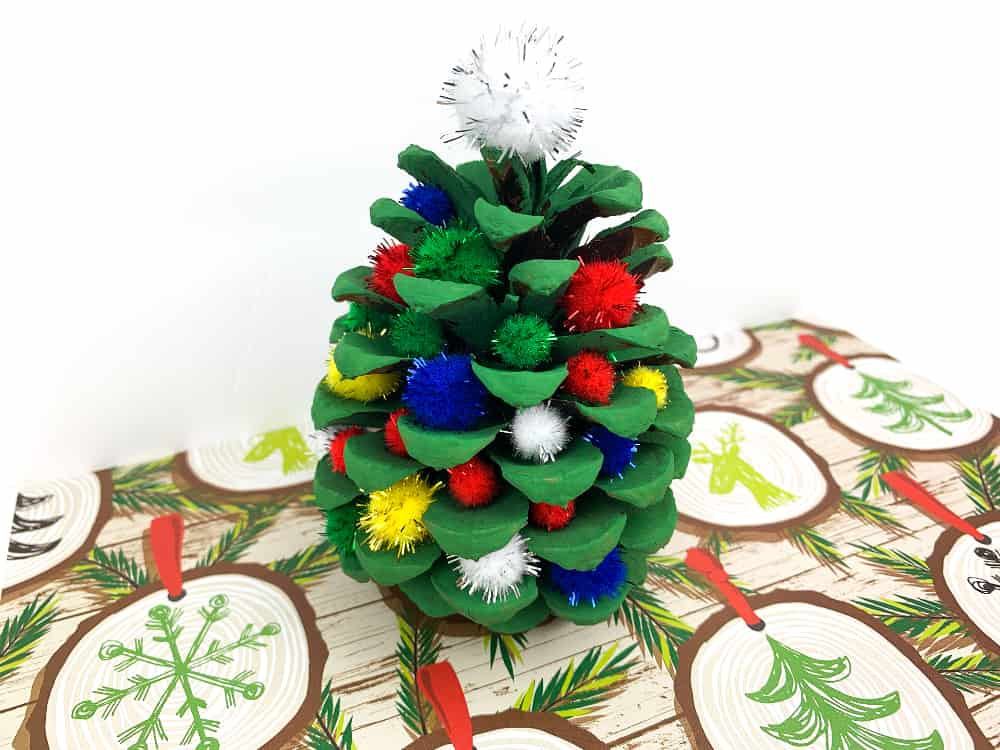
For a children’s craft afternoon, I treat the pinecone as a blank canvas rather than trying to create a finished décor piece with a specific style. Children can paint the cones and add age-appropriate decorations to create their own colorful Christmas trees.
This is the most activity-focused tree idea in the collection. The goal is less about achieving matching décor and more about giving children choices in color, pattern, and decoration.
I protect the table with a washable covering and prepare materials before the activity begins. Small decorative pieces should be kept away from children who may put them in their mouths, and adults should handle hot glue or sharp cutting tools.
10. Giant Pinecone Garlands
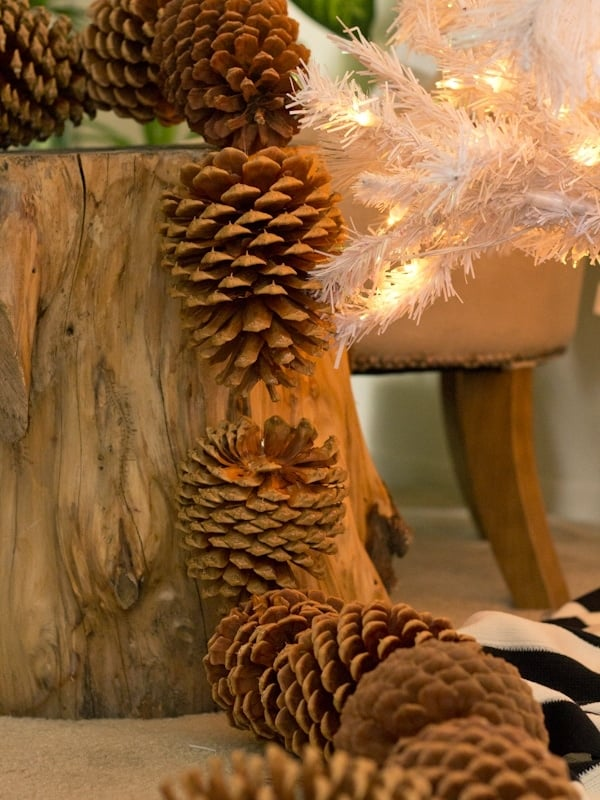
When I have a larger collection of pinecones, I can turn them into a substantial statement garland. I use sturdy twine or another suitable support and allow more space between the cones so the finished strand has presence across a mantel, wide doorway, or large decorating area.
This is a heavier, more substantial project than a small shelf garland. I check the hanging points and the weight of the completed strand before putting it in place.
The cones can remain natural for a woodland Christmas look or receive light white, metallic, or green accents to coordinate with the rest of the room.
Pro Tip: Measure the decorating area before assembling the garland and leave some extra length at the ends for securing it. It is much easier to shorten a strand than discover that it doesn’t reach both ends of the space.
Also read: 13 Cute Wine Cork Crafts for Christmas
11. Scented Pinecones
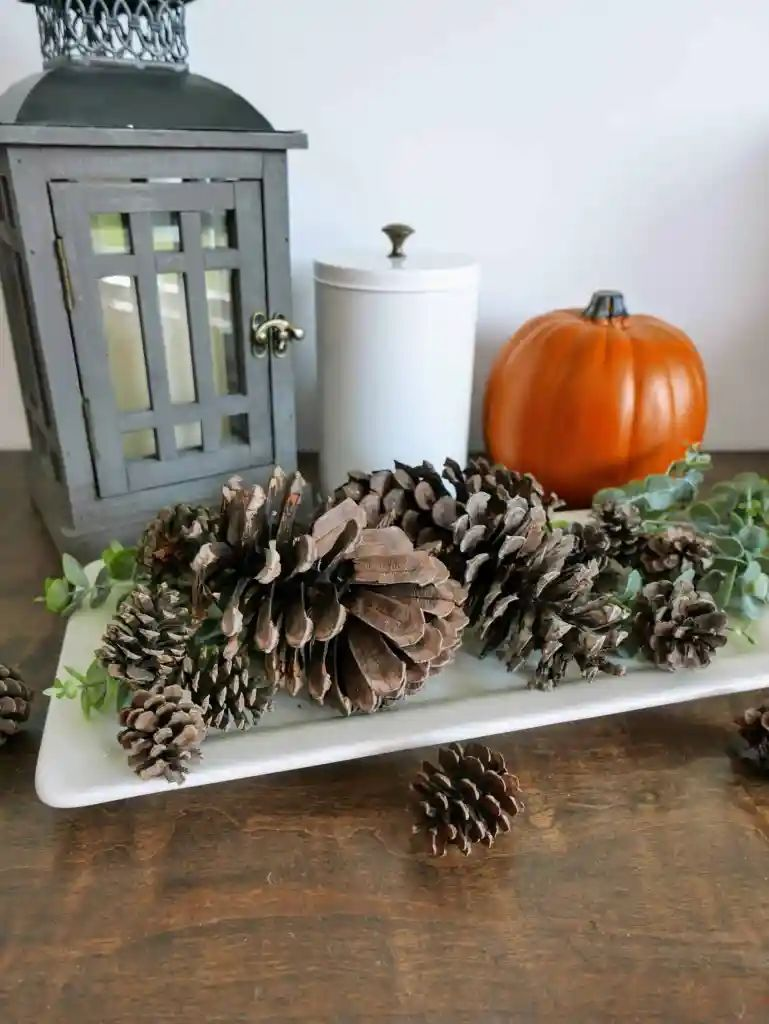
I like scented pinecones as a decorative addition to a Christmas bowl or seasonal arrangement, especially when I want the display to include both texture and fragrance.
For this project, I only use fragrance products intended for decorative or craft use and follow the manufacturer’s directions. I keep the finished pinecones away from food, children’s reach, pets where relevant, and open flames.
The scent should be treated as an optional decorative feature rather than the reason to use pinecones. Their texture and warm natural color are enough to make the arrangement feel seasonal.
12. Pinecone Owls
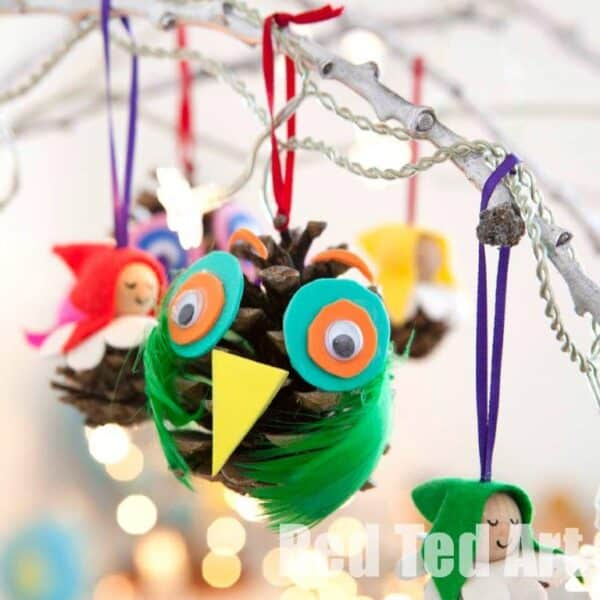
This version creates a structured pinecone owl with defined felt features. I cut simple shapes for the eyes, wings, and beak and arrange them so the finished bird has a clear face and silhouette.
Felt is useful here because it holds its shape and can be cut into different colors. The finished owl can become a hanging decoration if I add a secure lightweight hanger, or it can sit on a shelf with a stable base.
I choose this version when I want a more graphic, colorful owl rather than a fluffy winter character.
Pro Tip: Cut and lay out the felt pieces before attaching anything. It gives me a chance to adjust the eyes and wings while the pinecone is still easy to work with.
13. Snowy Pinecone Candle Jars
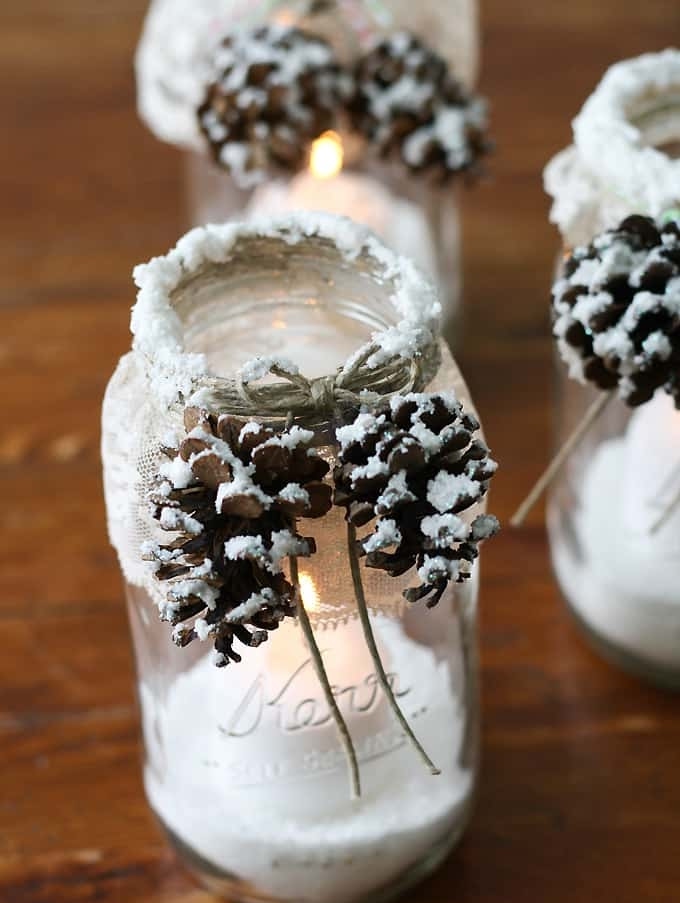
For a winter centerpiece, I can combine a glass jar with pinecones and snowy accents. The contrast between smooth glass and rough pinecone scales gives the arrangement a cozy seasonal appearance.
There is an important safety consideration here: pinecones, cotton, paper, ribbon, dried materials, and similar decorations are combustible. If I use a real candle, I keep all craft materials well away from the flame, use a stable candle holder, and never leave it burning unattended.
For a family-friendly display, a battery-operated LED candle is a practical alternative. It provides a lighted centerpiece without introducing an open flame to the craft arrangement.
14. Pine Cone Angel Ornaments
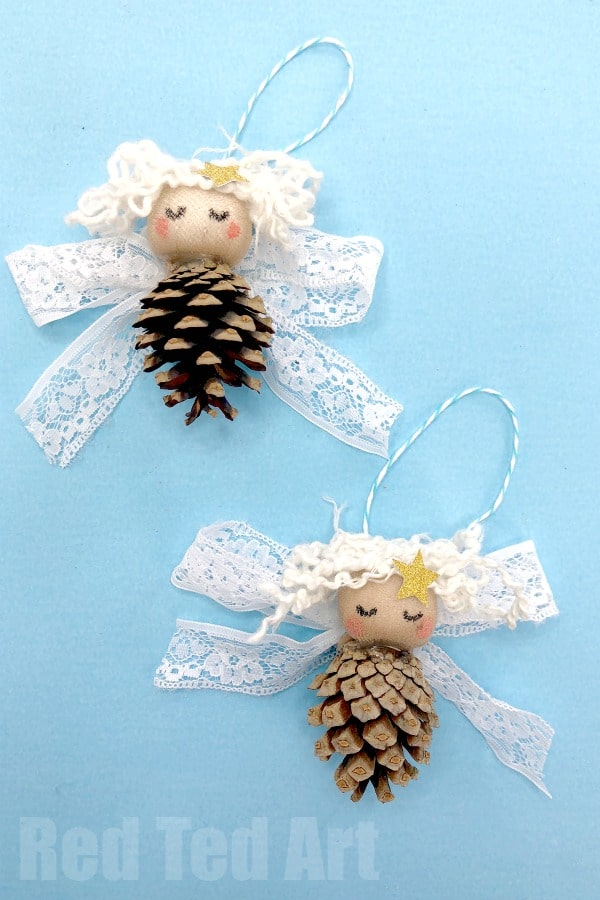
For these ornaments, the pinecone becomes the angel’s body. I add lightweight wings, a head, and a ribbon or other suitable trim to create the finished figure.
Lace or white ribbon can give the angel a traditional appearance, while different colors allow the design to fit a more modern Christmas tree.
I keep the finished ornament light and make sure the hanger is firmly attached before placing it on a tree. Any adhesive or finish needs to dry fully according to its product instructions.
15. Pinecone Snowmen
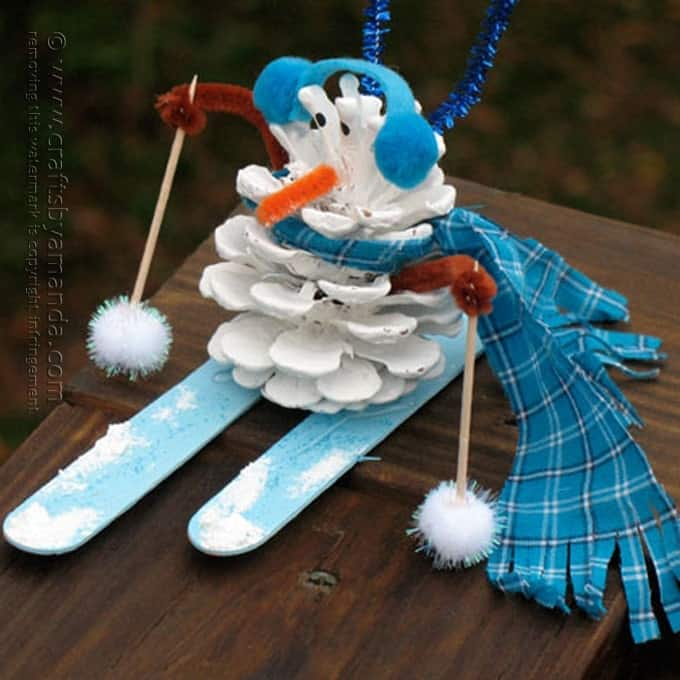
This project stays focused on the classic snowman look. I paint the pinecone white, then add simple facial features, a hat, and a scarf to create a small winter character.
Unlike the gnomes or owls, the recognizable snowman shape comes mainly from the white finish and familiar accessories. That makes this a good option when I want traditional Christmas or winter décor.
These snowmen can stand on a stable surface as mantel or tabletop decorations. If I turn one into an ornament, I keep the additions lightweight and make sure the hanger is securely attached.
16. Pinecone Snowy Owls
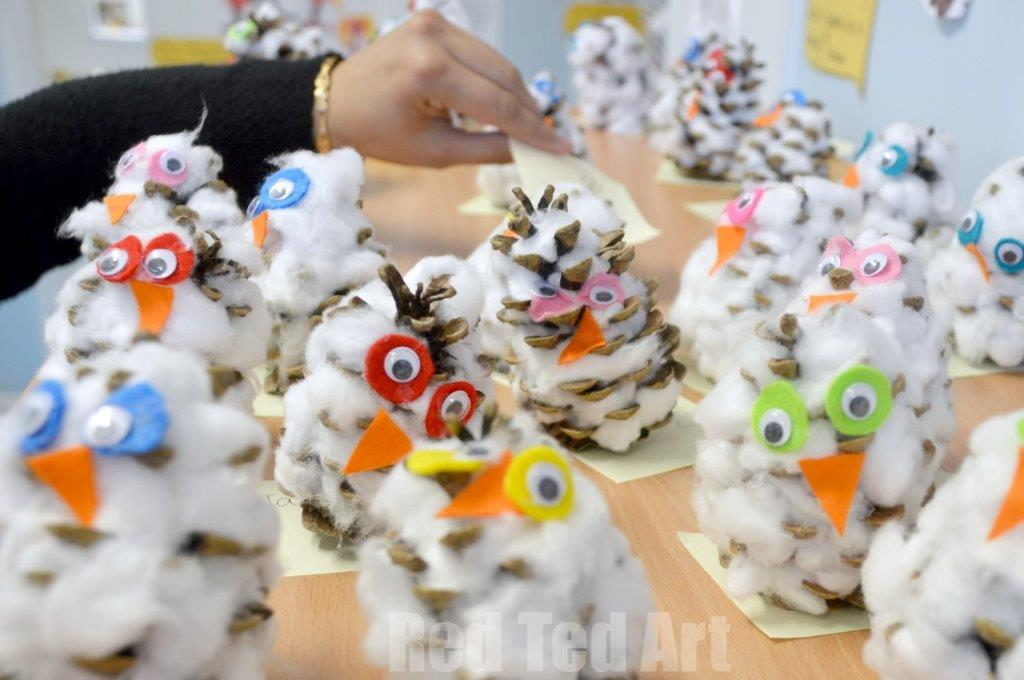
For a softer alternative to the felt owl, I use cotton or another suitable fluffy craft material to give this version a snowy appearance. The pinecone becomes partly hidden beneath the soft texture, creating a very different finish from the structured owl in #12.
Felt can still be used for the facial features, but the focus here is on the fluffy body rather than sharply defined wings and shapes.
I like this style for winter displays where I want the owls to look soft and snow-covered. It works particularly well as freestanding décor on a shelf or seasonal tray.
Pro Tip: Add the fluffy material in small sections instead of covering the pinecone all at once. This makes it easier to keep the owl’s shape recognizable and prevents the craft from becoming unnecessarily bulky.
17. Pinecone Wreath Ornaments
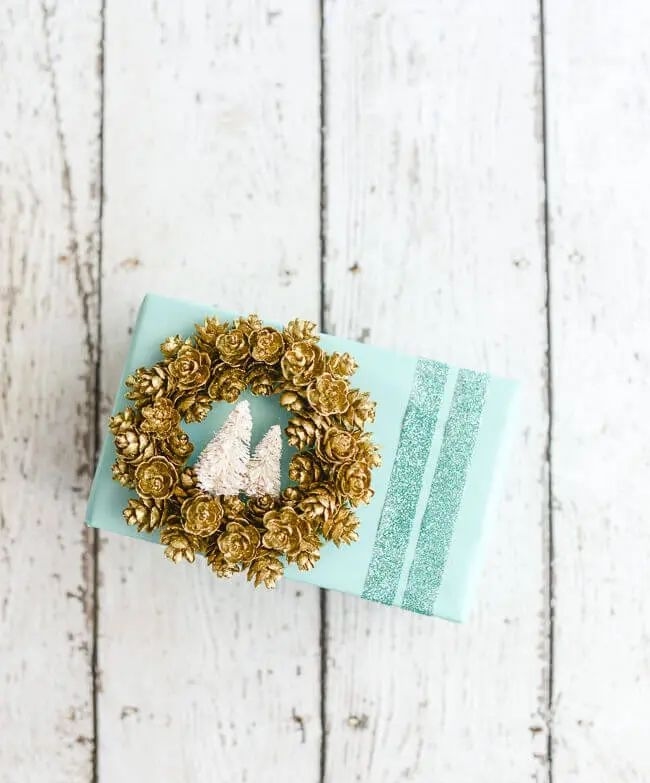
These small wreaths have a different job from the miniature wreath in #3: I use them primarily as handmade gift decorations. A tiny pinecone wreath attached to ribbon or twine can become an extra keepsake on a wrapped present.
Because I can prepare several at once, this is useful when I have multiple gifts to decorate. I keep the wreaths relatively lightweight so they don’t pull down the ribbon or make packages awkward to handle.
Small decorative elements should be selected with the recipient in mind, particularly when gifts may be handled by young children.
18. DIY Pinecone Garlands
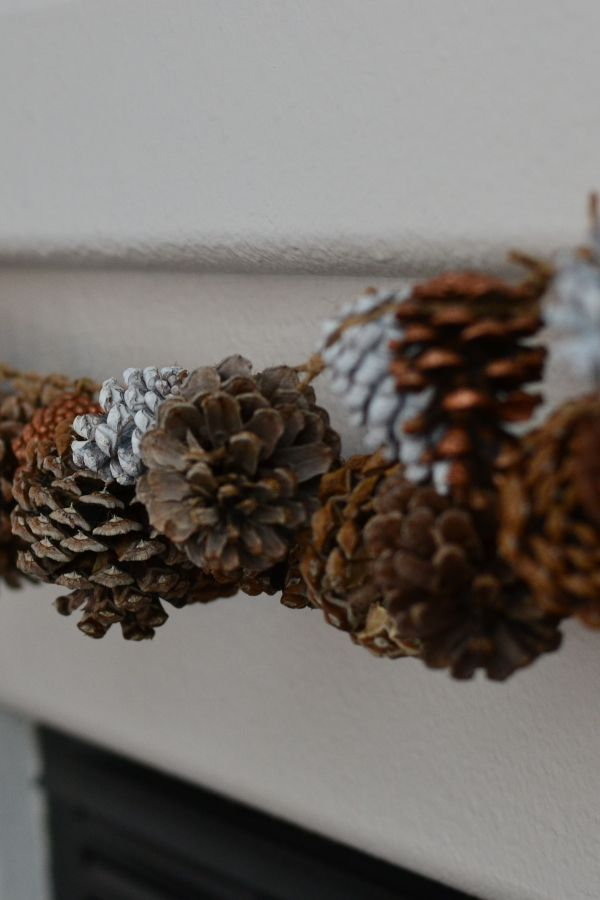
For smaller spaces, I prefer a lighter pinecone garland with fewer decorations and a simpler construction. Twine and naturally finished pinecones are enough to create a rustic strand for a shelf, narrow wall section, gift-wrapping area, or small mantel.
This differs from #10 because the goal is not a large statement piece. A shorter, lighter strand is easier to move, store, and fit into a compact decorating area.
I can leave the pinecones completely natural or add small accents that coordinate with nearby Christmas décor.
Pro Tip: Leave enough space between cones for the twine to bend naturally. Closely packed pinecones can make a small garland look heavy and restrict how easily it hangs.
19. Acorn and Pinecone Wreaths
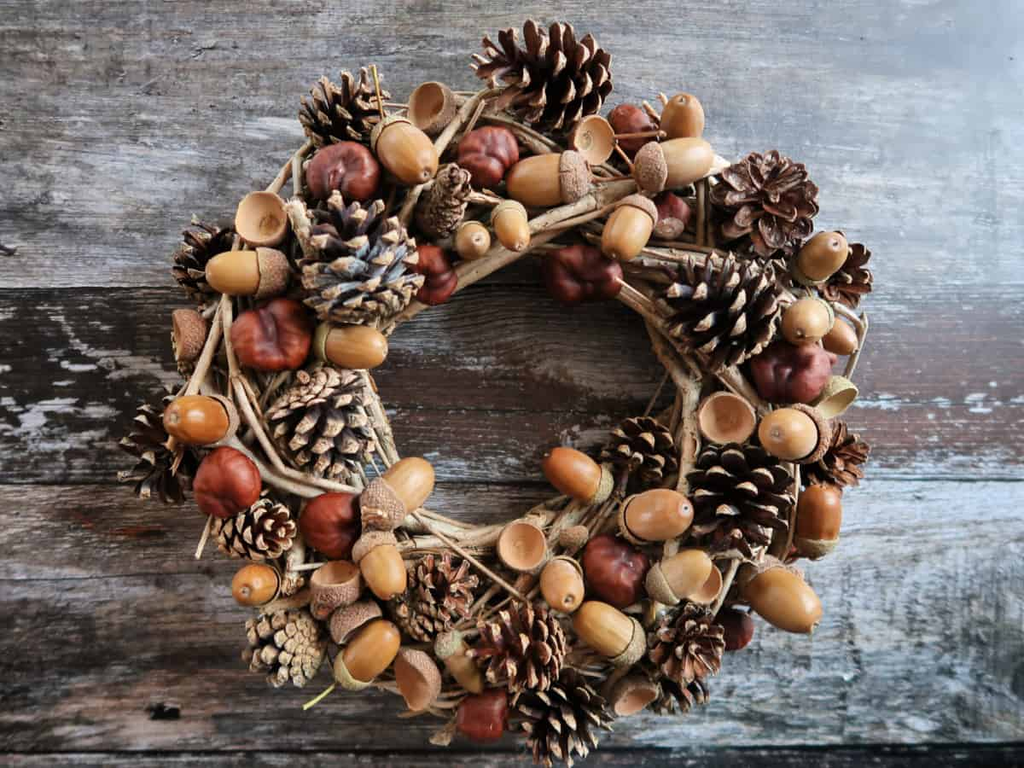
Combining acorns and pinecones gives me a wreath with two distinct natural textures. I arrange both materials around a stable wreath base and use a simple ribbon or restrained holiday accent if I want a more finished Christmas appearance.
This design can also transition beyond December because the materials have an earthy, seasonal-neutral look. For outdoor use, I choose a location and materials appropriate for the conditions rather than assuming natural materials will withstand the weather.
A covered porch offers more protection than a fully exposed doorway. Moisture, wind, temperature changes, and sunlight can all affect natural materials and finishes, so I bring delicate pieces indoors when conditions call for it.
20. Pinecone Christmas Wreaths and Ornaments
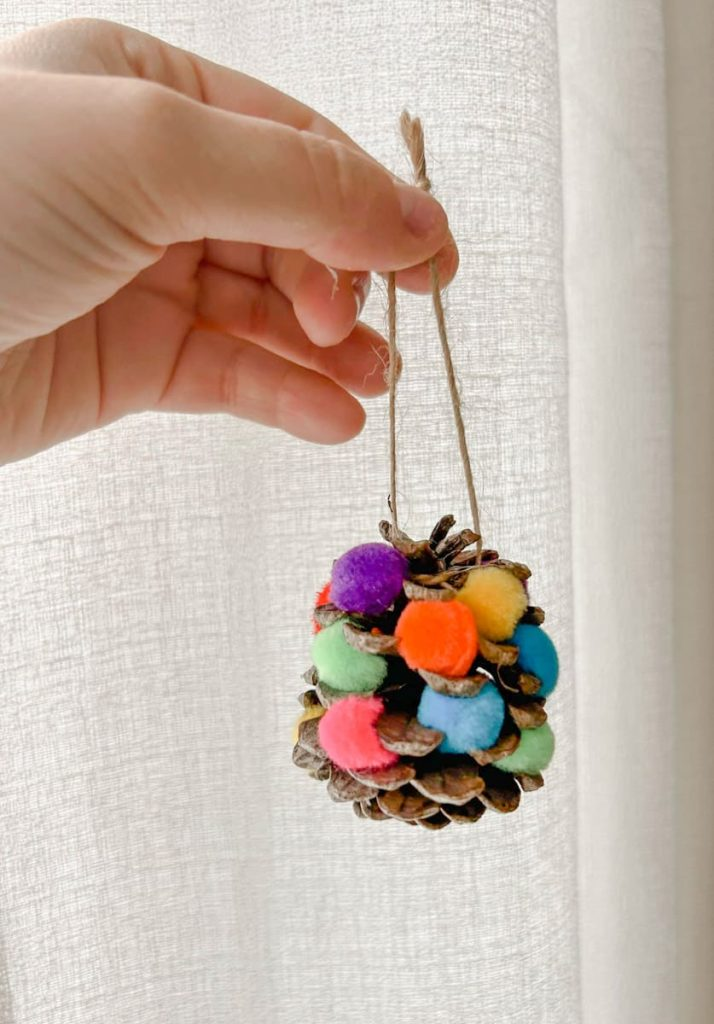
This is the most activity-oriented wreath project in the collection. Rather than focusing on a polished adult décor piece, I use the pinecone as a base for children to decorate with colorful pom-poms or other suitable craft materials.
It works well for a supervised preschool or family craft session because the decorating step gives children room to make their own color choices. I prepare the materials beforehand so the activity stays focused on decorating rather than waiting for supplies.
I use only materials appropriate for the children’s ages. Pom-poms, beads, and other small decorations should not be given to children who may put them in their mouths, and adults should handle hot glue and cutting tools.
21. Simple Rustic Pinecone Ornaments
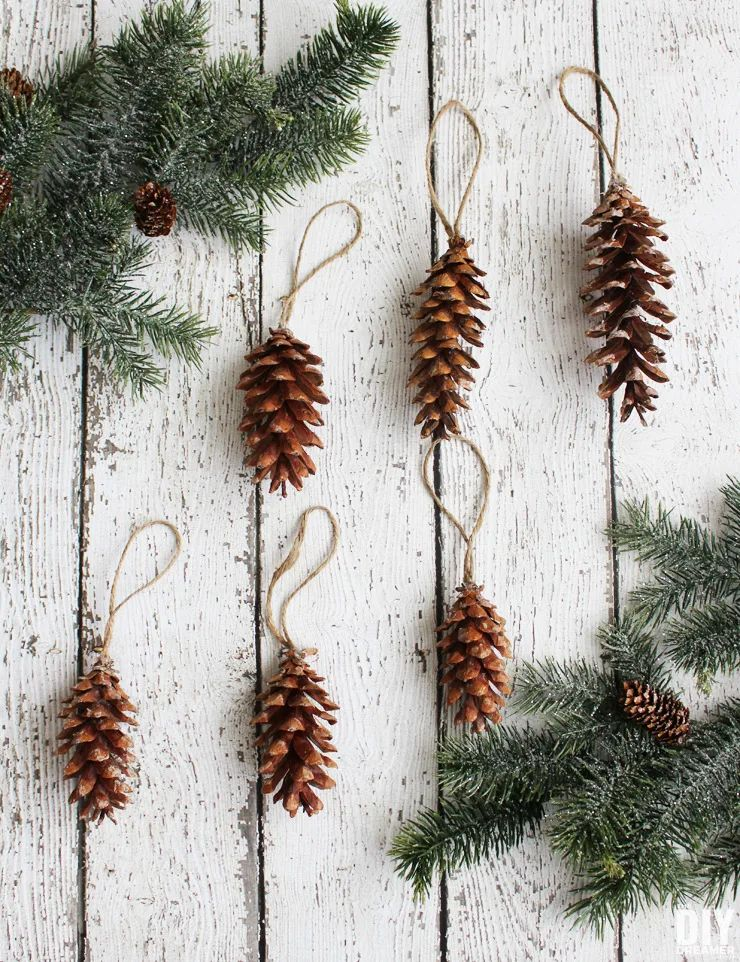
Sometimes the pinecone itself provides enough decoration. For these rustic ornaments, I keep the cone mostly untouched and add only a simple ribbon or twine hanger.
This makes them a good choice for a natural Christmas tree, farmhouse-style display, or anyone who wants to make several ornaments without spending a lot of time decorating each one.
If I decide to apply a protective finish, I choose one suitable for the material and intended use and follow the manufacturer’s directions for application and drying. Finished ornaments should be stored somewhere dry and checked for damage before being used again.
Read this next: 19 Easy Cricut Projects for Beginners
Frequently Asked Questions
How do I prepare pinecones for Christmas crafts?
I inspect pinecones for dirt, insects, loose debris, and damage, then make sure they are completely dry before painting, gluing, or adding a finish.
What can I use to decorate pinecones?
I commonly use acrylic or craft paint, felt, ribbon, twine, cotton, paper, and pom-poms. The best material depends on the craft and the intended display.
Are pinecone crafts suitable for children?
Yes, some are suitable for supervised family crafting. I keep small pieces away from young children who may put them in their mouths, while adults handle hot glue guns and sharp tools.
Conclusion
Pinecones give me a surprisingly flexible starting point for Christmas decorating. The same basic material can become a tiny tree, a snowy ornament, a larger wreath, a playful character, or a substantial garland simply by changing the construction and finishing materials.
The preparation matters just as much as the decorating. Clean, dry, suitable pinecones are easier to work with, while the right base, hanger, adhesive, and finish can make a handmade decoration more stable and easier to store.
I especially like mixing natural pinecones with a few colorful or snowy pieces rather than decorating everything the same way. That balance lets the texture of the pinecones stand out while still giving the Christmas display a finished, intentional look.




One Comment