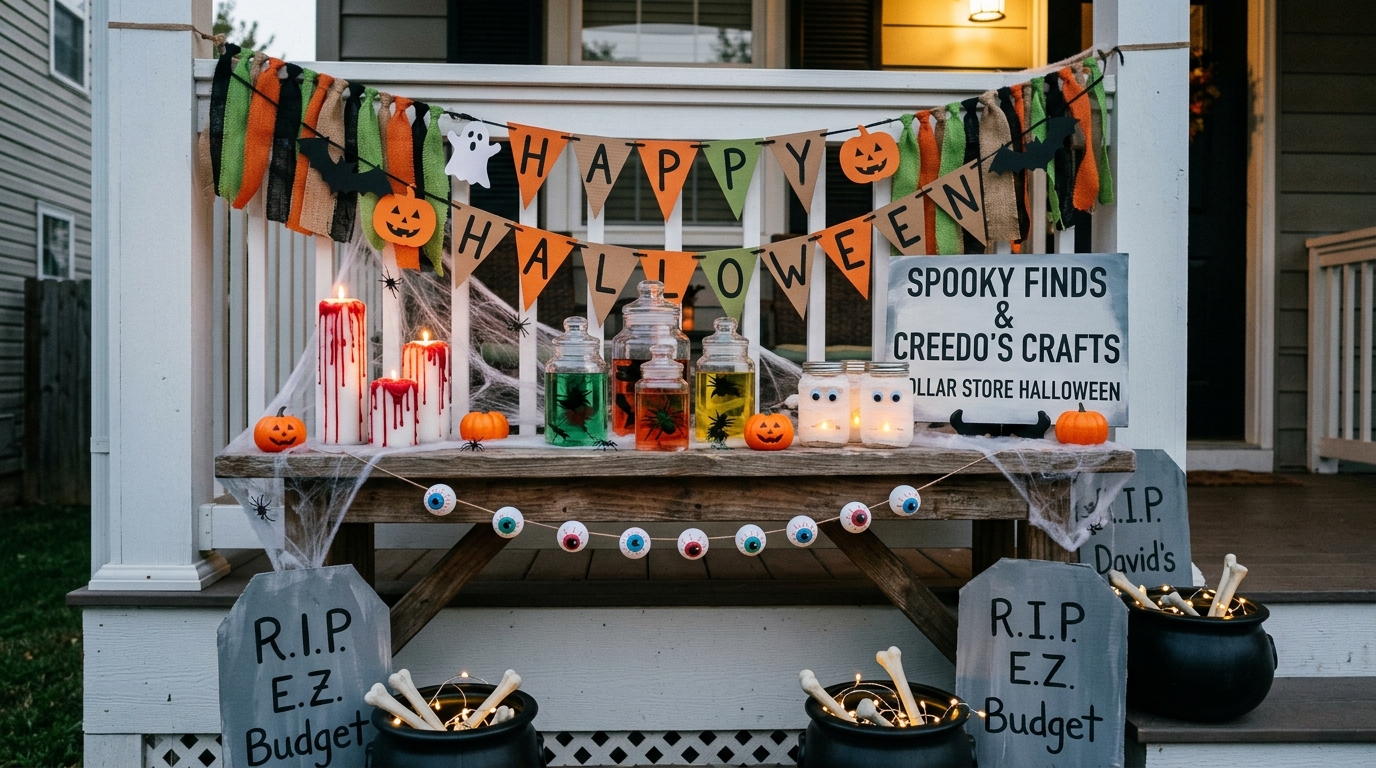
25 Dollar Store Halloween Decorations That Look High-End (DIY Hacks)
I plan Halloween decorating around inexpensive pieces that give me room to customize. A plain glass vase, mismatched candlestick, foam pumpkin, or simple frame can become much more useful once I change its finish or combine it with another basic item.
That is the approach behind these 25 projects. I am not trying to make every dollar store purchase look like a luxury decoration. Instead, I look for useful shapes, improve the finish, and style the finished pieces together so the room feels intentional.
After years of making seasonal décor, I have found that the biggest difference usually comes from paint, scale, placement, and restraint. A few coordinated pieces can have more impact than a room filled with unrelated Halloween items.
These dollar store Halloween decorations focus on transforming inexpensive materials rather than using every item exactly as it comes from the package. Glassware, candlesticks, frames, foam shapes, cheesecloth, paper, and skeleton pieces all provide useful starting points.
The 25 projects range from five-minute displays to crafts that need drying or curing time. I have included approximate project costs, active time, difficulty where useful, and the best place to use each decoration.
Save this for later
Table of Contents
The most successful projects follow a simple system: choose versatile materials, use a limited color palette, improve shiny or unfinished surfaces, combine pieces thoughtfully, and avoid buying supplies that do not contribute to the finished display.
Key Takeaways
- Shop the regular home, glassware, and craft aisles as well as the Halloween section.
- Treat inexpensive decorations as raw materials rather than finished products.
- A dominant color, a secondary color, and one small accent can make mismatched pieces feel coordinated.
- Matte or satin finishes can give suitable plastic and foam pieces a more finished appearance, but always check paint compatibility first.
- Use LED candles around fabric, paper, plastic, and other lightweight decorations instead of open flames.
- Keep small Halloween parts away from young children and pets who could swallow them.
- Outdoor decorations need appropriate materials, stable placement, and protection from rain and wind.
- I do not DIY everything. Complicated electronics, moving mechanisms, and projects that require more time than they are worth are often better purchased.
Related article: 19 Indoor Halloween Party Ideas For Teens That Are Spookily good
What Can You Make From Dollar Store Halloween Supplies?
I can create surprisingly complete Halloween displays from inexpensive starting materials. Clear jars can become potion containers, simple vases can become raised apothecary pieces, frames can become eerie wall art, and cheesecloth can become either standing ghosts or hanging decorations.
The key is choosing items with useful shapes. A plain glass container has several possible uses, while a highly specific seasonal decoration may only work in one display.
I also find that inexpensive pieces work best when I treat them as part of a collection. Three different glass containers with the same finish can look more cohesive than three identical novelty decorations scattered around the room.
The final cost depends on what I already have at home. Paint, adhesive, lighting, fabric, and other craft supplies can add to the base price, so I consider the complete finished project rather than assuming the dollar-store item is the total cost.
What Should You Grab First at the Dollar Store?
My first stops are usually the glassware, home décor, and craft aisles. Clear vases, jars, candlesticks, frames, foam pumpkins, skulls, cheesecloth, black fabric, and small skeleton pieces give me the most options.
I look for sturdy shapes rather than chasing a particular brand or seasonal design. Before buying something, I ask whether I could use it for at least two different projects or whether it will still be useful next year.
For spray paint, I would rather spend a little more on a product designed for the material than repeatedly repaint a piece with paint that does not adhere well. Always check the manufacturer’s instructions, especially with plastic and foam.
Pro Tip: Do not limit your shopping to the Halloween display. Year-round vases, candleholders, frames, trays, and glass containers are often better DIY starting points than the finished seasonal decorations.
Spray Paint Upgrades (The 20-Minute Transformations)
1. Matte Black Candlestick Cluster
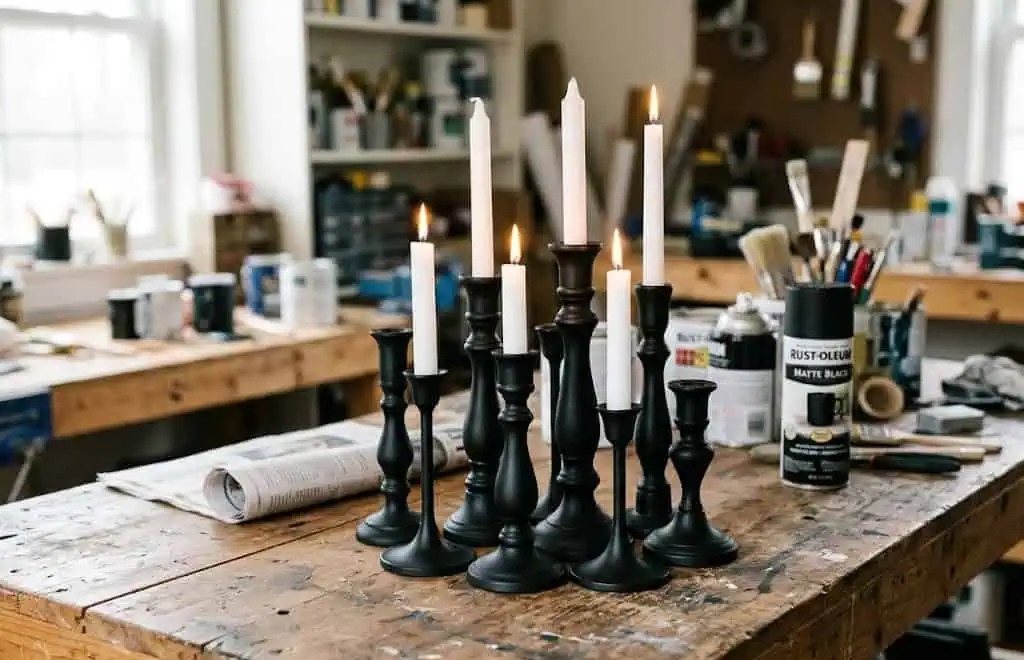
I start with three inexpensive candlesticks in different shapes and unify them with a compatible matte paint. Once they share the same finish, the mismatched shapes look like an intentional collection.
For the display, I use battery-operated LED taper candles instead of real flames. Varying the heights creates a stronger arrangement on a mantel, console, or dining table.
Estimated cost: About $5–$9, depending on the candlesticks, paint, and LED candles.
Active time: About 20 minutes, plus drying time.
Difficulty: Easy.
Best for: A gothic mantel, console, or Halloween centerpiece.
2. Gilded Skull Bookends
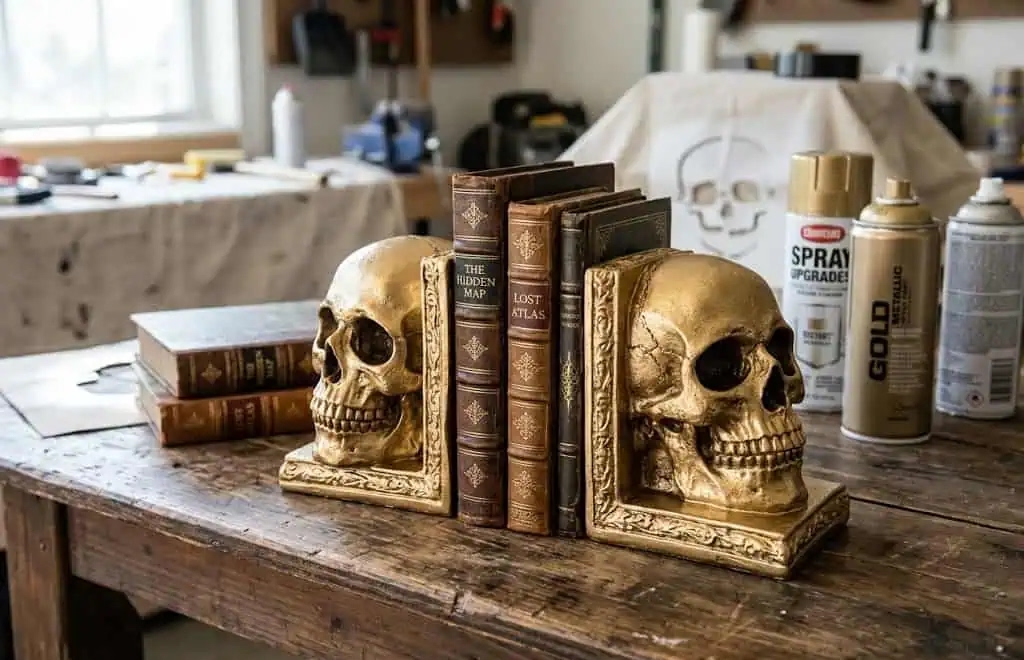
Two lightweight foam skulls can become decorative shelf accents with a metallic finish. I paint them first and let the surface dry completely before placing them beside books.
If the skulls are not heavy enough to support books safely, I treat them as decorative bookends rather than relying on them to hold a large stack upright. That small distinction keeps the project practical.
Estimated cost: About $3–$8, depending on paint and materials already owned.
Active time: About 15–25 minutes, plus drying.
Difficulty: Easy.
Best for: Bookshelves, desks, and Halloween reading corners.
3. “Stone” Cemetery Urns
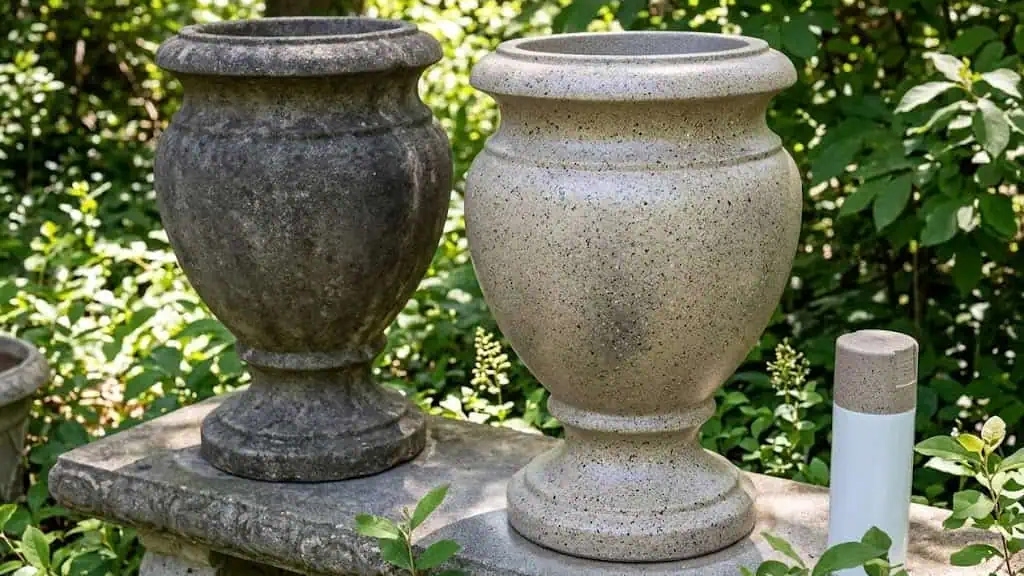
Inexpensive plastic planters can be given a muted stone-inspired finish with gray paint and a small amount of darker dry-brushing. I concentrate the darker color around edges and recessed areas instead of coating everything evenly.
Faux branches or dark floral stems add height to the finished planter. For outdoor use, I choose materials suitable for the conditions and give the planter enough weight or stability to resist ordinary wind.
Estimated cost: Roughly $6–$10 per finished planter, depending on size and additional supplies.
Active time: About 30 minutes, plus drying.
Difficulty: Easy to medium.
Best for: Porch corners, entryways, and symmetrical outdoor displays.
4. Matte Black Pumpkin Patch
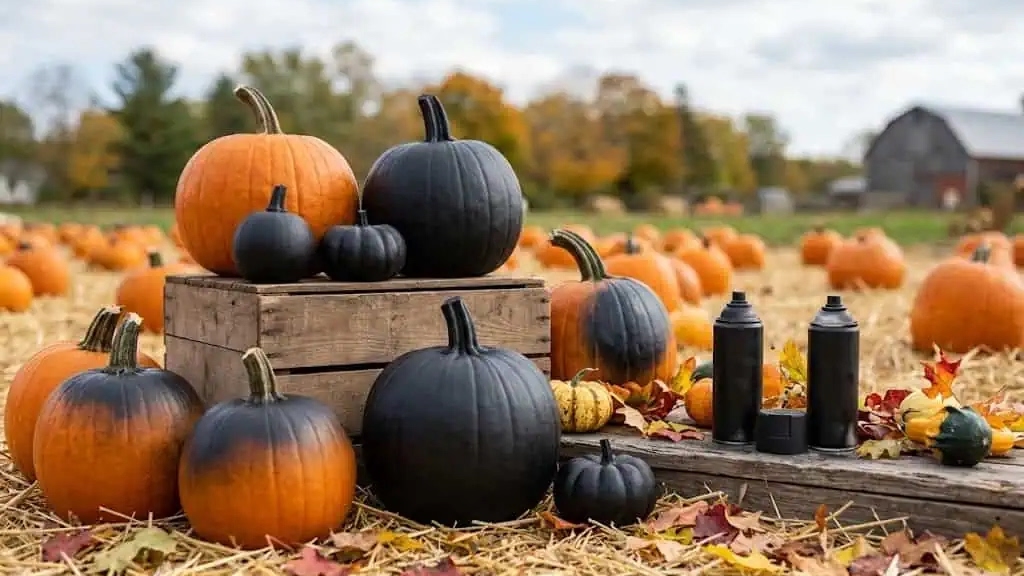
I repaint several inexpensive foam pumpkins in the same dark finish and add a restrained metallic accent to the stems. The change is simple, but it gives the collection a more coordinated appearance.
Rather than placing one pumpkin on every surface, I group several together on a tray, mantel, table, or shelf. Different sizes help the arrangement feel less flat.
Estimated cost: About $6–$12, depending on the number of pumpkins and paint.
Active time: Around 20 minutes, plus drying.
Difficulty: Easy.
Best for: Mantels, tables, shelves, and seasonal trays.
5. Antiqued Haunted Frames
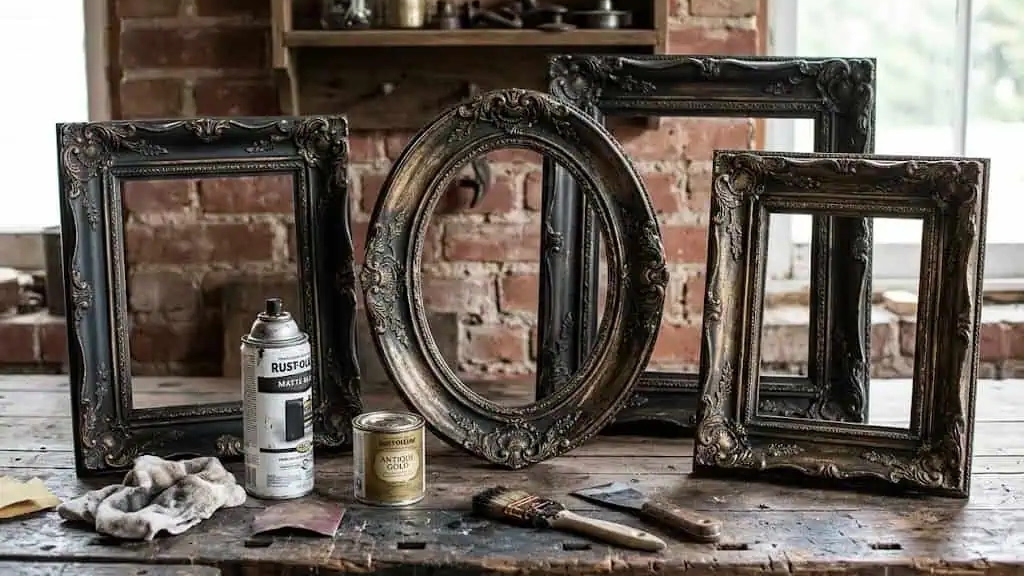
Plain frames become more interesting when I paint them a dark color and lightly distress selected edges. I keep the worn effect uneven so the frames do not look artificially identical.
For the artwork, I use public-domain images, my own photographs, or artwork I have permission to reproduce. Slight differences in image size and frame placement help create the feeling of an old collection.
Estimated cost: About $2–$5 per frame, excluding any printing costs.
Active time: About 25–30 minutes per frame, plus drying.
Best for: Stairways, hallways, and Halloween gallery walls.
6. Wicked Wreath Upgrade
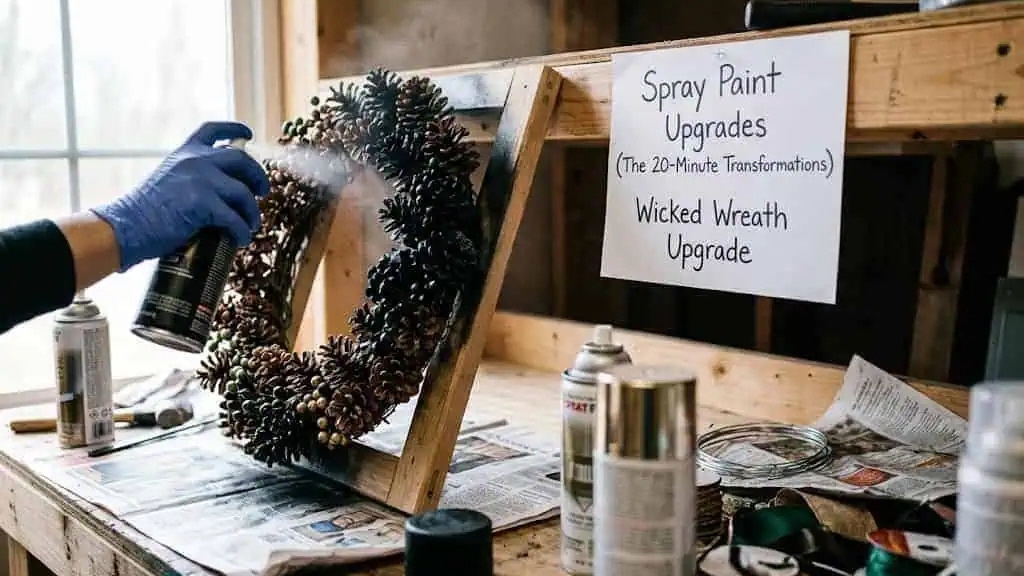
A plain inexpensive wreath gives me a good base for a customized front-door display. I can darken the original finish where appropriate and add a few Halloween floral picks, faux branches, or pieces of cheesecloth.
I avoid filling every open space. Leaving some of the original wreath visible makes the added details easier to see and keeps the result from becoming too heavy.
Estimated cost: Roughly $5–$10, depending on the wreath and additions.
Active time: About 30 minutes, plus drying if paint is used.
Difficulty: Easy.
Best for: Front doors and covered entryways.
Pro Tip: A compatible matte or satin finish is one of my easiest ways to make a mixed collection feel coordinated. I never assume one paint works on every plastic surface, though; I check the label and test a small area first.
Apothecary Jars and Potion Bottles
7. Pedestal Apothecary Jar Set
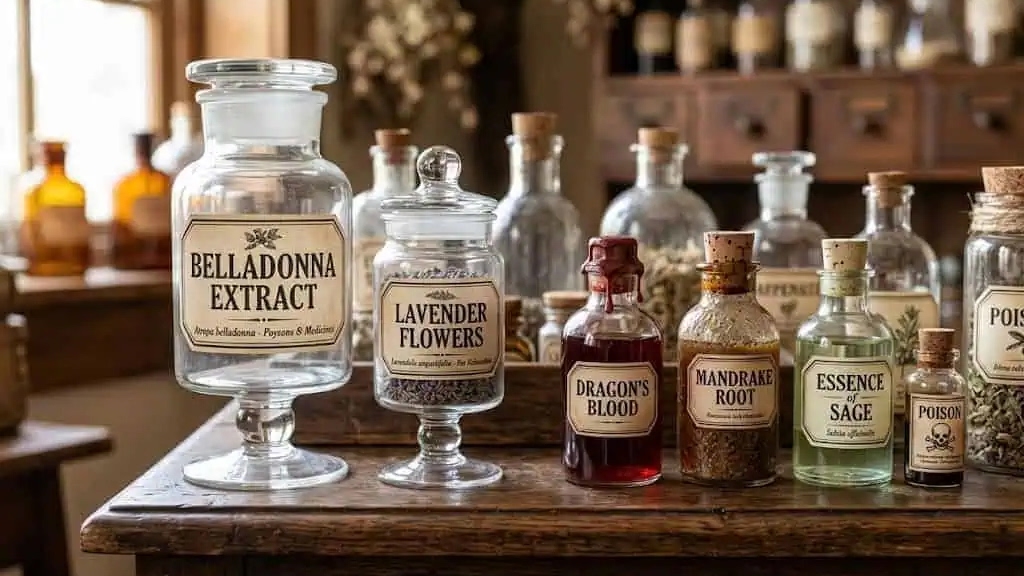
This project is about creating height. I pair a glass vase with a glass candlestick so the container sits above the surface instead of simply resting on it.
After choosing pieces that fit securely together, I use an adhesive suitable for both materials and allow the joint to cure fully before handling the finished jar. The raised form works especially well as a mantel or shelf focal point.
For filler, I use decorative materials such as faux moss, black beans, or lightweight plastic Halloween pieces. The finished appearance depends as much on the elevated shape as it does on what I put inside.
Estimated cost: About $3–$6 per jar, depending on the glassware and adhesive.
Active time: Around 20 minutes, plus adhesive curing time.
Best for: Mantels, shelves, and elevated Halloween displays.
8. Potion Bottle Collection

Potion bottles are different from the pedestal jars because the focus here is the collection itself. I gather several bottles in different shapes and sizes, then give them a common visual theme with handmade labels.
I vary the bottle heights and leave some containers partially empty. A small tray underneath helps define the display and keeps the bottles together.
For aged-looking labels, I use paper and a craft technique appropriate for the paper I am working with rather than relying on printed vintage graphics from an unknown source.
Estimated cost: About $8–$15 for a small collection, depending on bottles and supplies.
Active time: Around 45 minutes.
Difficulty: Medium.
Best for: Witch-themed shelves, mantels, and party tables.
9. Specimen Jars

These jars have a completely different look from potion bottles. I fill clear containers with water tinted with a small amount of food coloring and place one contained Halloween figure inside each.
A spider, eyeball, or small skeleton hand can create the appearance of a curious specimen display. I use containers with secure lids where appropriate and place them somewhere they will not be easily knocked over.
Because the figures and other components can be small, this project is better kept out of reach of young children and pets.
Estimated cost: About $2–$4 per jar.
Active time: Around 15 minutes for several jars.
Best for: Bathroom counters, shelves, and small Halloween vignettes.
10. Witch’s Spell Book Stack

Inexpensive hardcover notebooks or suitable old books can become decorative spell books. I add raised details to the covers, paint them a dark color, and highlight selected areas with small amounts of metallic paint.
I stack different sizes instead of making every book identical. The finished books can also provide a useful base for raising another decoration slightly higher on a shelf.
Estimated cost: About $5–$10 for a stack, depending on materials.
Active time: Around 40 minutes, plus drying.
Best for: Shelves, mantels, and displays beneath apothecary pieces.
11. Crystal Ball

A rounded glass bowl or similar clear container can work as the globe for a simple crystal-ball display. I place it over a battery-operated LED light and use a stable dark-colored base underneath.
Before securing anything, I check that the bowl sits securely and cannot easily roll or tip. I also avoid using an open flame underneath or inside a glass-and-fabric display.
Estimated cost: About $4–$8.
Active time: Around 10–15 minutes.
Best for: Fortune-teller corners, party tables, and Halloween shelves.
Cheesecloth Ghosts and Creepy Fabric
12. Stiffened Cheesecloth Ghosts
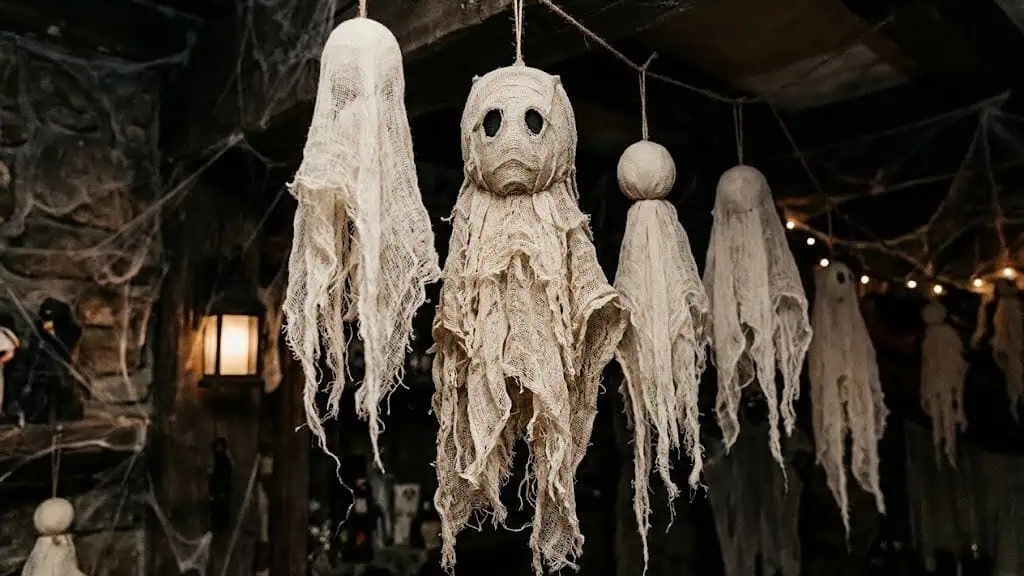
These are sculptural ghosts that stand on their own rather than hanging from the ceiling. I drape cheesecloth over a temporary form, such as a bottle with a lightweight foam ball, and apply a suitable fabric-stiffening mixture.
I leave the ghost undisturbed until it is fully dry before removing the form. Depending on humidity and the product used, that can take several hours or overnight.
Simple felt or fabric eyes can finish the face. For a family-friendly display, I keep the expression simple rather than making the ghost overly frightening.
Estimated cost: About $3–$6 each.
Active time: Around 30 minutes, plus several hours of drying.
Best for: Shelves, mantels, covered porches, and indoor displays.
13. Window Silhouettes
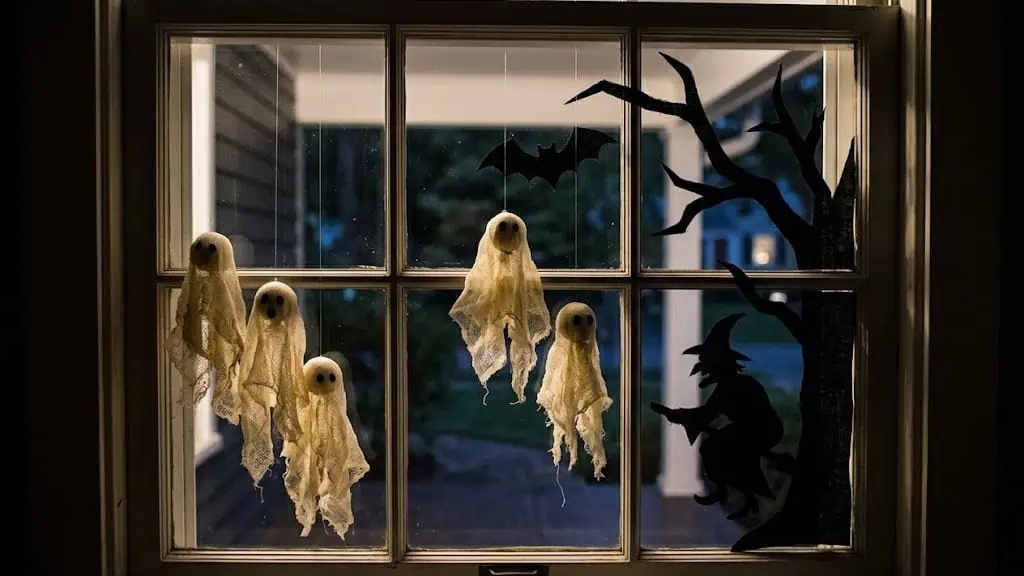
Black poster board gives me an inexpensive way to create large Halloween shapes for windows. Cats, bats, witches, and reaching hands all work because their outlines remain recognizable when viewed from a distance.
I attach the silhouettes from inside the window using a removable product appropriate for the surface. I do not assume that every tape or adhesive will remove cleanly, so I follow the product instructions and test cautiously when needed.
Estimated cost: About $2–$5 per window.
Active time: Around 30 minutes.
Best for: Front windows, renters, and nighttime curb appeal.
14. Tattered Doorway Curtain
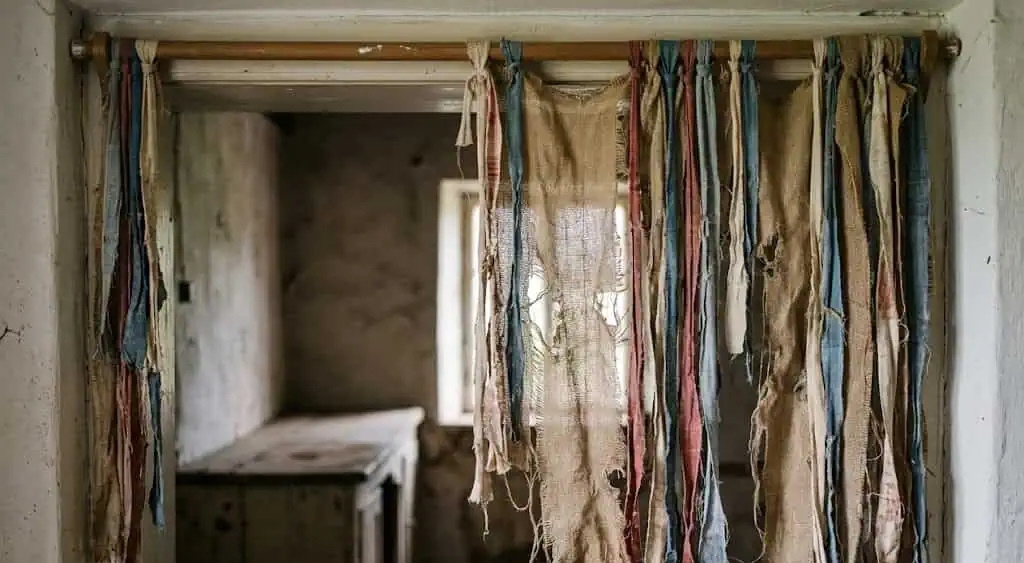
For a quick haunted entrance, I cut dark plastic table coverings or suitable fabric into long strips and attach them across a doorway.
I keep the opening easy to pass through and make sure the strips do not interfere with handles, locks, or an exit route. This is particularly useful for a Halloween party where guests move through the doorway frequently.
Estimated cost: About $3–$7.
Active time: Around 15–20 minutes.
Difficulty: Easy.
Best for: Party entrances and indoor Halloween displays.
15. Floating Ghost Lanterns
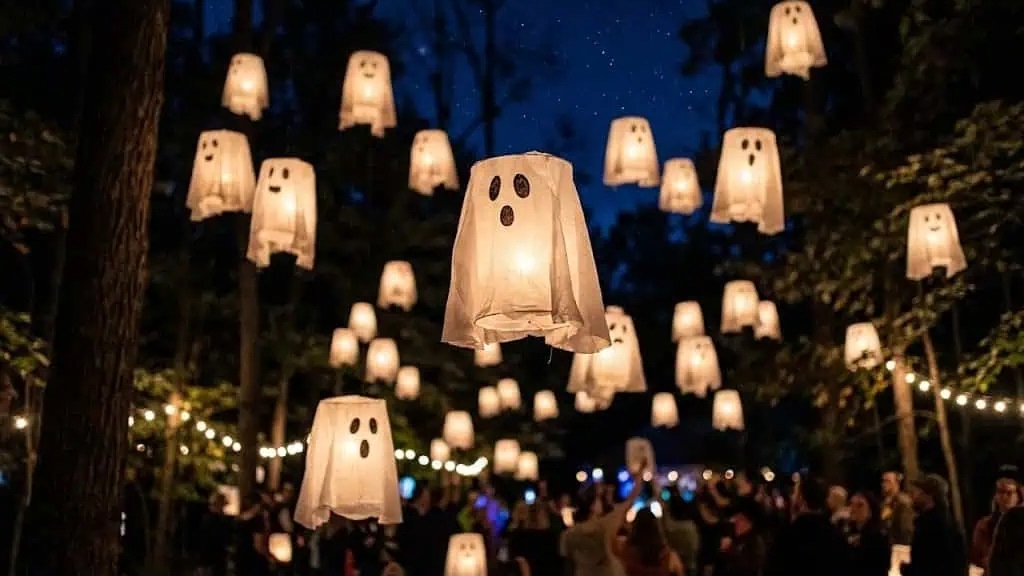
These are hanging ghosts rather than standing figures. I drape lightweight cheesecloth over small battery-operated LED lights and suspend the finished shapes at different heights.
Clear thread or fishing line can create the floating effect, but the hanging points need to be secure. I keep the decorations away from walkways, fans, doors, and anything that could catch or pull on the line.
For outdoor use, I place them in a protected area and bring the fabric inside during wet weather.
Estimated cost: About $3–$6 each.
Active time: Around 20 minutes.
Best for: Covered porches, party corners, and indoor displays.
Also read: Halloween House Party: The Ultimate Guide to Hosting a Killer Bash
16. Mummy Front Door
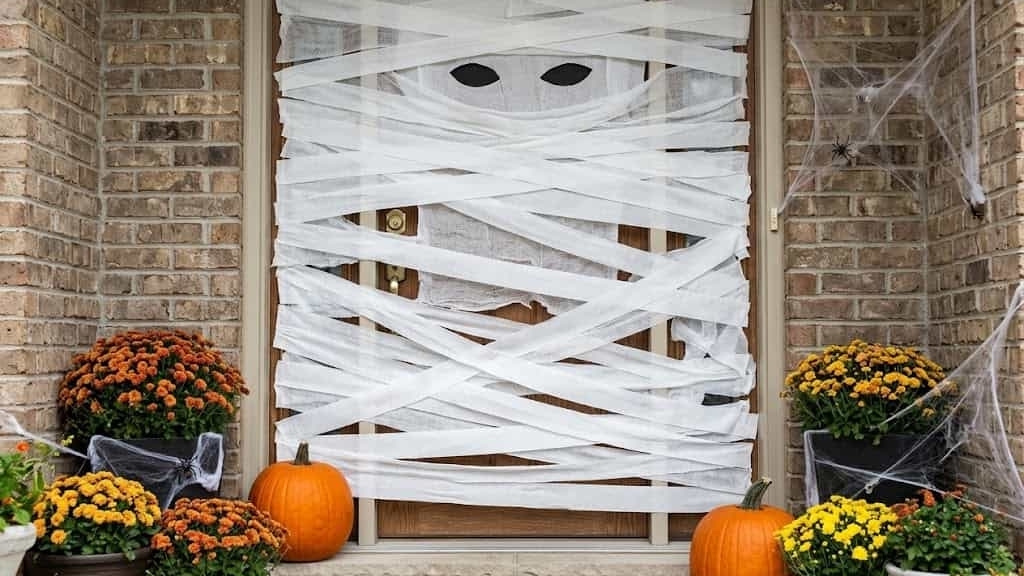
This family-friendly project turns the front door into a large mummy face. I use white crepe paper or fabric strips and add oversized eyes toward the center.
The important part is leaving the door hardware, locks, hinges, and other functional areas accessible. I use an attachment method suited to the door surface and remove the decoration carefully at the end of the season.
Estimated cost: About $3–$7.
Active time: Around 20 minutes.
Best for: Family homes, classrooms, and kid-friendly Halloween parties.
Skeleton Hacks
17. Skeleton Garden Hands
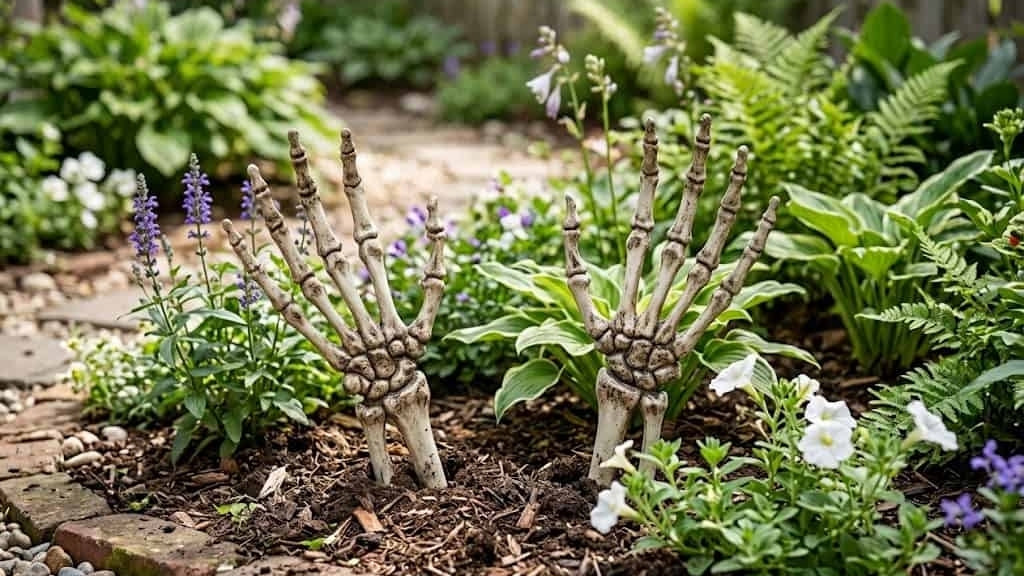
Skeleton hands are one of my quickest outdoor decorating options. I position them so they appear to be reaching through soil or emerging from a planter.
The small pieces need to be secured if the area is exposed to wind. I also keep them away from walking paths where someone could step on them or trip.
Estimated cost: About $2–$5.
Active time: About 5 minutes.
Difficulty: Very easy.
Best for: Planters, garden beds, and porch displays.
18. Framed Specimen Collection
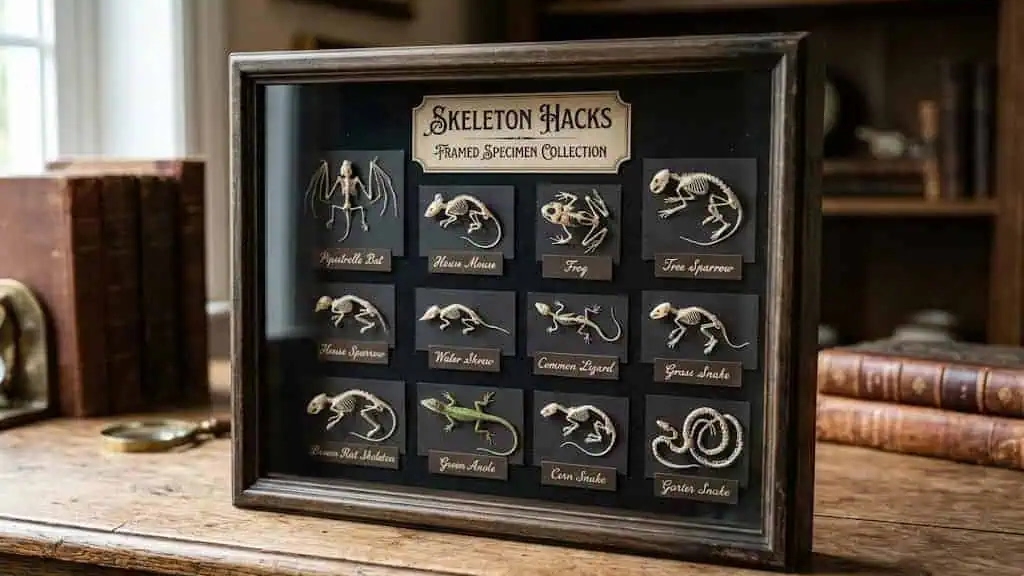
This project turns small plastic creatures into wall art rather than placing them in containers. I arrange bats, spiders, lizards, or other miniature figures inside dark-painted frames and add simple labels if desired.
The goal is a gallery or curiosity-cabinet effect, so I group several frames together rather than treating each one as a standalone decoration.
Small pieces can be choking hazards for young children and should be kept where they cannot reach them.
Estimated cost: About $3–$6 per frame.
Active time: Around 15–20 minutes each.
Best for: Gallery walls, hallways, and Halloween party backdrops.
19. Skeleton Terrarium
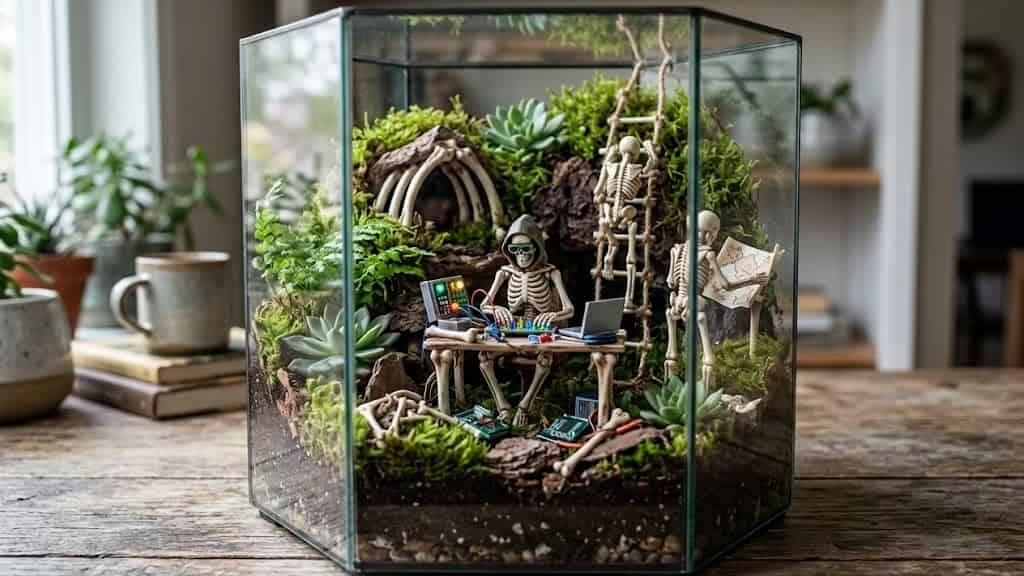
A skeleton terrarium is a contained tabletop display. I layer decorative stones and faux moss in a glass bowl or jar and position one small skeleton inside.
Unlike the framed collection, this project is meant to look like a tiny scene. I keep the container on a stable surface and make sure it cannot easily be tipped.
Because the pieces are small, I place the finished terrarium away from young children and pets.
Estimated cost: About $4–$8.
Active time: Around 15 minutes.
Best for: Desks, bookshelves, side tables, and small spaces.
20. Shrouded Porch Skeletons
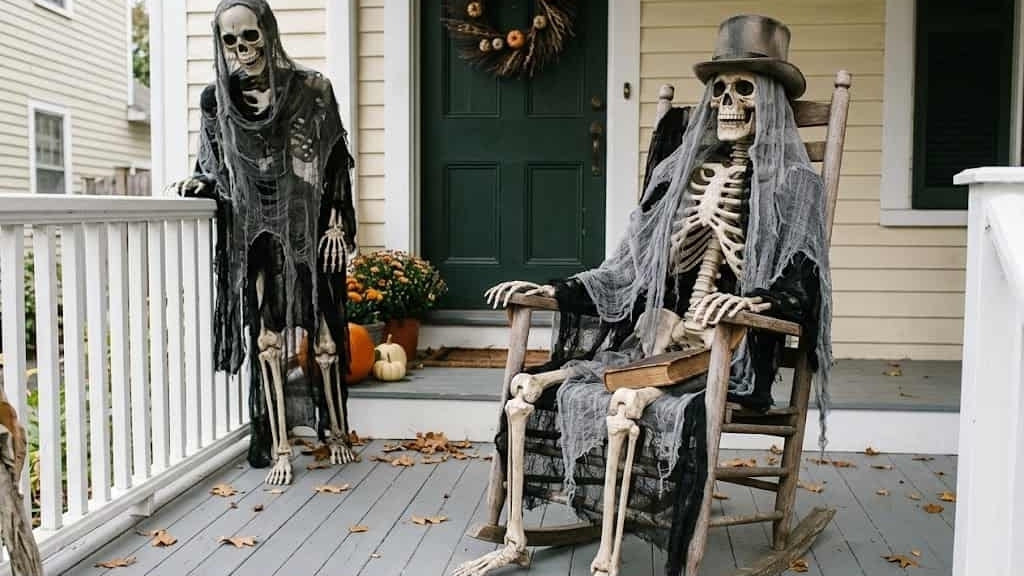
For a larger outdoor statement, I use full-size or larger hanging skeleton decorations and partially cover them with torn cheesecloth. Leaving portions of the skeleton visible keeps the shape recognizable.
I hang or position the skeleton securely and vary the heights when using more than one. Outdoor placement should account for wind, rain, and the strength of the attachment point.
If the fabric becomes wet, I bring it inside to dry rather than leaving it exposed unnecessarily.
Estimated cost: About $5–$10 per finished decoration, depending on the skeleton and fabric.
Active time: Around 20 minutes.
Best for: Porches, covered patios, and Halloween entrances.
Pro Tip: Inexpensive skeletons do not need perfect proportions to work well. Once part of the body is covered with cheesecloth or surrounded by other décor, the overall silhouette becomes more important than small details.
Five-Minute Wins for Tables and Entryways
21. Eyeball Vase Filler
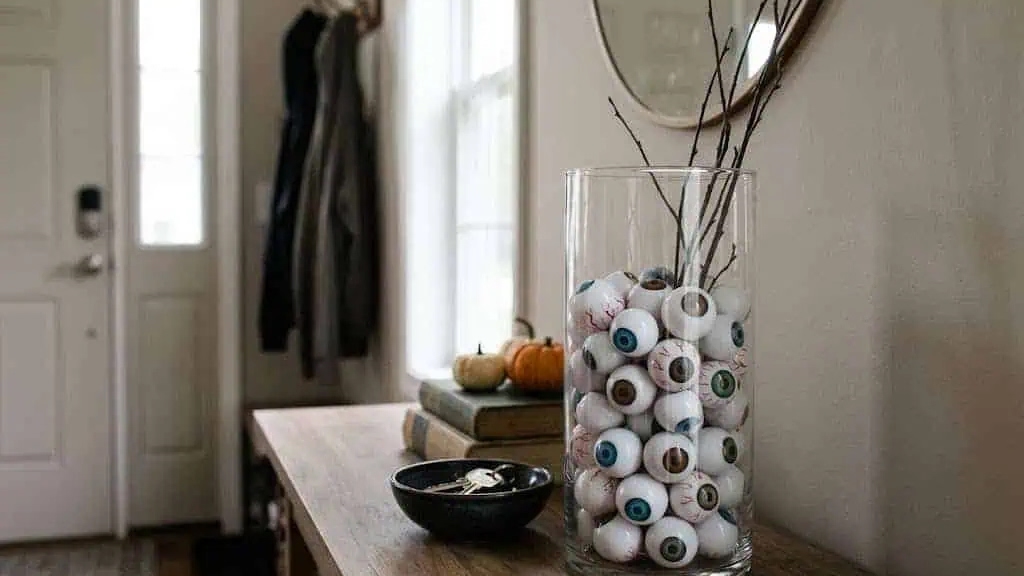
For a fast display, I layer a suitable decorative filler in a clear vase and add plastic eyeballs between the layers. The transparent container lets the shapes remain visible from different angles.
I place this type of decoration somewhere it will not be knocked over, especially when the filler contains small pieces. It is better suited to adult-accessible surfaces when young children are present.
Estimated cost: About $3–$6.
Active time: About 5 minutes.
Best for: Entry tables, shelves, and party displays.
22. Giant Corner Spider Web
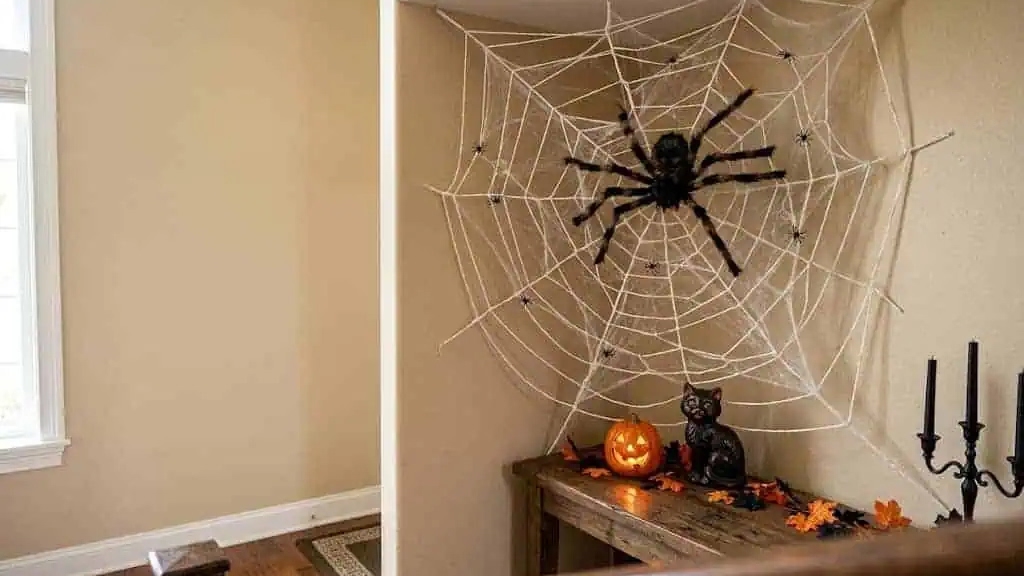
I pull synthetic spider web material apart into thin strands and stretch it across a ceiling or wall corner. The trick is resisting the urge to use the entire bag in one thick layer.
A few strategically placed plastic spiders give the web scale without hiding it. I keep the web away from heat sources, lights that generate heat, and areas where people could become tangled.
Estimated cost: About $2–$5.
Active time: Around 10 minutes.
Best for: Ceiling corners, doorways, and party rooms.
23. Bat Wall Colony
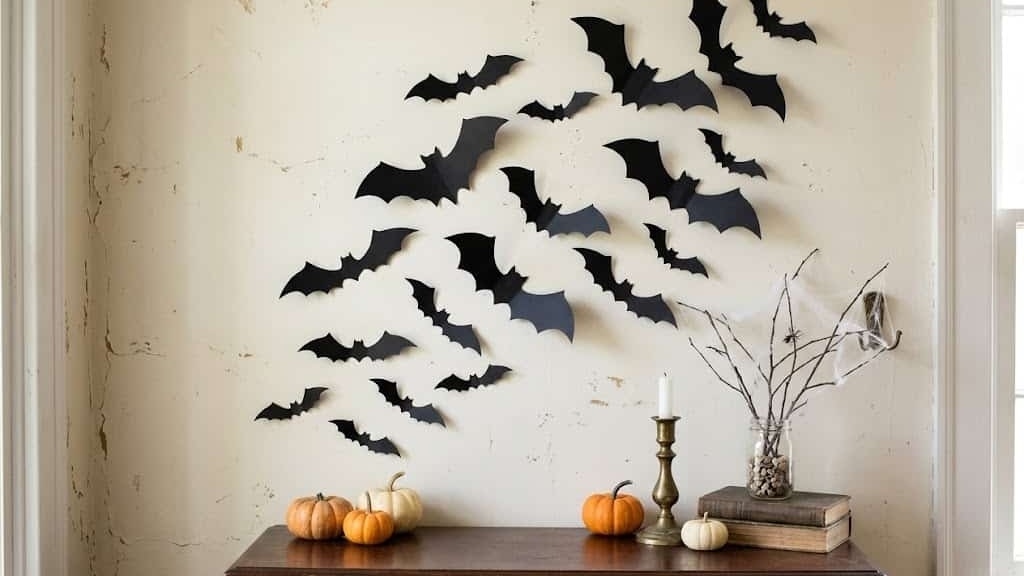
I make a simple bat template from cardstock and cut several shapes from black paper. Bending the wings slightly gives the flat pieces more dimension.
Instead of covering an entire wall, I arrange the bats in a loose path that appears to move upward toward the ceiling. Removable attachment products can work for renters when they are appropriate for the wall surface and weight of the decorations.
Estimated cost: About $3–$6.
Active time: Around 30 minutes.
Best for: Accent walls, hallways, and photo areas.
24. Walkway Luminaria Bags
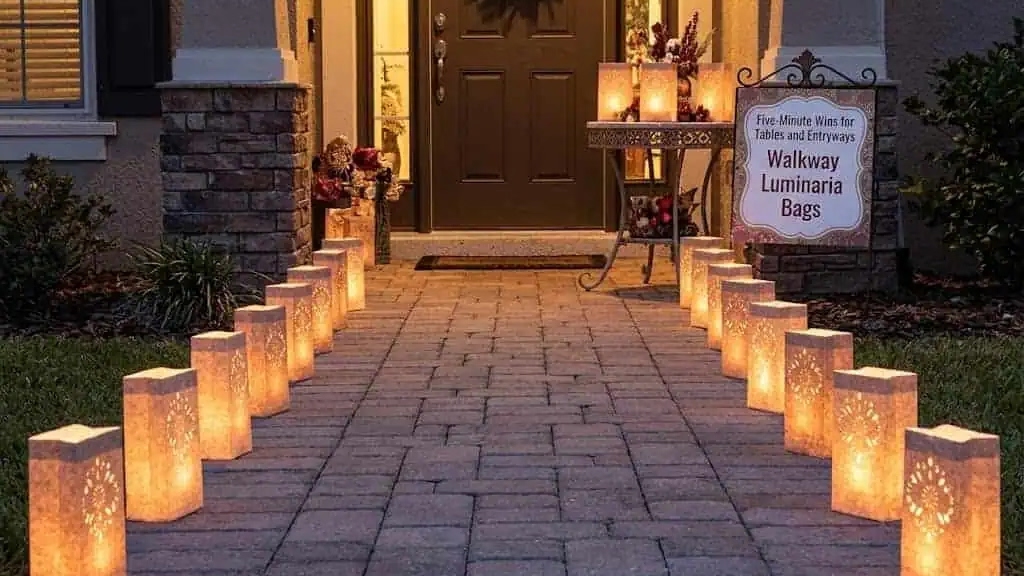
Paper bags can become simple Halloween walkway lights when I cut out small faces or shapes and place battery-operated LED tea lights inside.
I add enough weight to keep the bags stable and space them so they do not create an obstacle for guests. I never use real candles inside paper bags because an open flame is not appropriate for this setup.
For outdoor use, I check the weather and move paper decorations inside if rain is expected.
Estimated cost: About $5–$10 for a group, depending on the number of bags and lights.
Active time: Around 25–30 minutes.
Best for: Party entrances, walkways, and evening gatherings.
25. Haunted Mirror
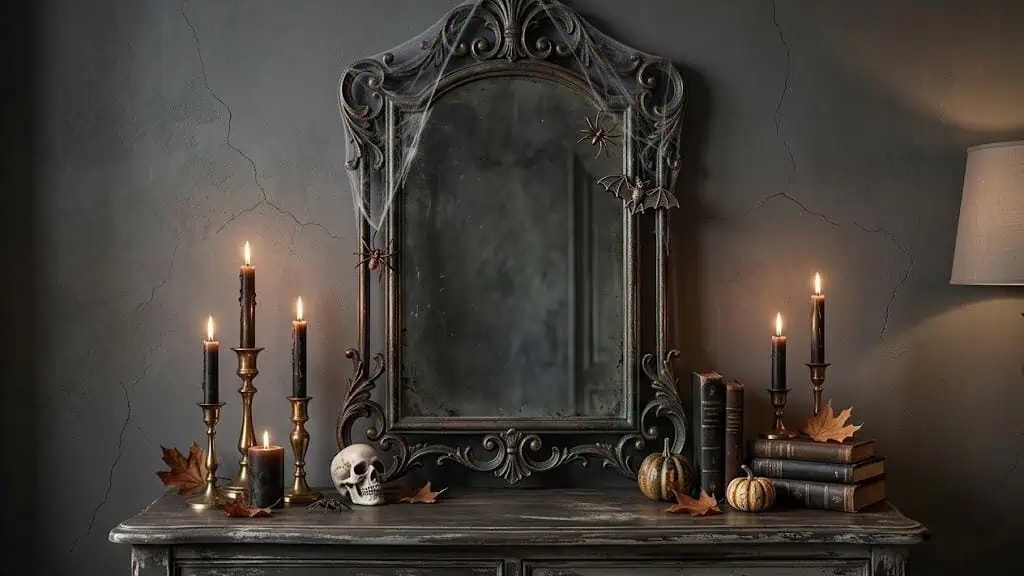
A basic mirror can become an entryway focal point with a dark frame and a few restrained distressed details. I use dry-brushing rather than covering the entire frame with metallic paint because I want the aged effect to remain subtle.
A small piece of torn cheesecloth can add texture to one corner without hiding the mirror. I check the frame and glass for cracks or chips before using it and place the finished piece where it will remain stable.
Estimated cost: About $4–$10, depending on the mirror and finishing supplies.
Active time: Around 20–30 minutes, plus drying.
Best for: Entryways, hallways, and Halloween party photo areas.
How Do You Make Dollar Store Decorations Look Expensive?
I focus on making inexpensive decorations look more polished and intentional, rather than trying to make them appear identical to expensive retail pieces.
A simple visual system works well:
- Dominant color: usually black, white, or another main neutral.
- Secondary color: a smaller amount of gold, orange, gray, or another supporting shade.
- Accent: one repeated detail, such as metallic stems, cheesecloth, or a particular Halloween motif.
I also look at the finish. A compatible matte or satin paint can reduce the overly shiny appearance of some plastic items, while a small amount of dry-brushing can add visual depth.
Removing price stickers and packaging is an obvious step, but it matters. I then group decorations into small arrangements rather than spreading them evenly across every available surface.
Finally, I vary height and texture. A tall candlestick beside a low pumpkin and a medium glass container gives my eye somewhere to move, which makes the display feel more considered.
Dollar Store DIY vs. Retail: The Receipts
The table below is a rough comparison, not a current retail price survey. Actual costs change by location, store, size, brand, and how many supplies I already have at home.
| Project | Approximate DIY Cost | Rough Retail Comparison | Approximate Time |
|---|---|---|---|
| Apothecary jar set | $7–$15 | Often more expensive as finished décor | 20–30 min + curing |
| Gothic candlestick trio | $5–$10 | Often $25+ as a finished set | 20 min + drying |
| Cemetery urn pair | $12–$20 | Often substantially more for decorative pairs | About 60 min |
| Potion bottle collection | $8–$15 | Often $25–$50+ depending on style | About 45 min |
| Cheesecloth ghost trio | $8–$15 | Often $30+ as finished seasonal décor | 90 min + drying |
I use these comparisons to decide whether a project is worth my time, not to promise a specific amount of savings. If I already own the paint, adhesive, tools, or filler, the DIY option becomes more attractive.
There are also projects I would simply buy. I do not try to recreate every electronic or motorized Halloween prop. Complicated mechanisms can take considerable time to reproduce, and safety-critical components should not be improvised just to save money.
For me, the dollar store wins most when the basic shape is useful and the transformation is straightforward.
Common Dollar Store Decorating Mistakes
Buying too many unrelated colors. I decide on a palette before shopping. This keeps inexpensive finds from turning into a collection of unrelated seasonal colors.
Leaving every shiny finish unchanged. When the material and paint are compatible, a new finish can make several mismatched pieces work together.
Scattering decorations randomly. I create a few defined vignettes instead of putting one small item on every table, shelf, and counter.
Making spider webs too dense. Thin, stretched strands give the web more visual definition. Thick clumps can hide the decorations underneath.
Using inappropriate candles. I avoid open flames around paper, fabric, plastic, and other lightweight materials. Battery-operated LEDs are a practical alternative for these projects.
Ignoring outdoor conditions. Rain, wind, moisture, and temperature changes can shorten the life of seasonal décor. Outdoor pieces need stable placement and materials appropriate for their location.
Buying more supplies than I need. Before checking out, I match each item to an actual project. This saves money and leaves me with fewer random craft supplies after Halloween.
Frequently Asked Questions
How much does it cost to decorate for Halloween with dollar store supplies?
A starting budget of around $40–$60 can cover several areas when I choose projects that share materials, but the actual amount depends on local prices and what I already own.
Paint, adhesive, LED lights, fabric, and tools can increase the finished cost, so I budget for the complete project rather than only the base dollar-store item.
What are the best dollar store items to transform?
Glass vases, jars, candlesticks, frames, foam pumpkins, planters, cheesecloth, and simple skeleton pieces are among the most flexible starting materials.
I especially value pieces that can be reused for different seasonal displays.
Which spray paint works on dollar store plastic and foam?
There is no single spray paint that should automatically be assumed safe for every plastic or foam item. I check the manufacturer’s label for the specific material and use the recommended preparation and ventilation.
Some solvents can damage certain foam products, so I never skip the compatibility instructions.
How do I make outdoor dollar store decorations last longer?
I choose materials suitable for outdoor use, protect painted surfaces with a compatible product when appropriate, and place decorations where they have some shelter from rain.
Lightweight pieces need secure placement in windy conditions. Fabric and paper decorations are better moved indoors when wet weather is expected.
Are these projects safe to make with children?
Some are suitable for supervised family crafting, but the project needs to match the child’s age and the materials involved. Adults should handle spray paint and hot glue, and young children should not have access to small skeleton parts, plastic eyeballs, beads, or other pieces that could be swallowed.
I also keep cords and hanging decorations out of areas where children could pull on them.
How do I make the pedestal apothecary jars?
I choose a vase and candlestick that meet securely, apply an adhesive designed for the materials, and hold the pieces together as directed by the adhesive manufacturer.
The finished piece needs to cure fully before I move or fill it. If the base is unstable, I choose different components rather than relying on a weak joint.
How do I make stiffened cheesecloth ghosts?
I soak cheesecloth in a suitable fabric-stiffening mixture, remove excess liquid, and arrange it over a temporary form. I let the fabric dry completely before removing the support.
Drying time varies with the mixture, fabric, and humidity, so I follow the product directions rather than assuming a fixed drying time.
How should I store my Halloween decorations?
I group decorations by area or type and label the storage containers. Glass pieces get individual protection, while painted surfaces should not rub directly against each other.
I also keep delicate paper and fabric decorations dry and away from heavy items. Spending a few minutes organizing after Halloween makes the next setup much easier.
Can renters use these decorations?
Many of these projects can be placed on existing furniture, windows, doors, shelves, or planters without permanent changes. For wall and window decorations, I use removable attachment products that are suitable for the specific surface and follow their weight limits.
I never assume that a removable product will leave every surface untouched, so testing a small area may be worthwhile.
🎃 Quick Summary
✅ Best for: Budget-conscious decorators, renters, families, and first-time Halloween hosts.
💰 Budget: Start with a project-based budget and remember that paint, adhesive, lighting, and tools can increase the finished cost.
⏱ Time: Most projects take about 5–45 minutes of active work, with some requiring additional drying or curing.
🌟 Projects I return to: Pedestal apothecary jars, matte black candlesticks, cheesecloth ghosts, painted pumpkins, and skeleton planters.
📌 Do not skip: Material-compatible paint, a simple color palette, secure placement, and LED lighting where open flames would be unsuitable.
Go Raid the Seasonal Aisle
I would not start by trying to make all 25 projects. A better approach is to choose three or four that work together and then shop for shared supplies.
For example, glass vases and candlesticks can support several projects, while one can of compatible paint may unify multiple decorations. That keeps the shopping list smaller and makes the finished room feel coordinated.
I also leave some things off my cart. If a decoration requires complicated electronics, takes hours to reproduce, or cannot be safely adapted with the materials available, buying the finished product may be the smarter choice.
The goal is not to prove that every expensive decoration can be copied for a few dollars. For me, the value is finding an inexpensive shape, giving it a useful new finish, and creating something I can store and use again.
Read this next: 15 Easy But Fun Halloween Party Games For Little Kids
Conclusion
Dollar store Halloween decorating works best when I stop thinking of inexpensive pieces as finished decorations and start treating them as raw materials. A plain vase, candlestick, frame, planter, or piece of fabric can become much more useful after a thoughtful transformation.
The projects I value most are the ones that can be grouped with other pieces, reused in future seasons, or adapted to the room I am decorating. A limited palette, varied heights, and a few consistent finishes can make a collection feel much more intentional without requiring a large budget.
I also consider safety part of good DIY planning. LED lighting is my choice around paper and fabric, small pieces stay away from young children and pets, adhesives are given time to cure, and outdoor decorations are secured and protected from changing weather.
Most importantly, I do not feel the need to DIY everything. When a project is complicated, unreliable, or simply not worth the time, I would rather buy the right piece and spend my crafting time on the transformations that actually make a difference.



3 Comments