Bumble Bee Crafts for Adults That Are Easy, Fun, and Actually Worth Making
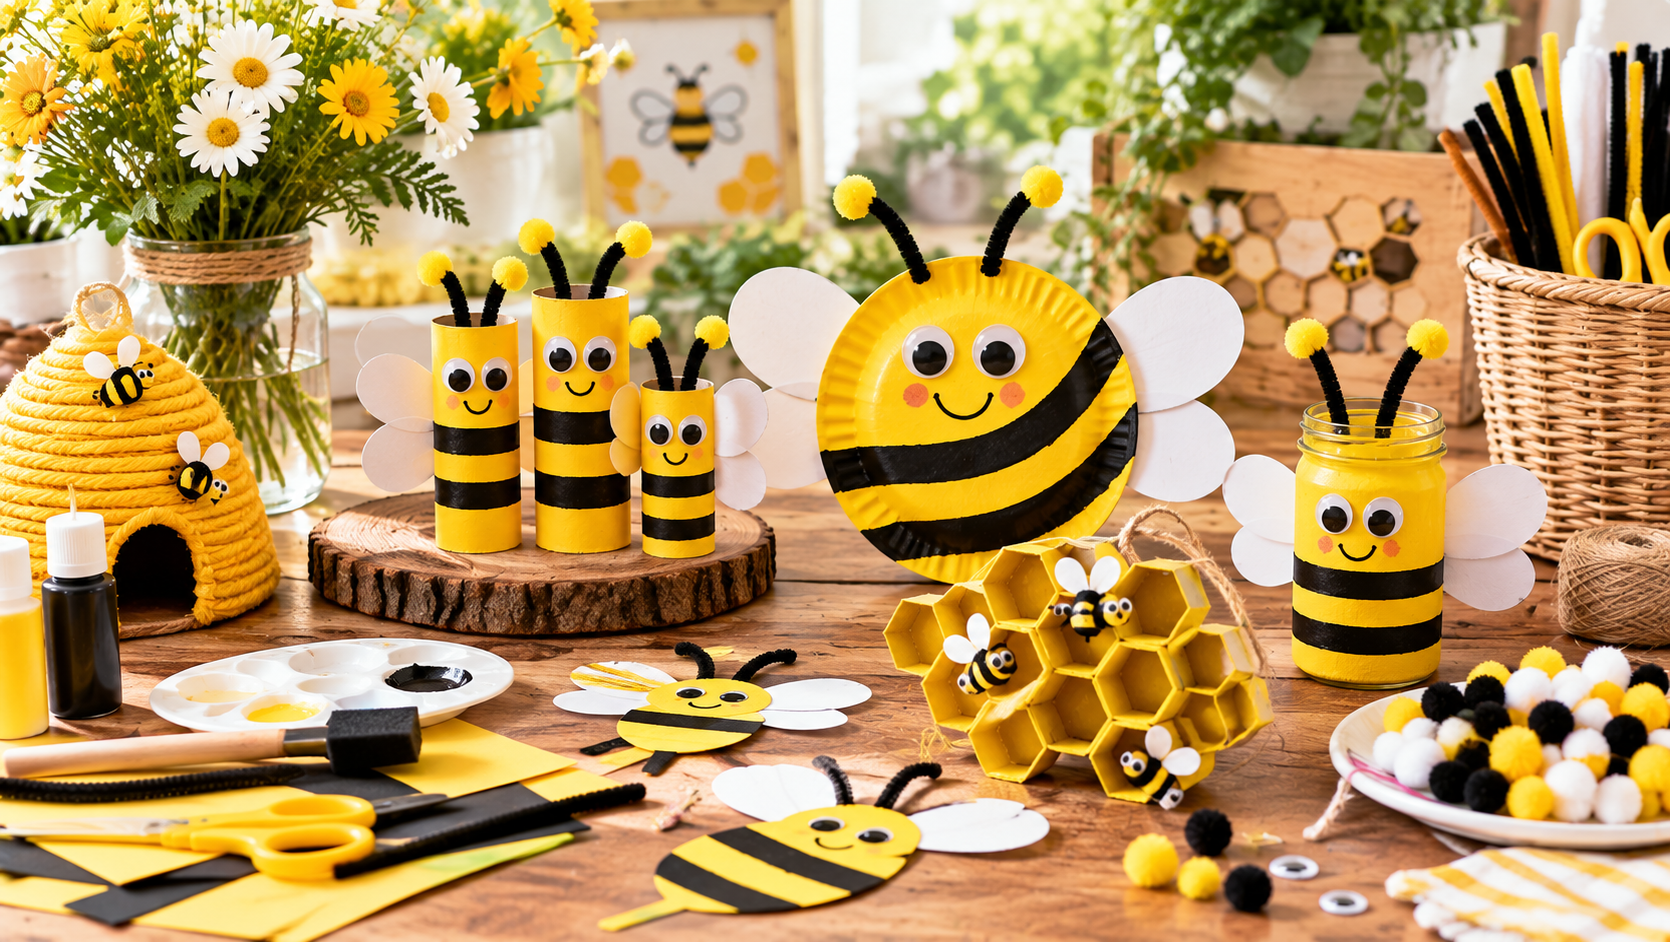
I’ve always liked crafts that don’t require a long supply list or hours of careful work. Bumble bee crafts are especially fun because the classic yellow, black, cream, and honey tones make even a simple project look cheerful.
When I want a relaxing project, I can usually make something bee-themed with supplies I already have around the house. A mason jar, flower pot, garden stone, or plain tote can become a cute piece of decor with just a little paint and creativity.
I also like that these projects work beyond spring and summer. Natural wood, honey colors, dried flowers, and bee details can fit into kitchens, gardens, craft rooms, and even seasonal displays throughout the year.
In this guide, I’m sharing 15 bumble bee crafts for adults that range from simple home decor and garden projects to handmade gifts. I’ve included the basic supplies, easy instructions, and practical tips I would use to get better results.
You’ll find beginner-friendly projects such as painted stones and mason jars, along with more involved ideas like concrete stepping stones, wind chimes, wreaths, and shadow boxes.
Save this for later
Table of Contents
I’ve also included ways to make bee crafts look more polished without making them complicated. A limited color palette, varied textures, proper sealing, and thoughtful placement can make a big difference.
Key Takeaways
- I can make many bee crafts with inexpensive supplies such as acrylic paint, twine, wood, glass jars, and fabric.
- Painted stones, mason jars, and terracotta pots are good starting points for beginners.
- Outdoor projects should be finished with an appropriate outdoor sealer for better durability.
- Bee-themed crafts can become useful gifts instead of simply sitting on a shelf.
- Yellow, black, cream, natural wood, and soft gold create an easy-to-coordinate bee-inspired palette.
- I don’t need perfect lines or professional painting skills for these projects to look handmade and charming.
Related article: Mushroom Crafts for Adults: From Quick Projects to Thoughtful Gifts
Why Bumble Bee Crafts Are Actually Worth Making
I think the appeal of bee crafts comes from how easy the theme is to recognize. A few yellow and black details can instantly suggest a bumble bee without requiring complicated artwork.
The projects also give me plenty of room to adjust the design to my own skill level. I can make simple stripes if I’m a beginner or add flowers, honeycomb patterns, lettering, and extra texture when I want more detail.
Another benefit is that many of these crafts can be useful. Instead of making something that only looks decorative, I can turn an everyday item into a planter, tote bag, candle display, garden sign, or gift.
They’re Low-Pressure by Nature
One reason I enjoy bee crafts is that they don’t have to look perfectly symmetrical.
A crooked stripe or slightly uneven wing can still look intentional. That makes these projects much less stressful when I’m crafting after a long day and simply want to make something with my hands.
I can also simplify almost every design. If detailed painting isn’t my strength, I can use paint pens, stencils, stickers, or simple geometric shapes instead.
The Materials Are Refreshingly Simple
Most of these projects use supplies I can find at a craft store, dollar store, garden center, or even around my home.
Acrylic paint, brushes, glue, twine, fabric, jars, wood pieces, and small decorative items cover a surprising number of bee-themed projects.
I always check the intended use of a material before starting. For example, outdoor projects need weather-resistant finishes, while items that come into contact with food should use food-safe materials.
The Mood Shift Is Real
For me, one of the best parts of crafting is the simple act of focusing on one small task.
Painting stripes, arranging flowers, tying twine, or placing decorative pieces gives me something concrete to concentrate on instead of constantly checking my phone or thinking about everything else I need to do.
Bee crafts also have a naturally cheerful color combination. The warm yellows and natural textures can make a finished project feel welcoming without requiring a lot of decoration.
Bumble Bee Home Decor Crafts for Adults
1. Bumble Bee Mason Jar Centerpiece
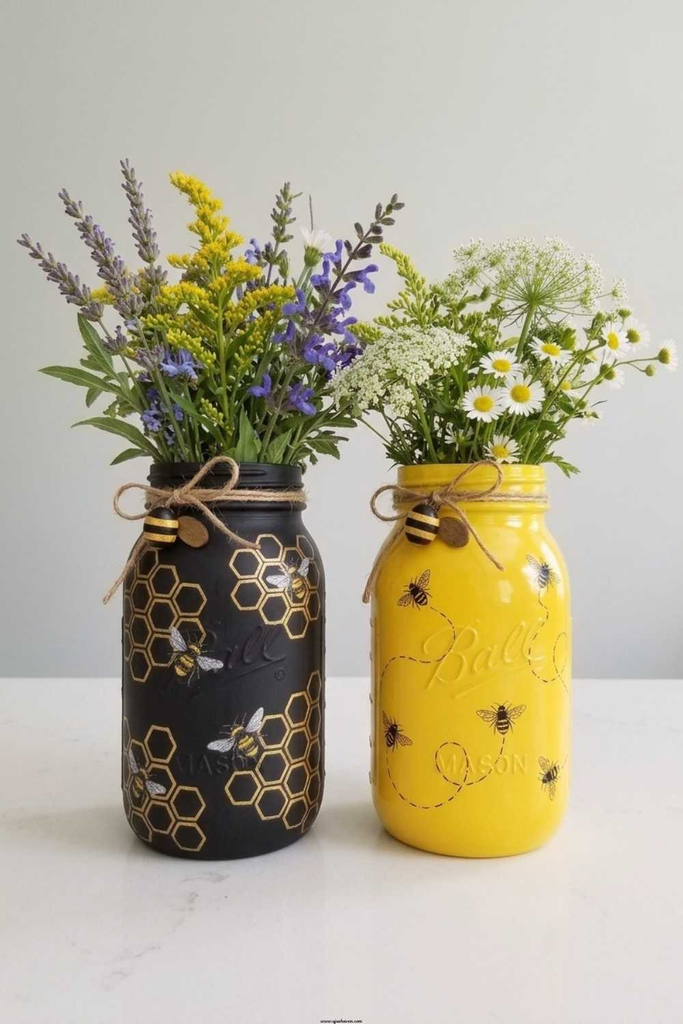
A mason jar is one of my favorite inexpensive craft bases because it can be turned into decor in so many ways. For this version, I use yellow paint, black details, twine, and a few flowers to create a simple bee-inspired centerpiece.
I can place it on a dining table, kitchen shelf, entryway table, or bathroom counter. It also works nicely as part of a small group of coordinating bee decorations.
Why adults will love it: I get to turn an ordinary jar into useful seasonal or year-round decor without needing advanced crafting skills.
Supplies Needed:
- Clean mason jar
- Yellow and black acrylic paint
- Twine or jute
- Small faux flowers or greenery
- Hot glue gun
- Black felt or craft foam
How to Make It:
- I wash and dry the jar thoroughly before painting.
- I cover the outside with yellow paint, adding a second coat if needed.
- After the base dries, I add black stripes around the jar.
- I cut small wings from black felt or foam and attach them near the upper portion.
- I wrap twine around the jar neck and secure it with a knot or small amount of glue.
- I finish it with faux flowers or greenery.
Pro Tip: I let each paint layer dry completely before adding another. Rushing between coats can cause smudging and uneven coverage.
2. Bee-Themed Wax Pillar Candle
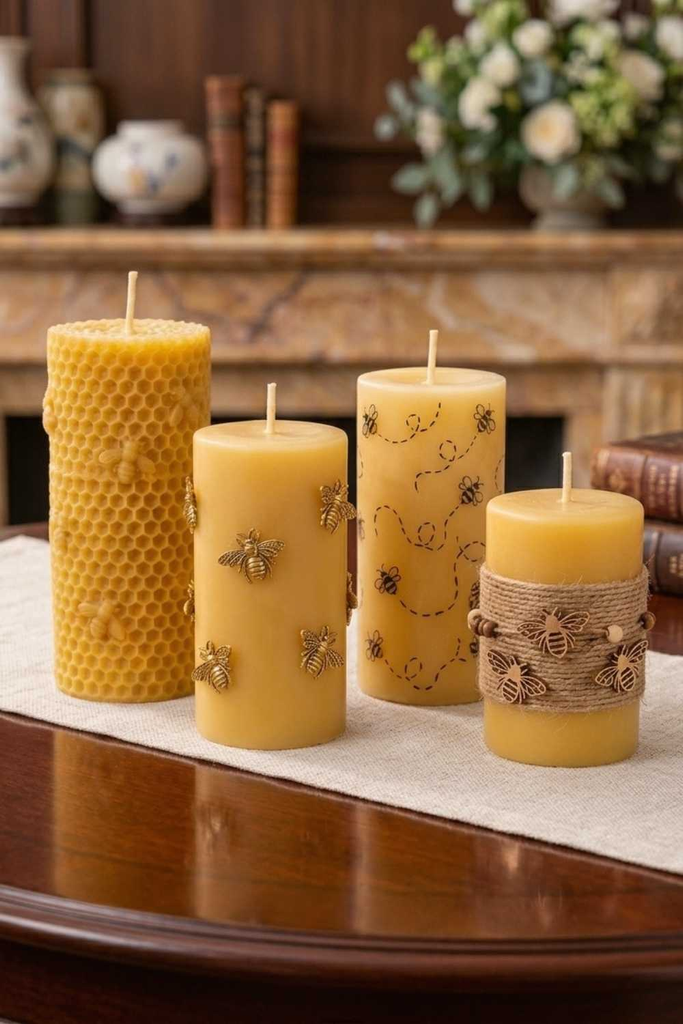
I like handmade candle decor because it combines decoration with something I can actually use. A plain pillar candle can become a simple bee accent with painted stripes and small wing details.
For candles that will be burned, I’m careful about where I place decorative materials. I keep anything flammable away from the wick and flame and follow the candle manufacturer’s safety instructions.
Why adults will love it: I can create a personalized decorative candle without making the candle itself from scratch.
Supplies Needed:
- Plain white or cream pillar candle
- Candle-safe paint or suitable paint pens
- Small detail brush
- Ribbon or twine for decoration around the base
- Candle-safe finishing product if recommended by the paint manufacturer
How to Make It:
- I gently clean the candle surface with a dry cloth.
- I create a small yellow oval to represent the bee’s body.
- Once dry, I add black stripes.
- I paint simple wings above the body using a suitable light color.
- I allow the design to cure according to the product instructions.
- I add ribbon around the base only if it can remain safely away from the flame.
Pro Tip: I use products specifically labeled for candle surfaces and always keep decorative materials well away from the wick and flame.
3. Bumble Bee Wreath for the Front Door
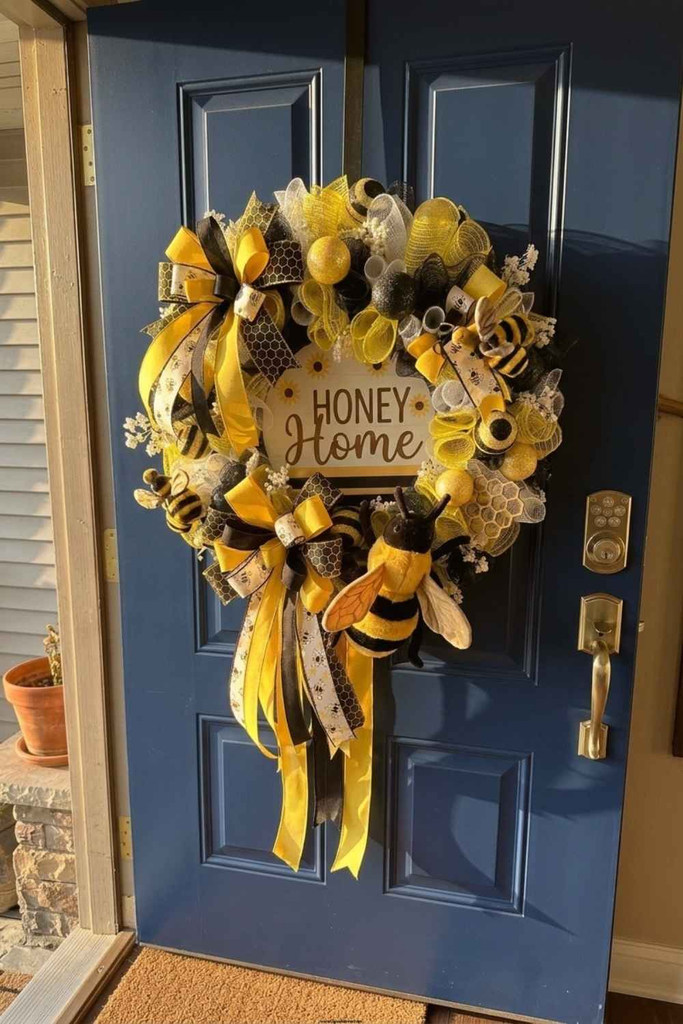
A bee wreath is an easy way for me to add personality to a front door without limiting the decoration to one holiday.
I like using a grapevine wreath because its natural brown texture works well with yellow, black, cream, and greenery. Faux flowers can add softness while small bee accents provide the theme.
Why adults will love it: It creates a welcoming entryway display that can stay up through much of spring and summer.
Supplies Needed:
- Grapevine or foam wreath base
- Yellow and black ribbon or burlap
- Faux bees
- Yellow or white artificial flowers
- Hot glue gun
- Faux greenery
How to Make It:
- I wrap the wreath base with ribbon or burlap, leaving some natural areas visible if I’m using grapevine.
- I add black ribbon in several sections for contrast.
- I arrange flowers around one side or across the lower portion of the wreath.
- I fill small gaps with greenery.
- I place a few artificial bees among the flowers.
- I secure everything with hot glue once I’m happy with the arrangement.
Pro Tip: I arrange all the pieces on the wreath before gluing anything. This makes it much easier to change the composition.
4. Honeycomb Hexagon Wall Art
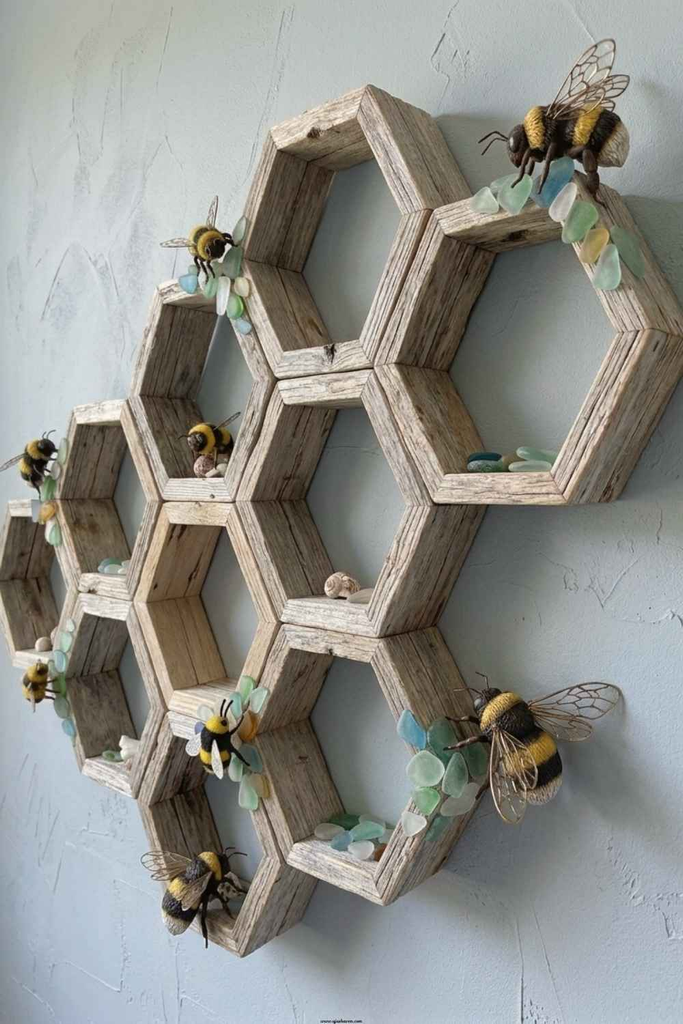
Honeycomb shapes make an easy connection to a bee theme, and hexagon pieces can be arranged in countless ways.
I like combining several shades instead of painting every piece exactly the same. Cream, pale yellow, warm gold, and natural wood can give the finished arrangement more depth.
Why adults will love it: I can create custom wall art that looks coordinated without needing complicated painting techniques.
Supplies Needed:
- Wooden hexagon cutouts
- Yellow, gold, and cream acrylic paint
- Small paintbrushes
- Black paint pen
- Fine-grit sandpaper
- Suitable wall-hanging strips or hardware
How to Make It:
- I lightly sand each wooden piece to remove rough edges.
- I paint the hexagons in several complementary shades.
- After they dry, I add simple outlines or small bee details with a paint pen.
- I lay the pieces on the floor and experiment with different arrangements.
- I transfer the arrangement to the wall using appropriate hanging hardware.
Pro Tip: I avoid making every hexagon identical. Slight differences in color and design make the arrangement feel more handmade.
5. Bee-Inspired Terracotta Pot
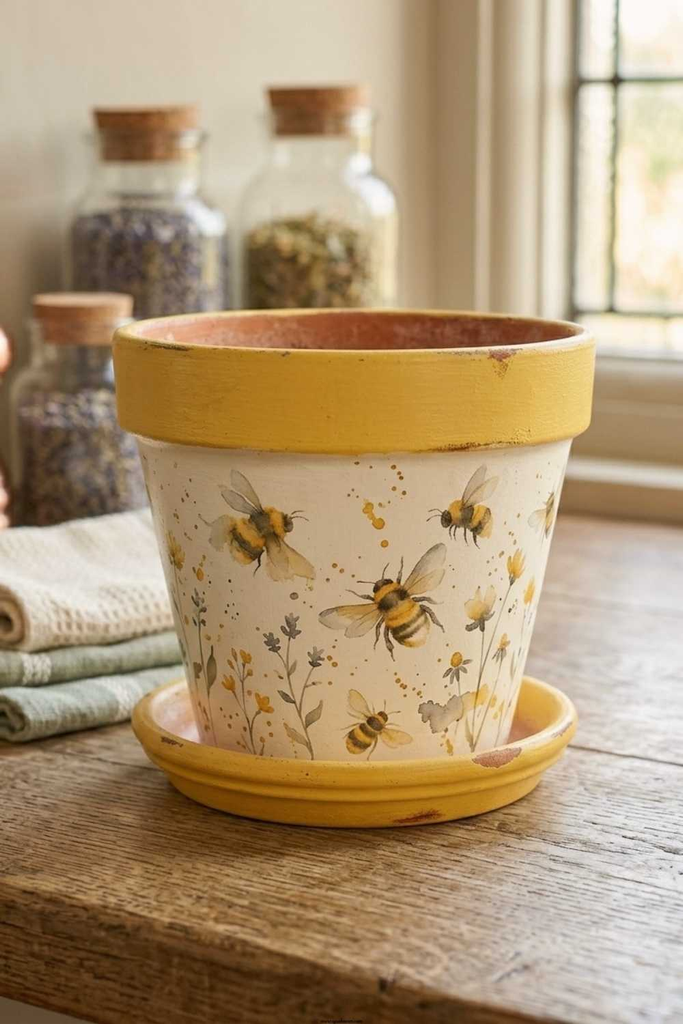
Terracotta pots are inexpensive and easy to customize, which makes them a great starting point for bee-themed garden decor.
I can paint a small pot for a windowsill herb, a succulent, or a larger planter for outdoor flowers. The key is choosing paint and sealant suitable for where I plan to use the pot.
Why adults will love it: I get a decorative craft and a useful planter in one project.
Supplies Needed:
- Terracotta pot
- Yellow and black acrylic or outdoor-rated paint
- Small paintbrush
- Appropriate clear sealant
- Potting soil
- Small plant
How to Make It:
- I wipe the pot clean and let it dry completely.
- I paint the outside yellow, using additional coats when necessary.
- I add black horizontal stripes after the yellow paint has dried.
- I add a small bee face or honeycomb accent near the top if desired.
- Once all paint has dried, I apply a suitable sealant according to its directions.
- I add soil and the plant after the finish has fully cured.
Pro Tip: I choose an outdoor-rated paint and sealer when the pot will live outside. Moisture and sunlight can wear down ordinary craft finishes much faster.
Easy Bumble Bee Garden Crafts for Adults
6. Painted Bee Garden Stones
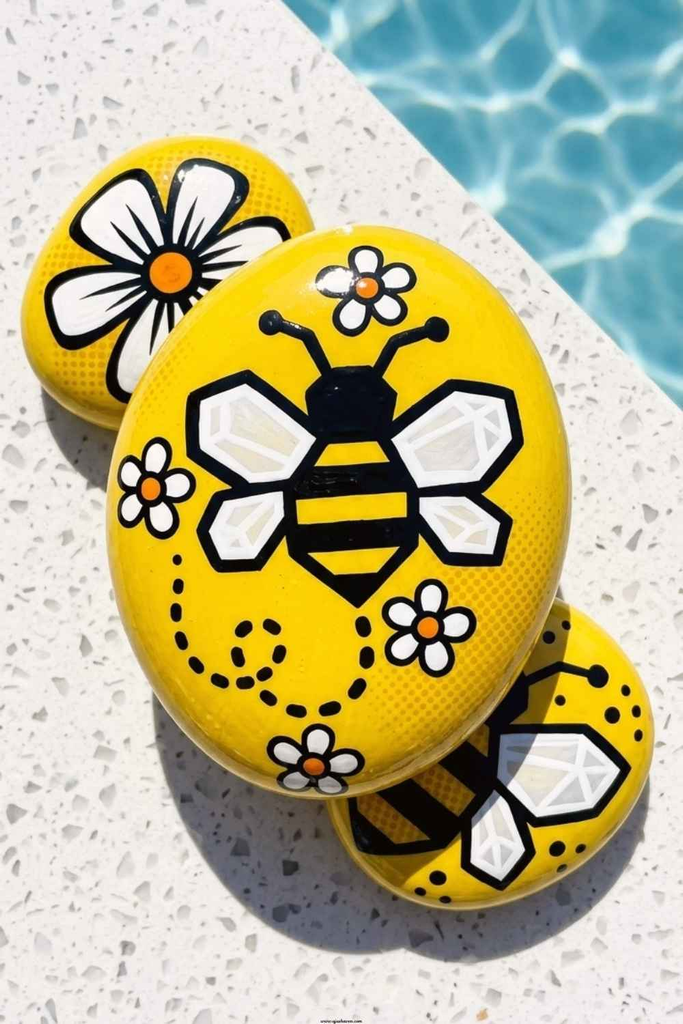
I love using smooth stones for simple garden crafts because they’re inexpensive and naturally imperfect.
A few painted bee stones can sit beside flowers, herbs, a walkway, or a container garden. I can make each one slightly different instead of trying to create identical designs.
Why adults will love it: It’s an inexpensive project that gives me an easy way to add handmade details outdoors.
Supplies Needed:
- Smooth flat stones
- Yellow and black outdoor-suitable acrylic paint
- White paint
- Fine-tip black marker or paint pen
- Outdoor clear sealer
How to Make It:
- I wash the stones and let them dry completely.
- I paint the surface yellow and allow it to dry.
- I add black stripes across the center.
- I create simple white wings near the top.
- I add facial details with a fine-tip marker or paint pen.
- I seal the finished stones with a product suitable for outdoor use.
Pro Tip: I use several thin coats instead of one heavy coat when sealing outdoor painted stones. It gives me better coverage and helps avoid a thick, cloudy finish.
7. Bumble Bee Stepping Stones
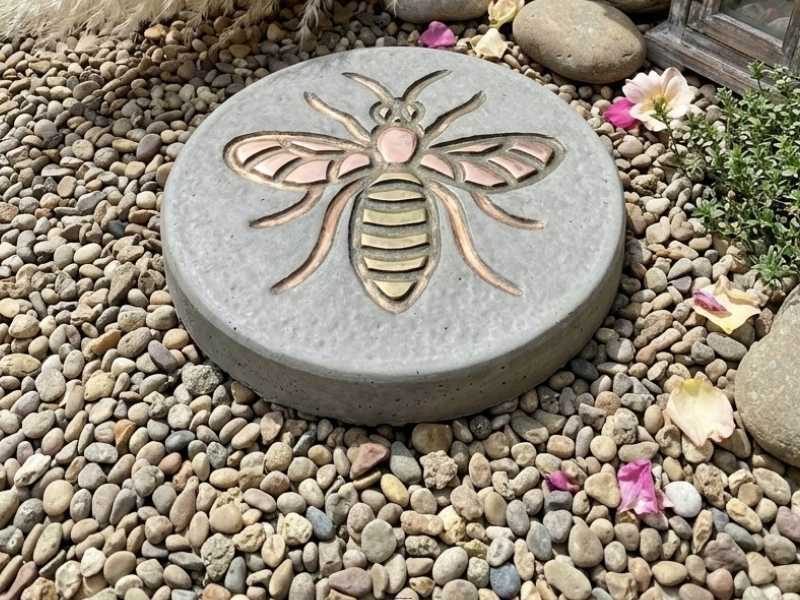
A handmade stepping stone can become a permanent part of a garden path or planting area.
I like the idea of adding yellow and black tiles or small glass pieces to wet concrete because the finished stone has texture as well as color.
Why adults will love it: It combines functional garden design with a personal handmade detail.
Supplies Needed:
- Stepping stone mold
- Quick-setting concrete mix
- Yellow and black decorative tiles or gems
- Rubber gloves
- Mold-release product such as cooking spray if compatible with the mold
- Small trowel
How to Make It:
- I prepare the mold according to the manufacturer’s instructions.
- I mix the concrete to the consistency recommended on the package.
- I fill the mold and smooth the top.
- I carefully press the decorative pieces into the surface while the concrete is workable.
- I allow the stone to cure for the full time recommended by the concrete manufacturer.
- I remove it from the mold and place it only after it has reached the required strength.
Pro Tip: I press decorative pieces firmly enough to hold them in place but avoid pushing them so deeply that the pattern disappears into the concrete.
8. Bee-Themed Wind Chime
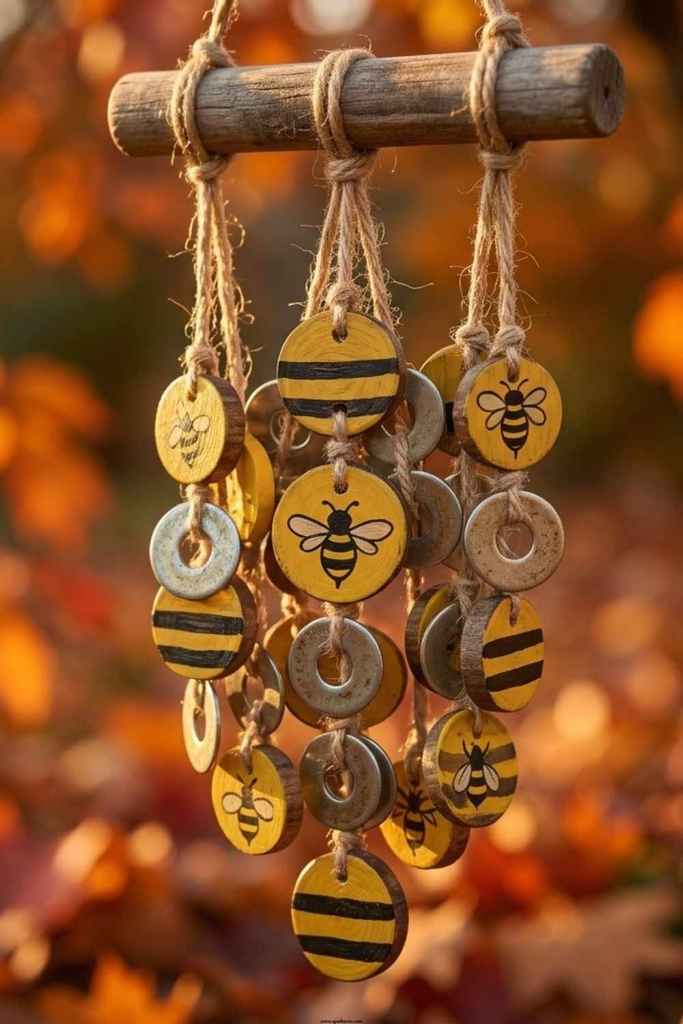
A homemade wind chime adds something different to a garden because it brings movement and sound along with visual decoration.
For a bee theme, I can paint wooden beads, discs, or lightweight shapes yellow and black and combine them with metal bells or washers.
Why adults will love it: It adds a handmade feature that changes slightly every time the breeze moves through it.
Supplies Needed:
- Small piece of driftwood or wooden dowel
- Wooden beads or discs
- Yellow and black paint
- Twine or thin cord
- Small metal bells or washers
- Hot glue gun
How to Make It:
- I paint the wooden pieces with bee-inspired colors.
- I cut several lengths of cord, making some slightly shorter than others.
- I thread the painted pieces and metal components onto the cords.
- I tie each finished strand to the wooden support.
- I attach a longer cord to the top for hanging.
- I test the balance before placing it outdoors.
Pro Tip: I use different strand lengths and spacing so the pieces don’t all hang at exactly the same height.
Also read: Mindfulness Crafts for Adults: Slow, Simple Ideas for When Your Mind Feels Loud
9. Wooden Bee Garden Stake
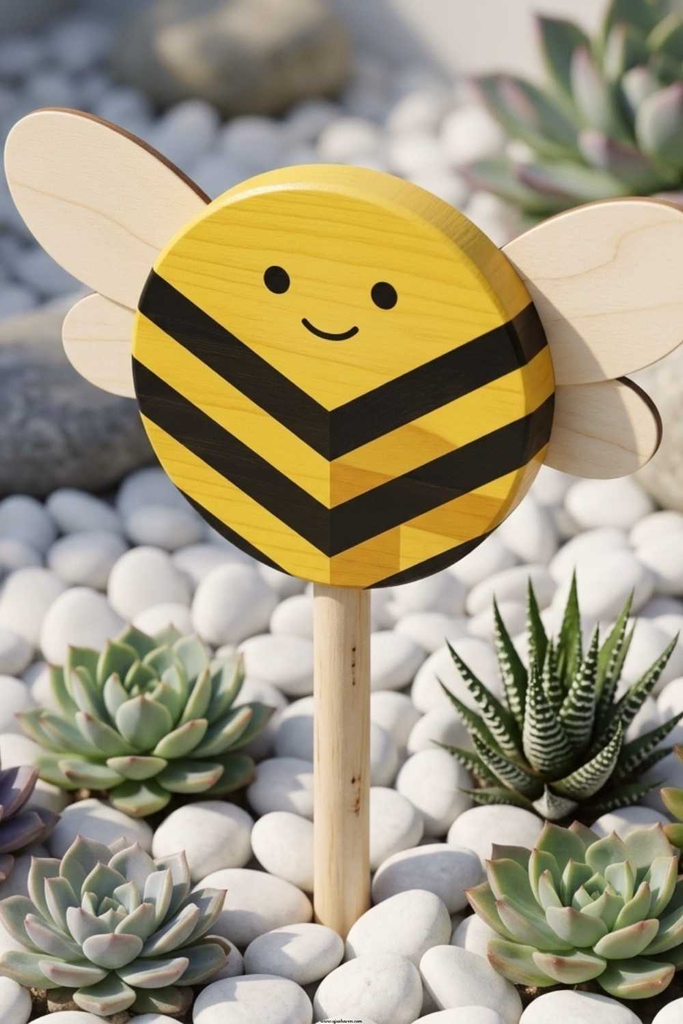
I find garden stakes especially useful when I want to add a small focal point without filling an entire flower bed with decorations.
A simple wooden bee attached to a stake can sit among herbs, flowers, or containers. I can also customize the face and wing shape to make it look completely different from a store-bought piece.
Why adults will love it: It’s small, practical, and easy to personalize.
Supplies Needed:
- Wooden garden stake or dowel
- Wooden disc or plywood bee shape
- Yellow and black paint
- White or cream paint
- Outdoor sealant
- Hot glue or suitable outdoor hardware
- Fine-tip paint pen
How to Make It:
- I paint the wooden disc yellow and allow it to dry.
- I add black stripes and simple facial details.
- I create small wing shapes from thin craft wood or another suitable material.
- I attach the wings to the back of the bee.
- I secure the bee to the top of the garden stake.
- I finish the project with an outdoor-appropriate protective coating.
Pro Tip: If I want a rustic appearance, I lightly sand a few painted areas after they dry so the wood shows through naturally.
10. Bee Pollinator Signpost
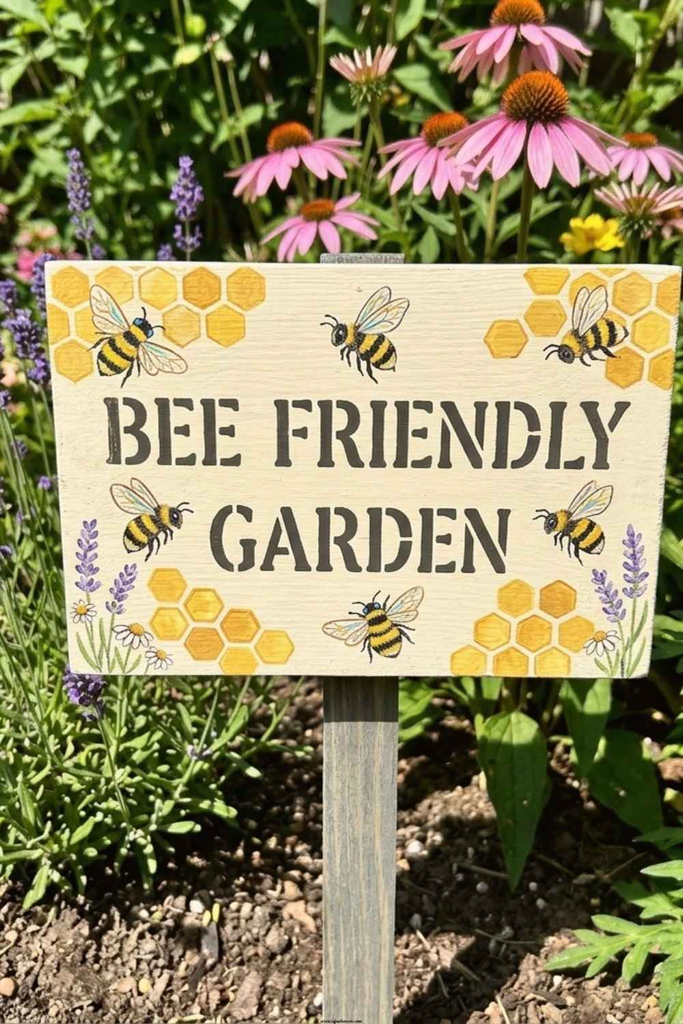
A pollinator sign gives me a chance to combine decoration with a useful garden message.
I can use reclaimed wood for a casual farmhouse look or smooth new wood for a cleaner appearance. Short phrases about pollinators work especially well because they keep the sign easy to read.
Why adults will love it: It gives a garden personality while creating a simple conversation piece about pollinator-friendly planting.
Supplies Needed:
- Wooden board
- Wooden post or garden stake
- Yellow, black, cream, and white paint
- Outdoor-rated sealant
- Paint pen or letter stencils
- Sandpaper
- Outdoor screws
How to Make It:
- I sand the board and remove the dust.
- I paint the board a light cream or white shade.
- I add a short garden message using stencils or a paint pen.
- I decorate around the words with bees, flowers, or honeycomb shapes.
- I attach the sign securely to the post.
- I apply an outdoor protective finish before placing it in the garden.
Pro Tip: I keep the lettering short and bold. A sign that is easy to read from several feet away usually works better than one packed with small details.
Creative Bumble Bee Gifts and Decorative Projects
11. Bumble Bee Honey Jar Gift Set
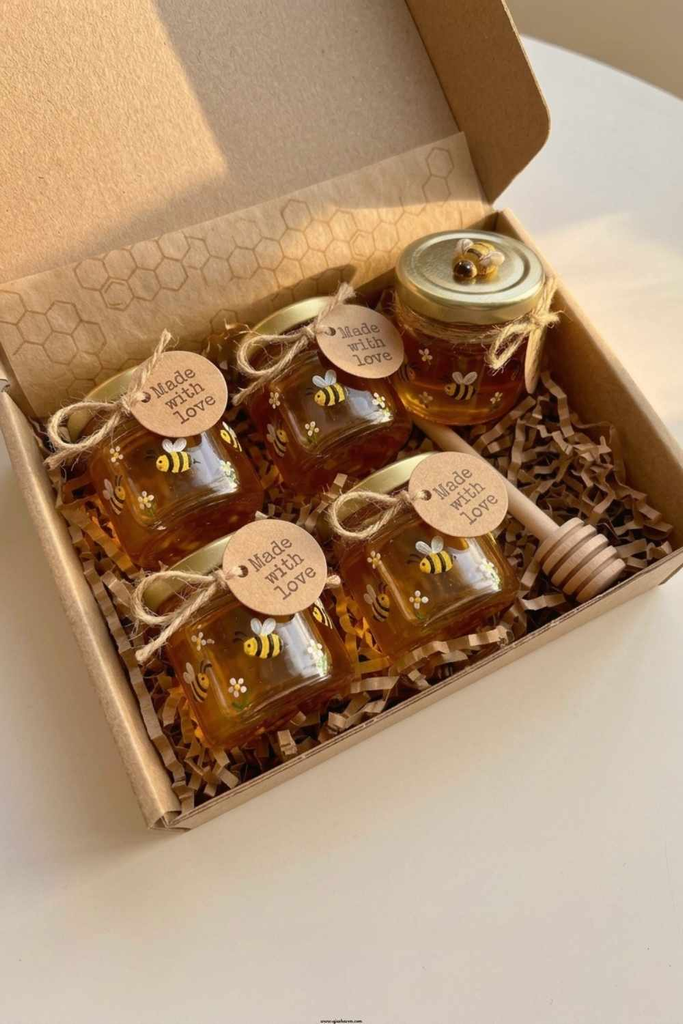
A small honey gift can feel much more personal when I add handmade packaging.
Instead of simply handing someone a jar, I can decorate the container with bee details, add a handwritten tag, and package several small jars together.
Why adults will love it: It combines a practical food gift with a handmade presentation.
Supplies Needed:
- Small food-safe honey jars
- Honey
- Suitable paint pens for the exterior
- Twine or ribbon
- Kraft paper gift tags
- Optional bee embellishments
How to Make It:
- I fill and close the honey jars according to safe food-handling practices.
- I decorate only the exterior with bee-inspired details.
- I let all decorative products dry and cure according to their instructions.
- I write the recipient’s name or a short message on a gift tag.
- I tie the tag around the jar with twine or ribbon.
- I arrange several jars together in a small gift box or basket.
Pro Tip: I make sure decorative paint or embellishments never touch the food or areas that come into direct contact with the honey.
12. Hand-Painted Bee Tote Bag
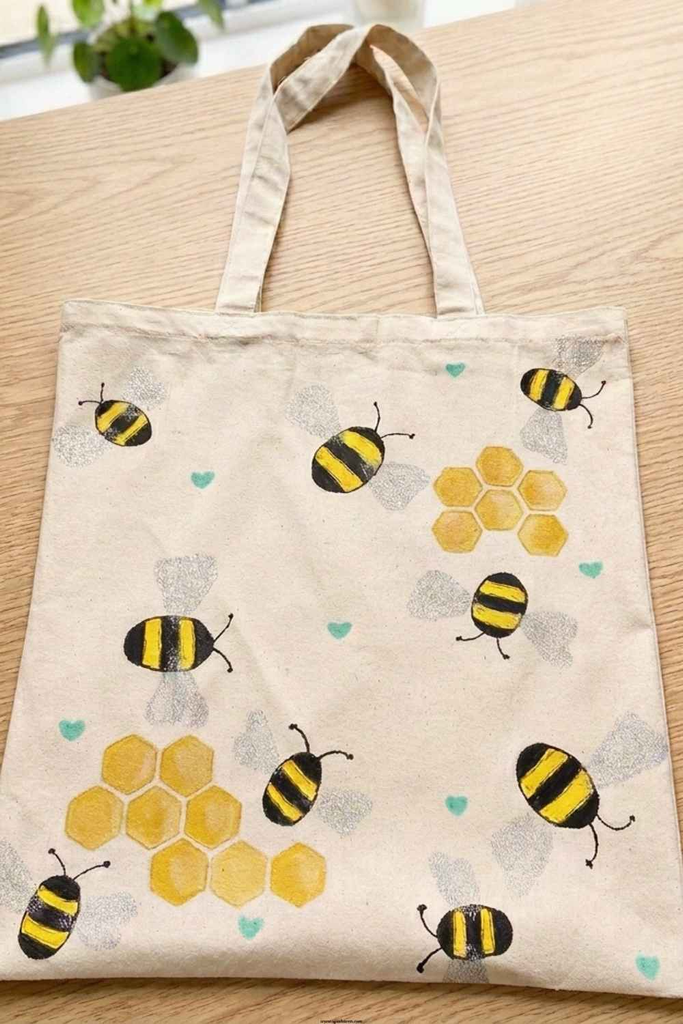
A plain canvas tote gives me a useful surface for a bee design, and I can make the artwork as simple or detailed as I want.
I prefer sketching the design lightly first so I can adjust the placement before using fabric paint.
Why adults will love it: The finished craft becomes something I can actually use for groceries, books, craft supplies, or everyday errands.
Supplies Needed:
- Plain canvas tote
- Yellow and black fabric paint
- Small flat brush
- Fine detail brush
- Cardboard insert
- Fabric medium if required by the paint
- Iron if required for heat setting
How to Make It:
- I place cardboard inside the tote to stop paint from transferring through the fabric.
- I lightly sketch a bee, honeycomb, or floral design.
- I fill in the yellow areas first.
- After they dry, I add black stripes and fine details.
- I let the paint dry completely.
- I follow the fabric paint manufacturer’s directions for heat setting and washing.
Pro Tip: I test my paint on a scrap piece of similar fabric first. This helps me see how the color spreads and whether the fabric needs a medium.
13. Bumble Bee Beeswax Wrap Set
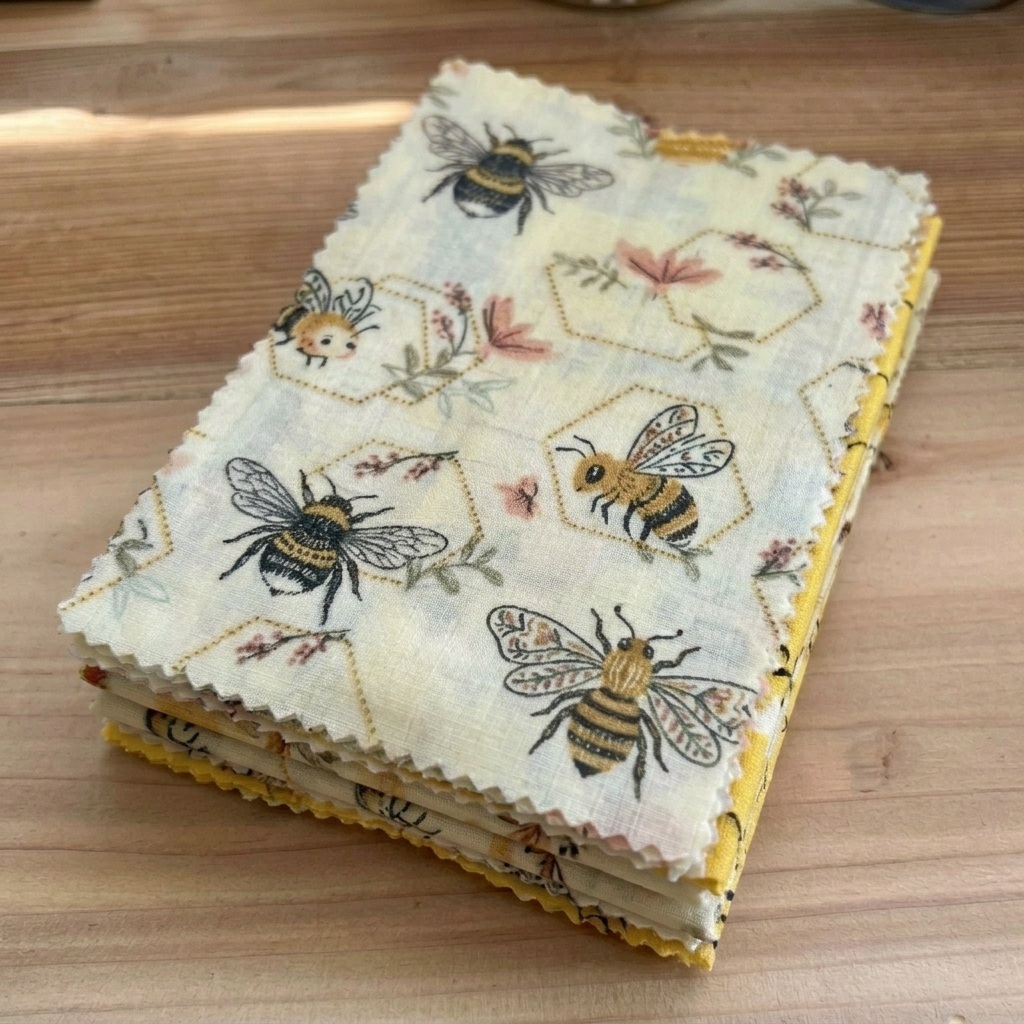
Beeswax wraps fit naturally with a bee-inspired gift theme, and they can be a practical alternative to some single-use food-storage materials.
For this project, I choose cotton fabric and follow a beeswax wrap method suitable for the intended food-storage use.
Why adults will love it: I can create a reusable kitchen item that also makes a thoughtful handmade gift.
Supplies Needed:
- 100% cotton fabric
- Beeswax pellets
- Pinking shears or fabric scissors
- Baking sheet
- Parchment paper
- Oven or another suitable wax-melting method
- Ribbon or twine
How to Make It:
- I cut the cotton fabric into several useful sizes.
- I place one piece on a parchment-lined baking sheet.
- I distribute beeswax evenly across the fabric.
- I warm it using a method and temperature recommended by a reliable beeswax-wrap recipe or the wax manufacturer.
- Once the wax has melted into the fabric, I carefully remove it and allow it to cool.
- I repeat the process for the remaining pieces and bundle them together.
Pro Tip: I work in a well-ventilated space and protect my baking equipment from wax. I also follow the finished wrap’s care instructions and avoid using beeswax wraps with raw meat or very hot foods.
14. Bee-Themed Shadow Box
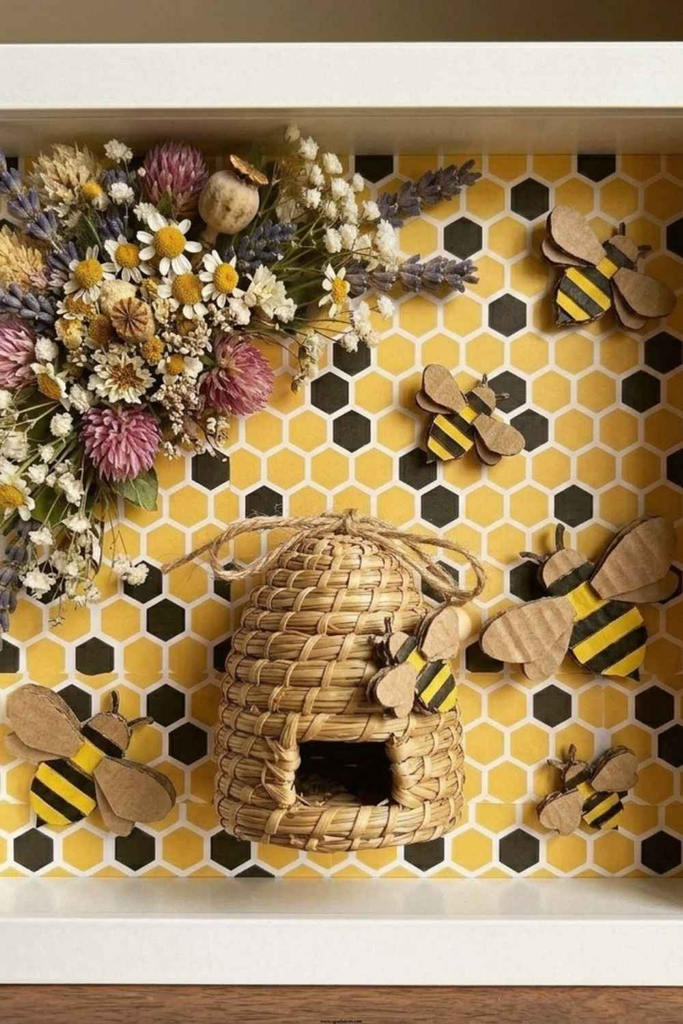
A shadow box gives me plenty of freedom because I can build the scene from small objects rather than relying on complicated artwork.
I can combine dried flowers, paper honeycombs, faux bees, fabric, and a simple background to create a layered display.
Why adults will love it: Every shadow box can tell a slightly different story, making this a good project for personalized decor or gifts.
Supplies Needed:
- Deep shadow box frame
- Yellow, black, cream, or honeycomb-patterned paper
- Small faux bees
- Dried or faux flowers
- Honeycomb embellishments
- Hot glue gun
- Optional decorative quote or tag
How to Make It:
- I cover the back panel with scrapbook paper, fabric, or another decorative background.
- I arrange all the elements before gluing them down.
- I create a focal area with flowers or a larger decorative piece.
- I position the bees around the composition rather than lining them up evenly.
- I add optional lettering or a small message.
- I secure everything and close the frame.
Pro Tip: I use foam adhesive or spacers behind some pieces to create different depths. That small change can make a flat arrangement look much more dimensional.
15. Bumble Bee Candle Gift Box
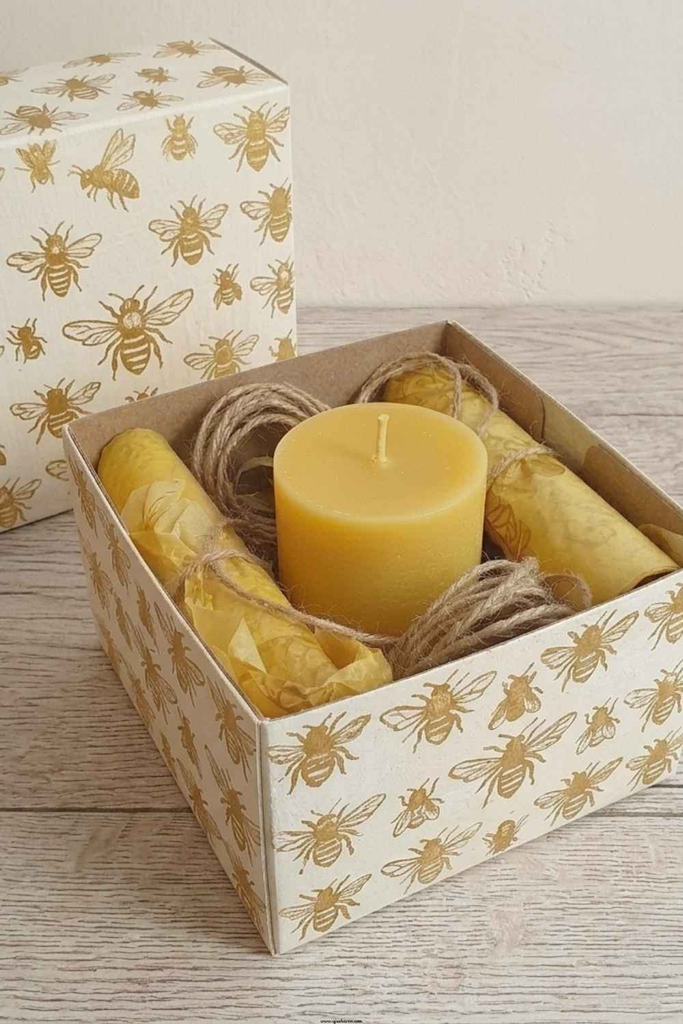
I like handmade gift boxes because presentation can make even a simple item feel much more personal.
A bee-themed candle, tissue paper, dried flowers, and a handwritten tag are enough to create a gift that feels thoughtfully assembled.
Why adults will love it: I can turn one simple candle craft into a complete ready-to-give present.
Supplies Needed:
- Plain candle
- Candle-safe yellow and black decorating materials
- Small gift box
- Yellow, cream, or black tissue paper
- Dried or faux flowers
- Kraft gift tag
- Twine
- Optional bee sticker or decorative seal
How to Make It:
- I decorate the candle with stripes, honeycomb shapes, or a simple bee.
- I allow the design to dry and cure properly.
- I line the gift box with tissue paper.
- I place the candle in the center and arrange flowers around it.
- I close the box or leave the top partially open depending on the presentation.
- I finish it with twine and a handwritten gift tag.
Pro Tip: I add the personal note last and place it somewhere the recipient will notice it when opening the box.
Read this next: Relaxing Crafts for Adults That Turn Ordinary Moments Into Self-Care
Tips for Making Bumble Bee Crafts Look Extra Charming
I’ve found that the finished appearance often depends more on a few design choices than on how expensive the supplies are.
When I keep the colors coordinated, mix textures, and give each piece enough breathing room, even a very simple craft can look thoughtfully planned.
Let Imperfection Do Some Work
I don’t try to make every stripe perfectly straight when I’m creating a handmade bee project.
Small variations can actually make the piece feel more personal. If I wanted everything perfectly identical, I could simply buy mass-produced decor.
For me, the goal is to make something that looks intentionally handmade rather than unfinished.
A Few Things That Genuinely Help:
I stick with a small color palette. Yellow, black, cream, soft gold, brown, and natural green are enough to create a cohesive bee-inspired look.
I also like mixing textures. Twine, burlap, unfinished wood, dried flowers, glass, and painted surfaces can keep a display from looking flat.
I vary the size of my decorations instead of placing several pieces of exactly the same scale together. One larger focal item surrounded by smaller accents usually gives me a more balanced display.
I also use odd-number groupings when arranging small decorations. Groups of three or five can create a more relaxed arrangement than lining up identical pieces.
Pro Tip: Before I glue or hang anything, I take a quick photo of the arrangement. Seeing it on my phone often makes spacing problems much easier to notice.
Think Seasonal Without Going Overboard
Bee decorations naturally work well in spring and summer, especially when I pair them with flowers, greenery, and light colors.
But I don’t think I need to pack them away when summer ends. Honey gold, warm cream, natural wood, and dried botanicals can work beautifully with fall decor too.
I can also make the theme subtle. A honeycomb wall arrangement, small bee planter, or decorated candle doesn’t have to turn an entire room into a bee display.
If I’m crafting with friends, these projects are also easy to use for a relaxed craft night. I can prepare the supplies ahead of time and let everyone choose a project based on their skill level.
FAQ’s
What are the easiest bumble bee crafts for adults with no experience?
I would start with painted garden stones, mason jars, or terracotta pots. They require basic supplies and allow plenty of room for imperfect lines.
What supplies do I need to start bee craft ideas for adults at home?
I can start with yellow and black paint, brushes, a glue gun, twine, basic wood or glass pieces, and a few decorative accents. I add specialty supplies only when a project requires them.
Can bumble bee crafts work as handmade gifts?
Yes. I especially like the honey jar set, decorated tote bag, beeswax wraps, and candle gift box because they combine handmade details with something useful.
Are bee-themed crafts only for spring and summer?
No. I can make them work year-round by using warm neutrals, natural wood, gold, dried flowers, and subtle bee accents rather than bright seasonal decorations.
How do I make my bumble bee crafts look more polished?
I keep the palette limited, plan my layout before gluing, mix textures, vary the sizes of decorative pieces, and use the correct protective finish for projects that will be outdoors.
Final thoughts
I enjoy crafts like these because they don’t require me to spend an entire weekend making something complicated. A painted stone, small planter, decorated jar, or handmade gift can be enough to make an ordinary afternoon feel more creative.
For me, the best bumble bee crafts for adults are the ones that balance simplicity with usefulness. When I can make something attractive and actually find a place for it in my home or garden, the project feels even more worthwhile.

One Comment