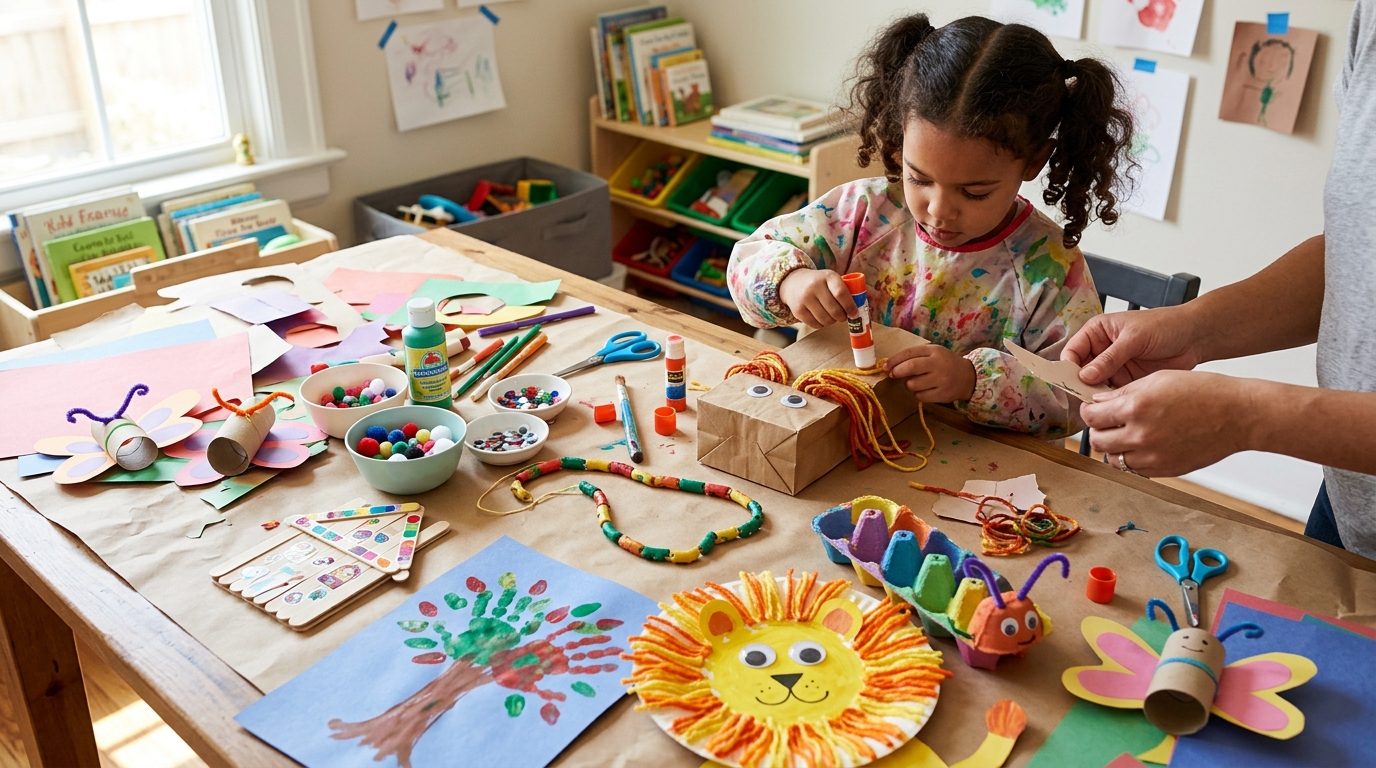
31 Crafts for 5 Year Olds
Five is such a fun age for crafting. I find that many children at this stage are ready to follow a few simple steps, choose their own colors and designs, and take more ownership of what they are making.
That does not mean every five-year-old will want the same level of help. Some children can cut and assemble most of a project themselves, while others do better when I prepare the tricky parts first. I try to follow the child’s lead rather than expecting the finished craft to look like mine.
I also like that many of these projects rely on things I may already have around the house. Cardboard tubes, paper plates, coffee filters, paper bags, salt, paper scraps, and leftover craft supplies can go a long way.
These 31 crafts for 5 year olds cover simple paper projects, painting, sensory activities, pretend-play toys, seasonal crafts, and projects that can become keepsakes or decorations.
I have included ideas using inexpensive materials such as cardboard tubes, paper plates, cardstock, coffee filters, cotton swabs, craft sticks, paper bags, yarn, and homemade dough. Several projects can be adapted with whatever colors or leftover supplies are already available.
Some crafts are ready to start almost immediately, while others need adult preparation. I may pre-cut shapes, punch holes, portion small supplies, prepare paint, or cover the table before the child sits down. That little bit of preparation can make craft time much smoother.
Save this for later
Table of Contents
The projects also vary in the amount of hands-on help needed. A child who is comfortable with scissors, threading, painting, or simple sequences may be able to do more independently, while another child may need me to handle the difficult steps.
Key Takeaways
- I choose crafts that give five-year-olds room to make their own creative decisions.
- Simple household and recycled materials can provide plenty of crafting opportunities.
- Pre-cutting difficult shapes and preparing supplies can reduce waiting and frustration.
- Scissors, beads, strings, cords, adhesives, and other small materials need appropriate adult supervision.
- Painting and sensory crafts are easier when I prepare the work surface and a place for finished pieces to dry.
- Many finished crafts can become toys, decorations, gifts, or props for pretend play.
- I do not worry about perfect cutting or matching the sample. The child’s version is allowed to look like their own.
Related article: 21 Pirate Crafts for Kids
Art and Craft Projects for 5 year olds
1. Paper Ring
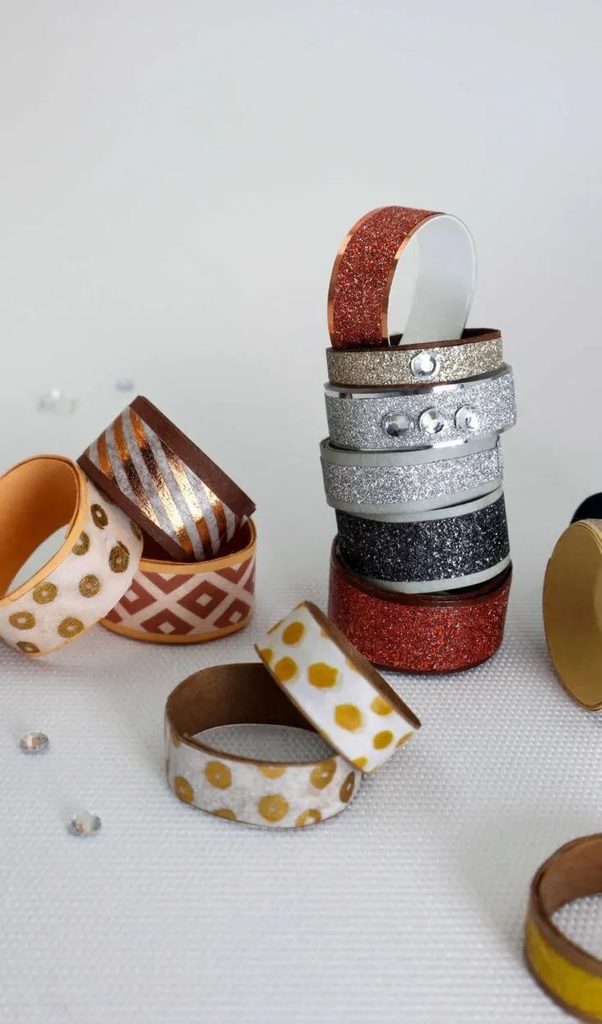
Paper rings are one of the easiest projects I reach for when a child wants to make something they can actually wear for pretend play. I start with a narrow strip of paper or lightweight cardstock and let the child decorate it before sizing it around a finger.
Markers, crayons, stickers, and drawn-on gems work well. I prefer paper decorations over tiny loose embellishments when I am working with younger siblings nearby.
Once the decoration is finished, I help adjust the strip to the right size and secure the ends with glue or tape. I give the adhesive time to set before the ring is worn.
If the child wants to make several rings, I cut a few paper strips first. This lets them concentrate on decorating rather than waiting for me to prepare another piece.
2. DIY Microphones
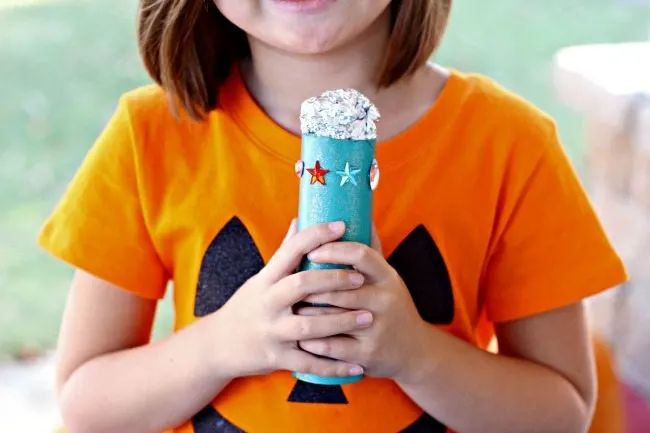
A cardboard toilet paper or paper towel tube makes a great starting point for a pretend microphone. I let the child cover the tube with paper or decorate it with crayons, markers, stickers, or other craft scraps.
For the microphone head, I use a lightweight craft material that can be securely attached to the top. I handle any cutting or shaping that is difficult for the child.
Once the microphone is dry and firmly assembled, the craft can become part of a pretend concert. I find children often get much more play out of a finished craft when there is an imaginary activity attached to it.
For a group, I prepare the tubes and microphone parts ahead of time. Then each child gets the same basic materials but can decorate their microphone differently.
Pro Tip: Skip loose glitter if you want a quicker cleanup. Paper scraps, stickers, and washable markers give plenty of decorating options without leaving tiny pieces across the table.
3. Painting With Salt
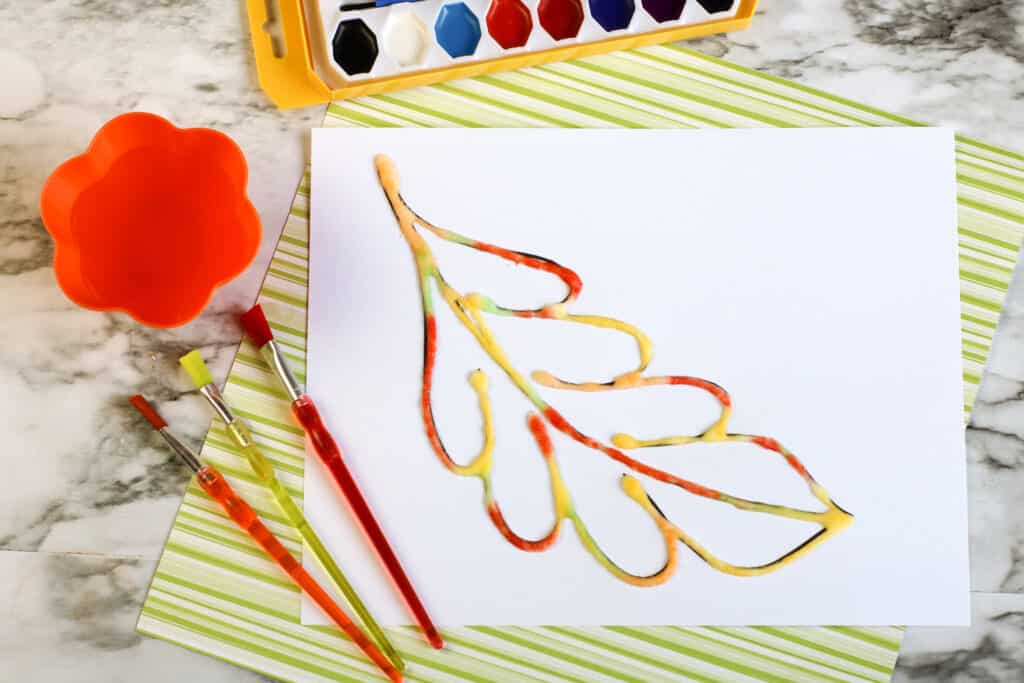
Salt painting is a process I like to save for when I have enough time to let the artwork dry. I draw simple lines or shapes with glue, sprinkle salt over the wet glue, and carefully shake the extra salt onto a tray or piece of paper.
Once the glue and salt are ready, the child can touch liquid watercolor or appropriately diluted paint to the salt lines. The color travels along the salty surface and creates an effect that is different from ordinary painting.
I keep the design fairly simple for a five-year-old. Large stars, flowers, hearts, rainbows, and basic animals are easier to manage than a very detailed picture.
I also cover the table before starting. Salt can spread farther than expected, and having a tray underneath makes cleanup much easier.
4. Toy Binoculars
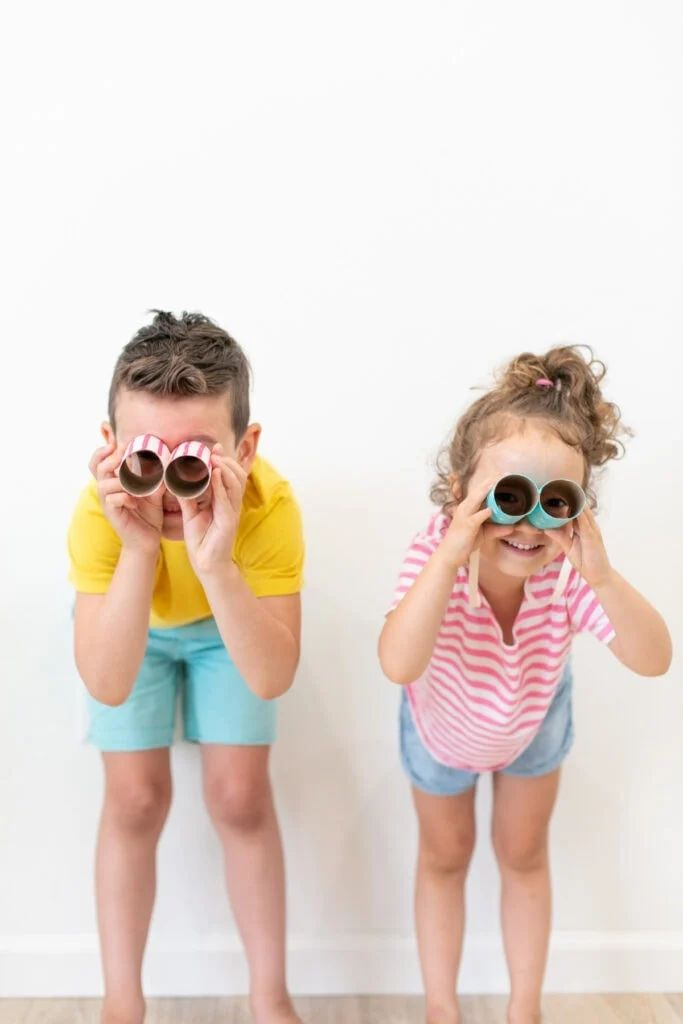
Two cardboard tubes can become pretend binoculars for a nature walk, treasure hunt, or backyard adventure. I help position and attach the tubes side by side, then let the child decorate them.
Paper, paint, crayons, and stickers are all easy choices for the outside. I make sure any glue or paint has dried before the binoculars are used.
If a child wants binoculars that can hang from their shoulders, I prefer to avoid leaving a cord or string around their neck. A safer option for our pretend play is to make a simple handle or have the child carry the binoculars.
Pro Tip: Prepare the two tubes and joining piece before craft time. For a group of children, this removes one of the slower assembly steps and gives everyone more time to decorate.
5. Paper Squishies
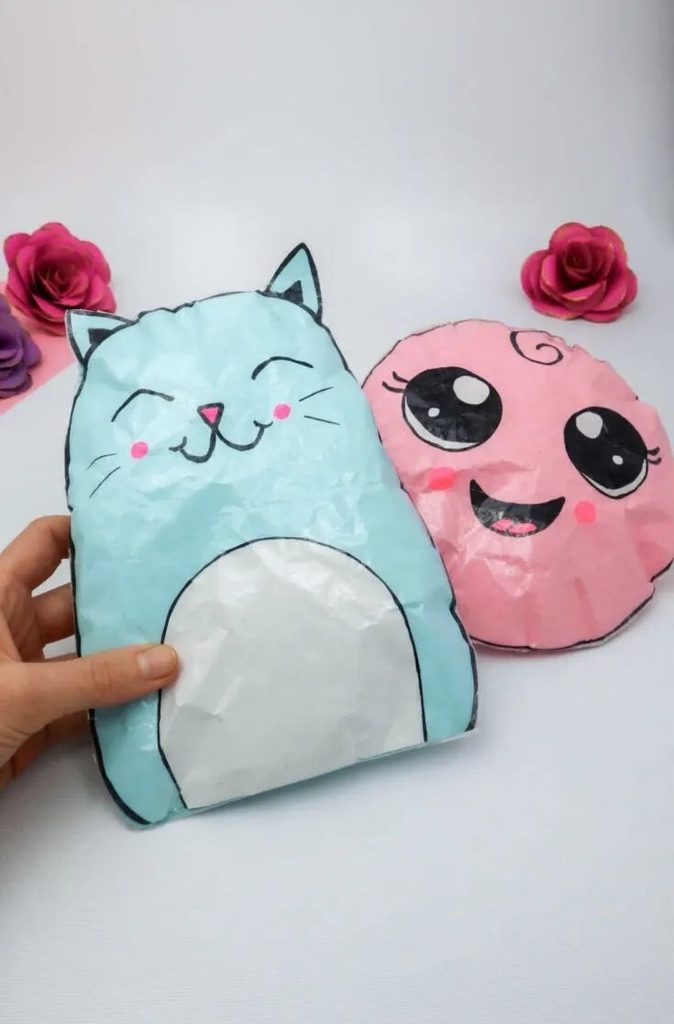
Paper squishies are a fun way for a five-year-old to make a pretend version of a favorite food, animal, or character. I let the child draw the shape or choose a simple template to decorate.
The basic idea is to decorate two matching paper shapes, add suitable soft filling, and securely close the edges. I handle the final sealing when necessary because the filling needs to stay contained during play.
I make sure children understand that these are pretend toys, not food. I also avoid small loose decorations that could come off during handling.
For a child who wants more of a challenge, I let them design the shape themselves. For a child who gets frustrated with drawing, I provide a simple outline and let the decorating be the creative part.
6. Paper Chains
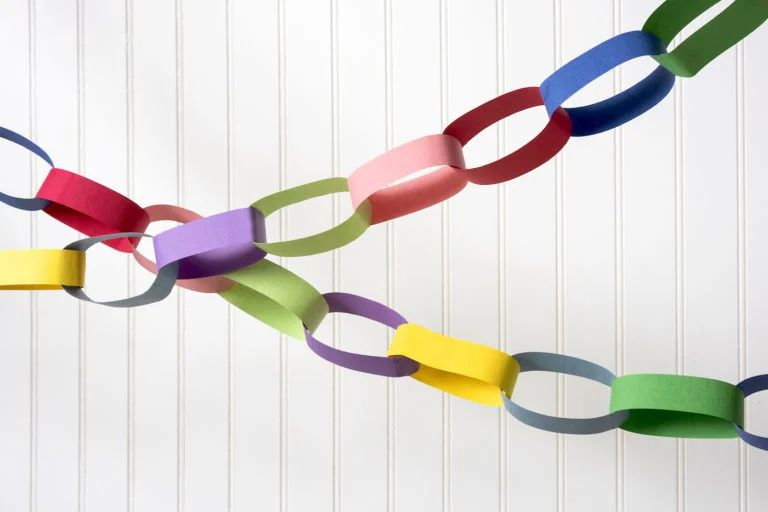
Paper chains are simple, inexpensive, and surprisingly useful. I cut strips of paper and let the child join them into loops, securing each one before adding the next.
The child can choose one color, alternate two colors, or make a completely random chain. I especially like alternating colors because it gives them a natural chance to work with a repeating pattern.
These chains work for birthday decorations, holiday displays, countdowns, classroom decorations, or just a rainy-day project.
If scissor work is still difficult, I cut the strips beforehand. If the child is comfortable using child-appropriate scissors, I let them help with the cutting while I stay nearby.
7. Dinosaur Toilet Paper Roll Craft
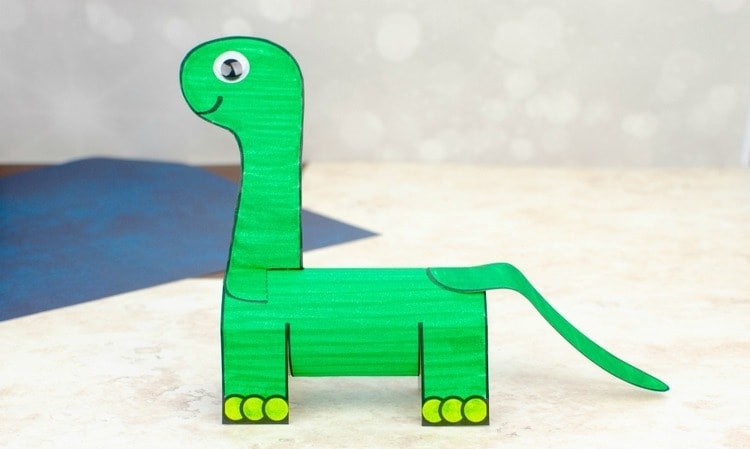
Cardboard tubes are one of my favorite recycled craft materials because they can become so many different things. For this project, I use one as the body of a dinosaur and add paper pieces for the head, tail, and legs.
I do the more awkward cutting if the shapes are difficult, then let the child glue and decorate the dinosaur. They can choose a familiar dinosaur or invent one with an unusual combination of features.
Paint, crayons, markers, and paper scraps all work for decorating. I do not worry about realistic colors.
Once the dinosaur is dry, it can become part of a pretend dinosaur world. Making a few different dinosaurs gives children even more to work with.
8. Coffee Filter Flowers
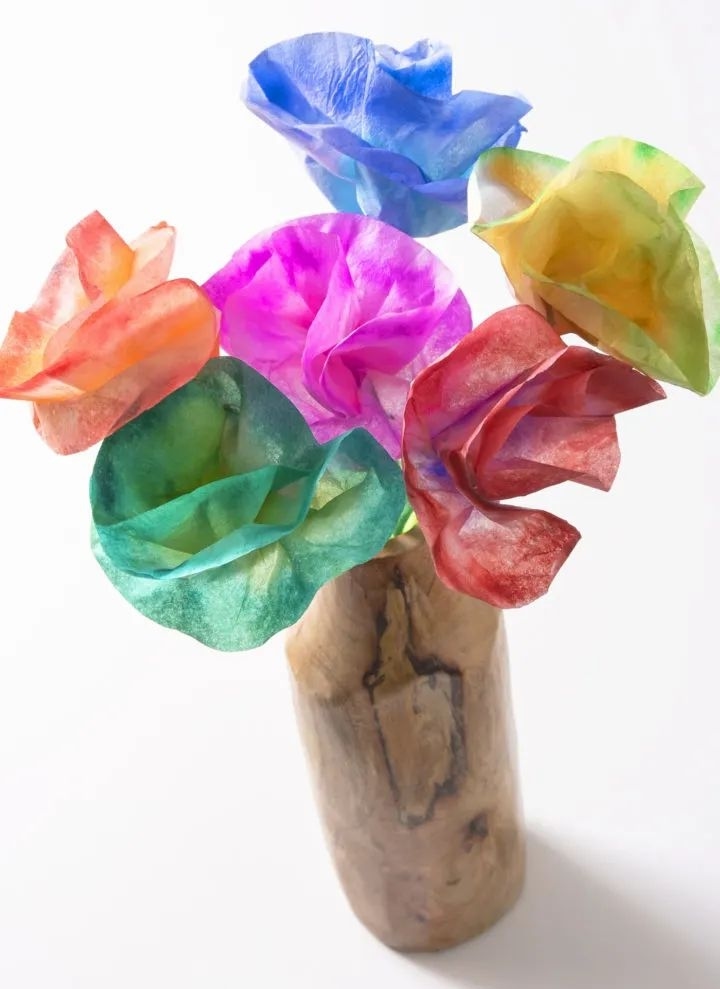
Coffee filter flowers are a useful choice when a child wants to make a gift. I color or paint the filters, allow them to dry, then shape and layer them into flowers.
The child can experiment with one color or several colors. I like using a washable coloring material when possible because coffee filters absorb liquid quickly and can become quite wet.
The drying stage is the part I plan for most. I keep the filters separated while they dry so the colors do not transfer onto other pieces.
Once several flowers are finished, I can arrange them into a small bouquet. It is a simple way for a child to make something they can give to a family member or use as room decoration.
9. Q-Tip Painted Dragonfly
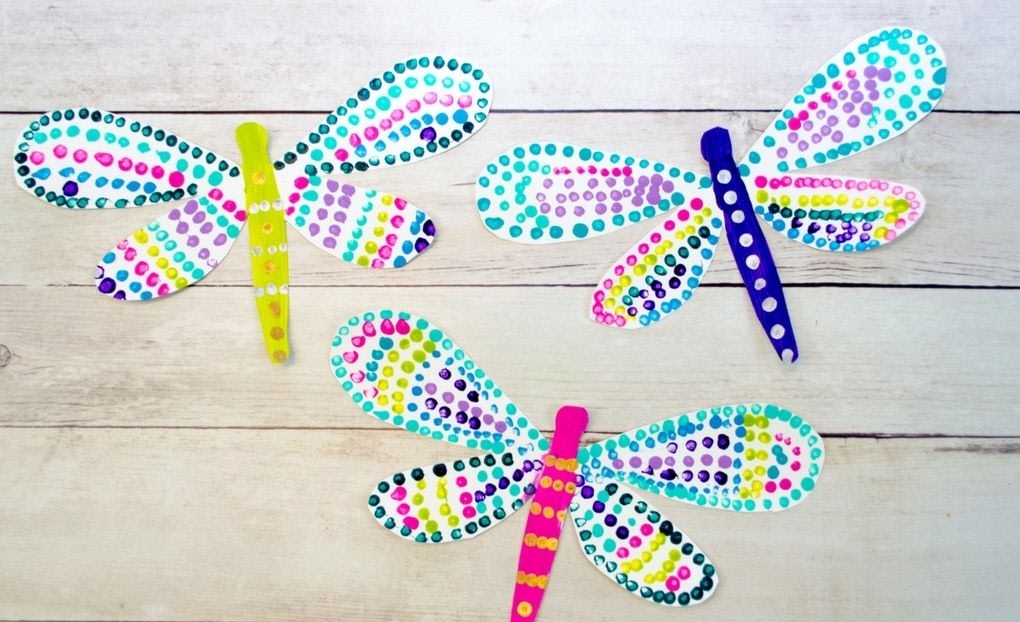
Painting with cotton swabs gives a child a different way to use paint. Instead of sweeping a brush across the page, they make individual dots to fill the dragonfly’s body and wings.
I draw a basic dragonfly outline first if the child benefits from having a guide. Then I place small amounts of paint in separate areas so the colors do not quickly turn into one muddy mixture.
This activity gives children a chance to practice controlling a small painting tool and placing marks intentionally.
I use fresh cotton swabs rather than reusing the same one between colors. It keeps the colors cleaner and makes the painting process less frustrating.
10. Handprint Bookmarks
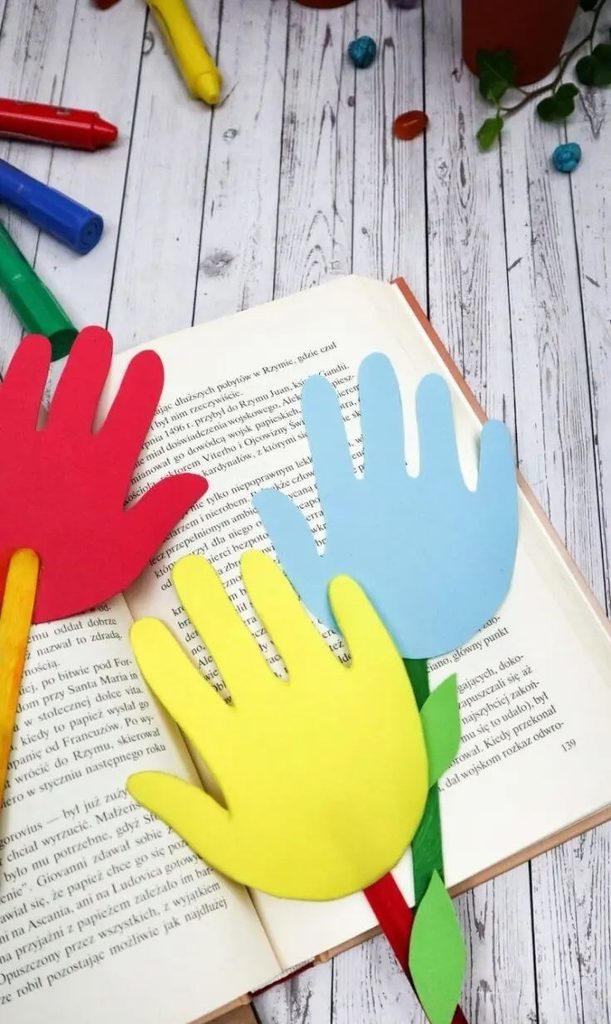
A handprint bookmark is both a craft and a simple keepsake. I trace the child’s hand on cardstock, cut around the outline, and let the child decorate it.
Cardstock works better than very thin paper because the finished bookmark gets handled often. Markers, crayons, stickers, or drawings can all work.
I may add the child’s name and the date to the back so I can remember when it was made. If I add a craft stick or another backing, I make sure it is securely attached and has no rough edges.
The larger handprint shape also makes it easier to spot inside a book than a tiny paper bookmark.
11. Pop-Up Rainbow Card
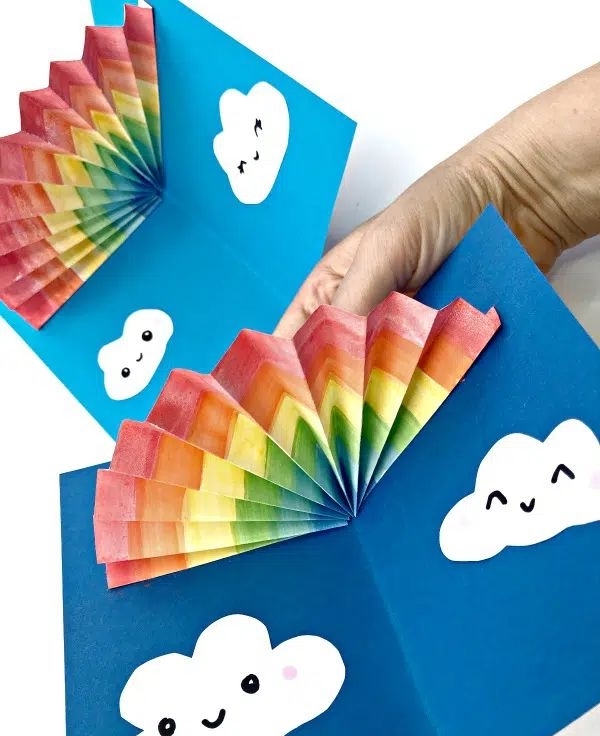
This rainbow card is a nice project when a child wants to make a card for someone special. I prepare the card base and help with the folds if the child has trouble making them accurately.
For the rainbow, I use strips of colored paper and simple folds to create a raised effect when the card opens. The child can choose the colors and add clouds, raindrops, stars, or other drawings.
I find it is better to keep the mechanism simple for this age. A card that opens successfully is more satisfying than one with too many complicated pieces.
For a holiday or seasonal version, I can change the colors and decorations without changing the basic construction.
12. DIY Play Dough
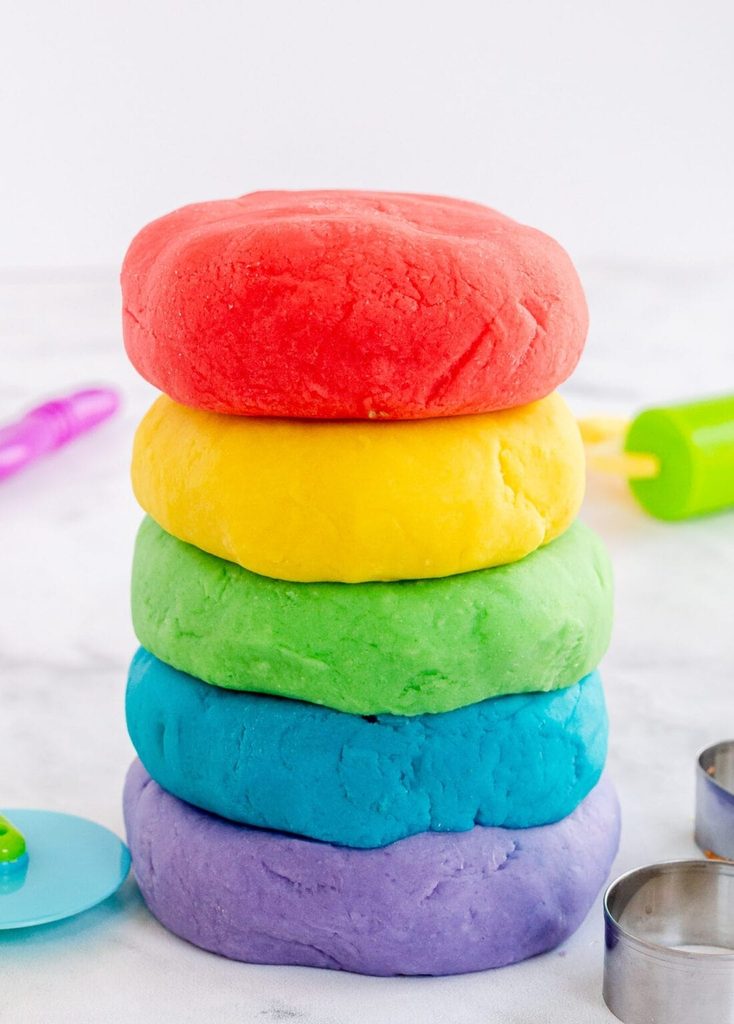
Homemade play dough is one of those activities that can continue long after the original mixing and crafting are finished. I make the dough, divide it into portions, and let the child choose colors or work with several colors at once.
Five-year-olds can use it to make pretend food, animals, letters, shapes, or small scenes. I like giving them a few simple tools rather than a huge collection of supplies.
I treat homemade play dough as a craft material, not food, even when the ingredients are common kitchen items. I keep it stored in an airtight container between uses and throw it away when it becomes dirty, dries out, or otherwise needs replacing.
For group activities, I portion the dough before the children arrive. Individual pieces reduce grabbing and make cleanup easier.
13. Apple and Pumpkin Fine Motor Activity

This apple and pumpkin activity adds a little more hand work to a seasonal craft. I prepare the paper shape and the holes ahead of time, then give the child a piece of yarn or another suitable threading material.
The child guides the material through the holes around the shape. A child who is already comfortable with threading may enjoy a longer path, while another child may do better with fewer holes.
I use sturdy paper or cardstock so the holes are less likely to tear while the child works.
For a fall activity, I use apple and pumpkin colors, but the same type of activity can be adapted to other seasons with different shapes.
14. Beaded Wind Chime
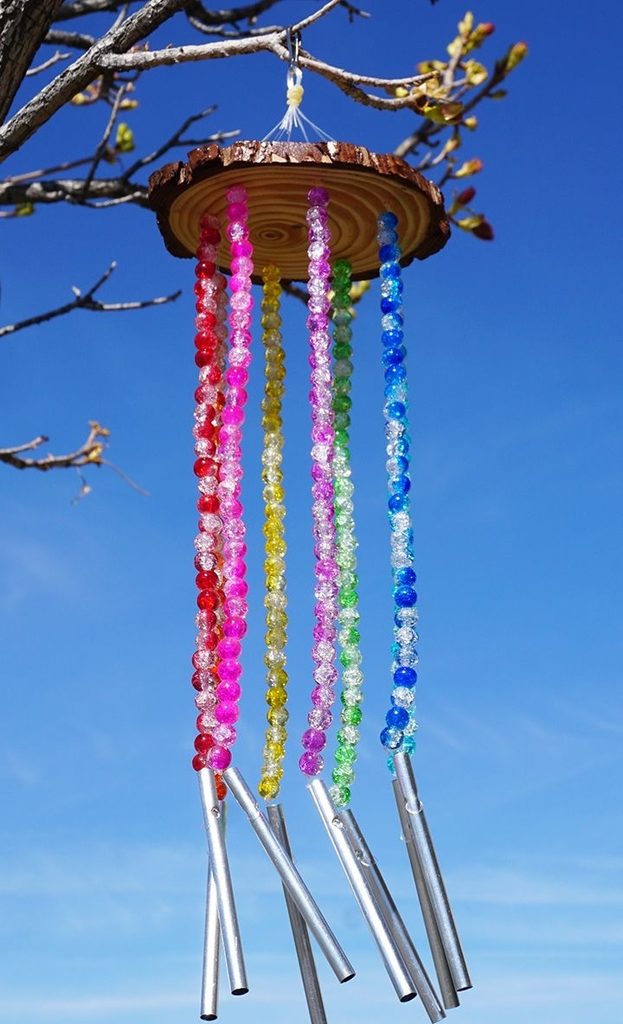
I like this project for children who enjoy both crafts and nature. Before starting, we can collect a few appropriate fallen materials, such as a suitable small stick, rather than picking unknown plants or handling sharp objects.
The child can choose beads and arrange them along prepared lengths of craft cord or another suitable material. Because beads are small, I keep them within close adult supervision and put unused beads away when the activity is over.
I handle difficult cutting, tying, or securing steps when needed. The finished pieces should be firmly attached before the wind chime is hung.
If I am making these with several children, I portion the beads into small containers first. It gives each child enough choice without putting a large pile of tiny pieces on the table.
Also read: 41 Crafts for 2 Years Old
15. Salt Dough
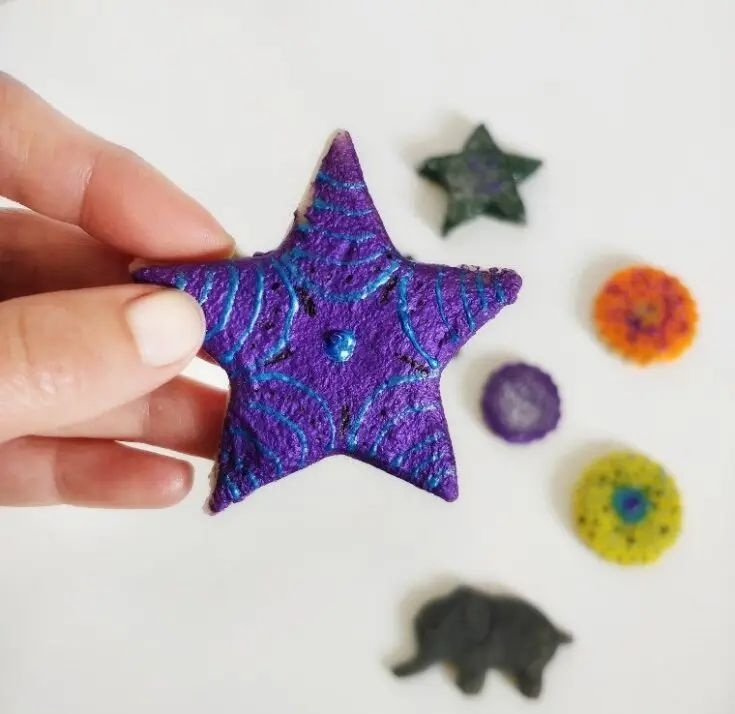
Salt dough is similar to play dough in how it feels during shaping, but I use it when I want the finished piece to become a decoration or keepsake.
A child can roll, flatten, pinch, and shape the dough into simple animals, ornaments, handprints, or other figures. I keep thicker designs modest in size because they take longer to dry.
I plan for drying time before starting this craft. Once the pieces have dried completely, they can be decorated with suitable craft paint if desired.
Salt dough is a craft material, not food. I keep the dough and finished pieces away from children who may be tempted to taste them.
16. Apple Paper Plate Lacing Activity
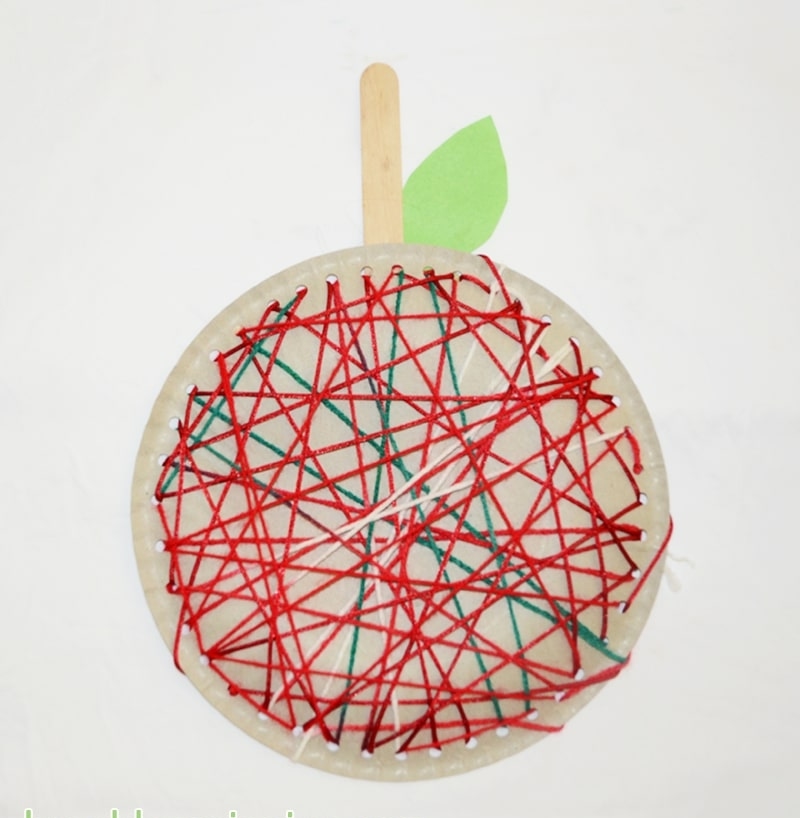
For this lacing activity, I prepare the paper plate before handing it to the child. I draw or cut an apple shape and punch a series of holes around the edge.
The child then threads yarn, a shoelace, or another appropriate material through the holes. I show them how to start and let them continue at their own pace.
I make the holes large enough that the threading does not become unnecessarily difficult. If the child needs more help, I guide the first few sections and let them take over.
Because the cord is part of the activity, I supervise closely and put it away when crafting is finished.
17. Jellyfish Craft
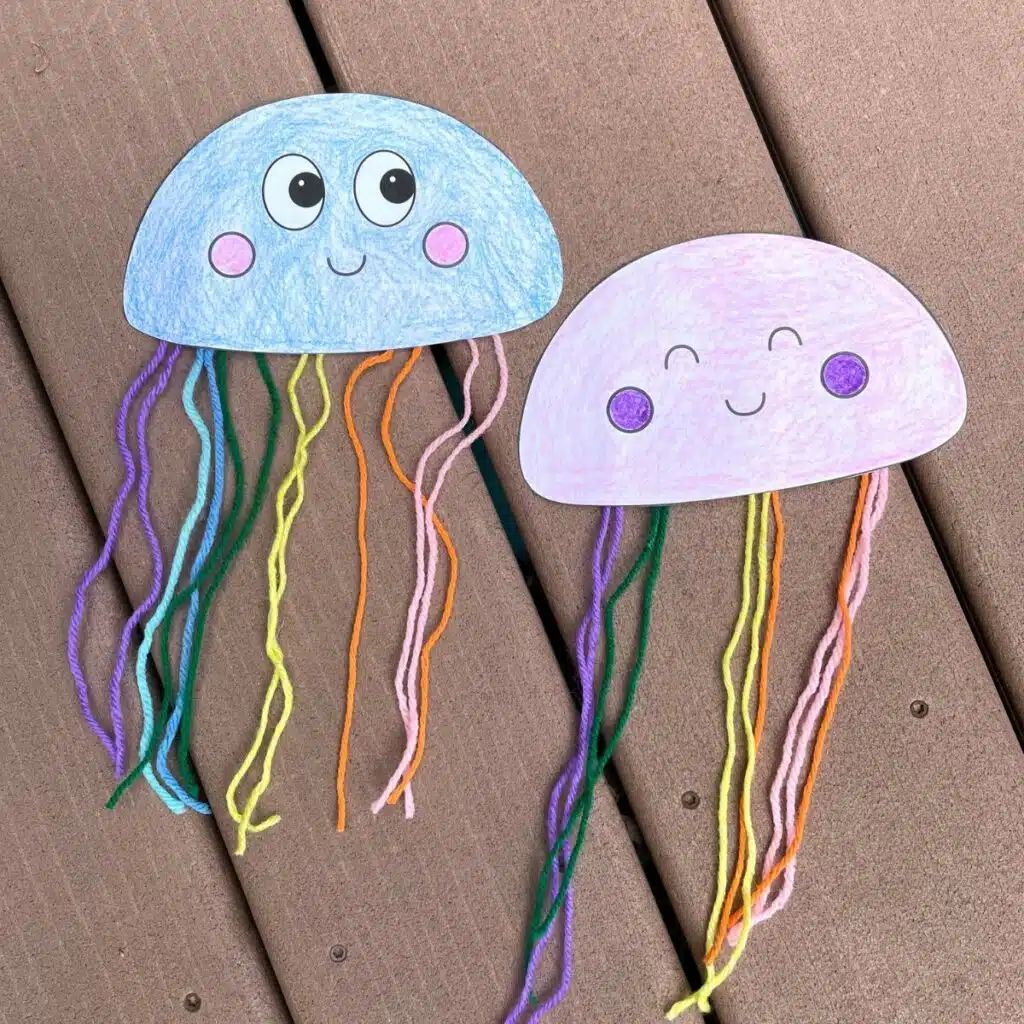
Jellyfish are easy to recreate with paper and a few decorating materials. I use a simple rounded body and add tentacles from paper strips, yarn, ribbon, or other lightweight materials.
The child can paint the body, add spots or patterns, and choose whatever colors they want. I like this craft because there is no need for the jellyfish to look realistic.
For children who find cutting difficult, I prepare the tentacles ahead of time. If the child is comfortable with scissors, they can help cut simple strips under supervision.
Once finished, several jellyfish can be hung together as a colorful underwater display.
18. Handprint Paper Plate Sun
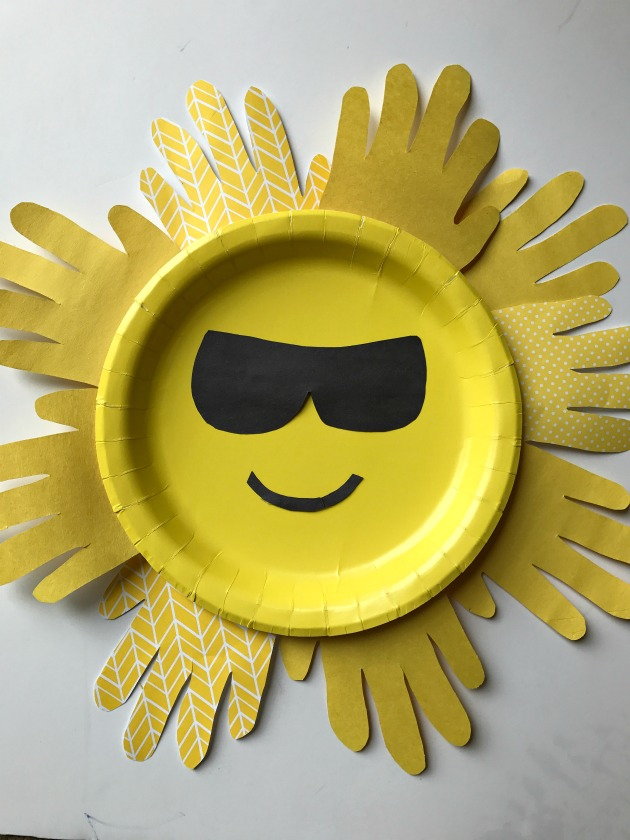
A paper plate gives me an easy base for this sunny handprint craft. I trace the child’s hand several times, cut out the hand shapes, and arrange them around the plate as sun rays.
The child can help decide how many rays to use and whether the sun should be yellow, orange, or a combination of colors.
I use glue sparingly and give the finished plate enough time to dry before hanging it. For a keepsake, I write the child’s name, age, and date on the back.
The handprints do not need to be perfectly positioned. I think the slightly uneven arrangement is part of what makes a child’s version feel personal.
19. Paper Plate Hot Air Balloon
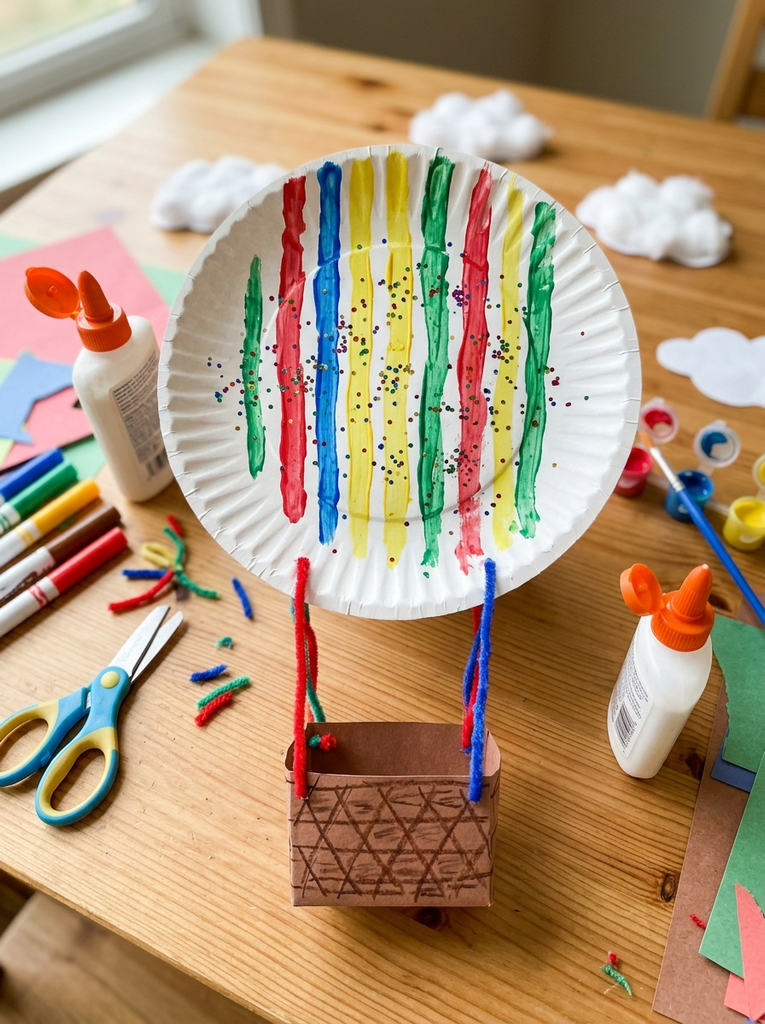
A paper plate makes a simple base for a colorful hot air balloon. I add paper pieces for the basket and connecting parts, while the child gets to decide how the balloon itself looks.
Stripes, dots, hearts, stars, and random blocks of color all work. I would rather see a child make unusual choices than have every balloon at a group activity look identical.
For a birthday or party craft, I can prepare the basic shapes in advance. The children can then spend most of their time decorating and assembling rather than waiting for cutting to finish.
20. Paper Mache
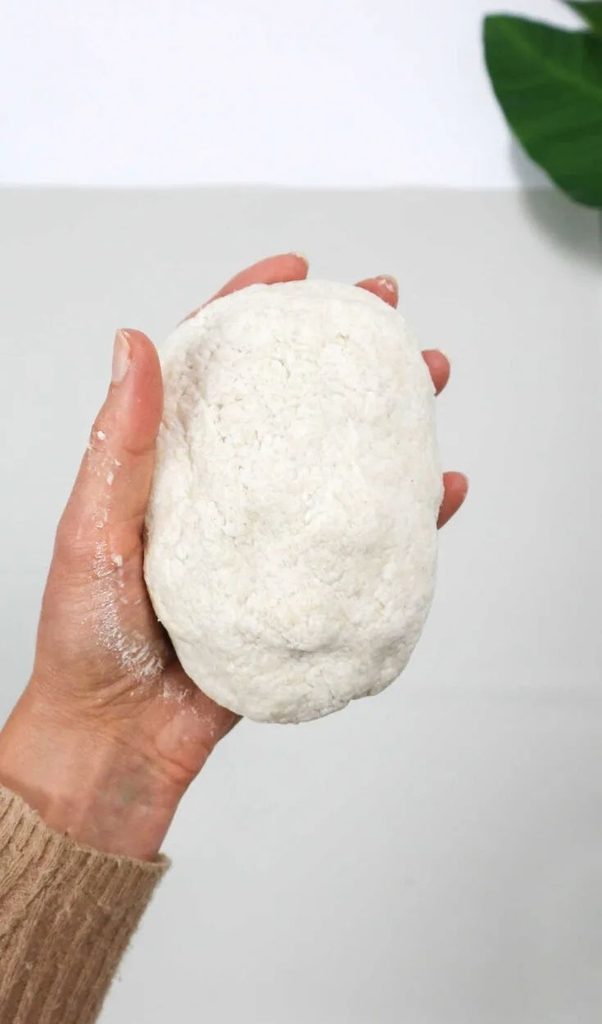
Paper mache is one of the messier projects on this list, so I save it for when I have enough time for preparation and drying. I protect the work surface first and keep the project relatively small.
The child can help tear or place paper strips and cover a simple form. I handle any steps that involve difficult shaping or materials that are not appropriate for the child to manage independently.
A small animal, letter, or basic shape is a better starting point than a large sculpture. Once the piece is fully dry, it can be painted and decorated.
I always plan a separate drying area because paper mache needs time to set before the finished project can be handled normally.
21. Marshmallow Squish Art
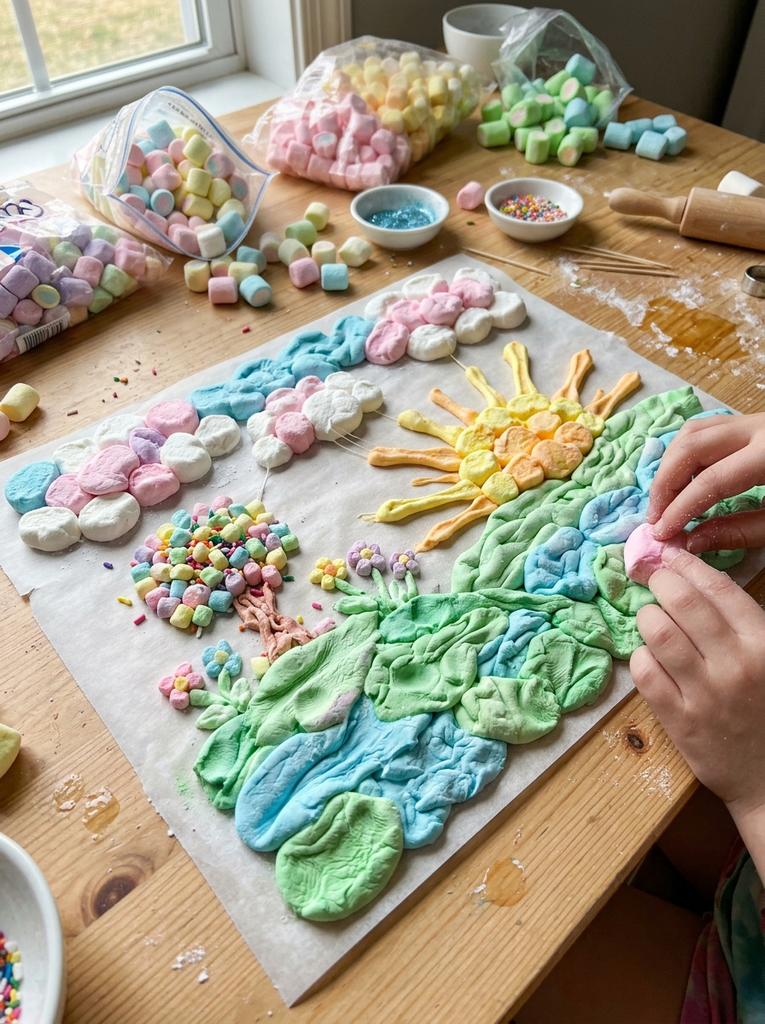
This is a sensory art activity where I keep the paint and other materials inside a sealed bag rather than giving the child a bowl of loose ingredients to handle.
The child presses and moves the contents around from the outside of the bag, watching the colors mix and change. I check the bag carefully for leaks before the activity starts.
The name may suggest food, but this is a craft activity. I make it clear that the materials inside the bag are for the project and are not something to eat.
For easier cleanup, I place the bag on a tray or secure it to the work surface. I also dispose of it if it becomes damaged or starts leaking.
22. Earth Day Activity
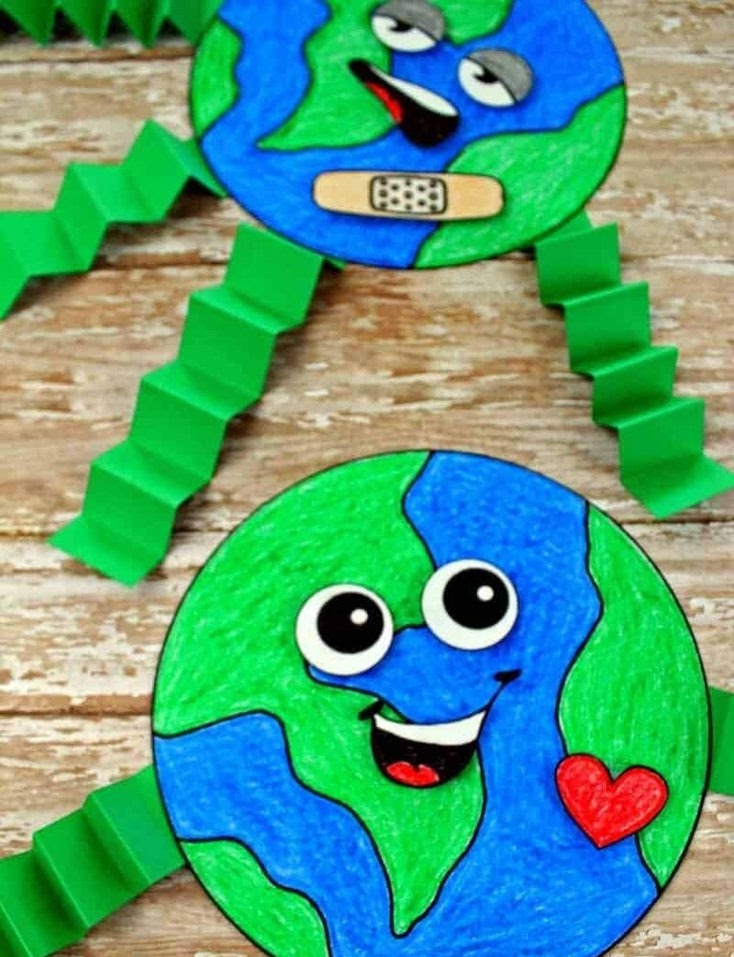
An Earth-themed craft gives me a simple way to talk about the planet while we make something together. A child can create a paper Earth, add land and water, and decorate it with their own ideas.
I keep the conversation simple rather than turning the craft into a formal lesson. We might talk about reusing paper, keeping outdoor spaces clean, or not wasting materials.
This is also a good project for using recycled cardboard and leftover paper scraps. I like when the materials themselves reinforce the idea of reusing things.
For Earth Day at a group event, I prepare the basic circles beforehand and let each child decide how to decorate their own Earth.
23. Toilet Paper Roll Bracelet
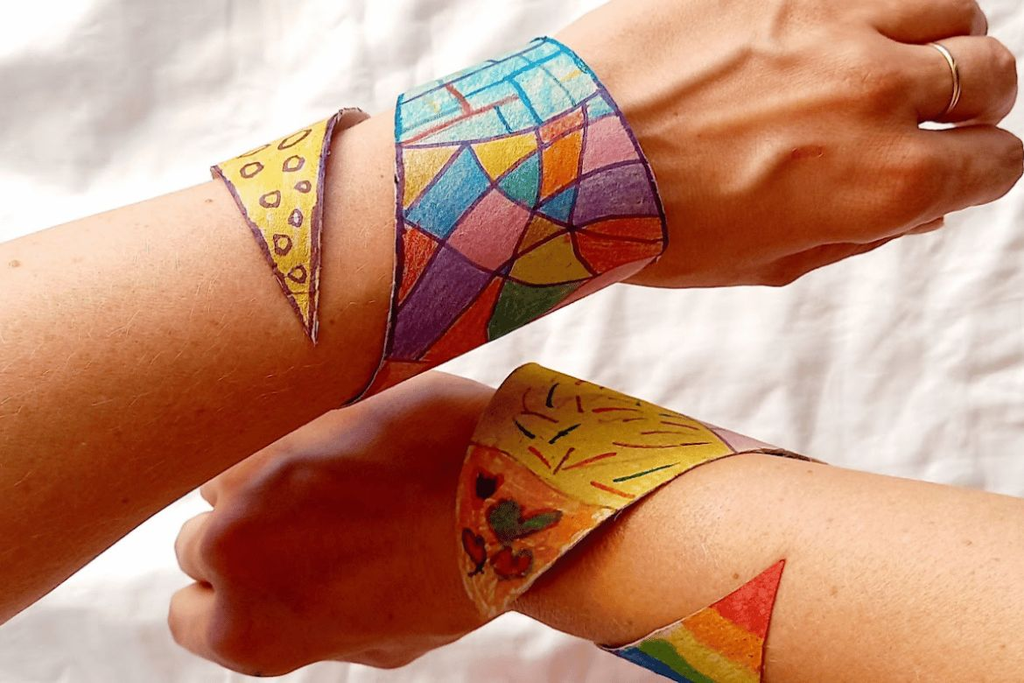
A cardboard toilet paper tube can become a pretend bracelet or superhero cuff. I cut the tube lengthwise before giving it to the child so it can open rather than needing to be forced around the wrist.
After that, the child can cover it with paper, draw symbols, add stickers, or create their own superhero design.
I check the cut edges carefully and cover or trim anything rough. I also make sure the finished cuff is loose enough to remove easily.
This is another craft where the pretend-play part can be just as enjoyable as the making. A child can invent a superhero identity and use the cuff as part of a costume.
24. Unicorn Paper Plate Craft
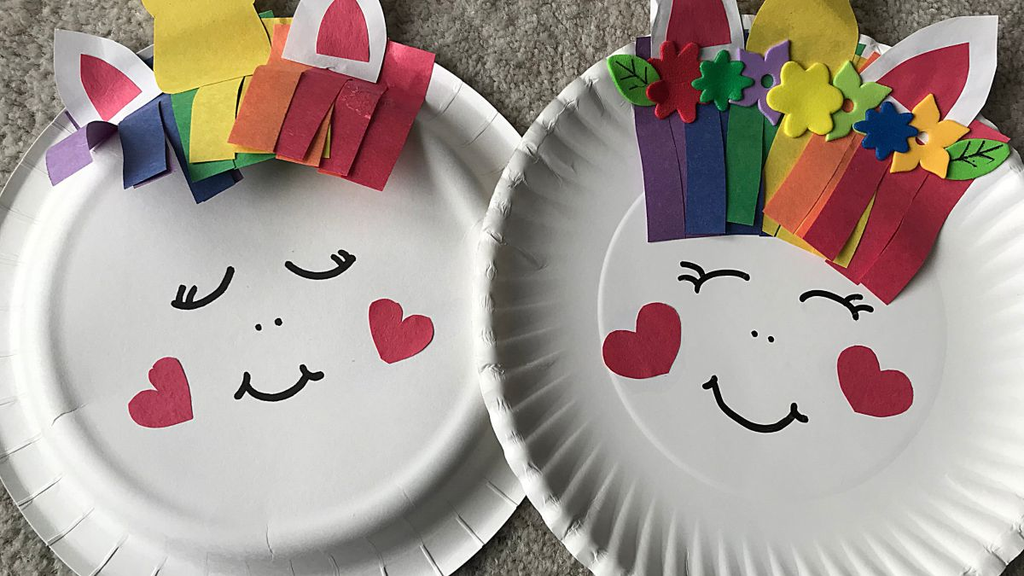
Paper plates make convenient canvases for simple character crafts, and a unicorn gives children plenty of room for color choices.
I prepare the basic horn, ears, and other shapes if the cutting is too difficult, then let the child arrange and decorate them. The mane can be made from paper strips, yarn, or other suitable craft scraps.
This works especially well for birthday parties and sleepovers because the basic materials are inexpensive and the children can personalize the same design in different ways.
If I am making this with several children, I place a limited selection of decorating materials on the table rather than putting every craft supply within reach at once.
25. Ice Painting
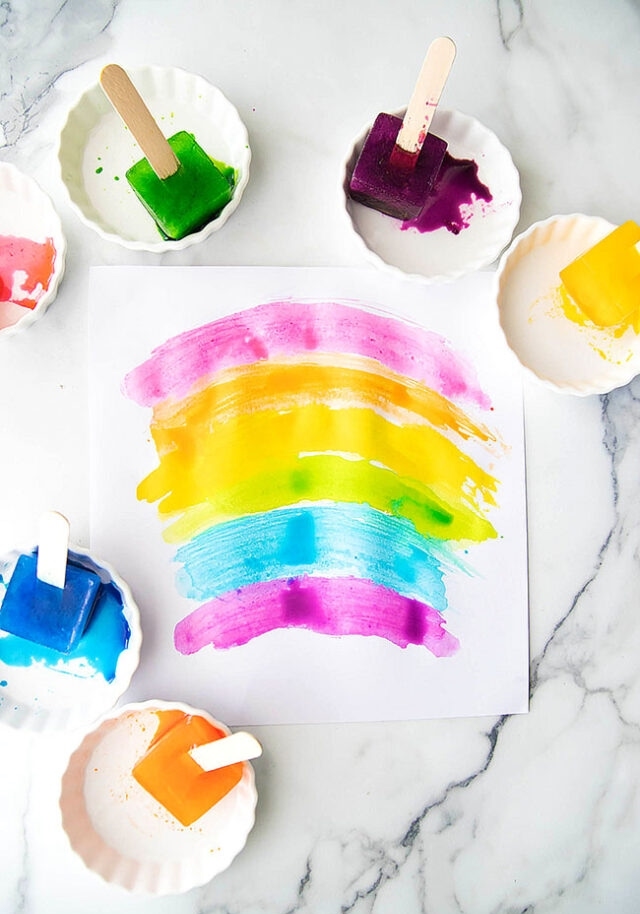
Ice painting is a fun activity for a warm day because the paint tool slowly changes while the child works. I freeze colored water in an ice cube tray and add a craft stick before freezing when I want each piece to have a handle.
I use a tray or protected outdoor surface because melting ice can quickly make a table wet. Washable coloring materials are a practical choice for easier cleanup.
The child can move the frozen colors across paper and watch the marks change as the ice melts.
I would keep the ice pieces fairly easy to grip and supervise the activity closely, especially when craft sticks are involved.
Pro Tip: Make the ice paints before craft time begins. The child can start creating right away instead of waiting for the freezer step.
26. Ice Cream Handprint
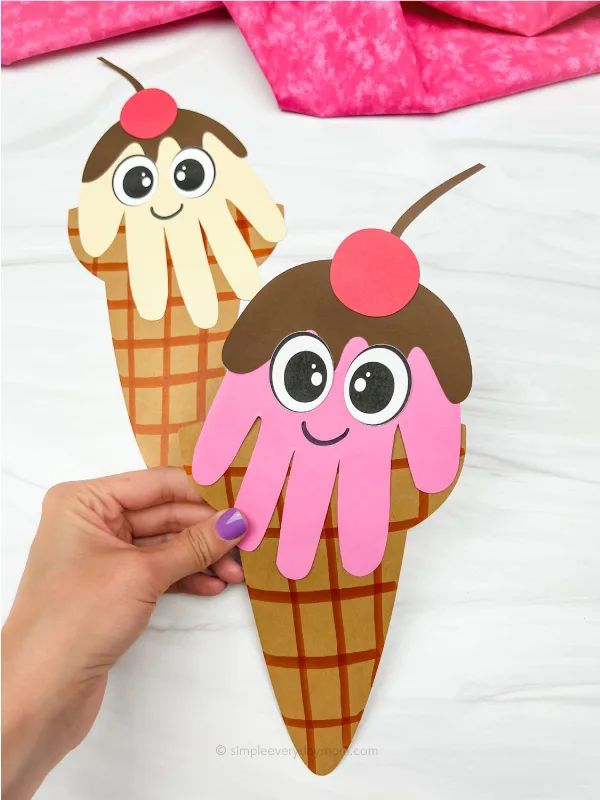
This handprint craft is a simple choice for summer or an ice-cream-themed birthday activity. I use the child’s handprint as the main shape and add a paper cone underneath.
The child can choose a favorite pretend flavor and decorate the ice cream with sprinkles, cherries, or other paper details.
I keep all decorations clearly in the craft category so there is no confusion between pretend food and something meant to be eaten.
For a keepsake version, I add the child’s name and date after the paint or glue has dried.
27. Paper Bag Dog Puppet
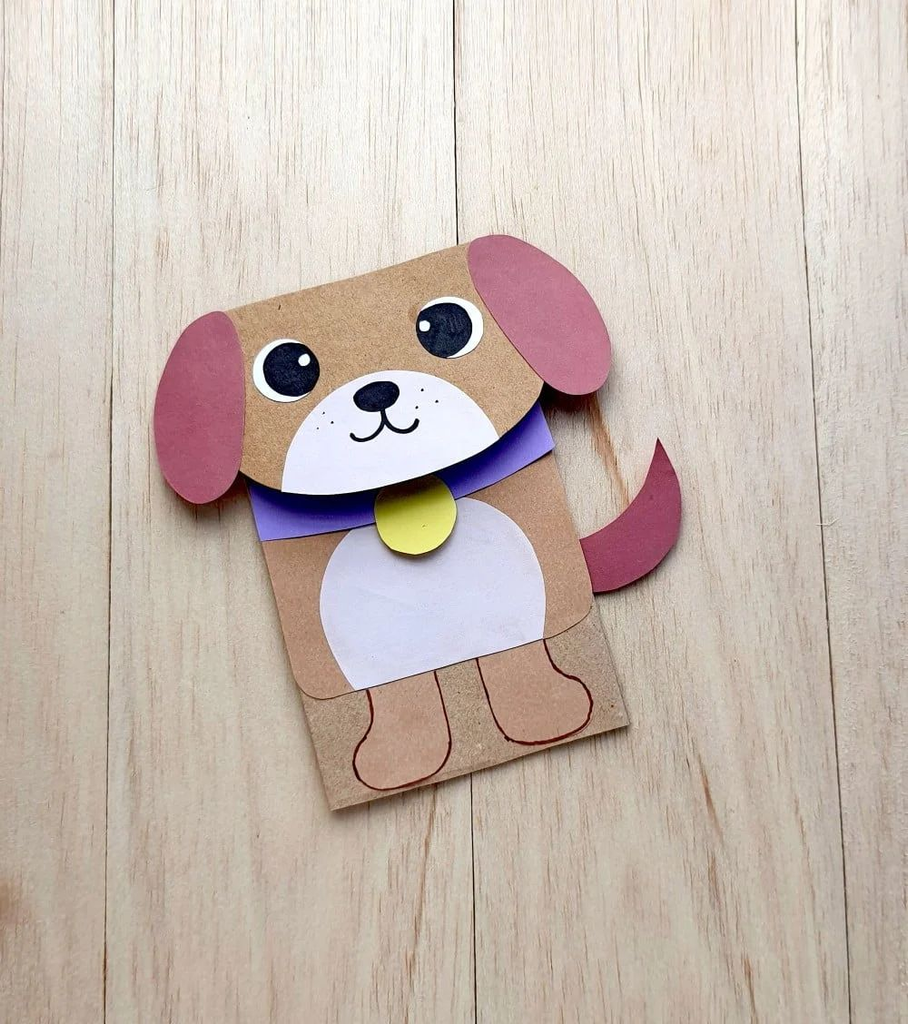
A paper bag becomes a simple dog puppet once the child adds ears, eyes, a nose, and other features. I prepare the pieces that require tricky cutting and let the child decide how the dog should look.
This is a great opportunity to copy a favorite family pet or invent a completely new dog. The child can choose the colors and markings instead of following a sample.
After the glue has dried, I like giving the puppet a job. It can become the star of a short puppet show, a pretend pet, or part of a larger animal story.
For group activities, I prepare one set of basic paper pieces per child. It keeps everyone moving without creating a large pile of shared scraps.
28. Crayon Name Craft
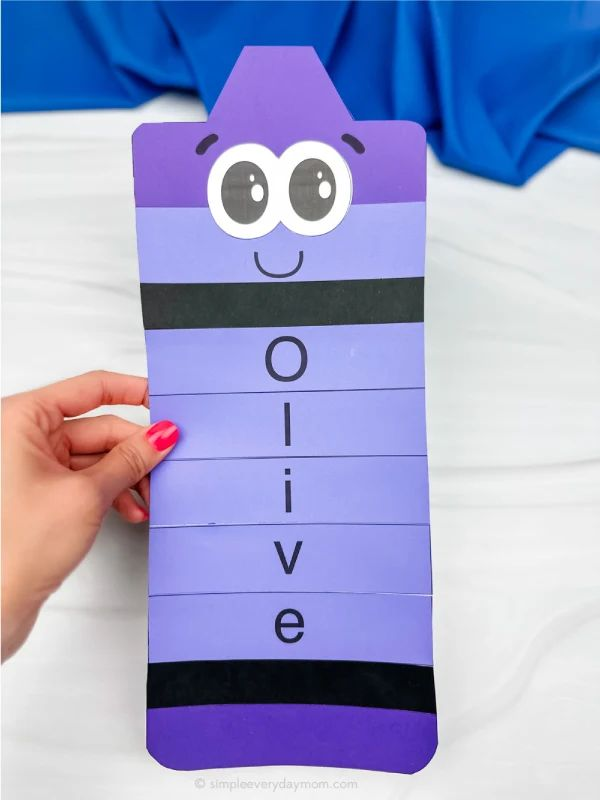
A name craft gives a child a chance to work with familiar letters while making something personal. I prepare the child’s name in large letters and let them color, decorate, or arrange the pieces.
If the letters are separate, I let the child try putting them in the correct order before any glue is used. A child who is still learning the letters may need help, and that is perfectly fine.
I always double-check the spelling and order before the pieces are permanently attached.
For a simple display, the finished name can be mounted on cardstock and decorated with crayons, paper scraps, or drawings.
Pro Tip: Keep the name large and short enough to manage comfortably. A clear, simple layout gives a five-year-old more space to decorate each letter.
29. Turtle Paper Plate Craft
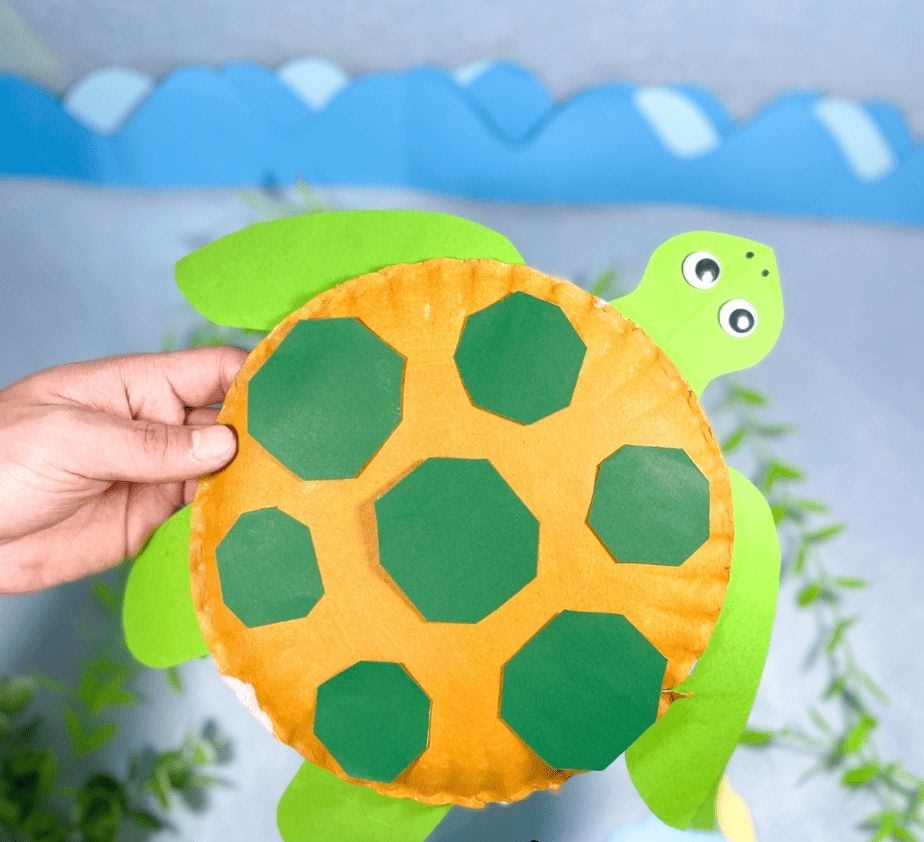
A paper plate makes an easy turtle shell, while paper scraps can become the head, legs, and tail. I let the child create the shell pattern rather than trying to make every turtle look the same.
They can use circles, lines, spots, zigzags, or their own invented pattern. A child who enjoys arranging colors can also make a repeating design.
Making turtles in several sizes can turn one craft into a small turtle family. Once they are dry, the turtles can become part of an imaginary ocean or outdoor scene.
30. Paper Bag Jellyfish
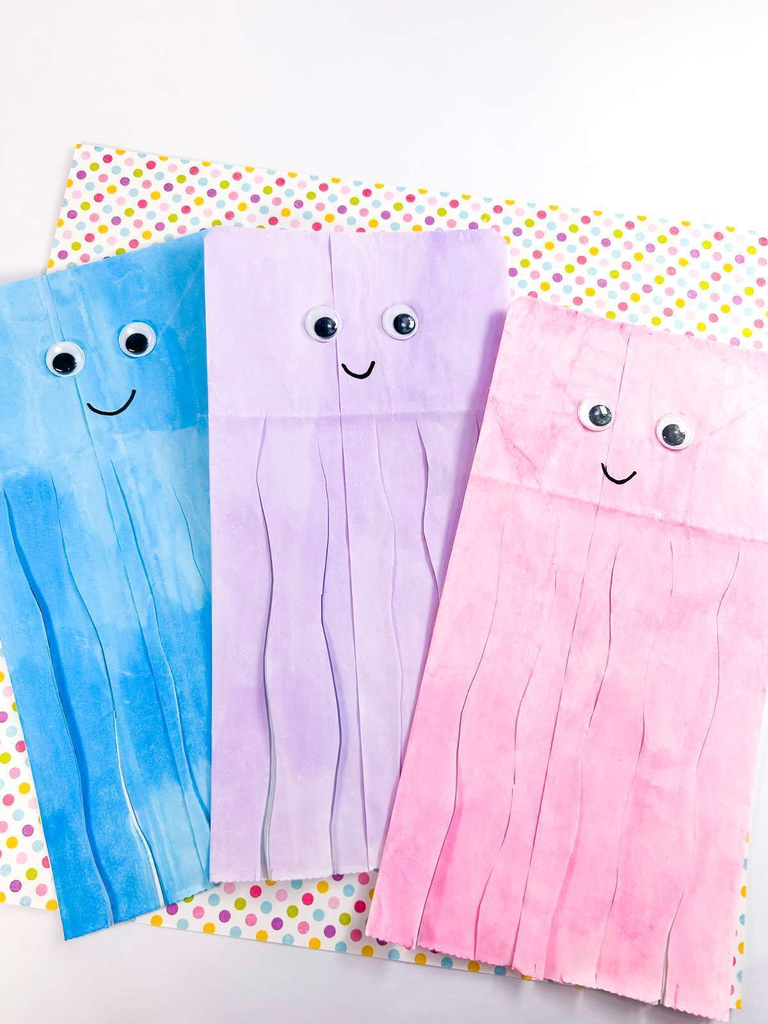
A paper bag gives this jellyfish a simple three-dimensional body. I let the child paint or color the bag first and wait for it to dry before adding the tentacles.
For the hanging pieces, I can use paper strips, yarn, ribbon, or another lightweight material. I prepare difficult cuts ahead of time when the child needs more assistance.
I prefer cutting and shaping the tentacles after the decorated bag is dry. It keeps wet paint and glue away from the scissors and makes the final assembly less messy.
Once complete, several jellyfish can be hung together as an underwater display.
31. Beaded Snakes
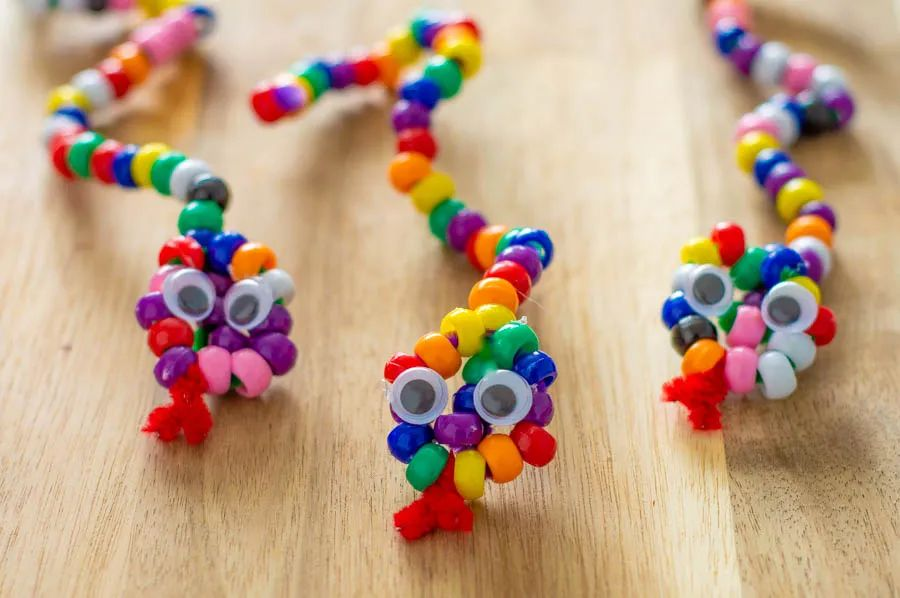
Beaded snakes are made by threading beads onto a flexible craft stem and shaping the finished piece into a snake. I let the child choose a single color, make a repeating pattern, or create a rainbow.
This project can provide a simple way to practice color matching and sequencing while still feeling like ordinary craft time.
Because the beads are small, I keep them under close adult supervision and store the extras away as soon as the activity is finished. I also handle any sharp or difficult-to-cut craft materials myself.
Once the snake is complete, children can bend it into different poses or use it as part of pretend animal play.
Read this next: 30 paper quilling ideas to keep you busy
Frequently Asked Questions
What are some easy crafts for 5 year olds?
Paper chains, paper rings, paper plate crafts, handprint art, and cardboard tube projects are easy places to start. I like these because the materials are inexpensive and the steps can be adjusted to the child’s skill level.
What craft supplies should I keep for a 5 year old?
I keep basic supplies such as cardstock, construction paper, paper plates, cardboard tubes, washable paint, crayons, glue, child-appropriate scissors, yarn, and craft sticks. Recycled materials can also replace many specialty supplies.
How can I make crafts safer for a 5 year old?
I supervise activities involving scissors, beads, small decorations, strings, cords, and adhesives. I prepare difficult cutting or threading steps beforehand when needed and put small materials away after the activity.
What crafts can 5 year olds make independently?
A child who is comfortable with basic craft skills may be able to work more independently on simple coloring, paper decorating, painting, and paper-chain projects. I still stay nearby and provide help when a step is difficult or a material needs adult handling.
How can I adapt crafts for different skill levels?
I simplify a craft by pre-cutting shapes, making fewer holes, using larger pieces, or reducing the number of steps. If the child is ready for more challenge, I let them design their own shapes, patterns, or color combinations.
Conclusion
I do not think five-year-olds need complicated supplies or elaborate instructions to have a good crafting session. Some of my favorite projects on this list start with something as ordinary as a cardboard tube, paper plate, paper bag, or scrap of cardstock.
What matters most to me is giving the child enough structure to get started while leaving plenty of room for their own choices. A purple dinosaur, an uneven paper chain, or a rainbow-colored turtle does not need correcting just because it looks different from the example.
I also find that a few minutes of adult preparation can make a big difference. Pre-cutting difficult shapes, punching holes, portioning beads, protecting the table, and setting up a drying area lets the child spend more time actually creating.
And when the craft becomes a microphone, puppet, dinosaur, binocular, snake, or other pretend-play prop, the activity does not have to end when the glue dries. That extra play is often my favorite part.
The goal is not a perfect finished project. It is giving a five-year-old a manageable activity, safe materials, creative freedom, and the chance to say, “I made this.”



One Comment