Mushroom Crafts for Adults: From Quick Projects to Thoughtful Gifts
Mushroom crafts for adults are one of my favorite ways to make something cute and relaxing without turning the craft table into a huge project. I especially like mushroom designs because they can look rustic, cozy, playful, or even a little elegant depending on the materials and colors I choose.
I can make these projects with basic supplies such as clay, felt, paper, paint, yarn, wood, or leftover craft materials. Some are simple enough for one evening, while others give me something enjoyable to work on over a quiet weekend.
I also like that mushroom crafts can serve a purpose after I finish them. Instead of making something that gets packed away, I can turn the design into wall art, ornaments, coasters, candle holders, small gifts, or seasonal decorations.
In this guide, I’m sharing 15 mushroom crafts for adults that cover quick projects, rustic home decor, everyday-material crafts, fiber art, handmade gifts, and small keepsakes. I’ve included simple material lists and practical steps so you can choose a project based on your available time and skill level.
For beginners, I’d start with painted rocks, felt mushrooms, or watercolor prints because they require fewer specialized supplies. If I have more time, I can move on to clay candle holders, mosaic coasters, embroidery, crochet, or macrame.
Save this for later
Table of Contents
I’ve also included ideas for using leftover yarn, felt scraps, paper, clay, and other supplies I may already have at home. At the end, I’ll share finishing and display tips that help handmade mushroom pieces look more polished.
Key Takeaways
- I can make many mushroom crafts with inexpensive or leftover supplies.
- Painted rocks, felt garlands, and watercolor art are good beginner projects.
- Clay, wood, and mosaic mushrooms work especially well as home decorations.
- Fiber projects such as embroidery, crochet, and macrame are useful for slower crafting sessions.
- Small mushroom charms and terrariums can make thoughtful handmade gifts.
- I get better results when I allow paint, glue, clay, and paper mache to dry completely.
- Using related colors and displaying several pieces together can create a more coordinated look.
Related article: 20+ Creative Craft with Sticks Ideas for Your Home
Quick and Easy Mushroom Crafts for Adults You Can Finish in One Evening
When I only have an hour or two available, I prefer crafts that don’t require complicated preparation. These ideas are simple enough to start after dinner and, depending on drying time, finish the same evening.
They are also useful when I want to craft without buying a large collection of specialty tools. I can adjust the colors and details to suit my home instead of following one strict design.
If I want more simple projects with a calming feel, I can also explore relaxing crafts for adults that work well for quiet evenings.
1. Painted Rock Mushrooms
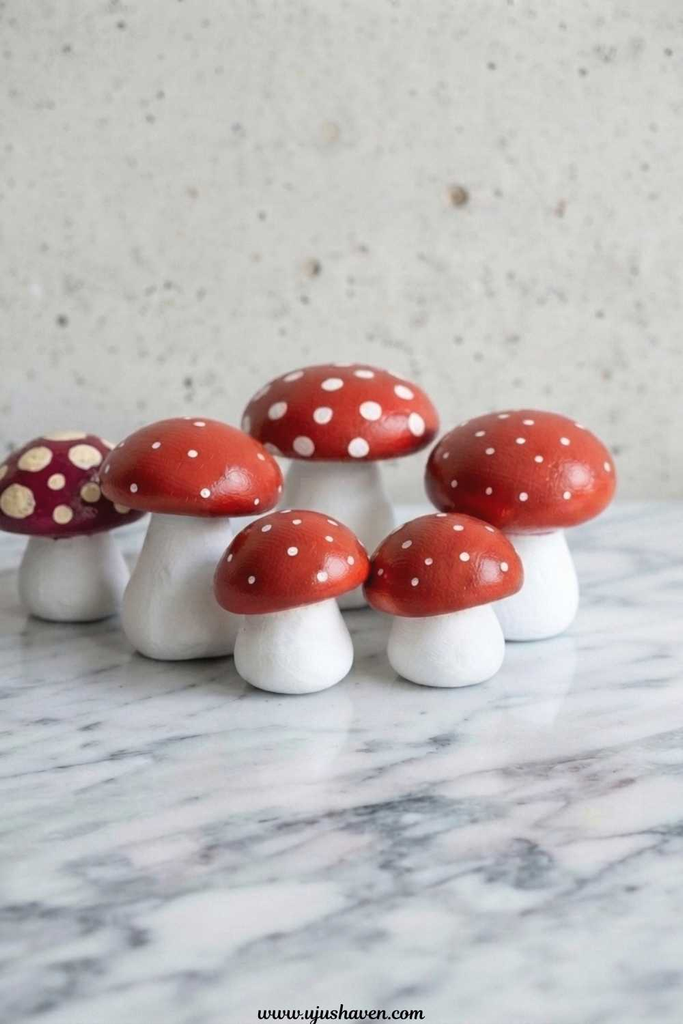
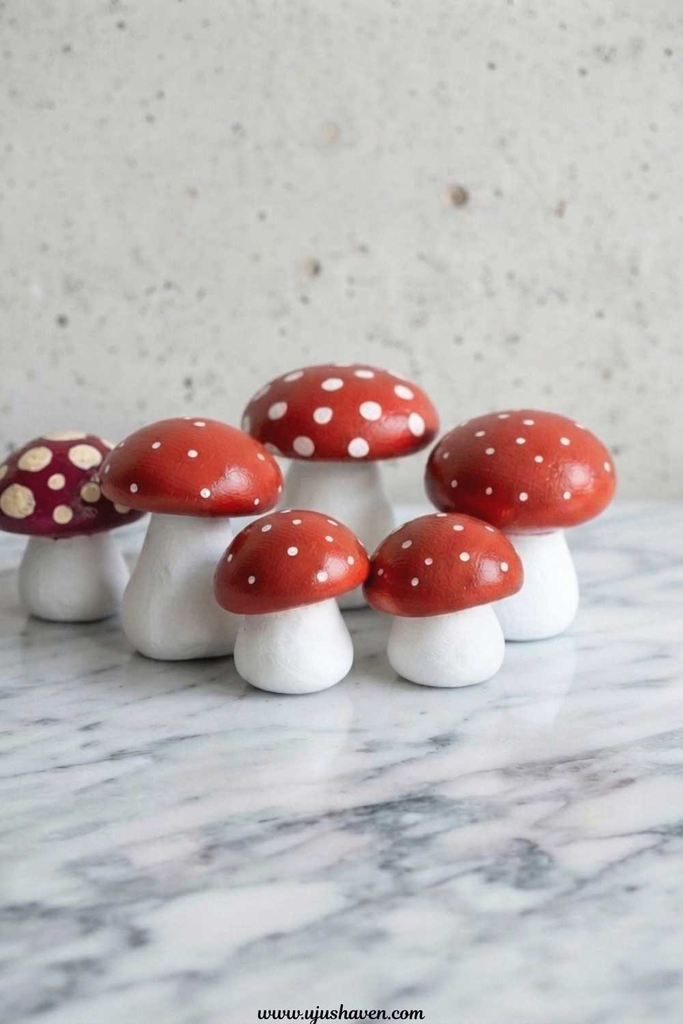
Painted rock mushrooms are one of the easiest mushroom crafts for adults I can make. Smooth stones give me a ready-made base, and I only need paint and a few basic supplies to turn them into tiny woodland decorations.
I like using stones with one flatter side because they are easier to glue together and less likely to tip over. I can collect suitable stones outdoors where permitted or buy smooth craft stones.
What You’ll Need:
- Smooth, rounded stones in different sizes
- Acrylic paint in colors such as red, cream, brown, or green
- Small paintbrushes
- Craft glue
- Clear matte or glossy sealant
Quick How to Make It:
- I wash the stones and allow them to dry completely.
- I paint the larger stone as the mushroom cap and the smaller piece as the stem.
- After the base colors dry, I add dots, lines, or small decorative details.
- I glue the cap and stem together and allow the adhesive to cure.
- I finish with a suitable sealant to help protect the painted surface.
Pro Tip: I sort my stones before painting. Flat-bottomed pieces are much easier to turn into stable mushroom decorations than very rounded ones.
2. Felt Mushroom Garland
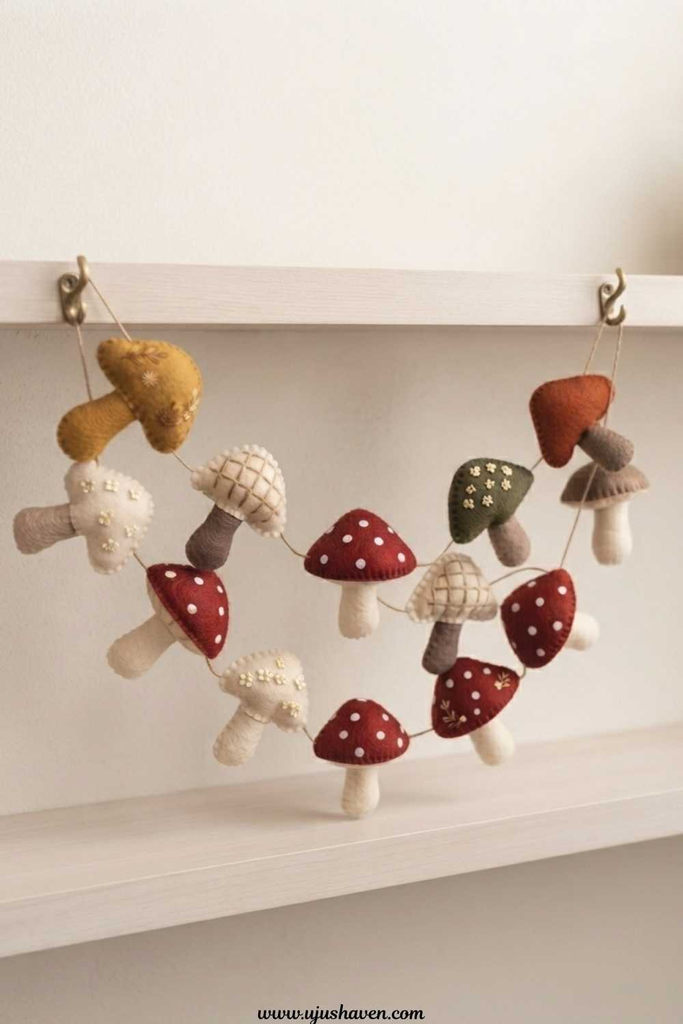
A felt mushroom garland is a soft and inexpensive project that I can customize for fall, woodland-themed decor, a craft room, or even a child’s party.
I don’t worry about making every mushroom identical. Slight differences in size, shape, and color give the finished garland a handmade appearance.
What You’ll Need:
- Felt sheets in autumn, earthy, or neutral shades
- Embroidery thread or yarn
- Needle
- Scissors
- Small amount of polyester stuffing
- Twine
Quick How to Make It:
- I cut matching cap and stem shapes from felt.
- I stitch around the edges while leaving a small opening.
- I add a little stuffing to give each mushroom some dimension.
- I close the opening and attach the cap to the stem.
- I secure the finished mushrooms to a length of twine with even or slightly varied spacing.
Pro Tip: I save felt scraps from other projects because small pieces are usually enough for these mushrooms. It helps me reduce waste while keeping the cost low.
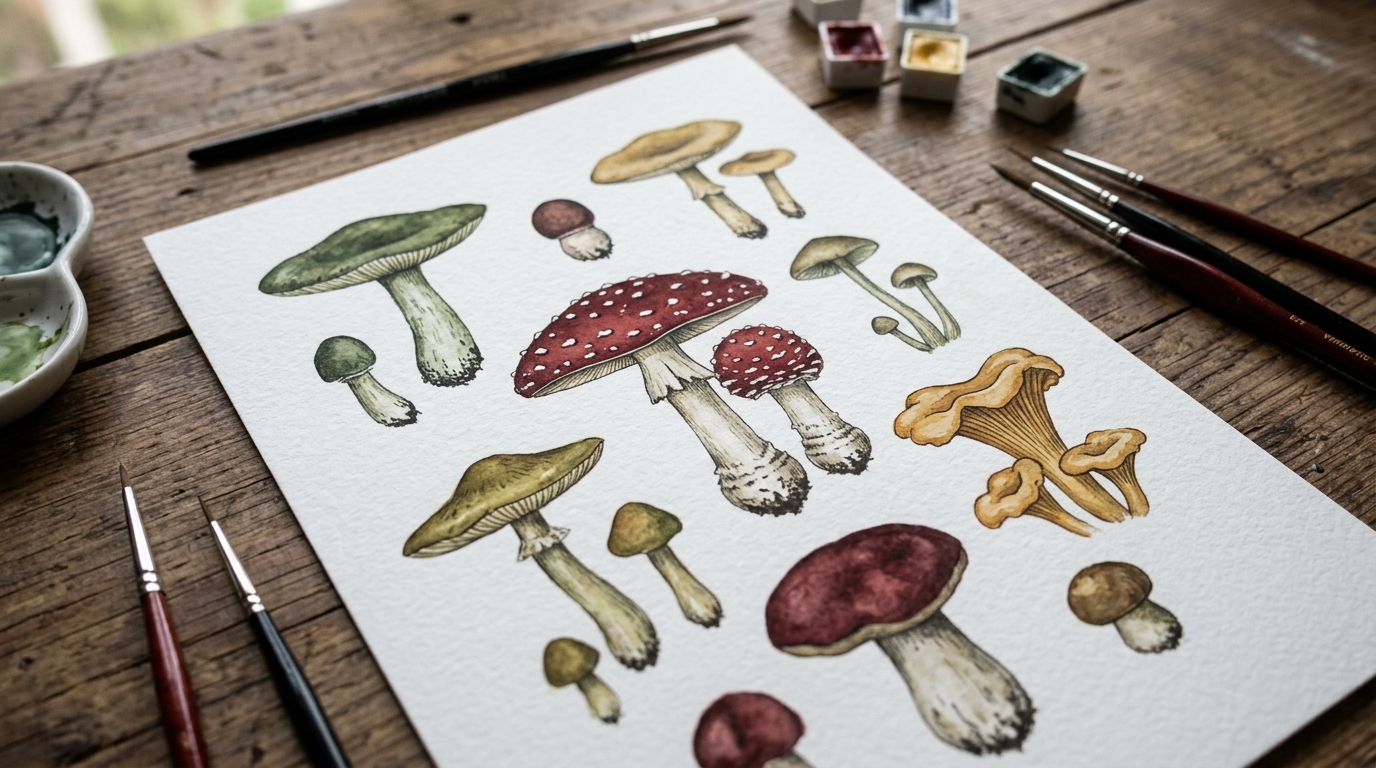
3. Watercolor Mushroom Prints
Watercolor is another relaxing option when I want to make mushroom artwork without needing perfect drawing skills.
I usually start with very simple mushroom outlines. The loose nature of watercolor actually works in my favor because small color variations make every mushroom look different.
What You’ll Need:
- Watercolor paper
- Watercolor paints
- Round paintbrush
- Pencil
- Water
- Paper towel
Quick How to Make It:
- I lightly draw two or three mushroom shapes onto watercolor paper.
- I add a little water to the cap area before applying the paint.
- I paint the stems after the caps have dried enough to prevent unwanted bleeding.
- I add small dots, gills, or other details with a finer brush.
- I let the artwork dry flat before trimming or framing it.
Pro Tip: If my paint spreads farther than expected, I leave it alone until it dries. Watercolor often looks more natural after the paper has completely dried.
Rustic Mushroom Home Decor Ideas You’ll Want to Display
I love rustic mushroom decor because natural materials make even simple crafts feel warm and collected. Wood, clay, earthy colors, and handmade textures work especially well together.
These projects can be displayed on shelves, side tables, windowsills, mantels, or seasonal decorating areas.
4. Wood Slice Mushroom Ornaments
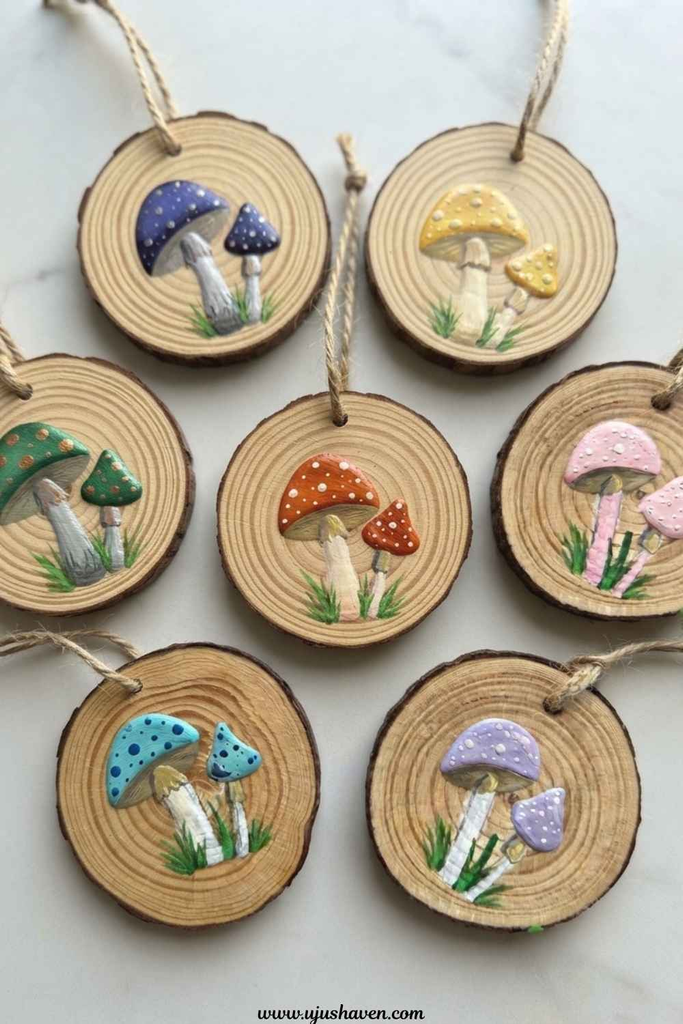
Wood slices already have natural grain and texture, so I don’t need to decorate them heavily. I can create small mushroom ornaments with only a few painted details.
I like leaving part of the wood exposed because it keeps the finished piece from looking overly polished.
What You’ll Need:
- Small wood slices
- Wooden pieces or beads for stems
- Wood or clay pieces for caps
- Acrylic paint
- Wood glue
- Fine sandpaper
- String or small hooks
Quick How to Make It:
- I smooth rough edges with fine sandpaper.
- I paint the mushroom cap while leaving some natural wood visible if desired.
- I add simple spots or gill details after the paint dries.
- I glue the mushroom pieces together and allow them to set.
- I attach a loop if I want to use the mushroom as an ornament.
I can also leave off the hanger and create standing mushrooms by making sure the bottom is flat.
Pro Tip: I usually make three or five mushrooms in different sizes rather than only one. Grouping varied pieces makes a small display feel more intentional.
5. Air-Dry-Clay Mushroom Candle Holders
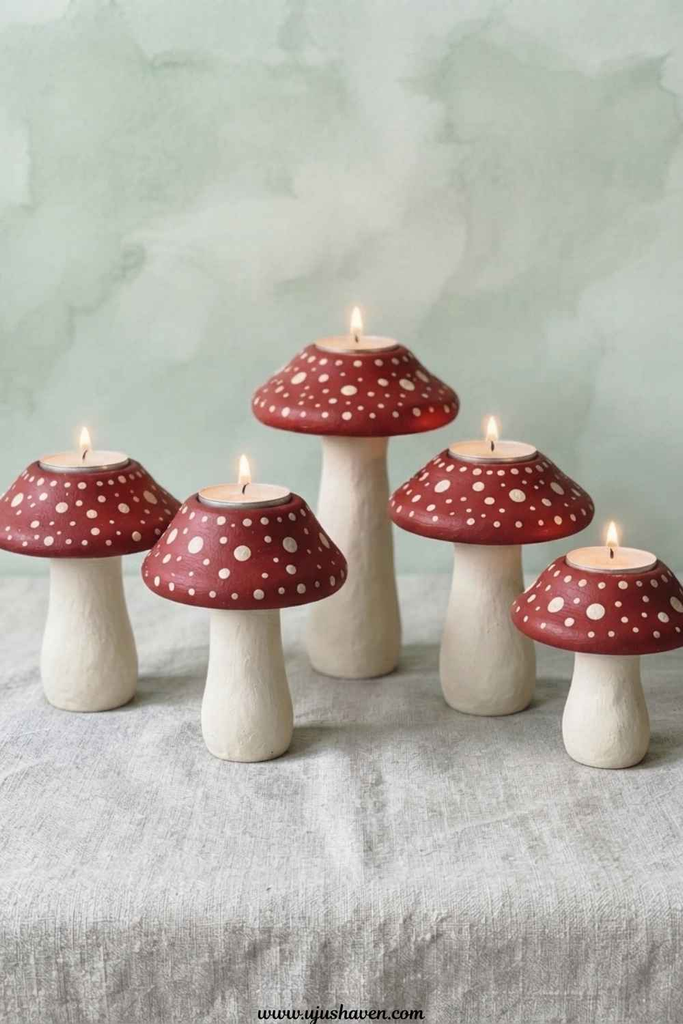
This is one of my favorite options when I want my craft to have a practical purpose. A mushroom candle holder combines handmade decor with useful tabletop lighting.
I use air-dry clay to create the mushroom form and make the candle opening while the clay is still workable.
What You’ll Need:
- Air-dry clay
- Small taper candle for sizing
- Sculpting tools or a butter knife
- Acrylic paint or suitable clay finish
- Sealant
Quick How to Make It:
- I form the mushroom cap and create a flat, stable bottom.
- I gently press the candle into the center to create the opening.
- I remove the candle and smooth the surrounding clay.
- I let the piece dry fully according to the clay manufacturer’s directions.
- I paint and seal the finished holder after it is completely dry.
Pro Tip: I avoid placing fresh clay near direct heat to speed up drying. Rapid drying can encourage cracks, so I prefer following the recommended drying time.
For safety, I also make sure the finished holder is stable and appropriate for the type of candle I plan to use.
6. Mushroom Mosaic Coasters
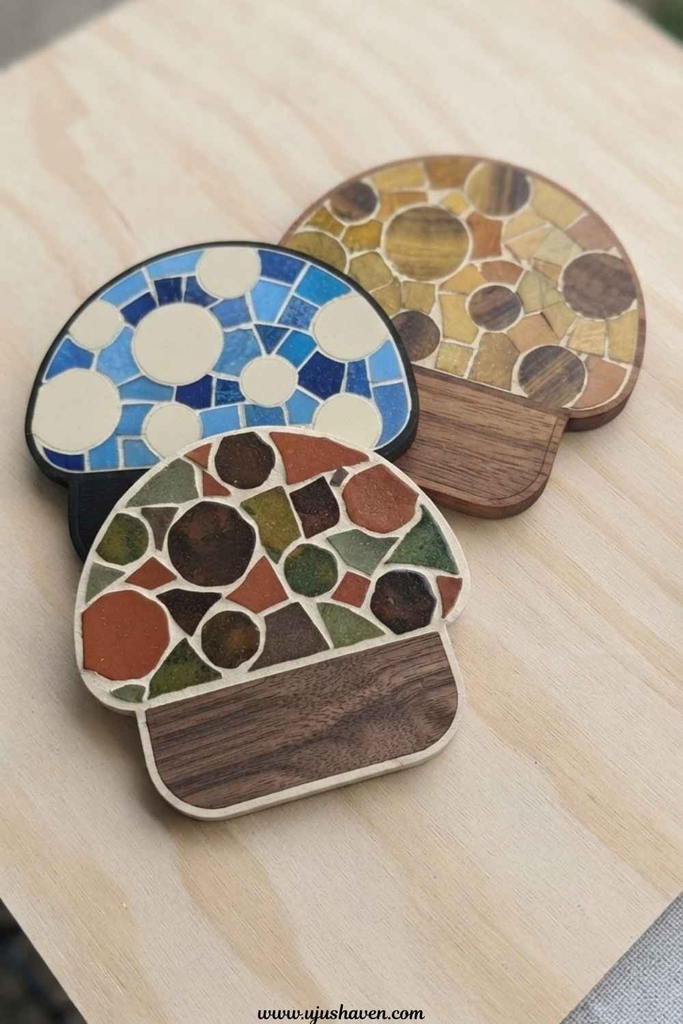
Mosaic coasters are a good choice when I want a mushroom craft that can become part of my everyday home decor.
I can use small tile pieces, clay fragments, or other suitable materials to create the mushroom pattern. The process takes longer than painting, but the finished set can be useful.
What You’ll Need:
- Cork or wooden coaster bases
- Small tile pieces or polymer clay pieces
- Suitable adhesive
- Grout, if desired
- Protective sealant
Quick How to Make It:
- I draw a simple mushroom outline on the coaster.
- I arrange the pieces before gluing them so I can check the design.
- I attach the pieces section by section.
- If I use grout, I apply it after the adhesive has cured and wipe away the excess.
- I seal the finished coaster once everything is completely dry.
Pro Tip: I keep the design to two or three main colors. Too many shades can make a small mushroom pattern difficult to recognize.
Mushroom Crafts for Adults Using Everyday Materials
I don’t always want to make a special shopping trip before starting a craft. These projects are useful when I want to work with materials that may already be sitting in my craft supplies.
Using what I already own can also make crafting more affordable and helps me use up materials before buying more.
7. Clay Mushroom Trinket Dishes
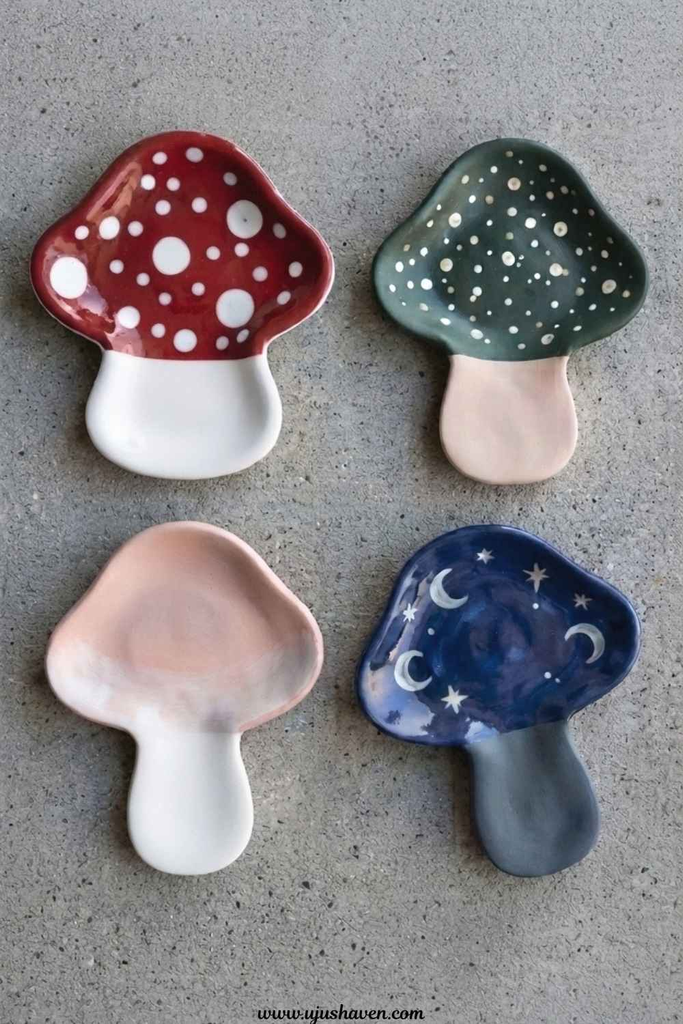
A mushroom-shaped trinket dish gives me a practical place to keep rings, coins, hair accessories, or other tiny items.
I like this project because the shape doesn’t need to be perfectly symmetrical. A slightly organic edge actually suits the woodland theme.
What You’ll Need:
- Air-dry or polymer clay
- Rolling pin or smooth glass
- Small bowl for shaping
- Paint or glaze
- Fine sandpaper
Quick How to Make It:
- I roll the clay to an even thickness.
- I place it over a small bowl to create a shallow dish.
- I shape the outer edge into a mushroom-cap form.
- I allow the clay to dry or cure according to its instructions.
- I smooth rough areas and decorate the surface with paint or glaze.
Pro Tip: I make the clay slightly thicker rather than rolling it extremely thin. A stronger base is less likely to warp while drying.
8. Paper Mache Mushroom Lanterns
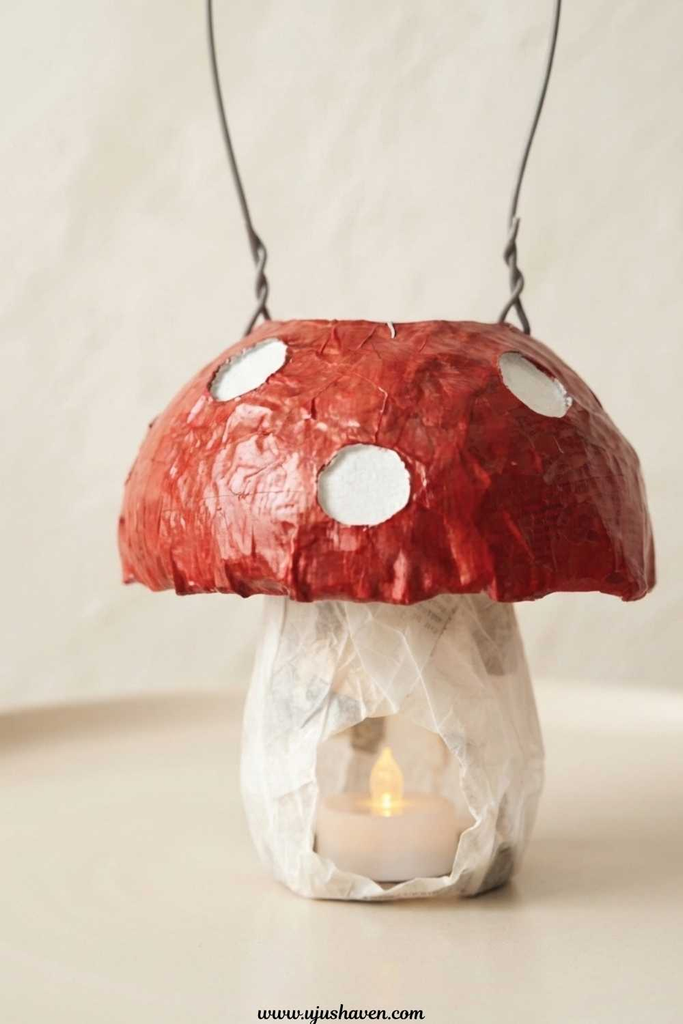
Paper mache takes more patience because each layer needs enough time to dry, but I enjoy it when I want a craft that can be spread over several days.
A mushroom lantern can become a fun seasonal decoration when paired with a battery-operated light.
What You’ll Need:
- Balloon
- Newspaper strips
- Flour-and-water paste or suitable paper-mache adhesive
- Battery-operated tea light
- Paint
Quick How to Make It:
- I inflate a balloon to the size I want for the mushroom cap.
- I cover it with several layers of prepared paper strips.
- I let the shell dry completely before removing the balloon.
- I create a suitable opening for the light and decorate the exterior.
- After the paint has dried, I place a battery-operated tea light inside.
Pro Tip: I use an LED tea light rather than a candle. Paper is combustible, so an open flame isn’t appropriate for this project.
9. Mushroom String Art
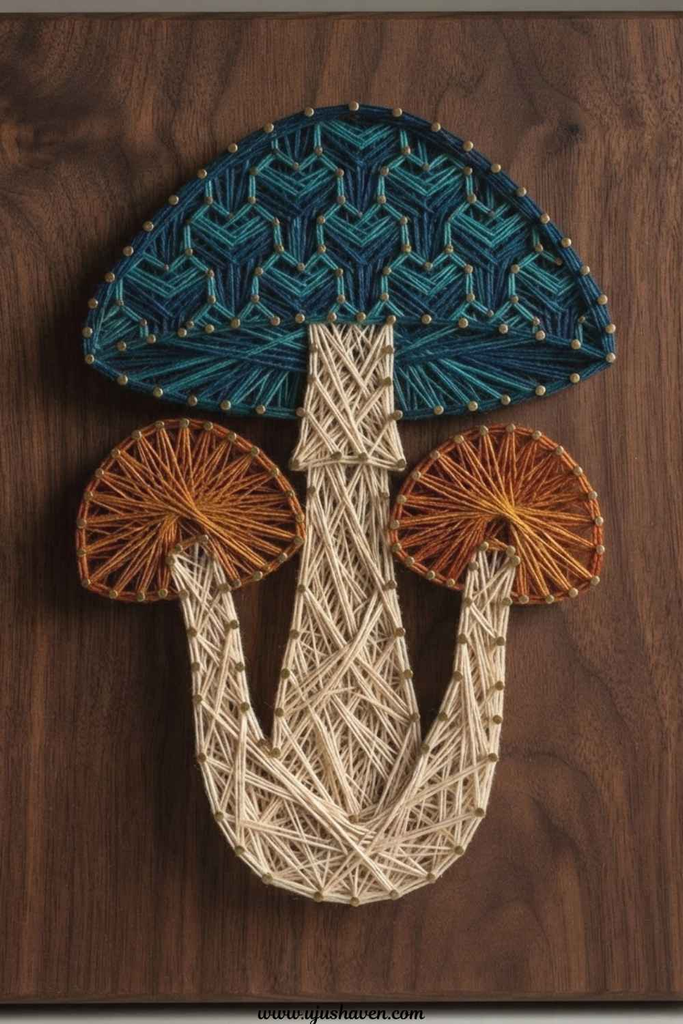
String art looks detailed when finished, but the basic process is repetitive and easy to learn. I can create the mushroom outline first and then fill it with overlapping strands of thread.
This is another project I enjoy when I want something hands-on without having to constantly change techniques.
What You’ll Need:
- Wooden board
- Small nails or pins
- Embroidery thread or string
- Hammer
- Mushroom template, optional
Quick How to Make It:
- I place a mushroom outline on the wooden board.
- I add nails around the outline with consistent spacing.
- I remove the paper template.
- I tie the thread to one nail and wrap it between different points.
- I continue until the mushroom shape has the amount of thread coverage I want.
Pro Tip: I make sure every nail is secure before starting the string. Loose nails can shift once the thread creates tension.
Also read: 16+ Charming Sunflower Craft Ideas to Brighten Your Home
Cozy Mushroom Fiber Art Projects for Slow Weekends
Fiber crafts are ideal for days when I don’t want to rush. Embroidery, crochet, and macrame give me something repetitive to work on while listening to music or watching a favorite show.
If I want even more quiet, screen-free ideas, mindfulness crafts for adults can provide similar low-pressure projects.
10. Embroidered Mushroom Hoop Art
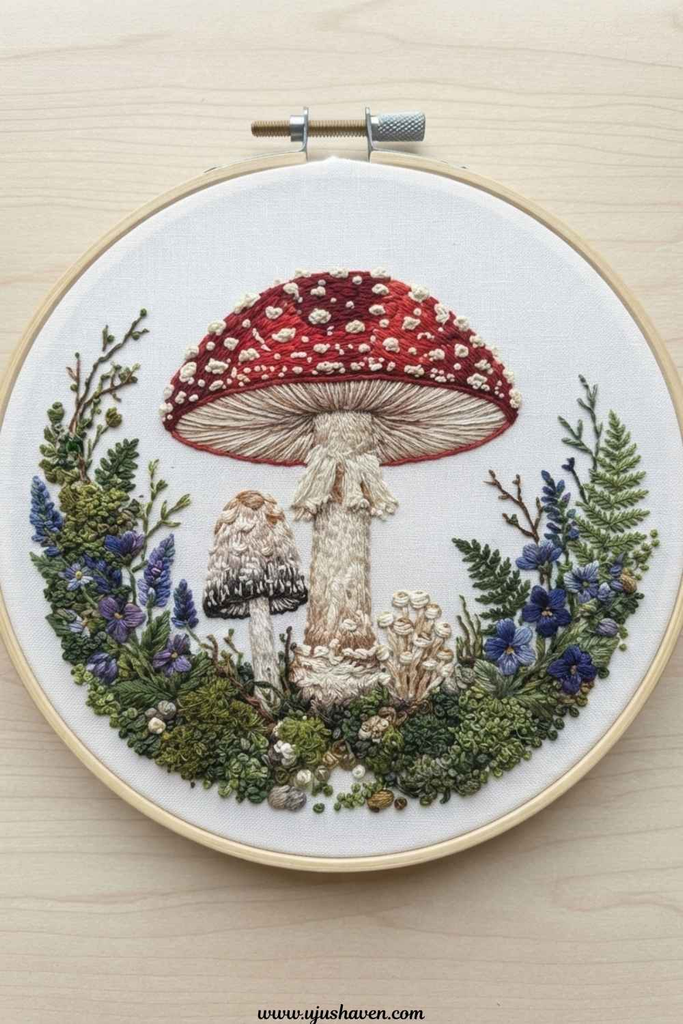
Embroidery is easy to work into small pockets of free time. I can stitch for 10 or 15 minutes and put the project away without needing to clean up a large workspace.
A small hoop also makes the finished project easy to display.
What You’ll Need:
- Embroidery hoop
- Fabric
- Embroidery thread
- Needle
- Water-soluble fabric pen
- Small scissors
Quick How to Make It:
- I draw a simple mushroom design on the fabric.
- I secure the fabric firmly inside the hoop.
- I fill the cap using stitches such as satin stitch.
- I outline details and add French knots or small stitches for texture.
- I trim and secure the fabric at the back when the embroidery is complete.
Pro Tip: I keep the fabric in the hoop when the piece is finished and use the hoop as the frame. It saves me from buying a separate frame for a small project.
11. Crochet Mini Mushrooms
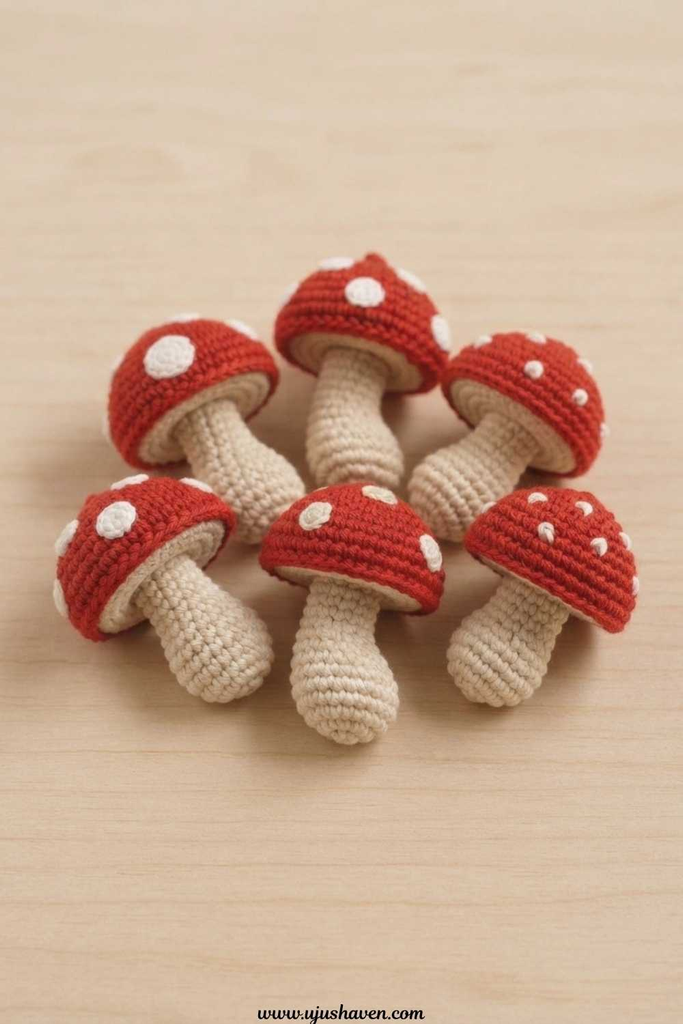
Crochet mushrooms are a fun way for me to use leftover yarn. They are small, portable, and easy to customize with different cap and stem colors.
I can make several at once and arrange them in a basket, on a shelf, or beside other handmade decor.
What You’ll Need:
- Worsted-weight yarn
- Crochet hook
- Fiberfill
- Yarn needle
- Stitch marker
Quick How to Make It:
- I crochet the cap into a rounded dome.
- I add stuffing while shaping the piece.
- I crochet a small cylindrical stem and fill it lightly.
- I add decorative stitches or spots to the cap.
- I sew the stem securely to the underside.
Pro Tip: I make a few mushrooms in different heights instead of making every piece identical. The varied shapes create a more natural woodland display.
12. Macrame Mushroom Wall Hanging
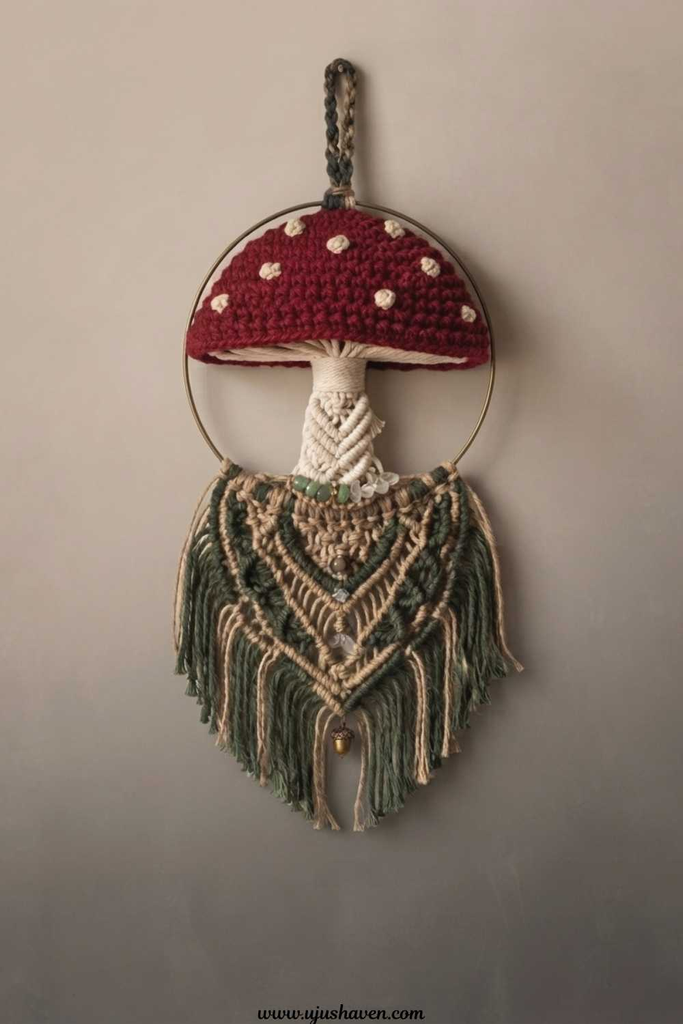
Macrame adds texture to a room without requiring paint or a lot of color. I can create a mushroom-inspired wall hanging with basic knots and adjust the size to fit the space I have.
I especially like this idea for a bedroom, craft room, reading corner, or cozy seasonal display.
What You’ll Need
- Macrame cord
- Wooden dowel or ring
- Scissors
- Comb for the fringe
- Tape or a temporary hook
Quick How to Make It:
- I attach the cords to the dowel using lark’s head knots.
- I work rows of square knots to form the mushroom cap.
- I gradually narrow the knot pattern to create the stem.
- I trim the lower cords.
- I comb the fringe and tidy the edges.
Pro Tip: I trim the fringe gradually rather than cutting everything at once. This gives me more control over the final shape.
Thoughtful Mushroom Craft Gifts and Keepsakes
Handmade gifts are especially meaningful to me because I can choose colors and details based on the person receiving them.
Small mushroom crafts are also practical when I need a quick birthday, thank-you, housewarming, or holiday gift.
13. Polymer Clay Mushroom Charms
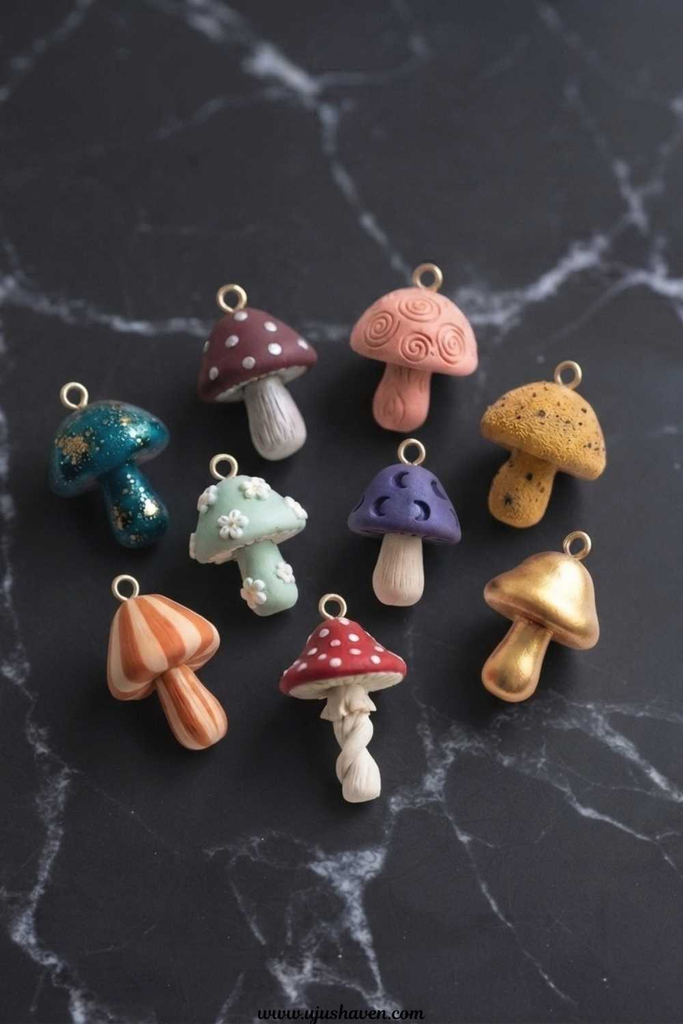
Polymer clay mushrooms are small enough to make in batches, which makes them useful when I need several handmade gifts.
Depending on the findings I use, I can turn the same basic mushroom shape into a keychain, zipper charm, bag accessory, or piece of jewelry.
What You’ll Need:
- Polymer clay
- Sculpting tool or toothpick
- Jump rings
- Jewelry findings
- Oven suitable for the clay instructions
- Clay glaze, optional
Quick How to Make It:
- I shape the mushroom cap and stem from polymer clay.
- I use a toothpick or sculpting tool to add small details.
- I add the appropriate loop or finding before baking when the clay instructions allow it.
- I bake the piece according to the manufacturer’s temperature and time directions.
- I let it cool completely before attaching the remaining hardware.
Pro Tip: I make one test mushroom before baking a full batch. This helps me check the color, size, shape, and baking result before using more clay.
14. Mini Mushroom Terrarium
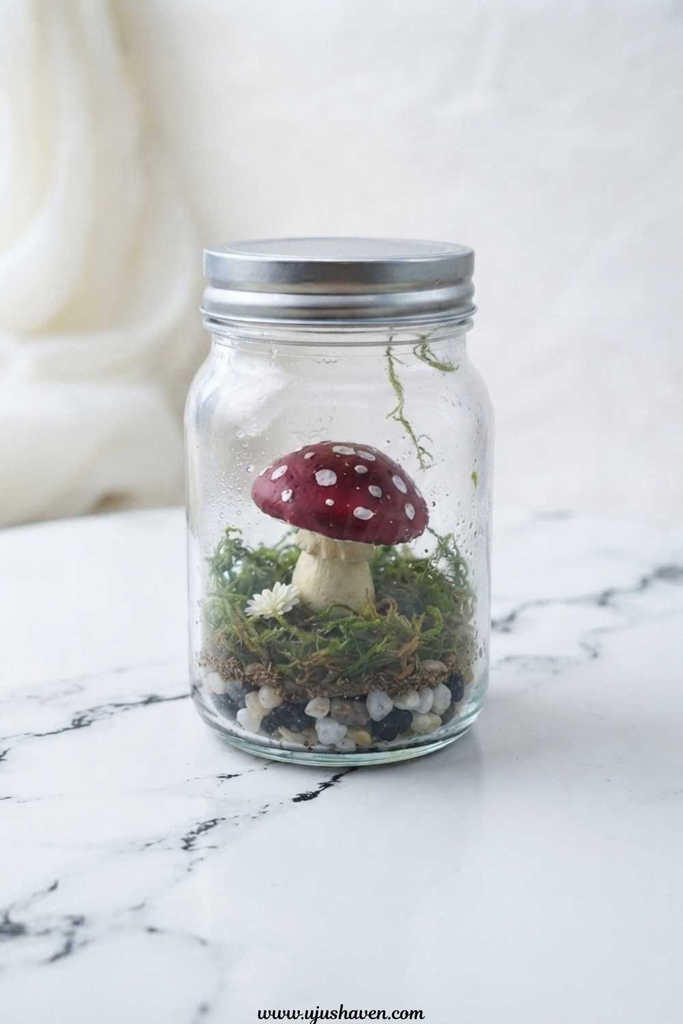
A small terrarium gives me a way to combine handmade mushroom decor with living greenery. I can add a tiny clay mushroom to the scene so it looks like a miniature woodland setting.
This makes a charming gift for someone who enjoys small decorative plants and doesn’t want a large indoor garden.
What You’ll Need:
- Small glass container
- Suitable potting soil
- Moss or appropriate terrarium plants
- Small clay mushroom
- Pebbles
- Spoon or tweezers
Quick How to Make It:
- I place a layer of pebbles at the bottom of the container where appropriate.
- I add a suitable growing medium.
- I arrange the moss or plants carefully.
- I position the clay mushroom so it looks naturally placed.
- I add only the amount of moisture appropriate for the plants I selected and keep the terrarium in suitable indirect light.
Pro Tip: I choose plants based on the type of terrarium rather than assuming every plant needs the same amount of water. Overwatering is one of the easiest ways to create problems in a small enclosed setup.
15. Pressed-Paper Mushroom Botanical Art
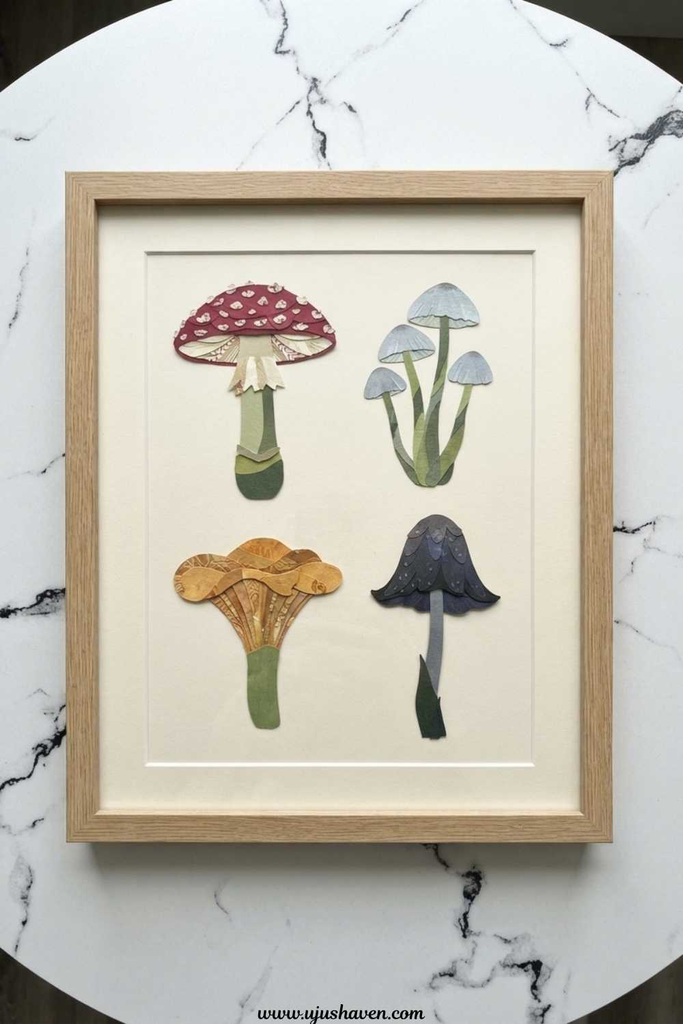
I like paper art when I want a quiet project that focuses more on cutting and arranging than painting.
Instead of trying to preserve a real mushroom, I create the botanical appearance with layers of textured or colored paper. This makes the finished piece easier to frame and display.
What You’ll Need:
- Textured or patterned paper
- Sharp scissors or craft knife
- Cutting mat
- Glue stick
- Frame or mat board
Quick How to Make It:
- I sketch simple mushroom caps and stems on paper.
- I carefully cut each shape.
- I layer different paper shades to create depth.
- I arrange and glue the pieces onto the background.
- I let the artwork dry completely before placing it inside a frame.
Pro Tip: I use sharp scissors for clean curves and a craft knife only where it gives me better control. I always use a proper cutting mat when working with a blade.
Read this next: 21 Creative Ideas To Wrap Money Gifts For Christmas
Quick Tips for Choosing and Finishing Your Mushroom Crafts for Adults
A little planning can make a noticeable difference in how polished my finished crafts look. Before I start, I consider how much time I have, what materials are already available, and where I want the finished piece to go.
- Match the project to my available time. If I only have an hour, I choose painted rocks, watercolor art, or a small clay project. I save paper mache, embroidery, and larger macrame projects for longer sessions.
- Choose a consistent color palette. Earthy shades such as cream, rust, brown, muted green, and deep red can make different mushroom pieces look connected.
- Respect drying and curing times. I don’t paint over damp clay, wet glue, or unfinished paper mache because doing so can lead to cracking, peeling, or other finish problems.
- Start with small quantities of supplies. I buy only what I need for the first project instead of purchasing large packs before knowing whether I enjoy the technique.
- Group finished pieces together. I often find that three or five mushrooms in varied sizes create a stronger display than one isolated piece.
- Think about function before finishing. If I’m making a candle holder, coaster, terrarium, or ornament, I choose materials and finishes suitable for that particular use.
- Keep safety in mind. I follow the manufacturer’s directions for clay, adhesives, sealants, and tools, especially when a project involves heat, blades, or candles.
Frequently Asked Questions About Mushroom Crafts for Adults
What are some easy mushroom crafts for adults to make?
I would start with painted rock mushrooms, felt garlands, or watercolor mushroom art. These projects use basic supplies and are easy to customize, making them suitable for beginners.
Do I need special tools to get started?
Not usually. Many mushroom crafts only require common supplies such as paintbrushes, scissors, glue, paper, felt, or basic clay tools. More specialized projects may need embroidery, crochet, or macrame supplies.
Are mushroom crafts good gift ideas?
Yes. I think small clay charms, mushroom ornaments, trinket dishes, and mini terrariums work particularly well as handmade gifts because I can customize the colors and details.
How long does a typical mushroom craft take to finish?
The time varies considerably. A painted rock or simple watercolor may take less than an hour of active work, while paper mache, embroidery, clay, and macrame can take several sessions because of drying or detailed handwork.
Can I make these without buying a lot of new supplies?
Yes. Several projects can use leftover felt, yarn, paper, paint, stones, or clay. I usually check my craft storage first because I can often adapt a project to materials I already have.
Bringing It All Together
I don’t think a good mushroom craft needs to be complicated or expensive. Some of my favorite projects are the ones I can make with a few basic supplies and a quiet hour at home.
Whether I choose painted stones, clay decor, fiber art, paper projects, or a tiny terrarium, the mushroom shape gives me plenty of room to play with color, texture, and size.
I can start with one simple project and build a small collection over time. For me, that’s part of the fun: the finished pieces can become cozy additions to my home or thoughtful handmade gifts for someone else.
If I want another easy craft theme to try next, bumble bee crafts for adults are another fun option with plenty of room for simple, colorful designs.



4 Comments