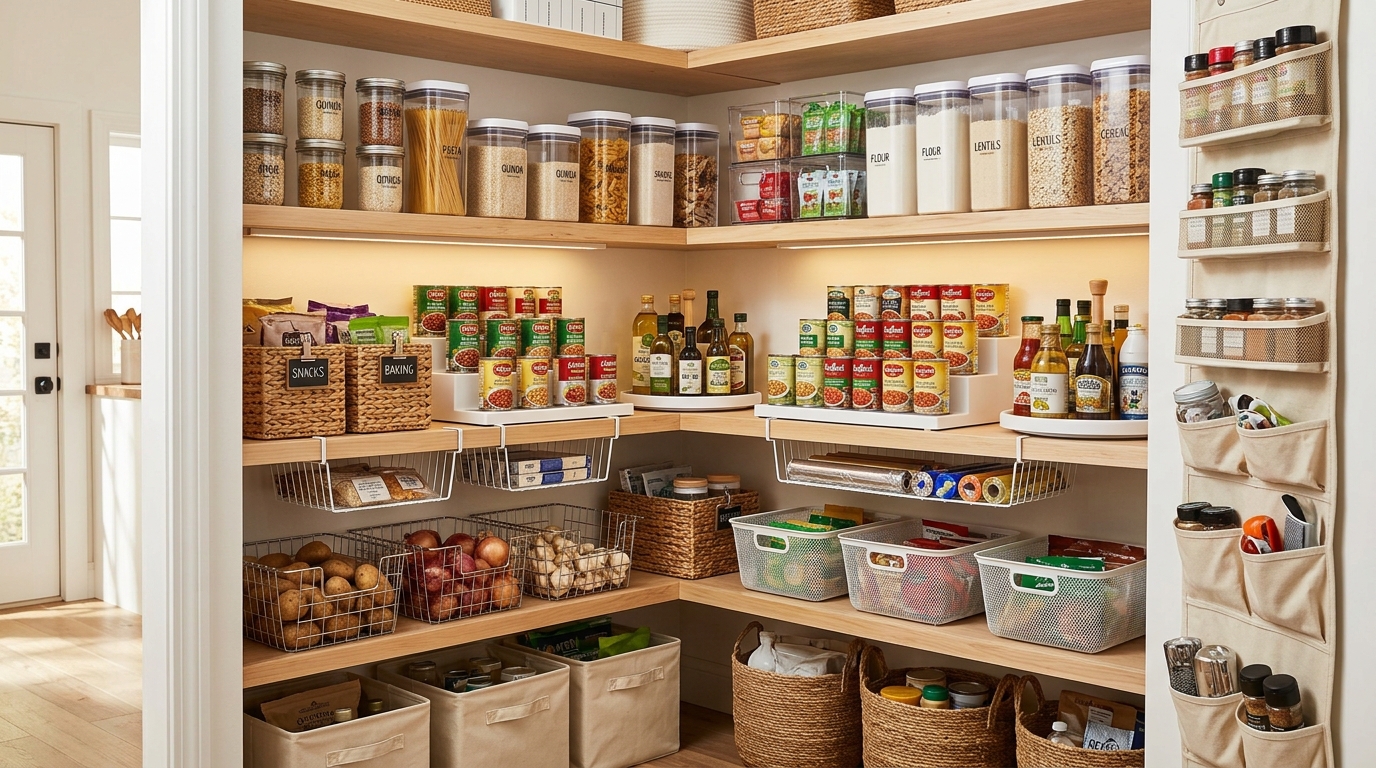
23 Food Storage Ideas for 2026
I used to think food storage was simply about putting groceries in the refrigerator or closing a container lid. But I’ve learned that where I keep food, how I package it, and how I organize my shelves can make a real difference in reducing waste and keeping my kitchen manageable.
I now look at food storage as two connected tasks: keeping food safe and making it easy to find. Airtight containers help protect dry ingredients from moisture, refrigerator bins keep similar items together, and sensible meal prep makes busy days easier. However, I also pay attention to food safety because a neat container cannot make spoiled food safe to eat.
In this guide, I’m sharing 23 food storage ideas that I can adapt to different kitchens, from small apartment refrigerators to family pantries. Each idea focuses on practical organization, with tips for choosing containers, arranging shelves, storing leftovers, and making better use of the space I already have.
I can make food storage easier by choosing containers that fit my kitchen, grouping similar ingredients, labeling leftovers, and keeping refrigerated food at safe temperatures. Clear containers help me see what I already own, while stackable designs make better use of vertical space.
Save this for later

Table of Contents
For pantry staples, I focus on dry, cool storage and tightly sealed containers. For refrigerated food, I prioritize safe temperatures, suitable packaging, and separation between raw meat and ready-to-eat foods. I also use smaller portions and a simple first-in, first-out system to reduce forgotten leftovers and unnecessary food waste.
Key Takeaways
- Choose storage based on the food: Dry grains need protection from moisture, while cooked leftovers need refrigeration.
- Use clear, stackable containers: I can identify ingredients quickly and make better use of shelves.
- Label and date leftovers: This helps me use older food first and avoid guessing how long it has been stored.
- Keep food safety in mind: My refrigerator should stay at 40°F (4°C) or below, and my freezer at 0°F (-18°C) or below.
- Separate raw and ready-to-eat foods: I store raw meat in sealed containers on the lowest refrigerator shelf to help prevent drips and cross-contamination.
- Prepare only what I can manage: Washing, chopping, and portioning selected ingredients ahead of time can simplify cooking without filling every shelf with containers.
Related article: 22 Mudroom Storage Ideas for 2026
What are the methods of food storage?
I use several food storage methods depending on whether I’m keeping something for a few hours, a few days, or several months. Refrigeration is useful for perishable foods, freezing helps preserve food for longer periods, and a cool, dry pantry works well for many unopened or properly sealed dry ingredients.
Airtight containers help protect foods from moisture, outside odors, and pests, but they do not replace refrigeration when a food needs to stay cold. I also keep in mind that freezing stops bacteria from multiplying while food remains frozen, but it does not reliably kill all harmful bacteria.
For everyday organization, I find that a combination of clear containers, labeled jars, divided boxes, and sturdy shelf bins is usually enough. I don’t need to replace every container in my kitchen; I can start with the foods I use most and build a system around them.
For safety, I keep my refrigerator at 40°F (4°C) or below and my freezer at 0°F (-18°C) or below. I refrigerate perishable food within two hours of cooking or serving, or within one hour when the temperature is above 90°F (32°C).
Stackable Airtight Containers

I like stackable airtight containers because they make refrigerator shelves easier to manage. Instead of balancing bowls and plates on top of one another, I can use containers with similar shapes and flat lids to create stable rows.
Clear sides are particularly useful because I can see leftover vegetables, cooked rice, cut fruit, or prepared ingredients without opening every container. I also choose different sizes so that I don’t waste space by storing a small portion in an oversized box.
A good seal helps limit moisture loss and prevents food from absorbing other refrigerator odors. However, I still refrigerate perishable food promptly, and I check that the container is suitable for the refrigerator and freezer before using it.
Pro Tip: I label leftovers with the food name and storage date. Most cooked leftovers should be used within three to four days in the refrigerator, or frozen for longer storage.
Fridge Zone Containers

I find it easier to manage a refrigerator when I give different types of food their own designated areas. One bin can hold breakfast ingredients, another can hold snacks, and a separate section can keep items that need to be used soon.
This arrangement makes grocery shopping easier, too. Before buying more yogurt, vegetables, or leftovers containers, I can quickly check what I already have. I also use a small, clearly marked area for food that needs to be eaten first.
I avoid packing the refrigerator too tightly because cold air needs room to circulate. I also never use an organizer bin as a reason to store raw meat beside uncovered ready-to-eat food.
Pro Tip: I keep a simple “use first” bin at eye level. It works especially well for opened ingredients and leftovers that might otherwise get pushed to the back.
Labeled Pantry Jars

Labeled pantry jars help me keep track of ingredients such as rice, lentils, oats, pasta, flour, and dried beans. When I can see the contents, I’m less likely to forget what I have or buy another packet unnecessarily.
I choose containers that fit the quantities I normally use. Large jars work well for frequently used staples, while smaller ones are better for seeds, nuts, spices, and ingredients that I buy in limited amounts.
Before transferring food, I make sure the container is clean and completely dry. I label it with the ingredient name and, when useful, the original best-before date or batch information. For foods with special storage instructions, I keep those instructions available.
Pro Tip: I refill a jar only after checking the remaining contents and cleaning it when needed. This helps me avoid mixing an old batch with a new one without knowing which should be used first.
Meal Prep Stack

I use meal prep containers to make weekday meals easier to plan. Preparing a few ingredients ahead of time means I can assemble lunch or dinner without starting every part of the meal from scratch.
For example, I might prepare a batch of rice, roast vegetables, and portion cooked protein into separate containers. I can combine them when needed instead of preparing more food than I can reasonably eat in a few days.
I prefer containers that stack securely and have lids that fit properly. I also check whether they are suitable for reheating, because not every plastic container or lid is microwave-safe.
Cooked food should be divided into shallow containers when necessary and refrigerated promptly. I don’t leave prepared meals on the counter for hours while waiting for them to cool completely.
Pro Tip: I prepare only a few days of refrigerated meals at a time. If I make extra portions for later in the week, I freeze the portions I won’t use within the recommended refrigerator-storage period.
Color-Coded Sizes

A drawer full of containers with mismatched lids can make even a simple kitchen task frustrating. I find that organizing containers by size and lid color makes it easier to put everything away and find the right combination later.
I can assign one color to small snack containers, another to medium leftover boxes, and a third to larger meal containers. The colors are simply an organizing aid; the actual container size and material still determine how I use each piece.
I keep lids together in a divided drawer organizer or store them upright beside their matching containers. When I buy a new set, I look for shapes that nest when empty so that the containers take up less cabinet space.
Pro Tip: Before purchasing more containers, I sort through my existing collection and recycle or discard damaged pieces according to local guidelines. A smaller, matching set is often easier to maintain than a crowded drawer.
Divided Glass Boxes

Divided glass containers are useful when I want to keep different parts of a meal separate. I can store rice beside vegetables, pack a lunch with several components, or keep a side dish away from a saucy main course.
Glass is a good option for many leftovers because it doesn’t readily absorb food odors or stains. It can also be convenient for reheating when the container is specifically rated for that use.
I check the manufacturer’s instructions before moving glass between cold and hot conditions. Sudden temperature changes can cause some glass containers to crack, and plastic lids generally need to be removed before oven use unless their instructions say otherwise.
Pro Tip: I use divided containers for meals that will be eaten together, but I store ingredients separately when one item needs different handling or when the compartments make the container too bulky.
Small Portion Bowls

I find small storage bowls useful for sauces, chopped vegetables, fruit portions, dips, and the last serving of a meal. They help me avoid leaving a small amount of food in a large bowl that takes up an entire refrigerator shelf.
Smaller portions can also be easier to cool quickly when I divide a large batch of cooked food into shallow containers. That matters because food should be cooled and refrigerated promptly, not left at room temperature for extended periods.
I choose bowls with secure lids and enough room for the food without filling them to the brim. If I’m storing liquids, I make sure the lid seals well before moving the container.
Pro Tip: I keep a few small containers near the front of my storage cupboard. They are useful for leftovers that are too small for a full meal container but still worth saving.
Soft Snack Storage

I use wide, shallow containers for cookies, muffins, and other baked snacks that can become crushed when stacked carelessly. The extra room helps me arrange the food without putting unnecessary pressure on softer items.
The right storage method depends on the snack. Some crisp cookies need protection from humidity, while soft muffins can dry out when exposed to air. I let baked goods cool before sealing them, because trapped steam can create excess moisture and affect texture.
I also avoid assuming that every baked item belongs on the counter. Cream-filled pastries, custard desserts, and other perishable treats may require refrigeration, so I follow the recipe or food label instructions.
Pro Tip: If I bake more than I can eat within a few days, I freeze suitable portions in freezer-safe packaging and label them. That lets me keep extra snacks without filling the counter with food.
Tall Dry Storage

Tall, narrow containers help me use vertical pantry space without spreading dry ingredients across several shelves. They work especially well for spaghetti, oats, rice, cereal, and other staples that fit their shape.
I measure the available shelf height before choosing containers. A jar that looks attractive but cannot slide out easily or fit beneath the shelf above it may make everyday cooking more difficult.
For dry goods, I look for tight-fitting lids and materials that are easy to clean. I keep the containers away from steam, direct sunlight, and heat from the stove because moisture and warmth can affect food quality.
Pro Tip: I leave a little room above the contents so I can pour or scoop without spilling. I also avoid filling a new container on top of an unverified old batch.
Open Shelf Jars

Open shelving can make frequently used pantry ingredients easy to reach. I like the idea of keeping a small group of jars together for everyday items such as oats, rice, pasta, or tea rather than spreading them throughout the kitchen.
I choose jars with secure lids, especially in kitchens where cooking steam, dust, or humidity can affect dry ingredients. I also keep the shelves away from the stove and sink whenever possible.
Although open shelves can look tidy, I don’t display every ingredient simply for appearance. Foods that are sensitive to light, heat, or moisture are better kept in suitable storage conditions, even if that means placing them in a cabinet.
Pro Tip: I keep the jars I use most often on the easiest-to-reach shelf and place less frequently used ingredients elsewhere. That makes the arrangement practical rather than purely decorative.
Flat Stack Meals

Flat containers are useful when I want to organize prepared meals without wasting vertical space. Their rectangular shape can fit neatly on refrigerator shelves, and the contents are often easier to identify when I use transparent sides.
I portion food into containers that are shallow enough to help it cool quickly. For large batches of soup, stew, or rice, I divide the food into several smaller containers instead of refrigerating one deep, hot pot.
I stack containers only when the lids are secure and the stack is stable. I also leave enough room for air circulation and avoid putting heavy items on lids that are not designed to support weight.
Pro Tip: I place the newest meals behind the older ones, or mark the containers with dates, so I can use the older food first.
Also read: 21 Bathroom Towel Storage Ideas for 2026
Produce Drain Boxes

Produce containers with removable drain trays can help when I store washed vegetables, berries, or other foods that are easily damaged by excess moisture. The raised tray keeps produce from sitting directly in collected water.
I first check whether the particular fruit or vegetable benefits from refrigeration and whether it should be washed before storage. Some produce keeps better when dry, while other items may need moisture management or a specific humidity setting.
I handle leafy greens gently, remove damaged leaves, and let washed produce drain properly when appropriate. I also clean the container regularly, because old moisture and decaying pieces can affect the rest of the contents.
Pro Tip: I don’t assume that a drain tray automatically extends the life of every vegetable. Good airflow, suitable temperature, clean containers, and the correct storage conditions all matter.
Mixed Container Stack

I don’t need every food storage container in my kitchen to match perfectly. A mix of jars, rectangular boxes, and small tubs can work well as long as each item has a clear purpose and the overall arrangement remains easy to manage.
I use jars for loose dry staples, rectangular containers for pasta or packets, and smaller boxes for seeds, nuts, or baking ingredients. Heavy containers go on lower shelves, while lightweight items can sit higher if they are easy to reach safely.
The most important thing is choosing containers that suit the food and the space. I avoid using a decorative jar for something that needs a better seal or placing a container near a heat source simply because it fits the shelf.
Pro Tip: I group containers by the way I cook. Keeping baking ingredients together and everyday cooking staples in one area makes it easier to find everything during meal preparation.
Category Shelf Sorting

Sorting pantry shelves by category helps me know where to return each item. I can dedicate one shelf to grains and pulses, another to baking supplies, and a separate basket to snacks or packaged foods.
This system is useful even when I don’t own matching containers. I can keep products in their original packaging and use simple bins to group them, provided the packaging is intact and the foods are stored under suitable conditions.
I also arrange items so that the foods I use regularly are easiest to reach. Less frequently used ingredients can go higher or farther back, as long as I can still identify and retrieve them safely.
Pro Tip: I check the pantry before making a grocery list and place older items toward the front. This small habit helps me use what I already own before opening another package.
Protein P roduce Stack

I pay particular attention to how I store meat, poultry, seafood, eggs, and fresh produce because safe separation matters more than an attractive arrangement. I keep raw meat and seafood in leakproof packaging or a sealed container on the lowest shelf so their juices cannot drip onto other foods.
I store washed produce and ready-to-eat items separately from raw animal products. I also clean hands, utensils, and surfaces after handling raw meat to reduce the risk of cross-contamination.
The container itself doesn’t make raw food safe for an extended period. I follow recommended refrigerator-storage times, use a food thermometer when cooking, and freeze items that won’t be used in time.
Pro Tip: I use a dedicated, washable tray beneath raw meat packaging. If a package leaks, I can clean the tray promptly instead of allowing juices to reach other shelves.
Pour-Top Canisters

Pour-top canisters are handy for dry ingredients that I use often, such as oats, rice, cereal, seeds, and certain grains. The spout helps me transfer ingredients into a bowl or saucepan without lifting a separate scoop each time.
I choose canisters with lids that close securely after pouring. A convenient spout is not enough if it leaves the food exposed to moisture or insects.
I also consider the size of the opening. A narrow spout is useful for small grains but may clog with larger ingredients, while a wider opening makes cleaning and refilling easier.
Pro Tip: I use a dry measuring cup or spoon when a recipe calls for an exact amount. Pouring directly from a canister is convenient, but it can make measurements less consistent.
Countertop Cereal Box

A countertop cereal container can make breakfast simpler when cereal, granola, or oats are part of my daily routine. I can see how much is left and refill it before the supply runs out.
I choose a container with a wide enough opening for easy filling and cleaning. A secure lid helps keep dry cereal away from humidity, dust, and household pests, but I still keep the container away from the stove and other sources of heat.
I also check whether the cereal needs to remain in its original packaging for any special storage instructions. If I transfer it, I keep the product name and date information where I can find them.
Pro Tip: I avoid topping up cereal automatically. First, I check the remaining amount and clean the container when necessary so crumbs and stale pieces don’t build up at the bottom.
Glass Lid Stack

Glass containers with fitted lids are a useful choice for storing many cooked meals, chopped ingredients, and leftovers. I like being able to see the food through the sides, and glass generally resists staining and odor retention better than many plastics.
I choose a size that suits the amount of food rather than keeping every meal in a large dish. This helps me use refrigerator space efficiently and makes portioning easier.
I check the manufacturer’s instructions for the container and lid separately. A glass base may be oven-safe while a wooden or plastic lid is not, and not every glass container is designed for sudden temperature changes.
Pro Tip: I keep spare lids paired with their containers whenever possible. If a lid is warped, cracked, or no longer seals properly, I replace it rather than relying on an unreliable closure.
Tall Counter Canisters

Tall canisters on the counter can keep frequently used dry ingredients close at hand. I might use them for pasta, oats, flour, or other staples that I reach for often, provided the counter is cool and away from steam or splashes.
I avoid putting too many containers on the work surface. A small, carefully chosen group leaves room for food preparation and makes it easier to wipe the counter after cooking.
The lid needs to fit well, and the container should be easy to clean. If a particular ingredient is sensitive to light, heat, or humidity, I move it to a more suitable cabinet rather than keeping it out for decoration.
Pro Tip: I keep only everyday essentials on the counter. Less frequently used ingredients stay in the pantry, where they are protected from kitchen activity and are less likely to clutter my workspace.
Prepped Veg Stack

Prepping vegetables ahead of time can make cooking much quicker. I can wash and cut the vegetables I plan to use soon, then store them in clean containers so they are ready for salads, stir-fries, or side dishes.
I don’t prepare every vegetable in advance without considering how it stores. Cut produce can dry out or deteriorate, and different vegetables have different storage needs. I follow appropriate refrigeration guidance and keep prepared produce covered.
I also make sure the containers are fully clean before filling them. A stackable shape helps keep the refrigerator orderly, but I leave room for cold air to circulate around the food.
Pro Tip: I prep ingredients based on the meals I plan to cook over the next few days. That keeps the amount manageable and reduces the chance that chopped vegetables will sit unused.
Cabinet Pantry Reset

When a pantry cabinet becomes crowded, I find it helpful to remove everything and group similar foods before putting items back. This gives me a chance to check dates, spot duplicate purchases, and identify foods that need to be used soon.
I keep everyday ingredients at a comfortable height and reserve higher shelves for lightweight items that I don’t need regularly. Heavier jars and bulk containers are safer on lower shelves where I can lift them without stretching.
Matching jars can make a cabinet look orderly, but I don’t replace original packaging unless doing so is useful. If I transfer food, I label it clearly and make sure the new container is suitable for the ingredient.
Pro Tip: I start with one cabinet rather than reorganizing the whole kitchen at once. Once the system works for my daily routine, I can apply the same approach to the rest of the pantry.
Dried Food Library

A dedicated area for dried foods helps me keep ingredients such as herbs, spices, dried fruit, beans, and dehydrated vegetables easy to identify. I arrange them by type so I can find the right ingredient without opening several containers.
For good quality, I keep dry foods in tightly closed containers in a cool, dry location away from direct sunlight. I also pay attention to package instructions because different dried products can have different storage requirements.
I label containers with the name and, when useful, the date I opened or transferred the food. Dried foods may last longer than fresh produce, but they don’t all have the same shelf life, and moisture can still cause quality problems.
Pro Tip: I store the ingredients I use most often toward the front and check older jars before buying replacements. If I notice dampness, mold, insects, or other signs of contamination, I discard the affected food and clean the container and shelf.
Wall Cabinet Bins

Wall cabinet bins help me organize small packets and ingredients that otherwise get lost at the back of a shelf. I can group baking supplies, snack packets, spice refills, or sealed pantry staples in separate bins and pull out the whole group when needed.
I measure the cabinet before choosing bins, paying attention to shelf depth, door clearance, and the weight the shelf can safely support. Rectangular bins tend to use space efficiently, but I avoid overfilling them because that makes them harder to pull out.
I label the front of each bin so I can identify the contents without removing everything. I also keep food separate from cleaning products and household chemicals.
Pro Tip: I use one small bin for packets that have already been opened, as long as their packaging can be closed securely. That way, opened items don’t get scattered among unopened supplies.
FAQs
How long does food actually stay fresh when stored properly?
I don’t use one storage timeline for every food because shelf life depends on the ingredient, how it was handled, its packaging, and the temperature at which it is kept.
For cooked leftovers, the USDA recommends refrigeration for three to four days at 40°F (4°C) or below. If I won’t eat a portion within that period, I freeze it promptly in suitable packaging. At 0°F (-18°C), food remains safe while continuously frozen, although its taste and texture can decline over time.
Dry staples such as rice, pasta, and dried beans can last much longer when kept dry and protected from pests. However, their storage life varies, so I follow package instructions and check for moisture, insects, damaged packaging, or other signs of deterioration.
I also remember that harmful bacteria don’t always change the smell, appearance, or taste of food. I never taste something to check whether it is safe, and I discard food that has been stored under unsafe conditions.
It’s better to store food in glass or plastic containers?
I choose between glass and plastic based on how I plan to use the container. Both can be suitable for food storage when they are designed for that purpose, clean, and in good condition.
Glass is useful for leftovers, prepared meals, and foods that may stain or leave odors in other materials. It is often easy to clean, and some glass containers are safe for oven use, but I always check the manufacturer’s instructions.
Plastic containers are lighter and convenient for packed lunches, snacks, and everyday refrigerator storage. I use food-safe containers and check whether they are suitable for the microwave, freezer, or dishwasher before using them in those conditions.
Neither material automatically keeps food safe for longer. Temperature, proper handling, a suitable seal, and the type of food matter more than whether the container is glass or plastic.
Pro Tip: I don’t buy a complete new set just to make my shelves match. I start with a few useful sizes, keep lids paired with their bases, and replace containers that are cracked, damaged, or no longer seal properly.
Read this next: 26 Narrow Storage Ideas for 2026
Conclusion
I’ve found that a useful food storage system doesn’t have to be expensive or complicated. A few well-chosen containers, labeled pantry jars, organized refrigerator bins, and a simple routine for checking older food can make everyday cooking easier.
I start by looking at what I already own, which ingredients I use most often, and where food tends to get forgotten. Then I organize one shelf or drawer at a time, keeping frequently used items accessible and less-used ingredients in suitable storage areas.
Most importantly, I treat food safety as part of organization. I keep the refrigerator cold enough, separate raw foods from ready-to-eat ingredients, refrigerate leftovers promptly, and use or freeze them within recommended time limits.
With these food storage ideas, I can make better use of my kitchen space, keep track of groceries, and reduce avoidable waste without buying unnecessary organizers.


2 Comments