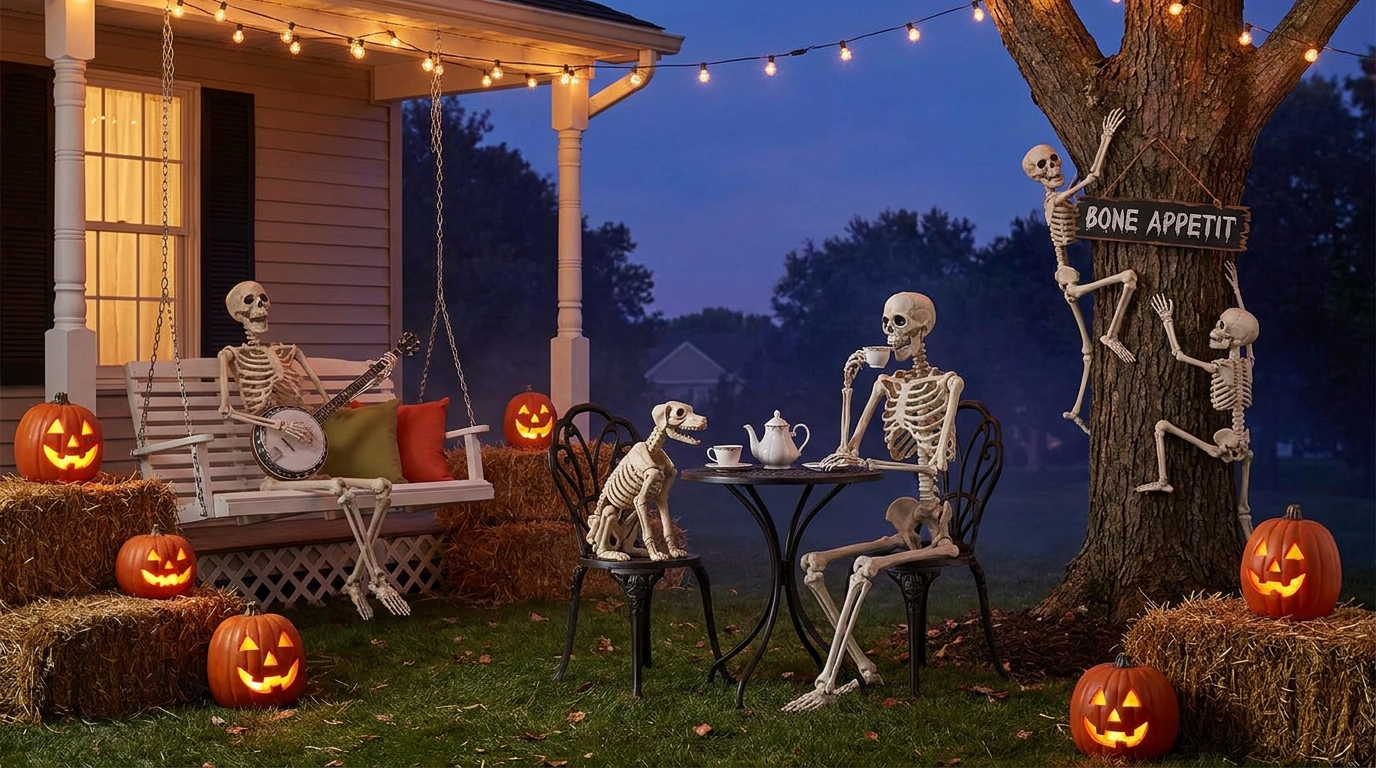
33+ Scary Skeleton Ideas For Yard To Recreate!
I love how outdoor skeleton decorations can turn an ordinary yard into a Halloween display that makes people stop, smile, or take a second look. I can use a few poseable skeletons, everyday garden items, and simple props to create anything from a funny outdoor scene to a creepy setup near the front entrance.
In this guide, I’m sharing 33 Halloween skeleton yard ideas that cover playful scenes, seasonal displays, climbing figures, and spooky arrangements. I would choose a design based on my available space, the weather, and how much time I want to spend setting everything up.
My favorite way to decorate a yard for Halloween is to give each skeleton a purpose rather than simply placing figures across the lawn. I can arrange them around a swing, set up a pretend poker game, create a skeleton wedding, or use trees and garden furniture to make the display more interesting.
Save this for later
Table of Contents
For a simpler approach, I can decorate a planter, wheelbarrow, or bench. With weather-resistant decorations, secure supports, and a little creativity, I can create an eye-catching Halloween display without making the project unnecessarily complicated.
Key Takeaways
- I can use poseable skeletons to create funny, spooky, or seasonal outdoor scenes.
- Everyday items such as benches, wheelbarrows, planters, and lawn furniture can become Halloween props.
- I can make a small yard look interesting by varying skeleton poses and arranging decorations at different heights.
- Outdoor skeletons need secure supports and weather-resistant materials to withstand wind and rain.
- I can save money by reusing decorations and making simple props from items I already own.
Related article: 13 Creative Halloween Cubicle Decor Ideas For You
Skeleton Swing

I would start with a skeleton sitting on a garden swing for a display that feels playful rather than frightening. The relaxed pose creates a little story, making it look as though the skeleton has decided to spend Halloween enjoying the evening outdoors.
I can use an existing porch swing or garden seat if it is sturdy enough for the decoration. For a freestanding swing, I would attach the skeleton securely so it does not slide off or swing into nearby objects when the wind picks up.
Pro Tip: I would position the swing where visitors can see it from the sidewalk, while keeping walkways clear for guests and trick-or-treaters.
Fire Pit Skeletons

I like the idea of arranging skeletons around an outdoor fire pit as though they have gathered for a late-night get-together. A few chairs, a small table, and different sitting poses can make the scene look lively without requiring many extra decorations.
I would keep the skeletons around an unlit fire pit or use a decorative prop instead of placing plastic figures near an active flame. This gives me the look of a campfire gathering without exposing the decorations to unnecessary heat.
Pro Tip: I can add a few artificial logs and warm-colored battery-operated lights to suggest a campfire while keeping the entire display suitable for outdoor use.
Poker Skeletons

A skeleton poker game is a fun option when I want my Halloween yard to have a humorous theme. I would seat several skeletons around a small table, add playing cards, and arrange their arms as though they are concentrating on a serious game.
The best part is that I can build this scene with inexpensive props. A folding table and weather-resistant chairs may be enough, especially if I already own a few skeleton decorations.
I would secure the cards and other lightweight accessories so they do not blow away. If the table is visible from the street, I would also angle the skeletons toward passing visitors to make the scene easier to notice.
Planter Skeleton

If I have a large planter near my front door or garden path, I can turn it into a simple Halloween decoration. I would position a skeleton so it appears to be sitting in, leaning over, or climbing out of the planter.
This idea works well when I want to decorate a small outdoor space without covering the lawn with multiple figures. I can use a planter filled with artificial autumn leaves, faux cobwebs, or seasonal branches to complete the look.
I would avoid putting a regular plastic skeleton directly into wet soil for long periods. Keeping the figure above the soil and protecting any metal fasteners from moisture can help the decoration last longer.
Creepy Skeleton

When I want a more frightening Halloween display, I would choose a skeleton with an unsettling pose and place it somewhere unexpected. A figure leaning around a tree, crouching beside a pathway, or appearing to emerge from a dark corner can create a spooky effect without requiring elaborate props.
I would use shadows and restrained lighting to make the scene more atmospheric. A battery-operated spotlight aimed from below can create dramatic shadows across the skeleton, particularly after sunset.
I would still keep the display away from steps, driveways, and narrow paths. A creepy decoration should surprise visitors visually without becoming a tripping hazard.
Relaxing Skeletons

For a lighter Halloween theme, I would arrange skeletons in comfortable poses as though they are enjoying a quiet afternoon outside. They could recline in garden chairs, stretch out on a bench, or sit together with a small table between them.
I like this idea because it does not depend on frightening props or complicated construction. A few chairs, sunglasses, and colorful cushions can make the figures look as though they are taking a break from the usual spooky activities.
I would choose outdoor-safe accessories and bring fabric items inside when rain is expected. This helps keep the display tidy and reduces the amount of cleaning I need to do later.
Harvest Skeleton

I can combine skeleton decorations with the colors and textures of the fall season to create a harvest-themed yard. Pumpkins, faux hay bales, autumn leaves, and corn-stalk decorations provide a warm seasonal background for the figures.
I would place one or two skeletons among the fall decorations, perhaps holding a small pumpkin or sitting beside a basket of artificial produce. The contrast between traditional autumn styling and Halloween skeletons makes the display feel festive without being overly frightening.
For a cohesive look, I would stick to a few main colors, such as orange, brown, cream, and black. Using the same colors across the pumpkins, signs, and other props helps the entire arrangement feel intentional.
Amazing Skeletons

Sometimes, I want a Halloween display that catches attention because of its size and arrangement rather than a specific joke or theme. For this approach, I would group several skeletons together in different poses and make the figures the main feature of the yard.
I could place one skeleton standing near the entrance, another sitting on a garden chair, and a third reaching toward a tree branch. This creates a more interesting scene than lining every figure up in the same position.
I would start with the decorations I already own and add props only where they improve the overall arrangement. A well-planned group of three skeletons can look more effective than a crowded display with too many competing elements.
Wheelbarrow Skeleton

An old wheelbarrow can become a useful base for a Halloween skeleton scene. I would arrange a skeleton inside it as though it is taking a ride, pushing it along, or trying to escape from a pile of autumn leaves.
This is a practical option because the wheelbarrow already provides a clear shape for the display. I can add pumpkins, artificial foliage, or a small Halloween sign to make the scene feel more complete.
If the wheelbarrow has a working wheel, I would chock it or secure the handles so it cannot roll away. I would also keep the skeleton firmly attached, especially if the display is placed on a sloped driveway or uneven lawn.
Skeleton With Spider

I would use an oversized decorative spider alongside a skeleton to create a scene that is both funny and slightly unsettling. The skeleton could appear to be walking the spider on a leash, trying to escape from it, or carefully approaching the creature.
This idea is especially useful when I want to combine two familiar Halloween decorations into one display. The spider adds a large visual feature, while the skeleton gives the scene a recognizable character.
I would secure the spider’s legs and the skeleton’s arms so that wind cannot pull the pieces apart. If I use artificial webbing, I would keep it away from trees and areas where birds or other wildlife might become entangled.
Tree Climbing

If I have a suitable tree in my yard, I can use its branches and trunk to make a skeleton look as though it is climbing upward. I would position the arms and legs at different points along the trunk to create the impression of movement.
This arrangement uses vertical space instead of spreading decorations across the grass. It can be especially useful in a narrow yard where there is limited room for larger scenes.
I would use lightweight skeletons and secure them with suitable outdoor ties that will not damage the tree’s bark. I would never climb onto unstable branches or attach heavy objects where they could fall onto visitors.
Pro Tip: I would test the arrangement from the sidewalk before finishing it. Moving one arm or leg slightly can make the climbing pose look much more natural.
Dog Skeleton

A decorative dog skeleton adds a different character to a traditional Halloween setup. I would position it beside a human skeleton, near a porch step, or next to a small pet bed to create a scene that looks playful and unexpected.
If I already have a dog-themed Halloween decoration, I can pair it with pumpkins or a seasonal sign to tie everything together. A standing dog pose works well beside a standing skeleton, while a sitting pose can fit neatly near a bench or doorway.
I would make sure the decoration does not block the entrance or startle real pets that use the yard. Keeping the display stable and away from a pet’s regular walking route can make it easier to manage.
Bonfire

A pretend bonfire scene gives me another way to create a nighttime Halloween display. I would arrange a few skeletons around artificial logs, using camping chairs or small stools to suggest that everyone has gathered for an evening outdoors.
I can make the scene look more convincing with orange and yellow LED lights placed among the logs. These provide a flickering effect without requiring an open flame near plastic decorations.
I would use a purpose-made outdoor light or a battery-operated product rated for the intended conditions. I would also avoid leaving loose electrical cables across the lawn where people could trip over them.
Caution Skeletons

For a more dramatic display, I would arrange skeletons behind bright caution-style tape or place them around a pretend restricted area. The setup could suggest a mysterious Halloween scene without needing complicated props.
I would use decorative warning signs and clearly visible tape to frame the figures. The idea is to create a themed display, not to make visitors believe there is a real emergency or an actual hazard in the yard.
I would avoid blocking sidewalks, public paths, or the entrance to my home. Keeping the tape within the boundaries of the display makes the scene easier to understand and safer for people passing by.
Hilarious Skeletons

When I prefer comedy over horror, I would give my skeletons poses that suggest everyday mishaps. One could appear to have fallen out of a chair, another could be reaching for a pumpkin, and a third could sit nearby as though watching the whole situation unfold.
I would focus on the body language rather than buying lots of accessories. A tilted head, an outstretched arm, or an awkward sitting position can communicate a joke without requiring a large sign.
I could also add a short, original caption to help visitors understand the scene. I would keep the wording brief so the display remains easy to read from a distance.
Baseball Fan Skeletons

For a baseball-themed Halloween yard, I would dress my skeletons as enthusiastic fans watching an imaginary game. Baseball caps, miniature bats, a glove, and a few decorative balls can help establish the theme.
I could arrange one skeleton in a chair as though watching the game while another stands nearby holding a bat. If I have room, I might add a small sign or a simple home-plate prop to complete the scene.
I would secure lightweight hats and other accessories so they do not blow away. If I use a real bat, I would position it carefully and make sure it cannot fall into a walkway.
Skeleton Wedding

A skeleton wedding can become the main attraction in a larger Halloween yard display. I would arrange two skeletons as the couple, then use a few additional figures as guests to create the look of an outdoor ceremony.
A simple arch, artificial flowers, a small aisle, and a few chairs can help establish the setting. I could dress the figures with a veil, bow tie, or other lightweight accessories to make the couple stand out.
This idea takes more planning than a single-skeleton display, so I would sketch the layout before setting everything up. I would also use weather-resistant decorations and secure the arch firmly, especially if it has a wide surface that can catch the wind.
Pro Tip: I would make the couple the focal point and keep the surrounding decorations simple. This helps the wedding scene look organized rather than crowded.
Also read: 13 Creative Halloween Door Decor Ideas For You To Recreate
Drunk Skeletons

For an adult-oriented Halloween display, I could arrange skeletons as though they have had a chaotic night out. One might be slumped in a garden chair while another appears to be leaning against a table.
I would use harmless props, such as empty decorative cups, a crooked party hat, or a small sign, to communicate the joke. This keeps the setup easy to assemble without needing expensive accessories.
If children will be visiting the yard, I would consider whether this theme fits the atmosphere I want to create. I can also make the scene more family-friendly by turning it into a sleepy skeleton party instead.
Picnic With Skeletons

I like the idea of setting up a skeleton picnic because it combines familiar outdoor items with Halloween humor. I would spread a picnic blanket on a flat area of the lawn and arrange two or three skeletons around a basket or small table.
A few artificial food props, plates, and cups can make the scene look as though the skeletons have stopped for lunch. I could also place a pumpkin beside the blanket to connect the picnic with the fall season.
I would use plastic or other weather-resistant accessories rather than leaving paper plates and fabric decorations outside in damp weather. If the ground is uneven, I would position the figures on a stable surface so they stay upright.
Skeleton Band

If I have a few toy instruments or spare musical props, I can create a skeleton band in my yard. I would give each figure a different role, such as a guitarist, drummer, or singer, to make the arrangement feel like a performance.
The instruments do not need to be functional. Lightweight props or homemade cardboard instruments can provide the same visual effect while keeping the setup affordable.
I would arrange the band on a small outdoor platform or along the porch, making sure each figure is visible from the front. Varying their heights and poses can make the group look more lively than placing every skeleton at the same level.
BBQ Skeleton

A barbecue-themed skeleton scene is a fun option if I want to decorate around a patio or outdoor dining area. I would position a skeleton beside a cold, unused barbecue grill and arrange a few chairs or serving props around it.
A second skeleton could sit at the table as though waiting for food. I could add a decorative apron, barbecue mitt, or a sign to make the theme easy to recognize.
I would never position plastic skeletons, artificial clothing, or other combustible decorations near an operating grill. For this display, I would keep the grill completely cold and use decorative food props to create the scene.
Fun Skeleton

Sometimes, a simple arrangement is enough to make a Halloween yard feel cheerful. I would choose a few skeletons and give each one a playful pose, such as waving at visitors, dancing beside a pumpkin, or leaning around a porch post.
This approach works well if I do not want to follow a detailed theme. I can mix decorations I already own and use a few small props to connect the figures visually.
I would leave enough space between each skeleton so that the individual poses remain easy to see. A little open space can make a display feel more deliberate and less cluttered.
Lawn Mower

A skeleton positioned beside or beneath a lawn mower can create a funny Halloween scene that people notice immediately. I would arrange the figure to suggest a gardening mishap without making the display look like a real accident.
For safety, I would use a stationary, switched-off mower or a lightweight decorative prop. I would never place a skeleton beneath machinery that could start unexpectedly, and I would remove the ignition key from a real mower used as a display prop.
I would keep the figure and mower away from the main walkway. A small patch of artificial grass or a few faux leaves can help make the scene feel connected to the garden.
Too Soon Skeleton

I would use a short, humorous sign to create a Halloween display built around the idea of a joke that arrives a little too early. The skeleton could stand beside the sign, sit on a bench, or lean against a porch post.
This idea is easy to adapt because the sign does much of the storytelling. I can choose a lighthearted phrase that suits my household and pair it with a simple skeleton pose.
I would use weatherproof lettering or protect a homemade sign with a suitable outdoor coating. Large, clear text is easier to read from the street than small lettering packed into several lines.
Hot Ghoul Summer

For a playful seasonal twist, I would style a skeleton as though it is enjoying a summer vacation even though Halloween is approaching. Sunglasses, a sun hat, a beach towel, or a colorful inflatable accessory can create the look.
I could place the figure in a lounge chair or beside a small beach-themed setup. This gives the yard a brighter, more humorous appearance than a traditional collection of dark Halloween props.
I would choose accessories that can withstand outdoor conditions and avoid using lightweight inflatables without proper anchoring. If the weather turns windy, I would bring loose items inside to keep the display intact.
Funny Skeletons

I can create a humorous Halloween yard by giving each skeleton a different everyday activity. One might be watering a plant, another could be reading a book, and a third might look as though it is struggling to carry a pumpkin.
I like this approach because I can build it gradually instead of completing the entire display in one afternoon. I can start with one figure and add another whenever I find a suitable prop or pose.
To keep the scene visually consistent, I would use a similar style of skeleton and repeat a few colors across the accessories. This gives the display a connected look even when the figures are doing different things.
Pool Skeletons

If I have a swimming pool, I can use it as the setting for a skeleton scene. I would place a skeleton in a lounge chair, beside a poolside table, or near a decorative pool float to create the impression of a Halloween vacation.
I would keep the figure on the deck or another stable surface rather than leaving it floating unattended in the water. Some skeletons may not be designed for prolonged water exposure, and their joints or fasteners can deteriorate if they get wet repeatedly.
I would also keep decorations away from pool ladders, gates, drains, and other areas that need to remain accessible. Safety should come before the appearance of the display.
Spooky Skeletons

When I want a more traditional Halloween atmosphere, I would use skeletons with dramatic poses, dark accessories, and carefully placed lighting. A figure standing beside a tree or emerging from behind a garden feature can create a spooky effect without filling the yard with decorations.
I would combine the skeletons with a few pumpkins, artificial cobwebs, or dark fabric accents. Rather than using every prop at once, I would choose a small group of decorations that work together.
I would test the display after dark to see how the lighting changes the appearance. A soft light aimed at the skeleton from below can create stronger shadows, while a path light helps visitors move safely around the yard.
Climbing Skeletons

For a display with a sense of movement, I would arrange several skeletons as though they are climbing a wall, fence, or porch support. One figure could reach toward the top while another appears to be following behind.
I would use lightweight figures and secure each one individually rather than relying on a single attachment point. Outdoor-rated ties or suitable removable fasteners can help keep the decorations in place without causing unnecessary damage to the surface.
I would avoid placing skeletons where they could fall onto people, vehicles, or fragile garden features. If I am decorating a fence, I would check that the structure is stable before attaching anything to it.
Falling Skeleton

A falling skeleton can add a funny moment to a Halloween display. I would arrange the figure so it appears to be slipping from a chair, tumbling beside a garden wall, or losing its balance while reaching for a pumpkin.
The pose should be clear from the viewing angle. I would test the arrangement from the sidewalk and adjust the arms and legs until the figure looks as though it is actually moving.
I would support the skeleton with a hidden base, sturdy ties, or another suitable method. The goal is to create the appearance of a fall without allowing the decoration to tumble into a path or driveway.
Skeletons on a Bench

If I already have a garden bench, I can turn it into a ready-made setting for Halloween skeletons. I would seat two figures side by side or place one at each end to make it look as though they are having a conversation.
A small pumpkin, decorative book, or seasonal sign can help give the scene a little personality. I could also add a scarf or hat to one figure to make the pair look different from each other.
I would make sure the skeletons are firmly attached to the bench, particularly if it is exposed to wind. If the bench is used by family members or guests, I would keep the decorations easy to remove so the seat remains practical.
Flying Skeletons

To make a Halloween yard more dramatic, I would use lightweight skeletons that appear to be flying above the ground. Placing them at different heights can create the impression that the figures are floating through the yard rather than standing in one spot.
I would use secure outdoor supports designed for the intended weight and conditions. Fishing line may be useful for a visual effect in some settings, but I would not rely on thin line alone to support a decoration where it could fall onto people.
I would also avoid stretching lines across walkways or at face height. The supports should be positioned so visitors can move around the yard without running into them.
Skeleton Apples

For a seasonal display with a playful twist, I would combine skeletons with artificial apples and other harvest decorations. I could place a skeleton beside a basket of faux apples, arrange one as though it is reaching for fruit, or create a small scene with a tree and autumn leaves.
This idea connects Halloween decorations with the wider fall season, making it suitable for a porch, garden bed, or front-yard display. I would use artificial fruit outdoors because it can be reused and will not attract insects or wildlife in the same way as real food.
I would choose a few colors that complement the rest of my decorations, such as red, green, orange, and black. Keeping the palette simple helps the apples stand out without making the arrangement look too busy.
Frequently Asked Questions
1. How do I decorate my yard with skeletons for Halloween?
I would start by choosing a theme, such as a spooky graveyard, a funny skeleton gathering, or a skeleton wedding. Then I would arrange the figures around existing yard features, including trees, benches, planters, and garden furniture. A few pumpkins and outdoor lights can help complete the display without making it look overcrowded.
2. How can I keep outdoor skeleton decorations from falling over?
I would secure each skeleton with sturdy outdoor ties, ground stakes, or a stable base suited to its size and location. For decorations placed on benches or tables, I would use suitable fasteners to prevent them from shifting in the wind. I would also check the setup after strong winds or heavy rain.
3. What can I use to make Halloween skeleton yard decorations on a budget?
I can reuse items I already have, such as old chairs, wheelbarrows, planters, baskets, and garden benches. Simple props like artificial pumpkins, cardboard signs, spare hats, and battery-operated lights can help create a complete scene without buying many new decorations.
4. How do I make my skeleton yard decorations look spooky at night?
I would use outdoor-rated lights to highlight the skeletons and create dramatic shadows. Placing a light below or beside a figure can make its shape stand out after dark. I would also combine a few dark props, artificial cobwebs, or pumpkins while keeping walkways clearly visible for visitors.
5. How can I protect Halloween skeleton decorations from bad weather?
I would check whether the skeletons and their accessories are suitable for outdoor use before setting them up. I would secure lightweight figures, protect any exposed fasteners from moisture, and bring fabric accessories and battery-powered items indoors when necessary. During severe weather, I would take down decorations that could blow away or become hazardous.
Read this next: 23 Halloween Party Ideas for Kids at Home (Ages 4–12, Full Party Plan)
Conclusion
I find that the most interesting Halloween skeleton yard displays are the ones that tell a little story. A skeleton relaxing on a swing, a group gathered around a pretend fire pit, or a pair sitting together on a bench can make an ordinary outdoor space feel much more festive.
I would start by choosing one theme that suits my yard, then build the display with decorations and household items I already have. I would also secure every figure, choose props suitable for outdoor use, and keep paths and entrances clear.
Whether I prefer funny skeletons, traditional spooky scenes, or an elaborate outdoor setup, I can create a memorable Halloween yard without buying a completely new collection of decorations every year.


One Comment