21 Winter Paper Crafts for Kids
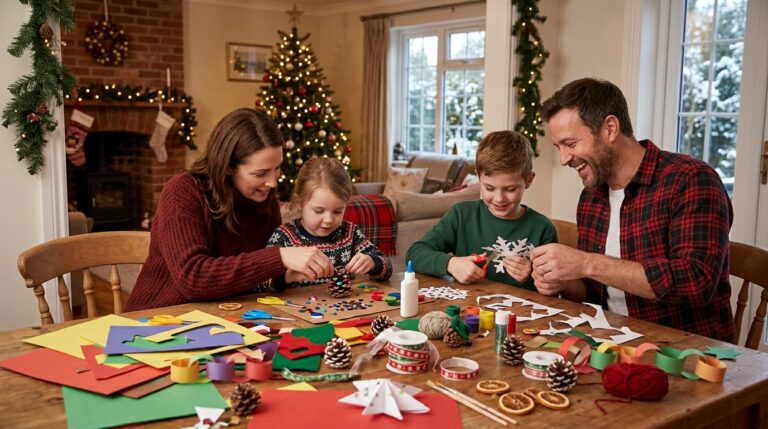
When the weather turns cold and the afternoons get dark early, my kitchen table becomes a paper-craft station, and these winter paper crafts for kids are the projects I reach for again and again.
I picked these 21 ideas the way I pick everything for my own children: I tested each one at home first, kept only the crafts that survived real children, real scissors, and a real mess, and dropped anything that looked cute online but fell apart in ten minutes.
Every project below uses cheap paper and tools you probably already own, and each one tells you honestly what worked, what went wrong in my house, and what to watch out for. If you want a simpler starting point, this Related article is a good warm-up.
Key Takeaways
- Start with snowflakes and stars: they are cheap, quick, and build scissor confidence fast.
- Keep a scrap box: most winter paper crafts for kids work beautifully with offcuts.
- Use battery lights only in paper lanterns, and always supervise cutting with younger children.
- Make in batches: cards, garlands, and stars are far easier to finish as a set.
21 Winter Paper Crafts for Kids to Try
1. Classic Fold-and-Cut Snowflakes

You need white copy paper, child-safe scissors, and a flat table covered with newspaper. I fold an A4 sheet into quarters, then into a triangle, and I cut small triangles and diamonds along the folded edges. I unfold it slowly, press it flat under a heavy book for ten minutes, and hang it with a loop of thread. I lay out every cut piece before gluing anything, so nothing ends up upside down or in the wrong place.
My youngest gasped the first time a plain folded square opened into a lacy snowflake, and she immediately asked to make one for every window in our house.
The downside is real: thin paper tears easily, so younger children need thicker paper and very simple cuts at first.
Cost: $2 | Time: 20 minutes | Difficulty: Easy
2. Snowflake Window Stars

You need white and pale-blue paper, scissors, and clear tape or sticky dots. I cut six-pointed snowflakes in two sizes, layer a small one over a large one, and tape them to the window so daylight shines through the cut shapes. I space them a hand-width apart so the window still looks tidy. I keep a small spare pile of the same paper or felt beside me, because one miscut should never end a project.
I tried this on a grey January afternoon and the whole kitchen felt brighter, even though the sky outside stayed dull.
Tape can leave marks on cold glass, so I use removable sticky dots and peel them off slowly.
Cost: $3 | Time: 25 minutes | Difficulty: Easy
3. Paper Christmas Tree Forest

You need green card, scissors, glue, and small star stickers for the treetops. I cut three triangles in different sizes for each tree, glue them in a row onto a long strip of card, and add a brown trunk and a star. I stand the strip along the mantel so it looks like a little forest. I do the trickiest cut or stitch first while everyone is still fresh, and save the easy decorating for last.
My daughter arranged and rearranged her forest for half an hour, which told me the play value lasts longer than the making time.
Card trees fall over easily, so I fold a small base flap at the bottom of each trunk.
Cost: $4 | Time: 30 minutes | Difficulty: Easy
4. Layered Paper Tree Cutouts

You need two shades of green paper, scissors, and a glue stick. I cut a large tree shape and a slightly smaller one, glue the smaller tree on top for depth, and add tiny paper dots as ornaments. I mount each tree on white card so the green really pops. I photograph the finished piece before it gets played with, because the best ones rarely survive the week intact.
I made a row of these for our hallway and visitors kept asking whether they were shop-bought, which made my daughter beam.
Glue sticks dry fast, so children need to press pieces down quickly or the layers curl at the edges.
Cost: $3 | Time: 25 minutes | Difficulty: Easy
5. Paper Tree Greeting Cards

You need yellow or white card blanks, green paper, scissors, and a pen for the message. I cut a simple tree shape, glue it to the front of a folded card, and write a short winter message inside in large letters. I keep the design to one tree so the card looks clean rather than crowded. I lay out every cut piece before gluing anything, so nothing ends up upside down or in the wrong place.
I still have the first card my son made me, with a wobbly tree and a very proud signature, tucked into a drawer.
Wet glue can buckle thin card, so I use a glue stick and let each card dry flat overnight.
Cost: $4 | Time: 30 minutes | Difficulty: Easy
6. Star and Moon Paper Lanterns

You need coloured paper, scissors, a glue stick, and a battery tea light, never a real flame. I cut star and moon shapes out of one side of a folded paper tube, glue the tube into a lantern shape, and place a battery light inside. The cut shapes glow softly in a dark room. I keep a small spare pile of the same paper or felt beside me, because one miscut should never end a project.
We switched the lights off one evening and my children sat quietly watching the stars glow, which almost never happens in our house.
The paper scorches if anyone uses a real candle, so battery lights are a strict rule here, not a suggestion.
Cost: $5 | Time: 35 minutes | Difficulty: Easy
7. Homemade Paper Lanterns

You need orange and yellow paper, scissors, tape, and battery tea lights. I fold a sheet in half, cut slits from the fold toward the edge, open it into a tube, and tape the ends together. I add a paper handle so the lantern can hang from a hook. I do the trickiest cut or stitch first while everyone is still fresh, and save the easy decorating for last.
My son carried his lantern around the house like a trophy for a full evening, and it survived surprisingly well.
Paper lanterns crush easily, so I store them standing upright in a box rather than stacked flat.
Cost: $4 | Time: 25 minutes | Difficulty: Easy
8. Origami Cranes

You need square origami paper, a flat table, and patience for crisp folds. I fold the square in half diagonally, fold the corners to the centre, and follow the classic crane steps slowly, creasing each fold with a fingernail. I hang finished cranes from thread near a window. I photograph the finished piece before it gets played with, because the best ones rarely survive the week intact.
My first crane looked more like a crumpled duck, but my daughter loved it anyway and named it Captain Flappy.
Origami frustrates younger children fast, so I only teach one new fold at a time and stop before tears start.
Cost: $3 | Time: 40 minutes | Difficulty: Medium
9. Origami Rabbits for a Winter Woodland

You need white and grey square paper and a black pen for eyes. I fold a simple rabbit with long ears, draw two small eyes, and place it beside paper trees to build a winter woodland scene. I keep the folds chunky so small hands can follow them. I lay out every cut piece before gluing anything, so nothing ends up upside down or in the wrong place.
We built a whole woodland on the dining table and it stayed there for a week because nobody wanted to clear it away.
Thin origami paper tears at the ears, so I use slightly thicker square paper for children under seven.
Cost: $3 | Time: 35 minutes | Difficulty: Medium
10. Origami Paper Fans

You need bright paper, scissors, and a stapler or tape for the base. I fold a long strip of paper back and forth like an accordion, pinch the bottom, and fan the top open into a semicircle. I tape several fans together into a garland for a party wall. I keep a small spare pile of the same paper or felt beside me, because one miscut should never end a project.
I made these for a winter birthday and the wall looked festive in ten minutes, which felt like a small miracle.
Fans lose their shape if the folds are uneven, so I score the fold lines lightly with a ruler first.
Cost: $3 | Time: 20 minutes | Difficulty: Easy
11. Stars and Moon Cutouts

You need dark-blue paper, scissors, and a pencil to trace the shapes first. I draw stars and a crescent moon on the back of the paper, cut them out carefully, and stick them on a bedroom wall or window. I cut a mix of large and small stars for a natural sky look. I do the trickiest cut or stitch first while everyone is still fresh, and save the easy decorating for last.
My daughter cut her first star all by herself and ran to show everyone in the house, scissors still in hand and all.
Small star points tear off easily, so I draw chunky stars with wide points for younger cutters.
Cost: $2 | Time: 25 minutes | Difficulty: Easy
12. Paper Star Garland

You need coloured paper, string, scissors, and a hole punch or tape. I cut a dozen stars, punch a hole near one point of each, and thread them onto string with even gaps. I hang the garland across a doorway where it catches the light. I photograph the finished piece before it gets played with, because the best ones rarely survive the week intact.
We hung ours over the kitchen doorway and every person who walked through it smiled, which is a good return on twenty minutes.
Stars spin and tangle on thin string, so I use slightly thicker twine and space them well apart.
Cost: $3 | Time: 30 minutes | Difficulty: Easy
13. Snowflake Christmas Cards

You need card blanks, white paper, glitter glue, and envelopes. I glue a small paper snowflake to the front of each card, add a dot of glitter glue in the centre, and write the message inside. I make them in batches of six so we always have spares. I lay out every cut piece before gluing anything, so nothing ends up upside down or in the wrong place.
I sent one to my mother and she framed it, which is far more than I expected from a ten-minute card.
Glitter glue takes ages to dry, so I make the cards a day before we need to post them.
Cost: $5 | Time: 35 minutes | Difficulty: Easy
14. Red Snowflake Cards

You need red card, white paper, scissors, and a glue stick. I cut white snowflakes and glue one to each red card front, keeping the snowflake slightly off-centre for a modern look. I add a short handwritten message inside. I keep a small spare pile of the same paper or felt beside me, because one miscut should never end a project.
I made a set of these with my son last December and he insisted on signing every single one himself, very slowly.
Red card shows every glue fingerprint, so I teach children to glue the snowflake, not the card.
Cost: $4 | Time: 30 minutes | Difficulty: Easy
15. Circular Winter Wreath Decoration

You need white and green paper, a paper plate as a base, scissors, and glue. I cut the centre out of the plate, glue paper snowflakes and pine shapes around the ring, and add a ribbon loop for hanging. I keep the decoration light so it hangs straight. I do the trickiest cut or stitch first while everyone is still fresh, and save the easy decorating for last.
Ours hung on the front door all winter and survived wind, rain, and one very curious neighbour’s dog.
Paper wreaths wilt in rain, so I only hang this one under a porch or indoors.
Cost: $4 | Time: 35 minutes | Difficulty: Easy
16. Red Paper Cutout Garland

You need red and white paper, scissors, and string or ribbon. I cut stars, snowflakes, and circles, then tape them along a length of ribbon with small gaps between shapes. I hang it along a shelf or mantel for instant colour. I photograph the finished piece before it gets played with, because the best ones rarely survive the week intact.
I put this up when I had ten minutes before guests arrived, and it genuinely saved a bare-looking mantel.
Tape loses grip on dusty shelves, so I wipe the surface first and use two small pieces per shape.
Cost: $3 | Time: 25 minutes | Difficulty: Easy
17. Kids’ Paper Craft Afternoon

You need a mixed paper pack, child-safe scissors, glue sticks, and a wipe-clean tablecloth. I set out papers in piles by colour, give each child a tray, and let them cut freely for twenty minutes before suggesting a project. I keep a finished example nearby for inspiration, not copying. I lay out every cut piece before gluing anything, so nothing ends up upside down or in the wrong place.
The freest session we ever had produced the strangest creatures, and the children talked about them for days afterwards.
Free cutting creates a mountain of scraps, so I put a recycling box on the table before anyone starts.
Cost: $5 | Time: 45 minutes | Difficulty: Easy
18. Paper Sunshine for a Winter Window

You need yellow paper, scissors, and sticky dots for the window. I cut a large yellow circle and short triangle rays, glue them together, and stick the sun low on a window where winter light hits it. I add a smiling face for younger children. I keep a small spare pile of the same paper or felt beside me, because one miscut should never end a project.
My daughter insisted our window sun needed sunglasses, and honestly, she was not wrong in January glare.
Yellow paper fades in strong sunlight, so I replace the sun every few weeks through winter.
Cost: $2 | Time: 20 minutes | Difficulty: Easy
19. Classroom Winter Village

You need white, grey, and blue paper, scissors, glue, and a long sheet of backing paper. I cut simple house shapes with triangle roofs, glue them in a row, and add paper snow on the roofs and cotton-wool smoke from chimneys. I label each house with its maker’s name. I do the trickiest cut or stitch first while everyone is still fresh, and save the easy decorating for last.
We built a village at a school craft afternoon and the children kept adding houses until we ran out of wall space.
A village takes over a wall fast, so I agree the display size with the children before we start cutting.
Cost: $5 | Time: 50 minutes | Difficulty: Medium
20. Scissor-Skills Snow Practice

You need scrap paper, child-safe scissors, and a tray to catch the pieces. I draw straight lines, zigzags, and curves on scrap paper and let children cut along them, then turn the cut strips into pretend snow. I praise slow, careful cutting over speed every time. I photograph the finished piece before it gets played with, because the best ones rarely survive the week intact.
My youngest went from jagged tears to neat zigzags in one week of short practice sessions, and her confidence jumped with it.
Scissor practice bores older children quickly, so I turn it into a race against a timer only after the basics are safe.
Cost: $2 | Time: 20 minutes | Difficulty: Easy
21. Family Paper Craft Night

You need a big paper pack, scissors, glue, and snacks that do not leave sticky fingers. I clear the table, put on music, and let everyone choose their own winter project from a short list. I join in rather than supervising, which keeps the mood relaxed. I lay out every cut piece before gluing anything, so nothing ends up upside down or in the wrong place.
Our best craft night ended with paper everywhere and four very different snowmen, and nobody remembered the mess the next morning.
Family nights run long, so I set a finish time and a tidy-up song before we begin.
Cost: $6 | Time: 60 minutes | Difficulty: Easy
Before you pick a favourite, this Also read pairs well with a quiet afternoon craft session.
Comparison Table
| Craft | Best Age | Mess Level | Best For |
|---|---|---|---|
| Classic Snowflakes | 4+ | Low | First craft of winter |
| Paper Lanterns | 6+ | Medium | Evening display |
| Origami Cranes | 8+ | Low | Patient older kids |
| Paper Tree Cards | 5+ | Low | Gifts and post |
| Family Craft Night | All ages | High | Weekend together |
Mistakes I Made (So You Don’t Have To)
I once bought fancy patterned paper for a whole class of snowflakes and watched children refuse to cut it because it felt too precious. Now I buy plain white paper in bulk and save the fancy sheets for finished cards.
I learned the hard way that glitter glue and bedtime do not mix. I now finish any glitter project at least a day before it needs to be gifted, posted, or hung.
I used to hand children adult scissors because they were sharper, and I regretted it within minutes. Child-safe scissors are slower, but they keep craft time calm and tear-free.
I once skipped the tablecloth to save time and spent longer cleaning glue off the table than we spent crafting. The wipe-clean cloth goes down first now, every single time.
Frequently Asked Questions
What age are winter paper crafts for kids best for?
Most of these suit ages 4 and up with help, while origami and detailed cutting suit ages 7 and up. I always start younger children on snowflakes and stars, then move to lanterns and trees once their cutting is steadier.
What paper should I buy first?
Start with white copy paper, one pack of coloured card, and a pack of construction paper. That combination covers nearly every project here without a big spend.
How do I stop paper crafts falling apart?
Use a glue stick for flat projects and white craft glue for anything 3D, and let pieces dry flat. Pressing finished snowflakes under a book also keeps them from curling.
Are paper lanterns safe for children?
Yes, as long as you use battery tea lights only. Never put a real candle inside a paper lantern, and keep finished lanterns away from heaters and cookers.
Final Thoughts
If I had to pick just three to start this weekend, I would choose classic snowflakes, star and moon lanterns, and paper tree cards, because together they cover cutting, folding, and gifting in one happy afternoon. And when you are ready for another project, this Read this next is next on my list.
The best part of winter paper crafting is not a perfect snowflake, it is a table full of children who are proud of something they made with their own hands, and that is worth every scrap on the floor.