21 Awesome Science Art Projects for Kids
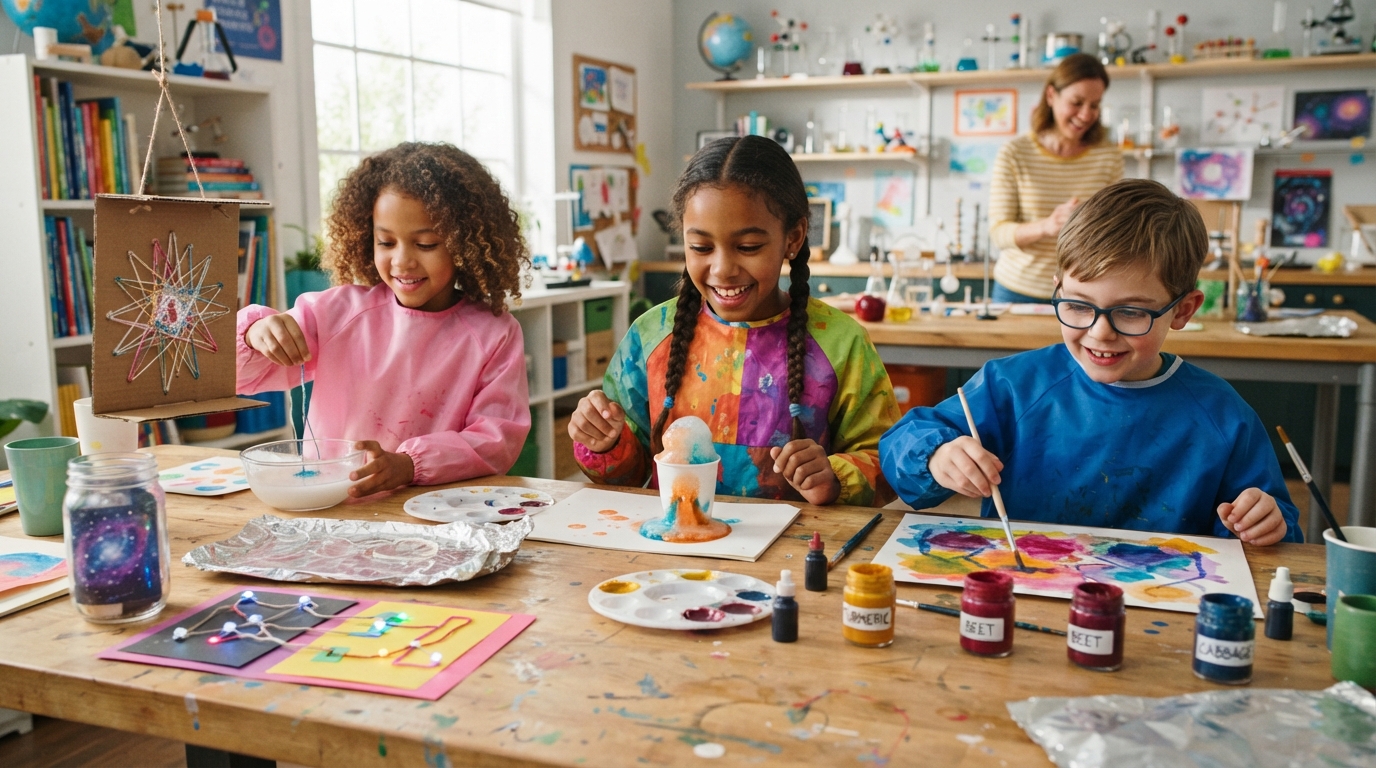
I’ve always found that kids stay interested longer when an activity gives them something to make and something to figure out. That is why science art projects work so well for afternoons when I want less screen time and more hands-on activity.
These projects combine painting, building, experimenting, and observing. Some focus on physical processes such as absorption, melting, motion, reflection, and static electricity, while others involve chemical reactions such as baking soda and vinegar.
Most of the supplies are inexpensive and familiar, including paper, watercolor, food coloring, baking soda, vinegar, leaves, straws, and ice. I still check the age suitability of each project because a few require adult preparation or materials that are not appropriate for toddlers.
For younger children, I focus on what they can see, touch, compare, and create. With elementary-age and older kids, I add predictions, measurements, and questions about why the results changed.
These 21 science art projects give kids a chance to create artwork while observing simple scientific processes. They can explore how salt affects wet watercolor, how air moves a straw rocket, how reflective surfaces create repeating images, and how water travels through paper towels.
There are also projects involving crystals, static electricity, shadows, sunlight, melting ice, absorption, and color mixing. A few activities use baking soda and vinegar to demonstrate a visible chemical reaction.
I’ve included indoor and outdoor choices, so there are options for rainy afternoons, summer days, science-themed activities, or a casual weekend craft session. Most setups use affordable household or craft supplies.
Save this for later
Table of Contents
Safety matters throughout these activities. Some projects involve hot water, Borax, rubbing alcohol, balloons, small pieces, pointed craft materials, or reactions that can spill. I recommend reading the individual safety notes before setting up an activity rather than assuming every project suits every age.
Key Takeaways
- These activities combine creative artwork with practical science observations.
- Kids can explore light, motion, absorption, reflection, static electricity, melting, capillary action, and chemical reactions.
- Many projects use inexpensive materials that are easy to find at home or in a basic craft supply collection.
- Preschoolers can focus on observing and creating, while older children can make predictions, compare results, and record observations.
- Adult preparation is important for projects involving heat, Borax, rubbing alcohol, balloons, pointed tools, or small materials.
- A simple question such as “What do you think will happen?” can turn a craft into a meaningful science activity.
Related article: 15 Easy But Fun Halloween Party Games For Little Kids
1. Watercolor and Salt
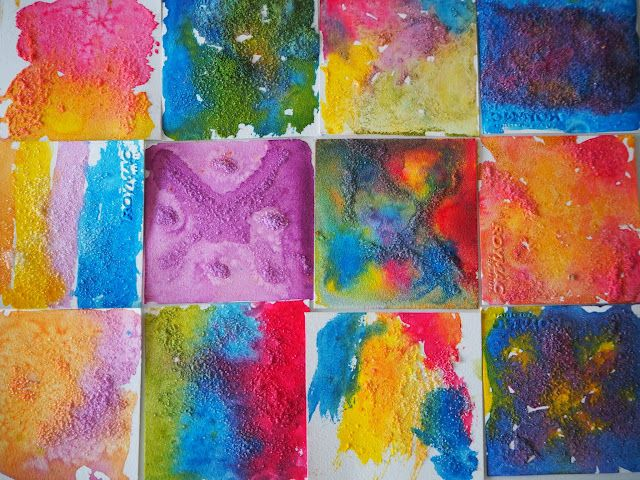
Watercolor and salt is a nice introduction to the way water and pigment behave on paper. I use wet watercolor rather than trying to make the salt itself do the painting.
After covering the paper with watercolor, children can sprinkle a small amount of salt over the wet areas. As the water moves and dries, the salt can affect the way the pigment is left behind, creating speckled or textured patterns.
The result varies with the amount of water, type of paper, amount of salt, and timing. That variation is actually useful because kids can compare two sections and see whether using more or less water changes the appearance.
For preschoolers, the main focus can be color and texture. Older children can test different amounts of salt and record which areas produced the most noticeable patterns.
Pro Tip: Watercolor paper handles wet paint much better than ordinary printer paper. I also place the artwork on a tray or protected surface because loose salt and wet pigment can make cleanup messy.
2. Straw Rocket
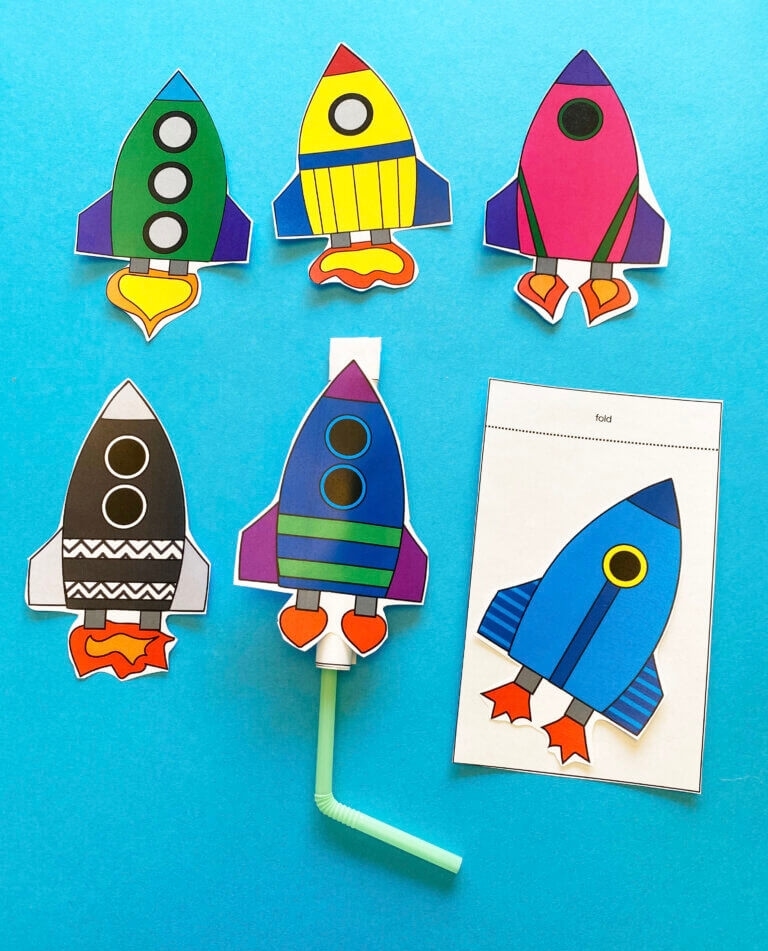
A straw rocket gives kids a visual way to explore air, force, and motion. The basic idea is straightforward: air pushed through the straw applies a force that sends the lightweight paper rocket moving.
I let children decorate their rockets before testing them. Once everyone has a design, they can launch the rockets from the same starting point and compare how far they travel.
The experiment becomes more interesting when only one feature is changed at a time. For example, kids can compare two rocket shapes or adjust the size of the paper and observe whether the movement changes.
This works well for preschoolers with close adult assistance and for elementary-age children who are ready to measure distances and make predictions.
Pro Tip: Keep the rockets lightweight and have children blow through the straw rather than suck on it. Use a clear launch area and avoid aiming rockets toward faces.
3. How to Make a Kaleidoscope
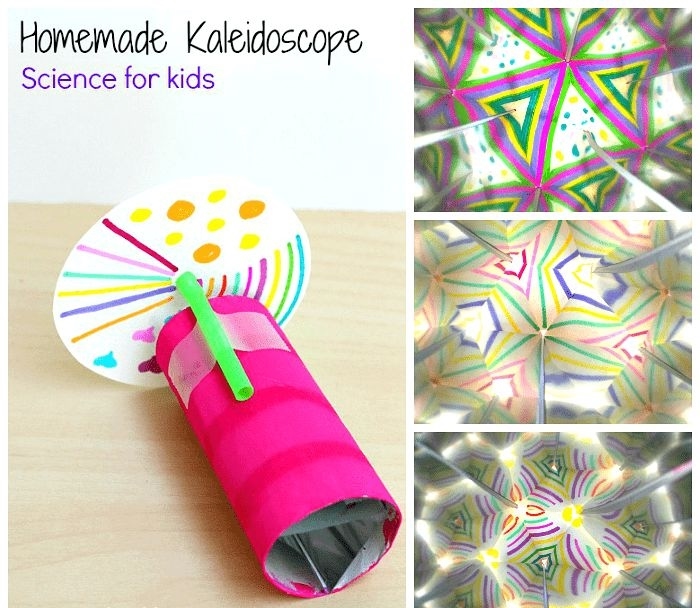
Making a kaleidoscope is a creative way to explore light, reflection, and symmetry. Reflective surfaces can bounce light and images back toward the viewer, producing repeated patterns inside the viewing tube.
I like giving children colorful, age-appropriate pieces to arrange inside. When they turn the kaleidoscope, the arrangement changes and the reflected pattern changes with it.
A useful question for older kids is, “What changes when you rotate the kaleidoscope?” They can also compare the pattern created by different shapes or colors.
This project is particularly suitable for elementary-age children because some construction steps may require more precise cutting and assembly. Younger children can enjoy using a finished kaleidoscope instead.
Pro Tip: Avoid loose tiny pieces for babies and toddlers. If the construction requires scissors or other tools, an adult can prepare the components before younger children begin decorating.
4. How to make Borax Crystals
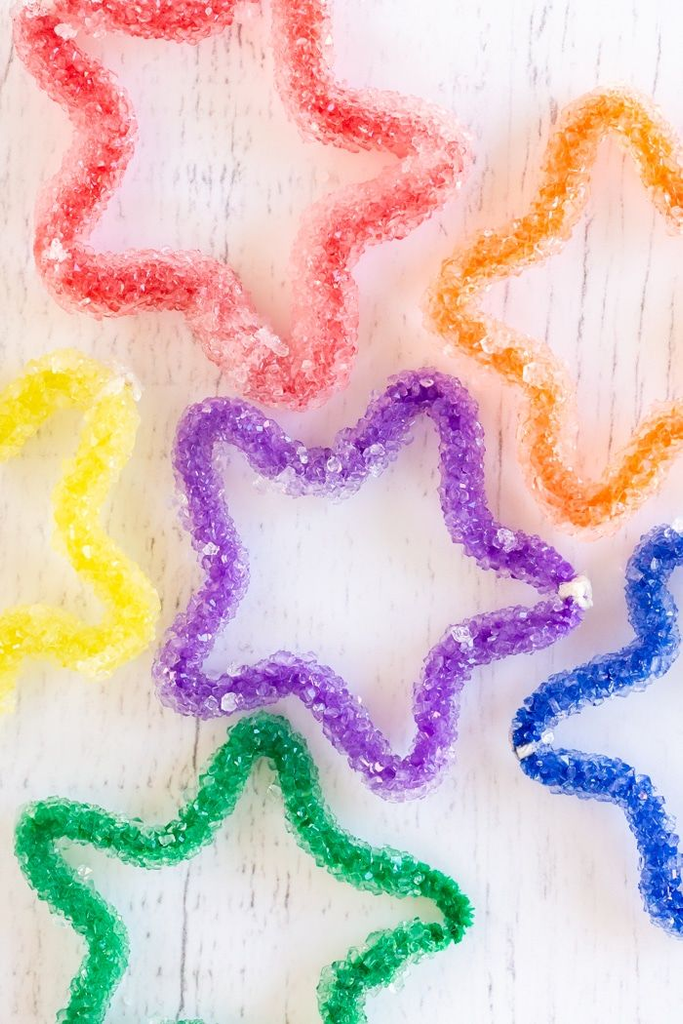
Crystal growing gives children a chance to observe how crystals can form from a solution. When Borax is dissolved in hot water and the prepared solution is allowed to cool under suitable conditions, crystals can form on a suspended pipe-cleaner shape.
I like using simple shapes such as stars or snowflakes because the crystals make the outline easy to see. Kids can check the project later and compare how the shape looks before and after crystal growth.
This is more suitable for older children because Borax and hot water require careful adult handling. Younger children should not be responsible for preparing the solution or touching the Borax.
Pro Tip: An adult should prepare and handle the Borax solution according to the product label. Keep Borax and the prepared solution away from young children and pets, avoid eye contact and unnecessary skin contact, and wash hands after the activity. Hot water can cause burns, so younger children should not handle it.
5. Fizzy Galaxy
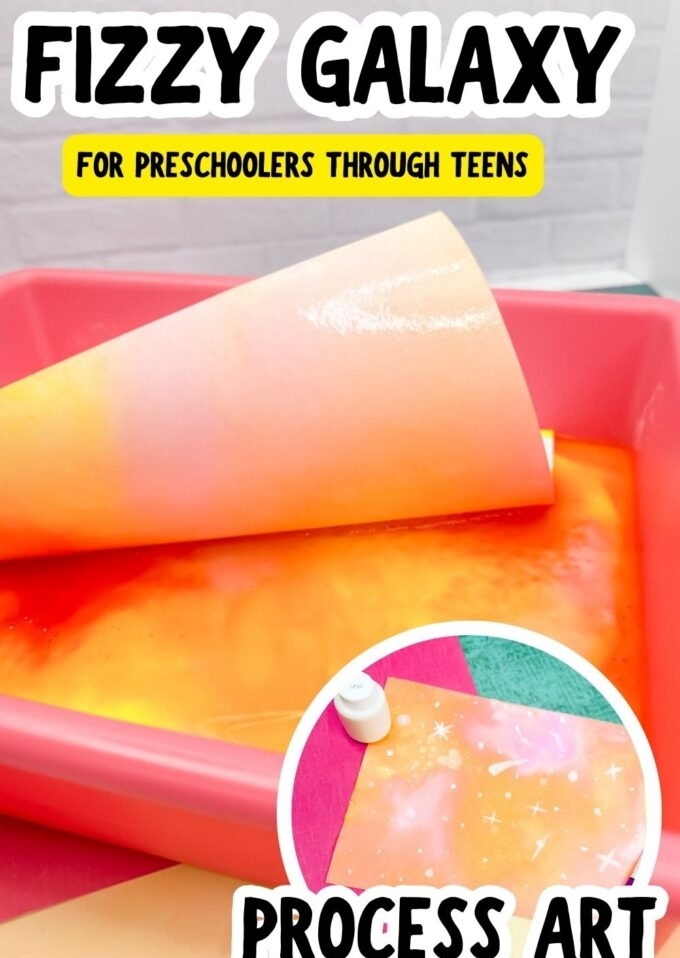
A fizzy galaxy combines painting with a visible acid-base reaction. Baking soda reacts with vinegar to produce carbon dioxide gas, which creates the bubbling and fizzing children can see.
I use small amounts of colored liquid so kids can create a scattered galaxy-like background. Once the reaction has finished and the artwork has dried, they can add stars, planets, moons, or other space details.
The colors can move into unexpected shapes, so I encourage children to observe rather than try to control every part of the result.
For younger children, an adult can manage the vinegar while the child chooses colors. Older kids can predict what will happen before the vinegar is added.
Pro Tip: Put the project on a tray or washable work surface. Food coloring can stain clothing and some surfaces, so old clothes and a protective covering are worth using.
6. How to Make Invisible Ink
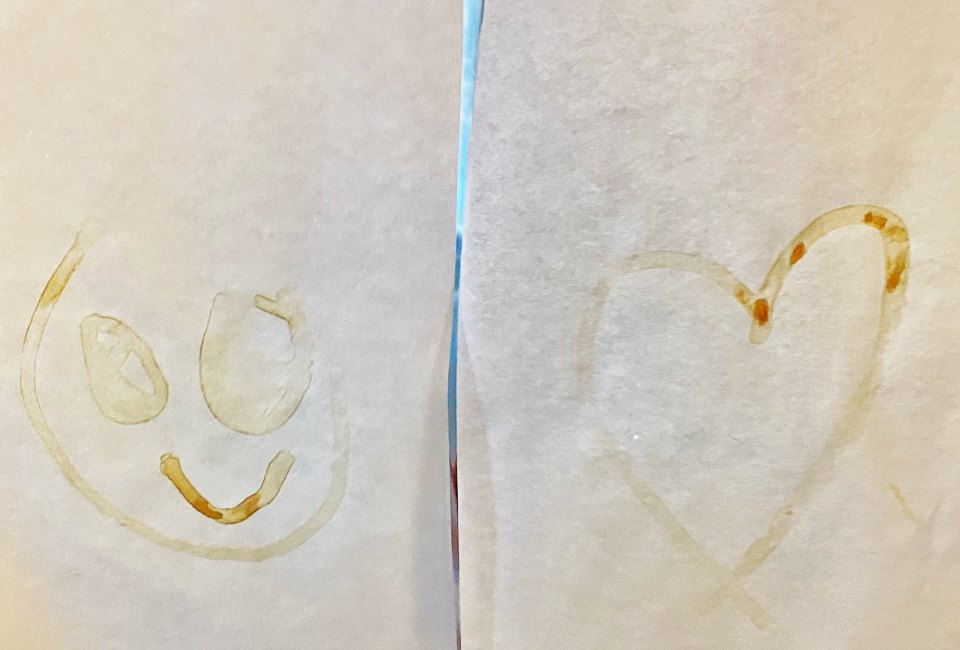
Invisible ink is a fun way to introduce children to chemical changes and observation, but the revealing method depends on the material used. Not every invisible-ink recipe is revealed with heat.
Some household liquids can leave writing that becomes more visible after drying or being exposed to an appropriate revealing method. If a recipe specifically calls for heat, I handle that step myself rather than having young children work with a flame, hot appliance, or heated paper.
For the creative part, kids can write short clues, names, or secret messages and then reveal them later.
This activity works best with elementary-age children and older kids who can follow instructions carefully.
Pro Tip: Follow the directions for the specific invisible-ink recipe you are using. Children should never hold paper over an open flame, and younger children should not handle hot appliances or heated materials.
7. Twirligig Paper Spinner Toy
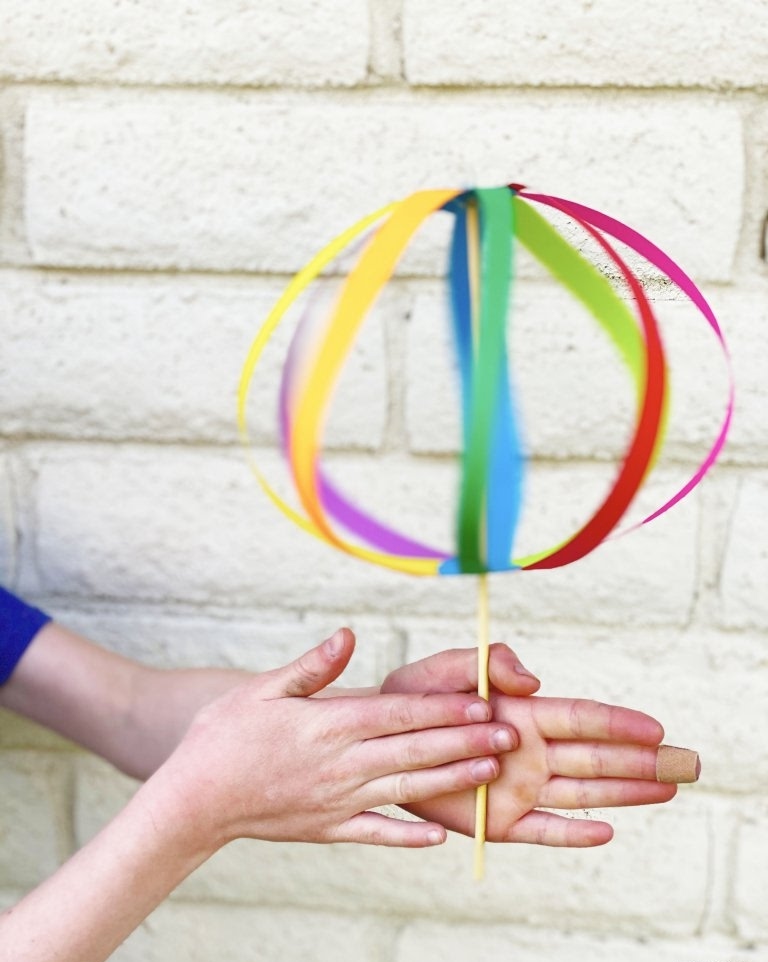
A paper spinner turns a basic craft into an observation about rotation and motion. Once the paper structure is assembled, moving or releasing it allows the shape to rotate and create changing visual patterns.
I encourage kids to notice what happens as the spinner turns rather than simply treating it as a finished toy. They can experiment with different paper lengths or shapes and compare the movement.
The activity can be kept very simple for younger children, while older kids can change one feature at a time and record what they notice.
Pro Tip: If the design uses a wooden skewer or another pointed support, an adult should handle that part for younger children. Keep pointed materials away from running children and use age-appropriate scissors.
8. Bubble Painting Hydrangea Flowers
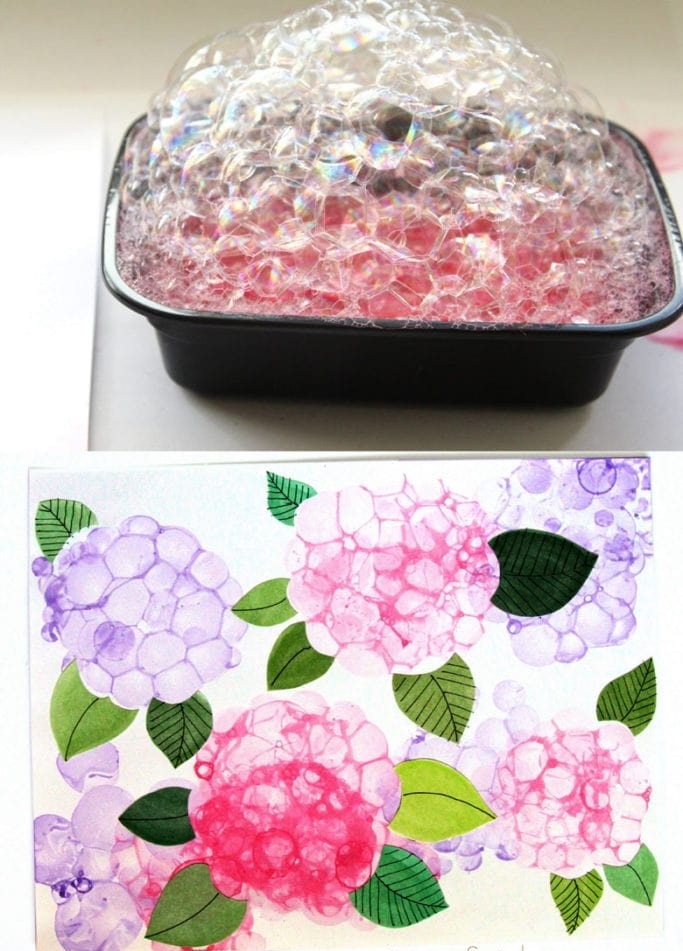
Bubble painting gives children a chance to see how bubbles can carry colored liquid and leave rounded patterns on paper.
I prepare a diluted paint-and-soap mixture and use a straw to create bubbles in the container. When the bubbles rise above the rim, they can gently touch paper and leave clusters of colored circles that work nicely as flower shapes.
Kids can build several clusters to resemble hydrangeas and then add stems and leaves with a brush.
Because the mixture contains soap and paint, children should never intentionally inhale it. Very young children who cannot reliably blow outward through a straw are better suited to an adult-prepared alternative method.
Pro Tip: I use individual containers when several children are participating and keep the mixture away from mouths and eyes. Children should blow through the straw, never suck the liquid upward, and hands should be washed after painting.
9. Magic Paper Towel
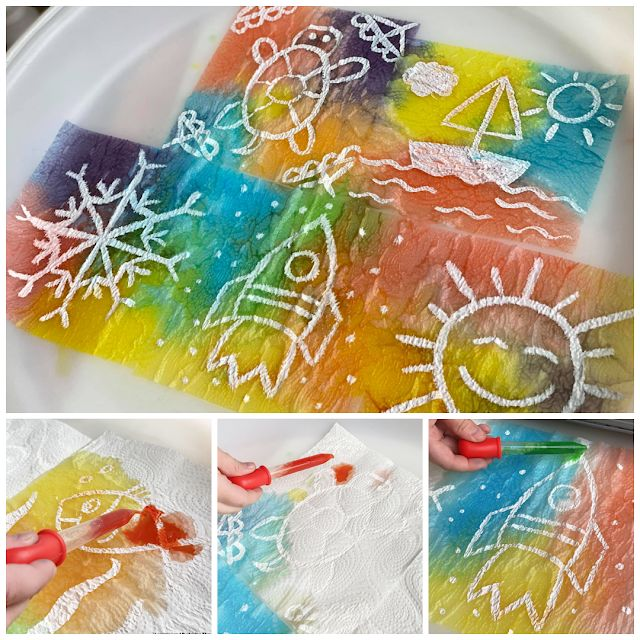
This project uses absorption to create a hidden-picture effect. Paper towel is porous, so liquid can move through its fibers and spread beyond the exact spot where it was applied.
I create a simple design with a suitable light-colored medium on the paper towel and allow it to dry. When colored water is added, the surrounding paper absorbs and carries the liquid while the prepared design remains easier to see.
The reveal is especially interesting for younger children because they can watch the picture appear without needing to understand the science terminology.
Older children can compare how quickly different types of paper towel absorb the same amount of liquid.
Pro Tip: Place the paper towel on a tray because water can travel through it quickly. A pipette or dropper also makes it easier to control the amount of liquid.
10. Fizzy Chalk Fireworks
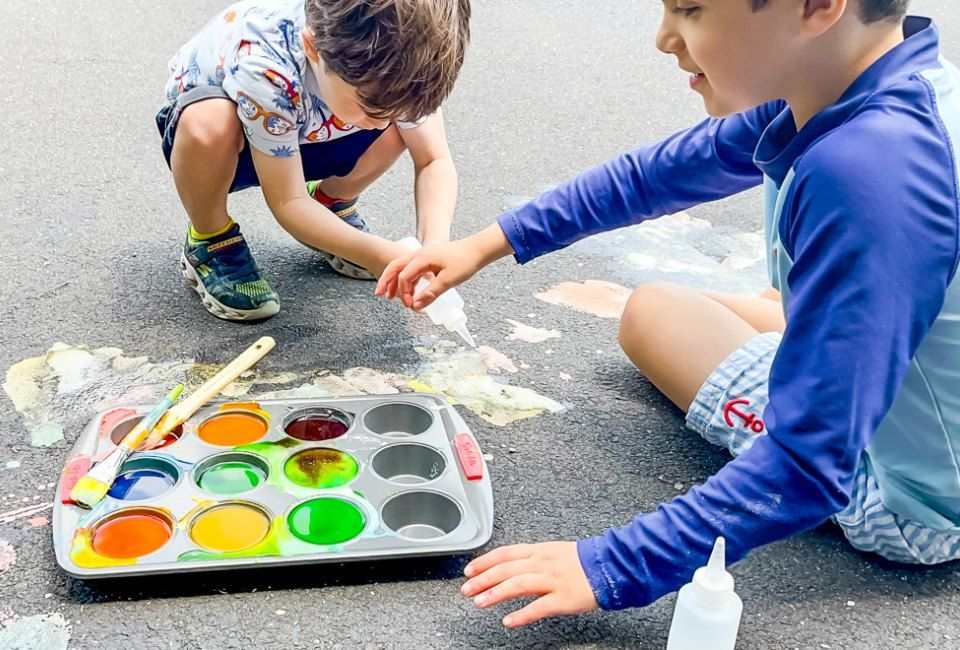
Fizzy chalk fireworks create colorful bubbling patterns outdoors without using actual fireworks. The fizz comes from the reaction between an acid, such as vinegar, and baking soda, which releases carbon dioxide gas.
I let children arrange colored mixtures into circles, bursts, or other shapes on an appropriate washable outdoor surface. Adding vinegar creates the bubbling effect and changes the appearance of the design.
This is a useful summer activity when kids want something creative to do outside while adults are preparing a meal or gathering supplies.
Pro Tip: Protect clothing and check the surface first. I avoid delicate or easily stained materials and use a small test area if I am unsure how the coloring will wash away.
Also read: 33 Under the Sea Craft Ideas to Keep Kids Busy
11. Tie-Dye T-Shirts with Permanent Markers
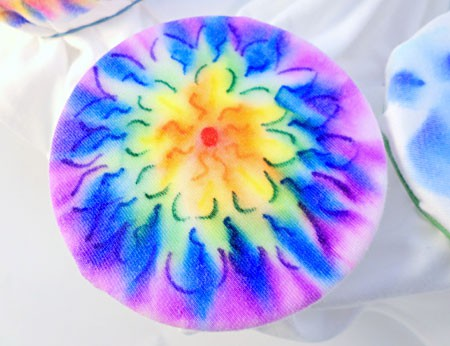
This project gives kids a way to create wearable artwork while observing how liquid can spread through fabric.
I use plain white shirts and permanent markers to create colorful designs. If the chosen method uses rubbing alcohol to spread the marker, an adult should handle the alcohol for younger children and follow the product directions carefully.
The liquid can move the marker pigment outward through the fabric, creating a tie-dye-like appearance. The exact result depends on the fabric, marker, amount of liquid, and design.
This is better suited to elementary-age children and older kids because permanent markers and rubbing alcohol require additional care.
Pro Tip: Protect the table and clothing because permanent markers can stain. Use good ventilation, keep rubbing alcohol away from flames and heat sources, and store it safely when the activity is finished.
12. Sun Prints
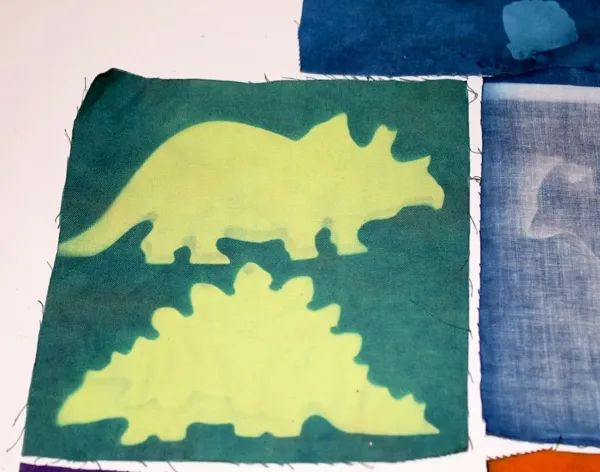
Sun prints are different from ordinary drawings left in sunlight. The clearest results come from specially prepared sun-sensitive paper or fabric designed to respond to light.
I let kids arrange leaves, flowers, simple shapes, or other suitable objects over the treated material. Following the product instructions, the exposed areas change while the covered areas remain different, creating a silhouette-like design.
This gives children an easy introduction to how light can affect specially prepared materials. It also makes a good outdoor activity because gathering suitable natural objects becomes part of the process.
Pro Tip: Check the instructions for the particular sun-print material because exposure times and processing steps vary. When collecting outdoor materials, avoid unknown plants, irritating plants, sharp objects, and anything that could cause injury.
13. Flower Petal Fingerpaint
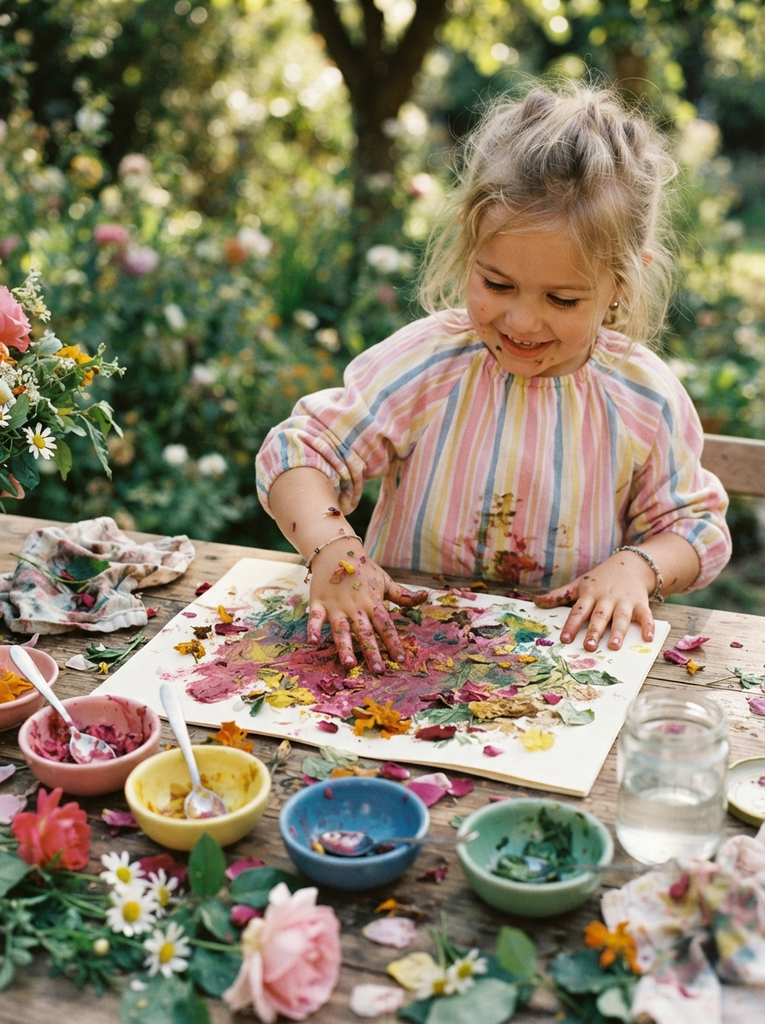
Flower petal painting connects art with the natural pigments found in plants. Different flowers contain different pigments, so the colors produced can vary considerably.
I use petals from plants that I have positively identified as suitable for the activity and mash them with water to create a simple coloring mixture. Kids can then use their fingers to make marks and patterns on paper.
The color may be softer or less predictable than commercial paint, which is actually useful for observation. Older children can compare petals from different flowers and record the colors they produce.
Pro Tip: Never assume that a flower is safe for skin contact simply because it is natural. Use known, suitable plant material, keep the mixture away from mouths and eyes, and wash hands afterward. This paint should not be treated as food.
14. Leaf Rubbing
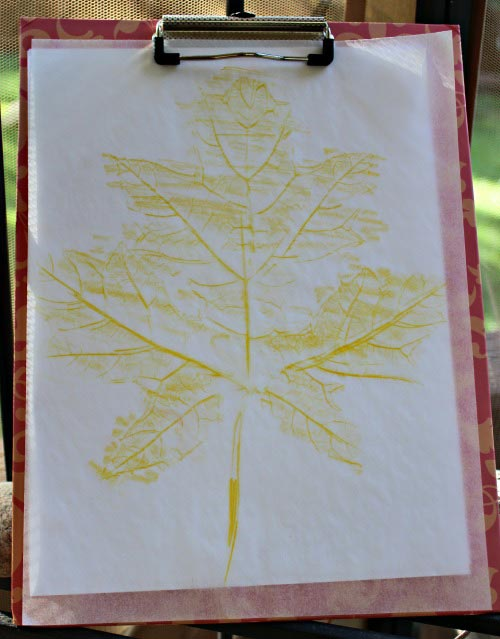
Leaf rubbing turns the texture and structure of leaves into artwork. When paper is placed over a leaf, rubbing the surface can reveal the raised veins, edges, and other textures underneath.
I like collecting several leaves with different shapes so children can compare the patterns they produce. The differences can lead to simple questions such as, “Why does this leaf make a different pattern?”
This works particularly well during autumn, but there is no need to wait for one season. Leaves from different plants can provide interesting comparisons throughout the year.
Pro Tip: Choose leaves that are fairly flat and intact. Dry, brittle leaves may crumble under pressure, while slightly flexible leaves tend to produce clearer rubbings.
15. Let’s Make Rain
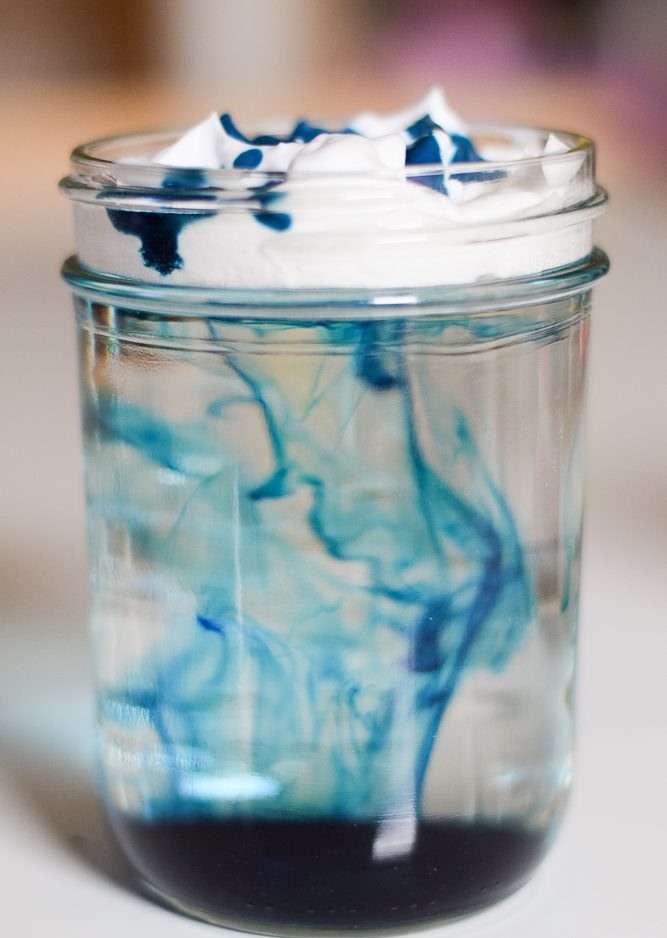
This activity uses shaving cream, water, and food coloring as a simple model for rainfall. It is not a complete representation of how clouds and weather systems actually form, but it gives young children a visual way to think about water moving through a cloud-like layer.
I fill a clear container with water and place shaving cream on top. Drops of blue food coloring can then be added to the shaving cream. As the coloring moves through the foam and reaches the water below, children can watch their “rain” appear.
Before starting, I ask kids what they think will happen and let them watch for changes rather than giving them the result immediately.
Pro Tip: Use a tray underneath the container because food coloring can stain. Keep shaving cream away from eyes and mouths and use a product appropriate for the children participating.
16. Static Electricity Butterfly Experiment
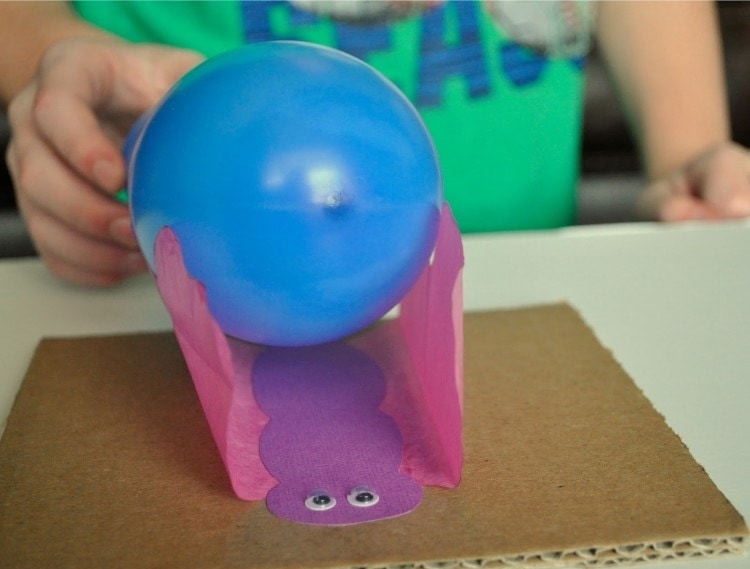
A tissue-paper butterfly is a simple way to make static electricity visible. When a balloon is rubbed against a suitable material, it can become electrically charged. Bringing it near a lightweight paper butterfly can cause the butterfly to move toward the balloon because of electrical attraction.
I find that children understand the idea more easily when they can repeat the experiment and watch the butterfly respond.
Older children can compare what happens before and after charging the balloon or experiment with the distance between the balloon and butterfly.
Pro Tip: Keep uninflated balloons away from babies and toddlers because they can be a choking and suffocation hazard. If a balloon breaks, collect all pieces promptly. Keep small tissue-paper pieces and other craft materials away from children who still put objects in their mouths.
17. Exploring Absorption
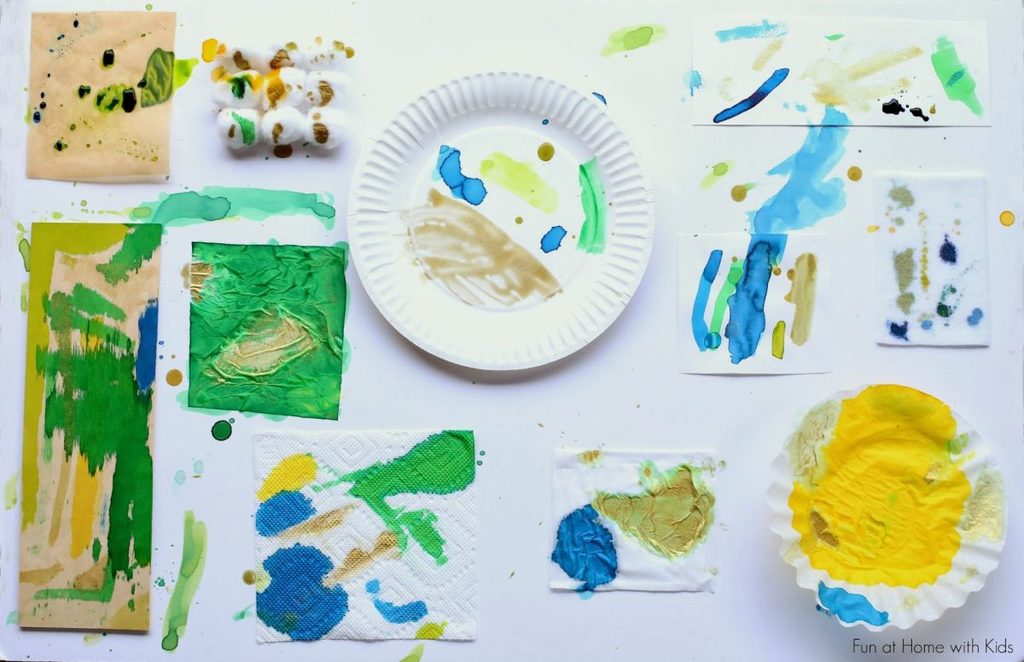
This activity helps children compare how different materials handle water. Absorbency varies between materials because their structures and surface properties are different.
I place samples such as cotton, watercolor paper, ordinary paper, felt, tissue, coffee-filter material, or another suitable surface where children can test them. They add similar amounts of watercolor to each sample and watch what happens.
Some materials take up liquid quickly, while others hold it on the surface or allow it to spread differently. Older kids can predict the result before testing and rank the materials afterward.
Pro Tip: A dropper or pipette helps children use similar amounts of liquid for each test. That makes the comparison more useful because the amount of water is less likely to affect the result.
18. Shadow Puppets
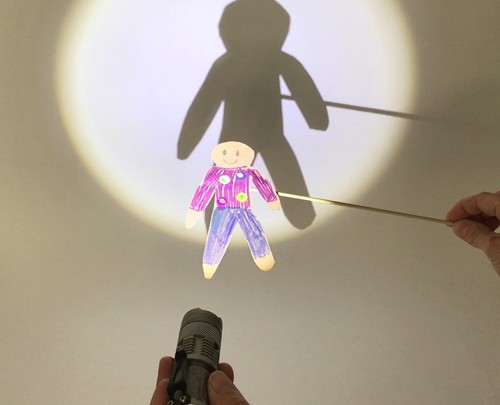
Shadow puppets combine storytelling with a simple lesson about light and position. When an object blocks light, a shadow forms on the surface behind it. Moving the object or light source changes the size, position, and appearance of the shadow.
I let children experiment with simple shapes before turning the activity into a puppet show. They can move a puppet closer to the light, farther away, or change the angle and observe the difference.
A good question for older children is, “What changes when the light moves?” They can test one position at a time and compare the resulting shadows.
Pro Tip: Use a stable light source that does not become dangerously hot. Keep children away from hot bulbs and make sure cords cannot become a tripping hazard. Small puppets should also be kept away from toddlers who may put pieces in their mouths.
19. Make a Walking Water Rainbow
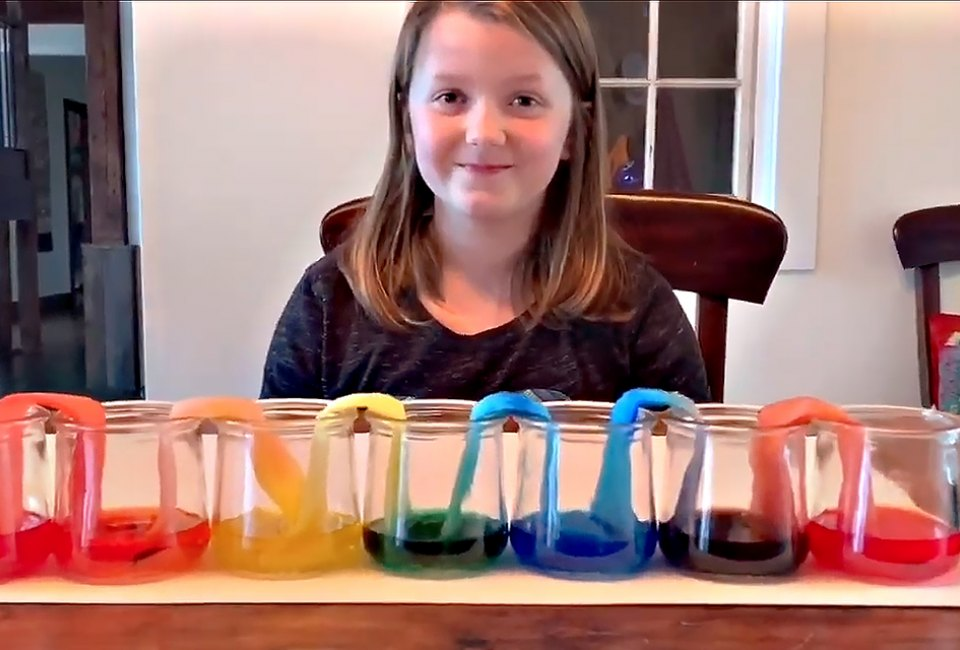
The walking water rainbow is a useful demonstration of capillary action. Water can move through the narrow spaces between fibers in paper towel, allowing it to travel from one container toward another.
I arrange clear containers with colored water and empty containers between them, then connect the containers with folded strips of paper towel. Over time, the water moves through the paper towel and begins collecting in the neighboring containers.
The colors can eventually mix, creating new shades. Older children can predict which colors will meet and observe how the water level changes.
Pro Tip: Place everything on a tray or waterproof surface. The experiment takes time, and even a small amount of spilled colored water can travel across a table surprisingly quickly.
20. Ice Cube Art
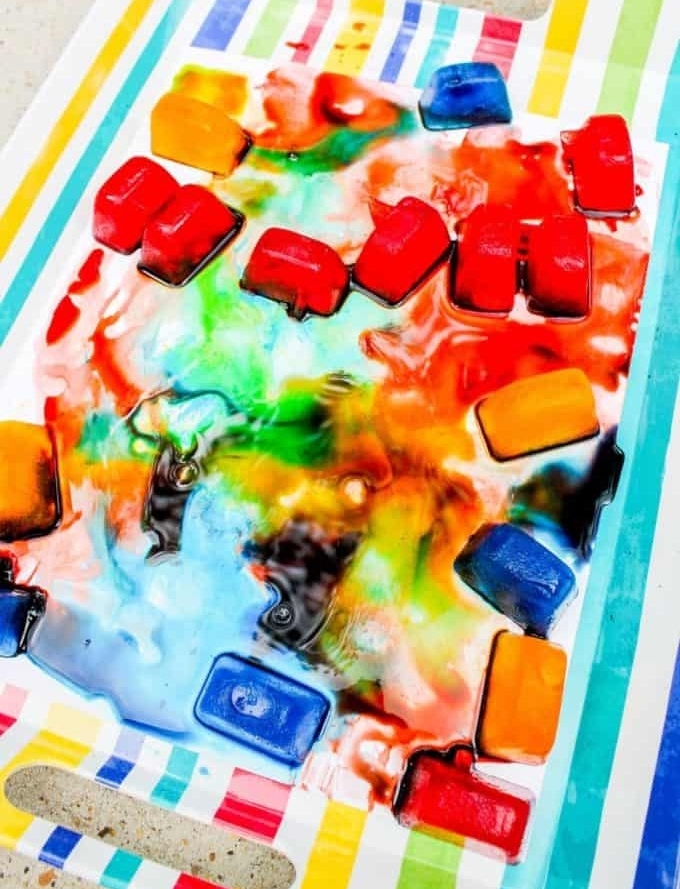
Ice cube painting gives kids a chance to observe a physical change while creating colorful artwork. Frozen water is a solid, and as the ice absorbs heat from its surroundings, it melts into liquid water.
I freeze colored art materials into cubes and add craft sticks if I want children to have handles. As the cubes move across thick paper, the melting water spreads the color and creates new patterns when different colors meet.
The exact materials matter here. Washable and non-toxic art supplies are not automatically edible, so I choose materials according to the intended art activity and make sure children understand that the colored ice is not for eating.
Pro Tip: Use thick paper or cardstock because melting ice can make thin paper soggy. Keep the artwork on a tray and wipe up wet spots promptly so the work area does not become slippery.
21. Fizzing Baking Soda Paint
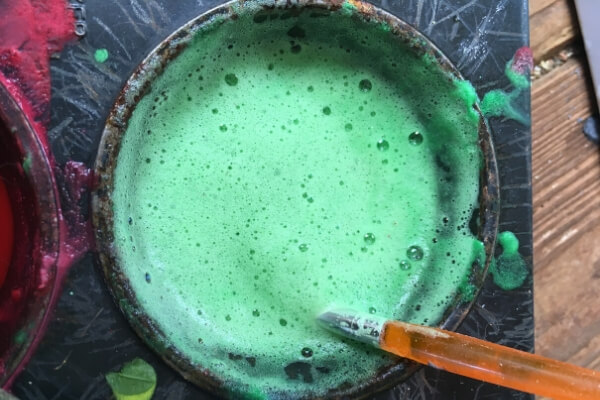
Fizzing baking soda paint combines an art project with another easy-to-see acid-base reaction. Baking soda reacts with vinegar and produces carbon dioxide gas, which creates the bubbles and fizz.
I prepare a baking soda-based paint mixture and let children create designs on suitable paper. They can then add vinegar with a dropper or small squeeze bottle and watch the painted areas bubble.
The reaction does not last forever, so I encourage children to observe closely and notice where the fizz is strongest. Older kids can make predictions about whether adding more or less vinegar will change the visible reaction.
Pro Tip: A dropper gives children better control than pouring vinegar directly. Work on a protected surface, keep the mixture away from eyes, and wash hands after the activity.
Read this next: 19 Rainbow Crafts for Kids That Brighten Any Rainy Day
Frequently Asked Questions
What are science art projects for kids?
Science art projects combine creative activities with simple science concepts such as color, light, motion, absorption, and chemical reactions.
What age are these science art projects suitable for?
Many work well for preschool and elementary-age children, but projects involving heat, Borax, rubbing alcohol, balloons, or small materials need age-appropriate adult assistance.
What supplies do I need for science art projects?
Most projects use affordable supplies such as paper, paint, watercolor, baking soda, vinegar, food coloring, leaves, straws, and ice.
How can I make these activities more educational?
I ask children to predict what will happen, observe the result, compare materials, and explain what changed. Older kids can also record simple measurements or observations.
Conclusion
Science art projects give kids a reason to create while paying attention to something happening in front of them. A watercolor painting can become an observation about water and pigment, a shadow puppet can demonstrate how light and position matter, and a walking rainbow can show water moving through paper towel.
I’ve found that the activity does not need to feel like a formal lesson to be educational. A simple question such as “What do you think will happen?” can encourage children to observe more carefully and explain what they notice.
For younger children, I keep the focus on touching, creating, comparing, and watching changes happen. Older children can take the next step by making predictions, measuring distances or materials, comparing results, and recording their observations.
That balance is what makes these activities useful for family craft time, rainy-day activities, STEM-inspired play, or a casual science afternoon. Kids get to make something they can enjoy while also seeing a simple scientific process happen for themselves.


One Comment