24 Kids Suncatcher Crafts That Turn Sunlight Into Rainbows
These kids suncatcher crafts are the projects my windows are actually full of right now, and I tested every one of them at my kitchen table before writing a word of this. I picked them the way I pick all our crafts: cheap materials, no special tools, and a result that genuinely glows when the sun hits it.
How I picked these: I started with the classics I grew up making, then added the ones my kids begged to repeat, and dropped anything that tore, faded, or fell apart within a week. If a craft needed an adult step, like the oven for melted beads, I say so plainly so nobody gets a surprise halfway through.
If you are stocking up on card and tissue, this related article is a good companion: Paper Plate Crafts for Kids. Most of these suncatchers cost under $5, take under an hour, and leave your windows looking like a rainbow moved in.
Key Takeaways
- Contact paper and tissue paper are the cheapest, fastest way to start — under $5 and under 30 minutes.
- Pressed flowers need a week of drying first, but they make the prettiest, most grown-up suncatchers.
- Melted bead and beaded glass versions are adult-supervised projects with the most durable, glass-like finish.
- Hang suncatchers in morning-light windows to slow fading, especially for red and pink tissue.
24 Kids Suncatcher Crafts to Try
1. Classic Tissue Paper Suncatcher
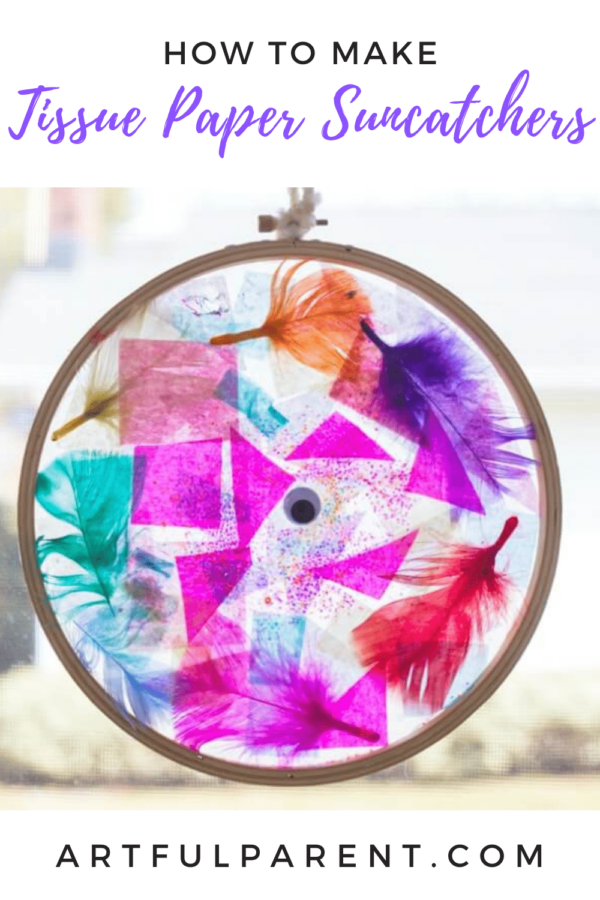
This is the suncatcher most of us start with, and it still earns its place. I cut a simple shape from black card, stuck it to clear contact paper, and let my kids fill it with torn tissue paper squares in rainbow order. The light does all the fancy work once it goes up on the window.
My daughter spent a full half hour sorting reds from oranges like it was treasure, then gasped when the afternoon sun hit it. The honest downside is that tissue tears easily when little hands press too hard, so I keep a spare sheet ready. Trim the edges after the second contact sheet seals it.
Cost: Under $5 | Time: 30 minutes | Difficulty: Easy
Pro Tip: Tear, don’t cut, the tissue — ragged edges blend into prettier colour washes.
2. Sticky Contact Paper Nature Suncatcher

For this one we skipped the mess entirely and used a sheet of sticky contact paper, sticky side out, taped to a table. The kids pressed on flat leaves, tiny flowers, and a few blades of grass, then we sealed it with a second sheet and trimmed it into a sun shape.
I loved that there was no drying time and no glue on sleeves. My son chose a slightly crinkled leaf and was upset it would not lie flat, so we learned to press leaves in a book overnight first. Thicker flowers can stop the seal sticking, so keep everything as flat as possible.
Cost: Under $5 | Time: 20 minutes | Difficulty: Easy
Pro Tip: Press leaves overnight between book pages so they lie perfectly flat.
3. Melted Bead Suncatcher

This is the grown-up step in the project, and the payoff is huge. I arranged translucent pony beads in a single layer in a metal baking tin, in a rainbow ring, and melted them in the oven until they fused into a solid disc. An adult must handle the oven and the hot tin — kids do the designing only.
Ours came out looking like stained glass, and my kids still point it out every sunny morning. The downside is the smell while it melts, so I open a window and run the fan. Let it cool completely in the tin before popping it out, or it can crack.
Cost: $3–$8 | Time: 45 minutes including cooling | Difficulty: Medium (adult oven step)
Pro Tip: Use one layer of beads only — a second layer makes a thick, cloudy disc.
4. Butterfly Tissue Paper Suncatcher

I drew a big butterfly outline on card, cut out the wings, and backed them with contact paper. Then the kids layered pink, purple, and yellow tissue until the wings looked like they were glowing from inside. A black body and two pipe-cleaner antennae finished it.
My youngest insisted the wings be symmetrical and checked them three times, which made me laugh. The tricky part is cutting the wing holes neatly — small scissors and a slow hand help. If a wing tears, patch it from behind with clear tape and nobody will ever know.
Cost: Under $5 | Time: 30 minutes | Difficulty: Easy
Pro Tip: Cut wing holes before adding tissue, and keep the card frame at least an inch wide.
5. Pressed Flower Suncatcher

We pressed tiny violas and daisies for a week, then sandwiched them between two sheets of contact paper inside a card frame. The flowers keep their shape and colour, and the sun shines straight through the petals. It looks far more delicate than the tissue versions.
I made one with flowers from my grandmother’s garden, and it still hangs in my kitchen window. The downside is patience: fresh flowers go mouldy if sealed too soon, so they must be fully dry. Flat, small blooms work best; chunky flowers will not seal.
Cost: $5–$10 | Time: 20 minutes plus a week of pressing | Difficulty: Easy
Pro Tip: Press flowers for at least five days — any dampness will fog the finished piece.
6. Coffee Filter Sunrise Suncatcher

Coffee filters are my secret weapon for toddlers. I let the kids paint them with washable markers, spritzed them lightly with water so the colours bled together, and let them dry flat. Once dry, we cut a sun shape and hung it where the morning light hits first.
The colour bleeding genuinely surprised me — the filters turned into watercolour sunrises with zero skill needed. The downside is that an over-wet filter tears, so I spritz from a distance and stop while it still looks patchy. It dries more vivid than it looks wet.
Cost: Under $3 | Time: 25 minutes plus drying | Difficulty: Easy
Pro Tip: Spray lightly and let colours bleed on their own — more water means tears, not prettier colour.
7. Heart Suncatcher for a Window

I cut a heart frame from red card and filled it with pink and red tissue squares, then added a ribbon loop for hanging. It takes ten minutes of actual work and looks like you tried much harder. We made a row of them for a bedroom window, smallest to largest.
My daughter gave hers to her teacher, who hung it in the classroom window all spring. The only flaw is fading: red tissue bleaches in strong sun after a few weeks. I now hang heart suncatchers on windows that get morning light, not harsh afternoon sun.
Cost: Under $3 | Time: 20 minutes | Difficulty: Easy
Pro Tip: Use two layers of tissue in the centre so the heart reads boldly from outside too.
8. Crystal Prism Rainbow Suncatcher

No crafting at all is needed for this one, and kids love it just as much. I hung a small crystal prism on fishing line in a south-facing window, and on sunny mornings it throws tiny rainbows across the floor and walls. The children chase them like butterflies.
We turned it into a morning game: whoever spots the first rainbow wins the good breakfast seat. The honest downside is that it only works in direct sun, so cloudy weeks are disappointing. Hang it low enough that kids can see the rainbows without climbing.
Cost: $5–$12 | Time: 5 minutes | Difficulty: Easy
Pro Tip: Hang the prism where direct sun hits between 9 and 11am for the longest rainbow show.
9. Pressed Flower Jar Lid Suncatcher
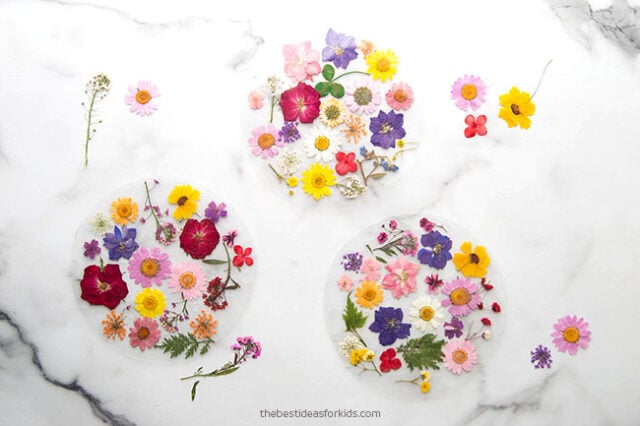
This version gives the pressed flowers a proper frame: a mason jar ring. I pressed small flowers flat, arranged them on clear contact paper inside the ring, sealed the back, and tied twine through the top for hanging. It looks like a little botanical specimen in the window.
I made a set of three with different flowers and hung them in a row, and visitors always ask where I bought them. The fiddly part is trimming the contact paper to fit the ring exactly — I trace the ring first now. A dab of glue holds the twine knot in place.
Cost: $5–$10 | Time: 30 minutes plus pressing time | Difficulty: Easy
Pro Tip: Trace the jar ring onto the contact paper before cutting so the seal sits flush.
10. Star Suncatcher

I cut a five-pointed star frame from yellow card and filled each point with a different shade of yellow and orange tissue. Hung in a west window, it glows gold in the late afternoon, which feels exactly right for a star. My kids made one each and argued over whose was brightest.
The star points are the challenge — narrow points tear if the card is thin, so I use proper cardstock. One of ours did rip, and we fixed it by gluing a second star frame on top, which actually made it sturdier and prettier.
Cost: Under $5 | Time: 30 minutes | Difficulty: Easy
Pro Tip: Use thick cardstock for star points, and double the frame if a point feels flimsy.
11. Stained Glass Christmas Suncatcher
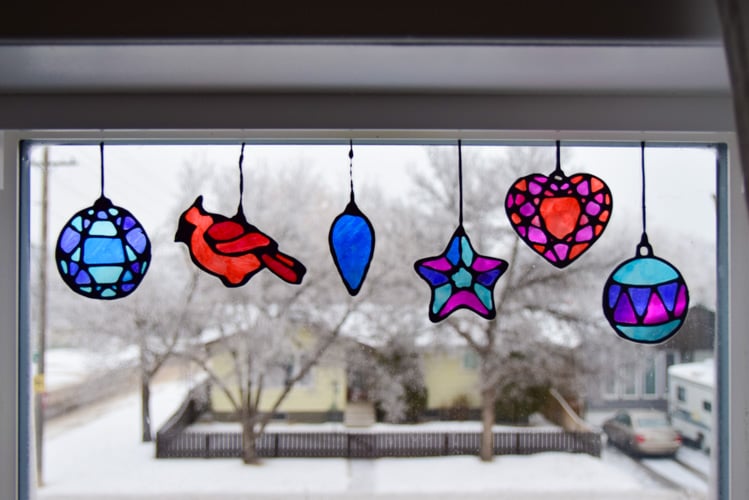
For this one I printed a simple Christmas shape template, traced it onto card, and filled it with red and green cellophane scraps saved from packaging. It uses recyclables, which made my kids feel clever, and the cellophane gives a deeper, glassier colour than tissue.
We hung ours on the front window in December, and neighbours commented on it. The downside is that cellophane creases show, so I smooth each piece with a finger before sealing. It is worth the extra minute — creased cellophane looks cloudy in sunlight.
Cost: Under $5 | Time: 35 minutes | Difficulty: Easy
Pro Tip: Smooth cellophane flat before sealing; creases show up as cloudy patches in sunlight.
12. Snowflake Suncatcher

I folded white paper, cut snowflake patterns, and backed the prettiest one with pale blue tissue on contact paper. Winter light is weaker, so I chose the palest blues and whites to let every bit of light through. It looks lovely against a grey January sky.
My son cut his snowflake too enthusiastically and it fell apart, which taught us both to leave wider bridges between cuts. Now I remind the kids: cut less than you think, because you can always cut more, but you cannot uncut.
Cost: Under $3 | Time: 25 minutes | Difficulty: Easy
Pro Tip: Leave wide bridges between snowflake cuts — thin joins tear the moment you unfold it.
Also read: Toilet Roll Crafts for Kids for another low-cost craft stash idea.
13. Fish Suncatcher
For an ocean theme, I cut a fish shape from card, filled the body with blue and green tissue, and added a googly eye and a foil fin. A row of fish at different heights looks like they are swimming across the window, especially if you add tissue bubbles above them.
My kids named each fish and staged races by blowing gently on them, which made me laugh more than the craft itself. The downside is that googly eyes fall off in heat near glass, so I glue them on the room side, not the glass side, and check them weekly.
Cost: Under $5 | Time: 30 minutes | Difficulty: Easy
Pro Tip: Glue googly eyes on the room side of the suncatcher so window heat does not loosen them.
14. Sun and Moon Suncatcher

I made a matching pair: a yellow sun and a silver-blue crescent moon, each on its own contact paper sheet, hung side by side. The sun catches the morning light and the moon looks best in the softer evening light, so the pair covers the whole day.
My daughter decided the moon needed a sleepy face, drawn in marker on the card frame, and it became her favourite. The only catch is balance: if one hangs higher than the other, the pair looks lopsided, so I measure the ribbon lengths before hanging.
Cost: Under $5 | Time: 35 minutes | Difficulty: Easy
Pro Tip: Cut both ribbons to the same length before hanging so the pair sits level.
15. Rainbow Strip Suncatcher
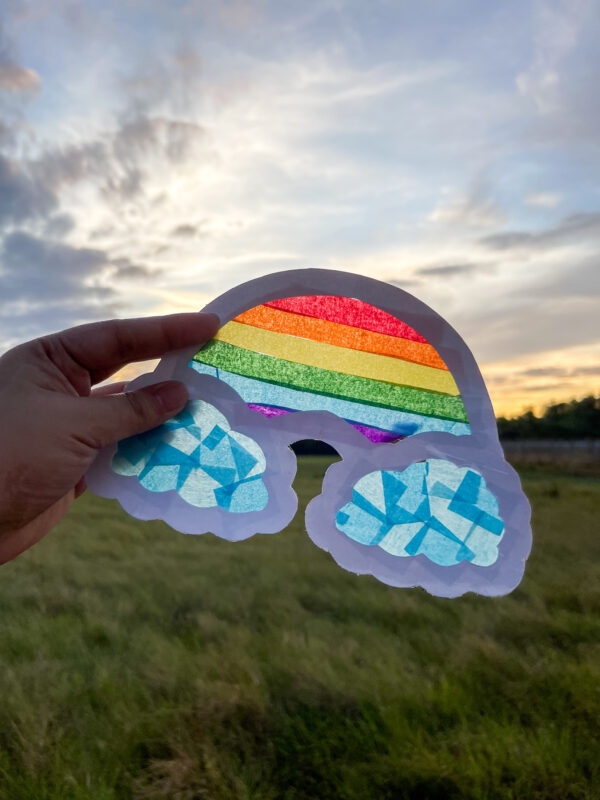
This is the simplest rainbow you will ever make. I cut an arch shape from card and filled it with straight strips of tissue in rainbow order — red, orange, yellow, green, blue, purple. No fiddly shapes, just stripes, and it still stops people at the window.
I made this one with a four-year-old who could not yet cut curves, and the straight strips were perfect for her. The downside is that uneven strips show, so I pre-cut the strips myself and let her place them. It kept the project joyful instead of frustrating.
Cost: Under $5 | Time: 25 minutes | Difficulty: Easy
Pro Tip: Pre-cut the rainbow strips for younger kids and let them focus on placing them in order.
16. Bird Suncatcher

I drew a plump little bird on card, cut out the body, and filled it with turquoise and yellow tissue, then added a paper beak and a tail of layered tissue strips. Hung near a real bird feeder window, it confuses visitors for a second, which the kids love.
My son insisted our bird needed a worm in its beak, made from a red pipe cleaner, and honestly it improved the whole thing. The tail strips are the weak point — they droop in humidity — so I seal the tail inside the contact paper rather than leaving it loose.
Cost: Under $5 | Time: 30 minutes | Difficulty: Easy
Pro Tip: Seal tissue tails inside the contact paper so humidity does not make them droop.
17. Flower Mandala Suncatcher

This is the slow, calming one. I arranged tiny petals and leaves in a circle pattern on contact paper, working from the centre outwards like a mandala, then framed it in an embroidery hoop. It looks like stained glass made from a garden.
I made this one alone one quiet evening and found it genuinely relaxing. The downside is that it takes patience — a mandala rushed looks messy, so I save this for older kids or a solo craft night. Small tweezers help place the tiniest petals.
Cost: $5–$10 | Time: 45 minutes | Difficulty: Medium
Pro Tip: Work from the centre outwards and use tweezers for tiny petals.
18. Sea Glass Suncatcher

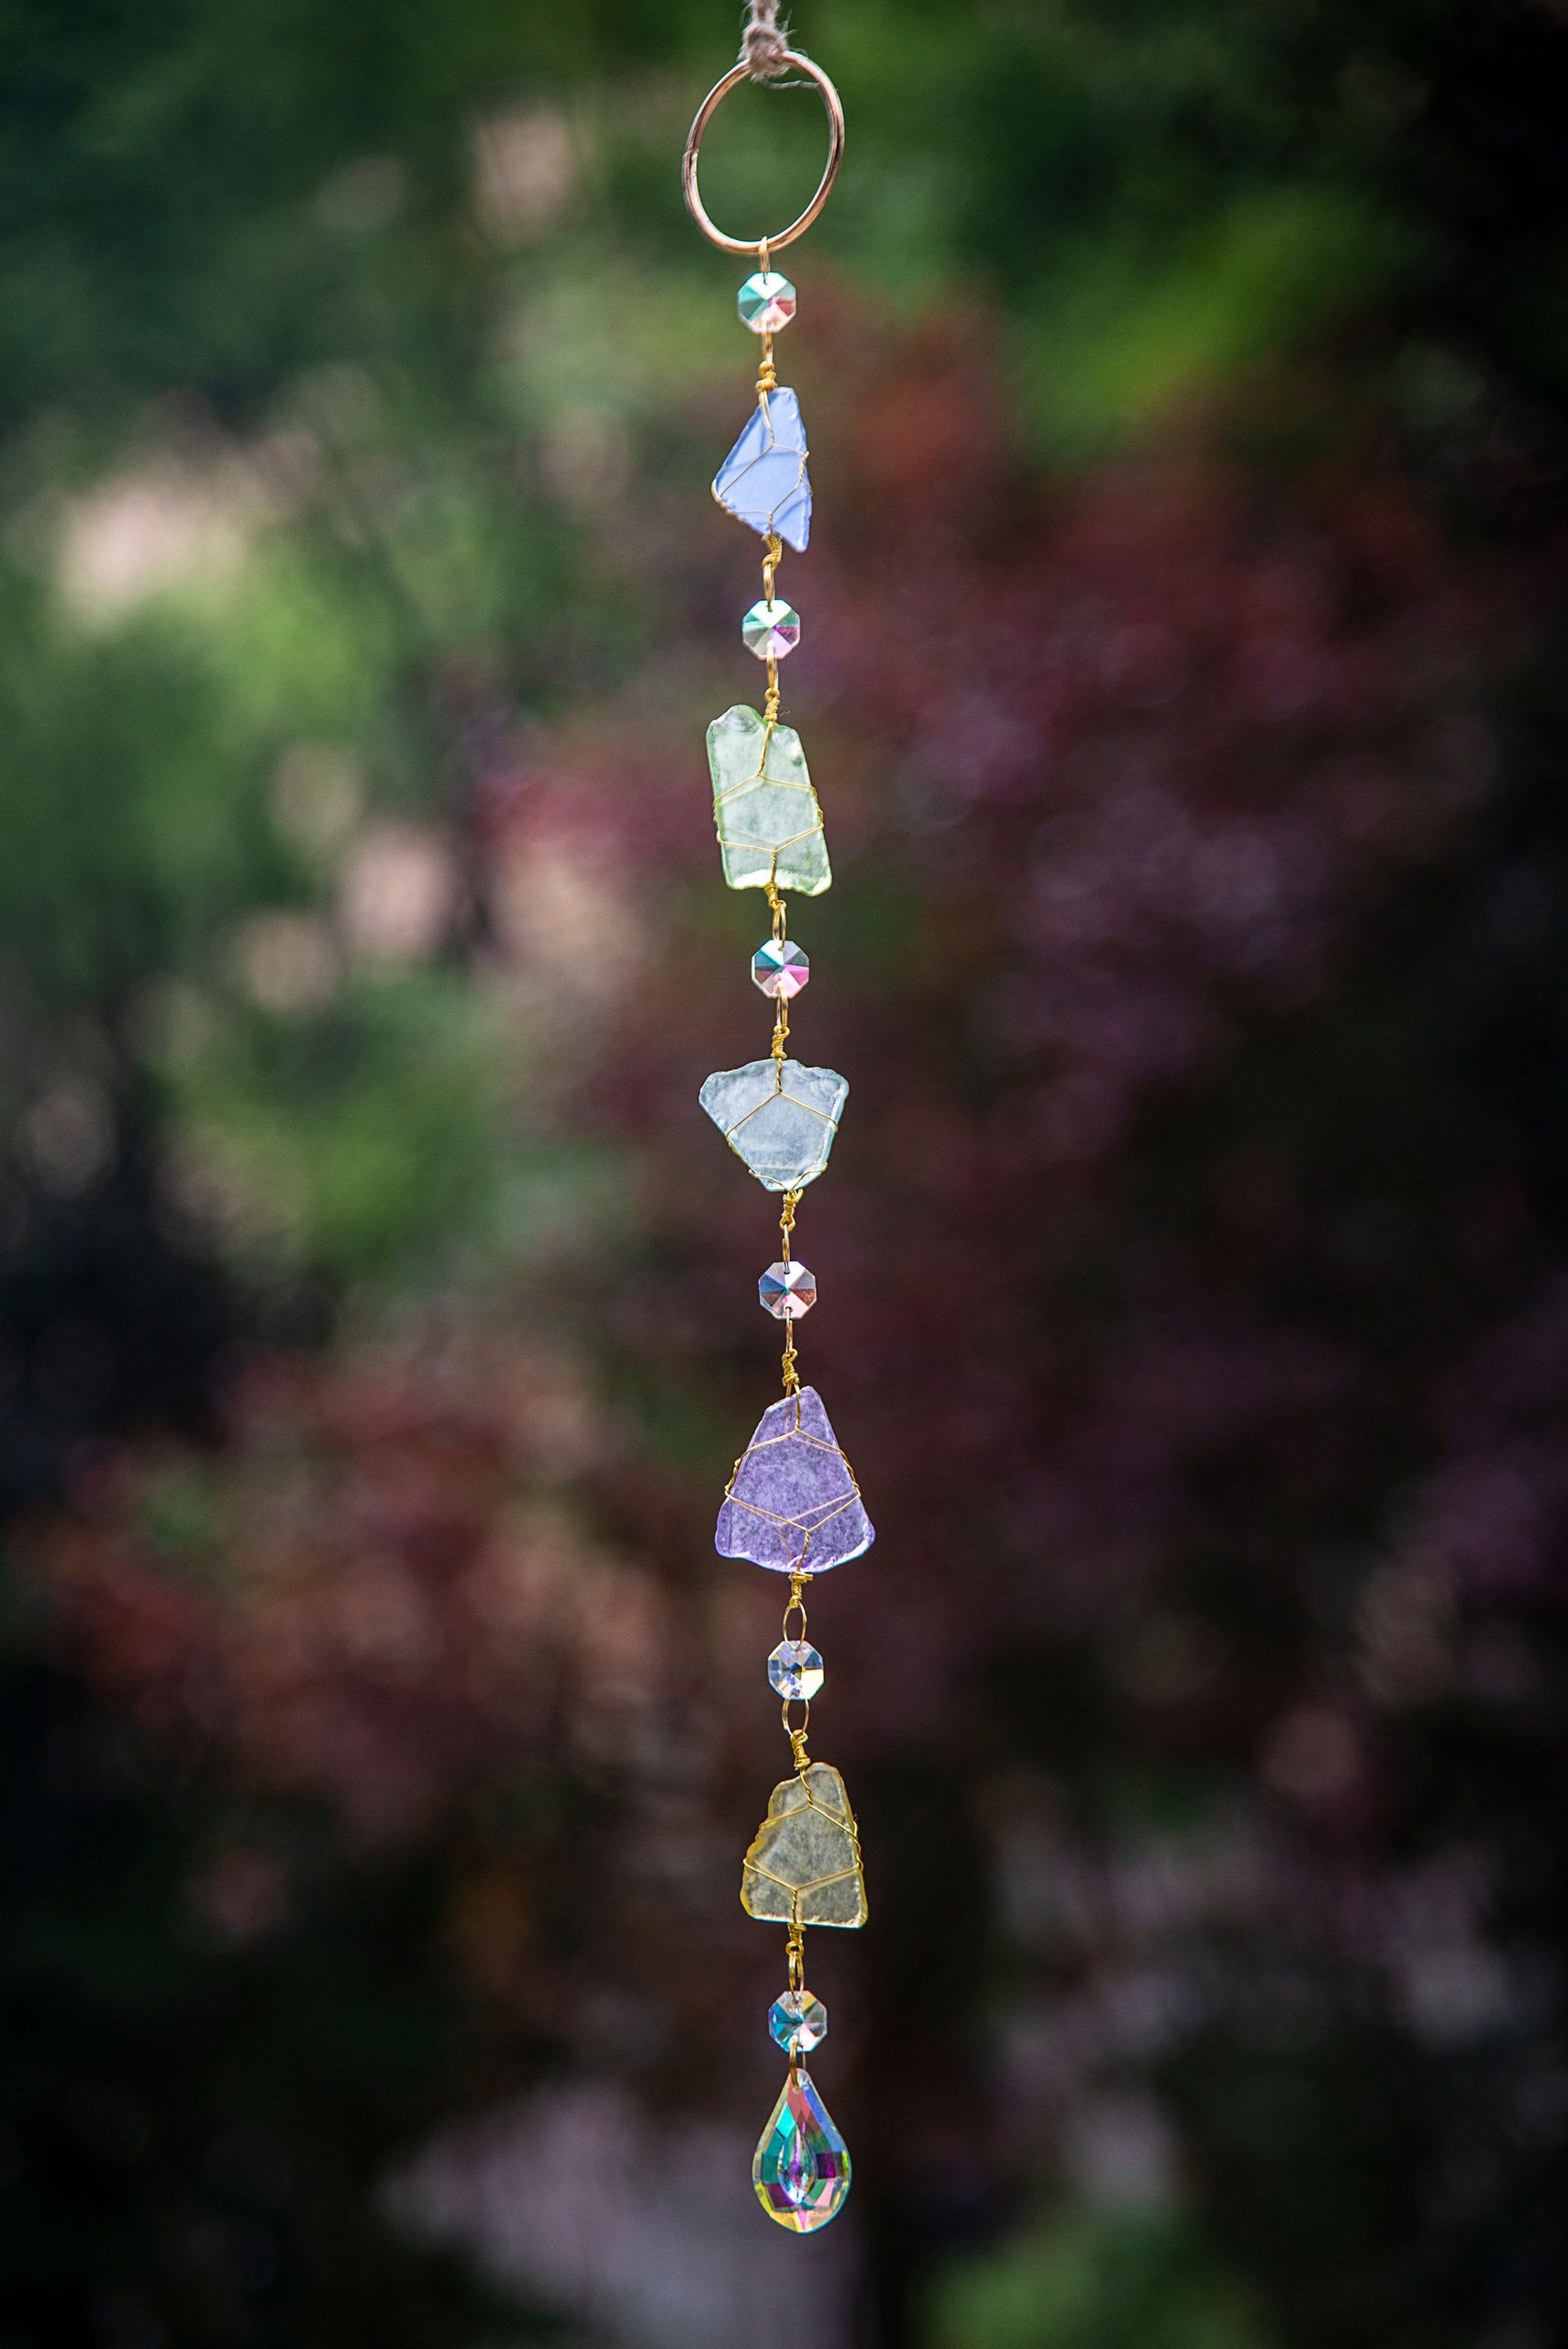
After a beach trip, we threaded our smoothest sea glass pieces and a few small shells onto fishing line and hung them in a kitchen window. Real glass catches light in a way tissue never can, and each piece holds a holiday memory.
My daughter still remembers exactly which beach each green piece came from. The honest downside is weight: too many pieces pull the line down, so I use a sturdy embroidery hoop as a frame and space the pieces out. Only use glass with no sharp edges.
Cost: Free if collected, $5–$10 if bought | Time: 40 minutes | Difficulty: Easy
Pro Tip: Use an embroidery hoop as a frame so heavier glass pieces do not drag the line down.
19. Waldorf Window Star Suncatcher

Waldorf stars are folded from kite paper into pointed stars that glow like jewels in the window. I folded eight points from translucent paper, glued them in a circle, and hung the star where the low winter sun hits it. The folding is the craft, not the cutting.
I learned this fold from a friend and messed up my first star completely, which is why I now practise with scrap paper first. The downside is that the fold sequence takes concentration, so this one suits ages eight and up, or a patient adult folding alongside.
Cost: $3–$8 for kite paper | Time: 45 minutes | Difficulty: Medium
Pro Tip: Practise the fold with scrap paper first — the sequence clicks on the second try.
20. Ladybug Suncatcher

I cut a round ladybug body from black card, filled the wings with red tissue, and dotted them with black paper spots. It is instantly recognisable, which makes it a hit with preschoolers who want everyone to know exactly what they made.
My youngest counted the spots out loud every time she walked past it, which was adorable for a week. The spots are the fiddly bit — I punch them with a hole punch instead of cutting them, which is faster and neater.
Cost: Under $5 | Time: 25 minutes | Difficulty: Easy
Pro Tip: Punch black spots with a hole punch instead of cutting tiny circles by hand.
21. Autumn Leaf Suncatcher

I traced a big maple leaf onto card, cut it out, and filled it with orange, red, and gold cellophane. In autumn light it looks like a leaf that never falls, and it is a lovely way to use up the leaf shapes kids bring home from school in October.
We made a whole tree’s worth and hung them along one window like a garland. The downside is that cellophane is slippery, so I tape each piece at the edge before sealing, or it slides into a pile. A little tape saves a lot of frustration.
Cost: Under $5 | Time: 30 minutes | Difficulty: Easy
Pro Tip: Tape cellophane edges down before sealing so slippery pieces do not slide.
22. Beaded Glass Suncatcher
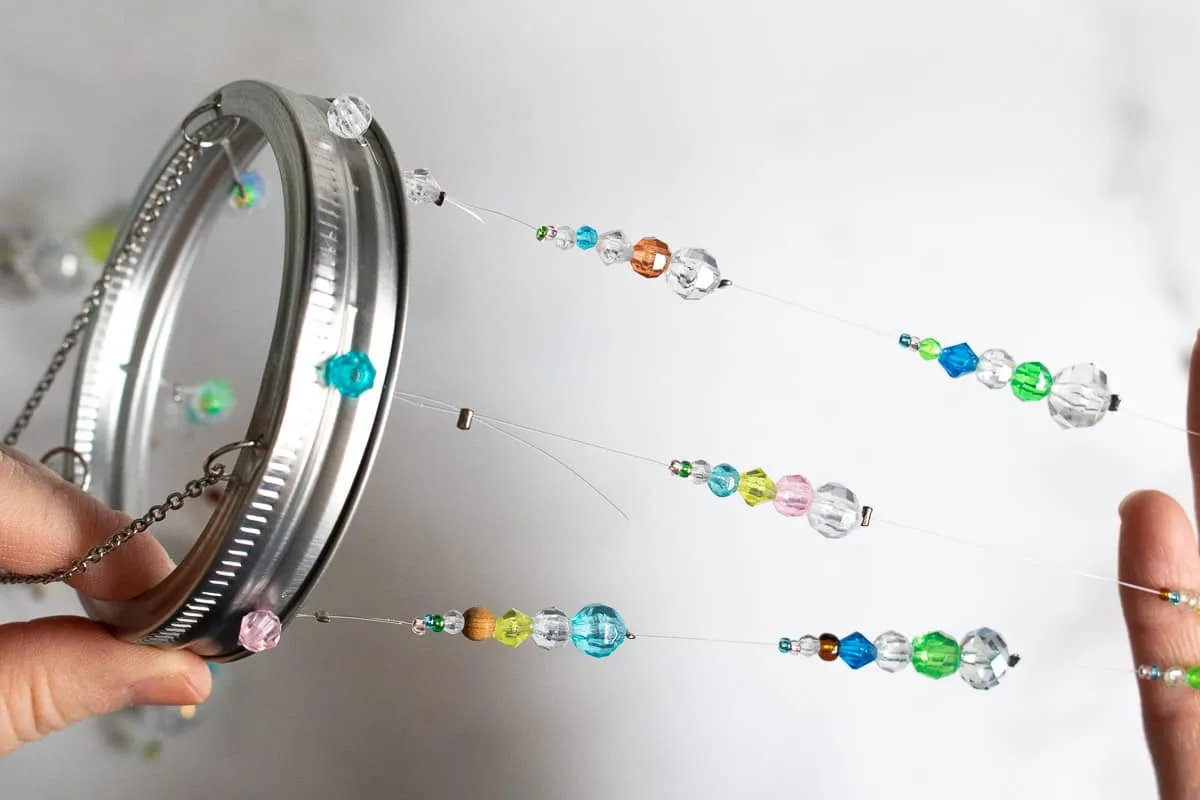
This is the bridge between kids’ crafts and real decor. I strung glass beads and small crystal drops onto wire, shaped it into a hoop, and hung it where it catches the sun. Older kids can do the stringing, and the result looks shop-bought.
I made one for my own window and guests assume I bought it, which still makes me smile. The downside is that wire ends are sharp, so I curl every end into a loop with pliers and check it twice. No poky ends, ever, especially with kids around.
Cost: $8–$15 | Time: 45 minutes | Difficulty: Medium
Pro Tip: Curl every wire end into a closed loop with pliers — no sharp ends.
23. Jellyfish Suncatcher
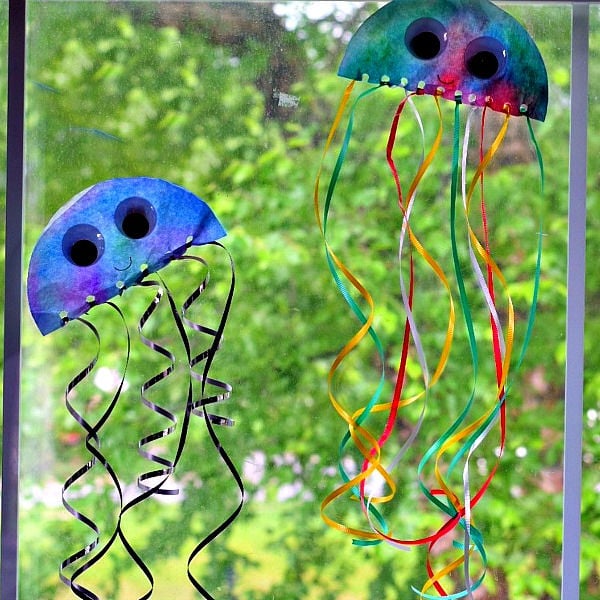
I painted a coffee filter pink and purple, cut it into a jellyfish dome, and hung tissue tentacles below it. In a window it sways gently in the draught, which is exactly what a jellyfish should do. My kids added googly eyes and named it Jilly.
The tentacles tangle if they are too long, so I keep them shorter than the dome is wide. That one change stopped the daily untangling complaints. It is a perfect summer holiday craft when the house needs something cheerful.
Cost: Under $5 | Time: 30 minutes | Difficulty: Easy
Pro Tip: Keep tentacles shorter than the dome is wide so they do not tangle.
24. Corn Suncatcher
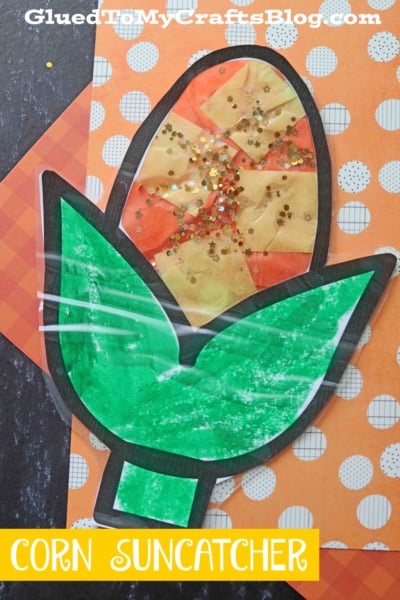
This one is pure fun. I cut a corn shape from yellow card, filled it with yellow tissue kernels, and added a green tissue husk at the bottom. It is silly, it is bright, and it is the suncatcher my kids remember most from last autumn.
We hung it in the kitchen window during harvest week, and it made everyone smile while cooking dinner. The downside is that the husk can hide the light if it is too big, so I keep it to the bottom third only. The corn itself should do the glowing.
Cost: Under $5 | Time: 25 minutes | Difficulty: Easy
Pro Tip: Keep the husk to the bottom third so it does not block the light.
Which Suncatcher Should You Make First?
| Craft | Best For | Cost | Effort |
|---|---|---|---|
| Tissue paper | First-timers, toddlers | Under $5 | Low |
| Pressed flower | Gifts, older kids | $5–$10 | Low, but slow drying |
| Melted bead | Durable keepsakes | $3–$8 | Medium, adult oven step |
| Beaded glass | Older kids, real decor | $8–$15 | Medium |
| Coffee filter | Rainy days, little kids | Under $3 | Low |
Mistakes I Made (So You Don’t Have To)
- I sealed fresh flowers once and they went mouldy inside the contact paper within days. Now I press everything for at least five days, no exceptions.
- I hung a red tissue heart in harsh afternoon sun and it bleached to pale pink in three weeks. Morning-light windows keep colours true for months.
- I let a melted bead disc cool too fast out of the tin and it cracked straight down the middle. Cool it in the tin, undisturbed, until it is room temperature.
- I left wire ends sharp on a beaded suncatcher and caught my sleeve on one. Every wire end now gets curled into a closed loop with pliers.
Frequently Asked Questions
What age are suncatcher crafts good for?
Toddlers can do coffee filter and tissue versions with help, while folding, beading, and melted bead versions suit ages eight and up, with an adult nearby for ovens and wire.
Do suncatchers work on cloudy days?
They still look pretty as window art, but the rainbow glow needs direct sun. Prism and glass versions need sun most of all, so hang them in your sunniest window.
How do I stop tissue suncatchers fading?
Hang them in morning-light windows rather than harsh afternoon sun, and use two layers of tissue in the centre so colours stay bold for longer.
Can I use regular paper instead of contact paper?
Clear contact paper is what makes the light shine through. Regular paper blocks it, so if you have no contact paper, try clear packing tape strips or a laminator pouch instead.
If your kids loved these, read this next: 15 Air Dry Clay Craft Ideas for Kids to Recreate.
Final Thoughts
Start with the tissue paper classic, then try one pressed flower version when you have a week to press blooms. That pair alone will fill a window with colour, and the kids will be asking which one to make next before the first one is even dry.
My windows have never looked happier, and neither have my kids on a sunny morning. Pick one, clear the table, and let the light do the rest.
If you try any of these kids suncatcher crafts this weekend, hang the finished piece where the morning sun hits first — that first burst of colour is the whole reward.