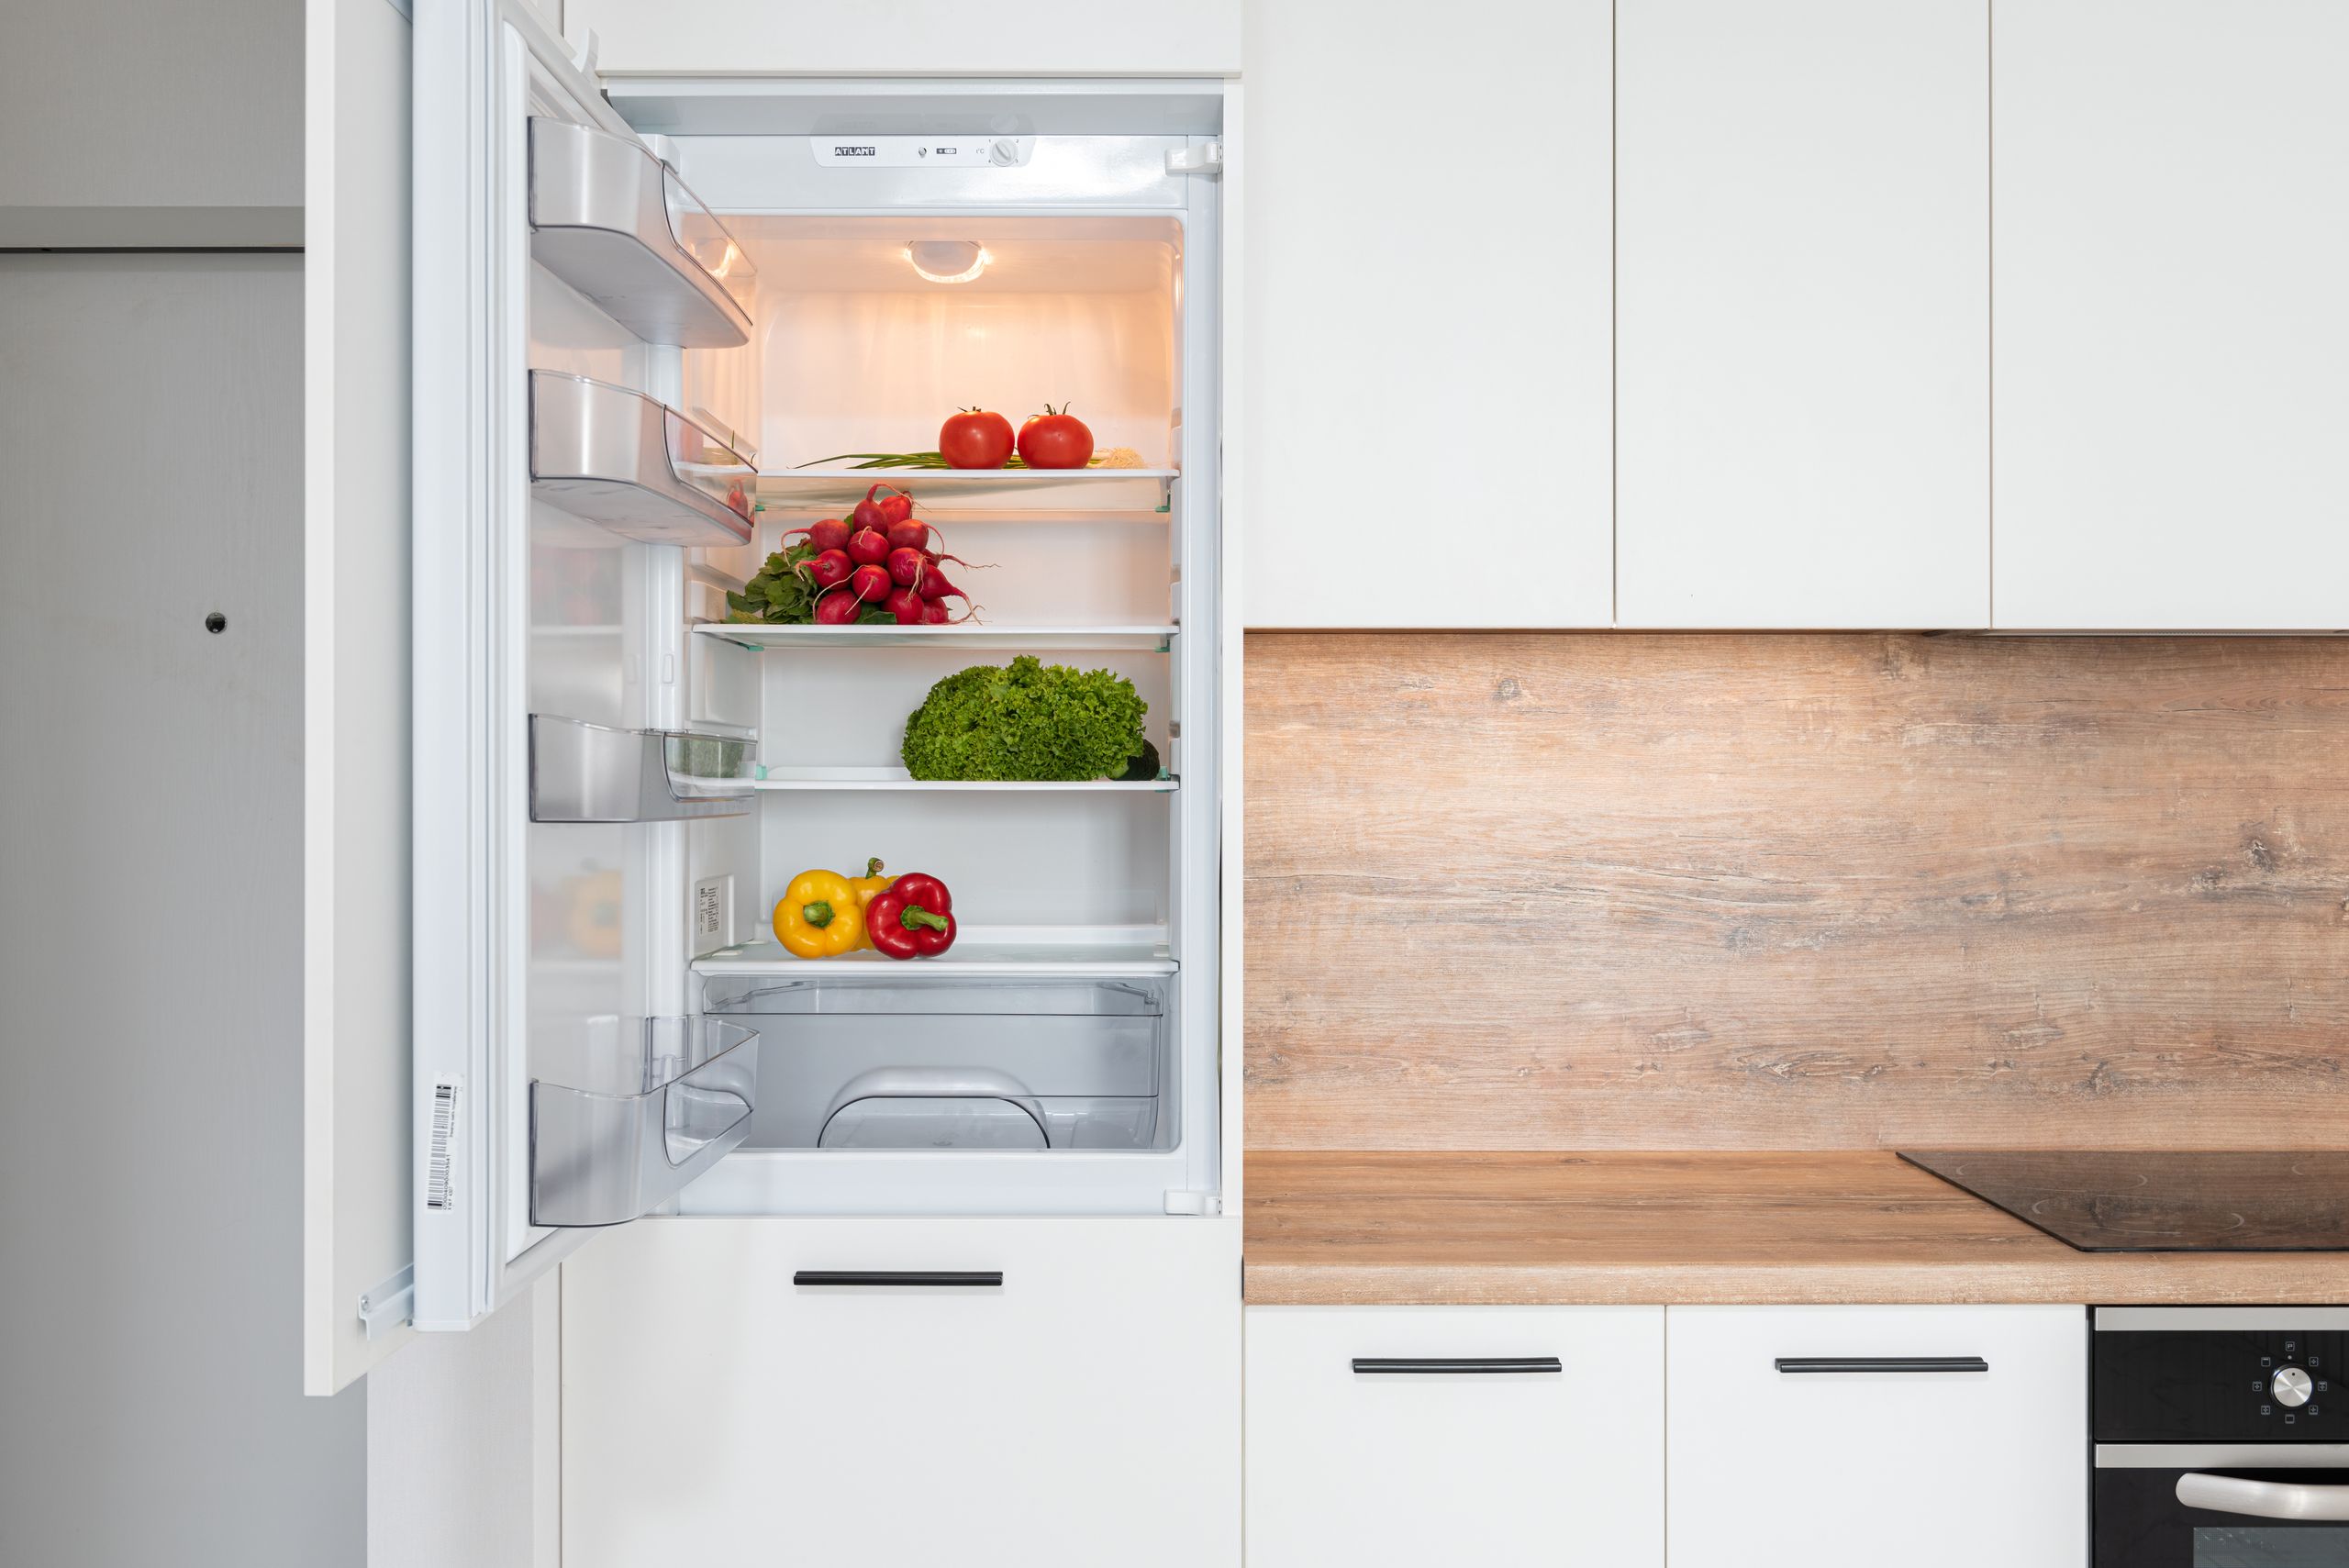
21 Refrigerator Organization Ideas That Stop Food Going Missing
I have lost count of the food I have thrown away because I forgot it was in the fridge. A bag of salad at the back, a jar of sauce behind the milk, leftovers I meant to eat on Tuesday and found on Sunday.
These refrigerator organization ideas are the ones I have actually tried in my own fridge and kept only if they still worked a month later. I picked them by one simple test: I emptied the fridge, put back only what we actually eat, and watched for a week to see what went missing. If an idea failed that test, it did not make this list. I tested them zone by zone — door, shelves, drawers, and freezer — because that is how a real fridge works.
This list covers the whole fridge, zone by zone. The door gets its own bins for sauces and jams. The shelves get clear bins, a leftovers shelf and an “eat me first” box. The drawers get the dairy, the fruit and the produce. And the freezer gets an inventory, so you stop buying a third bag of peas.
Most of these ideas cost under $30, and none of them took me more than 30 minutes to set up, except the monthly deep clean. I have kept the ones that still worked a month later, and I have been honest about every catch — the bins that were too tall, the tape that fell off, the door that started to sag. If an idea has a downside, you will read it before you buy anything.
Table of Contents
- Clear Bins on Every Shelf
- A First-In, First-Out Rule
- A Dedicated Leftovers Shelf
- Labels With Dates, Not Just Names
- A Snack Bin the Kids Can Reach
- Door Bins by Use, Not by Size
- A Condiment Lazy Susan
- An Egg Holder That Actually Fits
- A Drinks Zone on One Shelf
- A Meal-Prep Zone for the Week
- A Small Fridge Shelf Riser
- A Produce Drawer Liner
- An “Eat Me First” Box
- A Freezer Inventory on the Door
- A Dairy Drawer, Not a Dairy Shelf
- A Sauce Caddy in the Door
- A Fruit Drawer You Can See Into
- A Weekly Fridge Reset
- A Shopping List on the Fridge Door
- A No-Double-Buy Rule
- A Monthly Deep Clean
Key Takeaways
- Work in zones: door, shelves, drawers, and freezer each get their own job, so nothing drifts.
- Clear bins are the single best fridge organization buy — if you cannot see it, you will forget it.
- Put leftovers and “eat me first” food at eye level, not at the back.
- Label with dates, not just names, or you will still throw food away.
- A weekly five-minute reset beats a monthly big clean every time.
- Small fridge organization works best when every item has one home and one home only.
1. Clear Bins on Every Shelf
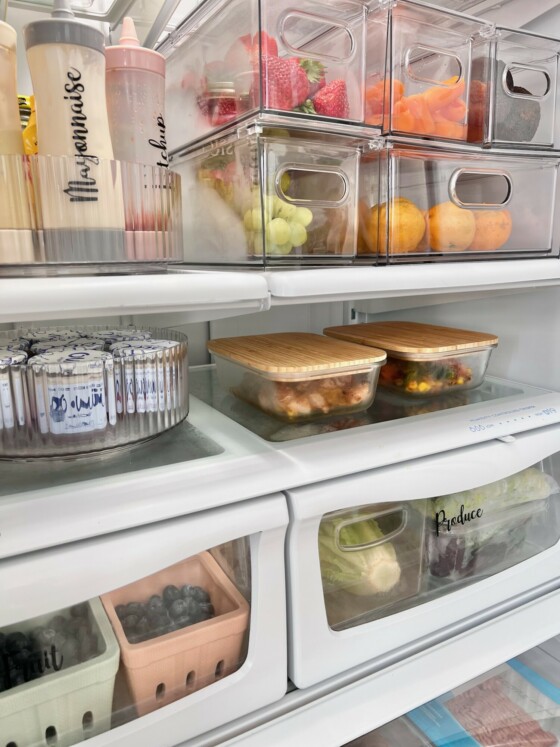
Image credit: Everything Envy
I bought six clear plastic bins, about 12 inches long, and gave every shelf a job: one for yogurts, one for cheese, one for sauces, one for leftovers, one for snacks, one for the children’s lunch things. Now I pull out a bin instead of moving ten jars to reach the one at the back.
The honest downside is that bins take up space. My first bins were too tall for the middle shelf and I lost a whole shelf of height. I measured the gap — 10 inches in my fridge — before buying the second set.
Pro Tip: Choose bins with handles. Without handles, you will drag the bin and spill everything inside it.
Cost: $15-$30 | Time: 20 minutes | Difficulty: Easy
2. A First-In, First-Out Rule

This is not a product, it is a habit, and it saves more food than any bin. When I put new shopping away, the new items go at the back and the older items come to the front. It takes thirty seconds, and it means we eat the older yogurt first instead of finding it a week past its date.
The catch is that it only works if everyone in the house does it. My husband put new milk in front of the old milk for a month. I fixed it by labelling the shelf “old at front”.
Pro Tip: Do this as you unpack the shopping, not later. If you put the bags down and walk away, the rule never happens.
Cost: $0 | Time: 2 minutes per shop | Difficulty: Easy
3. A Dedicated Leftovers Shelf

Image credit: Corrie Cooks
Leftovers used to hide behind the milk and get thrown away on Sunday. Now they live on one shelf at eye level, in clear containers, with nothing else on that shelf. If it is on the leftovers shelf, it gets eaten within two days or it goes.
The honest downside is space. On a big cooking day, the leftovers shelf overflows. I keep two spare containers in the cupboard for those days, and I never put leftovers on any other shelf, or the system breaks.
Pro Tip: Use square containers, not round ones. Square containers stack neatly and waste no space.
Cost: $10-$25 | Time: 10 minutes | Difficulty: Easy
4. Labels With Dates, Not Just Names
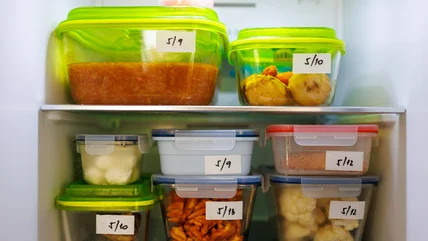
Image credit: Tasting Table
I used to label containers with what was inside — “soup” — and then wonder how old the soup was. Now every label has a date: “soup, Mon 3 Nov”.
A roll of masking tape and a marker cost less than two dollars, and they have saved more food than anything else in this list. The catch is the tape. Cheap tape falls off in the cold and damp, so I use freezer tape, which sticks properly.
Pro Tip: Label the lid and the side. When containers are stacked, you can only see the side.
Cost: $2-$5 | Time: 5 minutes | Difficulty: Easy
5. A Snack Bin the Kids Can Reach

Image credit: Horderly
The children used to open the fridge and stand there, door open, looking for a snack. Now there is one bin on the bottom shelf with yogurts, cheese sticks, and cut fruit, and they can help themselves. The door stays shut, the food stays cold, and I am not called every ten minutes.
The downside is restocking. If the bin is empty, the children go back to opening the door and staring. I refill it every Sunday and Wednesday.
Pro Tip: Keep only snacks you are happy for them to eat without asking. If the chocolate lives in the snack bin, it is not a snack bin anymore.
Cost: $5-$12 | Time: 10 minutes | Difficulty: Easy
6. Door Bins by Use, Not by Size

Image credit: Apartment Therapy
I used to put bottles in the door wherever they fit. Now the door has jobs: top bin for jams and butter, middle bin for sauces, bottom bin for drinks and milk. I reach for the same spot every time, and I never hunt for the mustard again.
The honest catch is weight. A door full of heavy jars puts strain on the hinges, and my door started to sag slightly. I moved the heaviest jars onto a shelf, and the door closes properly again.
Pro Tip: Keep milk on a shelf, not in the door, if you can. The door is the warmest part of the fridge, and milk lasts longer on a cold shelf.
Cost: $0 | Time: 15 minutes | Difficulty: Easy
7. A Condiment Lazy Susan

Image credit: Loose Ends Organizing
Condiments used to live three deep on a shelf, and I bought a second bottle of soy sauce three times because I could not see the first one. A small turntable on the middle shelf holds them all now, and one spin brings anything to the front.
The watch-out is size. My first turntable was too wide and blocked the shelf above it. I measured the shelf height before buying the second one, and now it spins freely.
Pro Tip: Group condiments by meal — breakfast sauces together, dinner sauces together — so you spin once, not three times.
Cost: $8-$18 | Time: 5 minutes | Difficulty: Easy
8. An Egg Holder That Actually Fits

Image credit: Popular Science
Eggs used to live in the cardboard box they came in, which got damp and fell apart. A clear egg holder with a lid holds twelve eggs, stacks neatly, and lets me see how many are left before I shop. It cost less than five dollars and it has lasted two years.
The downside is that it holds exactly twelve. If I buy eighteen eggs, six still live in the box. I now buy twelve at a time, which is enough for our week.
Pro Tip: Keep eggs on a middle shelf, not in the door. The door temperature changes every time it opens, and eggs keep better somewhere cold and steady.
Cost: $4-$10 | Time: 5 minutes | Difficulty: Easy
9. A Drinks Zone on One Shelf

Image credit: Vecteezy
Cans and bottles used to roll around on every shelf. Now they live on one shelf, in a small bin, lying on their sides. I can see at a glance what we have, and nothing rolls to the back and gets forgotten.
The honest catch is the bin. My first bin had no sides, and the cans rolled out anyway. A bin with low sides — about two inches high — holds them in place without hiding them.
Pro Tip: Keep water at the front and everything else behind it. The drink everyone reaches for most should be the easiest to grab.
Cost: $5-$12 | Time: 10 minutes | Difficulty: Easy
10. A Meal-Prep Zone for the Week

On Sunday, I prep three dinners’ worth of vegetables and store them in clear containers on one shelf — chopped onions, washed salad, marinated chicken. During the week, dinner takes half the time, because the prep is already done.
The downside is that prepped food goes off faster than whole food. I only prep for three days ahead, never five, and I label every container with the day I prepped it.
Pro Tip: Prep ingredients, not full meals. Chopped vegetables and marinated meat are flexible; a fully cooked meal you do not fancy on Tuesday is food waste.
Cost: $10-$20 | Time: 1 hour on Sunday | Difficulty: Moderate
11. A Small Fridge Shelf Riser

Image credit: Just Organized
A small wire riser on the middle shelf gives me a second level for short items — yogurts underneath, cheese on top. It cost less than ten dollars and it added a whole extra row of storage to a shelf that was wasting its height.
The watch-out is the height above the riser. My first riser was too tall, and nothing fit on top of it. I measured the gap to the shelf above — 8 inches in my fridge — and bought a riser that left room for a yogurt pot on top.
Pro Tip: Use risers only for short, light items. A riser full of heavy jars is hard to lift and easy to knock over.
Cost: $8-$15 | Time: 5 minutes | Difficulty: Easy
12. A Produce Drawer Liner

Image credit: Tasting Table
The bottom drawers used to get damp and slimy, and salad went off in days. A washable liner in each drawer keeps them dry and easy to clean, and I wipe the liners every week. Salad lasts two days longer now, which is two days of food saved.
The honest downside is that liners need washing too. I have two sets, so one is in the wash while the other is in the drawer. Without a spare set, I would skip washing them.
Pro Tip: Use a liner with small holes for air. A solid liner traps moisture and makes the problem worse, not better.
Cost: $5-$12 | Time: 10 minutes | Difficulty: Easy
13. An “Eat Me First” Box

Image credit: Suite101
This is a small clear box on the top shelf, and it is the most useful idea in this whole list. Anything that needs eating soon — the last piece of cheese, the half-used cream, the leftovers from yesterday — goes in the box.
When anyone opens the fridge looking for a snack, they check the box first. The catch is that the box only works if everyone uses it. I labelled it in big letters, and I put it at eye level so nobody can miss it.
Pro Tip: Empty the box every Sunday, no exceptions. Anything still in it on Sunday gets cooked, frozen, or thrown away.
Cost: $5-$10 | Time: 5 minutes | Difficulty: Easy
14. A Freezer Inventory on the Door
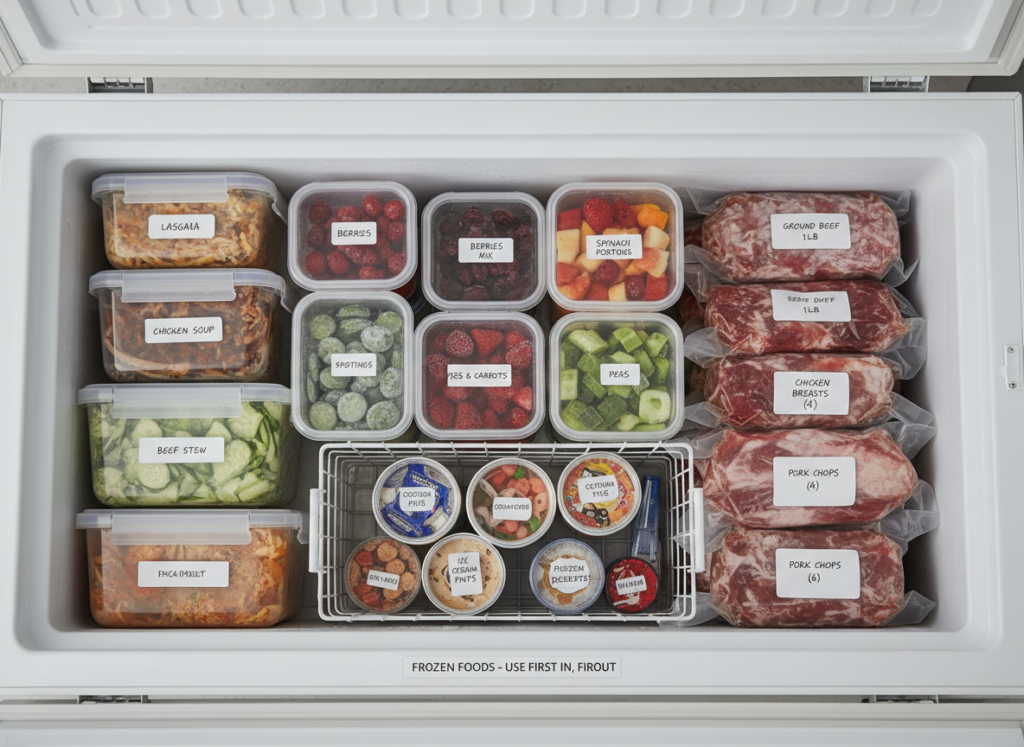
Image credit: Home Tips Daily
I used to buy frozen peas when I already had three bags. Now there is a small whiteboard on the freezer door with a list of what is inside, and I cross things off as I use them. It takes ten seconds to update, and it has stopped me buying duplicates.
The downside is that the list only works if it is accurate. I forgot to update it for two weeks once, and it was useless. Now I update it as I put shopping away, not later.
Pro Tip: Keep a marker on a string attached to the board. If the marker lives in a drawer, nobody will use the board.
Cost: $5-$12 | Time: 15 minutes | Difficulty: Easy
15. A Dairy Drawer, Not a Dairy Shelf
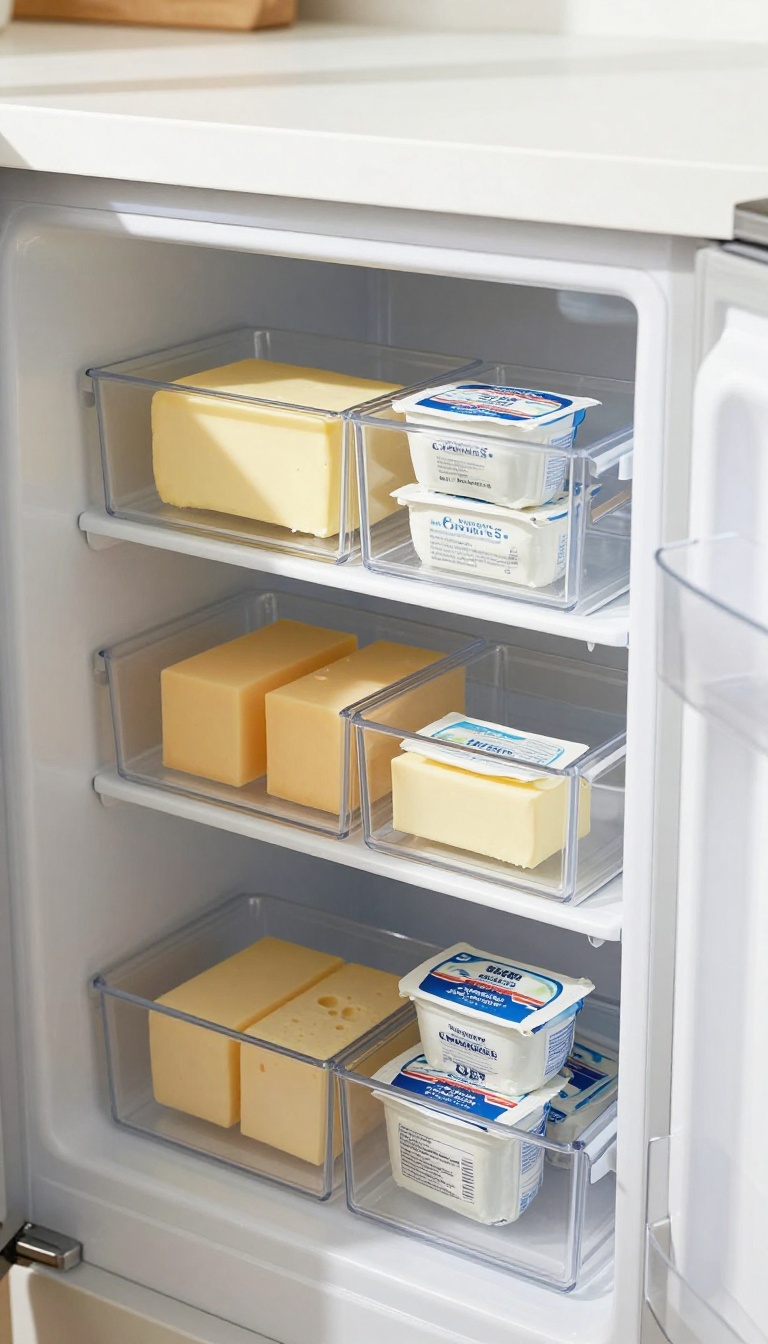
Image credit: Freshly Vibrant
Butter, cheese, and cream used to live on three different shelves. Now they share one shallow drawer, and I can see everything at a glance. No more finding three half-used blocks of cheese at the back of the fridge.
The honest catch is temperature. My drawer is at the top of the fridge, where it is slightly warmer, so soft cheese goes off faster there. I keep hard cheese in the drawer and soft cheese on a cold middle shelf.
Pro Tip: Keep butter in a covered dish, not in its wrapper. An open wrapper picks up every smell in the fridge, and butter tastes like onion within a day.
Cost: $0-$10 | Time: 10 minutes | Difficulty: Easy
16. A Sauce Caddy in the Door

Image credit: FoodBuzz Daily
Small sauce bottles — hot sauce, soy sauce, Worcestershire — used to fall over every time I opened the door. Now they stand upright in a small caddy that fits inside the door bin. I lift the whole caddy out, take what I need, and put it back.
The downside is the caddy size. My first caddy was too wide for the door bin, so it lived on a shelf instead, where it was useless. I measured the door bin — 6 inches wide in my fridge — before buying the second one.
Pro Tip: Keep only sauces in the sauce caddy. The moment a jam jar sneaks in, the caddy stops working as a caddy.
Cost: $5-$12 | Time: 5 minutes | Difficulty: Easy
17. A Fruit Drawer You Can See Into

Image credit: Yours Minimally
Fruit used to live in the bottom drawer, where I forgot it until it went soft. I swapped the solid drawer for a clear bin on a middle shelf, and now I see the fruit every time I open the fridge.
We eat more fruit, and less of it goes in the bin. The honest downside is that fruit on a shelf ripens faster than fruit in a drawer. I buy smaller amounts more often now, and I keep bananas out of the fridge entirely — they go brown in the cold.
Pro Tip: Put a paper towel in the bottom of the fruit bin. It soaks up moisture and keeps berries fresh for an extra day or two.
Cost: $5-$12 | Time: 5 minutes | Difficulty: Easy
18. A Weekly Fridge Reset

Image credit: Bleacher Breaker
Every Sunday evening, I do a five-minute fridge reset. I take out anything past its date, wipe one shelf, and move the “eat me first” food to the front. It is the habit that stops fridge organization from slowly falling apart, and it means I never face a big, smelly clean.
The catch is that it only works if you actually do it weekly. I skipped it for three weeks once, and the fridge looked like it did before I started. Now it is on my calendar, Sunday at 6 p.m.
Pro Tip: Do the reset before you write the shopping list, not after. That way you only buy what you actually need.
Cost: $0 | Time: 5 minutes a week | Difficulty: Easy
19. A Shopping List on the Fridge Door

A small notepad on the fridge door, with a pen on a string, is where our shopping list lives. When we finish something, we write it down straight away.
No more standing in the shop trying to remember what we ran out of, and no more buying a third bottle of soy sauce. The downside is that the list only works if everyone writes on it. I added it to the children’s chores — if you finish it, you write it down — and it has worked for months.
Pro Tip: Keep the list to one page, and cross things off as you buy them. A list with three weeks of old items on it is not a list, it is a museum.
Cost: $2-$5 | Time: 5 minutes | Difficulty: Easy
20. A No-Double-Buy Rule

This is a house rule, not a product: before I shop, I check the fridge, the freezer, and the pantry. It takes three minutes, and it has stopped me buying duplicates almost completely.
The freezer inventory on the door helps, because I can check the freezer without opening it. The honest catch is that it is easy to skip when you are in a rush. I do the check while the kettle boils on shopping day, so it is part of a routine I already have.
Pro Tip: Take a photo of the fridge before you shop. A photo on your phone is faster than a written list, and you can check it in the aisle.
Cost: $0 | Time: 3 minutes per shop | Difficulty: Easy
21. A Monthly Deep Clean

Image credit: Which?
Once a month, I empty the fridge completely, wipe every shelf with warm soapy water, and put back only what is still in date. It takes about thirty minutes, and it is the only way to catch the spills and the forgotten jars at the back.
I do it on the first Sunday of the month, so I never have to remember when I last did it. The downside is that it is a job nobody enjoys, and it is tempting to skip it. I make it easier by doing it before the big shop, when the fridge is at its emptiest.
Pro Tip: Check the temperature while you clean. A fridge thermometer costs a few dollars, and it tells you if your fridge is cold enough to keep food safe. If the temperature is above 40°F (4°C), turn the dial down a notch.
Cost: $0-$5 | Time: 30 minutes a month | Difficulty: Easy
Mistakes I Made (So You Don’t Have To)
Buying bins before measuring. My first set of fridge bins was beautiful and completely the wrong size for my shelves. I measured nothing, guessed everything, and returned half of them. Now I measure first, buy second, every single time.
Putting milk in the door. I kept milk in the door for years because that is where the bottle-shaped space was. It went off faster there, because the door is the warmest part of the fridge. Moving milk to a cold middle shelf added two days to its life.
Labelling without dates. I labelled containers with what was inside — “soup” — and then wondered how old the soup was. A label without a date is only half a label. Now every label has a date, and I throw food away far less often.
Forgetting the freezer. I organised the fridge beautifully and ignored the freezer for a year. It became a solid block of unlabelled bags, and I threw away half of it in one clean-out. The freezer inventory on the door fixed that, and I wish I had done it a year earlier.
Which Refrigerator Organization Idea Should You Try First?
| Idea | Best For | Cost | Effort |
|---|---|---|---|
| Clear Bins on Every Shelf | Any fridge, today | $15-$30 | Low |
| An “Eat Me First” Box | Stopping food waste | $5-$10 | Low |
| Labels With Dates | Leftovers | $2-$5 | Low |
| A Snack Bin the Kids Can Reach | Families | $5-$12 | Low |
| A Freezer Inventory | Duplicate buying | $5-$12 | Low |
| A Meal-Prep Zone | Busy weeks | $10-$20 | Medium |
| A Weekly Fridge Reset | Keeping it working | $0 | Low |
Frequently Asked Questions
How do I organize a refrigerator with very little space?
Start with small fridge organization, not a big buy. Clear everything out, keep only what you eat weekly, and use clear bins to group what is left. A shelf riser and an “eat me first” box add order without taking space, and a weekly reset keeps the gain.
How do I organize a refrigerator so food does not go missing?
Fridge organization ideas work when food is visible and dated. Put leftovers at eye level, use clear bins and clear containers, and label everything with a date. If you cannot see it, you will forget it — and if you cannot see the date, you will throw it away.
What are the best fridge organization bins?
Clear bins with handles, sized to your shelves, are the best fridge organization bins for most fridges. Measure your shelf height and depth before you buy, and buy one set to test before you buy more. Bins that are too tall waste a whole shelf of height.
How do I organize a small fridge?
For a small fridge, use every inch: a shelf riser for short items, a door caddy for sauces, and one snack bin instead of three. Keep drinks on one shelf, dairy together, and leftovers at eye level. In a small fridge, clutter builds up twice as fast.
How do I keep my refrigerator organized with kids?
Give the children one snack bin on a low shelf that they can reach, and a rule that they check the “eat me first” box before asking for anything else. Keep glass jars and cleaning products high, and keep the shopping list on the door so they learn to write down what they finish.
Final Thoughts
My fridge is not bigger than it was five years ago, but it feels bigger, because I can see everything in it and nothing goes missing at the back. That is what good refrigerator organization ideas do — they do not add space, they give you back the food you were already buying.
Start with clear bins and the “eat me first” box. Live with them for a week. Then add one more idea from this list, the one that fixes your biggest daily annoyance. Small, tested changes beat a big expensive makeover every time.