27 Zoo Animal Craft Ideas for Kids That Spark Creativity
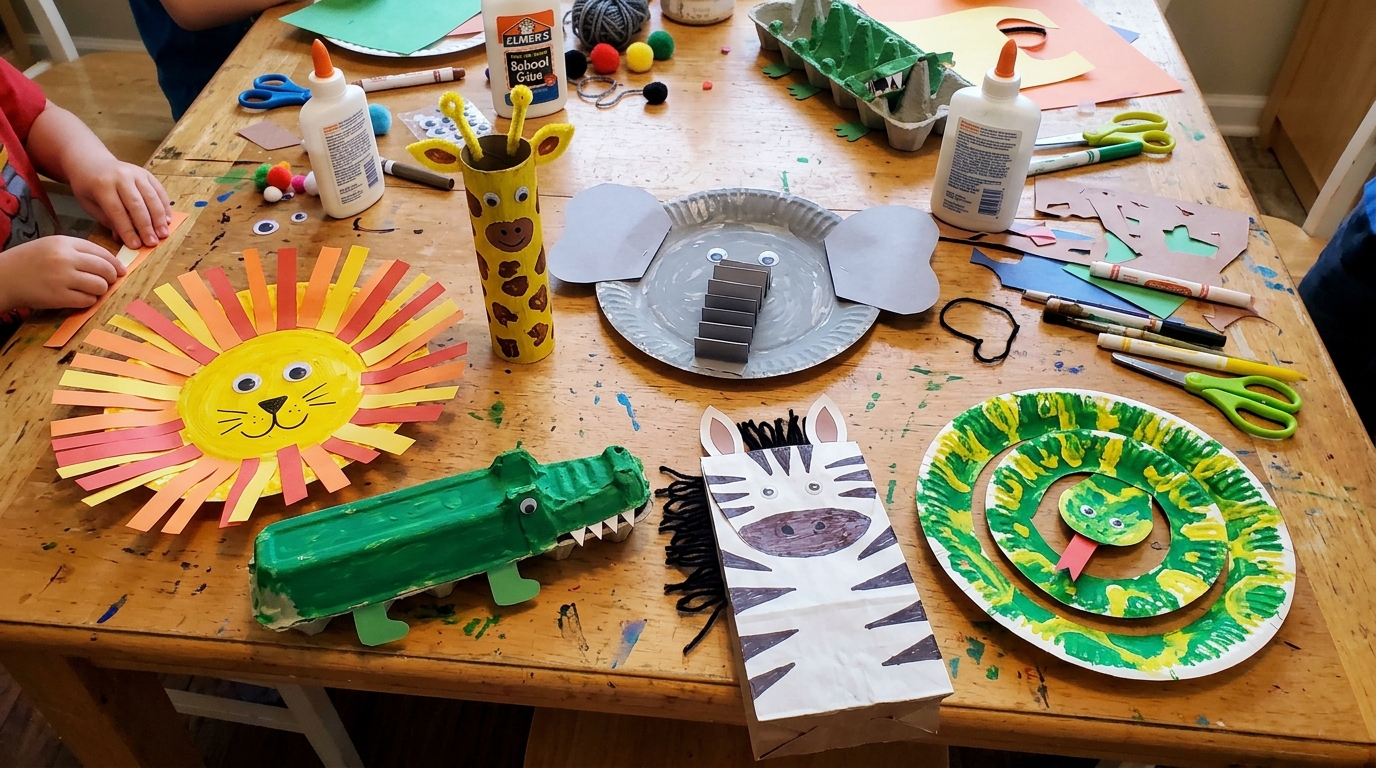
Zoo animal crafts give me a simple way to bring children’s interest in wildlife into an afternoon of painting, cutting, gluing, and building. From a paper plate elephant to a cardboard zoo, these projects use familiar materials to turn favorite animals into handmade creations.
I like having a mix of easy crafts and larger projects so children can choose something that fits their age, attention span, and available supplies. These ideas work well at home, in classrooms, after a zoo visit, or on a rainy day when an outdoor outing is not possible.
These 27 zoo animal craft ideas include paper plate animals, cardboard tube creatures, clay figures, puppets, wearable accessories, paintings, and a complete zoo diorama. Most use accessible supplies such as construction paper, cardboard, paint, felt, yarn, and glue.
Save this for later
Table of Contents
Each project includes a suggested age range, estimated crafting time, and materials list to help with planning. Drying and waiting times may add to the total time, particularly for clay, paint, and papier-mâché projects. Adult preparation is recommended whenever a craft involves sharp tools, sewing, wire, or small detachable parts.
Key Takeaways
- For younger children: Try the paper plate elephant, panda craft, or giraffe collage with pre-cut shapes and adult supervision.
- For recycled crafts: Reuse clean cardboard tubes, egg cartons, paper bags, and cardboard boxes.
- For pretend play: Make a kangaroo with a removable joey, a penguin puppet, an animal mask, or a zoo keeper costume.
- For animal observation: Use photographs to study tiger stripes, giraffe patches, and the shapes of different animals.
- For groups: Build a collaborative zoo mural, a painted rock collection, or a cardboard zoo diorama.
- For safer crafting: Choose age-appropriate, non-toxic supplies and keep small parts, long cords, sharp tools, and hot adhesives away from children who cannot use them safely.
Related article: 21 Pirate Crafts for Kids
1. Paper Plate Elephant
Suggested age: Ages 3–5 with adult help; ages 6 and up can complete more steps independently.
Estimated time: 20–30 minutes, plus paint-drying time.
Materials: Paper plate, gray paint, gray construction paper, white paper, child-safe scissors, glue, and markers or crayons.
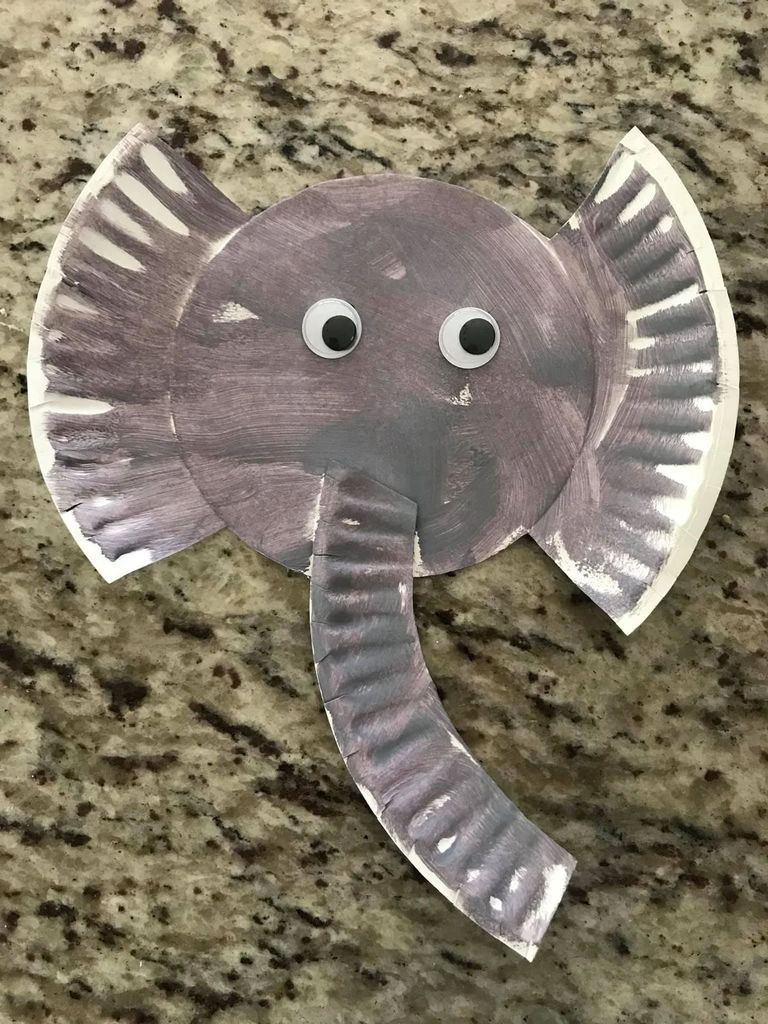
A paper plate makes a convenient base for an elephant’s face. Paint the plate gray and let it dry. Cut two large ears from gray paper, then add a long trunk, small white tusks, and eyes. Glue the ears to the sides and position the trunk in the center.
Children can bend the trunk upward as if the elephant is trumpeting, curl it sideways, or point it downward. For a more interesting version, fold a strip of gray paper accordion-style and attach one end beneath the eyes to create a flexible trunk.
Make several elephants with different trunk positions and display them together as a herd against a paper grassland background.
Pro Tip: Pre-cut the ears and trunk for younger children. Use paper facial details instead of small plastic eyes or other detachable pieces if the finished craft will be handled by children who may put objects in their mouths.
2. Toilet Roll Zebra
Suggested age: Ages 4–6 with adult help; ages 7 and up can handle more of the decorating independently.
Estimated time: 25–35 minutes, plus paint-drying time.
Materials: Clean cardboard toilet paper roll, white and black paint or markers, black-and-white construction paper, glue, child-safe scissors, and a small strip of black paper for the mane.
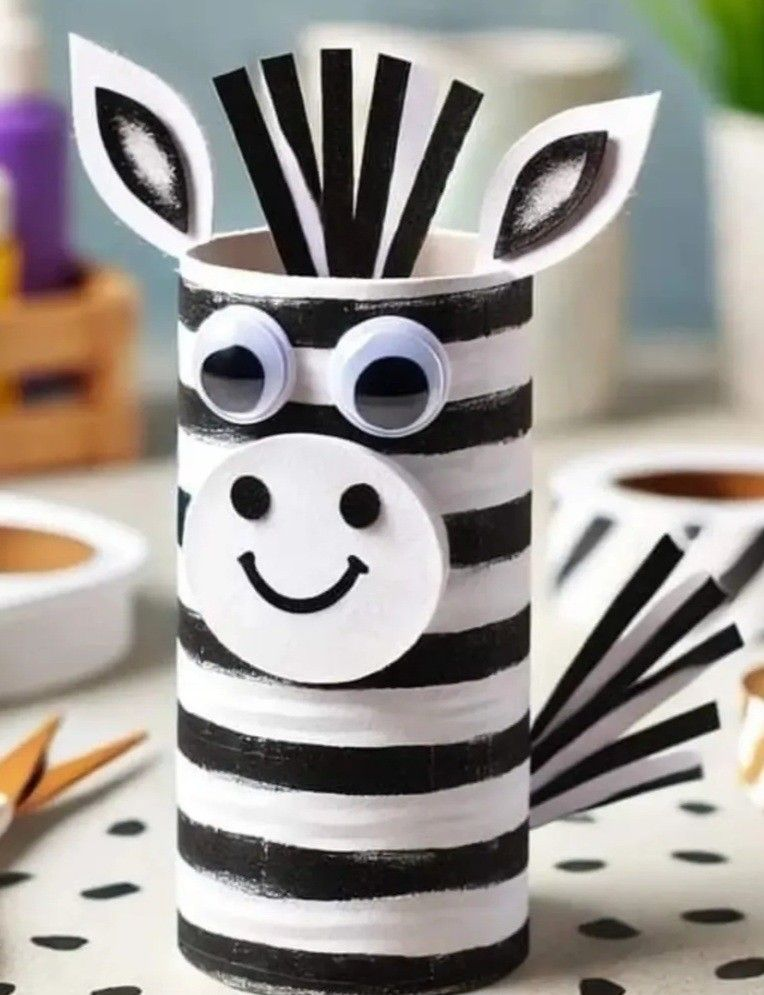
Paint the cardboard tube white and let it dry completely. Add black stripes using paint or a marker, varying their direction and thickness to create a distinctive pattern. Cut four legs from black paper and attach them to the lower part of the tube so the zebra can stand.
Add a short mane along the top, two small ears, and a black paper tail. Children can draw the face at one end of the tube and adjust the legs to help the zebra balance.
For a simple display, arrange a few zebras beside paper grass and a painted savannah background.
Pro Tip: Use a small amount of glue at each attachment point and allow it to set before standing the zebra upright. Avoid soaking the cardboard with paint, as excess moisture can soften the tube.
3. Handprint Giraffe
Suggested age: Ages 3–5 with adult help; ages 6 and up can create more details independently.
Estimated time: 20–30 minutes, plus drying time.
Materials: Washable, non-toxic yellow and brown paint, paper, a paintbrush, a shallow tray for paint, and markers.
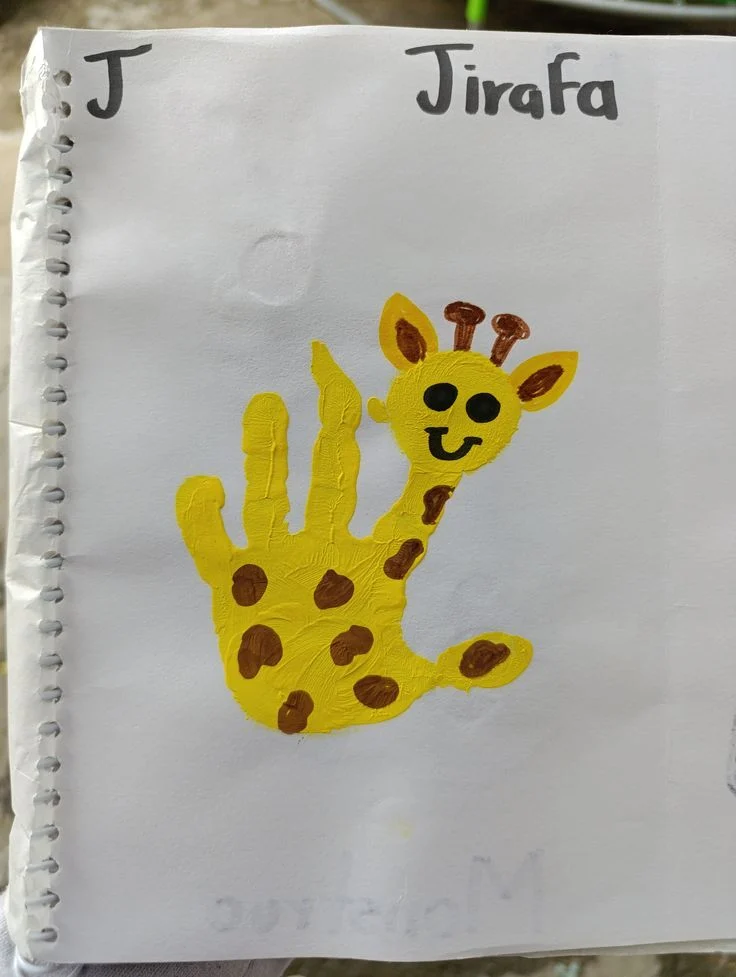
A handprint giraffe makes a personal keepsake that records the shape of a child’s hand. Apply yellow paint to the palm and fingers, then press the hand onto paper. Extend the neck and body with a brush or marker, and add brown patches, a small face, ears, and two short ossicones, the horn-like structures on a giraffe’s head.
For a version that uses less paint, trace the child’s hand onto yellow paper and cut it out with adult help. Extend the neck with a long paper strip and attach the pieces to a background sheet.
Add a few green leaves or a tree to create a simple setting. The child’s handprint remains the main feature, making the picture suitable for a family keepsake.
Pro Tip: Write the child’s name and date on the back. Keep paint away from the eyes and mouth, and wash hands after the activity.
4. Clay Penguin
Suggested age: Ages 4–6 with adult supervision; ages 7 and up can shape more detailed figures.
Estimated time: 25–40 minutes for modeling clay; air-dry clay may need additional drying time.
Materials: Black, white, and orange modeling clay, a small modeling tool if appropriate for the child’s age, and blue or white paper for an optional display.
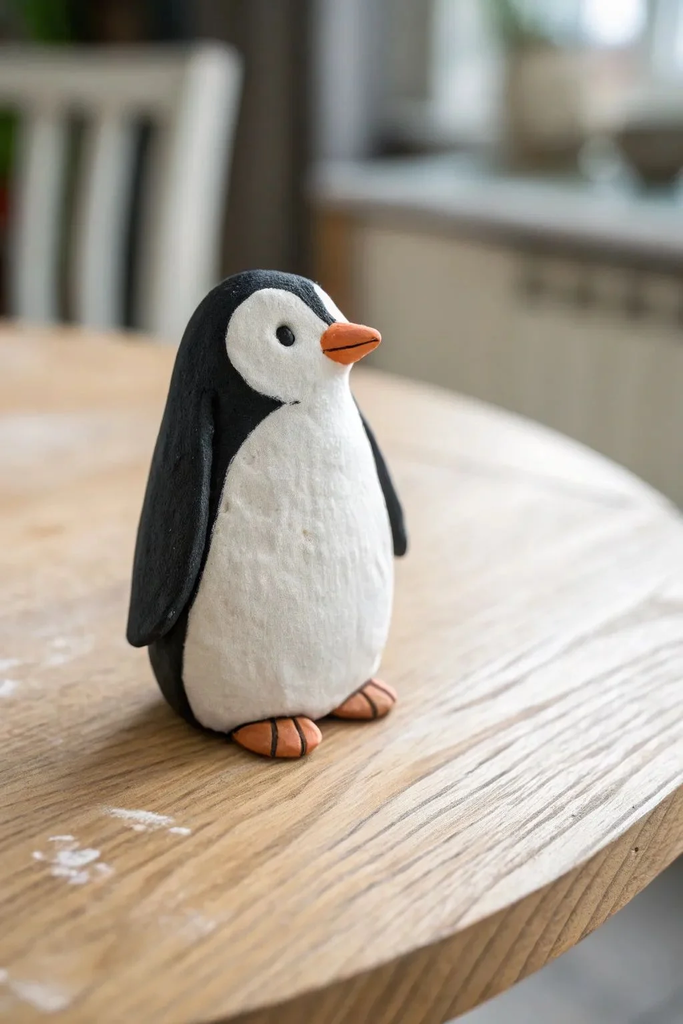
Shape black clay into an oval body and flatten a small piece of white clay against the front for the belly. Add two short black flippers, an orange beak, and orange feet. Shape the face with simple clay details rather than small beads or other loose pieces.
Make a colony of penguins in different sizes and positions. Place them on white paper for an Antarctic-inspired scene or use blue paper to suggest water. Penguins live in a range of environments depending on their species, so the icy setting is just one possible craft background.
Pro Tip: Choose clay labeled for the child’s age and follow the manufacturer’s instructions. If you use air-dry clay, allow it to dry fully before displaying the figures. Avoid small detachable details around children who may put objects in their mouths.
5. Sock Lion
Suggested age: Ages 6–8 with substantial adult help; ages 9 and up can assist with more assembly. Sewing should be handled by an adult where needed.
Estimated time: 40–60 minutes, plus any time needed for sewing and finishing.
Materials: Clean tan or golden sock, suitable stuffing, yarn or felt for the mane, felt for the face and tail, fabric glue suitable for the materials, and needle and thread for adult use.
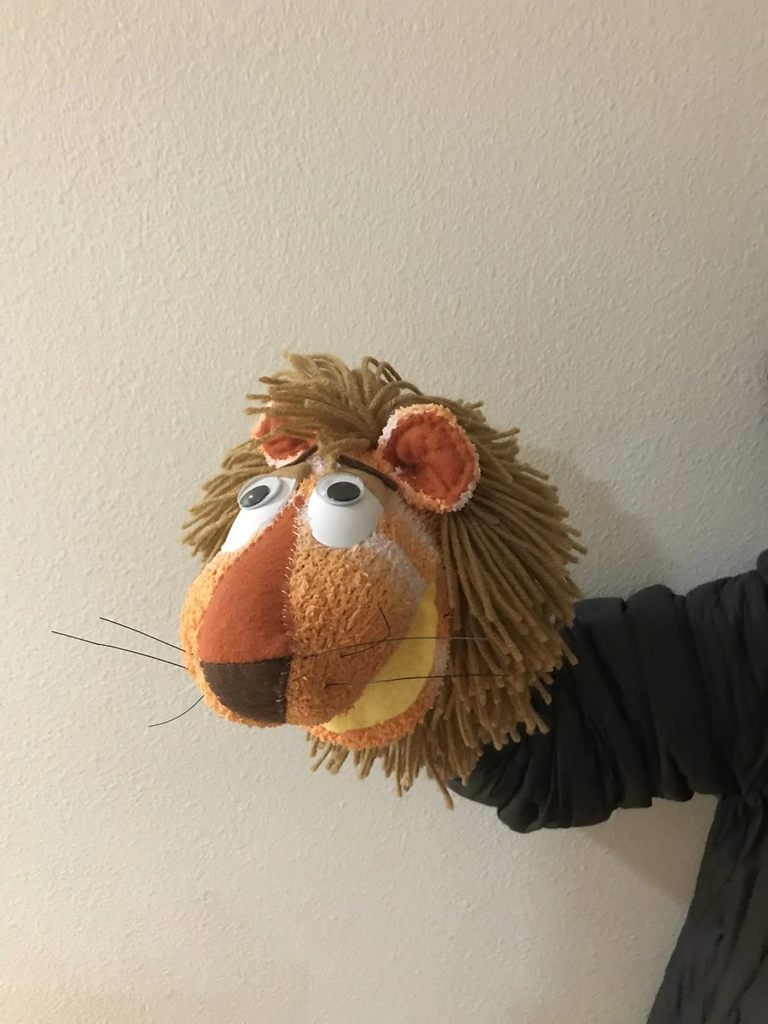
Fill the sock with stuffing, leaving enough material at the opening to close it securely. An adult can sew the opening shut or secure it using a suitable method appropriate for the finished project. Shape the filled sock into a body and head, using a few stitches or securely attached fabric sections to define the shape.
Cut yarn or felt into mane pieces and attach them around the head. Add felt ears, a nose, and a tail with a tuft at the end. If the lion is intended for young children, embroider the eyes and facial details rather than using buttons.
For a simpler no-sew alternative, cut a lion’s face from yellow cardstock and surround it with strips of brown paper to create a mane.
Pro Tip: Check the finished lion for loose stuffing, yarn, and facial pieces before play. Use only materials suitable for the intended age, and do not give a homemade soft toy with detachable parts to a child who may mouth them.
6. Paper Bag Gorilla
Suggested age: Ages 4–6 with adult help; ages 7 and up can assemble and decorate more independently.
Estimated time: 30–40 minutes, plus drying time if paint is used.
Materials: Brown paper lunch bag, black or dark brown paint or construction paper, lighter paper for the face, cardstock for the arms, glue, child-safe scissors, markers, and scrap paper for optional stuffing.
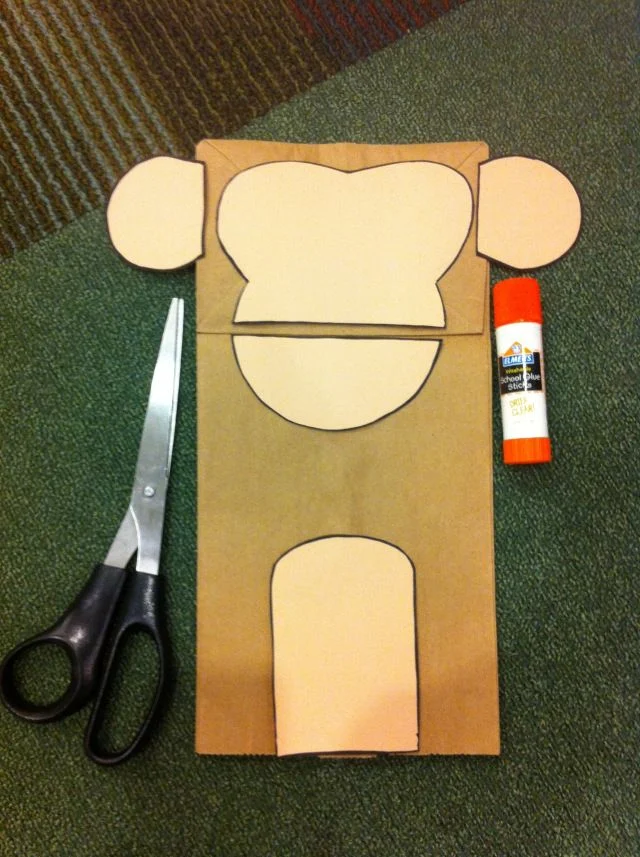
Place the bag with its bottom flap facing upward; this will become the gorilla’s head. Cover the bag with dark paper or paint, then add a lighter face, rounded ears, eyes, and a broad nose. Allow the paint to dry before attaching any paper details.
Cut two long arms from cardstock and glue them to the sides of the bag. Bend the arms across the chest, or position them forward to hold a paper banana. If you want the gorilla to stand more firmly, add a little crumpled scrap paper inside the lower section without overfilling it.
Children can make several gorillas with different expressions and poses, then use them in a pretend jungle scene.
Pro Tip: Keep the bottom flap free if the bag will be used as a puppet. Pre-cut the arms and face pieces for younger children, and let all wet glue dry before handling the figure.
7. Painted Rock Zoo Animal Set
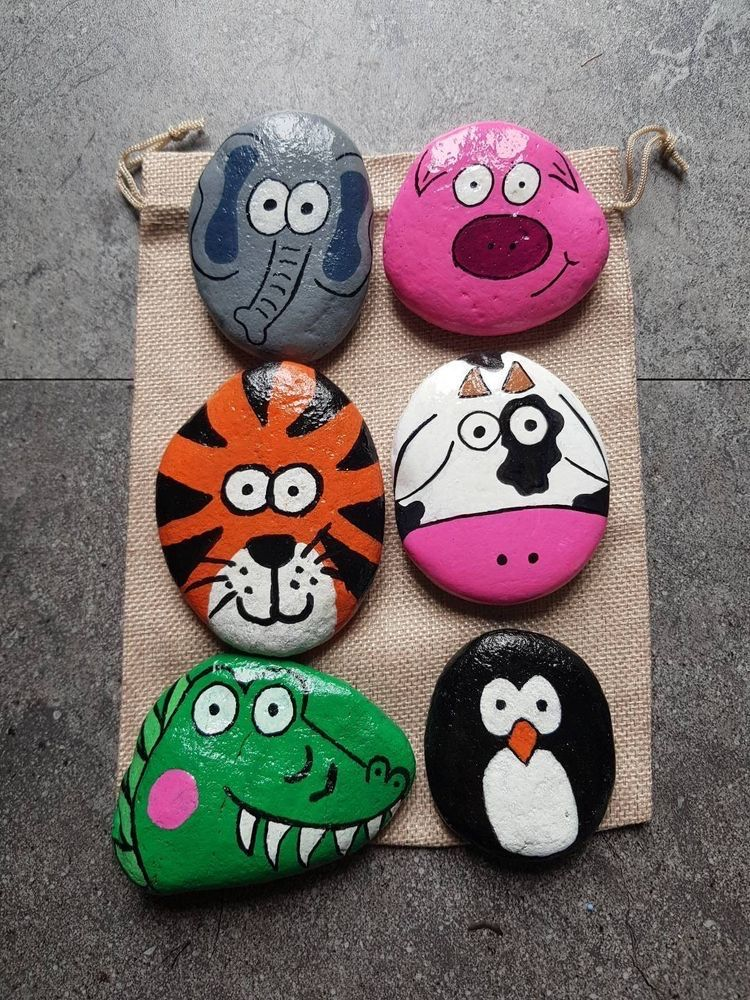
Suggested age: Ages 6–8 with adult supervision; ages 9 and up can manage more of the painting independently.
Estimated time: 30–60 minutes for a small set, plus drying time.
Materials: Smooth, clean stones, non-toxic craft paint, paintbrushes, a water container, scrap paper for the work surface, and an optional suitable sealant for adult use.
Choose several smooth stones and wash them before allowing them to dry completely. Paint each stone as a different animal. A rounded stone can become a panda face, while a longer stone may suit a crocodile, zebra, or elephant.
Start with the main body color and let it dry before adding contrasting markings. Use simple shapes and recognizable features instead of trying to paint every detail. Once the paint is dry, arrange the animals together to create a miniature zoo.
The finished stones can also be sorted by animal type or used as story prompts during supervised play.
Pro Tip: Small stones are choking hazards and are not suitable for children who may put objects in their mouths. Use larger stones under close adult supervision, and follow the paint manufacturer’s instructions. Apply a sealant only if it is suitable for the materials and intended use.
8. Kangaroo Pocket Craft
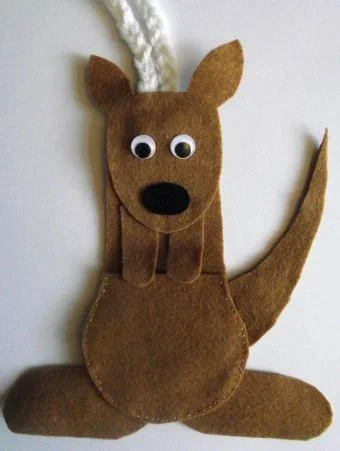
Suggested age: Ages 4–6 with adult help; ages 7 and up can complete more of the cutting and assembly.
Estimated time: 25–35 minutes.
Materials: Brown construction paper or cardstock, lighter paper for the face, felt or paper for the pouch, glue, child-safe scissors, and markers.
Draw a kangaroo with a large body, long tail, pointed ears, and strong hind legs on brown cardstock. Cut out the shape and attach a curved pocket to the front using glue around the sides and bottom, leaving the top open.
Make a small joey from paper or felt and slide it into the pouch. Check that the opening is wide enough for the joey to move in and out without tearing the pocket.
For the background, add grass, low shrubs, or open woodland details to suggest an Australian setting. Children can tell stories about the joey leaving the pouch to explore and returning when it is time to rest.
Pro Tip: Reinforce the pocket edges with a little extra paper or tape on the back if the craft will be handled repeatedly. Make the joey large enough to handle easily and keep small pieces away from children who may mouth them.
9. Tiger Stripe Painting
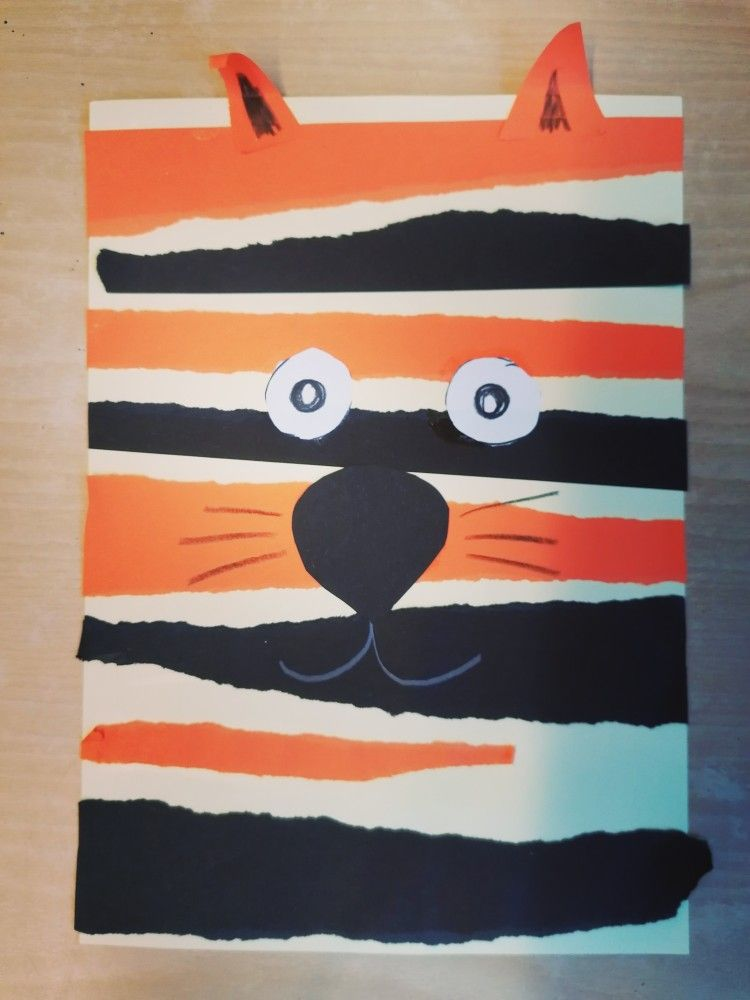
Suggested age: Ages 4–6 with adult help; ages 7 and up can add more detailed markings.
Estimated time: 25–40 minutes, plus paint-drying time.
Materials: Paper or cardstock, orange, black, and white paint, paintbrushes, a pencil, and photographs of tigers for reference.
Draw a simple tiger body or face on paper and fill the main areas with orange paint. Let the base coat dry before adding black stripes and white patches around the cheeks, eyes, and belly.
Before painting the stripes, look at a photograph of a tiger together. Notice how the markings curve around different parts of the body rather than appearing as identical straight lines. Children can use this observation to create a more recognizable tiger.
Display the finished painting on a contrasting background or combine several pictures into a collection of wild animals.
Pro Tip: Use a thicker brush for bold stripes and a smaller one for facial details. A scrap sheet helps children test the brush and paint before working on the main picture.
10. Flamingo Pom Pom Craft
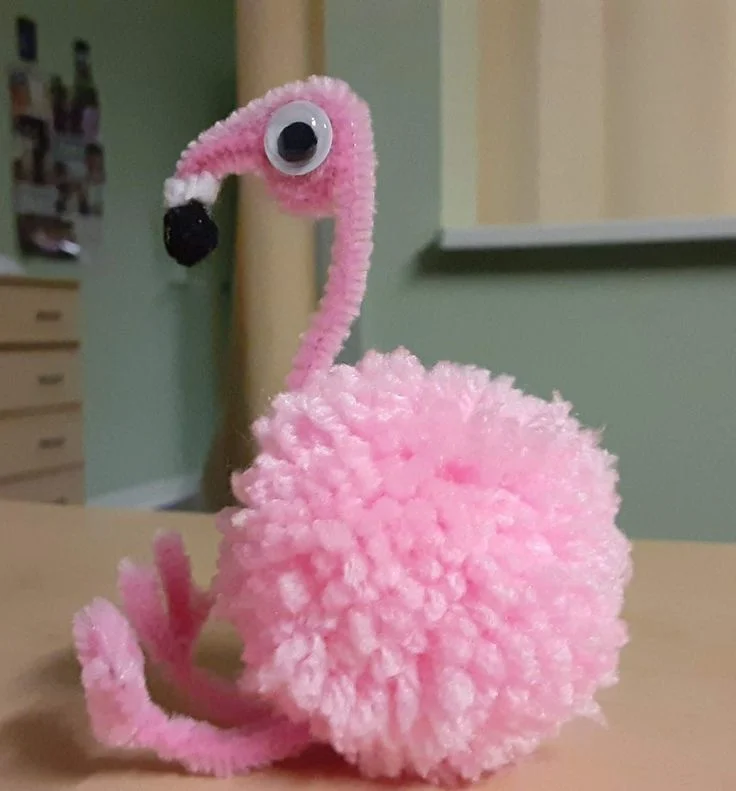
Suggested age: Ages 6–8 with adult help; ages 9 and up can assemble more independently.
Estimated time: 30–45 minutes.
Materials: Large pink pom-pom, pink and black construction paper, glue suitable for the materials, child-safe scissors, and a small piece of sturdy cardboard for the base.
Attach the pink pom-pom to a short folded paper support or a small cardboard base so the body remains upright. Cut a curved neck and small head from pink cardstock, then add a black-tipped beak. Glue the neck securely to the front of the body.
Make two long legs from folded cardstock strips and attach them to the underside of the body. Glue their lower ends to the cardboard base, spacing them far enough apart to help the flamingo stand. Bend one paper leg slightly to suggest the familiar one-legged pose.
For a group display, create several flamingos with different neck curves and arrange them together.
Pro Tip: Paper legs are a practical alternative to wire for children. If an adult chooses to use pipe cleaners, bend and cover exposed wire ends, and make sure the finished craft has no sharp points.
11. Penguin Waddle Puppet
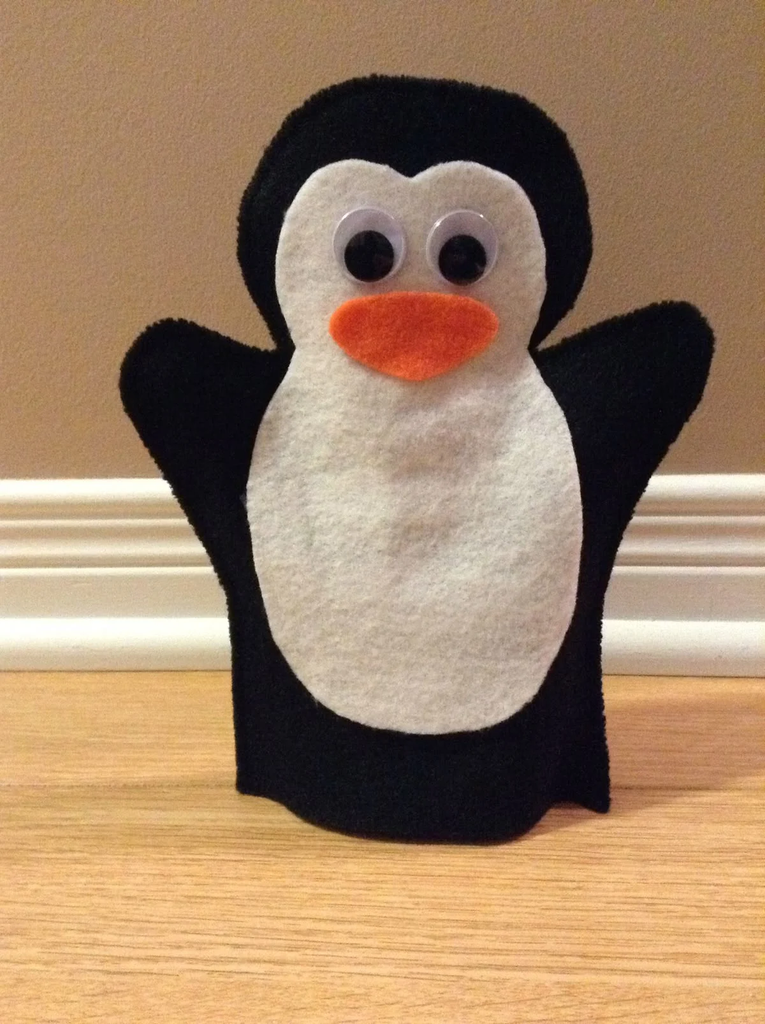
Suggested age: Ages 6–8 with adult help; ages 9 and up can handle more of the assembly. Sewing and hot-glue work are adult tasks.
Estimated time: 35–50 minutes, depending on the adhesive and construction method.
Materials: Black felt, white felt, orange felt, fabric glue suitable for the materials, child-safe scissors, and a marker or chalk for tracing.
Trace two matching penguin body shapes onto black felt. Cut a white belly from felt and attach it to the front piece. Add orange felt feet and a beak, then position the two black body pieces together.
Glue around the sides and top edges, leaving the bottom open for a hand. Allow the adhesive to cure according to its instructions before trying the puppet on. If sewing is preferred, an adult can stitch around the edges instead.
The hand opening should be wide enough to slide on and off comfortably without stretching the felt. Children can move the puppet from side to side to imitate a waddle and act out stories about a penguin colony.
Pro Tip: Test the opening with the intended user before the final edge is secured. Avoid small detachable decorations, and keep hot glue and sewing needles out of children’s reach.
12. Giraffe Spot Collage
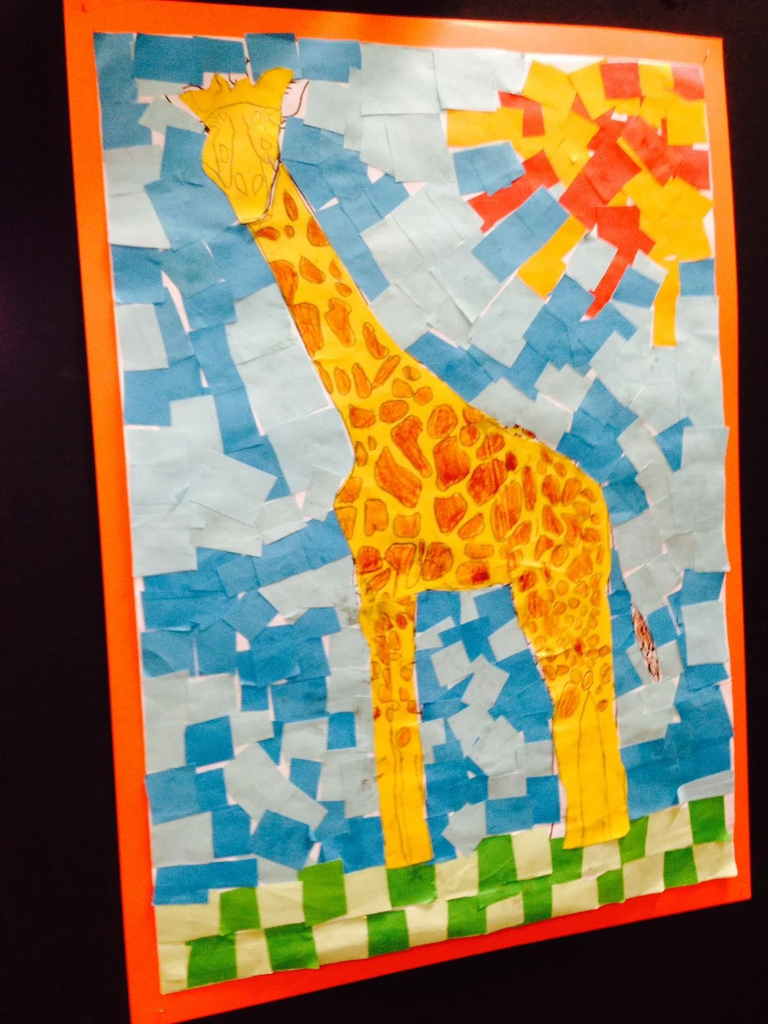
Suggested age: Ages 3–5 with pre-cut shapes and adult help; ages 6 and up can cut and arrange more independently.
Estimated time: 20–30 minutes.
Materials: Yellow construction paper, brown construction paper, a background sheet, glue, child-safe scissors, and a pencil.
Draw or trace a giraffe body with a long neck onto yellow paper and cut it out. Tear brown paper into irregular patches or cut them into different shapes. Arrange the patches across the neck and body, then glue them down once the design looks right.
Children can compare their arrangements with photographs of giraffes, noticing how the shapes and spacing of the markings vary. There is no need to copy one exact pattern; the aim is to make a recognizable giraffe using their own arrangement.
Add a small face, ears, and ossicones to finish the animal. A paper tree or a few leaves can complete the background.
Pro Tip: Tearing paper creates soft, uneven edges, while cutting gives children more control over the shape. Pre-cut the giraffe outline for younger children who are still learning to use scissors.
13. Elephant Ear Headband
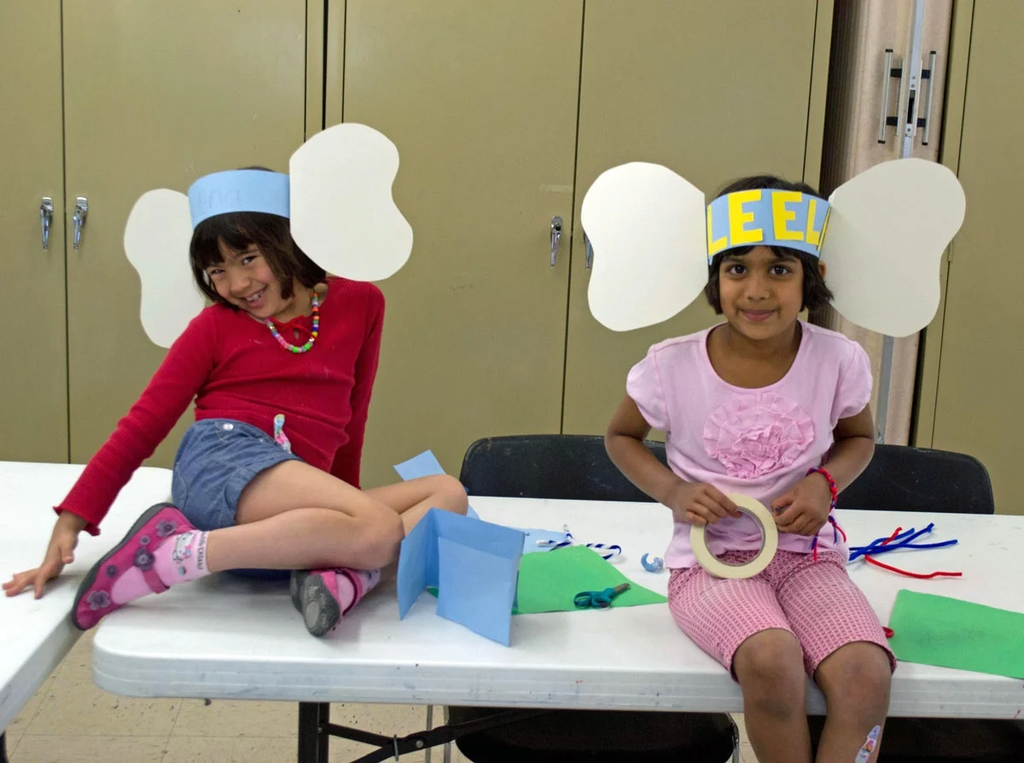
Suggested age: Ages 4–6 with adult help; ages 7 and up can assemble more independently.
Estimated time: 20–30 minutes.
Materials: Gray cardstock, a strip of construction paper for the headband, glue or tape, child-safe scissors, and a pencil.
Cut two large ear shapes from gray cardstock. Fold a small tab at the base of each ear and glue or tape the tabs to a paper headband. Measure the band around the child’s head, leaving enough room for a comfortable fit, then secure the ends with tape or an adjustable paper overlap.
Cut a curved trunk from gray paper and attach it to the front of the headband. Position it so it hangs below the nose without covering the child’s eyes or restricting breathing.
Children can wear the headbands during a pretend elephant parade, swaying their arms and making elephant sounds. Matching headbands make a simple group activity for a zoo-themed day.
Pro Tip: Check the fit before securing the final overlap. Keep the ears light enough that the band stays in place, and shorten the trunk if it interferes with vision or movement.
14. Monkey Bar Swing Craft
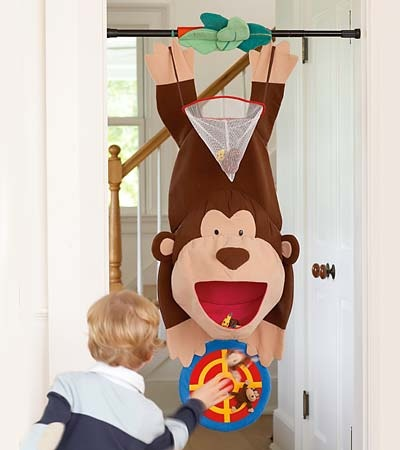
Suggested age: Ages 7–9 with adult preparation and supervision; ages 10 and up can help assemble the monkey. The suspended string should be installed and managed by an adult.
Estimated time: 30–45 minutes, plus drying time if clay or paint is used.
Materials: Lightweight paper or felt for the monkey, cardstock, string or yarn, glue, child-safe scissors, markers, and two stable supports prepared by an adult.
Make a lightweight monkey from paper or felt. Cut two long arms and position them around a short loop of string, securing the arms together so the monkey appears to hold the line. Add a face, ears, legs, and a tail.
An adult can tie the string between two stable supports, keeping it short, taut, and away from walkways. Test the attachment before placing the monkey on it. If the craft is intended as a display, the monkey can simply hang in one position rather than being repeatedly slid along the string.
Children can decorate a paper tree background and arrange additional monkeys around it to suggest a troop moving through the branches.
Pro Tip: This is a supervised craft display, not an unattended play structure. Remove loose string after the activity and keep cords away from toddlers to reduce entanglement risks.
Also read: 23 Boo Basket Ideas for 2026 (Kids, Teens, Adults & Couples)
15. Zoo Animal Mask Set
Suggested age: Ages 5–7 with adult help; ages 8 and up can decorate and assemble more independently.
Estimated time: 30–45 minutes per mask, plus drying time if paint is used.
Materials: Cardstock, colored paper, glue, child-safe scissors, markers or paint, and a pencil. Use a handheld stick only if an adult can attach it securely and supervise its use.
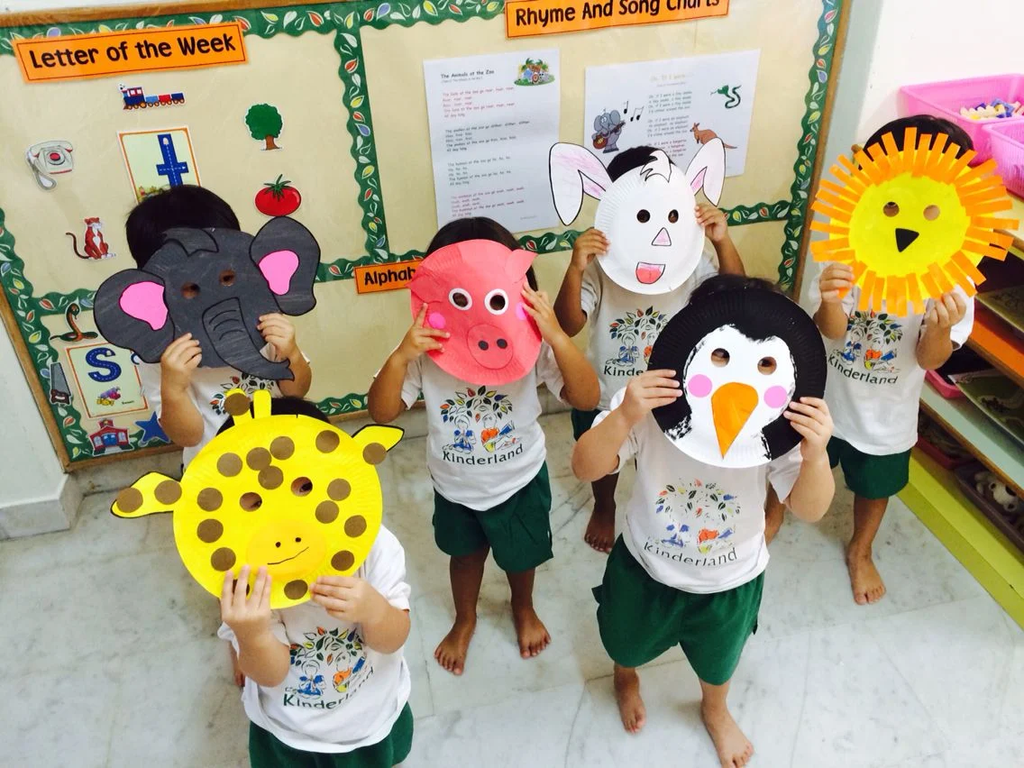
Draw a large face shape for an animal such as a lion, tiger, zebra, or elephant. Cut out the shape and decorate it with recognizable features: a paper mane for a lion, stripes for a tiger or zebra, or large ears for an elephant.
An adult should cut the eye openings and check that the child can see clearly through them. If the mask covers most of the face, make sure it does not restrict breathing. Children who dislike full-face masks can use a half-mask or a handheld animal face instead.
Once the masks are finished, children can take turns acting out animal movements and sounds or put on a short zoo-themed performance.
Pro Tip: Check visibility and comfort before any pretend play begins. Do not use tight cords around the neck, and supervise children using handheld masks so the handle stays away from their faces.
16. Watercolour Zoo Scene
Suggested age: Ages 5–7 with adult guidance; ages 8 and up can plan and paint more independently.
Estimated time: 35–50 minutes, plus drying time.
Materials: Watercolor paper, watercolor paints, brushes, a water container, paper towels, and photographs of animals or landscapes for reference.
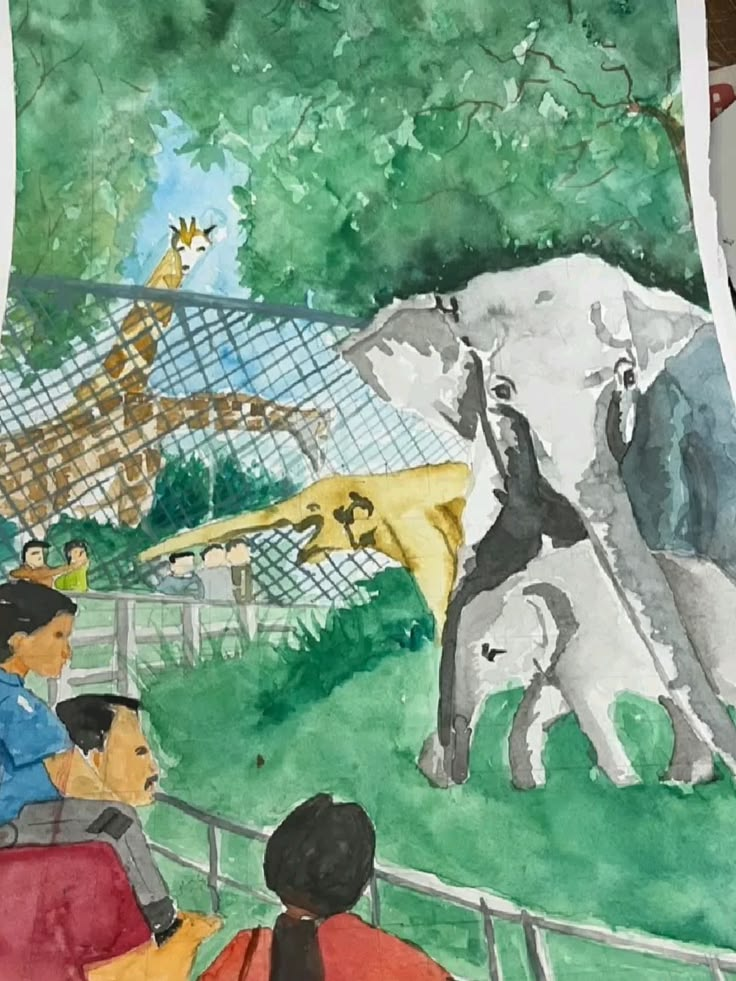
Start with a simple background using pale washes of green, blue, yellow, or brown. Children can paint hills, trees, grass, or a water feature, depending on the scene they want to create. Let the background dry enough before adding the animals.
Paint larger animals in the foreground and smaller shapes farther back. Elephants, giraffes, and zebras can be placed in a suggested savannah scene, while a different picture could show penguins beside water or a panda among green foliage.
The goal is to create a complete picture rather than a collection of unrelated animals. Children can add details with a smaller brush after the main colors have dried.
Pro Tip: Watercolor paper holds moisture better than ordinary printer paper. Test colors on scrap paper first, and avoid adding too much water at once.
17. Koala Pom Pom Craft
Suggested age: Ages 6–8 with adult help; ages 9 and up can complete more assembly independently.
Estimated time: 30–45 minutes.
Materials: One large gray pom-pom, one smaller gray pom-pom, gray and pink felt, black felt, glue suitable for the materials, child-safe scissors, cardboard for the branch, and green paper for leaves.
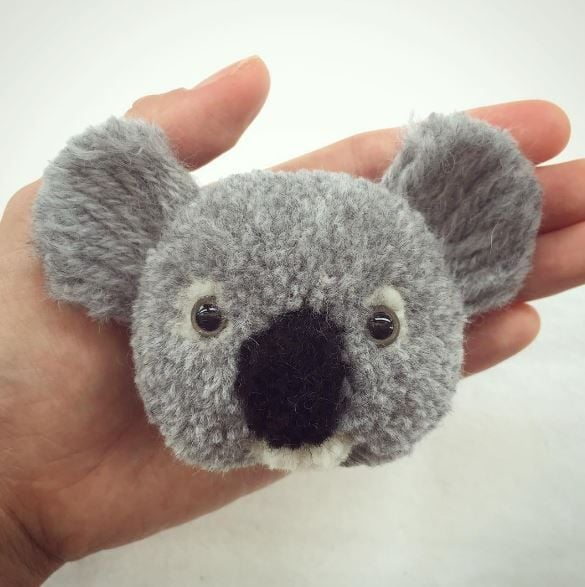
Glue the smaller pom-pom to the larger one to create the koala’s head and body. Cut round gray ears with pink centers, a black nose, and simple facial details from felt. Attach the features securely and allow the glue to dry.
Make a sturdy branch from folded or layered cardboard and add green paper leaves. Glue the koala to the branch so it appears to cling to the tree. The branch is a decorative eucalyptus-inspired setting; koalas feed mainly on eucalyptus leaves, although not every eucalyptus species is part of their diet.
Children can make more than one koala and position them at different points along the branch.
Pro Tip: For children who may put objects in their mouths, avoid loose pom-poms and tiny felt details. Use larger paper shapes and supervise the assembly closely.
18. Peacock Feather Fan Craft
Suggested age: Ages 5–7 with adult help; ages 8 and up can assemble more independently.
Estimated time: 30–45 minutes.
Materials: Blue or green cardstock for the body, colored construction paper, glue, child-safe scissors, markers or paint, and a background sheet.
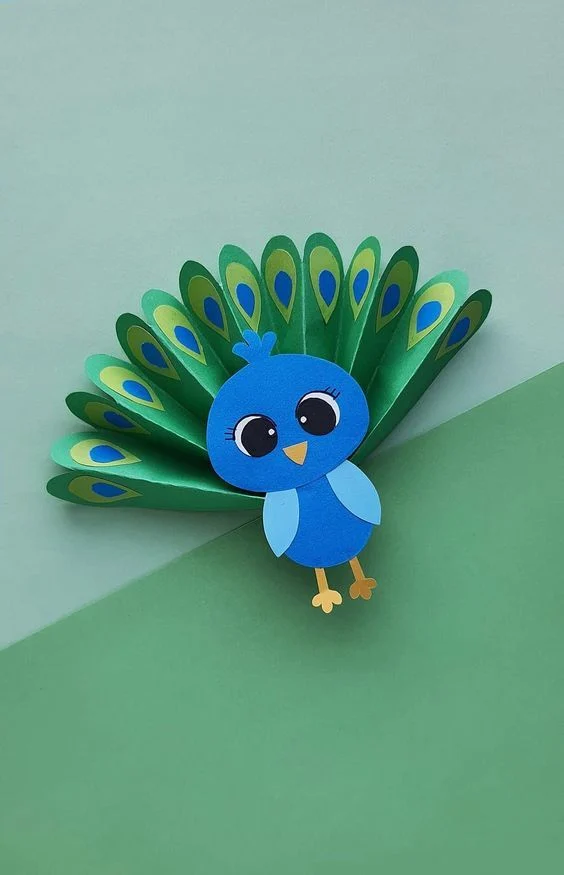
Cut a small peacock body from blue or green cardstock. Make several long feather shapes from colored paper, varying their lengths to create a fan. Decorate each feather with an oval pattern in blue, green, and gold, then arrange the feathers behind the body.
Glue the feathers in overlapping layers, starting with the outer ones and working toward the center. Attach the body over the lower ends of the feathers to cover the joins.
The finished paper fan represents the colorful tail display of a peacock rather than an exact anatomical model. Children can experiment with different color combinations and make a simple garden or foliage background.
Pro Tip: Lay out all the feathers before gluing so the fan looks balanced. Fold a small tab at the base of each feather if you want a slightly raised effect.
19. Crocodile Egg Carton Craft
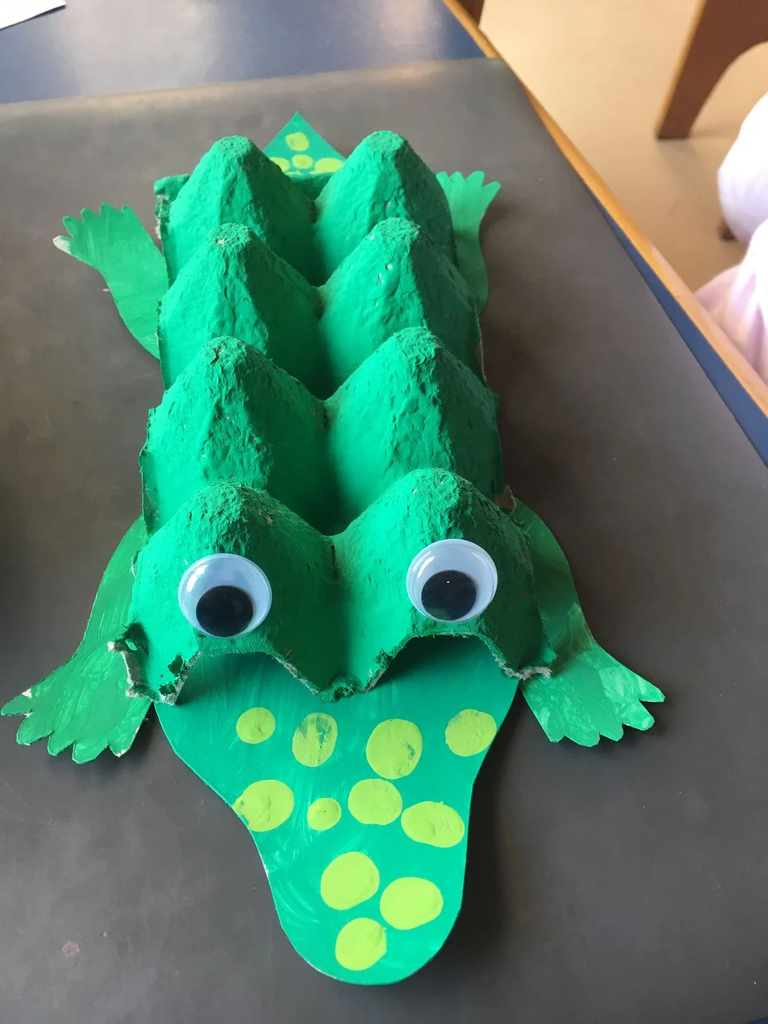
Suggested age: Ages 5–7 with adult help; ages 8 and up can do more of the decorating independently.
Estimated time: 30–45 minutes, plus paint-drying time.
Materials: Clean, dry cardboard egg carton, green paint, green cardstock, white paper, glue, child-safe scissors, and markers.
An egg carton has a naturally bumpy surface that works well for a crocodile’s textured back. An adult should cut a long section from the carton, leaving the raised shapes intact. Paint it green and allow it to dry completely.
Cut a long snout, four short legs, and a tapering tail from green cardstock. Attach the pieces to the body, then add eyes and white paper teeth. Check the underside to make sure the legs are positioned evenly so the crocodile can rest on a flat surface.
For a habitat display, place the crocodile on blue paper surrounded by paper reeds and green plants to suggest a watery setting.
Pro Tip: Use only clean, dry cartons without food residue, mold, or moisture damage. An adult should handle difficult cuts, and any pointed cardboard edges should be trimmed before children handle the finished craft.
20. Panda Paper Plate Craft
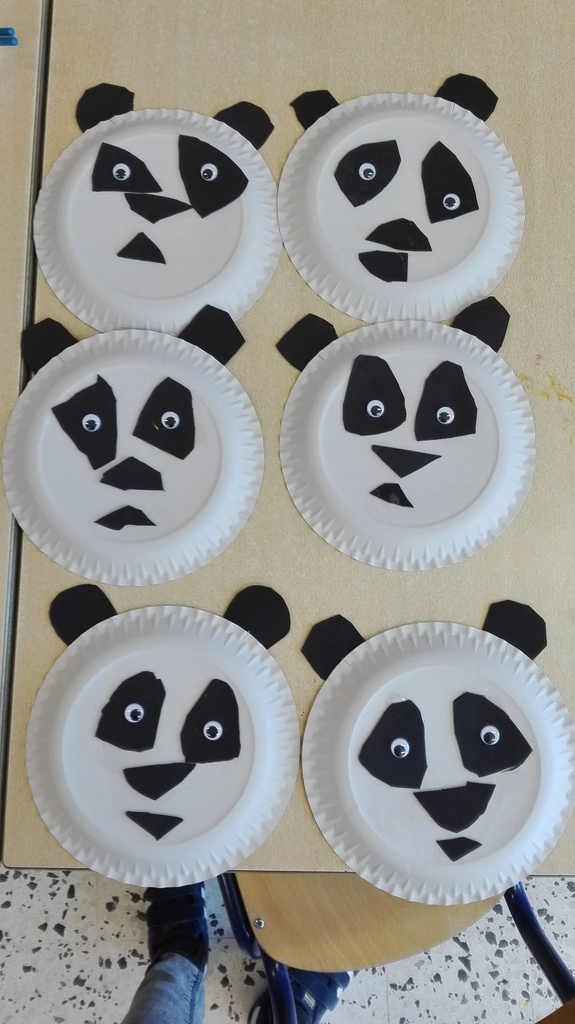
Suggested age: Ages 3–5 with adult help; ages 6 and up can complete more details independently.
Estimated time: 20–30 minutes, plus paint-drying time if using paint.
Materials: Paper plate, white and black paint or black construction paper, glue, child-safe scissors, and markers.
Use a white paper plate as the panda’s face. Cut two black ears and two eye patches from construction paper, then glue them into position. Add a small black nose and a simple mouth with a marker or paper shapes.
If you prefer paint, add the black areas with a brush and let them dry before finishing the face. Children can make their panda look curious, sleepy, or cheerful by changing the position of the eyes and mouth.
A paper bamboo stalk beside the panda completes the display without requiring additional complicated pieces.
Pro Tip: Pre-cut the black shapes for younger children. Paper details are a practical alternative to small plastic eyes, particularly when the craft will be handled during play.
21. Hippo Bath Craft
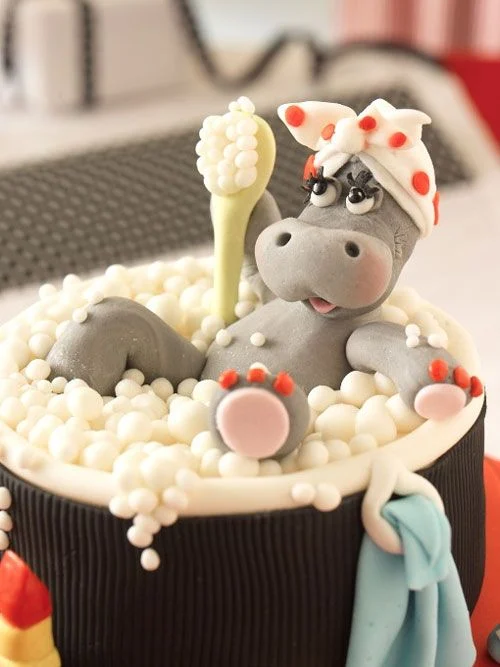
Suggested age: Ages 5–7 with adult help; ages 8 and up can shape and decorate more independently.
Estimated time: 30–45 minutes for modeling, plus any drying time required by the material.
Materials: Gray or purple modeling clay, small modeling tools suitable for the child’s age, blue paper or blue cellophane, cardboard for the base, and glue if needed.
Shape a rounded body from gray or purple clay. Add four short legs, small rounded ears, a broad muzzle, and eyes positioned high on the head. Keep the muzzle wide and simple so the hippo remains recognizable.
Create a pond using blue paper or blue cellophane on a cardboard base. Place the hippo so part of its body appears to sit in the water, then add paper reeds or grass around the edge. The water is a visual element rather than a real bath, so the clay and paper components remain dry.
Children can add a second hippo or other animals to expand the scene.
Pro Tip: Follow the clay manufacturer’s instructions and let air-dry clay harden completely before displaying it. Avoid real water around paper or air-dry components, as it can soften or damage them.
22. Zoo Keeper Costume Craft
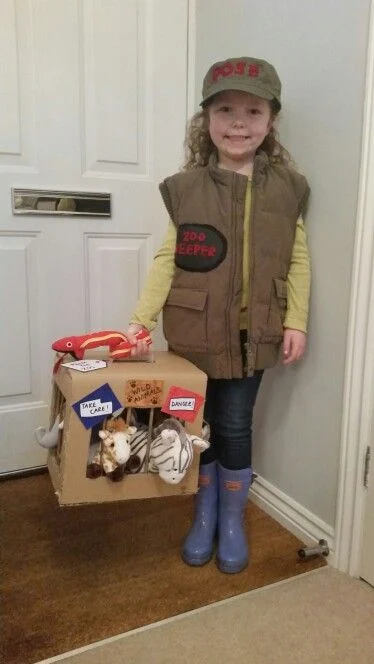
Suggested age: Ages 4–6 with adult help; ages 7 and up can make more of the accessories independently.
Estimated time: 30–45 minutes.
Materials: A comfortable shirt in a khaki or neutral color, cardstock, markers, glue or tape, child-safe scissors, a cardboard tube, and paper for a hat and checklist.
Start with a shirt the child already owns. Make a name badge from cardstock and decorate it with a pretend zoo keeper name. Fold a piece of cardboard into a clipboard and add a checklist featuring the animals in the child’s craft collection.
For the hat, shape a strip of paper into a comfortable band and attach a simple brim. Make a pretend walkie-talkie by decorating a cardboard tube with drawn buttons and a small paper antenna.
Children can use the checklist to pretend to check each animal’s enclosure, record observations, and make sure the animals have imaginary food and water. This activity pairs well with the complete zoo diorama.
Pro Tip: Keep the costume comfortable and avoid long cords or accessories with sharp edges. Use imaginary food rather than real food, and make sure all cardboard props are easy to hold.
23. Giraffe Height Measuring Chart
Suggested age: Ages 6–8 with adult help; ages 9 and up can assist with measuring and decorating.
Estimated time: 45–60 minutes, depending on the size and materials.
Materials: Sturdy cardstock or fabric, ruler or measuring tape, pencil, markers or paint, scissors, and suitable tape or mounting materials.
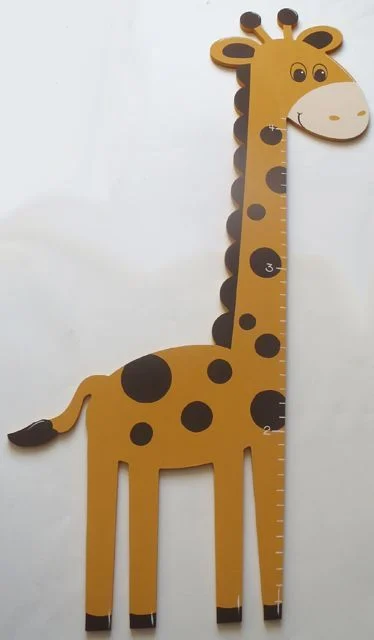
Draw a tall giraffe with a long neck on cardstock or fabric. Before decorating it, mark the measurement scale using a ruler or measuring tape. Add the numbers and tick marks, keeping them evenly spaced, then decorate the giraffe with brown patches and a simple face.
For the chart to provide useful measurements, mount it vertically with its zero point aligned to a clearly established reference height. A child should stand on a level floor, and measurements should be taken consistently rather than estimated from the decorative artwork.
Record the date beside each measurement so the chart can become a family keepsake. The giraffe design adds a playful touch to a child’s room, but its accuracy depends on how carefully the scale is prepared and mounted.
Pro Tip: Check the full scale against a reliable measuring tool before using it. A decorative homemade chart is not automatically a precision measuring instrument, so avoid relying on it for measurements that require high accuracy.
24. Meerkat Standing Guard Craft
Suggested age: Ages 5–7 with adult help; ages 8 and up can shape more detailed figures.
Estimated time: 25–40 minutes, plus drying time if using air-dry clay.
Materials: Modeling clay, a suitable modeling tool, cardboard for the base, glue if required by the material, and sand-colored paper for the background.
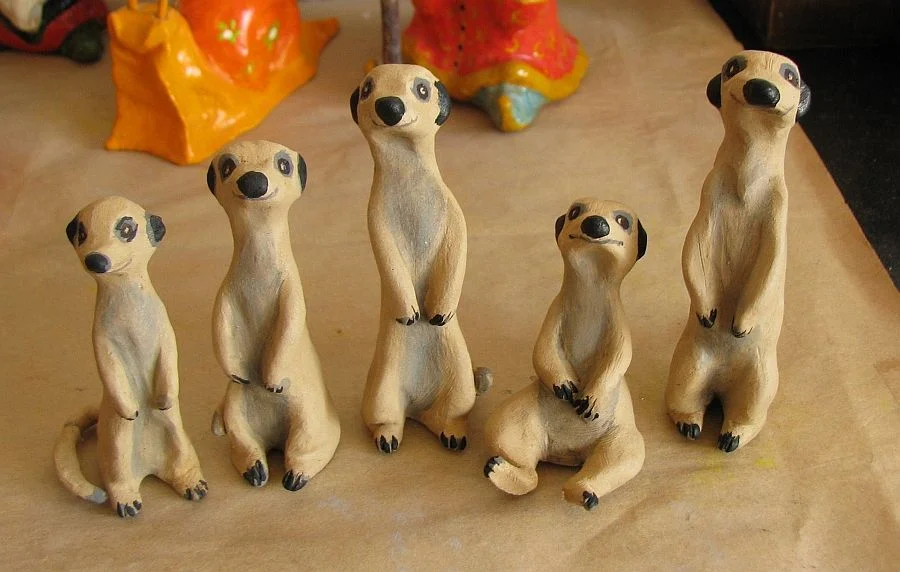
Shape a small upright body from clay and form two sturdy back legs underneath it. Add short front paws near the chest, a pointed face, small rounded ears, and dark markings around the eyes. Widen the feet if the figure needs extra support to stand.
Make a few more meerkats in slightly different poses and place them on a sand-colored cardboard base. Add paper rocks or small grass shapes to suggest a dry, open area of southern Africa, where meerkats live.
The figures can form a little group, with each one appearing to look in a different direction. Let the clay dry or harden according to the product instructions before moving the display.
Pro Tip: A small cardboard platform can help the figures stay upright. If the clay keeps tipping over, shorten the body or widen the feet rather than adding loose pieces.
25. Zoo Animal Sound Matching Game
Suggested age: Ages 3–5 with adult guidance for simple picture matching; ages 6–9 can use more cards and written clues.
Estimated time: 30–45 minutes.
Materials: Cardstock, markers or crayons, pictures or drawings of zoo animals, scissors, and an envelope or box for storage.
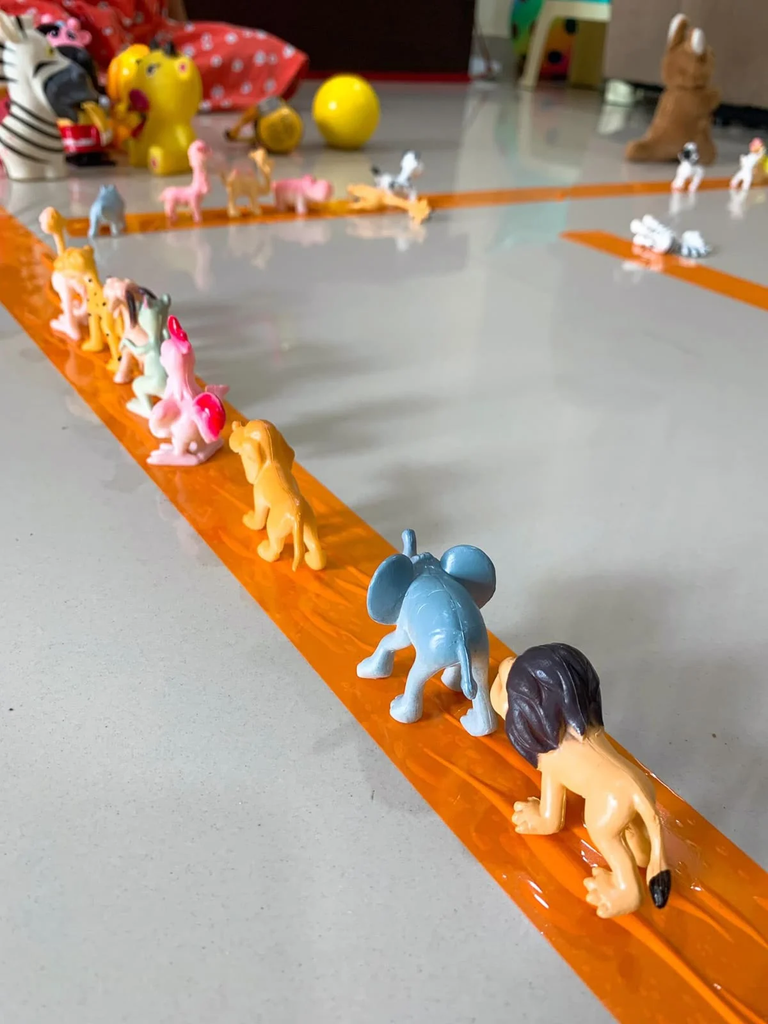
Make a set of animal cards using simple drawings or pictures of creatures from the other crafts. Create a matching set with animal names, sound descriptions, or illustrations representing the sounds. Keep the animal and matching clue separate so children have to find the correct pair.
For younger children, start with three or four animals and use picture clues. Older children can match more cards, read written descriptions, or add a third set featuring animal habitats.
Once the cards are ready, mix them up and ask children to match each animal with its clue. Store the finished set in a labeled envelope or box for another session.
Pro Tip: Make a small test set before creating all the cards to check that the pictures and clues are easy to distinguish. If you include sound descriptions, remember that animal calls vary, so simple familiar examples work best for a beginner’s game.
26. Giant Collaborative Zoo Mural
Suggested age: Ages 4–6 with adult preparation; ages 7 and up can help plan and create more of the mural independently.
Estimated time: 45–90 minutes across one or more sessions, depending on group size and detail.
Materials: A long roll of paper, washable paint or crayons, brushes, colored paper, glue, child-safe scissors, pencils, and reference pictures of animals and habitats.
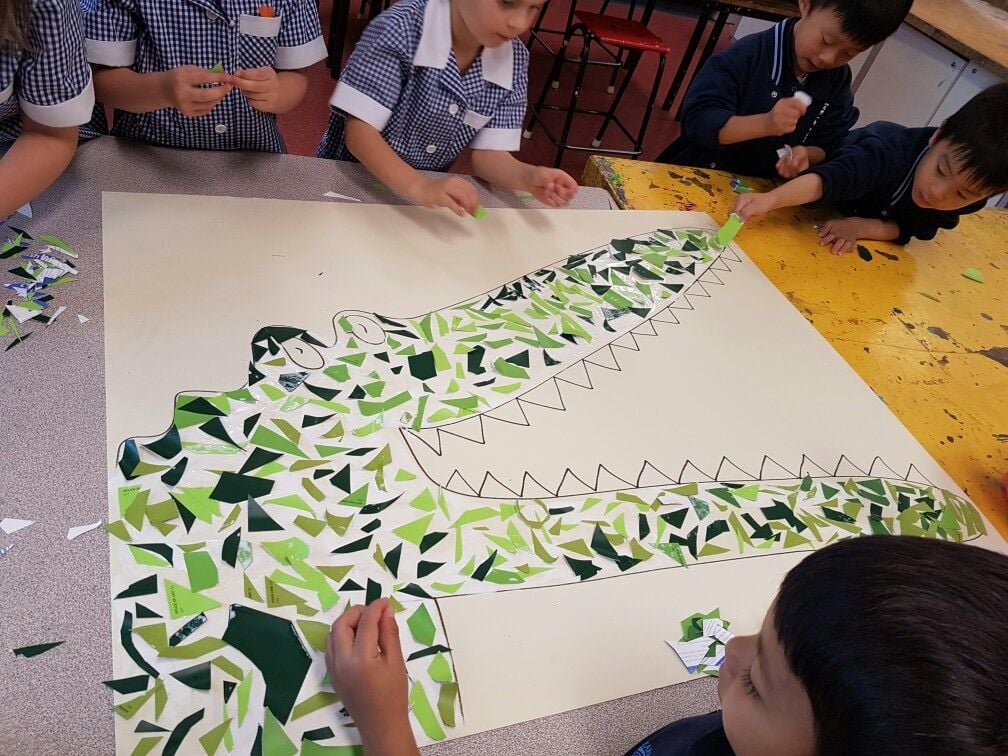
Spread the paper across a protected table or attach it securely to a suitable wall. Lightly mark different habitat sections, such as savannah, rainforest, and polar or coastal environments. These are suggested craft zones, not a claim that every zoo animal shares the same natural habitat.
Let each child choose an animal to draw, paint, or cut from paper. Before attaching the animals, discuss where each one belongs in the mural. Add trees, rocks, water, and other background details to help the sections look distinct.
For a larger project, complete the background in one session and add the animals in another. This gives paint time to dry and makes it easier for children to work without crowding the same area.
Pro Tip: Assign each group a section of the mural and keep extra paper nearby for testing paint colors. Use washable materials and supervise scissors, especially when several children are working together.
27. Complete Zoo Diorama
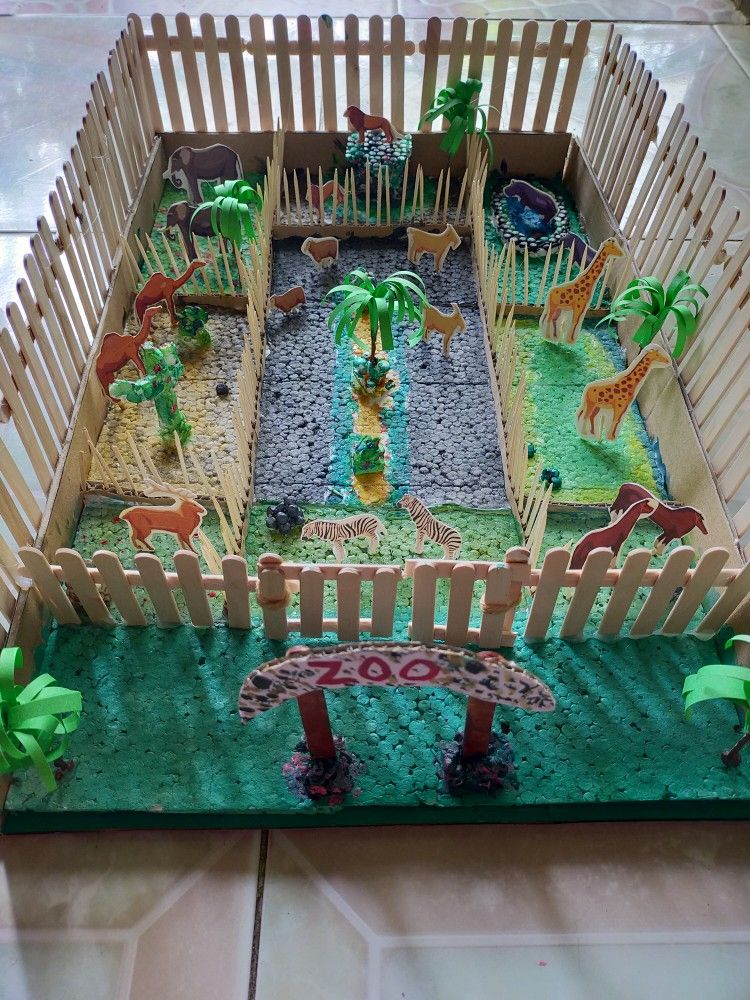
Suggested age: Ages 7–9 with adult help; ages 10 and up can plan and assemble more independently. An adult should cut thick cardboard.
Estimated time: 2–4 hours across several sessions, depending on the size and level of detail.
Materials: Large cardboard box, additional cardboard for dividers, construction paper, markers or paint, glue or tape, child-safe scissors, handmade animal figures, and paper for signs and paths.
Start by choosing a cardboard box with enough space for several animal areas. Sketch the layout before attaching anything, leaving room for paths, dividers, and a small entrance. Decide which animals will be included and create suitable background sections for them.
An adult can cut the box and thicker cardboard dividers to size. Attach the dividers with tape or suitable glue, then cover each section with colored paper or paint. Add paper fencing, paths, habitat details, and signs after the main structure is stable.
Position the handmade animals in their enclosures only after the layout is complete. This makes it easier to move the figures and adjust the arrangement before gluing any decorations permanently. Children can continue adding animals and details over several sessions.
Pro Tip: Build the structure in stages and let glue or paint dry before adding the next layer. Check for exposed staples, sharp cardboard edges, or loose small pieces, and keep the finished diorama on a stable surface.
FAQ’s
What are the easiest zoo animal crafts for kids?
Paper plate elephants, toilet roll zebras, handprint giraffes, and paper bag gorillas are easy zoo animal crafts for kids. They use simple materials such as paper, paint, glue, and recycled cardboard, making them suitable for a range of ages with adult help when needed.
What materials do kids need to make zoo animal crafts?
Most zoo animal crafts use everyday supplies, including paper plates, cardboard tubes, construction paper, washable paint, child-safe scissors, glue sticks, and markers. Some projects also use air-dry clay, yarn, pom-poms, or clean recycled containers.
What zoo animal crafts are suitable for toddlers?
Toddlers can enjoy simple activities such as making handprint giraffes, painting large cardboard animal shapes, or decorating paper plates with adult-prepared pieces. Choose large materials, supervise closely, and avoid small parts that could pose a choking hazard.
How can I make zoo animal crafts educational?
I like pairing each craft with a simple animal fact. While making a kangaroo, children can learn about its pouch; a peacock craft can introduce its colorful tail display; and a meerkat project can start a conversation about how meerkats live in groups. You can also discuss animal habitats, diets, and sounds.
How can kids make zoo animal crafts with recycled materials?
Clean cardboard tubes, paper bags, egg cartons, cereal boxes, and scrap paper can become animal bodies, legs, ears, and habitats. Wash and dry reusable containers first, and have an adult handle any cutting that requires sharp scissors or a craft knife.
Read this next: 28 fun and easy crafts for kids
Final Thoughts
These 27 zoo animal craft ideas offer a mix of simple paper projects, recycled-material creations, puppets, paintings, and larger builds. I recommend choosing a project based on the child’s age, available time, and supplies rather than trying to complete everything at once.
Once the animals are ready, children can use them for pretend play, build a habitat scene, or create a small zoo that grows with each new craft session. A little preparation, suitable materials, and age-appropriate supervision help keep the activity manageable and enjoyable.




One Comment