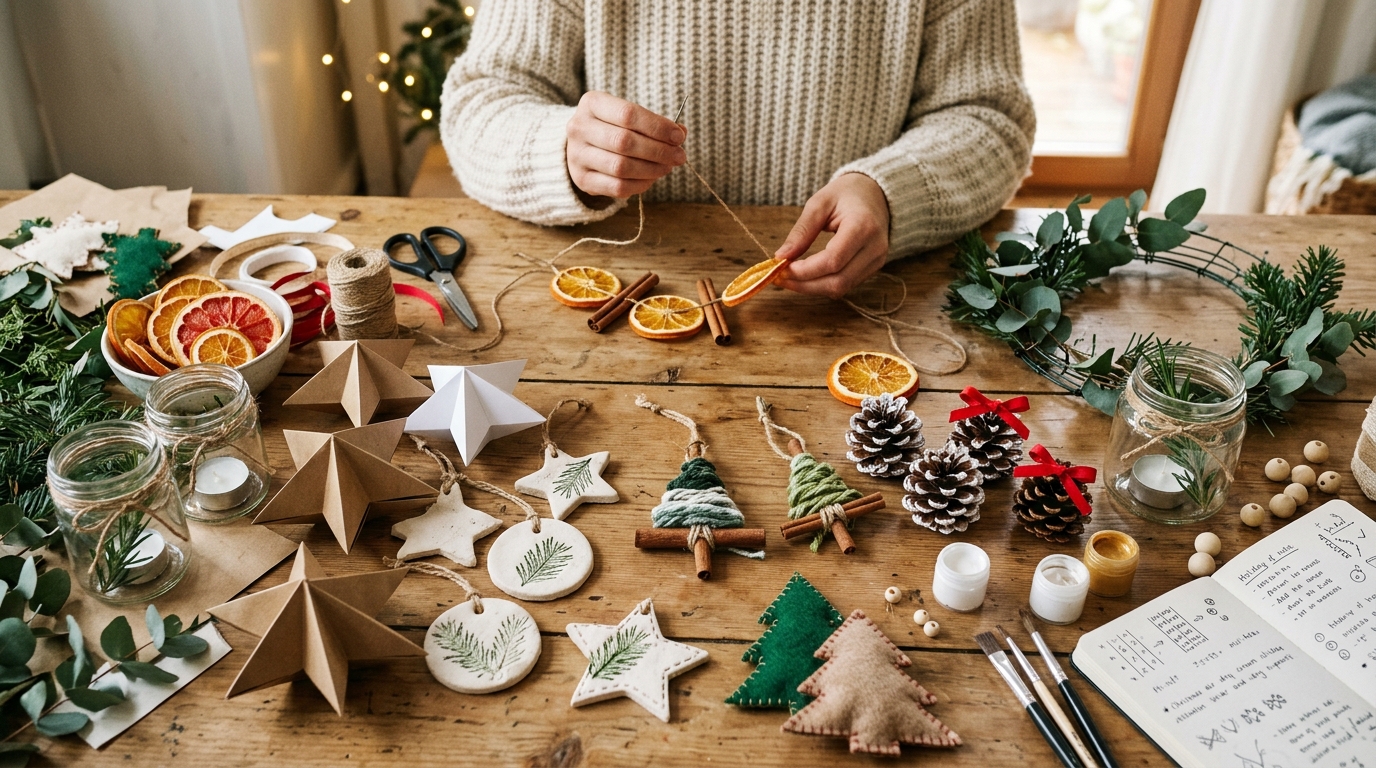
20 Eazy Christmas Crafts for Adults
I love the idea of making Christmas decorations that feel personal without spending a fortune on store-bought ornaments. A little fabric, a few leftover jars, some felt, and basic craft supplies can turn into decorations that look lovely around the house or make thoughtful handmade gifts.
When I plan Christmas crafts, I like to mix quick projects with a few that take more time. That way, I can make something simple on a busy evening and save the bigger projects for a relaxed weekend. I also look for ways to reuse materials I already own, especially glass jars, fabric scraps, buttons, and ribbon.
In this collection, I’m sharing 20 Christmas craft ideas for adults, including rustic decorations, Scandinavian-inspired trees, handmade ornaments, useful gifts, and festive finishing touches for holiday gatherings. Whether I’m decorating a mantel, preparing a small gift, or adding something special to a Christmas table, these projects offer plenty of ways to make the season feel more personal.
I can use these 20 easy Christmas crafts for adults to decorate my home, create handmade gifts, and reuse everyday materials. The ideas range from mason jar snowmen and flannel trees to felt reindeer, salt dough ornaments, wooden porch decorations, and rosemary drink stirrers.
Save this for later

Table of Contents
Some projects are suitable for beginners, while others give me a chance to practice sewing, painting, cutting, and assembling materials. I can keep the costs down by using supplies I already have, choosing a simple color palette, and making several matching decorations at once.
Key Takeaways
- For quick projects: I can make button ornaments, felt decorations, or yarn-covered baubles with relatively few supplies.
- For rustic Christmas decor: I can use mason jar rings, reclaimed wood, wine corks, and natural greenery.
- For handmade gifts: Felt reindeer, hand warmers, stockings, and scented diffusers are useful options.
- For a minimalist home: I can choose neutral felt trees, simple fabric patterns, and understated gold accents.
- For safer crafting: I should use hot glue carefully, allow paint and adhesives to dry fully, and keep real flames away from fabric and other flammable decorations.
- For better results: I can test colors and adhesives on spare material before starting the finished project.
Related article: 21 Wooden Christmas Crafts
1. Mason Jar Lid Snowman

I can turn ordinary metal mason jar rings into a cheerful snowman decoration that works on a shelf, beside a fireplace, or as part of a winter display. I like this project because it gives old canning supplies a second use instead of sending them to the recycling bin.
For the basic design, I need about 18 metal jar rings, white spray paint, floral wire, a small snowman ornament, needle-nose pliers, and a hot glue gun. I can also add a fabric scarf or a small hat to give the finished snowman more personality.
I start by cleaning the rings and letting them dry completely. After painting them white in a well-ventilated area, I arrange them into rounded sections and secure the rings with floral wire. I then attach the sections, add the decorative head, and check that the structure stands securely.
Pro Tip: I find that using rings of similar size creates a more balanced shape. If I want to hang the snowman on my Christmas tree, I make sure the wire and hanging loop are secure before displaying it.
2. DIY Flannel Trees

Flannel Christmas trees are a lovely way to bring warmth and texture into my holiday decorations. Their simple shapes work especially well with farmhouse, rustic, and country-inspired interiors.
I need cardboard or lightweight craft cones, two or three flannel fabrics, scissors, a hot glue gun, and small decorative stars for the tops. I can choose traditional red plaid, muted green checks, or neutral fabrics to match my existing decorations.
I cut the fabric into manageable strips or small sections, depending on the cone shape, and wrap them around the base. I secure each section with small amounts of hot glue, keeping the fabric smooth as I work upward. Once the cone is covered, I trim any loose edges and add a star or another small topper.
I like making three trees in different heights because they look more interesting together than a single tree. I can place them on a mantel, a bookshelf, or a dining table as a seasonal centerpiece.
Pro Tip: I choose fabrics with complementary patterns rather than mixing too many colors. This keeps the display coordinated and makes inexpensive materials look more polished.
3. DIY Christmas Stocking Wine Dispenser

For a Christmas dinner or a holiday gathering, I can sew a decorative stocking-shaped cover for a wine bottle. It gives a bottle a festive appearance and can turn a simple host gift into something more personal.
I need fleece fabric, a contrasting fabric for the cuff, matching thread, scissors, pins, and a sewing machine or hand-sewing supplies. I first measure the bottle so the finished cover has enough room for the body and neck.
I draw a stocking-shaped outline on paper, leaving a little extra space around the bottle for seams. After cutting two fabric pieces, I sew around the outline, leaving the opening at the top. I add the cuff, turn the cover right side out, and check that the bottle slides in and out without stretching the fabric.
I can use red and white for a traditional look, green for a classic Christmas palette, or a neutral fabric for a more understated design.
Pro Tip: I measure the bottle before cutting the fabric because wine bottles vary in width and height. I keep the cover removable and use it only as an outer decoration, away from open flames or hot serving equipment.
4. Cute Felt Reindeer with Printable Pattern

Felt reindeer ornaments are a sweet choice when I want handmade decorations that are easy to personalize. I can make them in traditional brown and red, or choose cream, forest green, and other colors that suit my Christmas tree.
I need felt sheets, a printable reindeer template, embroidery thread, scissors, a needle, and optional beads or small ribbons. For a soft stuffed reindeer, I also use a little filling material.
I print the template and cut out the individual shapes. Then I trace them onto the felt and cut out matching body pieces, antlers, and decorative details. I stitch or glue the smaller features in place before joining the body pieces, leaving a small opening if I want to add stuffing.
Once the reindeer is assembled, I add a ribbon loop so I can hang it on the tree. I can also attach a small name tag to turn it into a personalized gift.
Pro Tip: I cut all the felt pieces before sewing so I can check the colors and proportions together. For ornaments that may be handled by young children, I avoid loose beads and other small detachable parts.
5. Mini Christmas Mailbox Décor

A miniature Christmas mailbox can add a playful touch to an entryway, side table, or holiday village display. I like this idea because I can change the colors and decorations to suit almost any Christmas theme.
For this project, I need a small decorative mailbox, acrylic paint, a round wooden base, a short wooden dowel if needed for the design, artificial greenery, a ribbon bow, and small decorative picks. A hot glue gun helps attach the finishing details.
I start by painting the mailbox and allowing it to dry fully. I then attach it to the base or support, depending on the design, and add greenery around the opening or sides. A ribbon, small berries, miniature ornaments, or a decorative bird can finish the display.
I can personalize the mailbox with a family name, a holiday greeting, or a tiny sign. It also works as a decorative container for lightweight notes or Christmas wish lists.
Pro Tip: I keep the decoration proportional to the mailbox. A small arrangement of greenery and one standout bow usually looks neater than filling every available space with ornaments.
6. Fleece Buffalo Plaid Hand Warmers

Reusable fabric hand warmers are practical little gifts for winter. I can sew a matching pair for a stocking stuffer, a care package, or a small handmade present for a friend.
I need cotton or flannel fabric, matching thread, uncooked rice, scissors, a funnel, and a sewing machine or needle. Buffalo plaid gives the warmers a classic seasonal look, but any tightly woven cotton fabric works.
I cut two matching fabric rectangles for each warmer and place them with the right sides facing inward. I sew around the edges, leaving a small opening, then turn the fabric right side out. I fill each warmer only partway with rice and carefully sew the opening closed.
I make sure the stitching is secure so the rice cannot escape. Because the fabric and filling will be heated, I avoid fleece, synthetic fabrics, metallic decorations, and unsuitable thread in the finished heat pack.
Pro Tip: I use plain cotton or flannel for anything intended for microwave heating. Heating times vary, so I follow a reliable set of instructions for the exact size and filling, check the temperature carefully, and never leave a heated pack unattended.
7. Button Christmas Tree Ornaments

Button Christmas trees are one of the easiest ways I can use up small craft leftovers. They need very little space to make and can add a handmade touch to a Christmas tree, gift wrapping, or a seasonal garland.
I gather green buttons in different sizes, a few brown buttons for the trunk, thin craft wire or strong ornament cord, and a small bead or decorative piece for the top. I can also use gold, silver, or white buttons for a different look.
I arrange the buttons from largest to smallest to create a tree shape. Then I thread them onto the wire, beginning with the trunk and moving upward through the branches. Once the shape looks right, I secure the wire and form a loop for hanging.
I like making several ornaments in slightly different shades of green so they feel coordinated without looking identical. They also make nice additions to gift tags or handmade holiday cards.
Pro Tip: I lay out the buttons before threading them. This lets me adjust the order and size balance without having to undo the ornament later.
8. Adorable No Sew Felt Gnomes

Felt gnomes are a good choice when I want soft, whimsical decorations without using a sewing machine. Their hats, beards, and colors are easy to change, so I can make each one look different.
I need felt, faux fur or yarn for the beard, a small wooden bead or pom-pom for the nose, scissors, and a hot glue gun. Depending on the design, I may also use a small weighted base so the gnome can stand upright.
I shape the felt into a cone or hat, secure the seam with glue, and attach the beard underneath. I place the nose where the hat and beard meet, then add any extra trim or greenery. If I want a freestanding figure, I attach the finished pieces to a stable base.
These gnomes work well on shelves, window ledges, and mantelpieces. I can also make a small group in matching colors to create a simple winter display.
Pro Tip: I use small amounts of glue and allow each section to set before attaching the next. This helps keep the hat and beard in place without leaving visible glue marks.
9. DIY Wooden Christmas Tree

A wooden Christmas tree can make a striking decoration for a porch, front step, or covered outdoor area. I like this project because I can choose the size, finish, and decorations instead of buying a ready-made display.
I need suitable wood planks, sandpaper, a measuring tool, paint or wood stain, a saw, and an adhesive or fasteners appropriate for the design. For an outdoor display, I also consider weather-resistant finishes and a stable support.
I plan the tree shape first and mark the boards before cutting. After smoothing the edges, I arrange the pieces into a tree silhouette and attach them securely. Once the paint or stain has dried, I add a few pinecones, artificial greenery, or outdoor-rated lights.
For a farmhouse look, I prefer natural wood with a simple white or green finish. If I want a brighter decoration, I can use traditional red and green paint instead.
Pro Tip: I check the weight and stability before placing a wooden tree outdoors. I use proper eye protection and follow safe cutting practices, and I keep electrical decorations rated for outdoor use away from wet areas unless their instructions permit that exposure.
10. Your Very Own Christmas Stocking

Making my own Christmas stocking lets me choose fabric, size, trim, and personal details that match the rest of my holiday decorations. It can also become a keepsake that I bring out each year.
I need two pieces of stocking fabric, matching thread, scissors, pins, and a sewing machine or hand-sewing supplies. I can add a cuff, a hanging loop, a name label, or decorative appliqué.
I start by drawing a stocking outline on paper or printing a template. After cutting two mirrored fabric pieces, I sew them together around the edges, leaving the top open. I finish the upper edge with a cuff and attach a sturdy hanging loop.
I can make every stocking in the same fabric for a coordinated mantel or use different patterns for each family member. Adding initials or small embroidered designs makes each one more personal.
Pro Tip: I use a sturdy fabric for the main stocking and reinforce the hanging loop with extra stitching. If I plan to fill it with heavier gifts, I check the seams and loop before putting it on display.
Also read: 20 Farmhouse Christmas Decor Projects
11. A Scandi Felt Christmas Forest

I like Scandinavian-inspired Christmas decorations when I want a calmer look without losing the warmth of the season. A felt forest combines soft shapes, neutral colors, and natural-looking materials for a simple winter display.
I gather white or cream felt, a few neutral fabric scraps, small wooden bases or blocks, scissors, and craft glue. I can add a little gray, beige, or muted green to create depth while keeping the overall palette understated.
I cut felt into simple tree shapes and arrange the pieces in layers to give each tree a little dimension. Depending on the design, I can glue the layers together or attach the felt to a small cone or wooden support. I then arrange the finished trees in a small group with varying heights.
This decoration works well on a mantel, coffee table, bookshelf, or dining table. I can leave it plain for a minimalist effect or add a few small wooden stars for extra detail.
Pro Tip: I use three related colors at most so the display stays visually consistent. Mixing different tree heights and textures creates interest without needing lots of extra decorations.
12. Yarn Ball Ornaments

Yarn ball ornaments are a simple way to bring a soft, handmade texture to my Christmas tree. They are especially useful when I have leftover yarn from knitting, crochet, or other craft projects.
I need lightweight yarn, foam balls or clear fillable ornaments, scissors, wooden skewers if needed for support, and craft glue. I choose colors that complement my tree rather than using every shade in my yarn basket.
For a foam-ball version, I apply a small amount of glue and wrap the yarn around the surface, keeping the strands close together. I continue until the ball is covered, then secure the end neatly. If I use a clear ornament, I can fill it with yarn strands instead, creating a different effect without wrapping the outside.
After the glue dries, I attach a hanging loop and check that it holds. A group of yarn ornaments in cream, green, and red can give the tree a cozy, coordinated appearance.
Pro Tip: I work in small sections when using glue so it does not dry before I place the yarn. I also avoid making the ornaments too heavy, especially if I plan to hang them on delicate branches.
13. Christmas Reed Diffusers

A Christmas reed diffuser can add a seasonal touch to a guest room, entryway, or bathroom. I like the idea of presenting a small fragrance gift in a decorative container that can be reused after the holidays.
I need a suitable glass diffuser bottle, diffuser reeds, and a fragrance mixture specifically formulated for reed diffusers. I can decorate the outside with a festive ribbon or a small seasonal tag.
I first make sure the bottle is clean and completely dry. I add the diffuser liquid according to its product directions, insert the reeds, and arrange the container on a stable surface. For the Christmas look, I can use a bauble-shaped container designed for this purpose or a small glass bottle with a simple decorative finish.
I choose a fragrance that suits the season, such as a blend with evergreen, orange, or warm spice notes, using a formulation intended for diffuser use rather than assuming that any essential oil mixture will work.
Pro Tip: I keep the bottle away from children, pets, heat sources, and surfaces that fragrance oils could damage. I also follow the liquid manufacturer’s safety instructions and avoid placing the diffuser where it can easily be knocked over.
14. Scandinavian Felt Christmas Trees

These small felt trees are a practical choice when I want decorations that are easy to move and arrange. Their simple shape works on a windowsill, kitchen shelf, desk, or mantelpiece.
I need felt sheets, a paper template, scissors, wooden dowels, small wooden bases, and a hot glue gun. I can make the trees in one color or use several neutral shades for a layered winter scene.
I trace the template onto the felt and cut out the required shapes. I attach the felt pieces to the dowel or support, arranging them so the tree looks three-dimensional from different angles. I then secure the dowel into a stable wooden base.
Once the glue has set, I arrange the trees in a group or combine them with small wooden houses and other neutral decorations. They are light enough to move around whenever I want to change my seasonal display.
Pro Tip: I test the balance of each tree before gluing the support permanently. A slightly wider base can help taller trees remain upright on narrow shelves or windowsills.
15. Mason Jar Christmas Candles

I can turn clean glass jars into decorative candle holders using leftover ribbon, twine, and seasonal embellishments. This is a good way to reuse containers while creating coordinated decorations for a dining table, mantel, or sideboard.
I gather clean, dry jars, decorative ribbon, twine, artificial greenery, and suitable candles. I can use different jar sizes to create a small grouping, keeping the decorations simple enough that the glass remains visible.
I wrap the outside of each jar with ribbon or twine and secure the ends neatly. I then add a small sprig of greenery or a seasonal accent. For the finished display, I choose a candle that fits the holder safely or use a battery-operated candle when that is more suitable.
I like pairing these jars with pinecones, wooden decorations, or a simple table runner. The mix of glass and natural-looking textures creates a warm seasonal effect without needing expensive materials.
Pro Tip: I never let fabric, ribbon, twine, or artificial greenery sit near an open flame. I use only a candle holder designed for the candle and its heat, or choose battery-operated candles for decorated jars.
16. Salt Dough Ornaments

Salt dough ornaments are a classic craft I can make with basic pantry ingredients. They work well as tree decorations, gift tags, keepsakes, or small handmade gifts, and I can personalize them with stamped patterns or painted details.
For a simple batch, I use 2 cups of all-purpose flour, 1/2 cup of salt, and about 3/4 cup of warm water. I also need a mixing bowl, rolling pin, cookie cutters, a straw for hanging holes, and ribbon.
I combine the flour and salt, then add the water gradually until the dough forms a workable mixture. I roll it out evenly, cut out shapes, and make a small hole near the top of each ornament. I place the pieces on a lined baking tray and dry them slowly in a low-temperature oven, following a reliable salt-dough recipe. Thicker pieces need more time, and I let the ornaments cool completely before decorating them.
Once dry, I can paint the ornaments, add simple stamped details, or leave them plain for a natural look. I seal them with a suitable craft sealer if I want to protect the painted surface.
Pro Tip: I make sure the ornaments are completely dry before storing them. Salt dough is not edible, and I keep finished ornaments away from moisture to reduce the chance of softening or deterioration.
17. Wine Cork Sled Ornament

A miniature wine cork sled is a fun way to reuse leftover corks and turn them into a rustic Christmas ornament. I like this idea for a tree decorated with natural materials, handmade pieces, or vintage-inspired accents.
I need three wine corks for each sled, craft glue, a hot glue gun, yellow or gold acrylic paint, hemp cord, and optional glitter. I can also use a small amount of white paint to create a snowy effect.
I arrange the corks to form the sled’s base and secure them with glue. I add curved or straight decorative pieces underneath to suggest runners, depending on the materials available. Once the structure is firm, I paint selected details and allow everything to dry. Finally, I attach a cord loop for hanging.
I can make several sleds with slightly different finishes and use them as ornaments, gift toppers, or additions to a miniature winter display.
Pro Tip: I test the balance of the sled before adding the hanging cord. I use only enough glitter or paint to highlight the shape, and I allow the adhesive to cure fully before hanging the ornament.
18. Gold Leaf Christmas Trees

Gold leaf trees are a simple way to add a little shine to Christmas decorations without needing elaborate materials. I can display them on a coffee table, dining table, mantel, or bedroom dresser.
I need cardboard cones, white acrylic paint, imitation gold leaf, a suitable adhesive, a soft brush, and a protective covering for my work surface. I choose different cone heights if I want the finished display to have more dimension.
I paint the cones and let the base coat dry completely. I then apply the gold-leaf adhesive according to its instructions and carefully place the imitation leaf over the surface. I use a soft brush to remove loose pieces and smooth the finish, working in small sections for a more even result.
Once the trees are dry, I arrange them together on a tray or use one as a small decorative accent. I can leave them gold or combine them with white and natural wood for a softer look.
Pro Tip: I use a light touch when handling imitation gold leaf because it can tear easily. I follow the adhesive’s drying instructions and work in a well-ventilated area when required by the product label.
19. Snow Globe Soap Pump

A snow globe soap pump adds a small seasonal detail to a kitchen sink or bathroom counter. I like that the idea combines a useful dispenser with a festive decorative element.
I need a suitable clear jar, a compatible soap-pump lid, clear liquid soap, a small waterproof decorative ornament, and white decorative pieces intended for use in a sealed display. I can add twine around the outside for a rustic finish.
I first check that the pump lid fits the jar properly. I position the miniature decoration where it will not interfere with the pump mechanism, then assemble the container according to the materials being used. I fill the dispenser with compatible soap and make sure the lid seals securely.
I can change the central decoration to a small tree, snowman, or another seasonal figure. Keeping the design simple helps the contents remain visible and makes the dispenser easier to clean.
Pro Tip: I use only materials that are compatible with liquid soap and will not break down or contaminate it. I avoid loose glitter, ordinary craft items that may shed, and decorative pieces that could obstruct the pump or make the dispenser difficult to wash.
20. DIY Christmas Wreath Drink Stirrers

Christmas wreath drink stirrers are a small finishing touch that can make holiday drinks look more thoughtfully prepared. I can use them for a Christmas brunch, a family gathering, or a festive dinner party.
I need food-safe bamboo skewers, clean rosemary sprigs, fresh cranberries, and green floral wire only if it is suitable for direct food-contact use. I avoid ordinary decorative wire or any material that has not been confirmed safe for contact with food and drinks.
I shape the rosemary into a small wreath, using a food-safe fastening method to hold it together. I can thread a cranberry onto the skewer as a colorful accent and arrange the rosemary wreath around the top. Before serving, I check that each stirrer is clean, secure, and comfortable to hold.
These decorations look especially nice in clear glasses because the green rosemary and red cranberries stand out against the drink. I can prepare them shortly before serving so the rosemary stays fresh.
Pro Tip: I wash the rosemary and cranberries thoroughly and prepare the stirrers with clean hands and utensils. I make sure no wire ends, loose berries, or sharp pieces can come into contact with guests.
Read this next: 21 Fun Pinecone Christmas Crafts
Frequently Asked Questions
What are the easiest Christmas crafts for adults?
I recommend starting with button Christmas tree ornaments, yarn ball ornaments, mason jar decorations, or no-sew felt gnomes. These projects require basic supplies and are suitable for beginners who want to create festive decorations without complicated techniques.
What materials do I need for DIY Christmas crafts?
I can make many Christmas crafts using felt, fabric scraps, mason jar lids, buttons, yarn, cardboard cones, wooden pieces, ribbon, and glue. Before buying anything, I check my existing craft supplies because leftover materials can help reduce costs.
What Christmas crafts can I make to give as handmade gifts?
I like making felt reindeer ornaments, personalized Christmas stockings, fabric hand warmers, and decorative reed diffusers as handmade gifts. I can customize the colors, patterns, and packaging to make each gift feel more personal.
How can I make my DIY Christmas decorations look more expensive?
I choose a consistent color palette, such as red and white, green and gold, or cream and natural wood. I also pay attention to neat edges, secure attachments, balanced arrangements, and simple finishing details. Using a few coordinated decorations often creates a more polished look than mixing too many colors and styles.
Conclusion
I find that Christmas crafting is most enjoyable when I choose projects that suit my time, budget, and decorating style. I don’t need expensive materials or professional skills to create decorations that make my home feel festive. A few leftover jars, fabric scraps, buttons, and basic craft supplies can be enough to get started.
If I want something quick, I can make button ornaments or yarn-covered baubles. For a more substantial project, I can sew a Christmas stocking, assemble a wooden tree, or create a small Scandinavian-inspired display. Handmade gifts such as felt reindeer and cotton hand warmers are also thoughtful options when I want to give something personal.
My favorite approach is to choose two or three projects that share similar colors and materials. This helps my decorations look coordinated while keeping the work manageable. I can start with one simple craft, see how it turns out, and gradually build a collection of handmade Christmas decorations that I can enjoy year after year.



One Comment