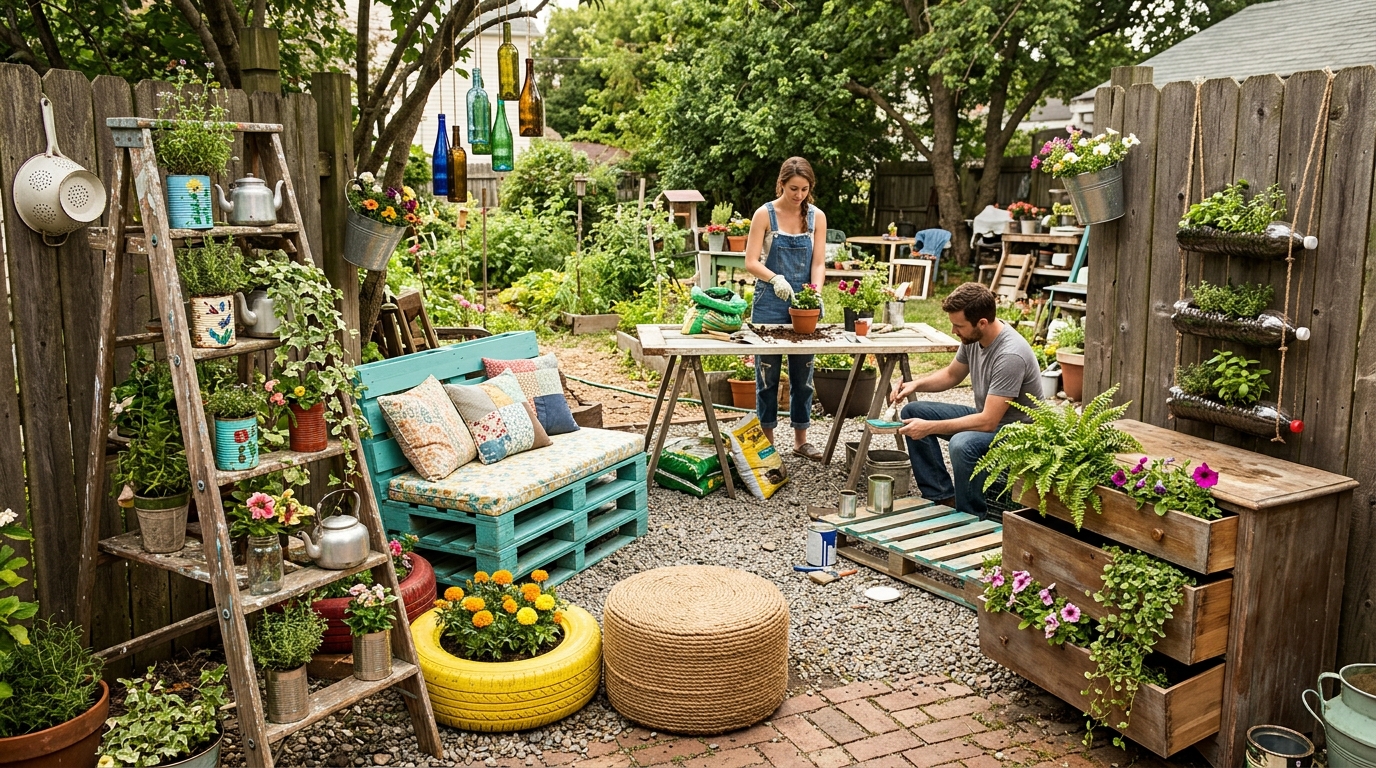
47 Ingenious Upcycling Ideas You’ll Find Easy to Make
I love finding ways to turn things I already have at home into something useful, especially when a little creativity can save money and reduce waste. Old clothes, empty containers, leftover wood, and even cardboard tubes can become practical organizers, home decorations, gifts, and fun projects for kids.
Upcycling is a simple way to get more use out of everyday items instead of throwing them away. I find it especially worthwhile when a project requires only a few basic supplies and gives an old object a completely new purpose.
These 47 upcycling ideas show how I can reuse common household items to create affordable home decor, storage solutions, handmade gifts, children’s crafts, garden accessories, and seasonal decorations. From turning old jeans into storage bins to transforming tin cans into desk organizers, many projects use materials that might otherwise end up in the trash.
Save this for later

Table of Contents
I can start with beginner-friendly crafts that require scissors, glue, and paint, then move on to furniture makeovers and larger home improvement projects. The key is to choose items that are still safe and sturdy, prepare them properly, and select a new use that makes sense for their original material.
Key Takeaways
- Save money on crafts: I can reuse jars, cans, cardboard, fabric scraps, and old furniture instead of buying everything new.
- Make everyday items more useful: Storage bins, pencil holders, planters, and wall organizers help me put unwanted materials to work.
- Find projects for every skill level: Simple paper crafts suit beginners, while furniture makeovers are better for people comfortable with basic tools.
- Get children involved safely: I can use age-appropriate recycled crafts to encourage creativity and introduce children to reuse and waste reduction.
- Prepare materials before crafting: Cleaning, drying, sanding, and checking for sharp edges help produce better results.
- Choose practical projects first: I get the most value from upcycling when the finished item solves a real problem in my home.
Related article: 47 Cheap Crafts to Make and Sell for $$
47 Ingenious Upcycling Ideas You’ll Find Easy to Make
I don’t need a dedicated craft room or an expensive shopping list to get started. I can begin by looking through my cupboards, closets, recycling bin, and leftover project supplies.
The ideas below cover everything from quick no-sew accessories to decorative furniture and useful household storage. I’ve included practical considerations for choosing materials and getting a better result from each project.
1. Scented Candles

Materials: Clean glass jars, candle wax, wicks, and optional fragrance oils
I like the idea of giving empty glass jars a second purpose by turning them into homemade scented candles. Mason jars, small food jars, and other suitable heat-resistant containers can become attractive additions to a coffee table, bedroom shelf, or bathroom counter.
To make them, I would clean and dry the jars, secure a candle wick in the center, and pour in melted candle wax according to the manufacturer’s instructions. Soy wax and beeswax are two options worth considering, and candle-safe fragrance oils can add a pleasant scent.
Pro Tip: I always check that a container is suitable for candle-making rather than assuming every glass jar can handle heat. I also keep burning candles away from curtains, children, and pets, and never leave them unattended.
2. Denim Storage Bins

Materials: Old jeans, fabric scraps, scissors, thread, and a sewing machine
When jeans become too worn to wear, I can still make use of the stronger sections of denim. Turning them into storage bins gives the fabric another purpose while helping me organize craft supplies, yarn, stationery, or small household accessories.
I would cut the denim into panels, sew them into a rectangular or cylindrical shape, and add a fabric lining if I wanted a neater finish. A folded cuff around the top creates a decorative edge, while a piece of sturdy cardboard or removable plastic inside the base helps the bin hold its shape.
I find that making several bins in different sizes is especially useful for shelves and cupboards. Before cutting, I measure the space where I intend to use them so the finished organizers fit properly.
Pro Tip: I choose denim without weak seams or extensive damage, and I reinforce the bottom corners if the bin will hold heavier items.
3. DIY Phone Holder

Materials: Empty toilet paper roll, decorative tape, scissors, and a craft knife
I can turn an empty cardboard tube into a simple phone stand without spending money on a store-bought accessory. This is a quick project for a desk, craft table, or bedroom shelf, especially when I want somewhere to rest my phone while following a recipe or watching a video.
I would flatten the tube slightly, cut a slot that fits my phone, and decorate the outside with washi tape, wrapping paper, or leftover craft paper. Small folded cardboard pieces can help support the base and prevent the holder from tipping over.
Because cardboard is lightweight, I would test the stand on a level surface before placing my phone in it. It works best for light devices rather than large tablets.
Pro Tip: I measure my phone’s width and thickness before cutting the slot. A snug fit helps prevent the device from sliding out.
4. Children’s Dress Up Wardrobe DIY

Materials: An old wooden wardrobe or dresser, suitable paint, sandpaper, and child-friendly storage accessories
An old dresser can become a lovely dress-up station for children with a little cleaning, repair work, and fresh paint. I would look for a secondhand piece with a solid frame and enough room for costumes, hats, dress-up shoes, and accessories.
First, I would remove the hardware and clean the surfaces. After sanding and repairing any damaged areas, I would apply a suitable primer and paint designed for the furniture’s material. Open shelves, labeled baskets, and a low hanging rail can make the finished wardrobe easier for children to use independently.
I would also check that drawers slide properly and that doors close safely. Since children may pull on handles or climb when reaching for costumes, securing the furniture to a wall is an important safety step.
Pro Tip: I choose a small selection of coordinating colors and label the storage areas with pictures for younger children who are still learning to read.
5. DIY Wooden Shape Puzzles

Materials: Clean scrap wood, a saw, sandpaper, non-toxic paint, and a suitable clear finish
I can reuse suitable wood offcuts to make simple shape puzzles that encourage children to recognize colors, shapes, and patterns. This project also gives leftover timber a purpose instead of leaving it unused in the garage.
I would draw large shapes on the wood, cut them out with the appropriate tools, and sand every surface until it feels smooth. Circles, triangles, squares, and rectangles make a good starting point. I could paint each shape a different color or create matching shapes and outlines on a separate board.
For young children, I would avoid small pieces that could become choking hazards. I would also make sure the wood is untreated, free from splinters, and finished with products suitable for children’s toys.
Pro Tip: I start with a few large, easy-to-recognize shapes before making more complicated puzzles. An adult should handle all cutting and tool work.
6. No-Sew T-shirt

Materials: An old T-shirt, fabric scissors, and tailor’s chalk
I don’t need a sewing machine to give a plain T-shirt a different look. An old shirt can become a fringed top, a tied-back design, or a casual piece for layering, depending on the fabric and the style I want.
I would wash the shirt first, lay it flat, and mark the areas I plan to cut with tailor’s chalk. Small cuts along the hem can become fringe, while carefully shaped openings can create a different neckline or sleeve style. Stretchy jersey fabric often curls slightly at the cut edges, which can give the finished shirt a relaxed appearance.
I would cut gradually and try the shirt on between adjustments. Removing too much fabric at once is difficult to reverse, so I prefer to start with small changes.
Pro Tip: I practice the cutting pattern on an unwanted shirt before altering one I still like. This helps me check the proportions without wasting a wearable garment.
7. Rainbow Crayons

Materials: Broken crayons, a silicone mold or dedicated craft tray, and an oven if required
Broken crayons can still be useful, so I like the idea of combining their remaining pieces into colorful new crayons. This is a good way to make use of art supplies that have become too short or awkward for little hands to hold.
I would remove the paper wrappers, break the crayons into smaller pieces, and arrange the colors in a heat-safe mold designed for crafting. Mixing several colors creates a marbled effect, while grouping similar shades produces more uniform crayons. I would follow the mold and wax manufacturer’s temperature instructions.
I would reserve the mold for craft use rather than returning it to food preparation. An adult should manage all heating and melted wax, and the crayons should cool completely before removal.
Pro Tip: I use similar color families when I want softer blends, or combine contrasting shades when I want a more playful result.
8. DIY Bracelet from Shoelaces

Materials: Clean shoelaces, scissors, and an optional suitable clasp
An unused pair of shoelaces can become a colorful bracelet with very little preparation. I like this idea because it allows me to experiment with different patterns without needing beads, expensive jewelry supplies, or complicated equipment.
I would choose a lace with a texture that feels comfortable against the skin, measure it around my wrist, and leave extra length for tying. Braiding, knotting, or weaving the lace creates different finishes. Two or three colors can make the design more noticeable, while a single color gives it a simpler look.
Before trimming the ends, I would check that the bracelet slips on and off comfortably. If I want a more polished finish, I could add a suitable clasp instead of relying on a knot.
Pro Tip: I use smooth, clean laces without frayed sections, and I avoid tight knots that could make the bracelet uncomfortable to remove.
9. Upcycled Old Vases with Paint

Materials: Old vases, suitable paint, brushes, sandpaper if needed, and a protective work surface
I can change the appearance of an outdated vase with paint rather than buying new home accessories. A plain glass vase, ceramic container, or secondhand decorative piece can become a coordinated accent for a shelf, mantel, or dining table.
I would begin by washing the vase and allowing it to dry completely. The paint needs to match the surface, so I would choose a product designed for glass, ceramic, or the material I’m working with. A primer may be necessary, particularly on smooth surfaces.
Once the base coat dries, I could add stripes, dots, textured effects, or a single muted color. I would use a separate waterproof insert if I wanted to display fresh flowers in a painted decorative vase and the paint wasn’t rated for contact with water.
Pro Tip: I test the paint on an inconspicuous area first. This helps me check its coverage and adhesion before decorating the entire piece.
10. Christmas Card Holder

Materials: An old wooden shutter, hanging hardware, suitable fasteners, and Christmas cards
I like keeping holiday cards where I can see them instead of leaving them in a stack on a table. An old wooden shutter can become a decorative display that makes use of its existing slats and gives a room a festive touch.
I would clean the shutter, remove loose paint, and check the wood for damage. After applying a suitable finish, I could attach a secure hanging system or stand it on a stable surface. The gaps between the slats provide convenient places to tuck in cards, while small clips can hold thinner envelopes in position.
Before hanging the shutter, I would make sure the wall fixings are suitable for its weight. I would also avoid using a damaged or unstable piece near children or busy walkways.
Pro Tip: I arrange the cards by size and leave a little space between them. This makes the display easier to update as new cards arrive.
11. Upcycled Tin Cans

Materials: Empty tin cans, paint or decorative paper, brushes, and a suitable protective finish
Tin cans are among the most practical materials I can save for small organizing projects. Once cleaned and decorated, they can hold pens, paintbrushes, scissors, craft tools, or other items that tend to clutter a desk.
I would remove the labels, wash the cans thoroughly, and check the rims for sharp edges. Any can with a damaged or jagged opening should be avoided unless the edge can be made completely safe. I could then paint the exterior, cover it with decorative paper, or wrap it in fabric.
For a coordinated desk organizer, I would prepare several cans in different heights and arrange them together on a tray. A can can also serve as an outer cover for a small plant pot, provided it has appropriate drainage or a separate draining pot is placed inside.
Pro Tip: I keep decorative coatings away from the inside of any can used for plants or items that may come into direct contact with food.
12. Wine Cork Ornaments

Materials: Clean wine corks, twine, decorative tape, craft glue, and optional embellishments
I can save natural corks from bottles and use them to create small ornaments for a Christmas tree, wreath, or seasonal display. Their lightweight texture makes them suitable for simple shapes, miniature figures, and rustic decorations.
I would arrange the corks into the design before attaching anything. Depending on the shape, I could use craft glue, suitable fasteners, or twine to hold the pieces together. Decorative tape, small fabric scraps, and ribbons can add color without requiring many new materials.
I would check each cork for damage and let any adhesive cure fully before hanging the ornament. If children are helping, I would choose simple designs that do not require sharp tools or small loose embellishments.
Pro Tip: I save corks in a small container until I have enough for a coordinated project. This makes it easier to create several matching ornaments at once.
13. Thrift Store Painting

Materials: A secondhand painting or canvas, suitable paint, masking tape, and optional letter stencils
A painting from a thrift store can become a personalized piece of wall art without starting with a blank canvas. I like this approach because the original artwork may already have an interesting texture, frame, or background color.
I would inspect the frame and canvas before purchasing anything, checking for water damage, loose parts, and signs of mold. Once I have a suitable piece, I could use masking tape to create geometric blocks or apply lettering over a painted background.
If I want to preserve parts of the original artwork, I would plan the layout carefully before adding paint. I would also make sure the new paint is compatible with the existing surface.
Pro Tip: I test my design on paper first, especially when working with words or lettering. A little planning can prevent uneven spacing and unnecessary repainting.
14. Unicorn Toilet Roll Craft

Materials: Cardboard tubes, colored paper, glue, scissors, markers, and optional yarn
I can turn an empty toilet paper roll into a colorful unicorn for a children’s craft session. The cardboard tube provides the body, while paper ears, a mane, and a horn give the character its familiar appearance.
I would cover the tube with colored paper or paint it and let it dry. Next, I would cut out the ears and mane, attach the pieces with child-safe glue, and draw on the eyes and facial details. Small strips of yarn or paper can make the mane look fuller.
This is a useful project for using up leftover paper and craft scraps. For younger children, I would prepare the shapes in advance and supervise the use of scissors and adhesives.
Pro Tip: I let children choose their own color combinations rather than sticking to traditional unicorn colors. It makes the activity more personal and encourages imaginative play.
15. Bread Pan Planter

Materials: An old bread pan, a suitable plant pot or drainage setup, potting mix, and optional wooden feet
An unused bread pan can make an attractive container for a windowsill garden or outdoor display. I like its long shape because it provides room for several small plants arranged in a row.
Before planting, I would inspect the pan for rust, peeling coatings, or damage. Since ordinary bread pans are not necessarily designed to hold wet soil, I would use a separate plant pot or liner with proper drainage rather than filling the pan directly. I could then arrange several small pots inside and conceal their edges with decorative material.
For a decorative centerpiece, I might use faux greenery or seasonal arrangements instead of live plants. If I add wooden feet, I would attach them securely and make sure the planter remains stable.
Pro Tip: I match the plants to the available light and avoid letting standing water collect inside the outer container.
16. Embroidery Hoop Pumpkin

Materials: Old sweater fabric, embroidery hoops, scissors, stuffing, and pipe cleaners or other decorative stems
I can reuse a sweater that has shrunk, developed a hole, or gone out of style by turning it into a fabric pumpkin. This is a useful autumn decoration for a shelf, entryway, or seasonal table display.
I would cut a suitable section of fabric, stretch it across an embroidery hoop, and gather or secure the material to create a rounded pumpkin shape. A little stuffing can give the design more volume, while a fabric stem or twisted pipe cleaner adds the finishing detail.
I would choose fabric in a color or pattern that suits my existing decorations. Textured knits and autumn-toned sweaters work well, but patterned material can also create a distinctive look.
Pro Tip: I keep the fabric slightly loose while assembling the pumpkin so I can adjust the shape before securing everything in place.
17. DIY Headband

Materials: An old stretchy T-shirt, fabric scissors, and optional fabric glue
When I have a soft T-shirt that no longer gets worn, I can reuse its fabric to make a comfortable headband. This is a straightforward way to turn an unwanted garment into an accessory that coordinates with other casual clothes.
I would cut long strips from the lower part of the shirt, using the existing hem where possible to reduce fraying. Depending on the design, I could braid the strips, twist them together, or arrange them in a woven pattern. The ends can be tied, stitched, or secured with a suitable fabric adhesive.
I would check the headband’s fit before trimming away any excess material. Fabric with a little stretch usually works better than stiff cotton because it sits more comfortably around the head.
Pro Tip: I use a clean section of fabric without stretched-out areas or thinning fibers. The stronger material is more likely to hold its shape with regular use.
18. Toilet Paper Seedling Pots

Materials: Cardboard toilet paper tubes, potting mix, seeds, a tray, and water
I can reuse cardboard tubes as temporary seed-starting containers for a small indoor gardening project. They’re convenient for organizing individual seedlings and can make planting more engaging for children who want to watch seeds grow.
I would cut the tubes to a manageable height, fold the bottom edges inward to form a base, and place them upright in a waterproof tray. After adding seed-starting mix, I would plant the seeds at the depth recommended on their packet and water gently.
The cardboard needs to remain moist enough for the seedlings without becoming waterlogged. I would also check whether the plant species is suitable for transplanting with the tube; if the cardboard remains firm, I may need to remove it before planting.
Pro Tip: I label each tube with the seed variety and planting date. This makes it easier to track germination and identify seedlings as they grow.
19. Socks Pumpkin Craft

Materials: Clean old socks, stuffing, rubber bands or thread, a small stem, and craft glue
Single socks and worn-out pairs can become soft decorative pumpkins with very little sewing. I like this project for autumn displays because I can use different fabrics and colors rather than buying new seasonal decorations.
I would fill a clean sock with stuffing, gather the open end, and secure it with thread or a suitable fastener. To create the pumpkin’s sections, I could wrap thread around the stuffed shape at intervals, pulling gently to form grooves. A small piece of twig or fabric can serve as the stem.
I would use firm but not excessive tension so the stuffing stays in place without tearing the fabric. If children are involved, I would supervise the use of small parts and keep the finished decoration away from anyone likely to put it in their mouth.
Pro Tip: I experiment with striped, patterned, or neutral socks to create pumpkins that work with different decorating styles.
20. DIY Pencil Case
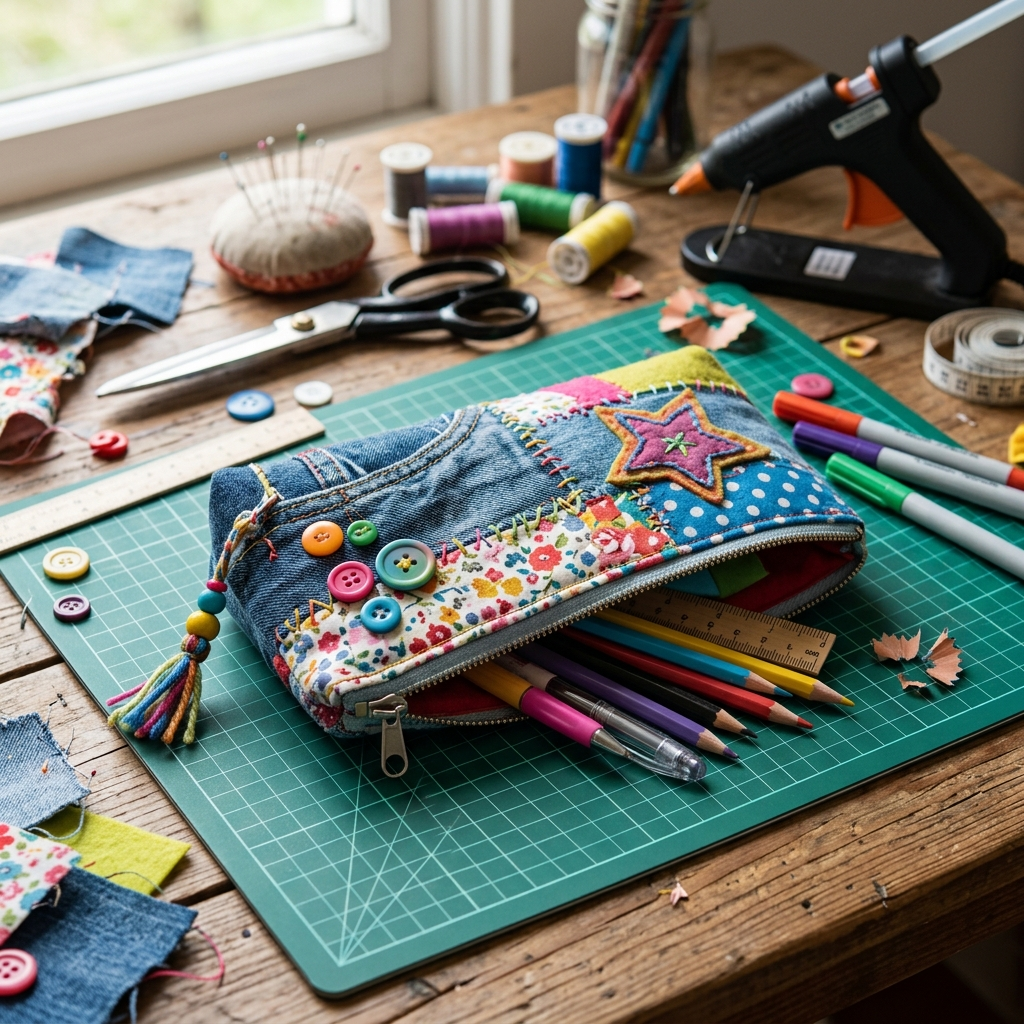
Materials: Clean cardboard tubes or sturdy cardboard, fabric or felt scraps, a zipper, glue, and basic sewing supplies
I can use leftover fabric and cardboard to make a small pencil case for pens, pencils, or art supplies. This project is particularly useful when I have scraps from other sewing jobs that are too small for larger projects but still worth keeping.
I would first decide on the case’s dimensions and create a simple pattern. Sturdy cardboard can help form a structured shape, while fabric or felt adds a softer exterior. If I want a zippered opening, I would attach the zipper securely and make sure it opens smoothly before finishing the seams.
Because cardboard is not washable and can weaken with moisture, I would use this construction for light, dry supplies. For a more durable pencil case, I would make the entire body from fabric and add a lining.
Pro Tip: I test the zipper before decorating the case. It’s much easier to correct alignment problems before the finishing details are attached.
21. Yoghurt Container Flower Pot

Materials: A clean, sturdy yogurt tub, a suitable plant pot or drainage setup, decorative paper, and paint if desired
Large yogurt tubs can make handy outer containers for small plants. I like reusing them because their shape is convenient for holding a nursery pot, herbs, or decorative greenery on a windowsill.
I would remove the label, wash the container thoroughly, and dry it before decorating the outside. I could cover it with weather-resistant paint suitable for the plastic or use decorative fabric and paper for indoor display. For a living plant, I would place a properly draining pot inside rather than allowing roots to sit in trapped water.
I would also check that the tub is sturdy enough to support the plant and its damp soil. Lightweight containers work best for smaller plants and indoor arrangements.
Pro Tip: I choose a decorative cover that can be removed easily so I can empty excess water and clean the container whenever necessary.
22. Money Tissue Box

Materials: An empty tissue box, paper currency, decorative paper, tape, and scissors
For birthdays, graduations, or other celebrations, I can transform an empty tissue box into a playful money gift. It adds an element of surprise while giving an ordinary box a second use.
I would cover the box with attractive paper, making sure the opening remains clear. Then I would carefully connect the folded bills using a method that does not damage them, such as small removable paper tabs or a separate paper strip. The recipient can pull the bills out one by one.
I would avoid applying adhesive directly to the currency and check that the bills move freely through the opening. A short message on the box can explain how the gift works without spoiling the surprise.
Pro Tip: I test the mechanism with scrap paper before adding the money. This helps me avoid a gift that jams when someone tries to open it.
23. DIY Dollar Tree Lantern

Materials: Inexpensive picture frames, suitable adhesive, decorative accents, and an LED candle
I can repurpose simple picture frames into a lantern-style centerpiece for a shelf, dining table, or covered porch. This project is useful when I want decorative lighting without purchasing a more expensive lantern.
I would remove the frame backs and glass if the design calls for an open structure, then arrange the frames into a box shape. A strong adhesive suitable for the frame material can secure the corners. Once the structure is stable and the adhesive has cured, I could add decorative stones, faux greenery, or other lightweight accents.
I would use an LED candle rather than a real flame, particularly if the frame includes plastic parts, decorative paper, or adhesives that could be damaged by heat.
Pro Tip: I check that the lantern sits level before adding decorations. A stable base makes the finished piece safer and more attractive.
24. Early Learning Recycled Project

Materials: A clean plastic container, large reusable lids, washable markers, and suitable adhesive
I like using everyday packaging to create simple learning activities for young children. A recycled matching toy can help children practice color recognition, sorting, and hand-eye coordination while exploring how familiar objects can be reused.
I would start with a clean, sturdy container and design large openings or matching spaces for the pieces. Different colors can indicate where each piece belongs, turning the container into a sorting game. I would smooth any cut edges and secure any components that need attaching.
For toddlers, I would avoid small lids and detachable pieces that could present choking hazards. I would also supervise the activity and check the toy regularly for damage.
Pro Tip: I introduce only a few colors at first, then add more as the child becomes comfortable with the activity. This keeps the game manageable and makes it easier to see which skills the child is practicing.
Also read: 21 Festive Christmas Crafts That Sell Like Crazy
25. Fire Chair Makeover

Materials: A sturdy old chair, sandpaper, suitable primer and paint, and an appropriate protective finish
An old dining chair doesn’t always need to be replaced when its appearance becomes dated. If the frame is still solid, I can give it a new look with paint and a design that suits an outdoor gathering area or a relaxed living space.
I would inspect the chair for loose joints, cracks, and wobbling before starting. After tightening or repairing the frame, I would clean and sand the surface, apply a suitable primer, and paint the chair with a finish appropriate for its intended location. A campfire-inspired design is one option, but geometric patterns or solid colors can work just as well.
I would choose paint and sealant based on whether the chair will stay indoors or be exposed to the weather. The chair should be fully dry and structurally sound before anyone sits on it.
Pro Tip: I test the chair’s stability before and after the makeover. Fresh paint improves its appearance, but it cannot make a damaged frame safe.
26. DIY Leaf Candle Holder

Materials: A suitable glass holder, decorative leaves, craft adhesive, and optional twine
I can turn a plain glass candle holder into a seasonal decoration with leaf-inspired details. Warm colors, natural textures, and simple accents make it a good addition to an autumn table or mantel.
I would clean the glass and arrange the decorative elements before attaching them. Dried leaves or artificial foliage can be used on the outside of a container intended for decorative display. If I plan to use a real candle, I would keep all decorations well away from the flame and use a suitable heat-resistant holder.
For a safer everyday option, I would place an LED candle inside the decorated container. I could finish the outside with a little twine or another embellishment that suits the rest of my seasonal decor.
Pro Tip: I keep combustible materials away from candle flames and avoid wrapping dried foliage around a container that could become hot during use.
27. Recycled Batteries Container

Materials: A clean, dry, lidded container, a clear label, and a secure storage location
I find it useful to keep spent household batteries in one clearly marked place until I can take them to an appropriate collection point. An old container with a secure lid can help prevent loose batteries from getting mixed in with everyday rubbish.
I would choose a container that is clean, dry, and made from a material suitable for storing the particular batteries involved. I would label it clearly and keep it away from heat, moisture, and children. Where possible, I would cover battery terminals with nonconductive tape, particularly on lithium batteries and 9-volt batteries, to reduce the risk of short circuits.
Batteries should not automatically be placed in ordinary household trash or curbside recycling. Disposal requirements vary by location, so I would check the instructions provided by a local waste authority or battery collection service.
Pro Tip: I keep damaged, leaking, swollen, or unusually hot batteries separate and seek guidance from an appropriate hazardous-waste collection service rather than placing them in a general storage container.
28. DIY Bottle Cap Candles
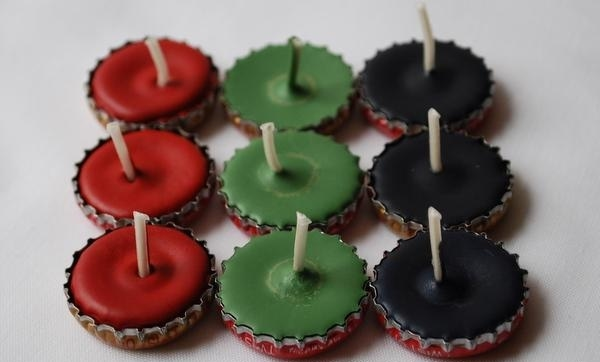
Materials: Clean metal bottle caps, candle wax, small wicks, and a heat-safe work surface
Metal bottle caps can be reused for tiny decorative wax pieces, although I would treat them as craft accents rather than dependable everyday candles. Their shallow shape makes them interesting for miniature displays, but the limited space can make them difficult to burn safely.
I would clean and dry the caps, then check that they have no sharp edges or damaged coatings. If I wanted to experiment with wax, I would use a purpose-made candle container and follow the wax manufacturer’s instructions rather than assuming an ordinary cap is safe for a flame.
For a no-flame alternative, I could fill the caps with colored modeling clay or use them in a mosaic, magnet, or other decorative craft.
Pro Tip: I never leave a homemade candle unattended, and I avoid burning wax in small metal caps that could tip over or overheat.
29. DIY Bathroom Vanity

Materials: A sturdy old suitcase, suitable brackets or a stable support, storage containers, and finishing supplies
An old suitcase can become a distinctive bathroom storage feature when it is clean, structurally sound, and suitable for the room. I like the idea of using its existing compartments to keep brushes, toiletries, spare soap, and other small items organized.
I would inspect the suitcase for mold, musty odors, damaged lining, and loose hardware before deciding whether to reuse it. Then I would clean it thoroughly and allow it to dry. For a wall-mounted design, I would use an appropriate mounting system secured to suitable structural support rather than relying on the suitcase handle or decorative fittings.
Because bathrooms are often humid, I would keep the suitcase away from direct splashes and provide ventilation. I would use washable organizers inside to make cleaning easier.
Pro Tip: I try the arrangement on a stable surface before mounting anything. If the suitcase will hold heavy bottles or glass containers, I make sure the supports can safely handle the combined weight.
30. Knotted T-shirt Headband

Materials: An old T-shirt, fabric scissors, and optional needle and thread
I can create a second headband design from a T-shirt by using a simple knot or twist at the front. It’s a useful way to reuse soft fabric while making an accessory that works for everyday wear, exercise, or keeping hair away from my face.
I would cut a long strip of fabric, keeping enough width for the finished headband to sit comfortably. Depending on the pattern, I could twist two strips together or form a decorative knot before joining the ends. I would secure the join with stitching or a suitable fabric adhesive.
Stretchy T-shirt material is usually easier to shape than stiff woven fabric. I would measure the fabric around my head before trimming it, allowing enough room for a comfortable fit without excessive pressure.
Pro Tip: I use the bottom hem of the shirt when possible because it creates a neat edge and can reduce the amount of finishing required.
31. Upcycled Drawers Wall Unit

Materials: A sturdy old drawer, sandpaper, suitable paint, wall fixings, and optional decorative hardware
I can give an old drawer a new purpose by turning it into a compact wall shelf. This idea works well in a bathroom, craft room, hallway, or home office where I need a little extra space for lightweight items.
I would remove any loose hardware, clean the drawer, and check its base and corners for damage. After sanding and painting it, I could add a decorative backing using suitable paper or a painted pattern. The drawer can be mounted horizontally or vertically, depending on its shape and the items I want to store.
I would use wall fixings suitable for the wall material and the expected load. Since a repurposed drawer may not have been designed for wall mounting, its joints and base need to be checked carefully.
Pro Tip: I keep the contents light and avoid mounting the shelf above areas where falling objects could cause injury.
32. Tin Can Piggy Bank

Materials: A clean tin can with a secure lid, paint, cardstock, and suitable adhesive
An empty can can become a simple savings container for coins or small notes. I like this project because it turns an ordinary household item into something children can decorate and use to practice saving.
I would clean the can thoroughly and make sure there are no sharp edges. If the lid is removable, I would secure it appropriately and create a coin slot using a safe method suited to the material. I would never leave a freshly cut metal edge exposed. For a simpler version, I could use a container with a plastic lid designed for cutting.
Paint, paper ears, and drawn facial features can turn the can into a piggy bank or another character. I would let all finishes dry completely before using it.
Pro Tip: I use a plastic container if I cannot make the metal opening completely smooth and safe. A cute design is not worth the risk of cuts.
33. Eco Friendly Wrapping Paper

Materials: Reused brown paper, clean newspaper, fabric scraps, twine, and leftover ribbon
I can wrap gifts attractively without buying a new roll of decorative paper for every occasion. Clean brown paper, suitable newspaper pages, and leftover packaging paper can all work well when paired with simple finishing touches.
I would measure the paper before cutting so I don’t create unnecessary scraps. Then I could use twine, fabric ribbon, pressed leaves, handmade tags, or a simple hand-drawn pattern to personalize the package. For a coordinated look, I would repeat the same colors or decorative details across several gifts.
I would avoid materials that could transfer ink or residue onto the gift itself, particularly if I am wrapping food or delicate objects. Clean inner tissue or another suitable barrier can help protect the item.
Pro Tip: I save usable lengths of ribbon and larger paper offcuts in a labeled container. Keeping these supplies organized makes future gift wrapping easier and reduces waste.
34. Christmas Glitter Jars

Materials: A clean, sturdy jar or bottle, glitter, decorative confetti, and a secure lid
A clear jar can become a festive sensory decoration with glitter, colored shapes, and a little creativity. I like these jars for seasonal displays because the contents catch the light and can create a calming visual effect when the jar is gently moved.
I would clean and dry the container, add the decorations, and close the lid securely. For a sensory jar with moving glitter, I would use a suitable liquid mixture that is compatible with the container and its seal. I would test the closure for leaks before allowing anyone to handle it.
For young children, I would supervise use and choose a sturdy, shatter-resistant container with no small detachable decorations. A decorative jar should never be treated as safe merely because the lid appears closed.
Pro Tip: I keep the contents simple. A few complementary colors often look more appealing than filling the entire jar with unrelated decorations.
35. Scrap Wood Sculptures for Kids

Materials: Clean, smooth wood offcuts, child-safe paint, and suitable craft glue
I can use leftover wood pieces to create a building activity that encourages children to experiment with shapes, balance, and simple structures. Instead of following a fixed pattern, children can make towers, tiny houses, abstract sculptures, or miniature buildings.
I would sort the wood beforehand and remove any pieces with splinters, protruding nails, sharp edges, or questionable coatings. An adult should handle any cutting or sanding that is necessary. Children can then arrange the pieces and decorate them with suitable paint or markers.
This activity offers a practical way to talk about how structures stand, why wide bases can be stable, and how different shapes fit together. I would let children experiment with their own ideas rather than insisting on a perfect result.
Pro Tip: I prepare a small selection of similar-sized blocks first. Once children understand how to balance them, I introduce more varied shapes for a greater challenge.
36. Repurposed Light Parts Angel

Materials: Salvaged decorative light parts, wire or craft materials, adhesive, and optional fabric or felt
Old lamps and light fixtures sometimes contain decorative components that can be reused in non-electrical craft projects. I can turn suitable knobs, small metal pieces, or other salvaged parts into a decorative angel for a shelf or holiday display.
I would begin by making sure the salvaged parts are completely disconnected from electricity. I would never reuse damaged wiring, sockets, or electrical components unless the item is professionally repaired and confirmed safe. For the angel’s body and wings, I could use craft wire, felt, cardboard, or other materials that are easier to handle.
I would attach the pieces securely and check for sharp edges or loose parts before displaying the finished decoration. If I wanted to add lighting, I would choose a separate, commercially made light suitable for the intended setting rather than modifying exposed electrical parts.
Pro Tip: I keep this project decorative and non-electrical. Repurposing the appearance of old light parts is much simpler than trying to make an old fixture work again.
37. Cutting Board and Grater

Materials: An old cutting board, a clean grater, suitable hooks or fasteners, and a mounting system
A worn cutting board and an old grater can become a useful kitchen display or recipe holder if their condition makes them suitable for reuse. I like the combination because the wooden board provides a backing while the grater can offer a place to hold notes, recipe cards, or lightweight papers.
I would inspect both pieces carefully before starting. A grater with rusty, loose, or sharp exposed parts may not be suitable for this project, and a cutting board with deep cracks or signs of contamination should not be reused for food. I would clean the items, sand the wood if appropriate, and attach the components securely.
Before mounting the finished piece, I would test its stability and choose fixings suitable for the wall. I would keep it away from areas where someone could accidentally brush against the metal.
Pro Tip: I wear suitable protective gloves when handling metal edges and use tools designed for the material rather than forcing fasteners into place.
38. Chair Back Kitchen Storage

Materials: A sturdy old chair back, suitable paint, shelf brackets or mounting hardware, and basic tools
I can turn part of an unwanted wooden chair into a wall-mounted kitchen rack. This is a practical option when the chair is no longer useful as seating but its back remains strong and attractive.
I would inspect the chair for loose joints and damaged wood before removing the section I want to use. Cutting should be done with the appropriate tools and protective equipment, preferably by someone experienced with the task. Afterward, I would sand the edges, apply a suitable finish, and attach hooks or decorative knobs if needed.
The finished rack could hold lightweight kitchen accessories, towels, or other items that suit the design. I would avoid placing heavy cookware on it unless the rack and its mounting system were specifically designed to carry that weight.
Pro Tip: I plan the mounting points before painting so I can avoid unnecessary damage to the finished surface during installation.
39. Wire Lampshade Frames into Plant Stands

Materials: A metal lampshade frame, wire cutters, pliers, protective gloves, and suitable paint if desired
An old metal lampshade frame can become a decorative support for a small plant pot. I like this idea because vintage frames often have interesting shapes that are difficult to find in ordinary plant stands.
I would remove all fabric, electrical parts, and loose attachments before inspecting the frame. If the metal is badly rusted, bent, or unstable, I would choose a different frame. I would carefully reshape the metal only when necessary and make sure all exposed ends are finished safely.
Once the frame is clean and stable, I could apply a suitable metal finish and place a lightweight pot on top. I would test the balance before adding a plant, especially if the stand has a narrow base.
Pro Tip: I measure the pot before modifying the frame. The pot needs to sit securely without slipping through the opening or making the stand top-heavy.
40. Nature Explorer Shoebox Trunk

Materials: An empty shoebox, scrap cardboard, brown paper, glue, and decorative fabric or stickers
I can transform a shoebox into a small keepsake trunk for shells, postcards, stones, drawings, and other lightweight treasures. It’s an enjoyable project for children who like collecting objects on walks, holidays, or nature trips.
I would reinforce the box with scrap cardboard where needed and cover the exterior with brown paper or leftover wrapping material. To create the look of an old travel trunk, I could add paper straps, a decorative label, and stickers. I would keep the lid easy to open so the box remains practical for everyday use.
Before storing natural finds, I would clean and dry them appropriately. I would also avoid placing damp stones, shells, or other objects inside the trunk because moisture can damage the cardboard.
Pro Tip: I label the trunk with the collection’s theme, such as beach finds or nature treasures. This helps keep similar items together and makes the box more meaningful.
41. Blue Jean Planter

Materials: Old jeans, stuffing or a support frame, a stable base, and a separate plant container
For a more unusual garden decoration, I can reuse old jeans to create the appearance of a pair of denim-clad legs holding or supporting a plant container. This works particularly well as a playful display for a porch, garden corner, or Halloween arrangement.
I would choose denim that is still strong enough to hold its shape and use a stable internal support. Rather than filling the jeans with wet soil, I would place a separate, properly draining plant pot inside the design. This helps protect the fabric and makes it easier to water the plant.
I would keep the finished piece sheltered from heavy rain because ordinary denim and stuffing can become waterlogged. For a seasonal display, artificial flowers can be an alternative to live plants.
Pro Tip: I test the balance with the empty container before adding a plant. A wider base and secure internal support help prevent the arrangement from tipping over.
42. Cardboard Tube Lamb
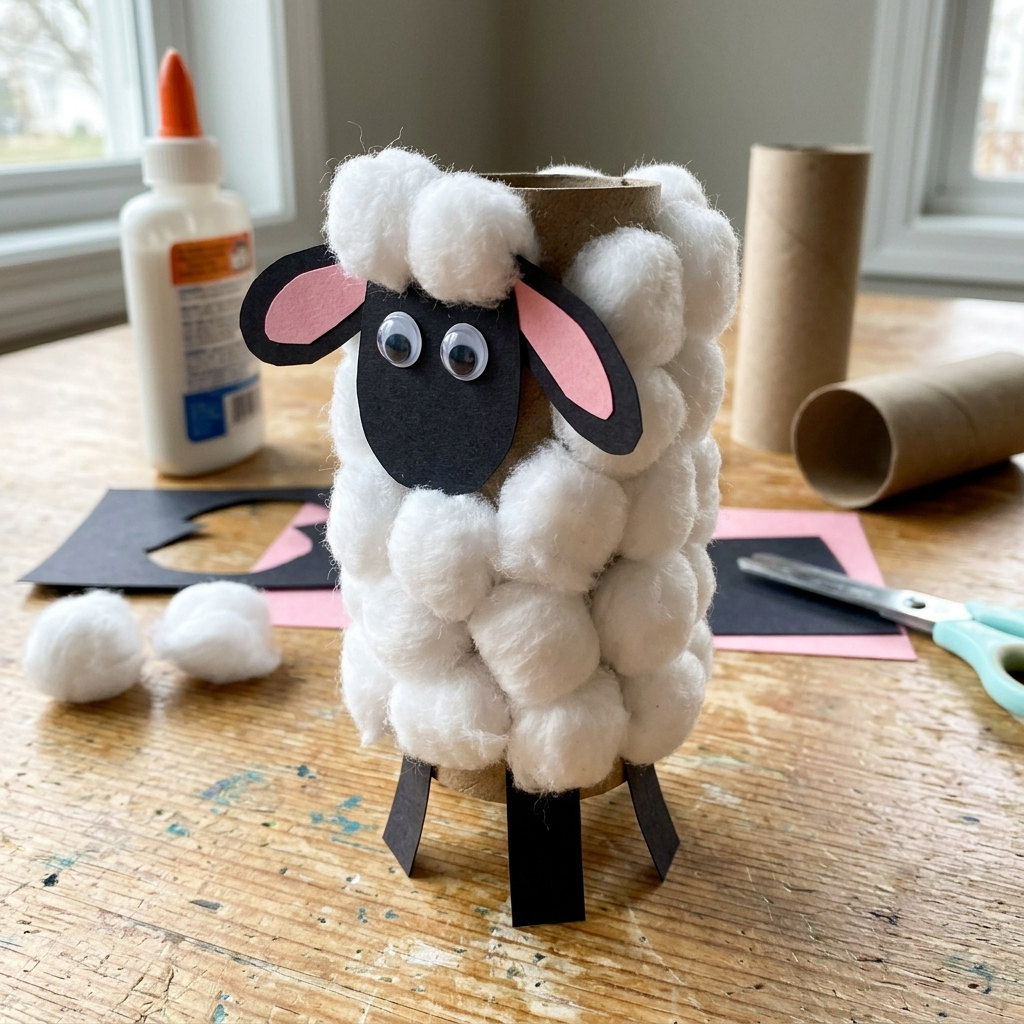
Materials: Cardboard tubes, cotton balls or suitable fiber, felt, glue, and markers
I can turn an empty cardboard tube into a little lamb using soft-looking materials and a few simple shapes. It’s a charming craft for spring displays, farm-themed activities, or a supervised classroom session.
I would cover the tube with white paper or another suitable material and attach cotton or craft fiber to create the lamb’s woolly body. Felt can be used for the face and ears, while markers add the eyes and other small details. I would let the adhesive dry before moving the finished craft.
For toddlers and young children, I would avoid small loose pieces and supervise the use of glue and scissors. A simpler version made from larger, securely attached shapes is easier for little hands to manage.
Pro Tip: I leave an uncovered section at the front for the face. This makes the lamb easier to recognize and keeps the facial details visible.
43. Bunny Doll Pattern

Materials: Clean fabric scraps, a simple bunny pattern, thread, stuffing, and sewing supplies
Fabric scraps can become a handmade bunny doll for Easter decorations, a nursery shelf, or a thoughtful handmade gift. I like this project because it gives small patterned pieces a purpose, especially when I have leftover material from other sewing projects.
I would choose a simple pattern with clearly marked body and ear pieces. After cutting the fabric, I would sew the sections together, leave a small opening for stuffing, and close the opening securely. Contrasting fabric can add detail to the ears, while a small bow or simple outfit can personalize the finished doll.
I would use durable stitching and make sure all decorative parts are securely attached. If the doll is intended for a young child, I would avoid buttons, beads, and other small pieces that could come loose.
Pro Tip: I make a paper template first and check that the pieces fit together before cutting the fabric. This helps reduce mistakes and saves valuable scraps.
44. Christmas Gift Tags

Materials: Cardboard packaging, leftover wrapping paper, ribbon or twine, markers, and decorative scissors
I can make personalized Christmas gift tags from cardboard packaging and leftover paper. It’s a small project, but it helps me use materials I already have while giving each present a more thoughtful finish.
I would cut the cardboard into rectangles, circles, or other simple shapes and cover one side with decorative paper if needed. Then I would punch a hole, thread through ribbon or twine, and write the recipient’s name or a short message. Decorative scissors can add a patterned edge without requiring additional embellishments.
I would make sure the tags are large enough to write on clearly and use a pen that stands out against the background. For a coordinated gift set, I would repeat a small number of colors and patterns.
Pro Tip: I prepare a batch of blank tags ahead of the holiday season and personalize them when I wrap each gift. This saves time during busy celebrations.
45. Wooden Wall Art

Materials: A sound wooden crate or pallet boards, sandpaper, suitable paint or stain, and hanging hardware
I can turn spare timber into a piece of wall art that suits my home rather than buying a ready-made decoration. Old crate boards and pallet wood can create rustic signs, geometric designs, or even a decorative clock.
I would inspect the wood for rot, splinters, nails, and chemical treatments before using it indoors. Pallets are not all suitable for home projects, so I would choose timber with a known, safe history and avoid wood that may have been contaminated. After cleaning and sanding, I could arrange the boards into a design and attach them securely.
If I wanted to add a clock mechanism, I would follow the manufacturer’s installation instructions and make sure the hands move freely. The completed artwork should be mounted with hardware appropriate for its weight.
Pro Tip: I lay out the boards on the floor first and photograph the arrangement before attaching anything. This makes it easier to compare designs and adjust the spacing.
46. DIY Beach Dollhouse from Scrap Wood

Materials: Suitable scrap wood, small dowels, non-toxic paint, craft glue, and lightweight decorative materials
I can use leftover wood to build a miniature beach house for dolls or small figures. This project allows me to reuse timber while creating a toy that can be customized with tiny furniture, a porch, and simple landscaping.
I would begin with a basic plan that includes the floor, walls, roof, and any open areas I want for play. After measuring and cutting the pieces, an adult would sand the wood and assemble the structure with suitable fasteners or adhesive. Children can help choose colors and decorate the finished house with lightweight materials.
I would check the construction for stability and make sure there are no exposed nails, splinters, or sharp corners. The dollhouse should be sized to suit the intended figures and the child’s available play space.
Pro Tip: I build a small, simple version first instead of attempting a complicated design immediately. A clear plan and a few sturdy parts usually produce a better result than adding too many details at once.
47. DIY Bathroom Cabinet

Materials: A sturdy wooden gift box, small shelves or dividers, suitable hinges or brackets, and protective finish
An attractive wooden gift box can become a compact bathroom organizer when I add the right compartments and choose a suitable place to use it. I like this idea for storing spare toiletries, cotton pads, hair accessories, and other small items that otherwise crowd the counter.
I would inspect the box for loose joints, damage, or moisture problems before cleaning and refinishing it. Small dividers can be made from scrap wood or sturdy cardboard, depending on the weight of the contents. If I want a door or wall-mounted cabinet, I would use suitable hardware and make sure the structure can support the intended load.
Bathrooms can be humid, so I would protect the wood with a finish appropriate for indoor use and keep the cabinet away from direct splashes. I would also avoid storing medicines or products that require special temperature conditions in a damp, unsuitable location.
Pro Tip: I measure the bottles and accessories before adding dividers. This gives each item enough room and prevents the finished cabinet from becoming another source of clutter.
How I Choose the Best Upcycling Projects for My Home
When I decide which upcycling idea to try, I consider the materials I already have, the time required, and how I will use the finished item. A simple project that solves a storage problem is often more worthwhile than a decorative craft that will sit unused.
I also think about the condition of the original material. Clean jars, sturdy fabric, and sound wood are generally easier to work with than damaged items that need extensive repairs. If a project requires specialist tools, costly supplies, or complicated electrical work, I consider whether reusing the item is genuinely practical.
My favorite approach is to start small, keep useful scraps organized, and make one project at a time. This helps me avoid buying unnecessary supplies and makes it easier to finish what I start.
Read this next: 41 Classy Christmas Crafts You Should Make
Conclusion
I don’t think useful materials need to be perfect or brand-new to have value. With a little planning, I can turn old clothes into organizers, empty containers into decorative pieces, and leftover wood into shelves or children’s crafts.
These 47 upcycling ideas offer plenty of ways to get started, whether I have only a few minutes for a simple craft or a weekend available for a furniture makeover. I would begin with one item I already own, choose a project that meets a real need, and make sure the finished piece is safe and practical for its intended use.
The best upcycling projects are the ones that make everyday life a little easier while helping me get more use from things I might otherwise discard.




One Comment