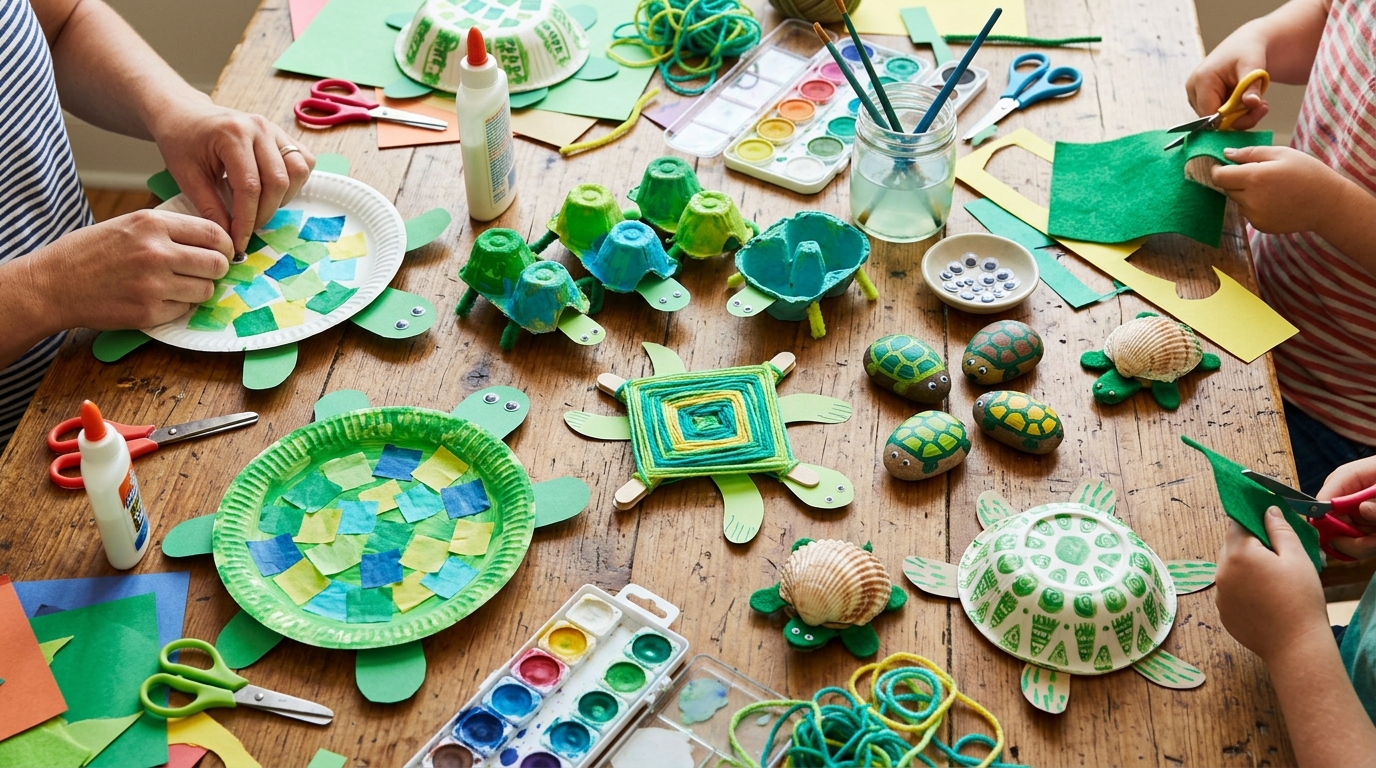
19 Turtle Craft Ideas That Look Cute and Colorful
Turtle crafts for kids are a fun way to explore colors, textures, shapes, and patterns using simple art supplies. I like projects that use materials already found at home, such as paper plates, cardboard tubes, egg cartons, scrap fabric, and pebbles. They make it easier to plan a creative afternoon without buying a long list of supplies.
The turtle’s shell gives children plenty of room to experiment. They can paint geometric designs, layer colorful paper, press patterns into clay, or combine different textures to make a turtle of their own. Some projects are simple enough for preschoolers with adult help, while others suit older children who enjoy more detailed work.
In this collection, I’ve included easy turtle crafts, recycled-material projects, keepsake artwork, and activities that combine crafting with imaginative storytelling. Choose a project based on your child’s age, available time, and comfort with the materials. Preparing the cutting and gluing supplies in advance can make the activity easier to manage.
These 19 turtle craft ideas use everyday materials to create colorful animal artwork, small sculptures, decorations, and storytelling props. You’ll find paper plate turtles, clay models, painted pebbles, fabric softies, suncatchers, and a sea turtle life cycle display. Each project offers a different way to decorate a shell, build a turtle shape, or create a scene inspired by nature.
Save this for later
Table of Contents
I’ve included suggested ages, estimated crafting times, materials, and practical instructions to help you choose a suitable activity. Some projects need only paper and paint, while others require adult assistance with cutting, sewing, adhesives, or assembly. Check the materials before starting, particularly if you’re crafting with preschoolers or children who may put small objects in their mouths.
Key Takeaways
- For younger children: Try paper plate turtles, handprint artwork, or simple collages using adult-prepared shapes.
- For recycled turtle crafts: Reuse clean cardboard tubes, egg cartons, paper bags, and leftover paper.
- For detailed projects: Clay sculptures, watercolor paintings, and mosaic-style shells offer more opportunities to experiment with patterns and textures.
- For group activities: A giant collaborative turtle lets several children contribute to one shared display.
- For learning and play: A sea turtle life cycle display introduces basic animal facts, while puppets and story stones encourage children to invent their own stories.
- For safe crafting: Choose age-appropriate supplies, supervise cutting and gluing, and keep small decorations, stones, and hanging cords away from children who may handle them unsafely.
Related article: 27 Zoo Animal Craft Ideas for Kids That Spark Creativity
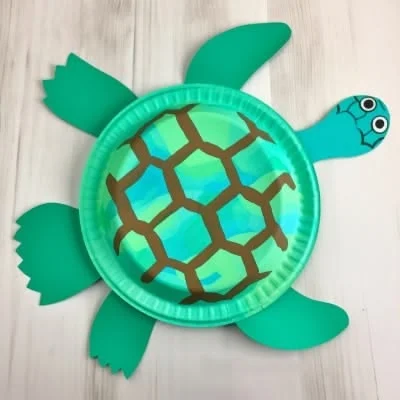
1. Paper Plate Turtle
Suggested age: Ages 3–5 with adult assistance; ages 6 and up can manage more of the decorating and assembly independently.
Estimated time: Approximately 20–30 minutes, plus paint-drying time.
Materials: Paper plate, green paint, paintbrush, green cardstock, child-safe scissors, glue, markers, and optional googly eyes.
A paper plate makes a handy turtle shell because its rounded shape gives children plenty of space to decorate. Paint the plate green and let it dry before adding shell patterns with darker green, turquoise, yellow, or other contrasting colors.
Draw and cut four legs, a head, and a small tail from green cardstock. Glue the head to one side of the plate, position two legs on each side, and attach the tail at the opposite end. For a flatter design, glue the pieces underneath the plate’s rim so they extend beyond the shell. Add eyes and facial details with markers or securely attached decorations.
Children can draw hexagons, dots, stripes, or curved lines across the shell. The colors can be realistic or completely imaginative. For an ocean-themed display, arrange several finished turtles on blue paper and add paper seaweed, bubbles, or fish.
Pro Tip: Sketch the shell pattern lightly in pencil before painting. For younger children, draw a few large sections they can fill in without needing to create the pattern themselves.
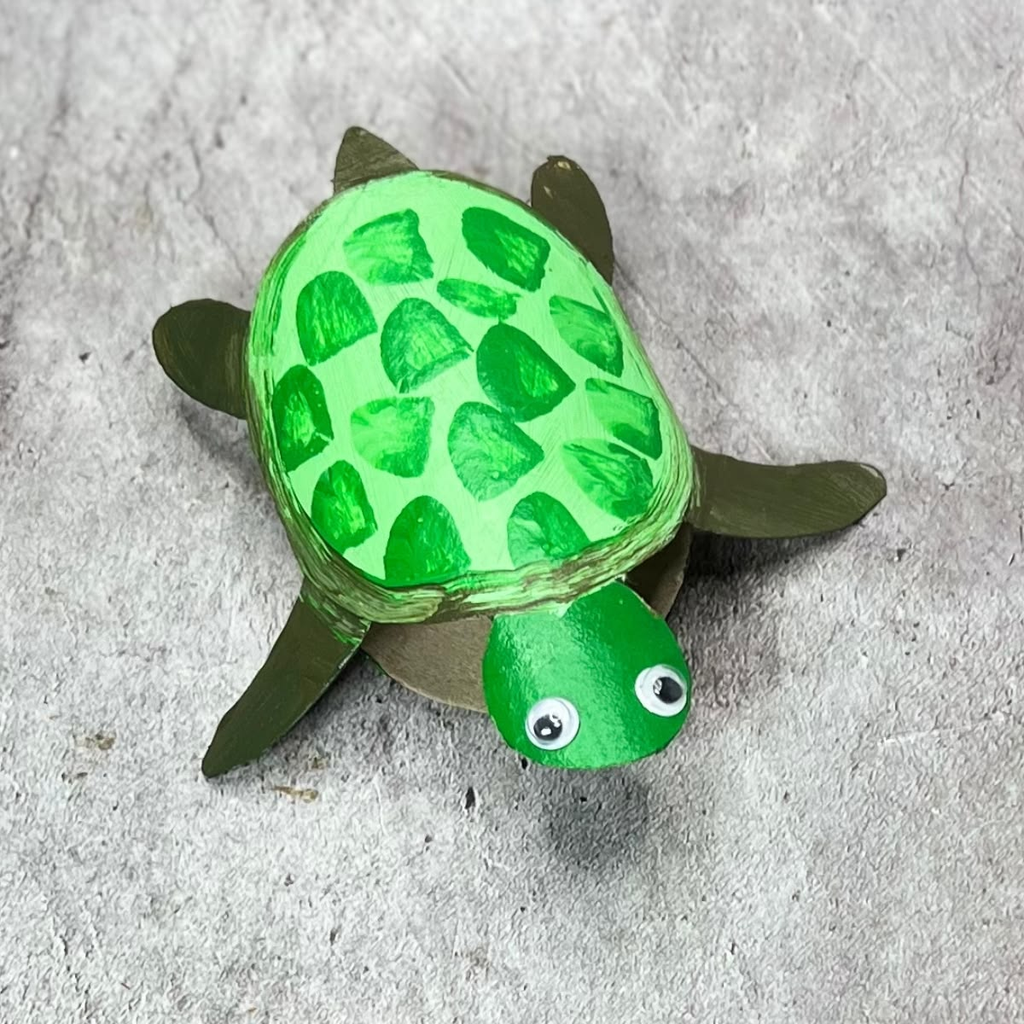
2. Toilet Roll Turtle
Suggested age: Ages 4–6 with adult help for cutting and assembly; ages 7 and up can complete more steps independently.
Estimated time: Approximately 25–35 minutes, plus paint-drying time.
Materials: Clean cardboard toilet paper tube, green paint, paintbrush, green cardstock, scissors, glue, markers, and optional googly eyes.
An empty cardboard tube provides a simple body for a small standing turtle. Paint the tube green and leave it to dry. Cut a rounded half-circle or dome from cardstock for the shell, then fold a narrow tab along its bottom edge. Glue the tab to the upper part of the tube so the shell sits over the body rather than sliding down the side.
Cut four short legs, a head, and a small tail from green cardstock. Attach two legs on each side near the bottom of the tube, place the head at the front, and add the tail at the back. Keep the legs at similar heights so the turtle can stand upright.
Decorate the shell with dots, stripes, or geometric shapes. To make a turtle family, use a full-length tube for a larger turtle and shorter tube sections for smaller ones. Arrange them together on blue paper to create a pond scene.
Pro Tip: Test the turtle on a flat surface before adding the final decorations. If it tips over, adjust the legs or glue a small, flat cardboard base underneath.
3. Clay Turtle
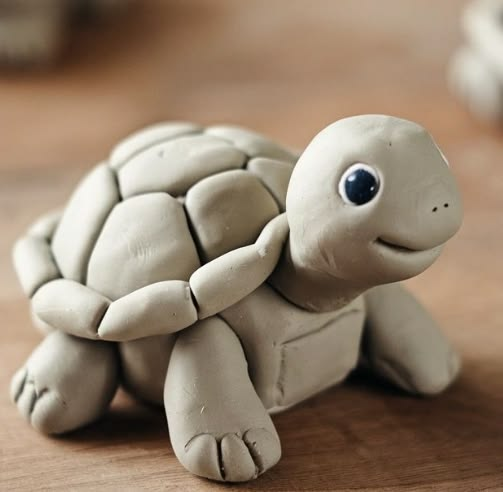
Suggested age: Ages 5–7 with adult guidance; ages 8 and up can try more detailed shell patterns and shaping techniques.
Estimated time: Approximately 25–40 minutes of active crafting, plus the drying time specified for the clay.
Materials: Air-dry clay, a protected work surface, blunt modeling tool or craft stick, child-safe paint, paintbrushes, and optional suitable sealant.
Clay is useful for making a turtle that can sit on a shelf or nature table. Begin with an oval piece of clay for the body. Form a rounded dome from a second piece and gently press it onto the upper surface of the body to create the shell.
Shape four sturdy legs, a small head, and a short tail. Attach each piece by pressing the clay together gently and smoothing the joins. Make the legs thick enough to support the body, and avoid thin projections that may break while drying.
Use a blunt modeling tool to draw lines across the shell, dividing it into sections. Once the clay has dried according to the manufacturer’s instructions, paint each section in a different color or use a simple repeating pattern. Check whether the clay requires a particular type of paint or finish before decorating.
Pro Tip: Let the sculpture dry fully before painting it. Turning or handling it too early can damage the shape, especially around the legs and head.
4. Rock Turtle
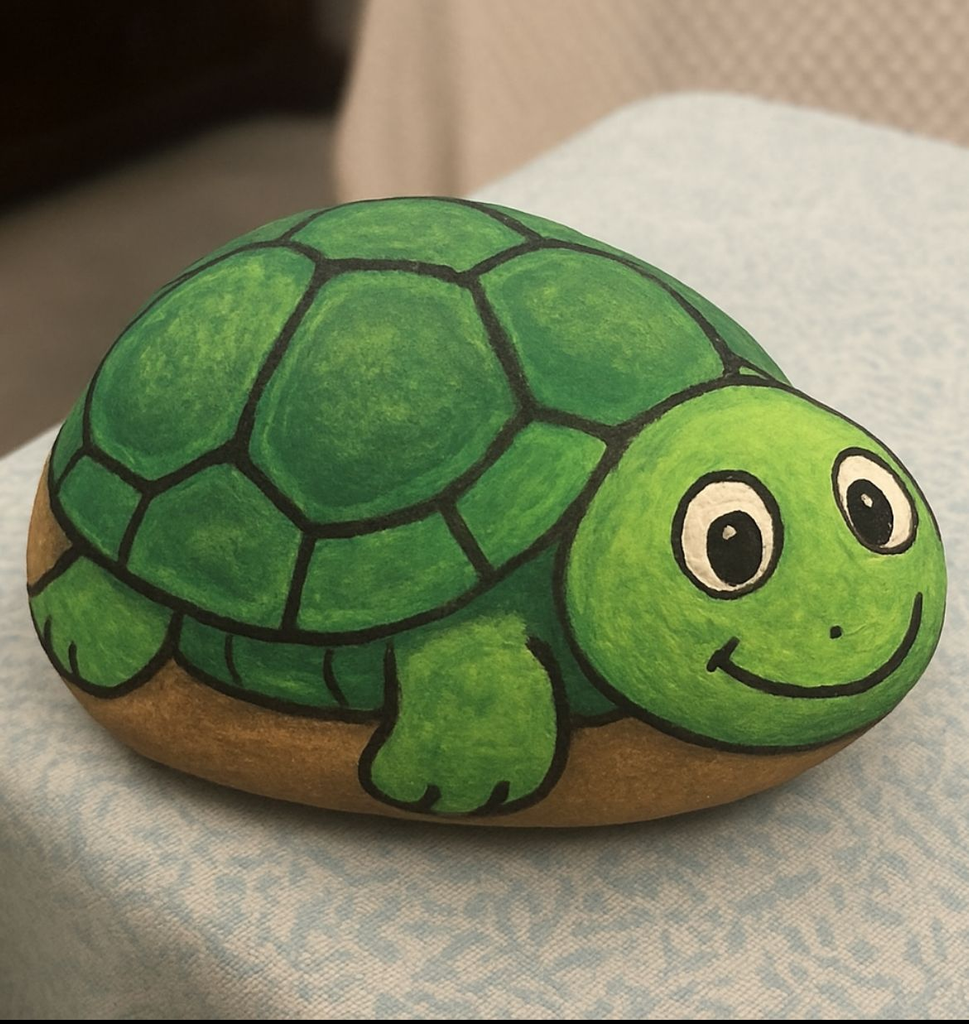
Suggested age: Ages 6–8 with close adult supervision for assembly; older children can take more responsibility for painting and arranging the stones.
Estimated time: Approximately 30–45 minutes of active crafting, plus adhesive curing and paint-drying time.
Materials: One large smooth pebble, four smaller pebbles for the legs, one small pebble for the head, an optional tiny tail stone, suitable paint, paintbrushes, adhesive appropriate for the stones, and an optional compatible outdoor finish.
Smooth pebbles provide ready-made shapes for a turtle’s shell, legs, and head. Choose one larger rounded stone for the shell and several smaller stones for the body parts. Before gluing anything, arrange the pebbles on a flat surface until the turtle looks balanced.
An adult should select and handle the adhesive according to its label, particularly if it is a strong bonding product. Attach the legs beneath or beside the shell, position the head at the front, and add the tail at the back. Allow the adhesive to cure fully before painting or handling the assembled turtle.
Paint a geometric shell pattern using dots, stripes, flowers, or contrasting blocks of color. If you plan to display the turtle outdoors, make sure the paint, adhesive, and any protective finish are suitable for outdoor conditions. Otherwise, keep the finished piece indoors.
Collect stones only where gathering is permitted, and avoid disturbing wildlife or removing stones from protected areas.
Pro Tip: Wash the pebbles and let them dry completely before painting. Dirt, moisture, and loose grit can affect how well paint and adhesive stick.
5. Handprint Turtle
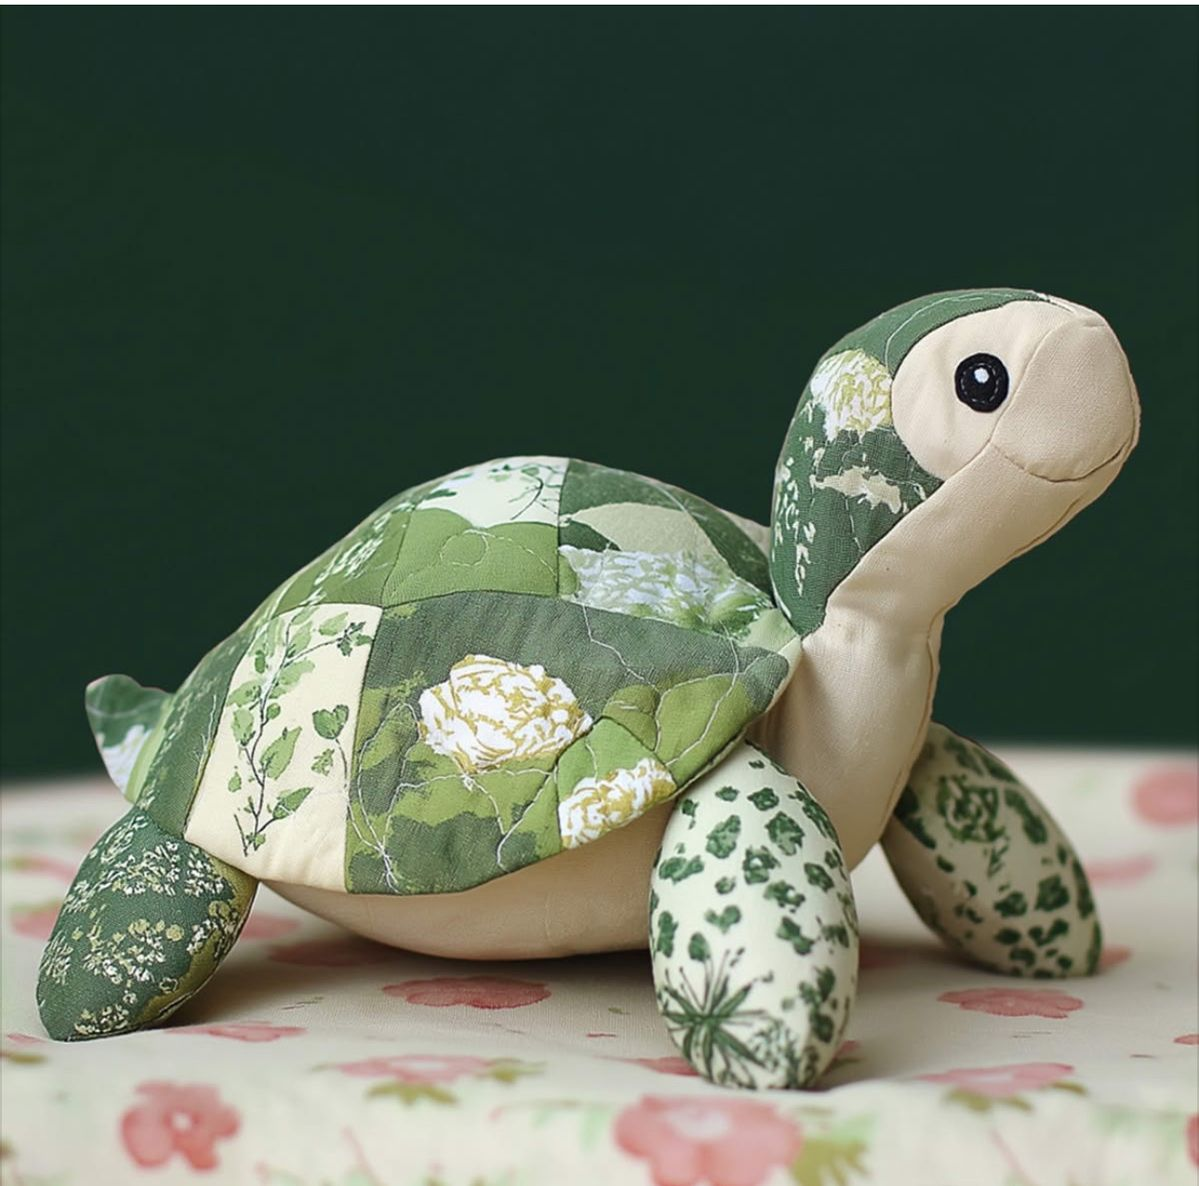
Suggested age: Ages 2–4 with direct adult assistance; ages 5 and up can add more independent drawing and decoration.
Estimated time: Approximately 15–25 minutes, plus drying time.
Materials: Washable, child-safe paint, paintbrush or sponge, paper or cardstock, markers, a damp cloth, and optional colored paper and glue.
Handprint turtles make personal keepsakes that are easy to customize. Apply a thin layer of washable green paint to the child’s palm and fingers, then help them press their hand onto paper. Position the fingers so they spread outward, creating a fan of shapes that can become the turtle’s legs and tail.
Once the print dries, draw or paint a rounded shell over the central palm area. Add a head near the front of the shell and a small tail at the opposite end. The printed fingers can be outlined as legs, with a few extra details added using markers.
For an ocean scene, let children paint blue water around the turtle and add seaweed, bubbles, or other sea creatures. Write the child’s name and date on the back if you’d like to keep the artwork as a childhood memory.
Keep a damp cloth and clean water nearby before starting so painted hands can be cleaned promptly.
Pro Tip: Test the paint on a small area of skin first and use only products intended for children’s craft activities. Avoid applying paint near the eyes or mouth.
6. Mosaic Shell Turtle
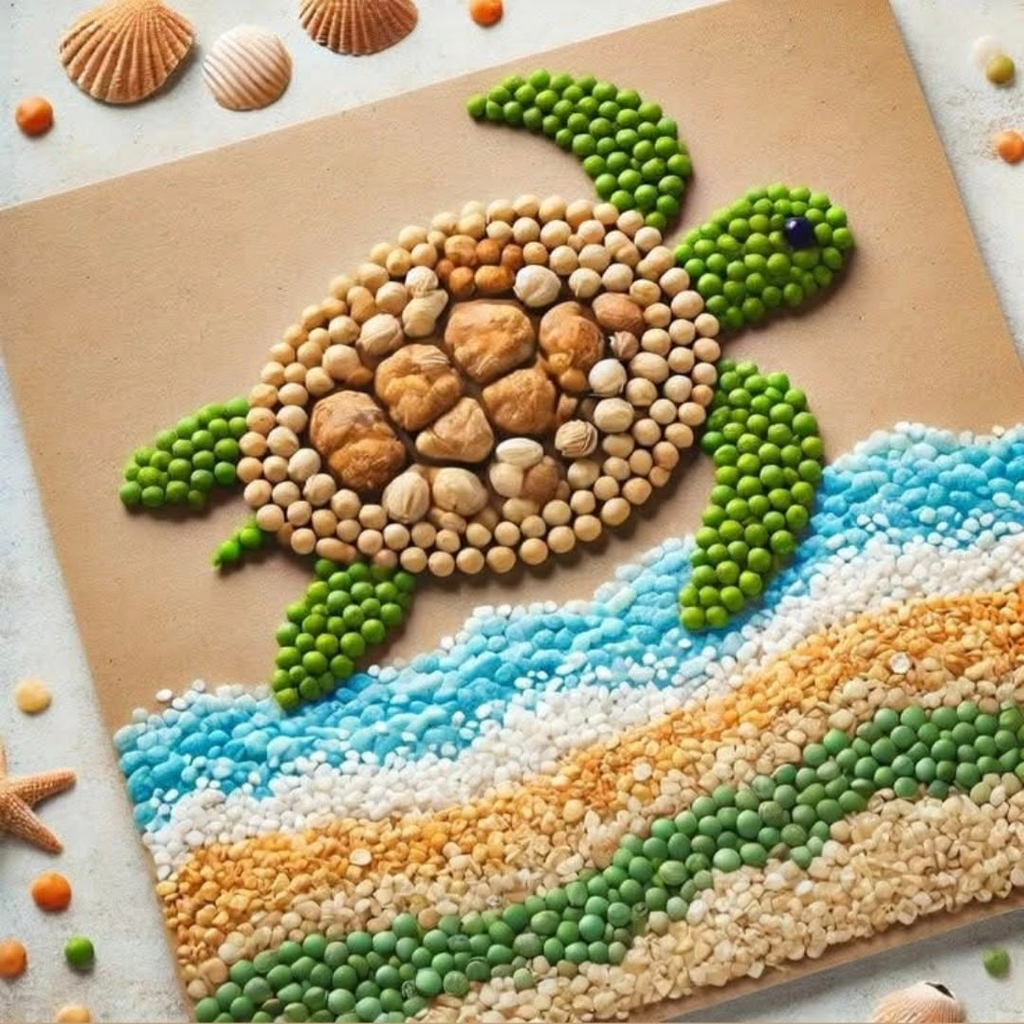
Suggested age: Ages 4–6 with adult-prepared shapes; ages 7 and up can cut larger pieces and plan more detailed patterns with appropriate supervision.
Estimated time: Approximately 25–40 minutes.
Materials: Thick cardstock, colored paper or tissue paper, pencil, child-safe scissors, glue, and markers.
A mosaic-style turtle lets children build a colorful shell from separate paper pieces. Draw a turtle outline on thick cardstock and divide the shell into several sections using pencil lines. The body, head, legs, and tail can remain a single color so the shell becomes the main feature.
Cut colored paper into squares, triangles, or other simple shapes. Younger children can use larger pre-cut pieces, while older children can work with smaller shapes if they can handle them safely. Apply glue to one shell section at a time and arrange the pieces inside the outline until the section is filled.
Children can repeat the same two or three colors to create a pattern, or give every section a different combination. Leave a small gap between some pieces if you want the outline of the shell sections to remain visible.
Mount the finished turtle on a contrasting background, such as dark blue or teal cardstock, to make the colorful shell stand out.
Pro Tip: Put a small amount of glue in a shallow dish and provide a scrap sheet for testing the paper pieces. This helps children avoid using so much glue that the paper becomes soggy.
7. Paper Bag Turtle
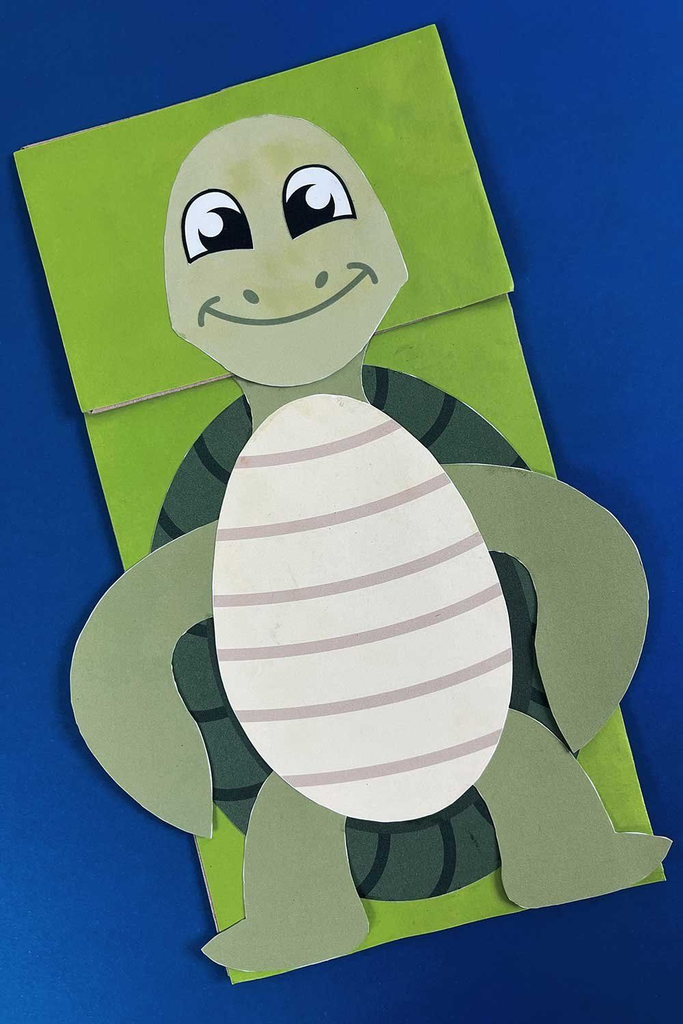
Suggested age: Ages 5–7 with adult help for securing the bag and cutting; ages 8 and up can handle more of the construction independently.
Estimated time: Approximately 25–40 minutes, plus drying time if paint is used.
Materials: Clean paper lunch bag, scrap paper or newspaper, green cardstock, scissors, tape or suitable glue, markers, and optional paint and paintbrushes.
A paper bag can become a rounded turtle body with a little shaping. Loosely fill the bag with crumpled newspaper or scrap paper, leaving enough space to shape it into an oval. Fold the open end closed and secure it with tape or glue. An adult can manage this step and check that the closure holds.
Cut a head, four legs, and a tail from green cardstock. Attach the head at the front of the rounded body, place two legs on each side, and secure the tail at the back. Use glue or tape suitable for the materials, and allow the joins to dry before moving the turtle around.
Decorate the upper surface with a shell pattern using markers or paint. Children can draw simple geometric sections, add dots, or create a bright fantasy design.
Make turtles in different sizes and arrange them together as a family. If younger children will play with the finished models, avoid loose string, tiny decorations, or parts that can easily detach.
Pro Tip: Fill the bag lightly rather than packing it tightly. A softer body is easier to shape and less likely to tear when the paper pieces are attached.
8. Watercolour Turtle
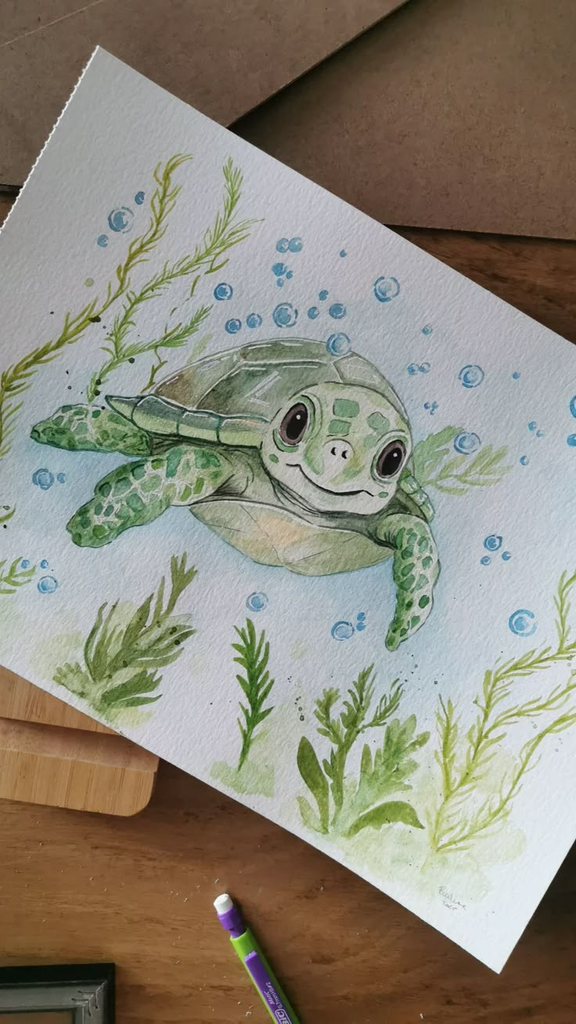
Suggested age: Ages 5–7 with guidance on brush control; ages 8 and up can add more detailed patterns and background elements.
Estimated time: Approximately 25–40 minutes, plus drying time.
Materials: Watercolor paper, watercolor paints, paintbrushes, water container, pencil, eraser, and optional fine-tip markers suitable for the paper.
Watercolor paints are a good choice for creating a turtle swimming through a colorful scene. Start by painting a light blue or blue-green background. Children can use broad brushstrokes to suggest water, leaving some areas lighter to create variation. Let the background dry before painting the turtle over it.
Draw a simple turtle outline in the foreground, including the shell, head, flippers or legs, and tail. Fill the shell with contrasting colors and divide it into sections using a fine brush. Younger children can paint large blocks of color, while older children may prefer dots, stripes, or more detailed geometric patterns.
Add a few bubbles, seaweed shapes, or small fish to complete the picture. If you are teaching children about a particular turtle species, check its body shape and habitat before adding species-specific details. Otherwise, the scene can be an imaginative underwater picture.
Watercolor paper is helpful because it generally handles wet paint better than thin printer paper. Once the painting dries, it can be displayed in a frame or classroom art gallery.
Pro Tip: Keep a scrap of watercolor paper nearby so children can test color combinations before applying them to the finished painting.
9. Egg Carton Turtle
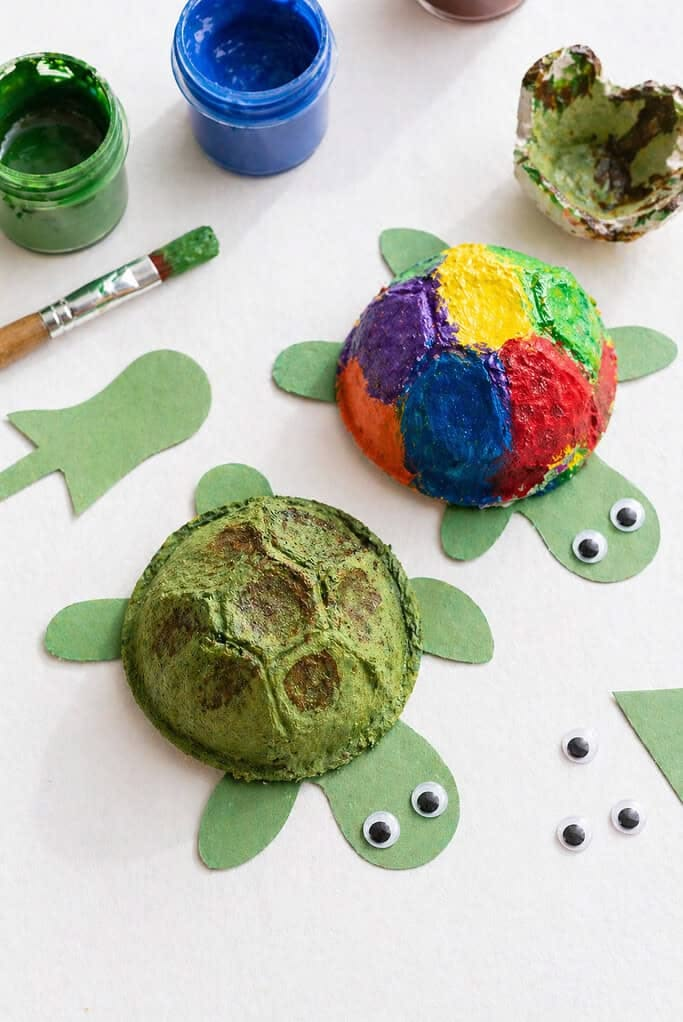
Suggested age: Ages 4–6 with adult help for cutting and assembly; ages 7 and up can complete more of the decorating independently.
Estimated time: Approximately 20–35 minutes, plus paint-drying time.
Materials: Clean, dry cardboard egg carton, green or colored paint, paintbrush, cardstock, child-safe scissors, glue, markers, and optional googly eyes.
Cardboard egg cartons have a naturally raised surface that makes an interesting turtle shell. For a simple turtle, an adult can cut out one individual egg cup. If you want a larger shell, cut two or more connected cups from the carton, keeping the design manageable for the child’s age.
Paint the outside of the cup or connected cups and allow it to dry. Cut a head, four legs, and a small tail from cardstock. Glue the pieces around the bottom edge of the shell, positioning the head at the front, two legs on each side, and the tail at the back. Make sure the pieces are attached securely before lifting the turtle.
Decorate the shell’s raised sections with dots, stripes, or different colors. If you use a single cup, the curved surface creates a compact shell; connected cups provide a larger area for patterns.
Children can make several turtles and place them on blue paper with green paper seaweed. Check that the carton is clean, dry, and free of mold or damage before using it.
Pro Tip: Have an adult prepare the egg carton pieces before the activity if the cardboard is difficult to cut. This leaves children more time to paint and decorate.
10. Fabric Turtle Softie
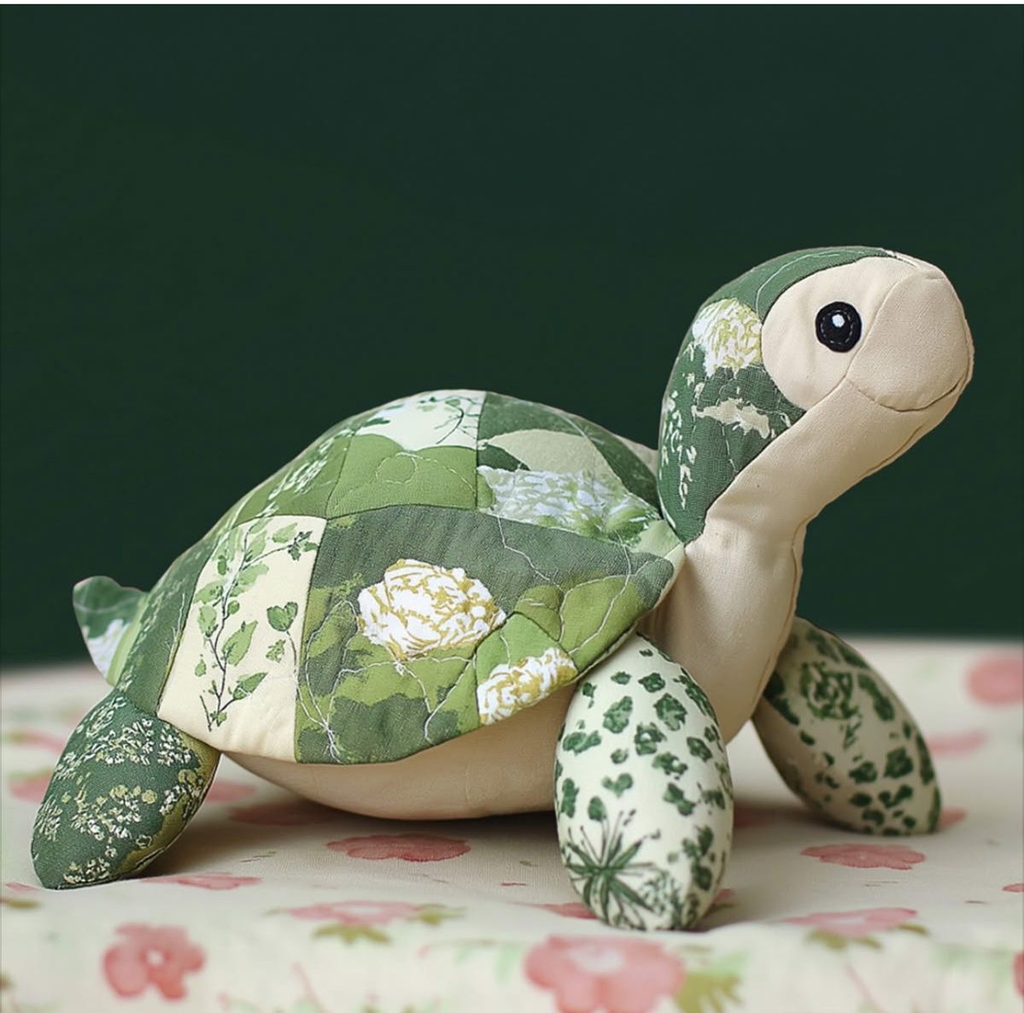
Suggested age: Ages 8–10 with close adult supervision for sewing; ages 11 and up may complete more steps independently if they can use sewing tools responsibly.
Estimated time: Approximately 45–75 minutes, plus any time needed for additional stitching or adhesive to set.
Materials: Two pieces of suitable fabric, paper template, fabric scissors, needle and thread or a sewing machine operated by an adult, toy stuffing, pins or fabric clips handled by an adult, and optional fabric markers.
A fabric turtle softie is a more involved project for children who enjoy working with textiles. Draw a simple turtle outline on paper, including the body and four short legs, and use it as a template to cut two matching fabric pieces. Choose fabric that is easy to handle and not too slippery.
Place the pieces together with the patterned sides facing inward. An adult should sew around the outline, leaving a small opening for turning and stuffing. Secure the seam with appropriate stitching, then turn the fabric right-side out. Add toy stuffing in small amounts, making sure the body is evenly filled without stretching the seams.
Close the opening securely with careful stitching. Add a contrasting fabric shell by sewing it onto the body or using a suitable fabric adhesive according to its instructions. If the turtle is intended for a young child, avoid buttons, beads, and other small detachable decorations. The finished softie should have securely closed seams and no exposed sharp parts.
For a simpler alternative, children can decorate a ready-made fabric shape using fabric markers or pre-cut fabric patches with adult assistance.
Pro Tip: Test the stitching by gently checking the seams before using the softie. If it will be handled frequently, secure construction is more important than extra decorations.
Also read: 28 fun and easy crafts for kids
11. Turtle Suncatcher
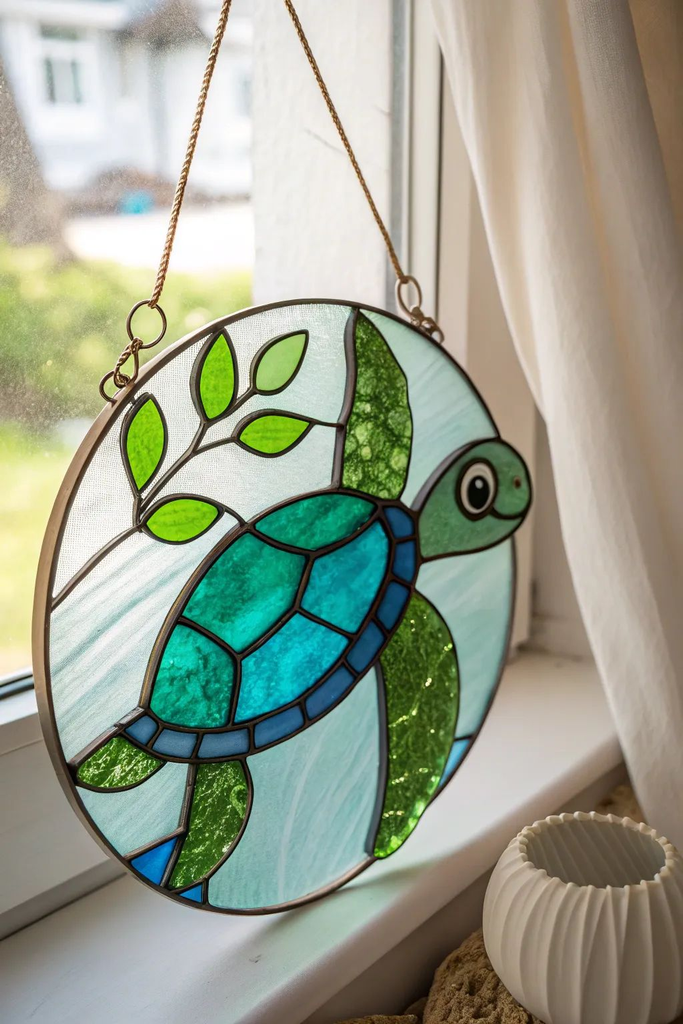
Suggested age: Ages 5–7 with adult help for cutting; ages 8 and up can plan more intricate shell patterns with supervision.
Estimated time: Approximately 25–40 minutes.
Materials: Black cardstock, clear contact paper, colored tissue paper, pencil, scissors, and optional tape for hanging.
A turtle suncatcher uses translucent paper to create a colorful window decoration. Draw a turtle outline on black cardstock and divide the shell into several sections. An adult should cut out the shell sections and any detailed openings, leaving a strong black border around the design.
Cut a piece of clear contact paper large enough to cover the openings. Place it behind the cardstock frame with the sticky side facing through the cutouts. Children can then press small pieces of colored tissue paper onto the sticky surface, filling each shell section with a different color.
When the design is complete, cover the back with a second sheet of clear contact paper to hold the tissue paper in place. Trim the edges carefully and attach the finished suncatcher securely to a window where sunlight can shine through it.
Make several turtles in different color combinations for a bright display. Keep the finished decoration out of reach of babies and toddlers, and avoid hanging it with long, loose cords.
Pro Tip: Use translucent tissue paper and overlap the pieces slightly so there are no large gaps in the shell sections.
12. Turtle-Inspired Woven Hoop
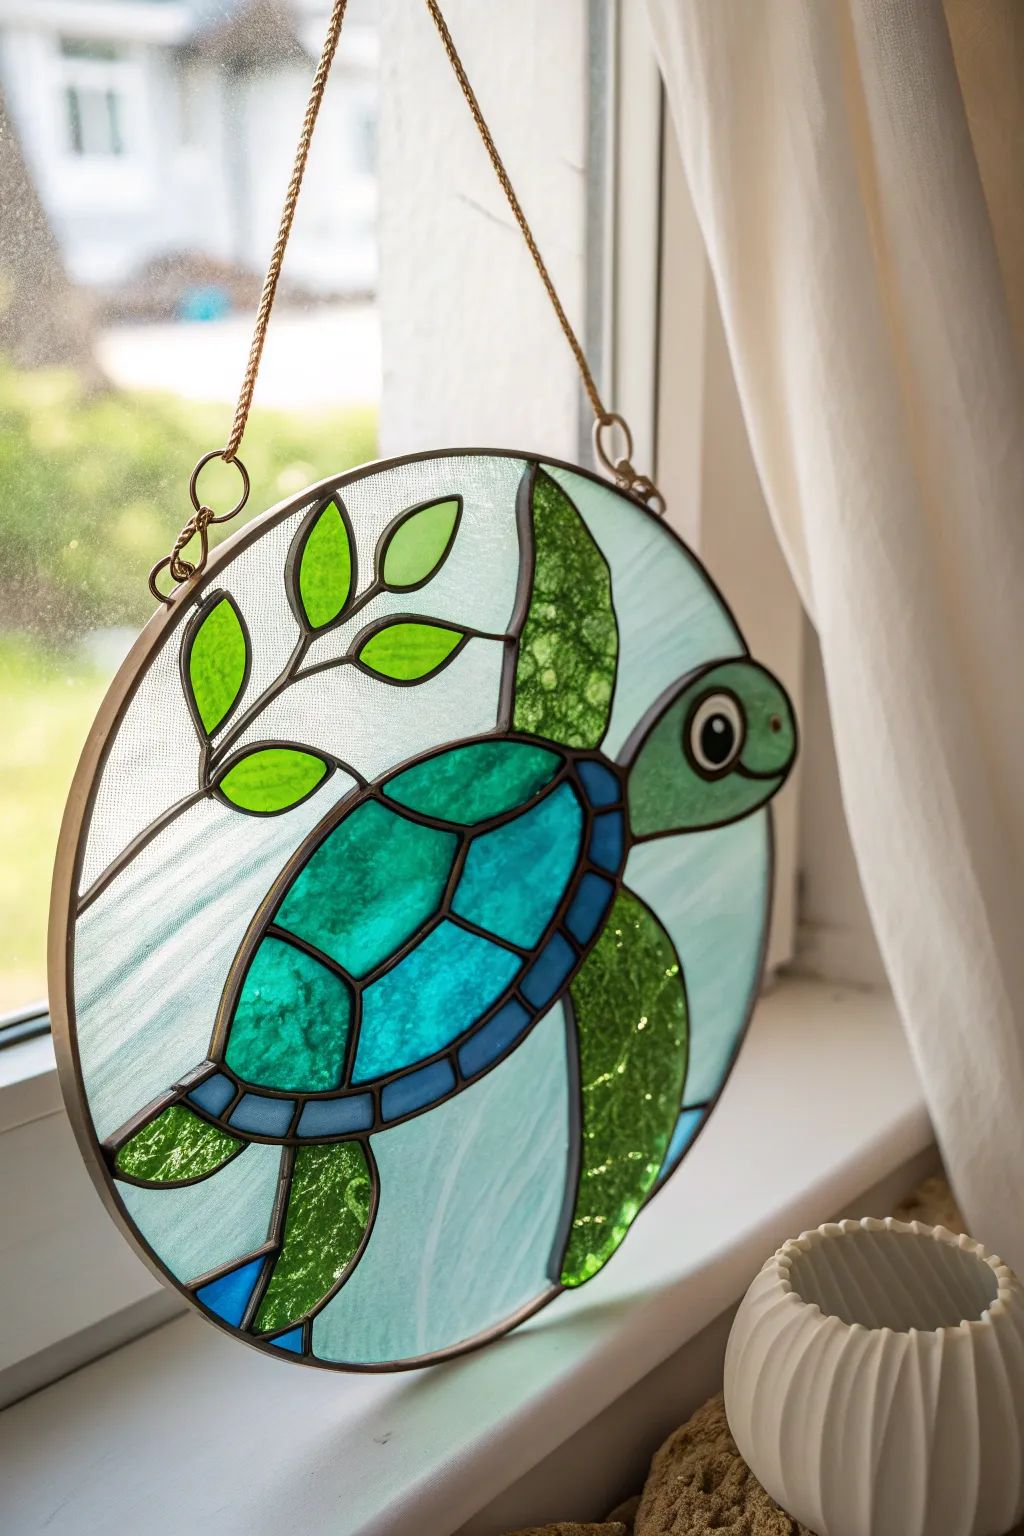
Suggested age: Ages 7–9 with help tying and securing the yarn; ages 10 and up can try more independent weaving.
Estimated time: Approximately 35–60 minutes.
Materials: Lightweight craft hoop, green and blue yarn, scissors, ribbons, and lightweight cardstock turtle shapes or other optional decorations.
This turtle-inspired woven hoop uses ocean colors and a web-like pattern that echoes the divided sections of a turtle shell. Start by tying one end of the yarn securely to the hoop. Wrap the yarn around the frame, keeping the strands close together until the hoop is covered. Secure the end so the wrapping does not loosen.
To make the woven center, tie a new length of yarn to the frame and stretch it across the hoop. Continue weaving the yarn between the strands, moving around the circle to form a pattern. Children can alternate blue and green yarn or choose a single color for a simpler design.
Add a few lightweight cardstock turtle shapes or short ribbons around the outside of the hoop. Keep the decorative pieces firmly attached and avoid adding heavy objects that could pull the frame out of shape.
The finished hoop can be displayed on a wall or used as a bedroom decoration. Keep it out of reach of babies and toddlers if it includes hanging strands or small pieces.
Pro Tip: Secure the yarn at each stage instead of waiting until the end. This helps the woven pattern stay in place while children work.
13. Turtle Collage
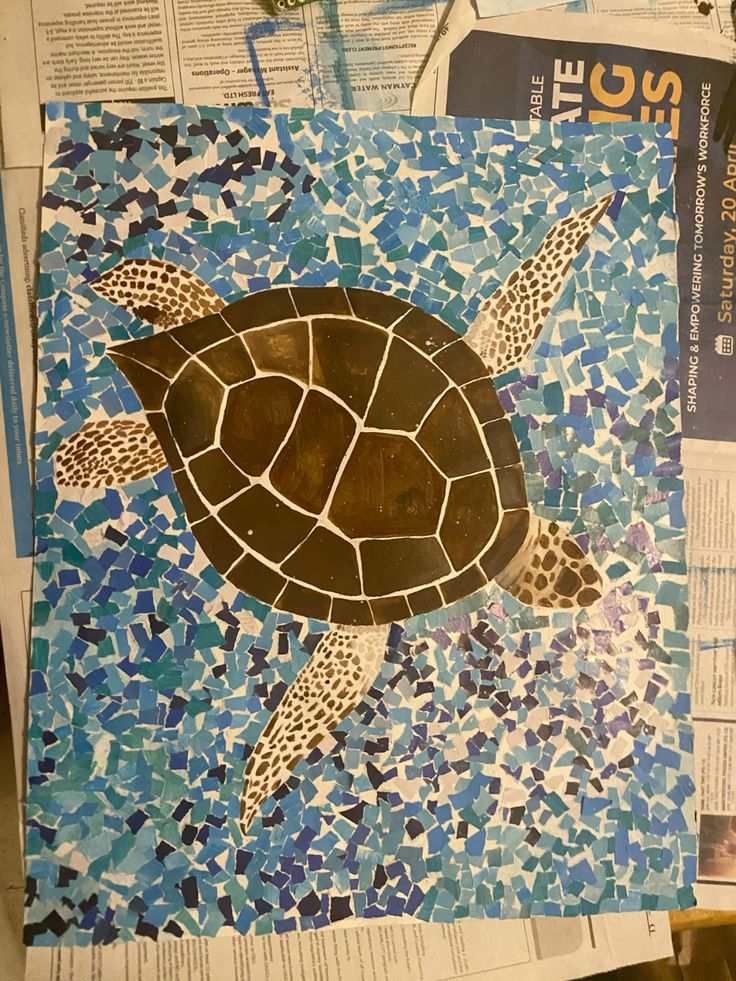
Suggested age: Ages 3–5 with adult-prepared shapes and supervision; ages 6 and up can choose, cut, and arrange more materials independently.
Estimated time: Approximately 20–35 minutes.
Materials: Cardstock, colored paper, tissue paper, fabric scraps, child-safe scissors, glue, markers, and optional larger decorative paper shapes.
A turtle collage gives children freedom to combine colors and textures in their own way. Draw a turtle outline on cardstock or provide a simple pre-drawn template. Set out a selection of green, blue, turquoise, yellow, and other colored materials, allowing children to choose which ones they want to use.
They can tear tissue paper, layer fabric scraps, draw shell patterns, or add paper shapes to create a textured picture. Rather than dividing the shell into precise sections, let children decide where each material belongs. Some may cover the shell with one dominant color, while others may mix several textures and patterns.
Once the collage is finished, add facial details and a background if desired. Mount the artwork on a contrasting sheet of cardstock to create a border around the turtle.
For a group project, display the finished collages together as an ocean-inspired gallery. Avoid small loose decorations around children who may put objects in their mouths.
Pro Tip: Offer a limited selection of materials first, then introduce a few more options if children want to add detail. This keeps the table organized without limiting their choices.
14. Sea Turtle Life Cycle Craft
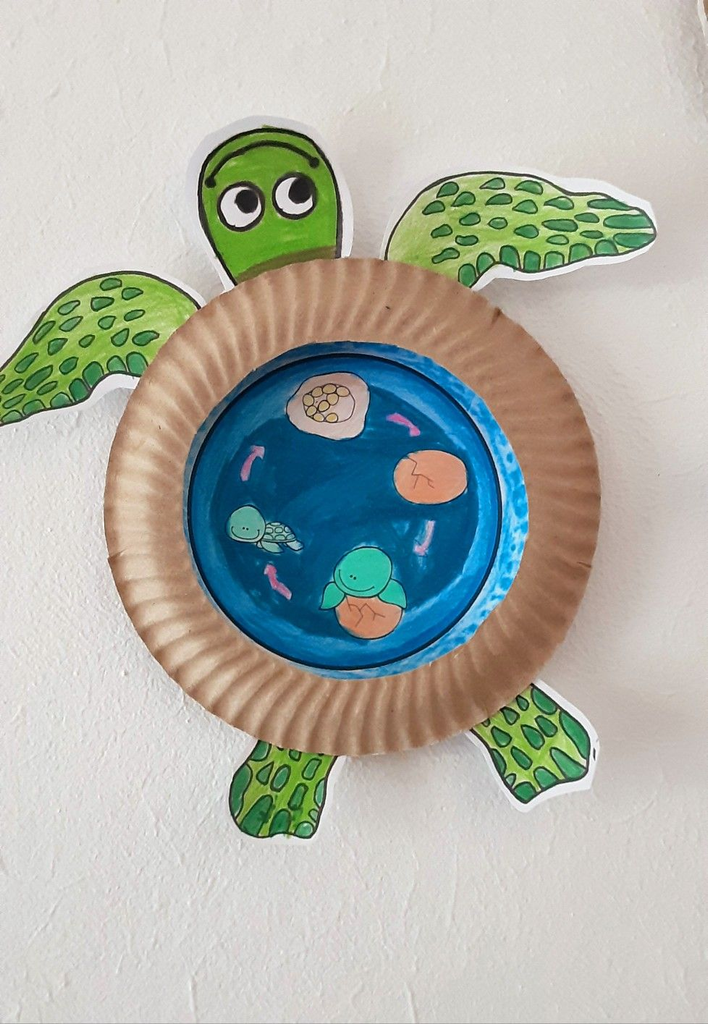
Suggested age: Ages 5–7 with adult guidance; ages 8 and up can add labels, research species-specific details, and create more elaborate scenes.
Estimated time: Approximately 35–50 minutes, plus drying time if paint or glue is used.
Materials: Large sheet of paper or cardboard, colored paper, pencils, child-safe scissors, glue, markers, optional air-dry clay, and optional suitable paint.
This sea turtle life cycle craft combines a simple visual project with an introduction to animal development. Divide a sheet of paper or cardboard into four sections, arranging them in sequence from left to right or from top to bottom.
In the first section, show sea turtle eggs in a sandy nest. In the second, illustrate hatchlings emerging from the eggs. In the third, show hatchlings moving from the nesting area toward the sea. In the final section, draw an adult sea turtle swimming in the ocean.
Children can create each stage using drawings, paper shapes, or small clay models. Add short labels beneath the pictures and talk about how a hatchling differs from an adult turtle.
Keep the information specific to sea turtles. Sea turtles lay eggs on beaches, but nesting behavior and other life-history details vary among species. Freshwater turtles and land-dwelling tortoises have different habitats and should not be treated as if they all follow the same nesting pattern.
If you want to include additional facts, consult a reliable wildlife organization or educational source for information about the species being discussed. The finished display can be used for a classroom presentation or a nature-themed craft afternoon.
Pro Tip: Keep the labels short and pair each fact with a picture. This makes the display easier for younger children to understand without turning the activity into a long research assignment.
15. Turtle Greeting Card
Suggested age: Ages 4–6 with adult help for folding and cutting; ages 7 and up can design more detailed cards and write their own messages.
Estimated time: Approximately 20–30 minutes.
Materials: Cardstock, colored paper, pencil, child-safe scissors, glue, markers, and optional patterned paper.
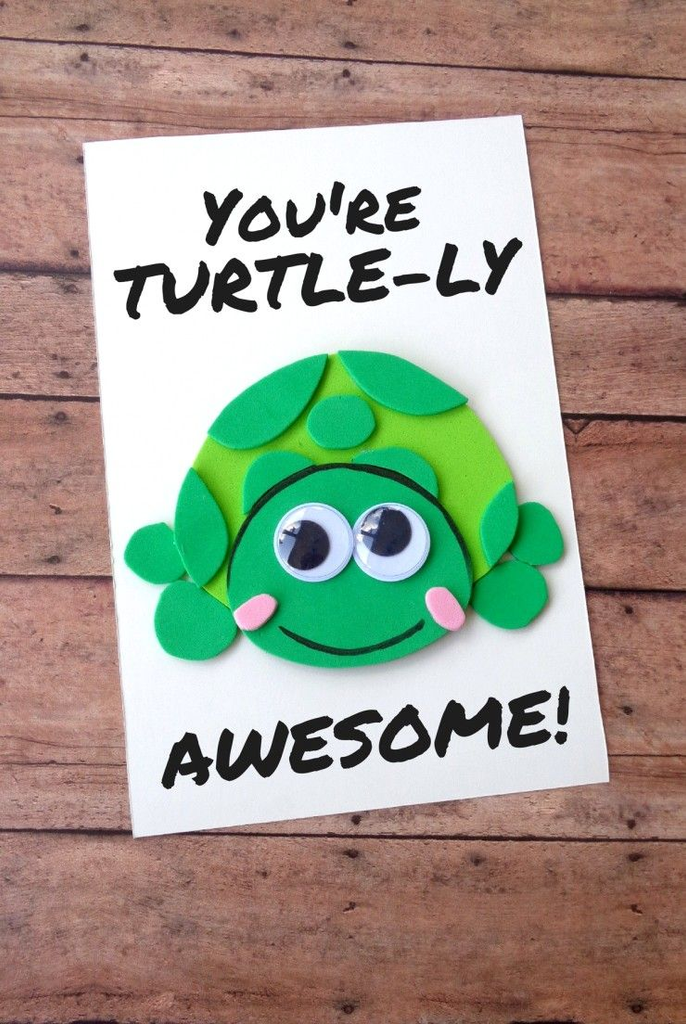
A handmade turtle greeting card works for birthdays, thank-you notes, or other special occasions. Fold a piece of cardstock in half and draw a cheerful turtle on the front. Children can color the body and decorate the shell with dots, stripes, flowers, or geometric patterns.
For a raised shell, cut an oval from contrasting cardstock. Fold a narrow tab along one edge and glue the tab to the card, allowing the oval to lift slightly away from the surface. Alternatively, attach the oval with a securely folded paper tab so the shell has a simple three-dimensional effect.
Inside the card, children can write a message such as “You’re turtle-y amazing!” or “Shell we celebrate?” They can also create their own turtle-themed wordplay or write a personal birthday or thank-you note.
This is a good project for children who enjoy making small gifts. The design can be simple for younger children or more detailed for those who want to add borders and layered shapes.
Pro Tip: Test the folded shell tab before adding the final decorations. Make sure it opens and closes with the card without tearing the paper.
16. Giant Collaborative Turtle
Suggested age: Ages 4 and up, with the complexity of each child’s contribution adjusted to their abilities.
Estimated time: Approximately 40–60 minutes, depending on the group size and decorating methods.
Materials: Large sheet of mural paper or several joined sheets, pencils or markers, colored paper, paint, paintbrushes, glue, child-safe scissors, and optional collage materials.
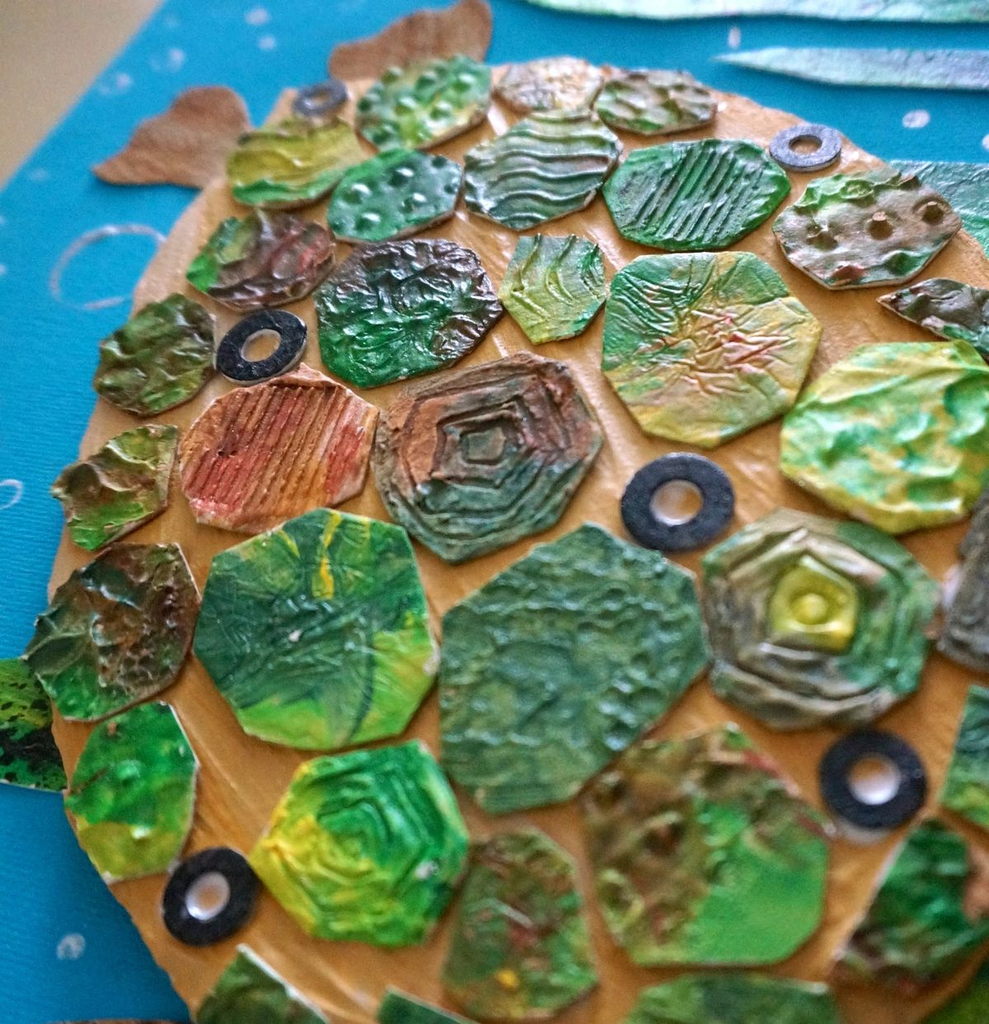
A giant collaborative turtle lets a group of children contribute to one large piece of artwork. Draw a large turtle outline on mural paper, making the shell big enough to divide into individual sections. Before the activity begins, draw the section boundaries clearly so every child has a defined space.
Give each child one section to decorate. Some might paint geometric patterns, while others use paper collage, dots, stripes, or repeated shapes. Let children choose their colors and techniques, provided the materials are suitable for the age group.
When everyone has finished, the decorated sections form one shared shell. Add the head, legs, and tail if they are not already included in the outline. Leave the mural flat until any paint or glue has dried, then display it on a wall or bulletin board.
This activity works well in classrooms, libraries, or family groups because the finished picture reflects the contributions of several children without requiring everyone to make an identical design.
Pro Tip: Agree on a few practical rules before starting, such as keeping materials inside each section and asking before adding anything to another child’s space.
17. Turtle Puppet
Suggested age: Ages 6–8 with adult help for assembly; ages 9 and up can take on more of the construction with appropriate supervision.
Estimated time: Approximately 30–45 minutes, plus any time needed for glue to dry.
Materials: Green felt, patterned felt or fabric, paper template, fabric scissors, fabric-safe adhesive or needle and thread, fabric markers, and optional larger felt facial details.
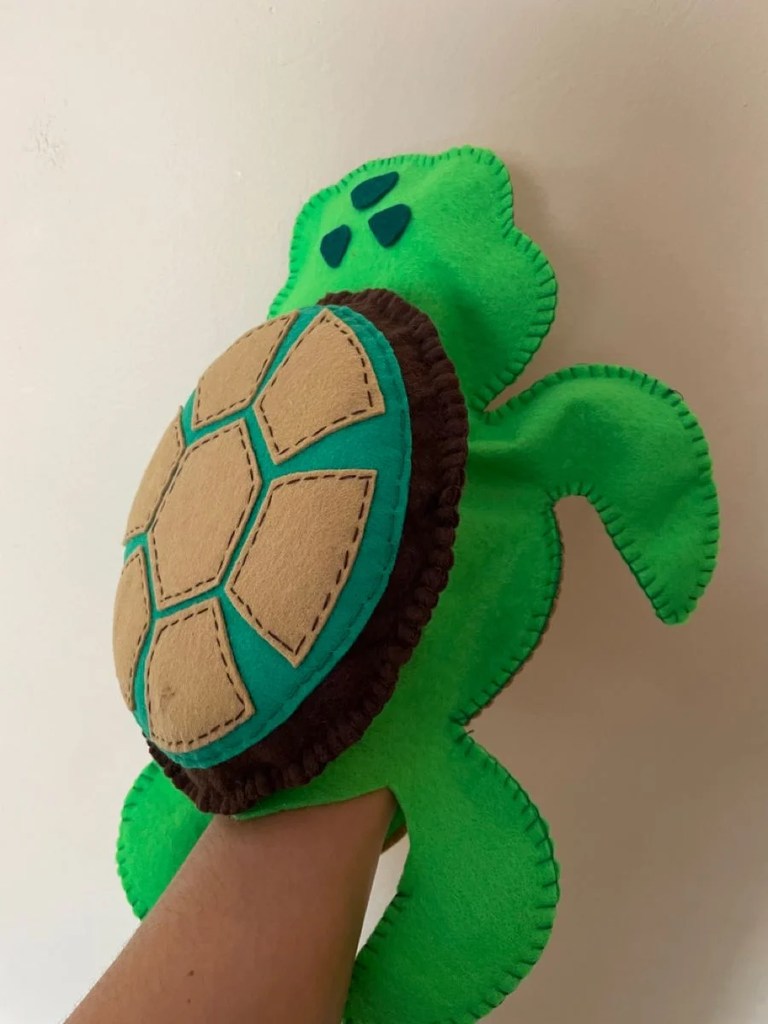
A turtle puppet gives children a character they can use for imaginative play after the craft is finished. Draw a simple turtle shape on paper, making the body large enough for a child’s hand. Use the template to cut two matching pieces of green felt.
Place the pieces together and secure the edges, leaving the bottom open for the hand. An adult should handle sewing or any difficult adhesive work. Check the opening before the adhesive dries or the stitching is finished to make sure a child’s hand can slide in comfortably without stretching the seams.
Cut a contrasting shell from patterned fabric or felt and attach it to the front. Draw the eyes and mouth with fabric markers or use securely attached, age-appropriate felt shapes. Avoid small detachable facial decorations for young children.
Once the puppet is ready, children can invent stories about a turtle exploring a pond, meeting other animals, or finding its way through an underwater scene. They can take turns speaking for their characters or create a short puppet show together.
Pro Tip: Test the puppet on the intended child’s hand before completing the assembly. A comfortable opening makes it easier to move the puppet during storytelling.
18. Turtle Mobile
Suggested age: Ages 7–9 with adult help for assembly and hanging; ages 10 and up can design the arrangement and decorate the shapes more independently.
Estimated time: Approximately 35–50 minutes, plus drying time if paint or glue is used.
Materials: Lightweight cardstock, pencils, child-safe scissors, markers or paint, string, a wooden dowel or sturdy craft hoop, and suitable tape or adhesive.
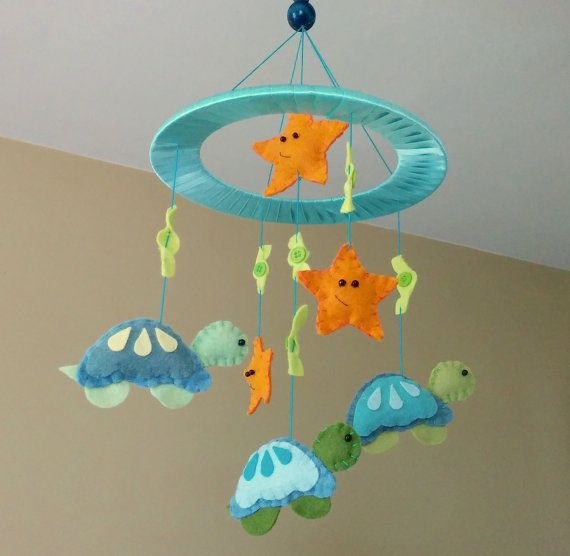
A turtle mobile turns several small turtle designs into a hanging ocean-themed decoration. Cut five or six lightweight turtle shapes from cardstock, or use painted paper turtles that have dried completely. Decorate each shell with a different pattern so the turtles are easy to distinguish.
An adult should attach the shapes to a wooden dowel or sturdy hoop using securely tied strings. Add lightweight paper fish, bubbles, or seaweed between the turtles if you want a fuller display. Arrange the pieces at different heights, then check that the weight is balanced before hanging the mobile.
The finished decoration should hang securely and remain out of reach of babies and toddlers. It is a display item, not a toy, and its strings should not be placed near a crib, bed, or area where children might become tangled.
Pro Tip: Hang the mobile temporarily at a safe height and check its balance before choosing the final position. Adjust the string placement until the support hangs level.
19. Turtle Story Stones
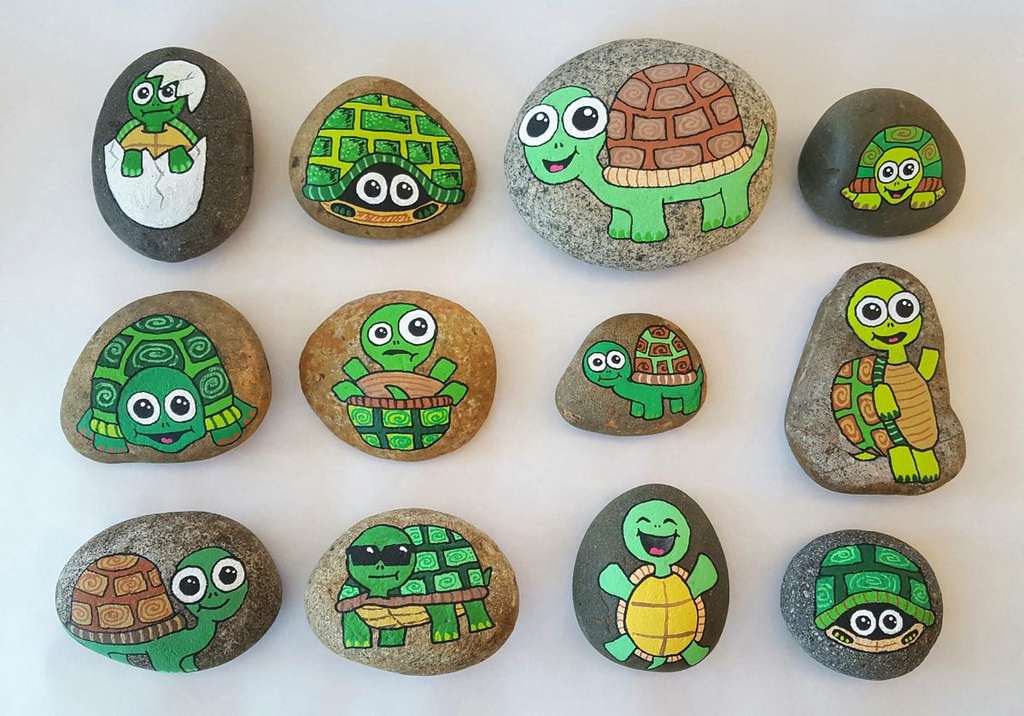
Suggested age: Ages 5–7 with close adult supervision; ages 8 and up can use the stones more independently if they understand the safety rules.
Estimated time: Approximately 30–45 minutes, plus paint-drying time.
Materials: Large, smooth stones, suitable paint or paint markers, paintbrushes, water container, protective work surface, and an optional finish compatible with the paint.
Turtle story stones combine painting with imaginative storytelling. Choose several large, smooth stones and clean them before decorating. Assign each stone a different picture, such as a swimming turtle, a sandy nest, a hatchling, a wave, seaweed, a crab, or an ocean sunset.
Paint the images using simple shapes and colors. Let each stone dry completely before handling it, and check the paint manufacturer’s instructions before applying any protective finish. If you use a sealant, choose one appropriate for the painted surface and intended use.
Once the stones are ready, place them in a basket and invite children to select a few. They can arrange the pictures in a sequence and invent a story about a turtle’s journey, an underwater discovery, or a meeting between sea animals.
The same set of stones can inspire many different stories because children can change the order of the pictures and imagine new events. For children who may put objects in their mouths, use large paper story cards instead of stones to avoid choking hazards.
Pro Tip: Start with three or four story prompts and add more once children understand the activity. A small selection makes it easier to connect the pictures into a beginning, middle, and ending.
Frequently Asked Questions
1. What are the easiest turtle crafts for kids?
Paper plate turtles, handprint turtles, and simple turtle collages are among the easiest crafts for kids. They use basic supplies such as paper, paint, glue, and markers, making them suitable for preschoolers with adult assistance.
2. What materials can I use to make turtle crafts?
You can use paper plates, cardboard tubes, egg cartons, cardstock, air-dry clay, fabric scraps, smooth pebbles, and watercolor paints. Reusing clean household materials is an affordable way to create different turtle designs.
3. Which turtle crafts are suitable for preschoolers?
Paper plate turtles, handprint artwork, and simple paper collages are good options for preschoolers. Prepare difficult-to-cut shapes in advance, use age-appropriate craft supplies, and supervise children closely when using glue or decorative pieces.
4. How can I make turtle crafts educational for kids?
You can combine turtle crafts with simple activities about colors, shapes, habitats, and animal life cycles. For example, create a sea turtle life cycle display or use turtle story stones to encourage children to invent stories about turtles and their environments.
Read this next: 21 Simple Group Games for Kids to Play Anytime, Anywhere
Final Thoughts
These 19 turtle craft ideas offer options for different ages, materials, and activity settings. Some use simple paper shapes and paint, while others involve more detailed construction, weaving, sewing, or group planning. Choosing a project that fits the child’s abilities and the time available can make the activity easier to enjoy.
I like leaving room for children to make their own choices, especially when decorating the shell. They can experiment with colors, patterns, and textures rather than feeling that every turtle needs to look exactly the same. A finished project might become a keepsake, a classroom display, a handmade gift, or a character in a story.
Before starting, gather the necessary supplies, prepare any difficult cuts, and check that the materials are appropriate for the children taking part. With a little planning, a simple turtle outline can become a colorful art project and a reason to share stories about the animals around us.


One Comment