15 Easy Halloween Crafts for Preschoolers That Actually Work (2026 Guide)
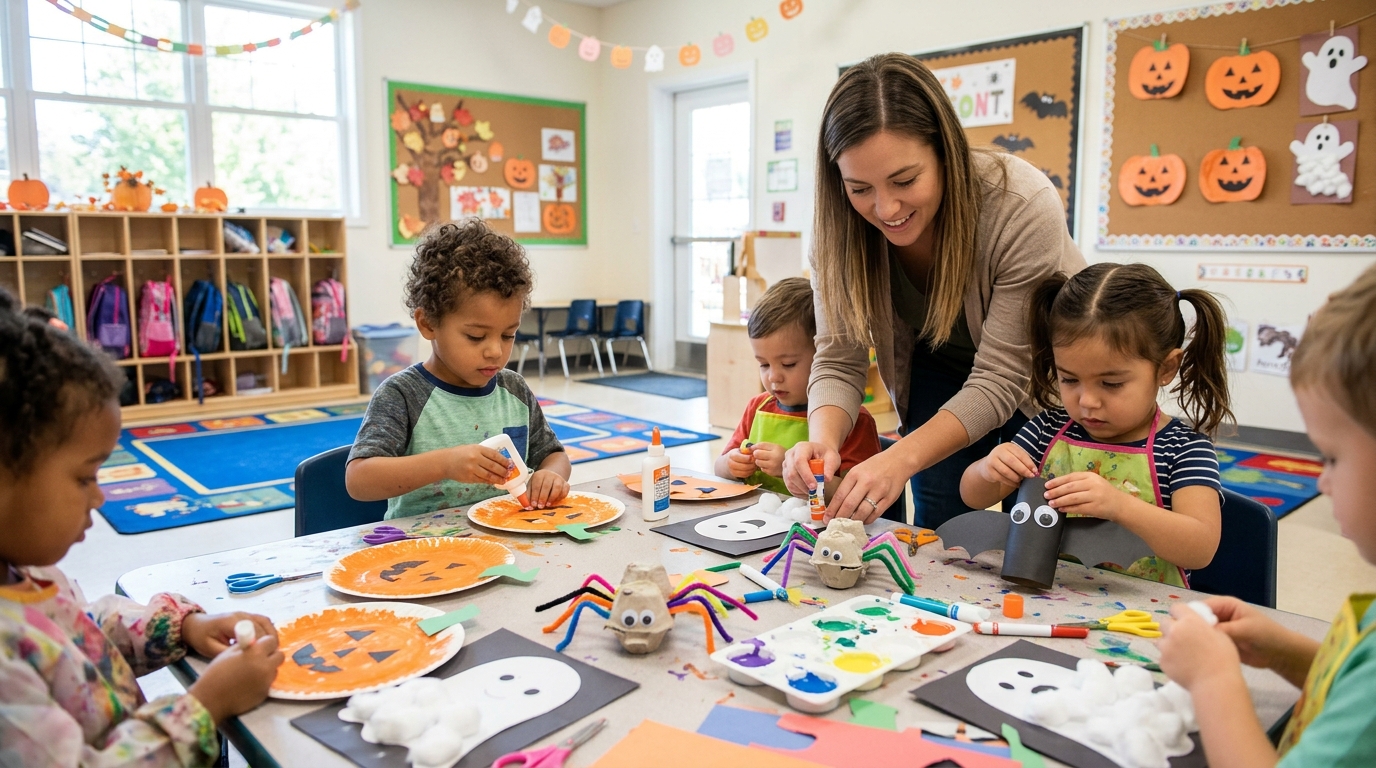
Halloween crafts for preschoolers can be simple, affordable, and fun without requiring complicated supplies or perfect results. I like projects that let children make their own choices, get creative with familiar materials, and finish with something they can proudly show their families.
For children ages 2–5, the best Halloween craft ideas usually involve a few manageable steps, clear instructions, and some adult preparation. Paper plates, cotton balls, cardboard tubes, tissue paper, and washable markers can become ghosts, pumpkins, bats, and friendly monsters without a long shopping list.
Whether you’re planning a preschool classroom activity, a Halloween party, or a creative afternoon at home, these 15 easy Halloween crafts offer options for different ages, budgets, and mess levels.
These 15 Halloween crafts for preschoolers include handprint ghosts, paper plate jack-o’-lanterns, cardboard tube bats, cotton ball mummies, monster puppets, and other seasonal projects. Most take about 10–25 minutes of active crafting time, although painting and drying may require additional time.
Save this for later
Table of Contents
I recommend preparing shapes ahead of time, organizing supplies before children arrive, and choosing materials suited to each child’s age and abilities. If you want a lower-mess activity, start with foam sticker scenes, dot marker pumpkins, or marker-decorated paper bag puppets.
Key Takeaways
- Best keepsake: Handprint Ghost on Black Paper or Handprint Bat.
- Best for younger children: Dot Marker Pumpkin, Foam Sticker Halloween Scene, and a supervised tissue paper pumpkin.
- Best low-mess choices: Foam Sticker Halloween Scene and Paper Bag Monster Puppet decorated with markers.
- Best for group activities: Paper Plate Jack-o’-Lantern and Cotton Ball Mummy Craft, with materials prepared in advance.
- Best budget strategy: Use supplies you already own and buy shared materials in suitable quantities.
- Most useful preparation tip: Pre-cut shapes, label projects, and sort supplies before children sit down.
- Important safety reminder: Supervise children with paint, glue, recycled materials, and small decorations. Avoid detachable pieces for children who still put objects in their mouths.
Related article: 21 Easy Halloween Crafts That Sell Like Crazy (2026 Edition)
What Makes a Halloween Craft Actually Work for Preschoolers?
When choosing Halloween crafts for preschoolers, I focus on how easily children can participate rather than how polished the finished project looks. A slightly crooked ghost or an unusually shaped pumpkin can still be a wonderful creation.
What it IS:
- Two or three manageable actions, such as pressing, sticking, coloring, or arranging.
- Materials that are easy for young children to handle.
- A design that allows children to choose their own colors and details.
- A realistic cleanup plan with table coverings and damp towels.
- Adult preparation where cutting, assembly, or other difficult steps are involved.
- Age-appropriate supplies and close supervision.
- A reasonable budget based on available materials, with $1–$2 per child serving as a planning target rather than a guaranteed price.
What it ISN’T:
- A project that expects a two-year-old to cut complicated shapes independently.
- An activity that depends on numerous tiny decorations.
- A craft with several lengthy drying periods during a short session.
- A design that requires an adult to complete most of the work.
- An activity that uses materials unsuitable for the children’s ages.
Children develop different interests and abilities, even within the same age group. A younger child might enjoy placing a few large stickers, while an older preschooler may want to draw a face or add extra decorations. Both can enjoy the same theme when the activity is adapted to their needs.
💡 Pro Tip: Prepare templates, cut out shapes, and divide supplies into small trays before children arrive. For a group activity, this makes it easier to get started and gives children more time to create.
What Are the Best No-Mess Halloween Crafts for Preschoolers?
Some rooms cannot accommodate paint, especially when there’s carpet, limited sink access, or furniture that needs extra protection. For these situations, I would choose a lower-mess project that doesn’t require an open paint tray.
- Foam Sticker Halloween Scene (Craft #13): Children peel large, age-appropriate stickers and arrange them on dark cardstock. No paint or glue is needed.
- Dot Marker Pumpkin (Craft #15): Children fill a pumpkin outline with washable dot markers. A table covering still helps prevent marks on surrounding surfaces.
- Paper Bag Monster Puppet (Craft #6): Children decorate paper bags with crayons or washable markers and prepared paper features.
These activities simplify cleanup, but none is completely mess-proof. Supervise younger children, check product age recommendations, and keep loose decorations out of reach when they could pose a choking risk.
15 Easy Halloween Crafts for Preschoolers
1. Handprint Ghost on Black Paper
Best for: Ages 2–5, family keepsakes, and classroom displays.
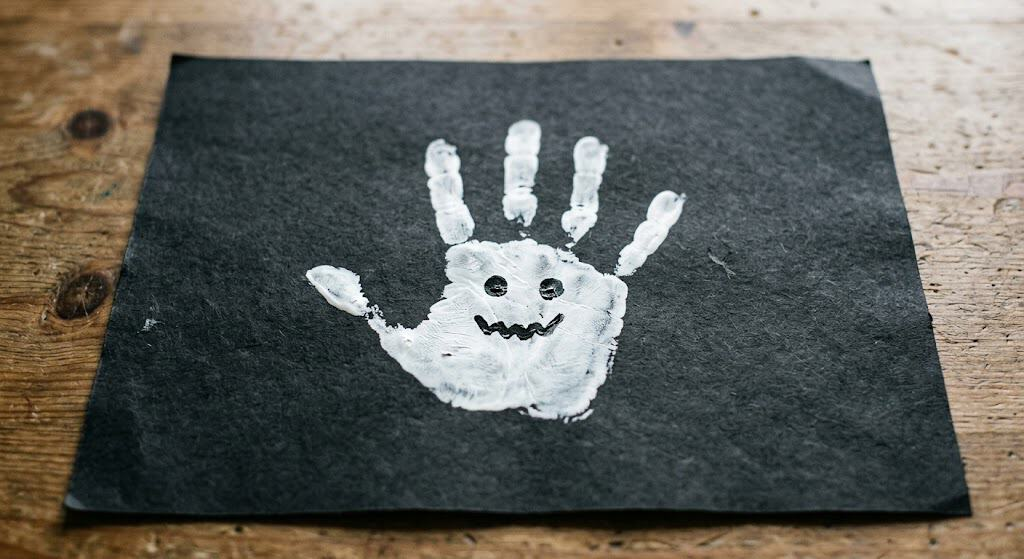
A handprint ghost is a simple Halloween keepsake that captures the size of a child’s hand. The white print stands out against black construction paper, and a few drawn details turn it into a friendly ghost.
What you need:
- Black construction paper
- White washable finger paint or tempera paint labeled for children’s use
- A paintbrush or sponge
- Damp paper towels
- A table covering
- A black marker for facial details
Cost: Approximately $1–$2 per child when supplies are shared.
Time: 10–15 minutes of active crafting, plus drying time.
Difficulty: Easy.
An adult can help apply a thin layer of paint to the child’s palm. Press the hand onto the paper and lift it straight up without sliding. Once the print dries, draw two eyes and a small mouth to complete the ghost.
Use construction paper rather than thin printer paper if you want a sturdier keepsake. Allow the picture to dry fully before stacking or displaying it.
💡 Pro Tip: Write the child’s name and date on the back before starting. This small step makes it easier to identify artwork when several children are crafting together.
Safety note: Keep paint away from eyes and mouths, and help children wash their hands after the activity. Supervise children throughout the process.
2. Paper Plate Jack-o’-Lantern
Best for: Ages 3–5, classroom displays, and take-home decorations.
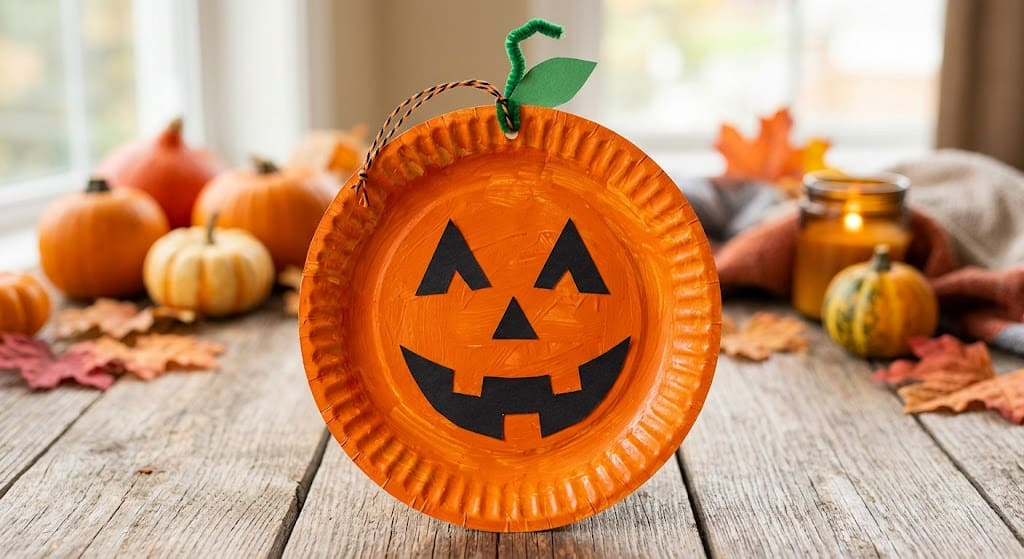
A paper plate jack-o’-lantern is an easy way to let preschoolers create their own Halloween character. Some children may choose a cheerful smile, while others prefer a silly or surprised expression.
What you need:
- Orange paper plates
- Black construction paper
- Child-safe glue sticks
- Green construction paper
- A marker for optional details
Cost: Approximately $0.75–$1.50 per child when supplies are shared.
Time: 15–20 minutes.
Difficulty: Easy.
Start with orange plates to avoid the extra painting and drying steps. Before the activity, cut large triangles for eyes and noses and prepare several mouth shapes. Children can choose their favorite pieces and glue them onto the plate.
Cut a green paper stem and attach it to the top. Older preschoolers can draw additional details, while younger children can keep their designs simple.
💡 Pro Tip: Put the prepared facial features in a shallow tray. Children can choose their own combinations without searching through a large pile of paper scraps.
Safety note: An adult should handle scissors and prepare the shapes in advance. For children who mouth objects, avoid small loose pieces and use drawn facial features instead.
3. Toilet Paper Roll Bat
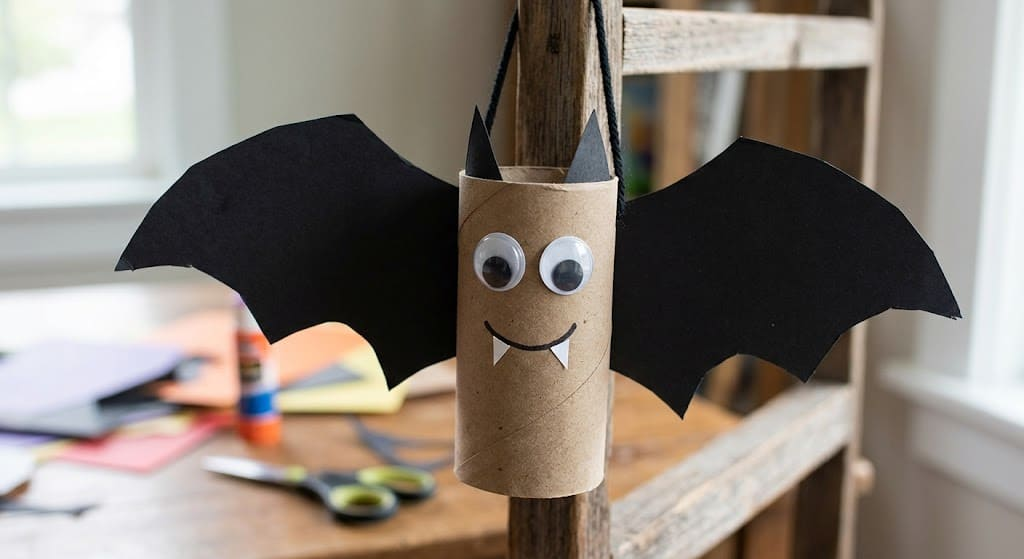
Best for: Ages 3–5, classroom decorations, and Halloween party crafts.
A clean cardboard tube can become a bat with simple wings and a drawn face. This project also gives families a useful way to reuse suitable cardboard materials.
What you need:
- Clean, dry cardboard tubes
- Black construction paper or washable black paint
- Black cardstock for wings
- Child-safe glue sticks
- A black marker
- Optional string for adult-installed decorations
Cost: Approximately $0.75–$1.50 per child.
Time: 15–20 minutes of active crafting, plus drying time if paint is used.
Difficulty: Easy.
For a shorter activity, wrap the cardboard tube in black construction paper instead of painting it. An adult can prepare a simple wing template and cut out matching pairs. Children can attach the wings and draw eyes and a mouth.
If you prefer painted bats, paint the tubes beforehand and allow them to dry completely. This lets children focus on decorating rather than waiting for paint to dry.
The finished bats can stand on a shelf. If you want to hang them, an adult should handle the hole punching and installation.
💡 Pro Tip: Make one wing template from scrap cardboard and use it to prepare the shapes before the session. This saves time and makes assembly easier.
Safety note: Use only clean, dry tubes without sharp or damaged edges. Keep string out of children’s reach, and do not leave hanging decorations where babies or toddlers can access them.
4. Cotton Ball Mummy Craft
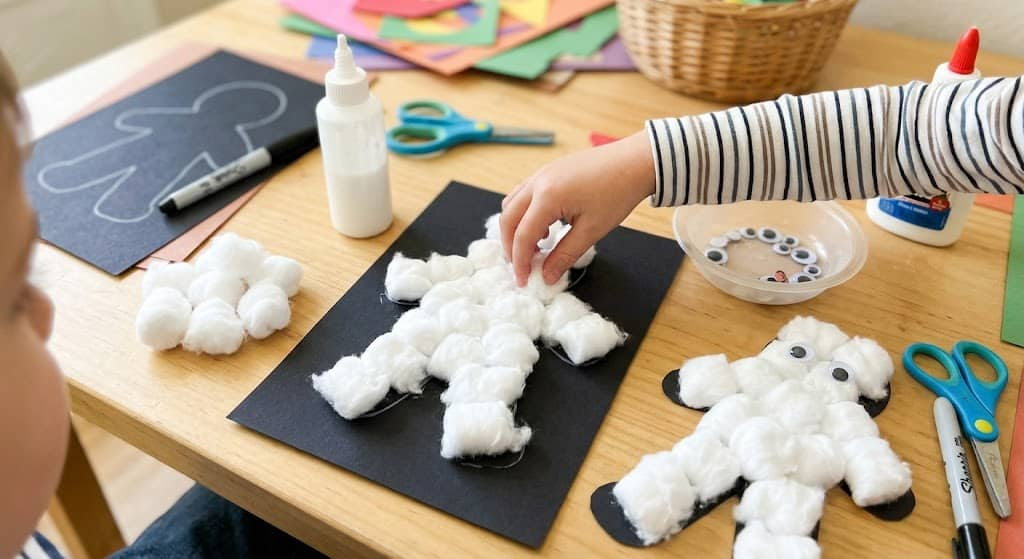
Best for: Ages 2–5, simple texture activities, and preschool craft tables.
Cotton balls give a mummy a soft, uneven appearance that works well for young children’s artwork. The design doesn’t need straight lines or precise placement to look recognizable.
What you need:
- White cardstock
- Cotton balls or large pieces of white tissue paper
- Child-safe glue
- A pencil or black marker for the outline
- A marker for facial details
Cost: Approximately $1–$1.50 per child when supplies are shared.
Time: 15–20 minutes.
Difficulty: Easy.
Draw a large mummy outline on the cardstock. Show children where to place the glue, then let them add cotton balls inside the shape. They can overlap the pieces or leave small gaps to create a wrapped appearance.
For children who may put materials in their mouths, use large pieces of white tissue paper instead of cotton balls. An adult can draw the eyes directly onto the finished design rather than providing loose decorations.
💡 Pro Tip: Make the mummy outline large and easy to follow. A wide shape gives children more room to place the materials without worrying about staying within narrow lines.
Safety note: Cotton balls and loose eyes can pose choking hazards. Supervise children closely and choose larger paper materials for children who mouth objects.
5. Fingerprint Pumpkin Card
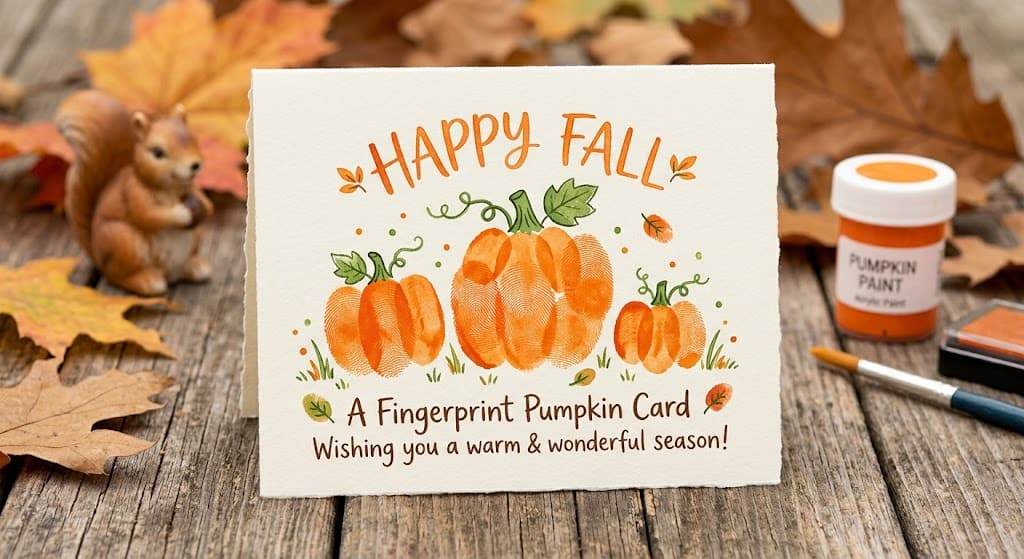
Best for: Ages 2–4, family greeting cards, and classroom keepsakes.
Fingerprint pumpkins turn small prints into a seasonal picture that can be saved or shared with family. This project works well on a folded card or a single sheet of white cardstock.
What you need:
- White cardstock or blank folded cards
- Washable orange finger paint or an age-appropriate stamp pad
- Green washable paint or a marker
- Damp paper towels
- A black marker for optional facial details
Cost: Approximately $0.75–$1.50 per child when supplies are shared.
Time: 10–15 minutes of active crafting, plus drying time.
Difficulty: Easy.
Help children make several orange fingerprints close together to form a pumpkin shape. Add a green stem after the prints dry. An adult can draw a face, or older preschoolers can add leaves and vines themselves.
If you use a shared stamp pad, follow the manufacturer’s cleaning instructions and avoid sharing it between children when hygiene is a concern. Wash hands after the activity.
💡 Pro Tip: Prepare one example card to show how the prints can form a pumpkin. Let children decide how many prints to use and where to place them.
Safety note: Use materials labeled for children’s intended use, supervise the activity, and keep paint and stamp pads away from mouths and eyes.
6. Paper Bag Monster Puppet
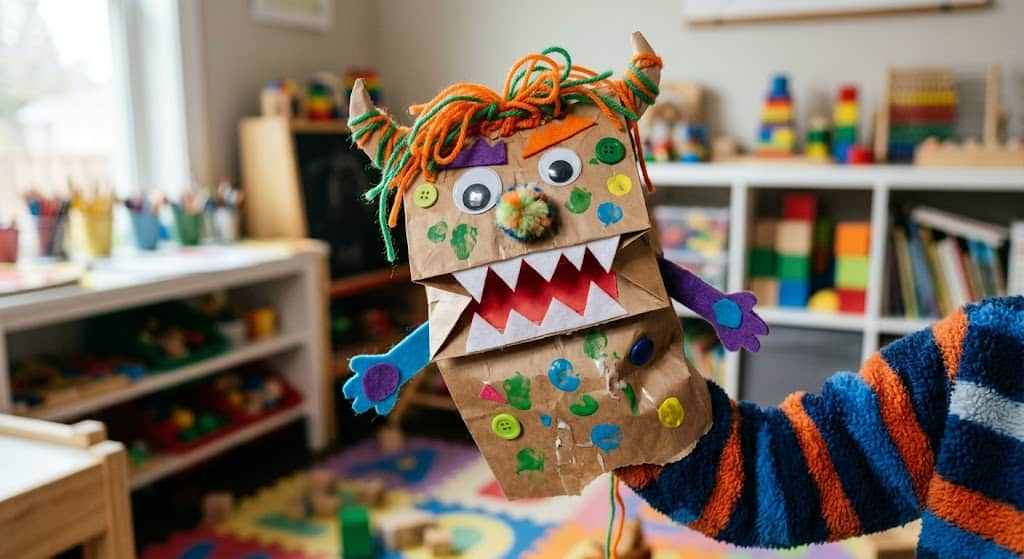
Best for: Ages 3–5, Halloween parties, and take-home toys.
A paper bag monster becomes a character children can play with after decorating. It can have a silly face, funny ears, or a row of paper teeth, depending on the child’s ideas.
What you need:
- Clean paper lunch bags
- Washable markers or crayons
- Colored construction paper
- Child-safe glue sticks
- Large paper shapes for facial features
Cost: Approximately $1–$2 per child when supplies are shared.
Time: 20–25 minutes.
Difficulty: Easy.
Place the bag with its folded bottom facing upward so the flap forms the monster’s mouth. Children can draw eyes and a nose, then choose paper ears, horns, or teeth to decorate the face.
For younger preschoolers, draw the facial features directly on the bag or offer large paper shapes that an adult can help attach securely. Avoid giving children a pile of small decorations.
Once the puppet is finished, invite children to make it talk or introduce it to the other monsters. Children who prefer quiet activities can simply take their puppets home.
💡 Pro Tip: Write each child’s name inside the bag before decorating begins. This helps keep finished puppets organized at parties and classroom events.
Safety note: Use clean, dry paper bags and age-appropriate adhesive. Keep loose decorations and strings away from younger children.
7. Bubble Wrap Pumpkin Print
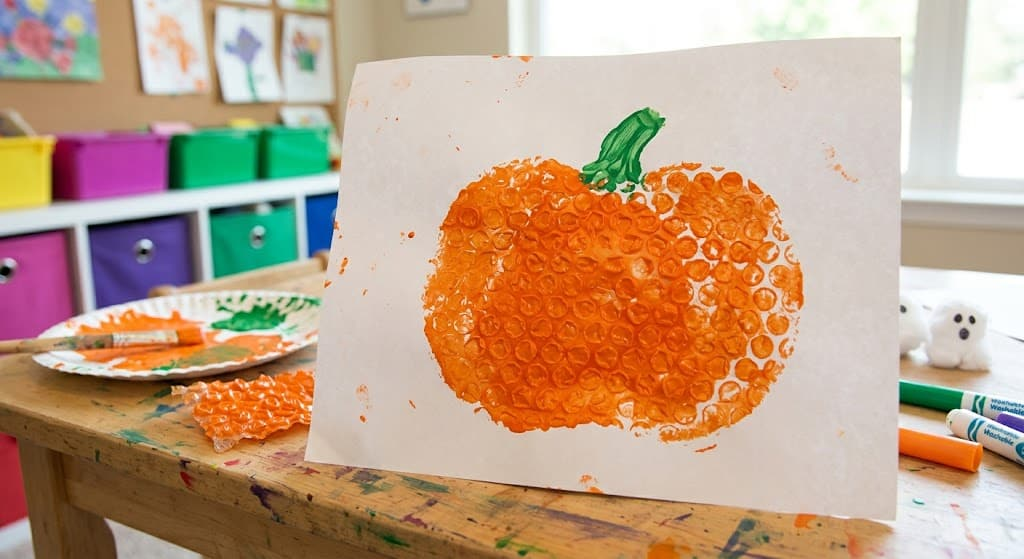
Best for: Ages 2–5, texture-based art, and Halloween displays.
Bubble wrap creates a bumpy pattern when pressed into paint, giving a pumpkin print extra texture without complicated drawing. If bubble wrap isn’t suitable for a child, a textured sponge can provide a similar effect.
What you need:
- Clean bubble wrap or a textured sponge
- White paper
- Washable orange tempera paint
- Green crayons or markers
- A shallow paint tray
- A table covering and damp towels
Cost: Approximately $0.75–$1.50 per child when supplies are shared.
Time: 10–15 minutes of active crafting, plus drying time.
Difficulty: Easy.
An adult should cut the bubble wrap into manageable squares before the activity. Spread a thin layer of orange paint in a shallow tray and help children press the textured surface into the paint, then onto the paper.
Lift the material straight up to reveal the print. After it dries, children can draw a stem, leaves, or a curling vine.
Test the paint coverage on scrap paper first. Too much paint can hide the texture, while a thin layer usually gives a clearer pattern.
💡 Pro Tip: Prepare one test print before children arrive so you can adjust the amount of paint and avoid overly wet results.
Safety note: Keep bubble wrap away from children’s faces and supervise closely. For children who mouth craft materials, use a suitable sponge instead.
8. Sponge-Painted Black Cat
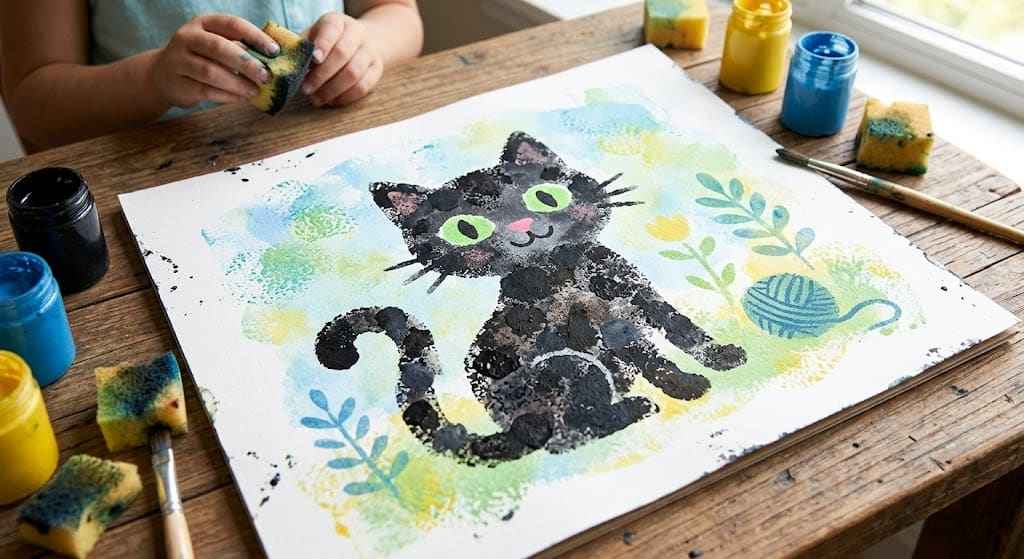
Best for: Ages 3–5, Halloween party stations, and seasonal wall art.
A black cat against yellow paper creates a simple Halloween picture with strong contrast. Using prepared sponge shapes makes the activity easier for preschoolers than painting the whole cat with a brush.
What you need:
- Yellow construction paper
- Washable black paint
- Clean household sponges
- A shallow paint tray
- A marker or crayons for details
- Optional yellow paper for a moon
Cost: Approximately $1–$2 per child when supplies are shared.
Time: 15–20 minutes of active crafting, plus drying time.
Difficulty: Easy.
An adult can prepare a round sponge for the cat’s head and a simple body shape. Children can stamp the head and body onto yellow paper. An adult can help connect the shapes if needed.
Once the paint dries, add a tail, whiskers, and eyes with a marker. A yellow paper moon or a few hand-drawn stars can complete the scene.
💡 Pro Tip: Test the sponge on scrap paper first. If the stamp is too wet, remove some excess paint before making the final print.
Safety note: An adult should prepare any sponge shapes using scissors. Use paint labeled for children’s intended use and supervise the activity.
Also read: 15 Last-Minute Halloween Party Ideas: Throw It Together in 3 Hours (Under $50)
9. Tissue Paper Stuffed Pumpkin
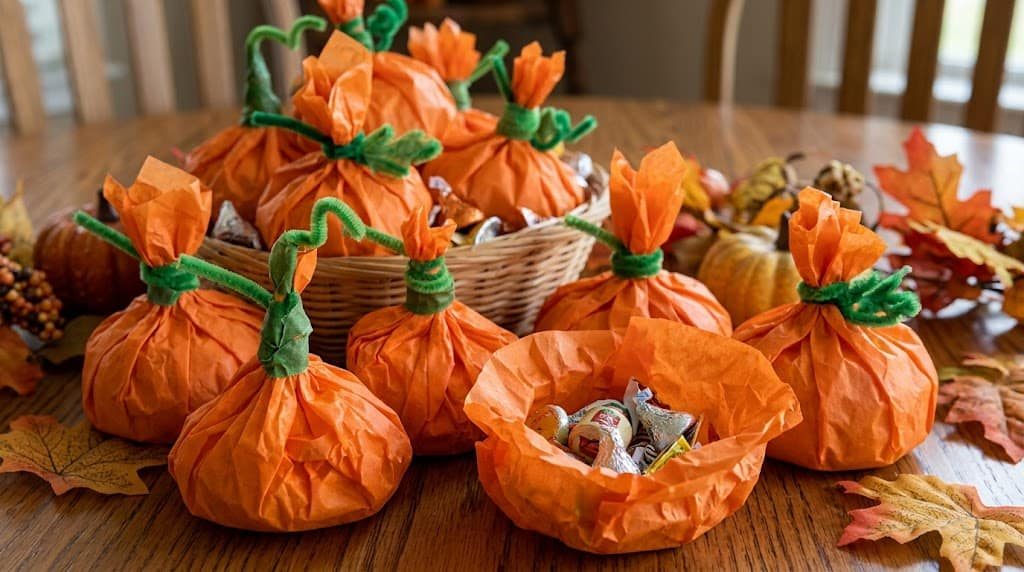
Best for: Ages 2–4, classroom decorations, and lower-mess crafting.
A tissue paper pumpkin is a simple three-dimensional decoration that doesn’t require paint. I would use a paper bag for the base because it gives the filling a clear shape and is easy for children to handle.
What you need:
- Orange paper lunch bags
- Orange tissue paper for filling
- Green construction paper
- Child-safe tape or glue
- Crayons for optional details
Cost: Approximately $0.75–$1.50 per child when supplies are shared.
Time: 10–15 minutes.
Difficulty: Easy.
Give each child an orange paper bag and several large pieces of orange tissue paper. Show them how to crumple the tissue loosely and place it inside the bag until it forms a rounded shape.
An adult can fold the top of the bag closed and secure it with tape. Add a stem made from folded green paper, using child-safe glue or adult assistance to attach it.
Children can draw a face or add paper leaves if they want to personalize the pumpkin. Display the finished decorations together on a shelf or classroom table.
💡 Pro Tip: Keep the tissue filling loose so the pumpkin is easy to shape. Prepare the green paper stems before the activity to make assembly quicker.
Safety note: Supervise children with tissue paper and adhesives, especially if they tend to mouth materials. Use a folded paper stem instead of loose chenille stems, and keep small tape pieces away from young children.
10. Googly Eye Monster Rock
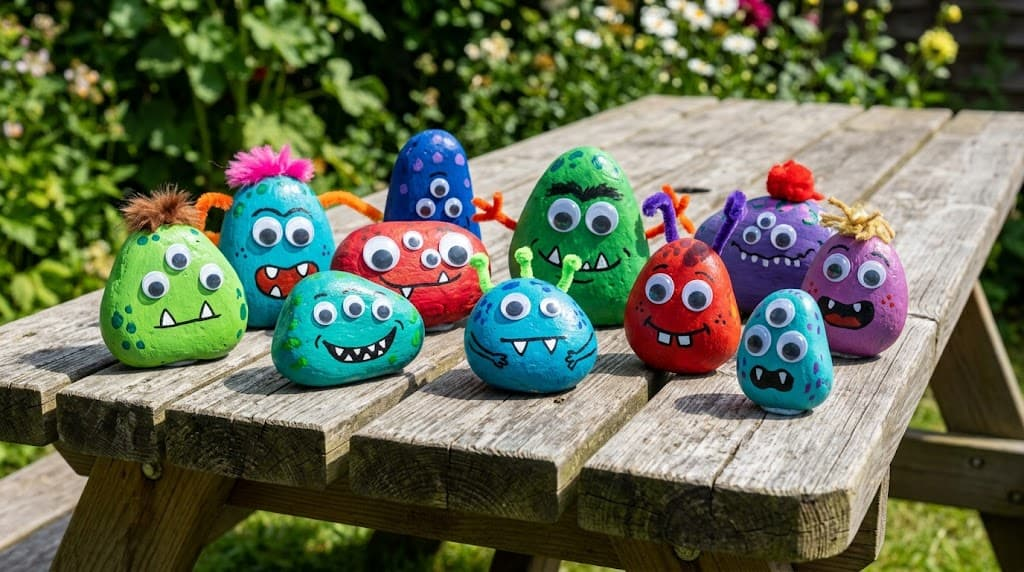
Best for: Ages 3–5, nature-inspired crafts, and take-home decorations.
A smooth rock can become a colorful monster with a funny expression. For younger preschoolers, I prefer drawn facial features or large paper eyes instead of small detachable decorations.
What you need:
- Clean, smooth, reasonably large stones
- Children’s paint suitable for the intended surface
- Paintbrushes
- Markers or large paper shapes for facial features
- Child-safe glue, if paper features are used
- Optional protective finish applied by an adult according to the product label
Cost: Approximately $1.50–$3 per child, depending on the stones and supplies.
Time: 20–25 minutes of active crafting, plus drying time.
Difficulty: Easy.
Choose stones with stable, rounded surfaces and inspect them for sharp edges. Children can paint the stones in bright colors and let them dry before adding a monster face.
If the activity needs to be completed in one session, an adult can prepare the painted stones in advance. Children can then draw the eyes and mouth with suitable markers or attach large paper features with child-safe glue.
Any protective finish should be suitable for the stone surface and intended use. Follow the manufacturer’s directions and have an adult apply it in an appropriate area, away from children.
💡 Pro Tip: Pick flatter stones that are easy to hold and decorate. They are generally more convenient for young children than very small or irregular stones.
Safety note: Small rocks can be choking hazards. Supervise the activity closely and avoid small stones for children who mouth objects. Keep finished rocks out of reach when they could be mistaken for toys or food by younger children or pets.
11. Paper Cup Mummy
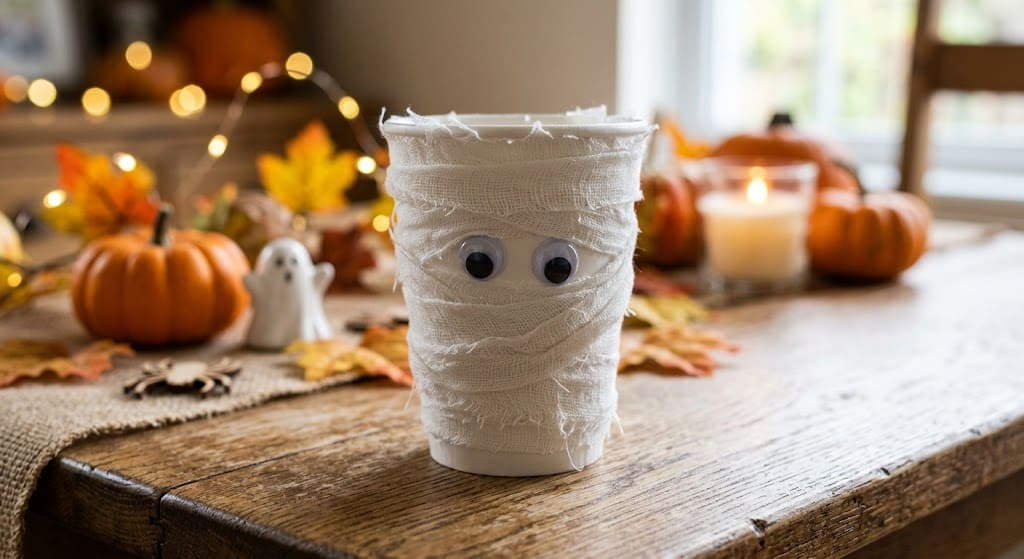
Best for: Ages 3–5, Halloween decorations, and take-home favors.
A paper cup mummy is made by wrapping short white paper strips around a cup and leaving small spaces for the face. The finished decoration can hold crayons or other suitable non-food items.
What you need:
- Clean white paper cups
- White paper strips
- Child-safe glue sticks or tape used with adult assistance
- A black marker for facial details
- Optional large paper eyes
Cost: Approximately $1–$1.75 per child when supplies are shared.
Time: 10–15 minutes.
Difficulty: Easy.
Prepare the paper strips before children sit down. Show them how to place one strip across the cup and add more strips at different angles to create the mummy’s wrapped appearance.
Draw the eyes directly on the cup or use large paper features secured by an adult. Avoid long, loose ribbon or gauze that could tangle around fingers or pose a strangulation hazard.
If you want to use the cup for food, use a clean, food-safe container and keep craft materials separate from the food-contact area. For a simpler option, fill the finished cup with crayons or pencils.
💡 Pro Tip: Cut the strips to a manageable length before the session. Short strips are easier for preschoolers to position without tangling.
Safety note: Supervise children with glue and tape. Keep loose strips and small decorations away from children who may put them in their mouths.
12. Handprint Bat
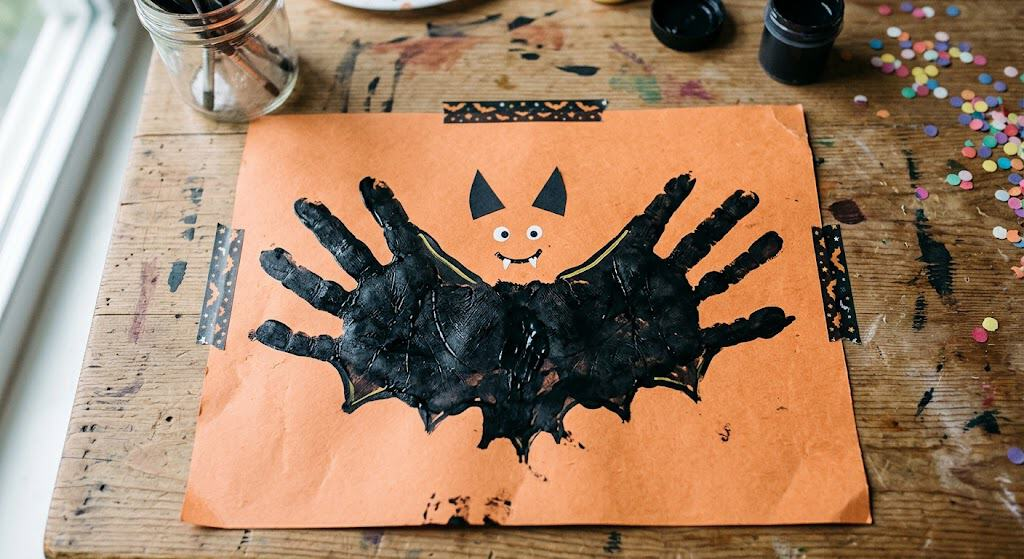
Best for: Ages 2–5, family keepsakes, and Halloween displays.
A handprint bat uses two prints to form the wings, with the palms meeting near the center. The result is a simple seasonal picture that can be dated and saved as a keepsake.
What you need:
- Orange construction paper
- Black washable finger paint or tempera paint
- A paintbrush or sponge
- Damp towels
- A black marker for facial details
Cost: Approximately $1–$1.75 per child when supplies are shared.
Time: 10–15 minutes of active crafting, plus drying time.
Difficulty: Easy.
Help the child apply a thin layer of black paint to one hand and press it onto the paper. Repeat with the other hand beside the first print, positioning the palms near each other and the fingers pointing outward like wings.
After the prints dry, draw a small head, ears, and face in the center. Children can add a moon or stars with crayons if they want a more detailed picture.
💡 Pro Tip: Write the child’s name and date on the back before painting. This makes it easier to save the picture as a record of that year’s Halloween.
Safety note: Keep paint away from eyes and mouths and help children wash their hands afterward. Draw the facial details rather than using small detachable pieces for children who mouth objects.
13. Foam Sticker Halloween Scene
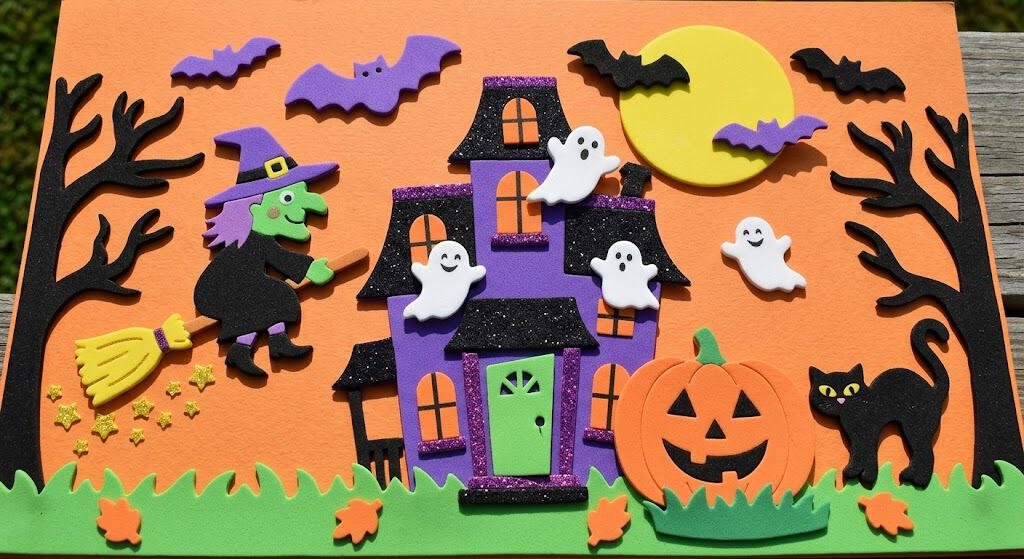
Best for: Ages 2–3, lower-mess activities, and simple classroom crafts.
Foam stickers let preschoolers create a Halloween picture with minimal setup. The activity involves choosing shapes and placing them on paper, so children can make their own designs without using paint.
What you need:
- Large, age-appropriate Halloween foam stickers
- Black or dark-colored cardstock
- A tray for organizing the stickers
- Crayons for optional details
Cost: Approximately $0.75–$2.50 per child, depending on the sticker pack and shared supplies.
Time: 10–15 minutes.
Difficulty: Easy.
Give each child a sheet of dark cardstock and place the stickers in a tray. Children can arrange pumpkins, ghosts, bats, and cats to create their own Halloween scene.
Some may cover the paper with stickers, while others may choose just a few shapes. Both approaches work well. Older preschoolers can add stars or a moon with crayons.
💡 Pro Tip: Choose a sticker pack with a variety of large shapes rather than one with many tiny decorations. This gives children options while keeping the materials easier to manage.
Safety note: Check the manufacturer’s age recommendations before using foam stickers. Supervise younger children, and avoid stickers with small detachable parts for children who mouth objects.
14. Popsicle Stick Frankenstein
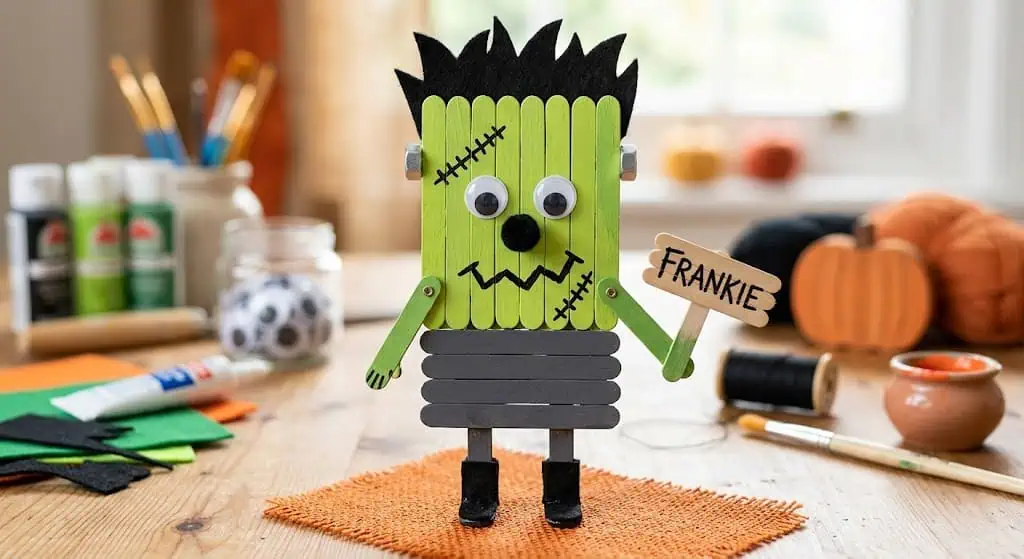
Best for: Ages 3–5, assembly activities, and Halloween displays.
Craft sticks can form a simple Frankenstein-inspired face with green coloring and black paper hair. A cardboard backing helps keep the finished design together.
What you need:
- Wide craft sticks
- Green construction paper or washable green paint
- Black construction paper for hair
- Child-safe glue
- Markers or crayons
- A piece of cardboard for backing
Cost: Approximately $1–$2 per child when supplies are shared.
Time: 20–25 minutes of active crafting, plus drying time if paint is used.
Difficulty: Easy to moderate.
Arrange four or five wide craft sticks side by side to create a rectangular face. An adult should apply glue to the back of the sticks and press them onto the cardboard backing, allowing the adhesive to set according to its instructions.
Children can color the face green or use green paper, then add a strip of black paper for hair. Draw the eyes, nose, mouth, and any optional scars with markers.
For a shorter activity, prepare the stick-and-cardboard base beforehand. Children can then focus on coloring and adding facial details.
💡 Pro Tip: Check each craft stick for splinters or rough edges before setting out the materials. Prepare the cardboard backing in advance so children don’t need to handle cutting tools.
Safety note: An adult should handle scissors and any cutting of cardboard or craft sticks. Use child-appropriate glue and supervise children during assembly.
15. Dot Marker Pumpkin
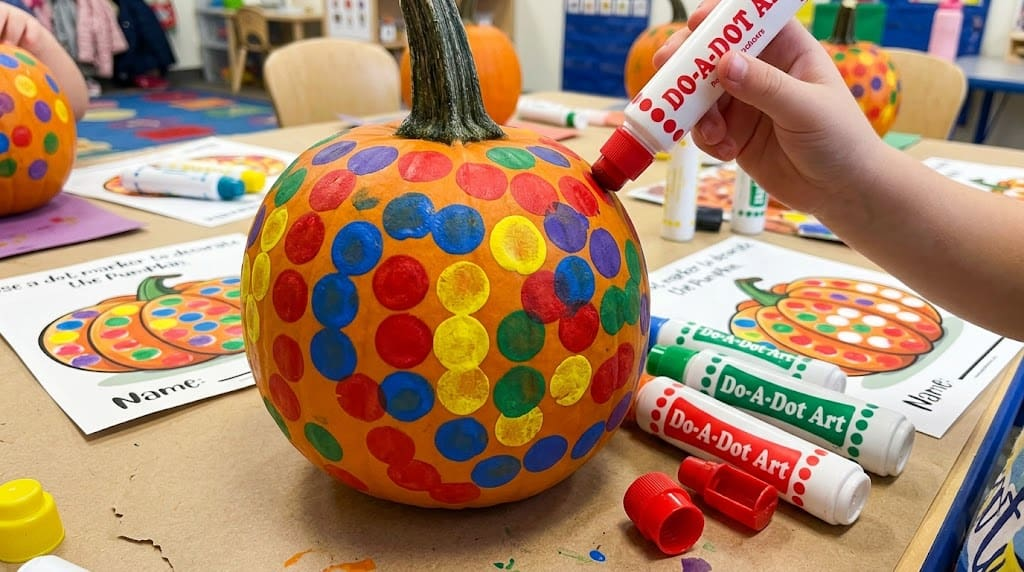
Best for: Ages 2–3, lower-mess art, and short Halloween activities.
Dot markers offer a simple way for preschoolers to fill a pumpkin shape without using a paintbrush. The repeated pressing action is easy to demonstrate, and children can decide how much of the outline to fill.
What you need:
- A printed pumpkin outline
- Washable dot markers labeled for children’s intended use
- A table covering
- Crayons for optional details
Cost: Approximately $0.50–$1.50 per child when markers are shared.
Time: 10–15 minutes.
Difficulty: Easy.
Print a large pumpkin outline on each sheet of paper. Show children how to press the marker down and lift it to make a dot. They can fill the pumpkin with orange marks and add a green stem with crayons.
Test the markers on the paper before the activity. If the ink bleeds through, use thicker paper or place a protective sheet underneath.
💡 Pro Tip: Set out a limited number of marker colors at a time. This keeps the table organized while still allowing children to personalize their pumpkins.
Safety note: Check the manufacturer’s age recommendations, supervise younger children, and keep markers away from mouths and eyes. Store the caps and markers safely when the activity ends.
How Much Should I Budget for Preschool Halloween Crafts?
The cost of Halloween crafts depends on the materials, package sizes, number of children, and supplies already available at home. I would treat any per-child amount as a planning estimate rather than a guaranteed price.
Here are a few ways to plan the budget:
- Use existing supplies first. Check for construction paper, crayons, glue sticks, and washable markers before buying new materials.
- Choose shared materials. Paint trays, brushes, and markers can be used by several children when the products and activity allow it.
- Compare package quantities. A larger pack may cost less per usable item, but only if you can store and use the extras.
- Consider drying and preparation needs. A low-cost painting project may require more setup than a sticker activity.
- Keep specialty materials optional. Rocks, specialty finishes, and individual kits can increase the cost.
For a simple activity, $1–$2 per child can be a useful starting target when supplies are shared or already available. Projects requiring new stones, paint, or specialty materials may cost more. Check current local prices before setting a final budget.
💡 Pro Tip: Make a list of the exact materials needed for each craft before shopping. Buying supplies for two planned activities is often easier to manage than purchasing a large kit with pieces you may not use.
What Are Common Mistakes When Doing Halloween Crafts With Preschoolers?
A craft can look simple in a photograph but become difficult when several young children are trying to complete it at once. A little preparation helps keep the activity manageable.
- Too many steps: Simplify the instructions to a few clear actions suited to the children’s ages.
- Unprepared materials: Cut shapes, prepare templates, and sort supplies before the children arrive.
- Insufficient table protection: Use a washable covering and keep damp towels nearby, especially when paint is involved.
- Too many activities: Plan one main craft and offer an optional simple activity if children finish early.
- Unsuitable craft kits: Check the age recommendation, small parts, and amount of adult assembly required before buying.
- Expecting identical results: Let children choose their own colors and facial expressions rather than correcting every uneven detail.
- Overlooking safety: Keep adult-use tools away from the work area and supervise materials according to their age recommendations.
For a classroom or party, I would set up a separate area for finished crafts so wet pictures and glued decorations can dry without being disturbed. Labeling each project also helps prevent mix-ups when children take their artwork home.
Frequently Asked Questions
What Halloween crafts are best for 2-year-olds?
Dot marker pumpkins, large foam sticker scenes, and tissue paper pumpkins are good options when the materials are suitable for the child’s age. Choose activities with a few simple steps, supervise closely, and avoid small detachable decorations for children who mouth objects.
How long should Halloween crafts take for preschoolers?
Many preschool crafts take about 10–20 minutes of active crafting time. Some projects may take closer to 25 minutes, and painted crafts need additional drying time. Allow time for handwashing and cleanup when planning a classroom activity or party.
What supplies do I need for preschool Halloween crafts?
Useful basics include construction paper, paper plates, paper bags, cardboard tubes, cotton balls, tissue paper, washable markers, children’s paint, and child-safe glue. The exact supplies depend on the projects you choose. Check the age recommendations and use instructions before purchasing materials.
What are the best low-mess Halloween crafts for preschoolers?
Foam sticker Halloween scenes, dot marker pumpkins, and paper bag monster puppets decorated with markers are practical options. They avoid open paint trays and simplify cleanup, although adult supervision is still necessary.
How much does it cost to set up a preschool Halloween craft activity?
Costs vary according to the number of children, materials, and supplies you already own. A simple project may fit a $1–$2 per-child planning target when materials are shared, while projects requiring special supplies can cost more. Check current local prices before shopping.
Are Halloween crafts with paint suitable for toddlers?
Paint activities may be appropriate when the product is labeled for the child’s age and intended use, with close adult supervision. Keep paint away from mouths and eyes, protect clothing and surfaces, and help children wash their hands afterward. A non-toxic label does not mean that paint is safe to swallow.
Read this next: 16 Scary Good Halloween Outdoor Decoration Ideas
Conclusion
Halloween crafts for preschoolers don’t need expensive kits or complicated instructions. With a few basic supplies and some preparation, children can create ghosts, pumpkins, bats, and monsters that reflect their own ideas.
Choose projects based on the children’s ages, available space, time, and the amount of adult assistance required. Handprint pictures make keepsakes, paper bag puppets encourage pretend play, and sticker scenes offer a convenient option when cleanup needs to be simple.
The finished projects don’t need to look perfect. Give children room to choose their colors and add their own details, supervise the materials carefully, and enjoy the creative time together.



4 Comments