18 Cardboard Box Crafts for Kids That Turn Recycling Into Real Play
I keep a stash of clean cardboard boxes by our back door. These cardboard box crafts for kids are the projects my family actually finished, played with for days, and then recycled without guilt when they finally fell apart.
How I picked and tested these: I only included projects we built at home with ordinary boxes, paint, tape, and scissors, that survived at least one full afternoon of real play.
Before you start, a few safety rules matter more than perfect paintwork. Box cutters and craft knives are adult only. Tape over every cut edge, check every box is clean and dry, and clear floor space before you start cutting.
Related article: https://craftedcornerhome.com/unicorn-crafts-for-kids/
Key Takeaways
- A plain delivery box can become a car, castle, shop, or rocket with paint, tape, and imagination.
- Start with one medium box per child so nobody waits too long for a turn.
- Let kids paint and decorate while an adult does all the cutting.
- Most of these projects cost almost nothing if you already have paint and tape at home.
- Big builds need floor space, so plan where the finished piece will live before you start.
1. Cardboard Box Car
A cardboard box car is the classic starting point, and it never fails in our house. We took a medium moving box, cut off the top flaps, and left the bottom closed so my youngest could sit inside it without the whole thing folding.
I cut a door opening on one side, added paper-plate wheels with brass fasteners so they actually spun, and let the kids paint racing stripes.
The honest downside is that the bottom wears through if a child drags it across rough floors, so keep it on carpet or smooth wood, and reinforce the base with an extra layer of cardboard.
Pro Tip: Cut the door on only three sides so it opens and closes like a real door instead of falling off completely.
Cost: Under $5 if you have paint at home / Time: 1 to 2 hours / Difficulty: Easy

Image credit: https://www.make.do/blogs/at-home/how-to-make-a-cardboard-car
2. Cardboard Castle
A cardboard castle turns a big appliance or wardrobe box into a whole kingdom. We used one tall box for the main tower and two smaller boxes taped to the sides, then cut battlements along the top edge with a craft knife while the kids watched from a safe distance.
My son painted grey stone lines with a sponge, and we added a drawbridge from a cereal box flap with string handles.
The downside is size. A castle this big dominates a room, so measure your corner first, and be ready for it to shed little bits of paint onto the floor.
Pro Tip: Paint the inside too, because kids spend half their playtime peeking through the windows from inside.
Cost: $5 to $10 for paint and tape / Time: 2 to 3 hours / Difficulty: Medium

Image credit: https://hodgepodgecraft.com/cardboard-castle-photo-story/
3. Cardboard Puppet Theatre
A puppet theatre is perfect when you have a box that is too small to sit in but too good to throw away. We cut a rectangular stage window in the front of a large cereal or shoe box, then taped a curtain made from an old tea towel across the top.
The puppets were simple sock puppets and paper-bag characters, and my kids wrote a whole show about a dragon who kept losing his keys.
The downside is that the stage window weakens the front panel, so tape a cardboard frame around the opening to stop it tearing when excited puppeteers lean on it.
Pro Tip: Tape a torch inside the back of the box for a spotlight effect during evening shows.
Cost: Under $5 / Time: 45 minutes to 1 hour / Difficulty: Easy

Image credit: https://barleyandbirch.com/make-diy-recycled-cardboard-puppet-theater/
4. Cardboard Rocket
A cardboard rocket is all about height, so start with the tallest narrow box you can find. We used a tall wardrobe box, cut a pointed nose cone from a separate piece of cardboard, and taped fins to the sides at the bottom.
My kids painted the whole thing silver and red, added round porthole windows with paper plates. I added a small door flap near the bottom so they could climb in and out without tearing the sides.
The honest downside is that tall rockets tip over easily, especially on carpet, so weigh the base down with a flat book inside or tape it to a larger flat piece of cardboard.
Pro Tip: Cut the portholes before you paint, so the paint edges stay neat and the windows line up.
Cost: $5 to $10 / Time: 2 hours / Difficulty: Medium
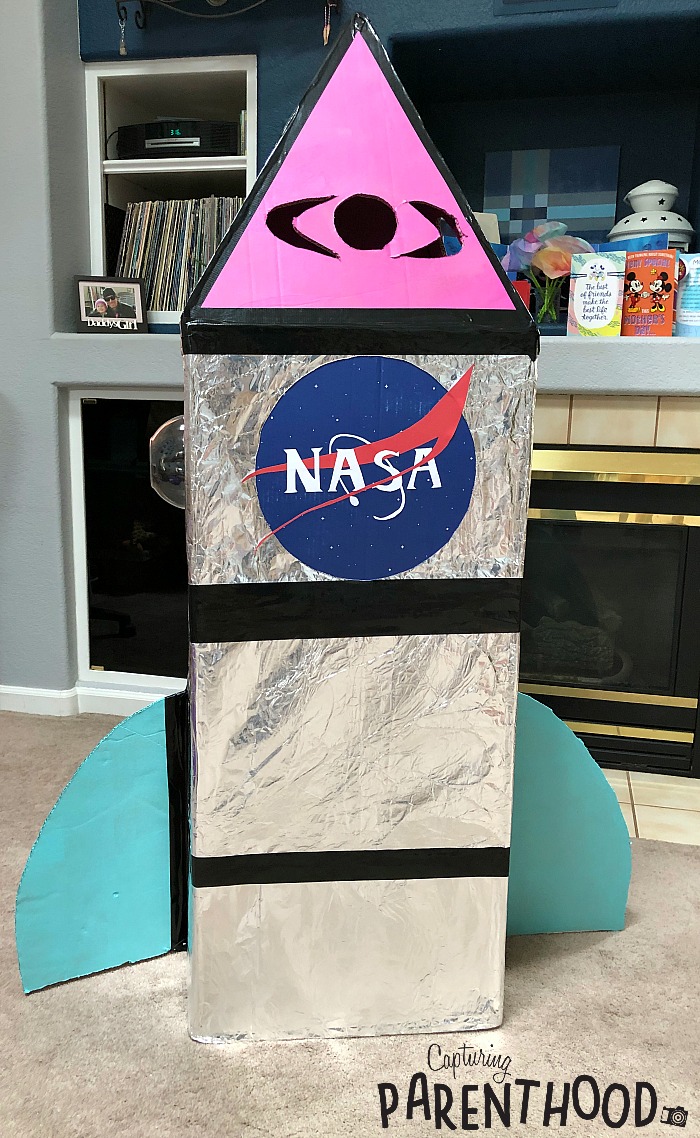
Image credit: https://capturingparenthood.com/diy-cardboard-rocket-ship/
5. Cardboard Shop
A cardboard shop lets kids play at being grown up, which they love far more than I expected. We cut a serving hatch in the front of a big box, made a little counter shelf from a folded flap, and stocked it with play food from our toy kitchen.
My daughter ran a bakery for a week. I taped a small sign above the hatch with the shop name.
The downside is that the counter shelf sags if kids lean on it, so support it underneath with a rolled-up cardboard tube or a small box.
Pro Tip: Add a price list on the side, because kids love writing and changing prices even more than selling.
Cost: Under $5 / Time: 1 to 2 hours / Difficulty: Easy

Image credit: https://ohhappyday.com/2013/07/cardboard-lemonade-stand-diy/
6. Cardboard Robot Costume
A robot costume is a wearable box project, and it is pure joy for about twenty minutes at a time. We used a medium box for the body, cut arm holes in the sides and a head hole in the bottom, then added a smaller box on top for the head with eye holes cut out.
I covered ours in silver paint and stuck on bottle-cap buttons, foil antennae, and a paper dial on the chest, and my son stomped around the garden beeping at everyone.
The downside is comfort. It gets warm inside quickly, so keep wear time short, cut generous breathing holes, and never let a child wear it near stairs or roads where vision is limited.
Pro Tip: Make the head box separate from the body box so the child can lift it off easily for a break.
Cost: $5 to $10 / Time: 2 hours / Difficulty: Medium
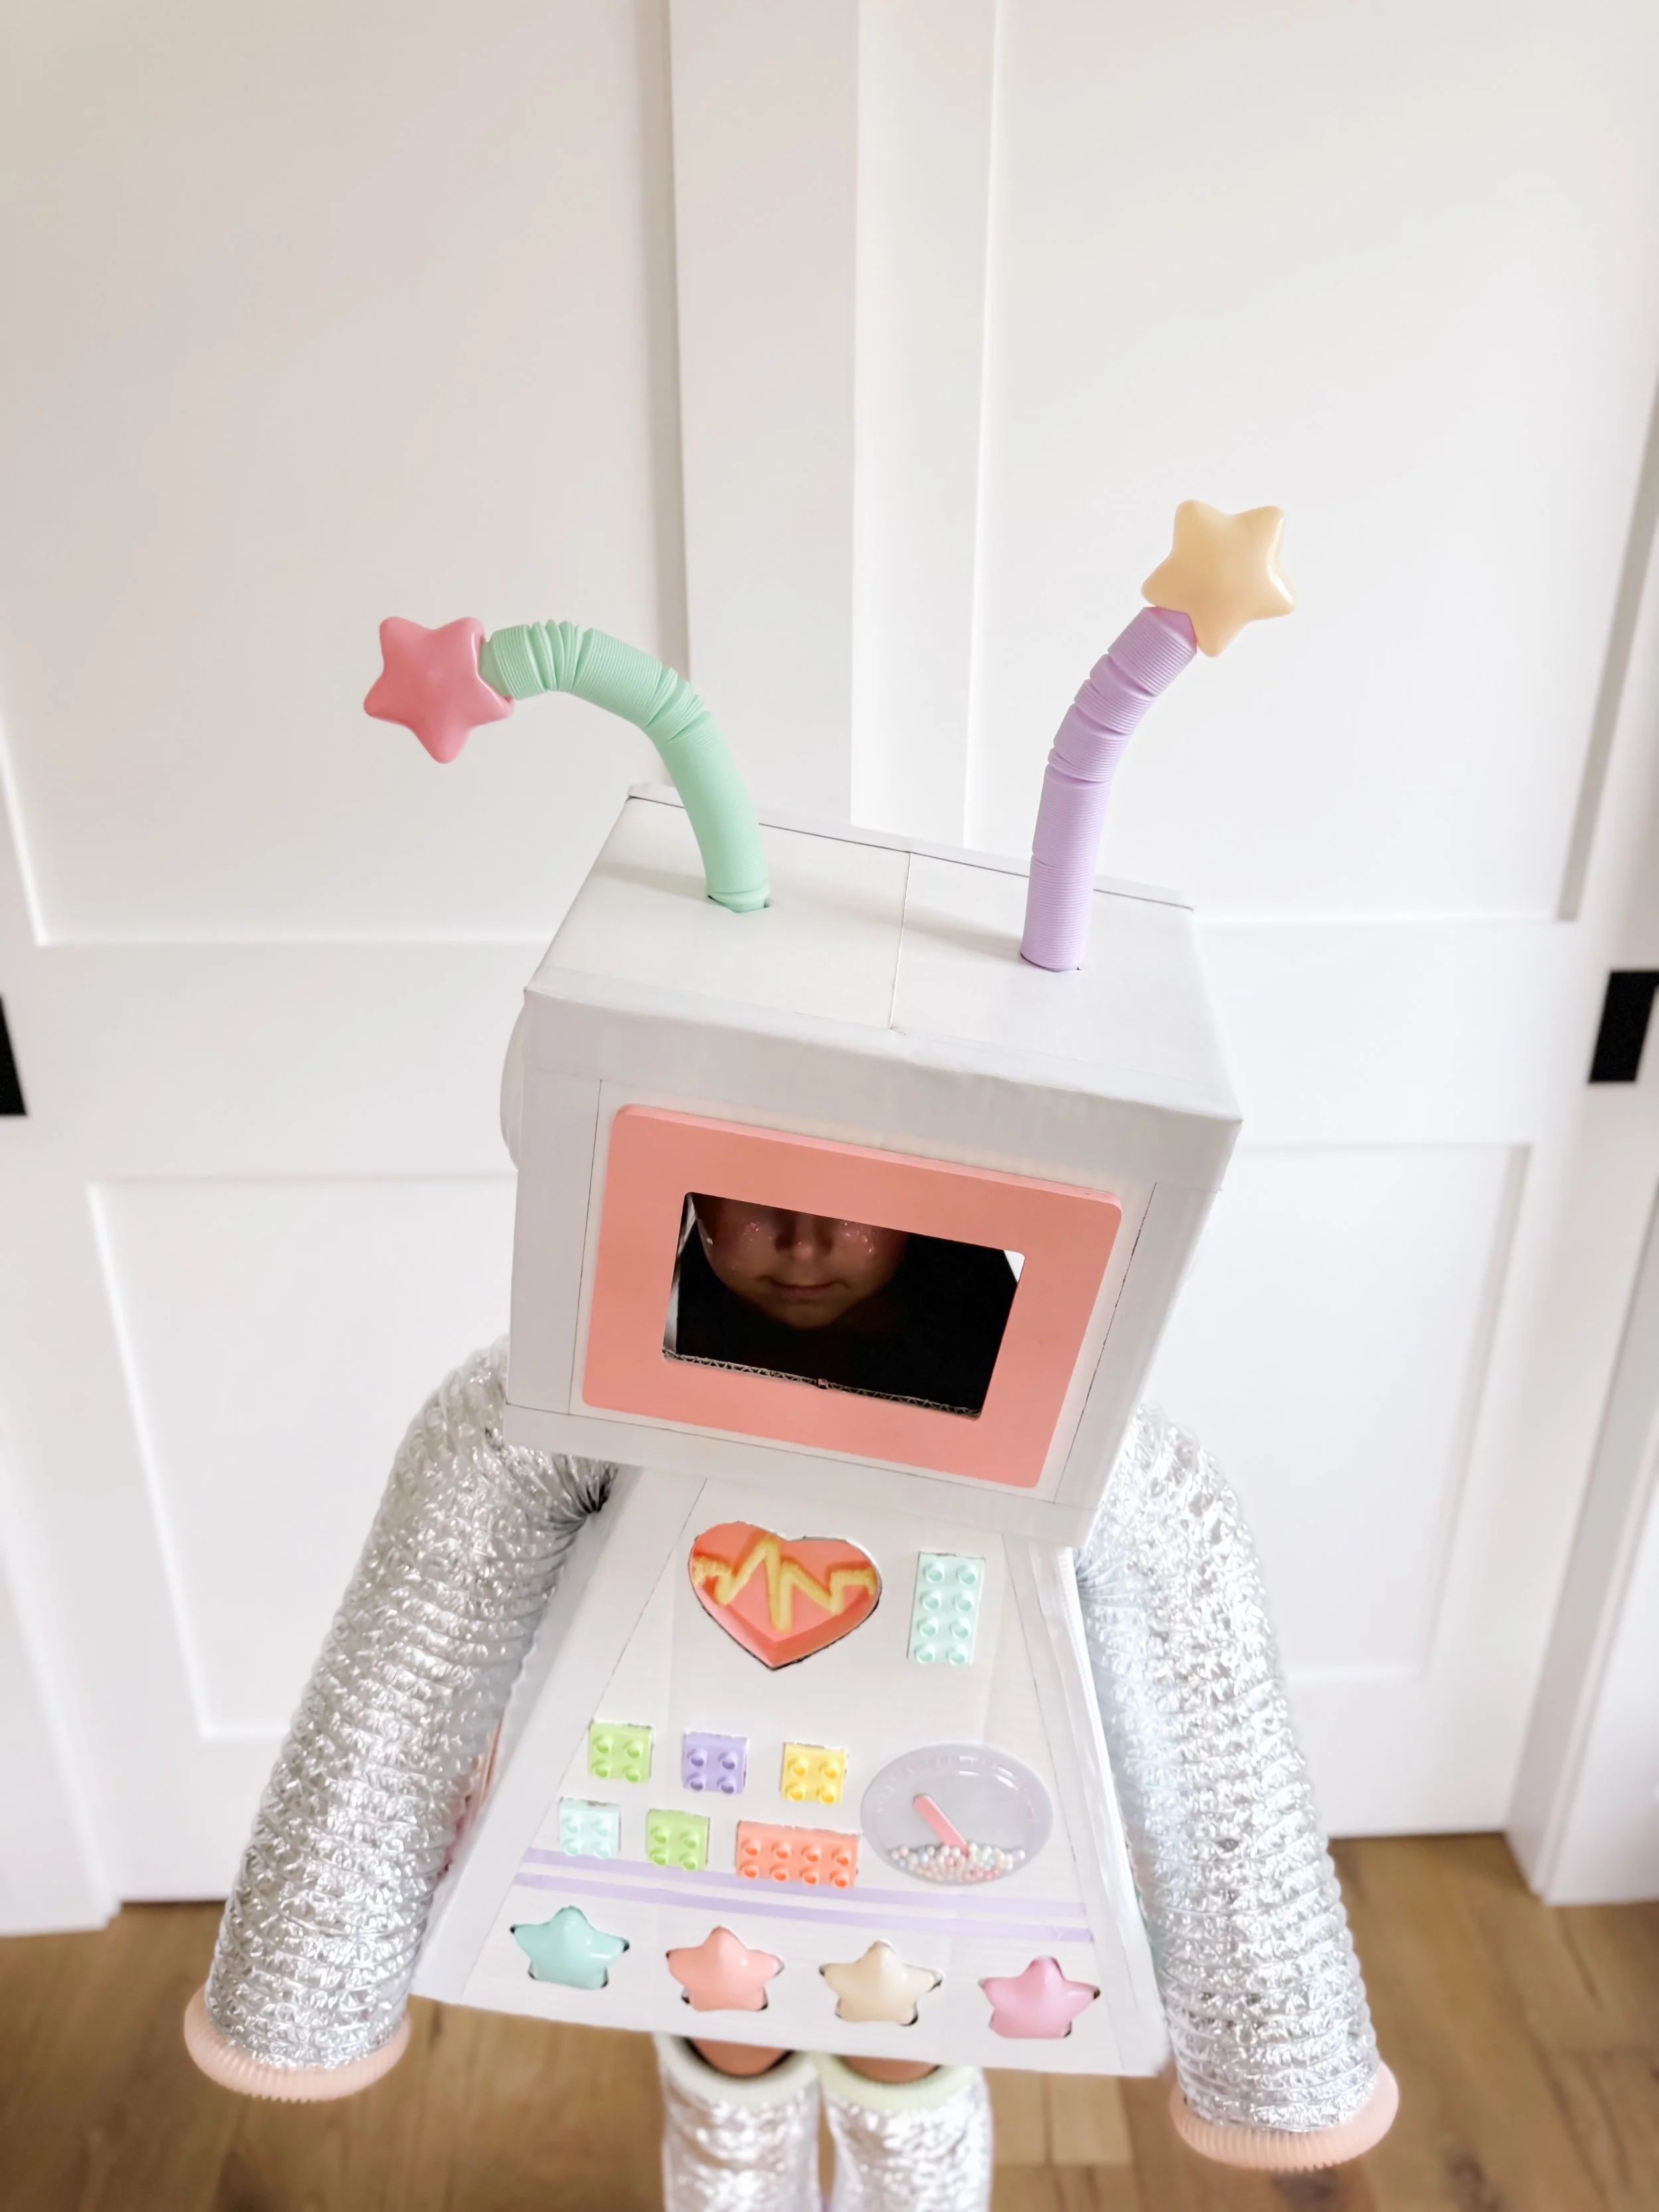
Image credit: https://www.goodnightfox.com/blog/robot-costume
7. Cardboard Maze
A cardboard maze is the best use I have found for a pile of small and medium boxes. We taped boxes together in a winding path on our living room floor, cut doorways between them, and let the kids crawl through from one end to the other.
My youngest spent an entire rainy afternoon crawling through with a torch. The maze came apart easily when we needed the room back.
The downside is that taped joints pull apart under crawling weight, so use wide packing tape on every join and check the doorways are big enough before you tape the whole route shut.
Pro Tip: Leave one roof panel open on each box so you can reach in quickly if a child gets stuck or scared.
Cost: Under $5 for tape / Time: 1 to 2 hours / Difficulty: Easy

Image credit: https://www.make.do/blogs/how-to/how-to-make-a-cardboard-maze
8. Cardboard Dollhouse
A cardboard dollhouse is a quieter project, and it suits kids who like arranging tiny rooms. We laid a large box on its side, added cardboard dividers to make four rooms, and cut small windows in the back panel for light.
My daughter furnished it with fabric scraps for rugs, bottle caps for tables, and tiny drawings taped to the walls as art.
The downside is that small furniture pieces get lost inside the box, so keep a little pouch or tin beside it for the tiny bits, and expect the dividers to need re-taping after enthusiastic redecorating.
Pro Tip: Paint each room a different soft colour, because it helps kids remember which room is which during play.
Cost: Under $5 / Time: 2 to 3 hours / Difficulty: Medium

Image credit: https://artfulparent.com/from-cardboard-box-to-lighted-dollhouse/
9. Cardboard Guitar
A cardboard guitar is a brilliant rainy-day project because it is quick and noisy in the best way. We cut a guitar shape from flat cardboard, stretched rubber bands across a small tissue box as the sound hole, and added a neck from a rolled cardboard tube.
My son strummed it for a full evening concert.
The downside is that rubber bands snap and ping off, so use thicker bands, keep spares nearby, and remind kids not to aim the guitar at anyone while strumming enthusiastically.
Pro Tip: Glue a small piece of foam under the rubber bands at the bridge so they sit higher and sound clearer.
Cost: Under $5 / Time: 45 minutes to 1 hour / Difficulty: Easy
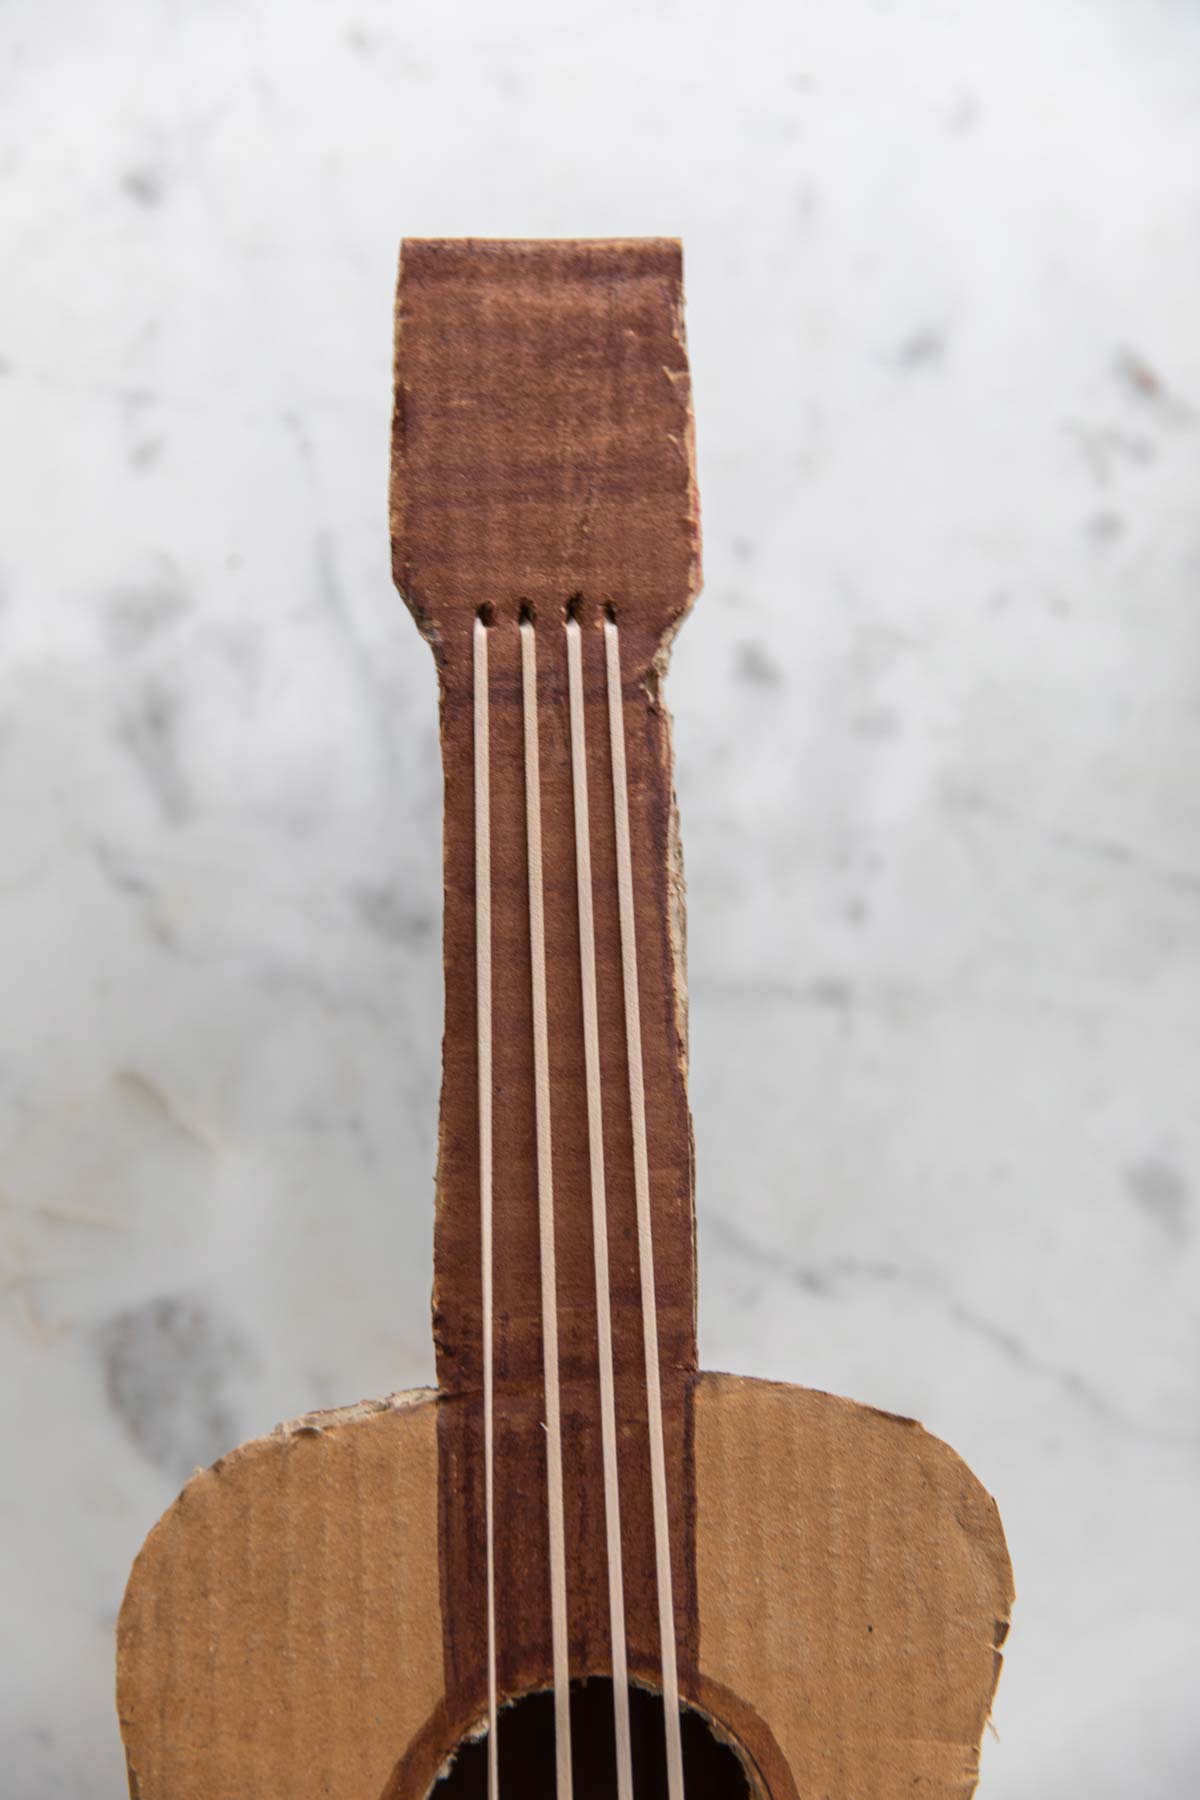
Image credit: https://rodgersandhammerstein.com/the-sound-of-music/craft-corner/cardboard-crafts/
10. Cardboard Train
A cardboard train is perfect when you have several boxes of different sizes and more than one child. We lined up three boxes in a row, joined them with string, and gave each carriage a different job: one for the driver, one for passengers, and one for luggage.
The string joins meant it could bend around corners without breaking apart like a taped version would. I added paper wheels to each carriage and a chimney on the engine.
The downside is that string joins tangle easily, so keep the strings short, tie them firmly, and check them after every play session before they become a knot nobody can undo.
Pro Tip: Number each carriage on the side, because kids love calling out carriage numbers as the train moves.
Cost: Under $5 / Time: 1 to 2 hours / Difficulty: Easy

Image credit: https://kidsactivitiesblog.com/68288/cardboard-box-train/
11. Cardboard Camera
A cardboard camera is a small, detailed project that suits older kids who like pretend photography. We used a small box, cut a round lens hole in the front, added a paper lens ring, and attached a strap made from ribbon so it could hang around the neck.
My daughter took it on every walk for a week, pointing it at flowers and cats.
The downside is that the lens hole weakens the front if it is cut too large, so keep it small, reinforce the front with a second layer of cardboard, and tape all edges smooth.
Pro Tip: Add a paper roll on the back as pretend film, because kids love winding it after each pretend photo.
Cost: Under $5 / Time: 45 minutes / Difficulty: Easy

Image credit: https://www.sunhatsandwellieboots.com/2019/10/diy-cardboard-camera-recycled-craft.html
12. Cardboard Aquarium
A cardboard aquarium is a lovely no-water alternative to a real fish tank. We cut a large viewing window in the front of a box, painted the inside blue, and hung paper fish from the top with thread so they swayed gently.
My kids drew and cut out their own fish, seaweed, and a very proud octopus. I taped clear plastic wrap across the window once, which made it look surprisingly like glass.
The downside is that hanging fish tangle and fall off, so use short threads, tape them firmly at the top, and keep spare paper fish ready for quick repairs.
Pro Tip: Paint the inside before you add the fish, and let it dry fully so the colours do not smudge.
Cost: $5 to $10 / Time: 1 to 2 hours / Difficulty: Easy
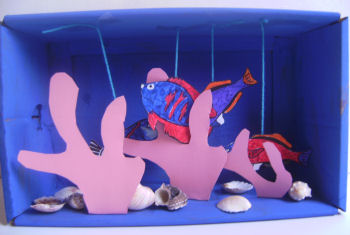
Image credit: https://www.activityvillage.co.uk/coral-reef-aquarium-craft
13. Cardboard Farm
A cardboard farm is a sprawling project that grows over time, which is part of its charm. We started with one flat box as the base, added cardboard fences from strips, a barn from a smaller box, and paper animals that the kids drew themselves.
My son built the barn first and then spent a week adding fields and a pond made from blue paper.
The downside is that it spreads. Set a clear boundary, like one tray or table, or the farm will slowly take over the whole room, one fence at a time.
Pro Tip: Glue the fences to a flat cardboard base instead of standing them loose, so they survive daily play.
Cost: Under $5 / Time: 2 hours to start, then ongoing / Difficulty: Easy
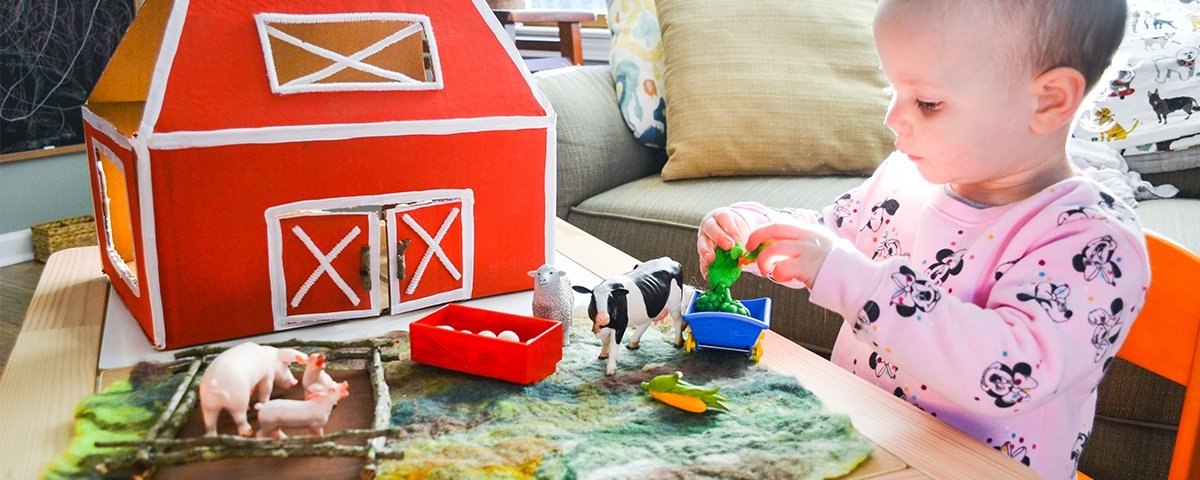
Image credit: https://www.safariltd.com/blogs/toys-that-teach/farm-toob-series-diy-cardboard-barn
Also read: https://craftedcornerhome.com/dinosaur-crafts-for-kids/
14. Cardboard Treasure Chest
A cardboard treasure chest is small, satisfying, and perfect for a birthday or rainy afternoon. We used a small box, cut the lid so it curved slightly, added a paper lock and gold paper coins, and painted the whole thing brown with gold trim.
My daughter hid her best treasures inside. I added a handle made from twisted paper.
The downside is that a curved lid is tricky to cut neatly, so score the cardboard lightly first, bend it slowly, and tape the inside seam before you paint.
Pro Tip: Line the inside with bright paper, because the contrast makes the treasures inside look far more exciting.
Cost: Under $5 / Time: 1 hour / Difficulty: Easy

Image credit: https://theimaginationtree.com/diy-treasure-chest/
15. Cardboard Post Box
A cardboard post box teaches letter writing without anyone noticing it is educational. We cut a letter slot in the front of a tall box, painted it bright red, and added a little flag that lifted when mail arrived.
My kids wrote letters to grandparents, to each other, and to the cat. I made paper stamps and envelopes with them.
The downside is that the slot can tear if letters are pushed through roughly, so reinforce the slot edges with tape and keep the opening wide enough for chunky envelopes.
Pro Tip: Put a small tray inside to catch letters, so they do not fall to the bottom and get forgotten.
Cost: Under $5 / Time: 1 hour / Difficulty: Easy

Image credit: https://tinybeans.com/make-a-diy-mailbox/
16. Cardboard Space Helmet
A cardboard space helmet is a smaller wearable project than the robot costume, and it is easier to fit. We used a medium box, cut a large face window in the front, covered it with clear plastic wrap, and added foil details and a paper antenna on top.
My son wore it for a full space mission around the garden I made sure the face window was generous, because a small window fogs up and limits vision.
The downside is heat and visibility, just like the robot costume, so keep missions short, cut side air holes, and never let a child wear it while climbing or near water.
Pro Tip: Tape the plastic wrap on the outside of the window, so it does not peel off onto a child’s face during play.
Cost: Under $5 / Time: 1 hour / Difficulty: Easy

Image credit: https://rainydaymum.co.uk/junk-model-astronaut-helmet-simple-space-craft-for-kids/
17. Cardboard Mini Golf
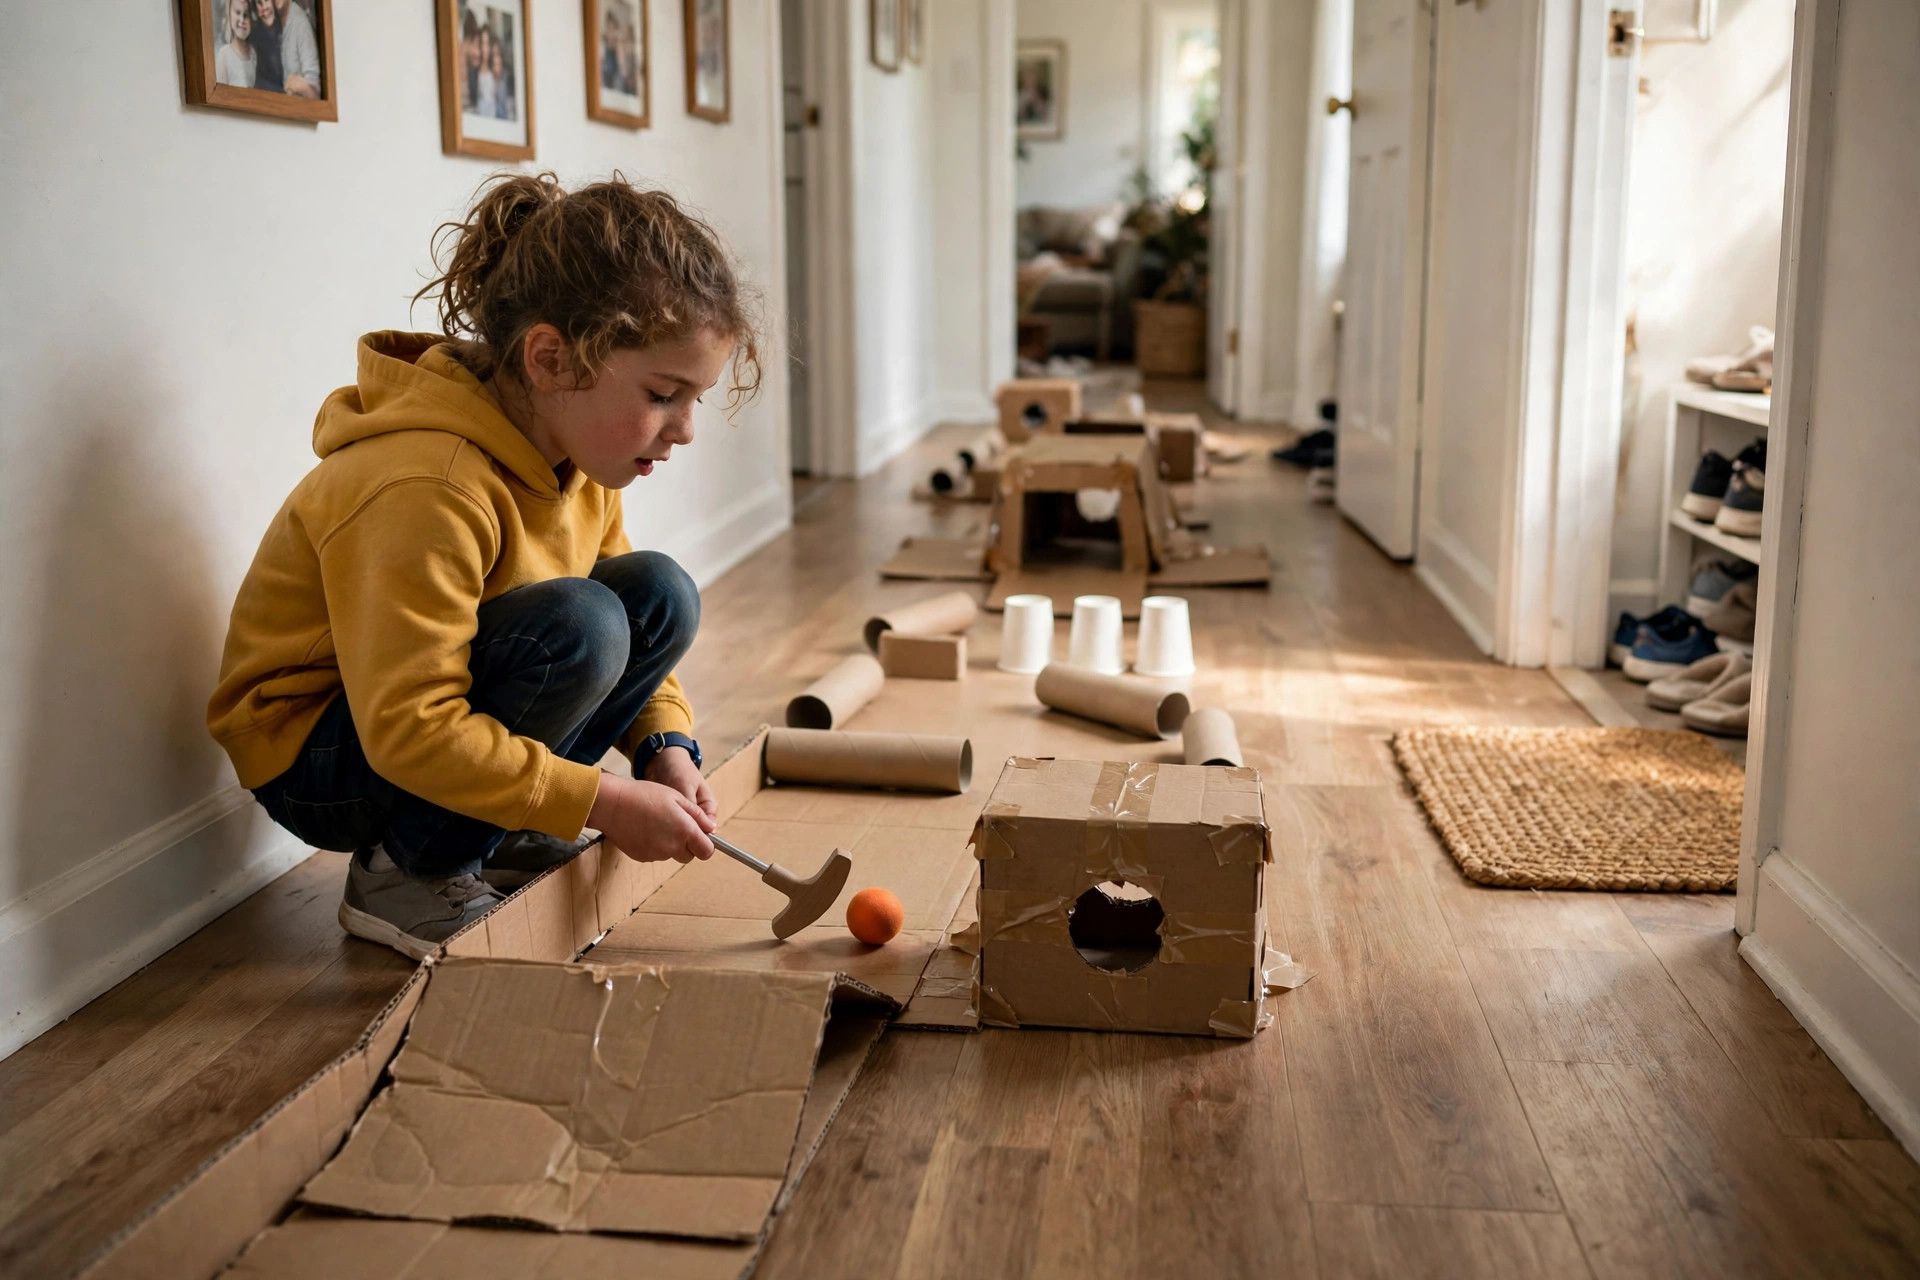
Cardboard mini golf turns a hallway into a proper course, and it is the project my whole family joined in with. We built tunnels from small boxes, ramps from folded cardboard, and obstacles from tubes and cups, then laid the course along our hallway floor.
My kids designed each hole and kept score on a paper chart stuck to the wall.
The downside is that balls roll under furniture constantly, so use soft foam balls, block the gaps under doors with towels, and keep the course away from anything breakable.
Pro Tip: Tape the ramps down firmly, because a ramp that slides mid-putt causes more arguments than any missed shot.
Cost: Under $5 / Time: 1 to 2 hours / Difficulty: Easy
18. Cardboard Birdhouse
A cardboard birdhouse is a gentle project, and it works best as decoration rather than a real outdoor home. We used a small box, cut a round entrance hole, added a pitched roof from folded cardboard, and painted it in soft garden colours.
My daughter painted flowers around the entrance and hung it from a branch in our garden for decoration. I explained honestly that real birds need wood and weatherproofing, so ours stayed as a garden decoration.
The downside is weather. Cardboard softens and collapses in rain, so keep it indoors or under a covered porch, and bring it inside during wet weather if you want it to last.
Pro Tip: Paint it with two coats and let each coat dry fully, because a single thin coat looks patchy on cardboard.
Cost: Under $5 / Time: 1 hour / Difficulty: Easy

Image credit: https://rhythmsofplay.com/diy-upcycled-birdhouse-ornaments/
Comparison Table
| Project | Best for | Cost | Time | Difficulty |
|---|---|---|---|---|
| Box Car | First-time builders | Under $5 | 1 to 2 hours | Easy |
| Castle | Big imaginative play | $5 to $10 | 2 to 3 hours | Medium |
| Puppet Theatre | Storytelling and shows | Under $5 | Under 1 hour | Easy |
| Rocket | Tall-box fans | $5 to $10 | 2 hours | Medium |
| Shop | Pretend play | Under $5 | 1 to 2 hours | Easy |
| Robot Costume | Dress-up parties | $5 to $10 | 2 hours | Medium |
| Maze | Rainy days, crawling play | Under $5 | 1 to 2 hours | Easy |
| Dollhouse | Quiet arranging play | Under $5 | 2 to 3 hours | Medium |
| Guitar | Quick music fun | Under $5 | Under 1 hour | Easy |
| Train | Groups of kids | Under $5 | 1 to 2 hours | Easy |
| Camera | Older kids, pretend photos | Under $5 | 45 minutes | Easy |
| Aquarium | Art and display | $5 to $10 | 1 to 2 hours | Easy |
| Farm | Slow, growing play | Under $5 | 2 hours plus | Easy |
| Treasure Chest | Small gifts and secrets | Under $5 | 1 hour | Easy |
| Post Box | Letter writing | Under $5 | 1 hour | Easy |
| Space Helmet | Dress-up missions | Under $5 | 1 hour | Easy |
| Mini Golf | Whole-family play | Under $5 | 1 to 2 hours | Easy |
| Birdhouse | Garden decoration | Under $5 | 1 hour | Easy |
Mistakes I Made (So You Don’t Have To)
First, I let the kids paint before I had taped the cut edges, and we ended up with paint on rough edges. Now I always tape every edge first, then hand over the paintbrushes.
Second, I built a castle that was too big for the room it had to live in, and we tripped over it for a week. Measure the space before you start, not after you finish.
Third, I used a box that looked clean but had been stored in a damp garage, and the paint went patchy and the cardboard sagged. Check every box is clean and dry before you build.
Fourth, I once left a craft knife on the table while I went to answer the door, and that scared me enough to change our rule completely. Now cutting tools stay in an adult-only box, and cutting happens only with an adult at the table.
Frequently Asked Questions
What age are these projects best for?
Most suit children aged three and up with adult help. Older children aged seven and up can take over more decorating and planning, but cutting stays adult only.
Are cardboard box crafts for kids safe?
Yes, with the rules in this article: adults do all cutting, cut edges are taped smooth, boxes are clean and dry, and wearable projects are used for short sessions with clear vision and breathing space.
How long do cardboard projects last?
Most lasted from a few days to a month. Cars and castles lasted longest with a reinforced base, while wearable costumes wore out fastest, which is fine because they cost almost nothing to rebuild.
What would you do differently next time?
I would start with one medium project instead of three at once, and keep spare tape, paint, and paper plates ready, so we never had to stop halfway to go shopping.
Can I use any cardboard box?
Almost, but skip boxes that held chemicals, strong-smelling food, or anything damp or mouldy. Clean delivery, moving, and cereal boxes are safest.
Final Thoughts
If you have one clean box and an hour to spare, you already have everything you need to start. Pick the car or the guitar for a first project, and let the kids lead the decorating.
The best part was never the finished box itself. It was the afternoon we spent building it together, and the week of play that followed.
Read this next: https://craftedcornerhome.com/paper-plate-crafts-for-kids/