20 DIY Hallway Console Table Ideas That Make an Entryway Feel Finished
My hallway used to be the spot where keys vanished, bags piled up, and the whole house felt unfinished the second you walked in. I tried a store-bought table first, and it wobbled, stuck out too far, and still had nowhere for shoes, so I went looking for diy hallway console table ideas that actually fit a real, narrow hallway.
So I started building my own. These diy hallway console table ideas are the ones I actually built or styled at home, measured against my own walls, and lived with through muddy shoes, school runs, and guests arriving with coats. I picked them because they fit real hallways, not showroom ones, and because each one solves a small daily problem as well as looking good.
If your entry feels bare, start here before you buy anything new. A slim, well-placed console can hold your keys, catch the mail, and give the hallway a finished edge. Related article for more wall storage above a console.
Key Takeaways
- Keep console depth to 10–14 inches in a narrow hallway so the walkway stays clear.
- Standard console height is about 30–34 inches; match it to your mirror or artwork, not to your dining table.
- One tall item, one medium item, and one low tray beats a crowded top every time.
- Wall anchors matter: a floating or top-heavy console must be fixed into studs, not just drywall.
- Leave the lower shelf or floor space for baskets, so shoes and bags have a home.
1. Reclaimed Wood Top on Black Hairpin Legs

I built this one from two reclaimed pine boards, glued and clamped overnight, then sanded to 220 grit and sealed with matte polyurethane. The top is 48 inches long, 12 inches deep, and 1.5 inches thick, which keeps it slim against the wall.
I screwed on four 28-inch black hairpin legs, and I learned the hard way to check the floor first: one leg sat on a rug edge and the whole table rocked until I levelled it. The honest downside is that reclaimed boards can hide old nail holes and uneven edges, so expect extra sanding time.
Pro Tip: Seal the underside too, or the top can cup when hallway humidity changes.
Cost/Time/Difficulty: About $85 / 1 weekend / Easy to moderate.
2. Floating Wall-Mounted Console

For our narrowest hallway, I skipped legs completely and mounted a chunky oak board on a hidden wall cleat. I fixed the cleat into two studs with long screws, then slid the top over it and added two small corbels for extra support and a finished look.
The floor stays completely open, so I can sweep under it and tuck a basket underneath without a fight. The downside is real, though: if you miss the studs, a floating top will sag, so a stud finder is not optional here.
Pro Tip: Mark your stud centres with painter’s tape before you drill anything.
Cost/Time/Difficulty: About $60 / Half a day / Moderate.
3. Farmhouse Console With a Shiplap Back

I framed a simple pine base, added a lower shelf, and fixed vertical shiplap boards to the back panel so the wall behind the console finally looked intentional. I painted the frame soft white and left the top in natural pine for contrast.
My favourite detail is how the shiplap hides scuffs from bags brushing the wall. The downside is dust: those grooves collect it, and a quick wipe-down is a weekly job, not a monthly one, if you want it to stay crisp.
Pro Tip: Paint the shiplap before assembly to avoid brush marks in the grooves.
Cost/Time/Difficulty: About $110 / 1 weekend / Moderate.
4. Live-Edge Walnut Slab Console

I found a walnut slab with one natural edge, flattened it with a router sled, and finished it with hardwax oil so the grain stayed rich without looking plastic. I paired it with simple black steel legs so the wood, not the base, did the talking.
Guests always touch the edge first, and I love that no two slabs look alike. The honest downside is price and weight: a good slab costs more than pine, and you will want a second pair of hands to carry and mount it.
Pro Tip: Test the oil on the underside first to check the colour.
Cost/Time/Difficulty: About $220 / 1 weekend / Moderate to hard.
5. Pallet Wood Console on a Budget

I pulled apart two clean, heat-treated pallets, removed every nail, and joined the best boards into a 42-inch top. I used the rougher boards for a lower shelf, sanded everything well, and stained it in a warm mid-brown.
It cost me almost nothing in lumber, and the mixed grain looks far more expensive than it was. The downside is time: pulling pallets apart, de-nailing, and sorting usable boards took me longer than the actual build.
I also added small felt pads under the legs, because pallet boards can sit slightly uneven on hard floors.
Pro Tip: Only use pallets marked HT (heat-treated), never chemically treated ones.
Cost/Time/Difficulty: About $35 / 1 weekend / Easy to moderate.
6. Industrial Pipe-Frame Console

I built this frame from black iron pipe fittings and flanges, with a thick pine top bolted through the flanges. The whole thing is 48 inches long and feels rock solid, which matters when kids lean on it to pull on shoes.
I love the factory look against a plain wall, and the open frame keeps it from feeling bulky. The downside is that pipe fittings are heavy and pricey, and you must tighten every joint or the frame will slowly twist out of square.
Pro Tip: Assemble the frame loosely first, square it, then tighten in stages.
Cost/Time/Difficulty: About $140 / 1 day / Moderate.
7. Mid-Century Console With Tapered Legs

I cut tapered legs from walnut, splayed them slightly outward, and joined them to a walnut-veneer top with a simple apron. I kept the styling minimal: one vase, one stack of books, and a small bowl for keys.
This is the console I reach for in a hallway that already has a lot going on, because its clean lines calm the space down. The downside is that splayed legs need accurate angles, so measure twice and cut a test leg first.
I also tested the leg angle on scrap wood first, because one wrong cut can waste a whole walnut board.
Pro Tip: Use a taper jig or a simple angled fence for matching legs.
Cost/Time/Difficulty: About $130 / 1 weekend / Moderate.
8. Ten-Inch Narrow Console for Tight Hallways

Our back hallway is only 36 inches wide, so I built a console just 10 inches deep and 36 inches long. It holds keys, sunglasses, and mail, and it leaves a comfortable path even when the front door swings open.
I anchored it to the wall so it cannot tip, and I kept the top almost bare. The downside is obvious: a 10-inch top will not hold a big lamp or a wide basket, so you have to be ruthless about what lives there.
Pro Tip: Use wall space above for a mirror instead of crowding the top.
Cost/Time/Difficulty: About $50 / Half a day / Easy.
9. Whitewashed Coastal Console

I brushed a thinned white wash over pine, wiped it back, and sealed it so the grain still showed through. I paired it with a woven basket underneath and a pale ceramic vase, and the hallway instantly felt lighter.
This is my go-to when a hallway gets little natural light. The downside is that whitewash shows scuffs from shoes and bags faster than a darker stain, so keep a small touch-up pot handy.
I also left the basket half empty on purpose, so there is always room for a bag or a pair of gloves.
Pro Tip: Whitewash in thin coats; you can always add more white.
Cost/Time/Difficulty: About $70 / 1 day / Easy.
10. Dark-Stained Console With Brass Accents

I stained a pine top in dark walnut, added brass cup pulls to two small drawers, and finished the legs in matte black. Against a light wall, the dark top grounds the hallway and makes brass and greenery pop.
The drawers are the real win here: sunglasses, dog leads, and spare keys finally disappear. The downside is that dark stain shows dust and fingerprints, so it needs a quick wipe more often than I expected.
I also keep a small tray on top for sunglasses, so the drawers stay for things I use less often.
Pro Tip: Condition pine before staining to avoid blotchy patches.
Cost/Time/Difficulty: About $120 / 1 weekend / Moderate.
11. Crate and Cubby Storage Console
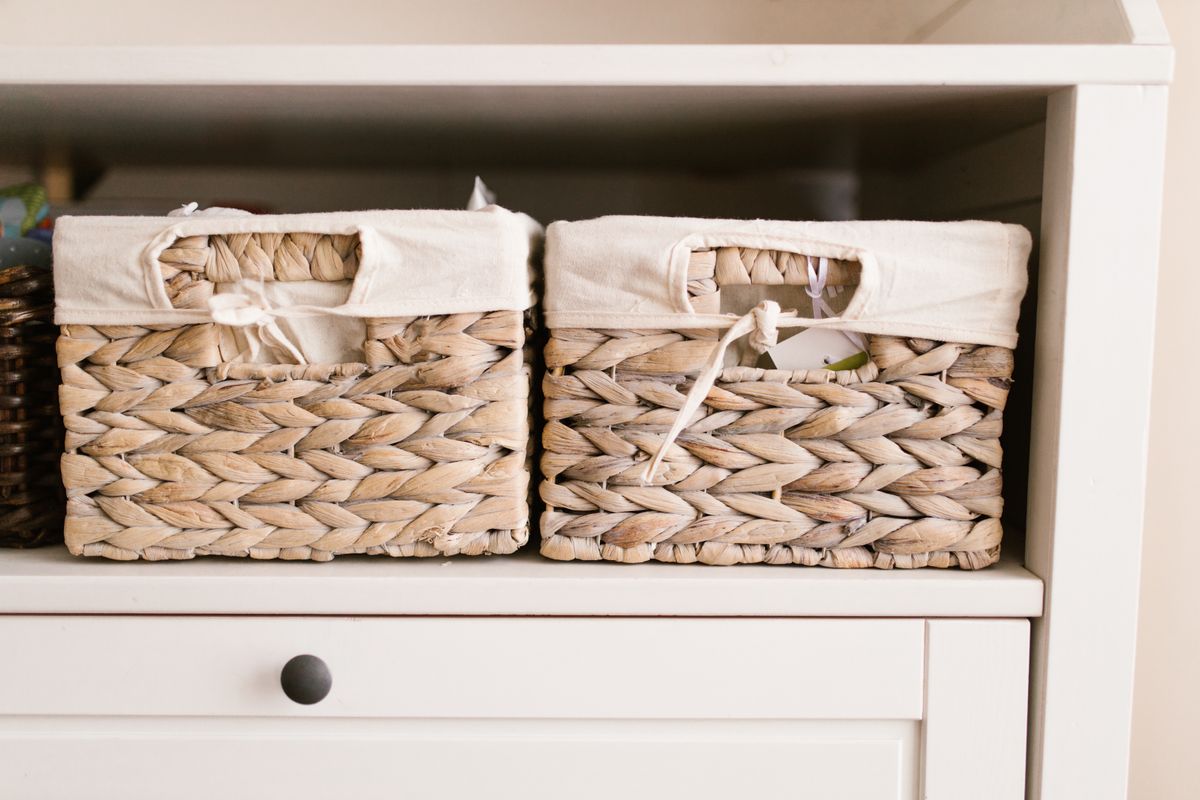
I stacked three wooden crates on their sides, screwed them together, and topped them with a single pine board. Each cubby holds a labelled basket: one for hats, one for gloves, and one for the dog’s things.
My kids actually use this one, because every basket has a clear job. The downside is that open cubbies can look messy fast if baskets are not returned, so I keep one spare basket for overflow.
I also screwed a thin back board behind the crates, so small things cannot slip out the back.
Pro Tip: Label baskets on the front, not the top, so you can read them standing up.
Cost/Time/Difficulty: About $65 / Half a day / Easy.
12. Old Door Turned Console Top

I rescued a solid interior door, cut it down to 54 inches, and mounted it on simple trestle-style legs. I filled the old hinge marks, sanded the panels smooth, and painted the whole top in a soft sage green.
The panelled detail gives it character no plain board can match. The downside is weight and prep: an old door is heavy, and filling, sanding, and priming took me a full extra afternoon.
I also sealed the cut ends twice, because old door edges drink up paint and finish unevenly.
Pro Tip: Check for lead paint on very old doors before sanding.
Cost/Time/Difficulty: About $75 / 1 weekend / Moderate.
13. Two-Tier Console With a Lower Shelf
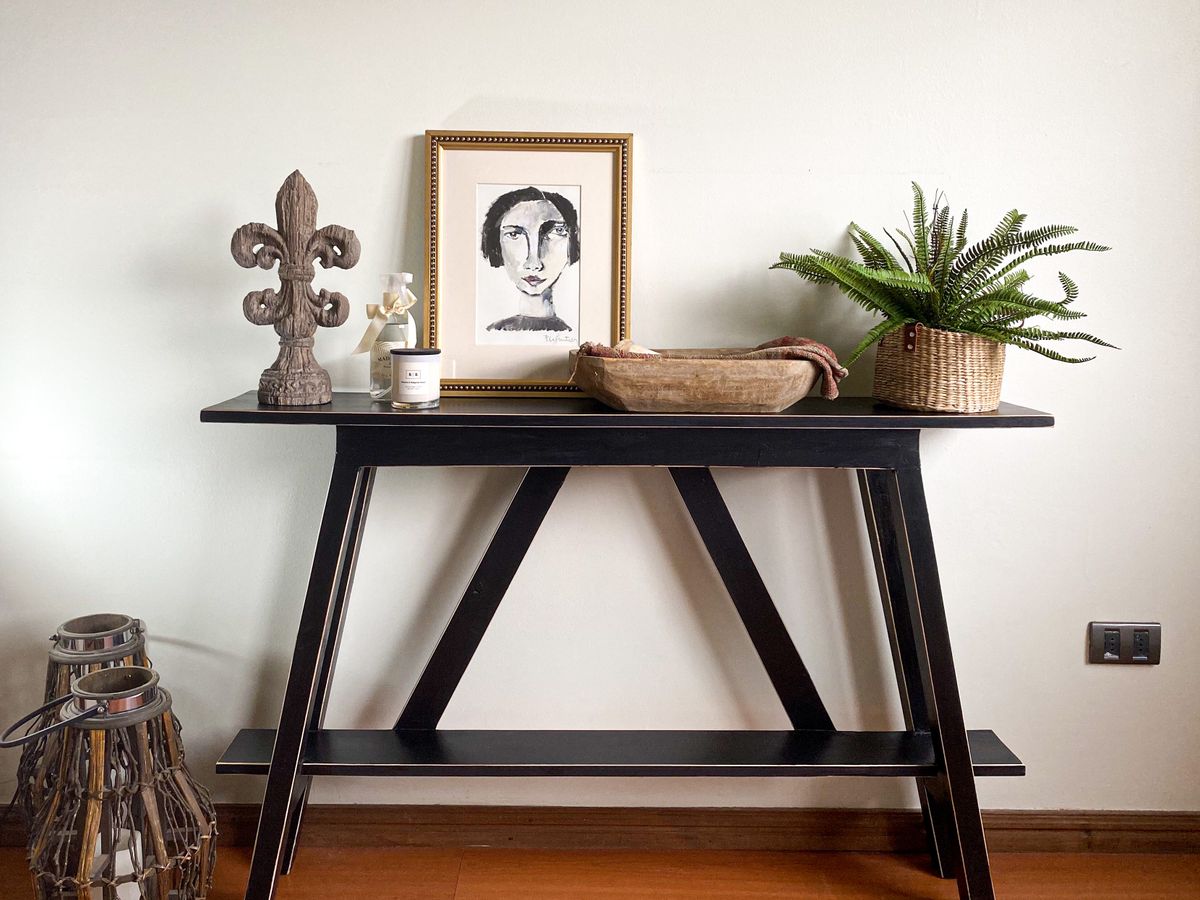
I built a classic two-tier console: a top at 32 inches and a lower shelf about 10 inches off the floor. The top holds keys and a lamp, while the lower shelf holds two baskets and a pair of everyday shoes.
This is the most practical shape I have made, because it doubles usable space without widening the footprint. The downside is that the lower shelf collects clutter if you do not give it a rule, so mine is baskets only, never loose shoes. Also read if you want greenery on that lower shelf.
Pro Tip: Leave at least 18 inches between shelves for tall baskets.
Cost/Time/Difficulty: About $95 / 1 weekend / Easy to moderate.
14. Console With Hooks and a Hall-Tree Feel
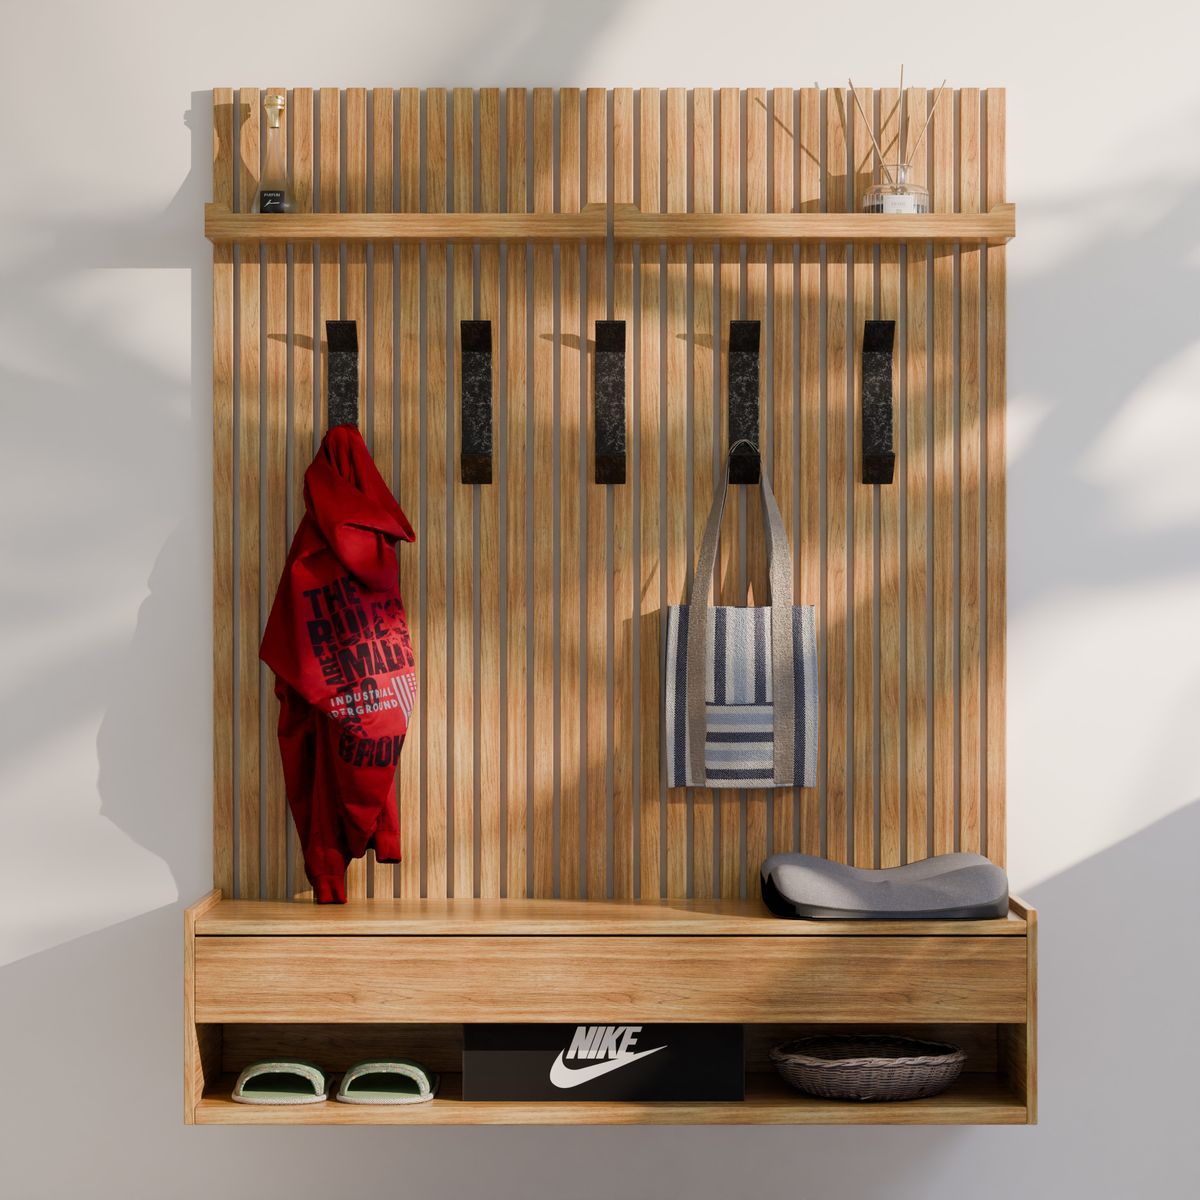
I added a back board to a low console and fixed five sturdy hooks at coat height, with a small shelf above for hats. It works like a hall tree but takes up far less floor space than a full bench unit.
Coats finally stopped landing on the console top, which was my whole goal. The downside is that hooks invite overloading, so I limit each hook to one coat and move out-of-season coats elsewhere.
I also added a small tray on the console top for keys, so coats and keys never compete for space.
Pro Tip: Fix hooks into the back board’s framing, not just the thin panel.
Cost/Time/Difficulty: About $90 / 1 day / Easy to moderate.
15. Thrifted Dresser Turned Entry Console

I found a short, solid dresser at a thrift shop, removed the top drawer for an open display cubby, and painted the body in warm cream. The remaining drawers now hide chargers, tape, and all the small things a hallway collects.
It feels like furniture with a past, and the closed storage keeps the entry calm. The downside is depth: most dressers are 16–18 inches deep, so measure your hallway before you fall in love with one.
I also lined the open cubby with peel-and-stick paper, which hides old scuffs inside the drawer space.
Pro Tip: Replace wobbly drawer runners before you paint, not after.
Cost/Time/Difficulty: About $80 / 1 weekend / Moderate.
16. Marble-Look Console Top

I used a marble-look laminate over plywood for the top, edged it with solid oak strips, and set it on slim black legs. It gives the hallway a polished, stone-like surface without the weight or cost of real marble.
Spills wipe off easily, which matters by the front door. The honest downside is the edge: if the oak edging is not glued and clamped well, the laminate seam will show, so take your time there.
I also used soft pads under the legs, because the slim black legs can mark a hard hallway floor.
Pro Tip: Order the laminate slightly oversized and trim it flush with a router.
Cost/Time/Difficulty: About $105 / 1 day / Moderate.
17. Light Oak Scandinavian Console
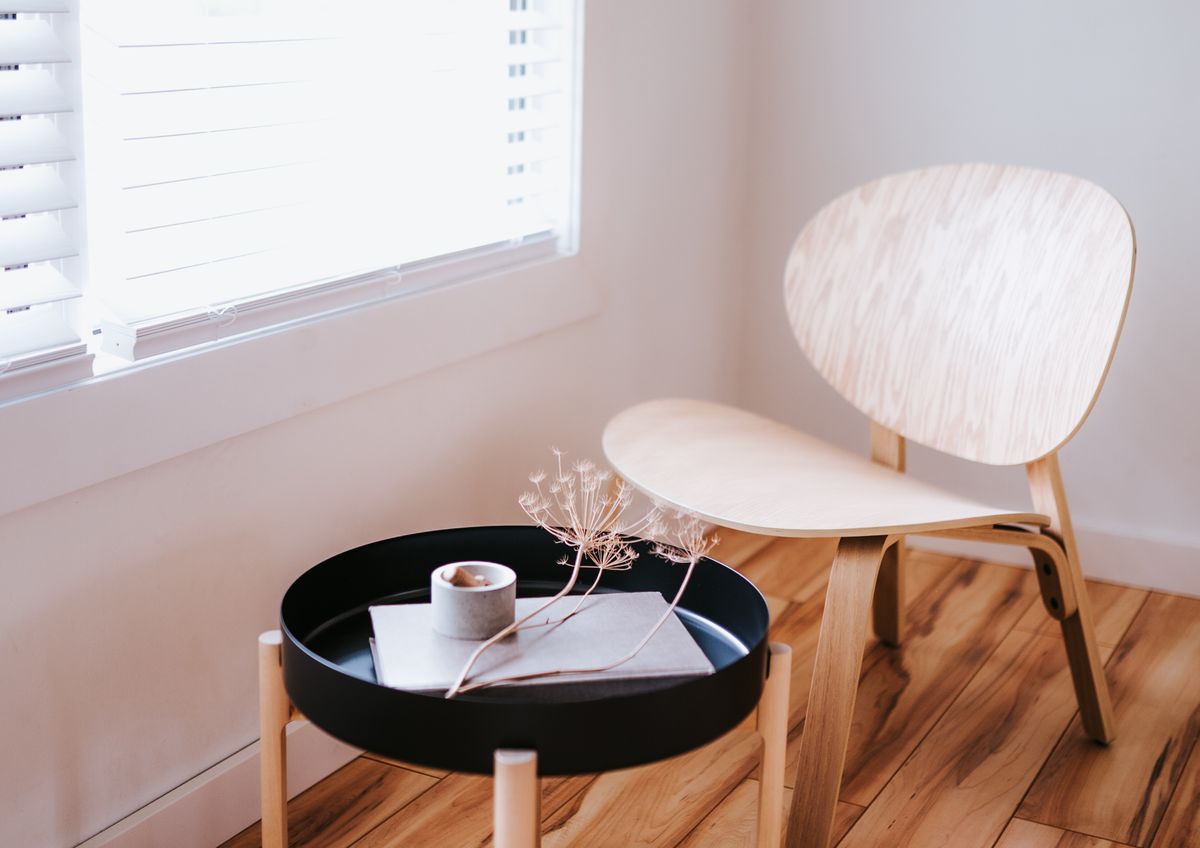
I kept this build deliberately plain: light oak top, pale legs, no extra trim, and a single drawer for keys. I finished it with clear matte oil so the oak stayed pale instead of turning yellow.
In a small, dark hallway, this is the console that makes the space feel bigger rather than busier. The downside is that pale oak marks easily, so coasters and a tray are not optional if you set drinks down here.
I also kept the drawer front plain and handle-free, so the whole console stays calm and uncluttered.
Pro Tip: Choose a matte, non-yellowing finish to keep oak pale.
Cost/Time/Difficulty: About $115 / 1 weekend / Easy to moderate.
18. Boho Console With Woven Texture

I added woven cane panels to the front of a simple pine console and styled it with a rattan tray, a terracotta pot, and dried grasses. The texture does the decorating, so the top can stay simple.
I love how warm this one feels against white walls. The downside is that cane panels are delicate: a hard knock from a bag can dent them, so I keep this console in our wider hallway, not the tight back entry.
I also used a low woven tray for keys, which echoes the cane panels without adding another pattern.
Pro Tip: Soak cane webbing before fitting so it tightens as it dries.
Cost/Time/Difficulty: About $100 / 1 weekend / Moderate.
19. Mirror-and-Basket Entry Console

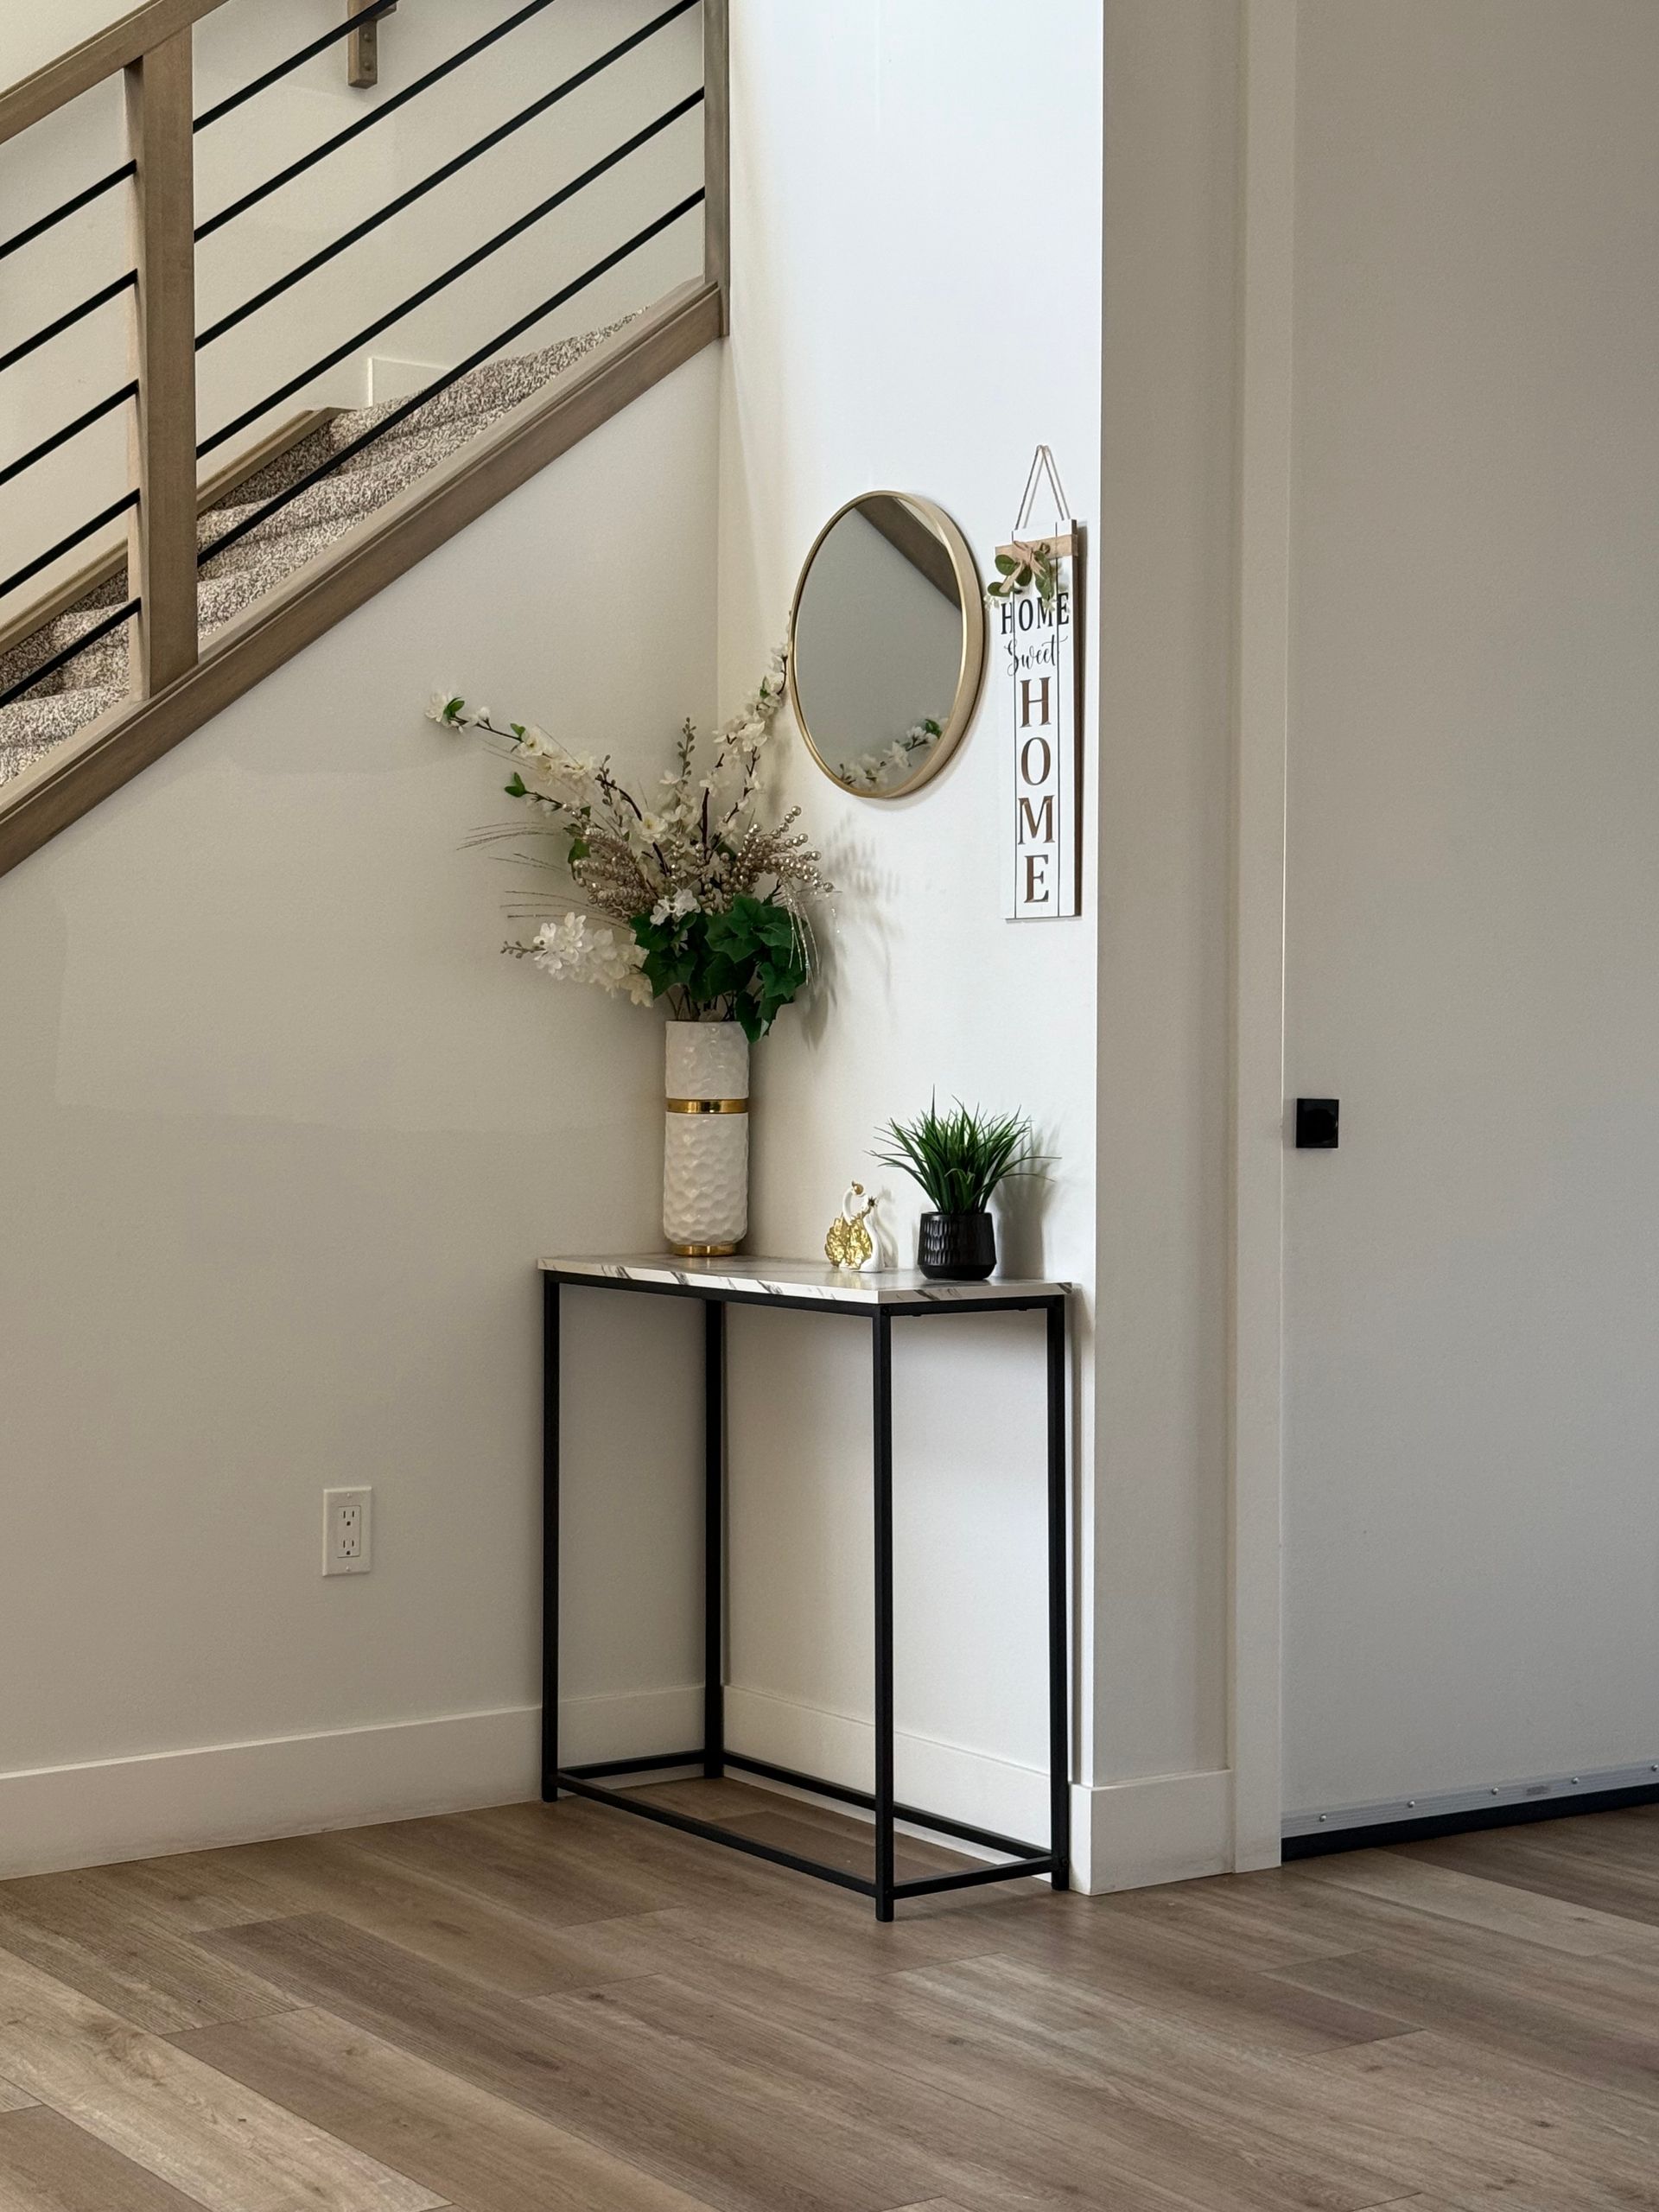
I paired a simple pine console with a round mirror hung two-thirds as wide as the top, and two matching baskets underneath. The mirror bounces light down the hallway, and the baskets hide shoes without a closed cabinet.
This is the setup I recommend first to friends, because it looks finished with very little effort. The downside is mirror placement: hang it too high and it reflects the ceiling, not the room, so check it at eye level.
I also keep a small dish by the mirror for sunglasses, so I never leave home without them.
Pro Tip: Hang the mirror so its centre sits at about eye level.
Cost/Time/Difficulty: About $85 / Half a day / Easy.
20. Slim Behind-the-Sofa Console for a Hallway Wall

When our hallway wall ran straight into the living room, I built a 12-inch-deep console to sit behind the sofa instead of against a blank wall. It holds a lamp, books, and a charging tray, and it defines the hallway edge.
It turned a walk-through space into a real room boundary. The downside is access: anything stored on the lower shelf is harder to reach behind a sofa, so I keep that shelf for books only.
Pro Tip: Add a power strip inside the console for lamps and chargers.
Cost/Time/Difficulty: About $70 / 1 day / Easy.
Comparison Table: Diy Hallway Console Table Ideas at a Glance
| Idea | Best For | Approx. Cost | Build Time |
|---|---|---|---|
| Reclaimed wood and hairpin legs | Warm, rustic entries | $85 | 1 weekend |
| Floating console | Very narrow halls | $60 | Half a day |
| Farmhouse shiplap back | Plain walls | $110 | 1 weekend |
| Live-edge walnut | A statement piece | $220 | 1 weekend |
| Pallet wood | Tight budgets | $35 | 1 weekend |
| Industrial pipe frame | Loft-style homes | $140 | 1 day |
| Mid-century tapered legs | Clean, calm halls | $130 | 1 weekend |
| Ten-inch narrow console | Tight hallways | $50 | Half a day |
| Whitewashed coastal | Dark hallways | $70 | 1 day |
| Dark stain and brass | Light walls | $120 | 1 weekend |
| Crate and cubby storage | Family entries | $65 | Half a day |
| Old door top | Character on a budget | $75 | 1 weekend |
| Two-tier console | Everyday practicality | $95 | 1 weekend |
| Hooks and hall-tree feel | Coat chaos | $90 | 1 day |
| Thrifted dresser | Closed storage | $80 | 1 weekend |
| Marble-look top | Polished entries | $105 | 1 day |
| Light oak Scandinavian | Small, pale halls | $115 | 1 weekend |
| Boho woven texture | Warm, relaxed halls | $100 | 1 weekend |
| Mirror and baskets | Quick finished look | $85 | Half a day |
| Behind-the-sofa console | Open-plan halls | $70 | 1 day |
Mistakes I Made / What I Learned the Hard Way
First, I built a console too deep for the hallway and spent a month bumping into it with bags. Measure the walkway with the front door open, not just the empty wall, and leave at least 30 inches clear for passing.
Second, I skipped wall anchors on a top-heavy console, and it leaned forward the first time a child pulled on a drawer. Now I anchor every console, even a light one, into a stud or with a proper wall fixing.
Third, I styled the top beautifully and forgot daily life: keys, mail, and sunglasses had nowhere to go, so they landed on top anyway. Give every daily item a tray, hook, or basket before you add a single vase.
Fourth, I chose a finish for looks alone and regretted it within weeks. A pale top near the door needs a hard-wearing seal, or wet bags and muddy hands will mark it fast.
Frequently Asked Questions
How deep should a hallway console table be? In most hallways, 10–14 inches is ideal. Go deeper only if you have at least 36 inches of clear walkway left after the table is in place.
What height works best for a diy hallway console table? About 30–34 inches suits most entries. Match it to the mirror or artwork above it, and keep the top low enough to set keys down without reaching up.
Can I build a console table if I am a beginner? Yes, if you start with a simple top-and-legs build or a crate console. Floating consoles and live-edge slabs need more accurate measuring, drilling, and finishing, so save those for a second project.
How do I keep a console table from looking cluttered? Limit the top to three groups: something tall, something medium, and a low tray for daily items. Store the rest in baskets or drawers below, and leave some empty surface showing.
Should a console table be anchored to the wall? Yes, especially in homes with children or pets, and always for floating designs. A wall anchor stops tipping and keeps a narrow table steady when drawers or hooks are used.
Final Thoughts
These diy hallway console table ideas all started the same way for me: a bare wall, a pile of keys, and a hallway that did not feel like part of the home. The best one for you is not the prettiest photo, it is the one that fits your wall, your walkway, and your daily routine.
Start slim, anchor it well, and give every everyday item a home before you style the top. Once that is done, the hallway finally feels finished, and walking in the front door feels a little calmer every single day. Read this next for a small project to style on top.