Fall Leaf Crafts for Adults That Are Actually Worth Your Time
I usually think of fall crafts as something I plan when the weather starts cooling down and the leaves begin changing. But I’ve found that the best projects often start much more simply: I notice a few beautiful leaves outside and wonder what I can actually do with them.
Real leaves can be surprisingly useful for seasonal crafting. Their natural shapes, colors, and vein patterns already give a project plenty of character, so I don’t need expensive supplies or advanced crafting skills.
The only challenge is choosing projects that are practical. I’ve included 15 fall leaf crafts for adults that I can realistically finish without turning my dining table into a permanent craft station. Some take less than 30 minutes, while others are better for a relaxed afternoon.
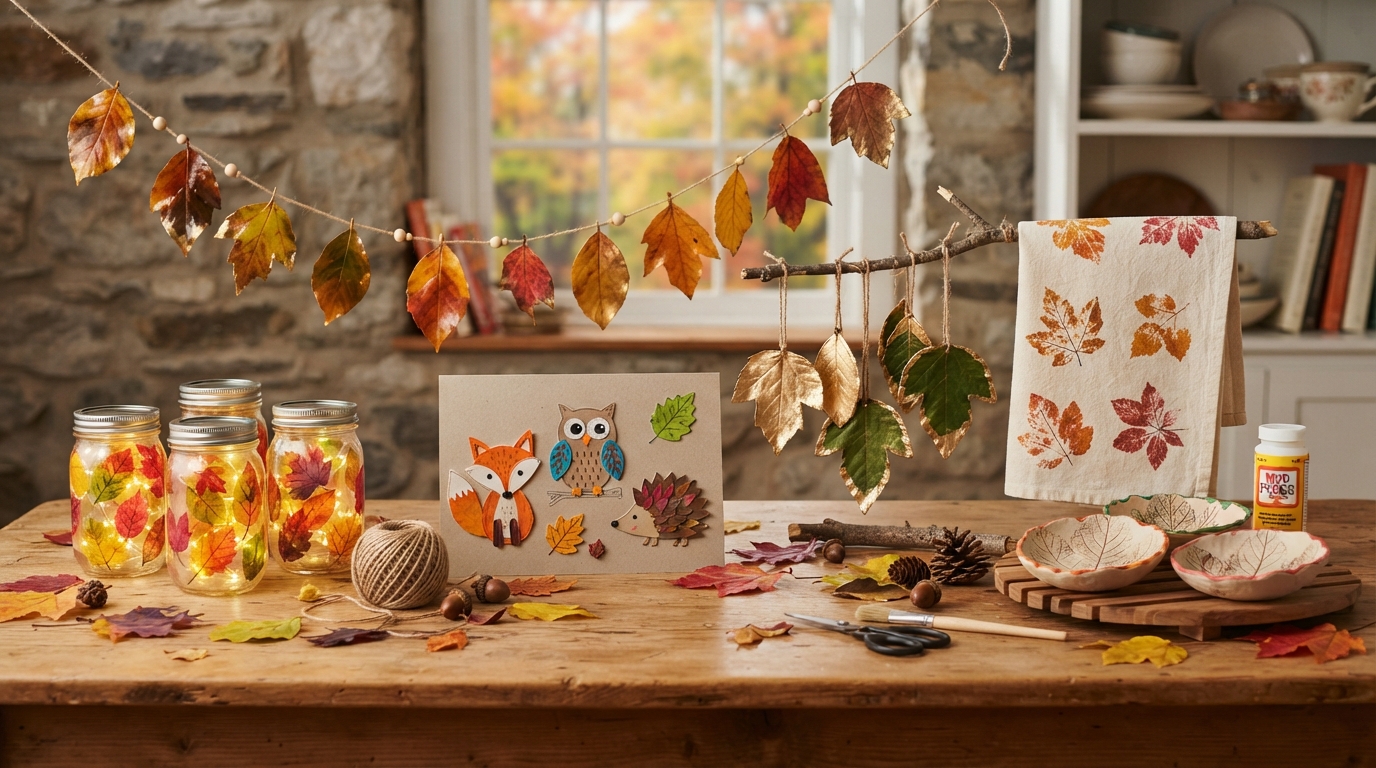
I can use pressed, fresh, or dried leaves to make bookmarks, tote bags, garlands, coasters, wall art, wreaths, table decorations, candle jars, journals, artwork, sachets, greeting cards, soap, and resin ornaments. Most projects need inexpensive supplies such as cardstock, fabric paint, Mod Podge, twine, glue, or a few basic craft tools.
Save this for later
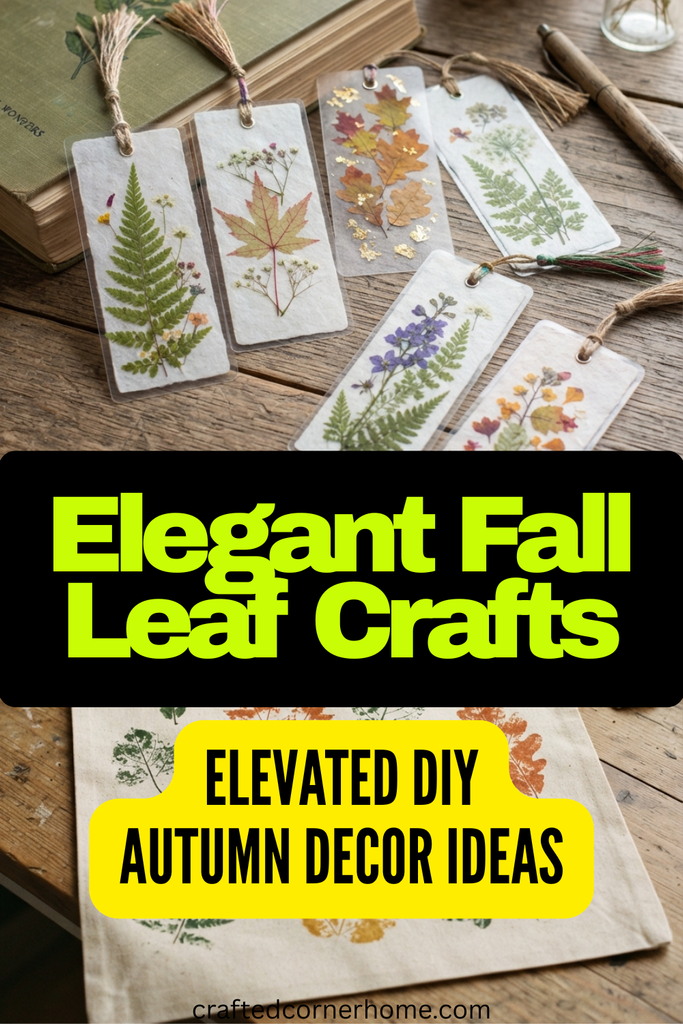
Table of Contents
I’ve grouped these fall leaf crafts for adults by how I would use them: quick projects, home decor, relaxing evening crafts, and handmade gifts. I’ve also included simple instructions and practical tips for keeping leaves from cracking, curling, or losing their color.
Key Takeaways
- I can turn ordinary fallen leaves into useful seasonal decor and handmade gifts.
- Pressing leaves for at least 48 hours gives me flatter material for many projects.
- Thin layers of sealer generally work better than one heavy coat.
- Maple, oak, and sweetgum leaves are useful choices because their shapes and vein patterns work well for crafts.
- I can substitute faux leaves for projects such as wreaths and garlands when I want something more durable.
- I always test paint, adhesive, wax, or resin on a spare leaf before starting a larger project.
Related article: 19+ Creative Valentine’s Day Crafts for Adults
You Don’t Need to Be Crafty for This
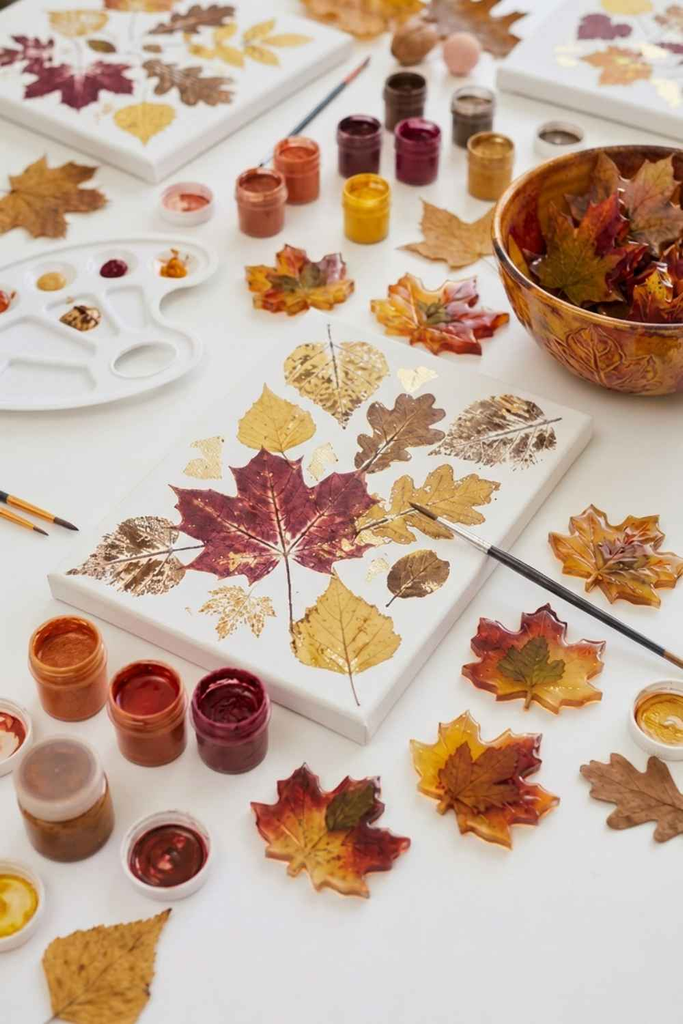
I know some craft tutorials look much easier in photographs than they feel when I actually sit down to make them. That is especially true when I’m working with natural leaves because they can curl, tear, or break unexpectedly.
That’s why I prefer projects where small imperfections don’t ruin the finished piece. Natural materials already have variations in color and shape, so I don’t need every leaf to look identical.
For most of these projects, I only need basic supplies and a little patience. If I can press a leaf under a heavy book, use scissors, and apply glue carefully, I can handle many of these ideas.
I also like that collecting leaves can make the project feel more personal. Instead of buying every material, I can gather interesting shapes from my own yard or a permitted outdoor area.
Fall Leaf Crafts for Adults You Can Finish in Under 30 Minutes
1. Pressed Leaf Bookmarks
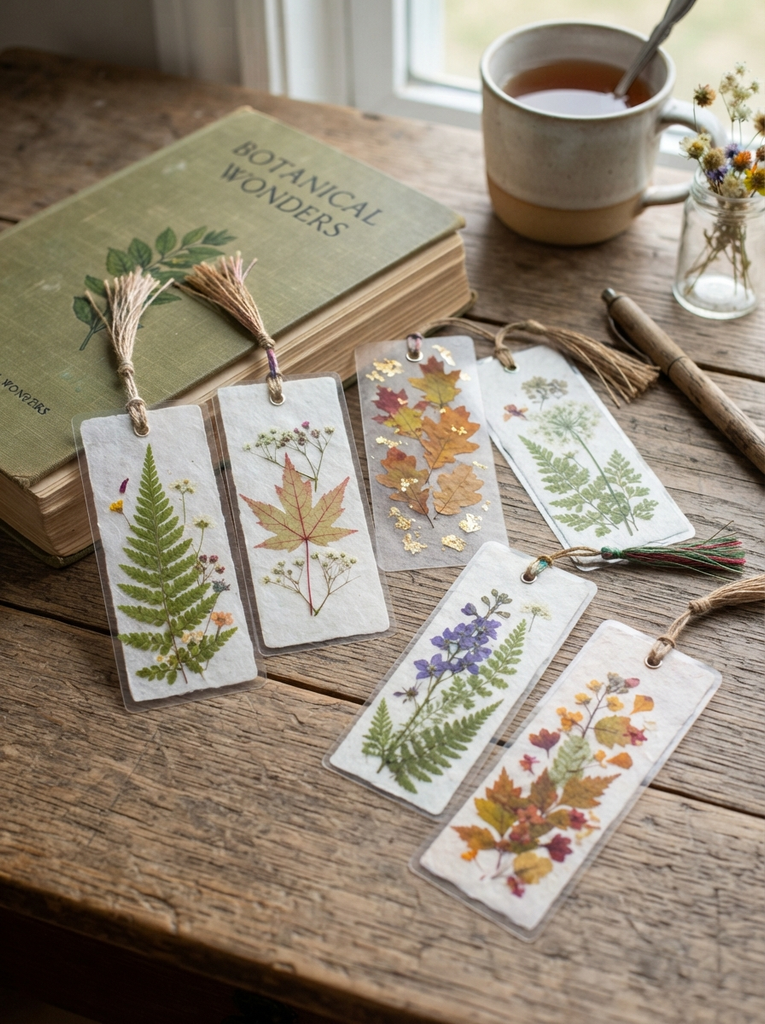
When I want a quick fall craft, pressed leaf bookmarks are one of the easiest options. They are useful rather than simply decorative, which makes the finished project feel worthwhile.
What you’ll need:
- 2–3 pressed leaves
- Clear cardstock or laminating sheets
- Scissors
- Small hole punch
- Ribbon or decorative string
How to make it:
- I press the leaves beneath heavy books for at least 48 hours.
- I place a leaf between clear cardstock sheets or laminating material.
- I seal the edges carefully so moisture and air cannot easily reach the leaf.
- I trim the material into a long bookmark shape.
- I punch a small hole near the top and add ribbon or string.
Pro Tip: I press leaves before they become completely brittle. Leaves that are already extremely dry can crack much more easily during trimming and sealing.
Make it yours: I like combining two small leaves or adding a narrow strip of decorative paper behind the leaf for more visual interest.
2. Leaf Stamped Tote Bag
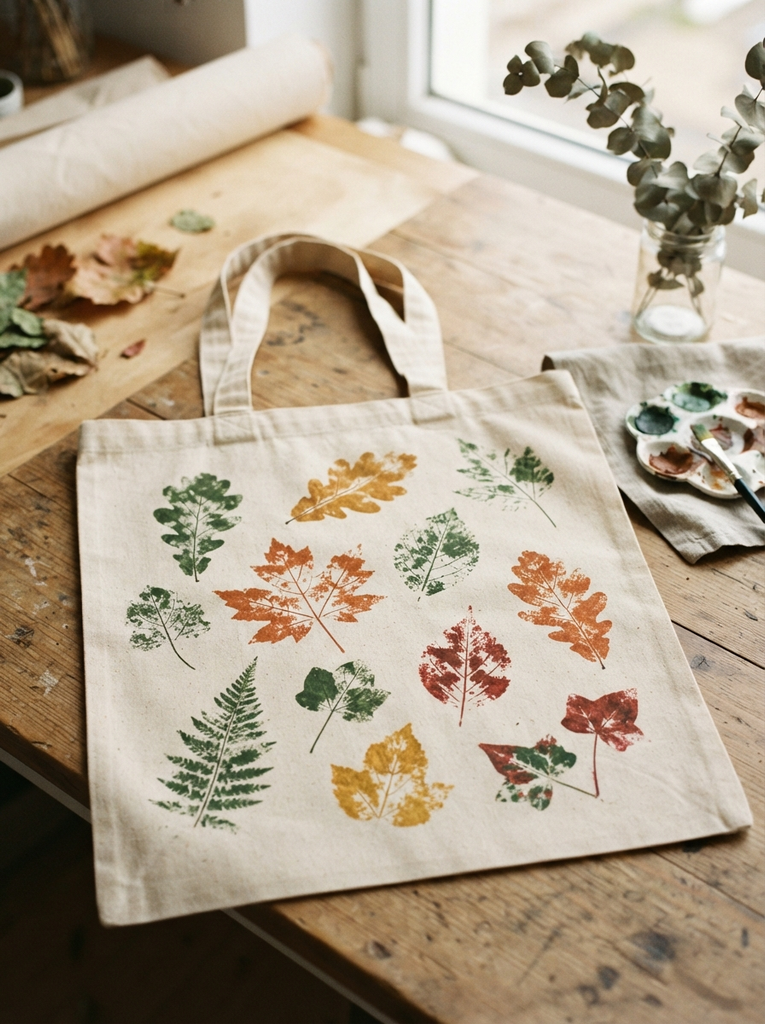
A plain canvas tote gives me a great surface for experimenting with natural leaf prints. I can create a simple botanical design without needing to draw anything myself.
What you’ll need:
- Plain canvas tote bag
- Fabric paint
- Sturdy leaves with noticeable veins
- Foam brush
- Cardboard
How to make it:
- I place cardboard inside the tote to prevent paint from transferring to the other side.
- I brush a light, even layer of fabric paint onto the textured underside of a leaf.
- I position the leaf carefully on the tote.
- I press firmly across the entire leaf.
- I lift it slowly and allow the print to dry according to the paint instructions.
Pro Tip: I avoid soaking the leaf in paint. Too much paint fills the natural veins and leaves me with a blurry shape instead of a detailed print.
Make it yours: I can combine warm autumn shades such as rust, mustard, brown, or muted green to create a layered seasonal pattern.
3. Simple Leaf Garland
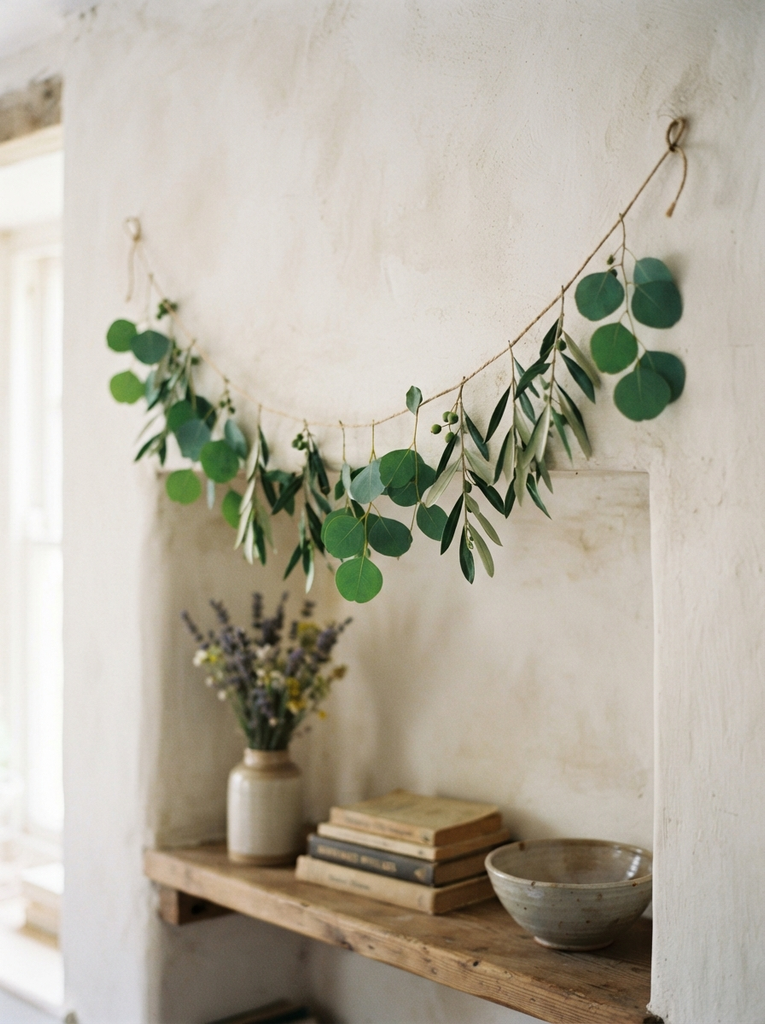
I like leaf garlands because they add seasonal character without requiring a lot of materials. They work around a mantel, shelf, window, entryway, or party table.
What you’ll need:
- 8–10 pressed leaves
- Twine
- Hot glue gun
- Scissors
How to make it:
- I cut the twine to the length I need.
- I arrange my leaves first so I can see the spacing.
- I place a small amount of hot glue near each leaf stem.
- I attach the leaves to the twine one at a time.
- I let the glue cool before moving the garland.
Pro Tip: I mix large and small leaves rather than lining up identical shapes. The uneven arrangement usually looks more natural.
Make it yours: I can tuck small dried flowers, seed pods, or pieces of raffia between the leaves for additional texture.
4. Mod Podge Leaf Coasters
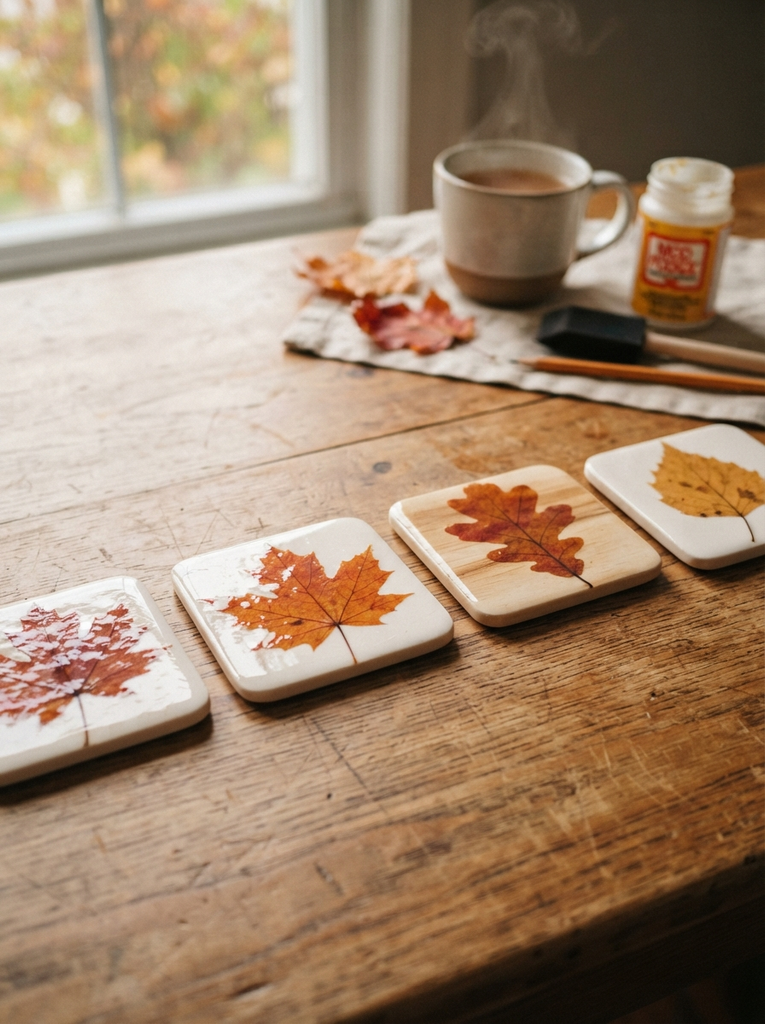
These coasters are useful when I want fall decor that can stay on the table rather than simply hanging on the wall. I can make a coordinated set using leaves from the same season.
What you’ll need:
- Cork or unfinished wood coasters
- Small pressed leaves
- Mod Podge
- Foam brush
How to make it:
- I brush a thin layer of Mod Podge over the coaster.
- I position the pressed leaf before the adhesive begins drying.
- I smooth the leaf gently from the center outward.
- I apply another thin coat over the leaf.
- Once dry, I add additional protective coats as needed.
Pro Tip: I prefer several light coats to one thick application. Heavy coats can create bubbles or make the surface look uneven.
Make it yours: I can coordinate the leaf colors with my dining room, kitchen, or fall table setting instead of using random colors.
Fall Leaf Crafts for Adults That Double as Home Decor
5. Framed Pressed Leaf Art
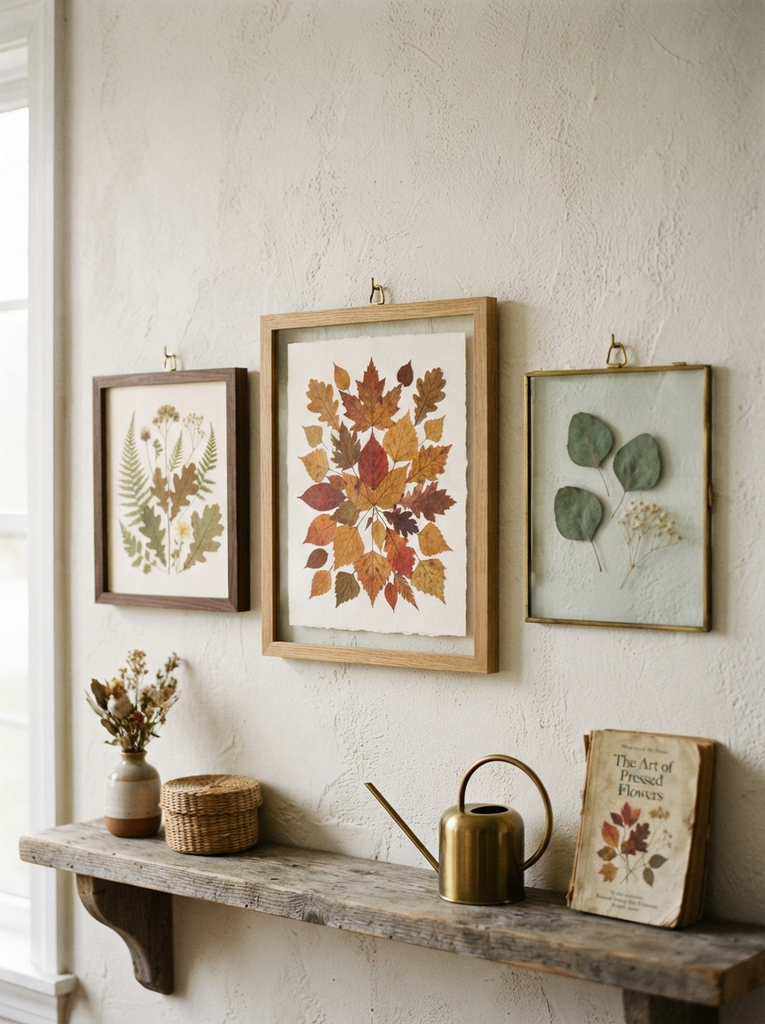
Pressed leaf art is one of my favorite ways to bring fall indoors without using traditional seasonal decorations. A simple frame can make even a few leaves look intentional.
What you’ll need:
- 3–4 pressed leaves
- Frame with a mat
- Acid-free adhesive
- Tweezers
How to make it:
- I arrange the leaves on the mat before using any glue.
- I experiment with spacing until the composition looks balanced.
- I add tiny amounts of adhesive to the back of each leaf.
- I use tweezers to make small placement adjustments.
- I let everything dry before assembling the frame.
Pro Tip: I keep pressed-leaf artwork away from strong direct sunlight. Light exposure can gradually fade natural pigments, so indirect light is a better choice for long-term display.
Make it yours: I can use one large statement leaf in the center instead of several smaller leaves for a cleaner, more modern appearance.
6. Natural Leaf Wreath
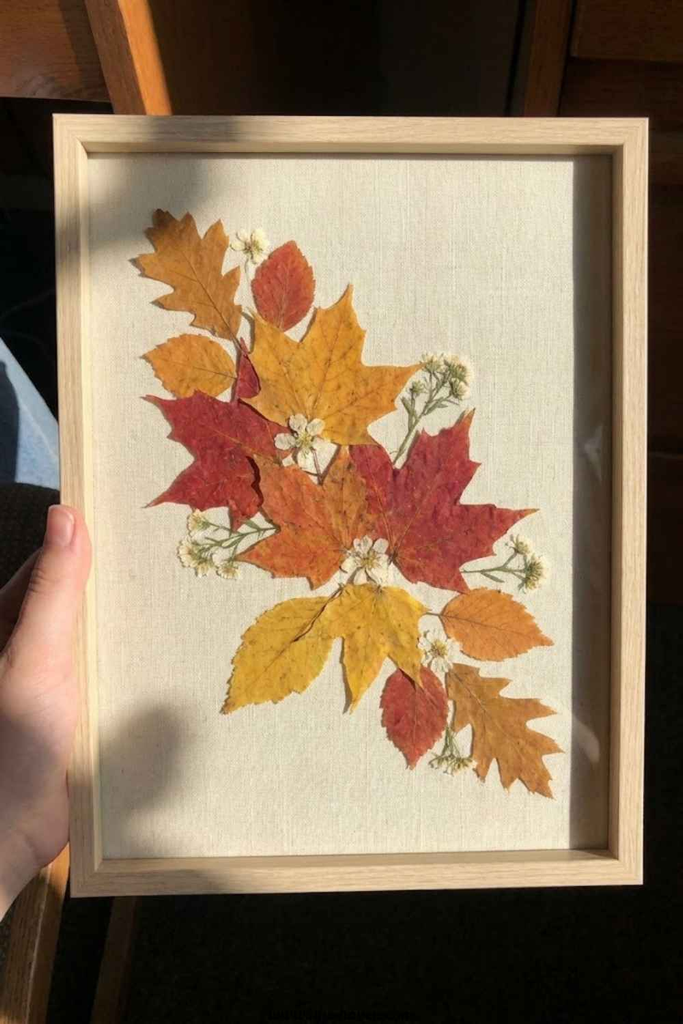
A leaf wreath can look elaborate, but I find the basic construction fairly straightforward. It’s especially useful when I want an autumn decoration for my front door or an interior wall.
What you’ll need:
- Grapevine or foam wreath form
- Assorted dried leaves
- Hot glue gun
- Ribbon
How to make it:
- I choose one starting point on the wreath.
- I begin attaching leaves in the same direction around the base.
- I overlap each leaf slightly with the previous one.
- I continue until most of the base is covered.
- I fill noticeable gaps with smaller leaves.
- I finish with a ribbon for hanging.
Pro Tip: I keep the leaves moving in one general direction. This gives the wreath a cleaner flow and prevents the arrangement from looking random.
Make it yours: I can add pinecones, dried berries, small twigs, or a simple fabric bow for more dimension.
7. Wax Dipped Leaf Centerpiece Bowl
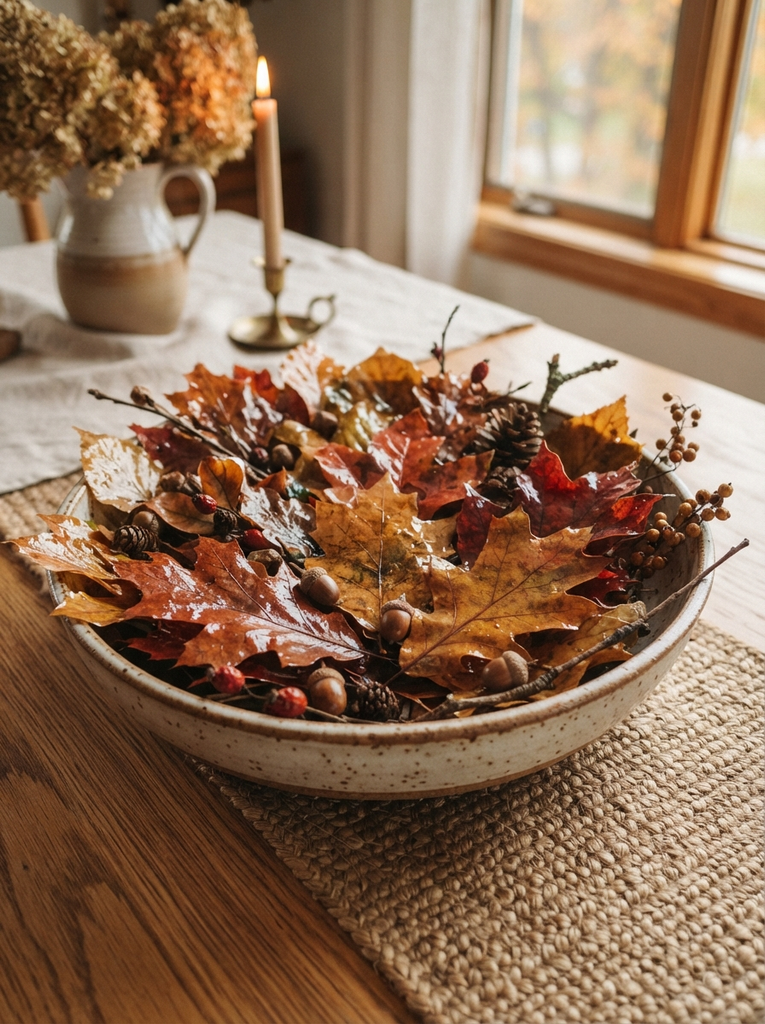
This project gives me a different way to preserve the appearance of fresh leaves for seasonal decorating. The finished leaves can be arranged in a decorative bowl or scattered across a table.
What you’ll need:
- Fresh, sturdy leaves
- Paraffin wax
- Tongs
- Parchment paper
How to make it:
- I melt the wax carefully using a double-boiler setup.
- I hold each leaf with tongs and briefly dip it into the melted wax.
- I lift the leaf out and allow excess wax to drip away.
- I place the coated leaf on parchment paper to harden.
- Once several leaves are ready, I arrange them in a bowl or across the table.
Pro Tip: I keep the wax coating light. A thick layer can make the leaves stiff, heavy, and more likely to break.
Make it yours: I can combine wax-coated leaves with pinecones or other dry natural materials to create a fuller centerpiece.
8. Leaf Print Table Runner
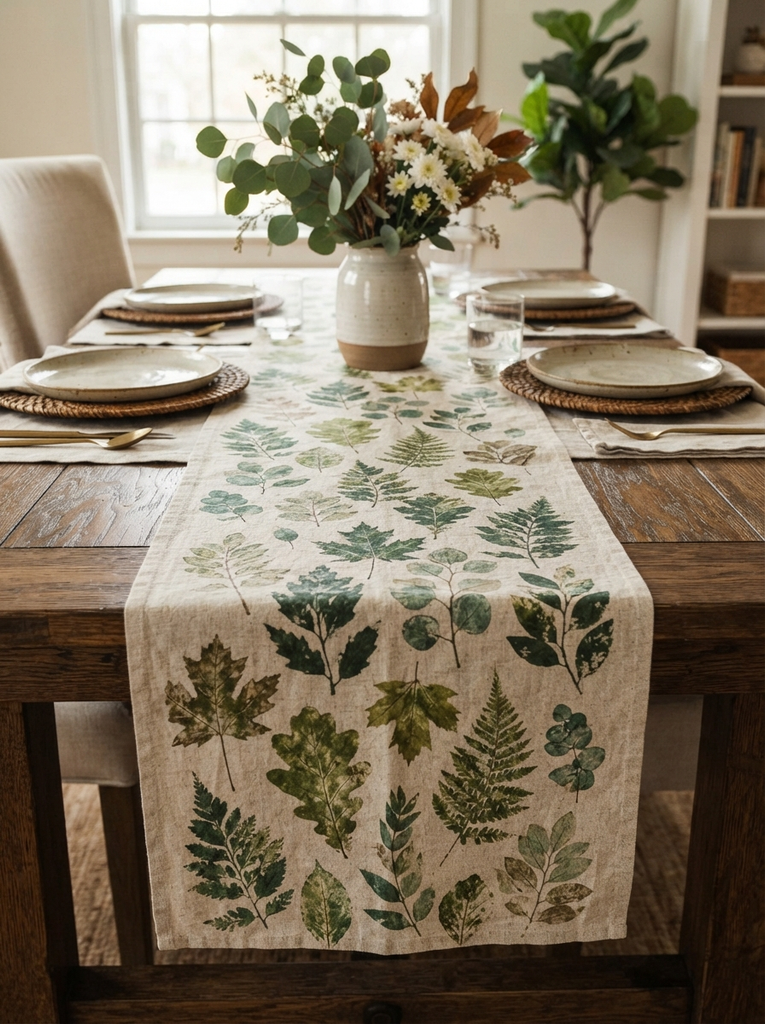
A leaf-printed runner gives me a simple way to change the look of a dining table for fall. I can cover the entire runner or keep the design much more understated.
What you’ll need:
- Plain cotton or linen table runner
- Fabric paint
- Leaves with defined veins
- Foam brush
How to make it:
- I spread the runner over a protected, flat surface.
- I apply a thin layer of fabric paint to the underside of a leaf.
- I press the leaf onto the fabric.
- I lift it carefully to reveal the print.
- I repeat the pattern until I’m happy with the arrangement.
- I allow the paint to dry and heat-set it if the product instructions require it.
Pro Tip: I always make a test print on scrap fabric first. This helps me determine how much paint produces a clear image before I work on the finished runner.
Make it yours: I can place leaf prints only along the two ends of the runner instead of covering the entire surface.
Also read: 23+ Creative Bunny Craft Ideas for Your Home
Fall Leaf Crafts for Adults for a Cozy Night In
9. Leaf Silhouette Candle Jars
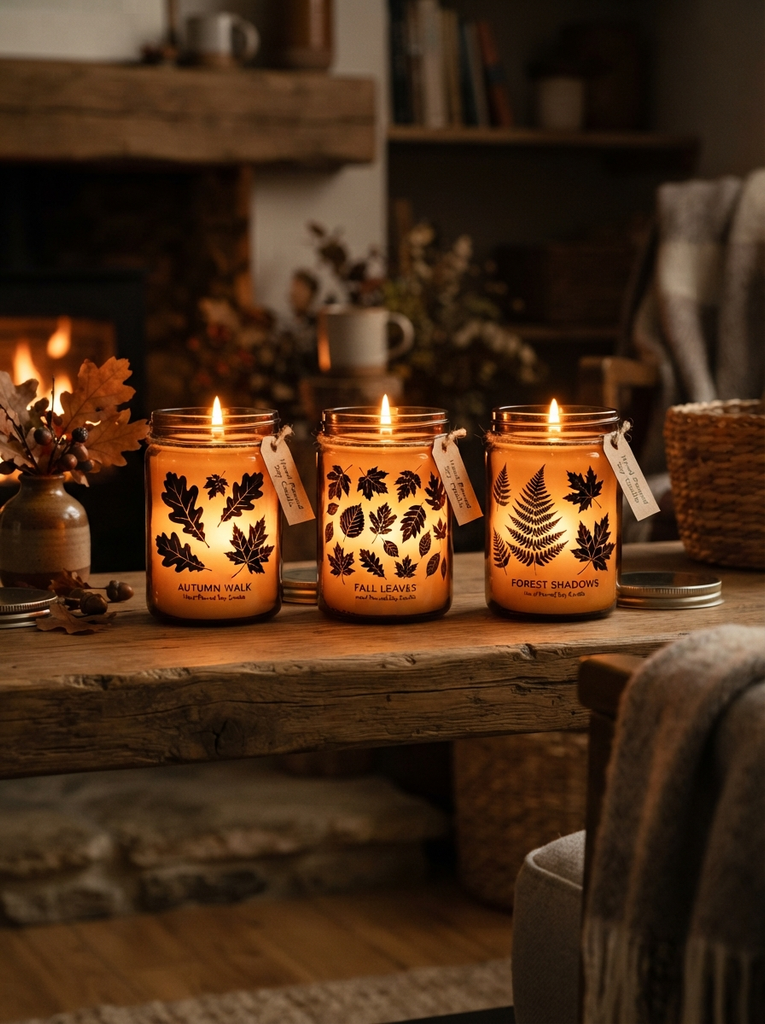
When I want a quiet fall project, decorated glass jars are easy to work on while I’m listening to music or watching a movie. Once finished, they create attractive light and shadows.
What you’ll need:
- Clear glass jars
- Small pressed leaves
- Mod Podge
- Battery-operated tea lights or suitable tea lights
How to make it:
- I clean and dry the outside of the jar.
- I brush a thin layer of Mod Podge over the area where I want the leaves.
- I position the leaves with a little overlap.
- I brush another light layer over them to secure them.
- I allow the jar to dry completely before adding the light.
Pro Tip: I prefer battery-operated tea lights for decorative jars, especially when the leaves or adhesive are close to the light source. They reduce the risk associated with an open flame.
Make it yours: I can group three jars in different sizes to create a simple glowing arrangement on a shelf or table.
10. Pressed Leaf Journal Cover
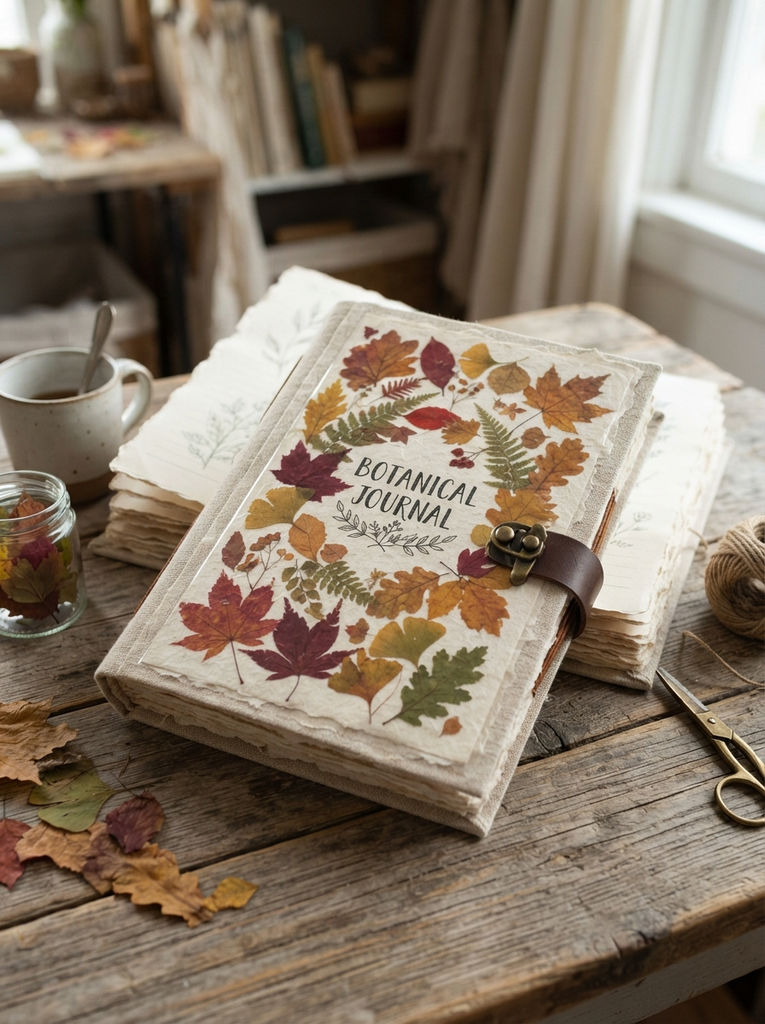
A plain notebook can become a personalized fall journal with only a few pressed leaves and clear covering material. I especially like this idea for seasonal journaling, recipes, notes, or gift giving.
What you’ll need:
- Plain notebook or journal
- Pressed leaves
- Clear contact paper or laminating sheet
- Scissors
How to make it:
- I arrange the leaves on the front cover.
- I carefully place clear contact paper over the design.
- I smooth the covering from the center toward the edges.
- I trim away the excess material.
- I repeat the process on the back if I want a matching design.
Pro Tip: I work slowly when applying the clear covering. Smoothing outward as I go helps reduce trapped air bubbles and wrinkles.
Make it yours: I can add a few pressed flowers, a handwritten title, or a small initial to personalize the journal.
11. Leaf Stamped Watercolor Art
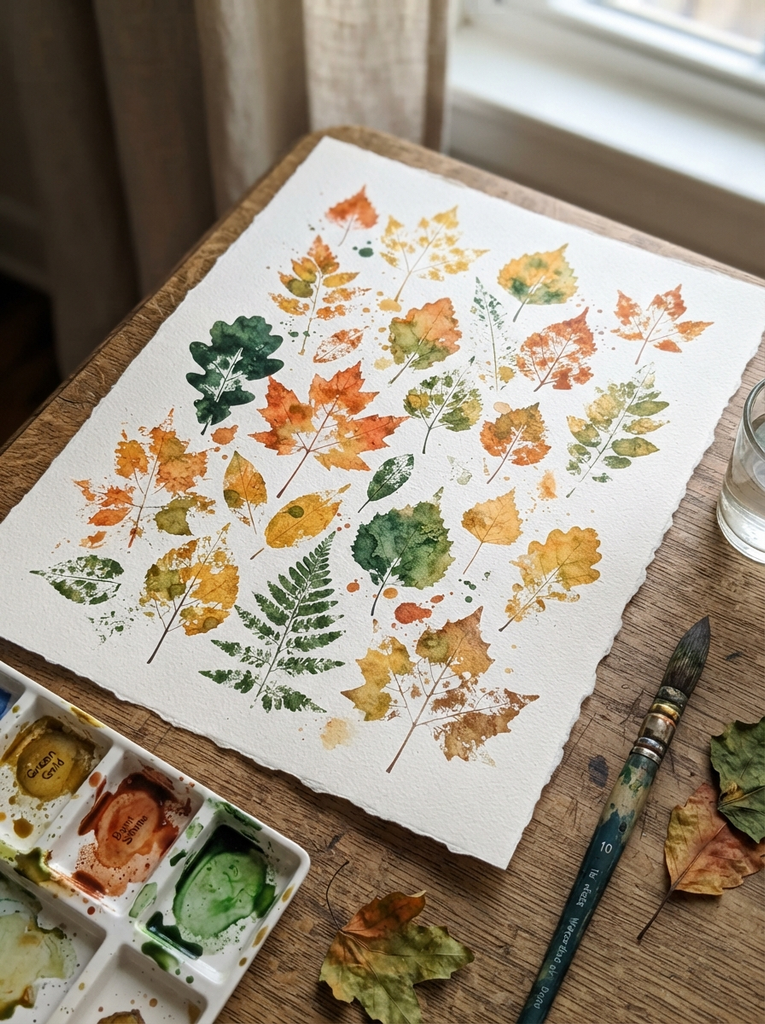
I don’t need to be good at drawing to make botanical artwork. The natural shape of the leaf does most of the work for me, while watercolor gives the finished print a softer appearance.
What you’ll need:
- Watercolor paper
- Watercolor paints
- Sturdy leaves
- Paintbrush
How to make it:
- I brush watercolor onto the underside of a leaf.
- I press the painted leaf onto the paper.
- I lift it carefully to reveal the impression.
- I repeat the process with different leaves or related colors.
- I let the paper dry completely before framing it.
Pro Tip: Watercolor often appears darker while wet than it does after drying. I use enough pigment to make sure the finished print still has good definition.
Make it yours: I can stay within one color family, such as gold, rust, and brown, for artwork that feels coordinated rather than busy.
12. Dried Leaf and Spice Sachets

These small sachets combine seasonal crafting with fragrance. I can place them in drawers, closets, linen storage, or gift baskets.
What you’ll need:
- Dried leaves
- Cinnamon sticks or cloves
- Small fabric pouches
- Twine
How to make it:
- I crumble the dried leaves into smaller pieces.
- I combine them with a small amount of whole spices.
- I fill each pouch partway so there is room for the contents to move.
- I close the pouch tightly with twine.
- I place the finished sachets where I want a gentle seasonal scent.
Pro Tip: I start with a small quantity of strong spices. Cinnamon and cloves can quickly overpower lighter natural scents.
Make it yours: I can use dried orange peel instead of some of the spices for a fresher citrus note.
Fall Leaf Crafts for Adults to Give as Gifts
13. Leaf Print Soap Bars
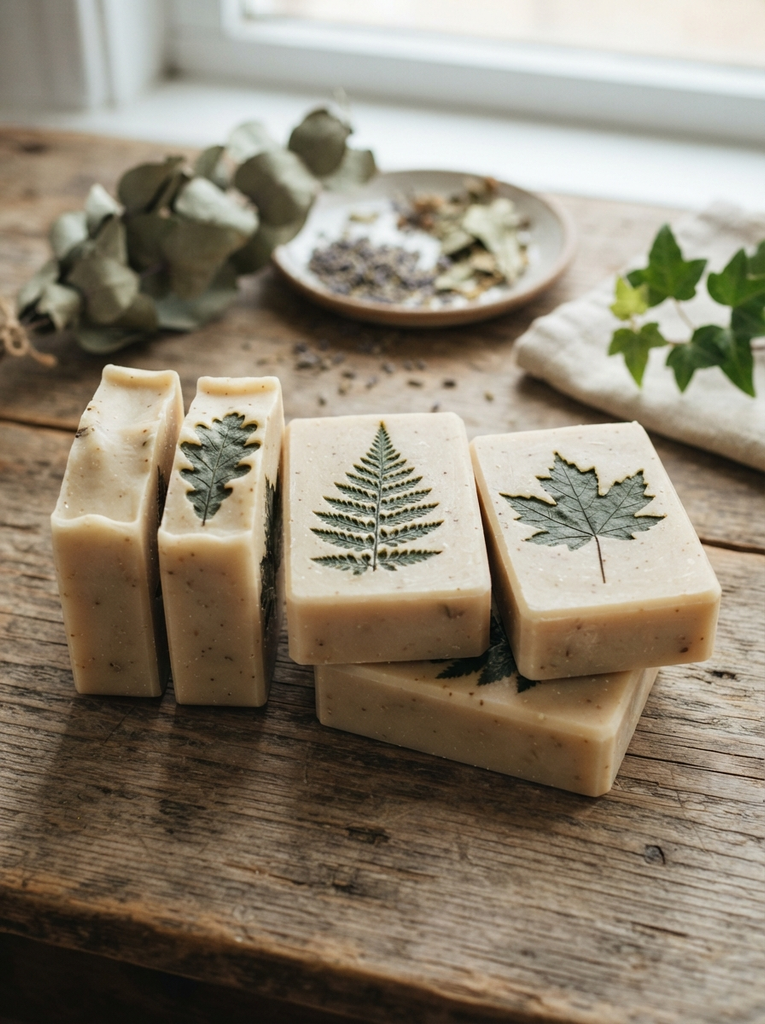
Handmade soap can make a thoughtful seasonal gift when I want something small and practical. Using a melt-and-pour base keeps the process more approachable than making soap completely from scratch.
What you’ll need:
- Clear melt-and-pour soap base
- Small pressed leaves suitable for embedding
- Soap molds
- Microwave-safe bowl
How to make it:
- I cut the soap base into smaller pieces.
- I melt it according to the manufacturer’s directions.
- I pour a shallow layer into each mold.
- Once that layer has started to set, I place the leaf carefully.
- I add the remaining melted soap to cover the leaf.
- I let the bars cool completely before removing them.
Pro Tip: I prepare all my leaves and molds before melting the soap because the base begins setting as it cools.
Make it yours: I can use two compatible soap colors in separate layers to create a subtle autumn-inspired design.
14. Hand Stamped Leaf Greeting Cards
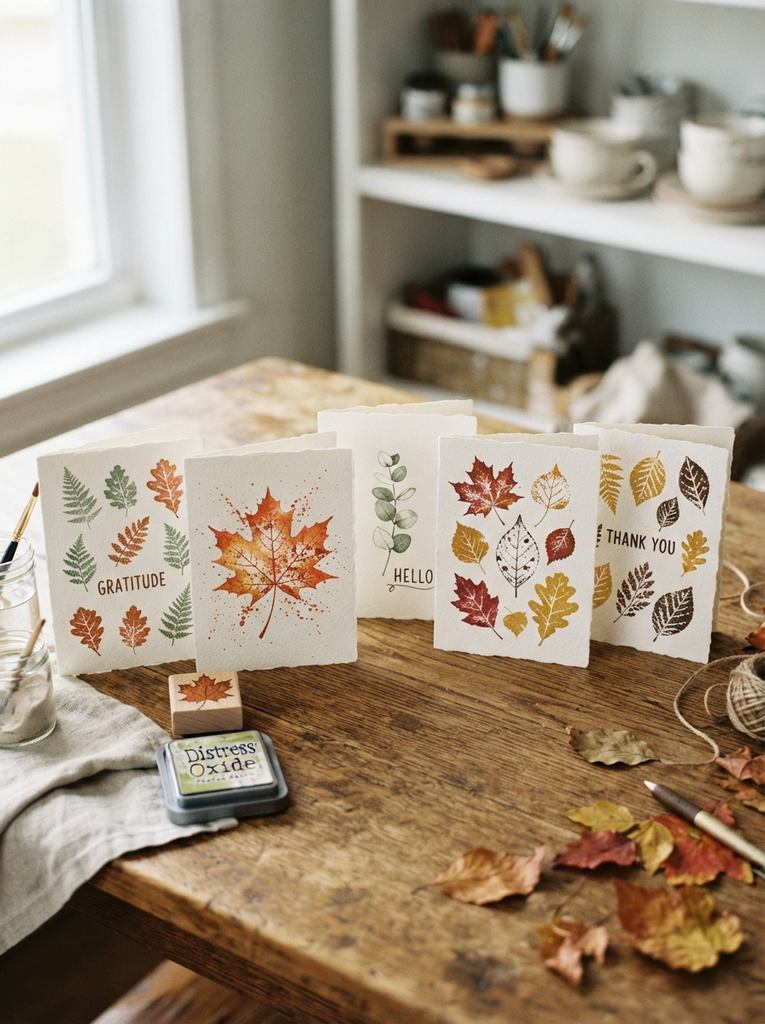
Handmade leaf cards are inexpensive enough for me to make several at once. They work well for fall birthdays, thank-you notes, hostess gifts, or simple seasonal messages.
What you’ll need:
- Blank cardstock cards
- Fall-colored ink pads
- Leaves with defined veins
- Brayer or small roller
How to make it:
- I roll an even layer of ink across the underside of the leaf.
- I position the leaf over the front of the card.
- I press firmly without sliding the leaf around.
- I lift it slowly to reveal the print.
- I let the ink dry before adding a message.
Pro Tip: I re-ink the leaf before each impression. This keeps the prints more consistent across the set.
Make it yours: I can write a short personal message inside each card instead of using a printed greeting.
15. Resin Leaf Ornaments
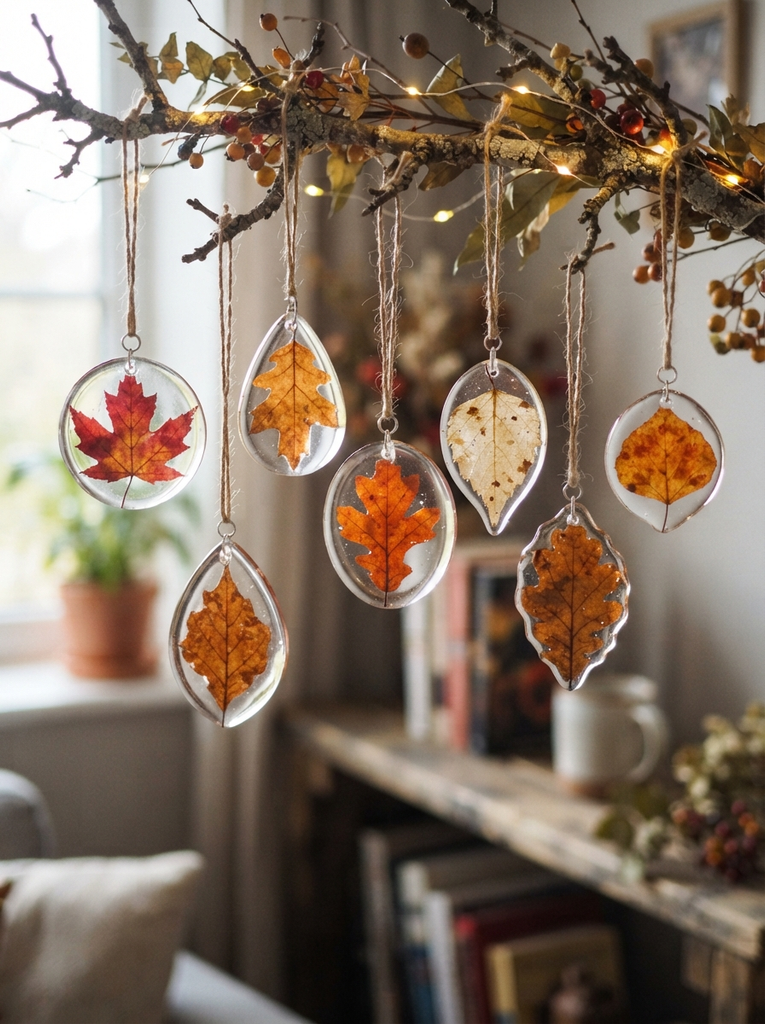
Resin ornaments take more preparation than some of the other projects here, but I like them when I want to preserve a particularly beautiful leaf. They can become keepsakes, gift tags, or small seasonal decorations.
What you’ll need:
- Small pressed leaves
- Clear resin and hardener
- Silicone ornament molds
- Ribbon or string
How to make it:
- I prepare my workspace according to the resin manufacturer’s safety instructions.
- I mix the resin and hardener using the correct ratio.
- I pour a thin first layer into the mold.
- I position the leaf once the resin reaches the appropriate stage.
- I add another layer to cover the leaf.
- I allow the ornament to cure completely before removing it.
- I finish by adding ribbon or string.
Pro Tip: I work in a well-ventilated area and follow the product’s recommended protective equipment and curing times. Slow pouring also helps reduce unnecessary bubbles.
Make it yours: I can add a tiny initial, year, or small decorative charm to turn the ornament into a personal keepsake.
How to Keep Pressed Leaves From Cracking
Cracked leaves are one of the most frustrating problems I run into when making fall crafts. The good news is that a few preparation steps can greatly reduce the chance of breaking them.
I start with leaves that are mature enough to hold their shape but are not completely brittle. I place them between absorbent paper and press them beneath an even weight for at least 48 hours.
Once pressed, I keep the leaves flat until I’m ready to use them. Bending them repeatedly while they are dry is an easy way to create tiny cracks that become much larger during crafting.
I also handle the leaves by their sturdier areas whenever possible. For delicate projects, I seal them with an appropriate clear medium before moving them around too much.
If I’m using glue, paint, wax, or resin, I test the material on one spare leaf first. That small test can tell me whether the leaf is strong enough for the project before I risk my best specimens.
Read this next: 12+ Creative Feather Craft Ideas for Your Home
Frequently Asked Questions on Fall Leaf Crafts for Adults
What are the best leaves to use for crafting?
I usually look for maple, oak, and sweetgum leaves because they offer interesting shapes and visible vein patterns. The best choice also depends on whether I need a flexible, sturdy, or very flat leaf.
How long do leaf crafts last?
It depends on the project and how well I protect it. Properly sealed, framed, or resin-encased leaves can remain decorative for years, while unprotected natural leaves generally fade and become fragile much sooner.
Can faux leaves work instead of real ones?
Yes. I find faux leaves especially useful for wreaths, garlands, and other projects where durability matters more than preserving a real leaf. They also eliminate concerns about cracking and seasonal availability.
Are special tools needed to get started?
Not for most of these projects. I can complete many of them with scissors, heavy books, glue, basic paint supplies, and materials I may already have at home. Projects involving resin or heated wax require additional equipment and safety precautions.
Conclusion
I love fall leaf crafts because they let me turn something temporary into something I can actually use or display. A handful of leaves can become seasonal artwork, table decor, a thoughtful handmade gift, or even a simple bookmark.
I don’t need perfect leaves or advanced crafting skills to get started. In fact, I think the small variations in natural leaves are part of what makes these projects look interesting.
When I want an easy afternoon project, I usually start with pressed leaf bookmarks, stamped artwork, or a simple garland. If I have more time, I can move on to a wreath, framed art, or resin ornament.
The most important step is preparing the leaves properly. Once they are pressed, stored flat, and handled carefully, I have a much better chance of finishing my project without watching my favorite leaf crack at the last minute.





2 Comments