
21 Simple and Fun Halloween Science Experiments for Kids
Halloween is a great excuse to turn ordinary household ingredients into hands-on science activities. When I plan experiments for kids, I want them to have something they can see, touch, test, or change instead of simply watching a demonstration.
I also pay attention to age and setting. Younger children tend to do well with quick reactions and sensory activities, while older kids can spend more time making predictions, comparing results, and asking why something happened.
These Halloween science experiments can work for a classroom, homeschool lesson, family afternoon, Halloween party, or rainy October day. Some take only a few minutes, while others need several hours or days before the final result appears.
This collection includes exactly 21 Halloween science experiments using household ingredients and basic craft supplies. The activities introduce concepts such as chemical reactions, static electricity, chromatography, density, pH indicators, non-Newtonian fluids, fluorescence, shadows, polymers, and crystallization.
For younger children, some of my easiest choices are the erupting pumpkin, dancing tissue-paper ghosts, oobleck, Frankenstein static hair, and mini pumpkin volcanoes. Older children can explore chromatography, density towers, invisible ink, softened bones, and crystal formation with appropriate adult supervision.
Save this for later

Table of Contents
For a party, I would choose about four to six activities rather than trying to complete all 21. Pre-measuring supplies, protecting tables, having cleanup materials nearby, and testing each activity before the event can make the experience much easier to manage.
Key Takeaways
- I match each experiment to the children’s ages, attention spans, available space, and supervision level.
- Many activities can use inexpensive pantry ingredients and basic craft supplies, especially when the same ingredients are used for several experiments.
- I test activities before presenting them so I know how the reaction looks, how long it takes, and how difficult cleanup will be.
- Dry ice, borax, boiling water, heat, and pressure-producing demonstrations need direct adult control.
- Trays, washable surfaces, aprons or old clothing, towels, and outdoor work areas are useful for messy activities.
- For parties, small rotating groups can be easier to supervise than having everyone gathered around one table.
- A number on an age range does not automatically make an experiment safe; the materials, setting, and level of supervision matter too.
Related article: 30 Halloween Party Games for Adults That Are Actually Fun
What Are Halloween Science Experiments for Kids? (And What They Aren’t)
What They Are
For me, a good Halloween science experiment combines a recognizable scientific idea with something children can actively investigate. The Halloween theme makes it fun, but the science should still be real and understandable.
The activities in this list involve ideas such as chemical reactions, electrostatic attraction, density, light, color separation, acidity, material properties, and crystallization. Some are hands-on experiments, while others are short demonstrations that work best with an adult leading them.
I also look for activities that allow children to make a simple prediction. Asking, “What do you think will happen?” gives them something specific to watch for when the experiment begins.
What They Aren’t
I don’t consider a Halloween worksheet or decorative activity to be a science experiment unless children are actually observing, testing, comparing, or changing something.
I also don’t think an activity needs complicated equipment to be worthwhile. If a simple household experiment can demonstrate the same basic scientific idea, I would rather use the simpler setup when it fits the group.
The important part is choosing an activity that matches the children and the environment. A preschool group and a group of older elementary students may enjoy the same Halloween theme but need very different levels of participation and supervision.
Pro Tip: Before starting an experiment, ask children what they think will happen. Afterward, ask what they noticed and whether the result matched their prediction.
DIY Pantry Halloween Science Experiments vs. Store-Bought Kits: What’s Worth It?
Store-bought science kits can be convenient, particularly when they include equipment or instructions that would otherwise take time to gather. But many Halloween experiments can also be made from ingredients already found in a kitchen or craft cupboard.
Here is how I think about the options when planning an activity:
| Approach | Typical Cost | Reusable Supplies | Best Use |
|---|---|---|---|
| Store-bought kit | About $15–$40+ | Depends on kit | Gifts or convenient projects |
| DIY pantry activity | About $1–$8 | Often high | Parties and family activities |
| Combination approach | About $10–$25 | Moderate | First-time experimenters |
These are rough planning estimates, not fixed prices. Costs vary by brand, location, package size, and how many supplies are already at home.
The biggest advantage of a DIY approach is that the same baking soda, vinegar, food coloring, cornstarch, oil, balloons, and craft materials can often be used for several different activities. I prefer building a supply list around multiple experiments instead of buying a separate specialty product for each one.
Pro Tip: Check the ingredient list for several planned activities before shopping. One multipurpose supply can sometimes cover several stations.
The 21 Best Halloween Science Experiments for Kids
1. Erupting Jack-O-Lantern Volcano
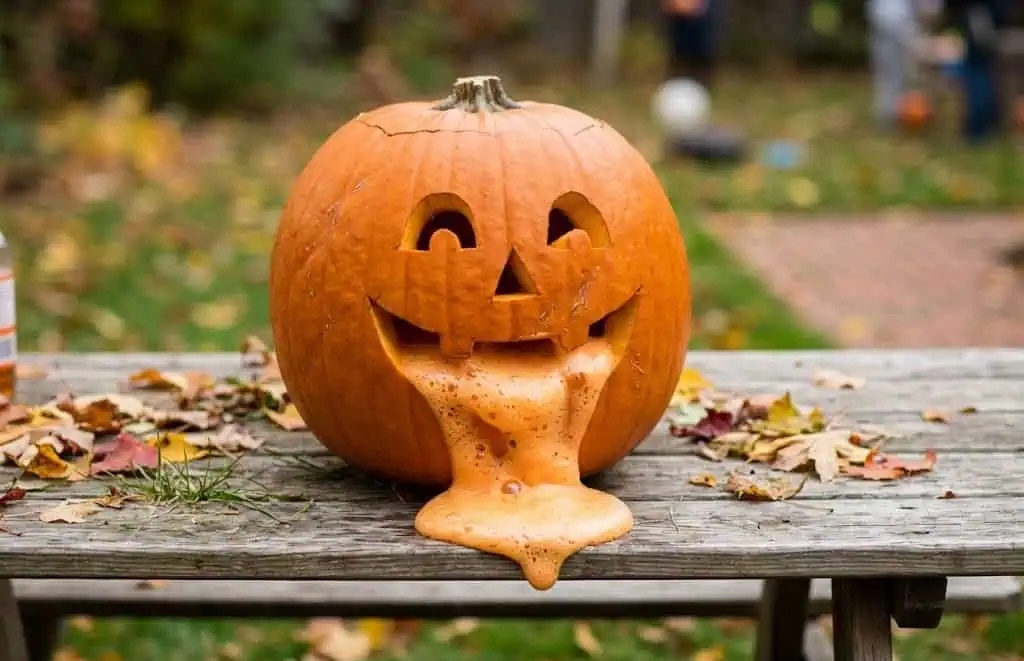
A carved pumpkin turns a familiar baking soda and vinegar reaction into a fun Halloween demonstration. The foam spilling through the pumpkin’s opening gives children an immediate visual result.
Materials & cost: One carved pumpkin, about ½ cup baking soda, about 1 cup vinegar, 1–2 tablespoons dish soap, and a few drops of food coloring. These quantities are a workable starting point rather than a guaranteed formula for every pumpkin.
How to do it: Place the pumpkin on a baking sheet or take the activity outdoors. Add the baking soda, dish soap, and food coloring to the hollow pumpkin. Slowly add the vinegar and step back as the foam develops.
The science: Vinegar contains acetic acid, while baking soda is sodium bicarbonate. When they react, they produce carbon dioxide gas along with other products. The dish soap helps trap the gas in bubbles, making the reaction look much foamier.
Best for: Ages 4–10 with close adult supervision.
Safety: Keep the pumpkin on a stable surface and protect nearby clothing and surfaces from food coloring. Children should not drink or taste the reaction mixture.
2. Glow-in-the-Dark Witch’s Slime

Slime adds a sensory element to Halloween science, and glow pigment can make it especially fun under suitable lighting. The exact recipe can vary because different glues, saline solutions, and activators behave differently.
Materials & cost: Clear school glue, baking soda, saline solution containing the appropriate activating ingredient, and glow-in-the-dark pigment. Costs depend on the products and quantities purchased.
How to do it: Start with the slime recipe recommended for the specific glue and activator being used. A common starting point is clear glue combined with a small amount of baking soda, followed by glow pigment and an activator added gradually while stirring. Stop adding activator when the mixture reaches the desired consistency.
The science: Slime forms when the activator helps link polymer chains in the glue, changing the material’s texture from a flowing liquid into a stretchy gel-like substance. Glow pigments work by absorbing light and releasing some of that energy as visible light.
Best for: Ages 6–12 with supervision.
Safety: Not every saline solution works as a slime activator. Check the product information and use only the ingredients specified for the recipe. Slime should not be eaten, and children should wash their hands afterward.
Pro Tip: I protect the table with a washable covering and keep slime away from carpets, upholstered furniture, and clothing that needs special care.
3. Dancing Tissue Paper Ghosts
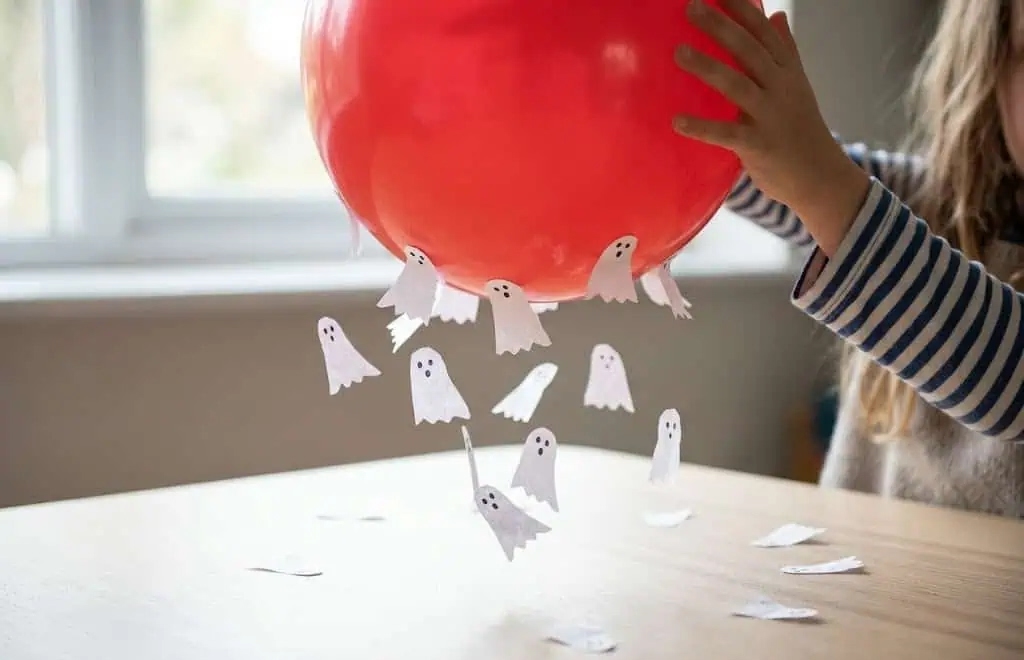
This quick static-electricity experiment needs very little preparation. Lightweight tissue paper can move toward a charged balloon, giving the ghosts a surprisingly lively appearance.
Materials & cost: Tissue paper, one balloon, and dry hair or wool fabric.
How to do it: Cut small ghost shapes from tissue paper and place them on a dry surface. Inflate the balloon and rub it against dry hair or wool for several seconds. Bring the balloon close to the ghosts without touching them and watch for movement.
The science: Rubbing can transfer electrical charge between materials. The charged balloon then interacts with the lightweight paper through electrostatic attraction.
Best for: Ages 4–8 with supervision.
Pro Tip: Static experiments generally work better in dry conditions. If the weather is humid, I move this activity indoors and use a dry surface.
4. Bleeding Paper Towel Ghost Chromatography
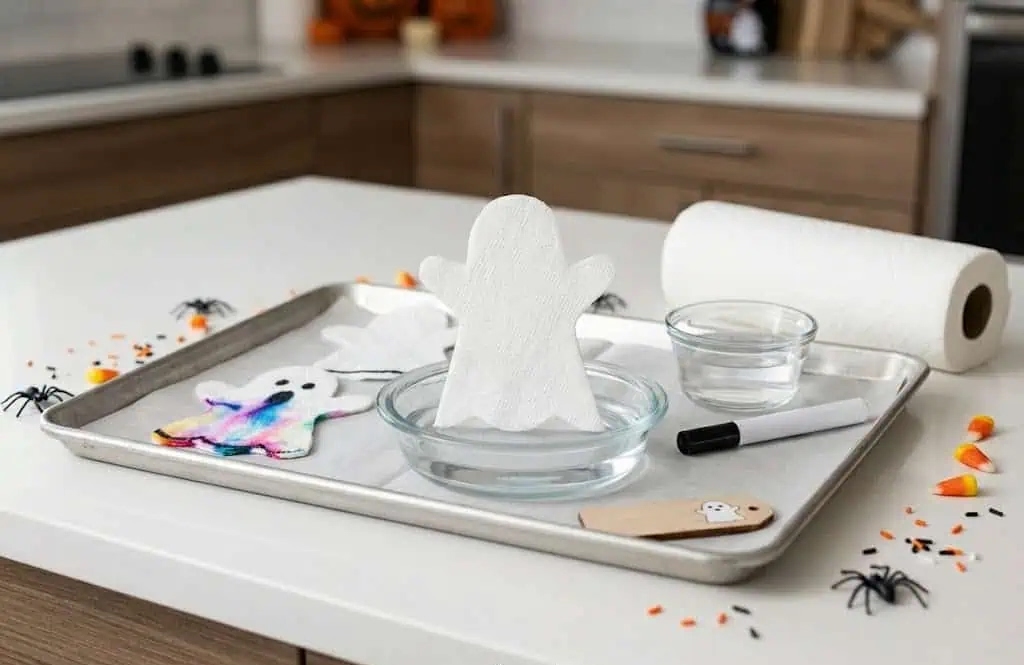
This is one of the stronger educational activities in the collection because children can see a real separation process rather than simply watching something fizz.
Materials & cost: White paper towels, a washable black marker, water, and a shallow dish or tray.
How to do it: Cut a ghost shape from a paper towel and draw a thick black line near the lower portion. Add a small amount of water to the dish and place only the bottom edge of the paper towel into the water. As the water moves upward, watch the ink separate.
The science: Washable black inks can contain several pigments. Water travels through the paper and carries those pigments at different rates, causing the original color to separate into several shades. This process is called chromatography.
Best for: Ages 7–12 with supervision.
Safety: Use washable markers rather than permanent markers and protect the work surface from ink.
Pro Tip: I leave enough space between the ink line and the top of the paper so the separated colors have room to spread.
5. Floating Ghost Balloon
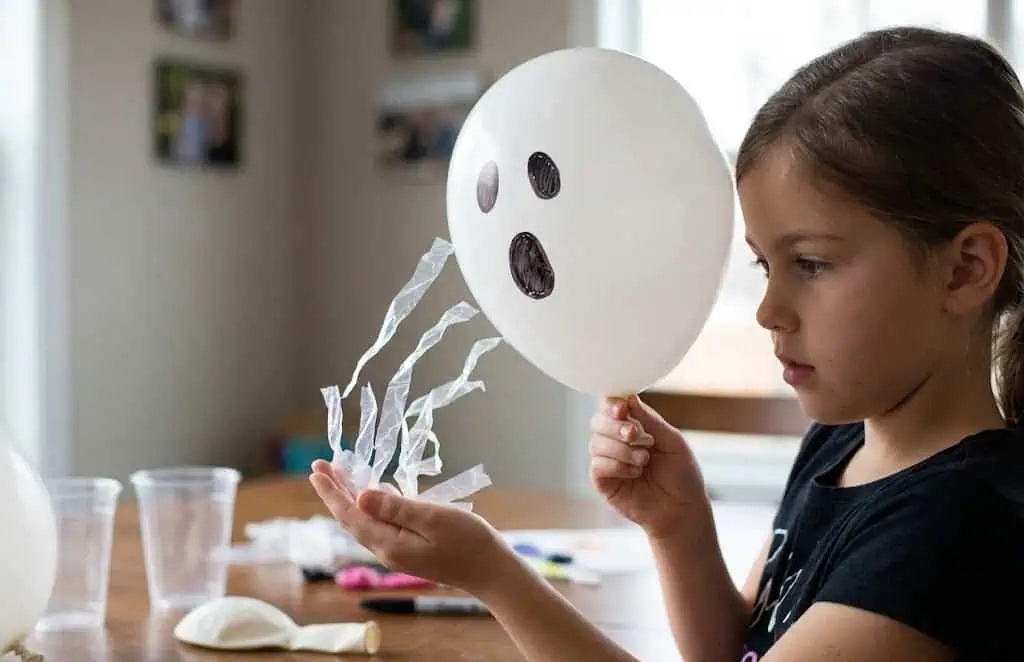
This is another simple static-electricity demonstration. The lightweight material may move toward a charged balloon, although the effect depends on the materials and surrounding conditions.
Materials & cost: A balloon, lightweight plastic strips, and a marker.
How to do it: Draw a ghost face on the balloon and inflate it. Rub the balloon against dry hair or suitable fabric. Hold it close to the lightweight plastic strips and observe how they respond.
The science: The charged balloon can attract nearby lightweight material through electrostatic forces. The strips may lift, bend, or move toward the balloon, but they are not actually floating independently in the air.
Best for: Ages 5–10 with supervision.
Safety: Keep balloon pieces away from young children. Deflated or broken latex balloons can be a choking hazard, so adults should collect fragments immediately.
6. Rubber Chicken Bones
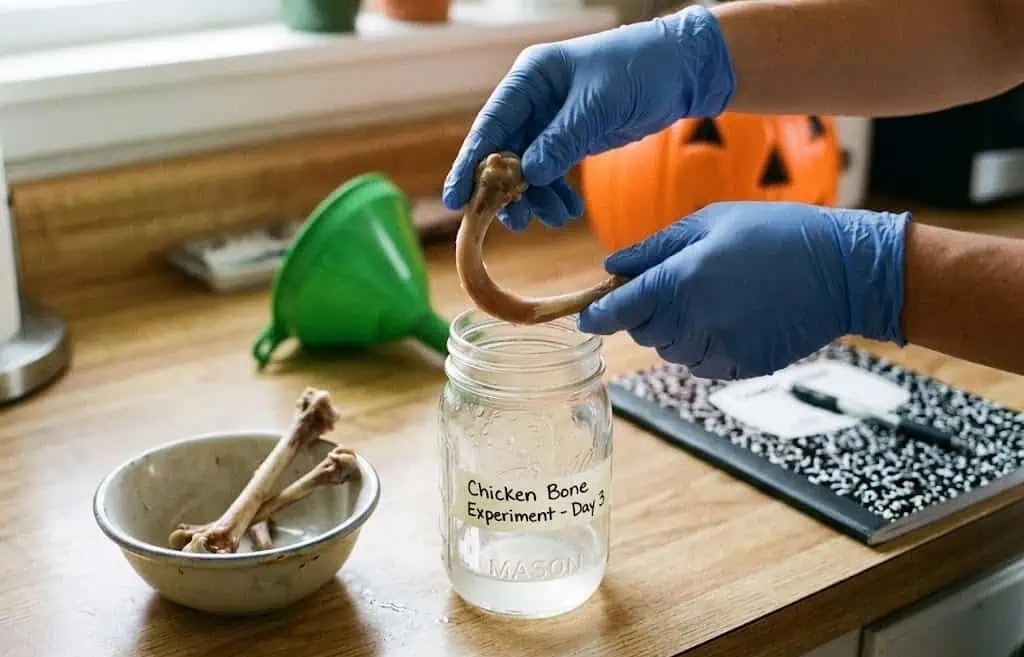
This is a slower experiment that works better as a multi-day observation than as a party activity.
Materials & cost: One thoroughly cleaned chicken bone and enough white vinegar to cover it. Cost varies depending on what is already available.
How to do it: An adult should thoroughly clean the bone before placing it in a clearly labeled container. Cover it with vinegar and leave it for several days. Check it periodically rather than handling it unnecessarily. After several days, the bone may become more flexible.
The science: Bone contains mineral components that contribute to its hardness as well as an organic framework that includes collagen. Vinegar’s acidity can dissolve some of the mineral material, leaving a more flexible structure.
Best for: Ages 8–12 as an adult-prepared observation.
Safety: Do not use food-preparation equipment for this experiment. Keep the container away from food, cooking surfaces, and young children. Children should not taste or casually handle the treated bone. Wash hands after handling the container or materials, and clean the work area separately from food-preparation areas.
7. Bubbling Witch’s Brew Lava Lamp
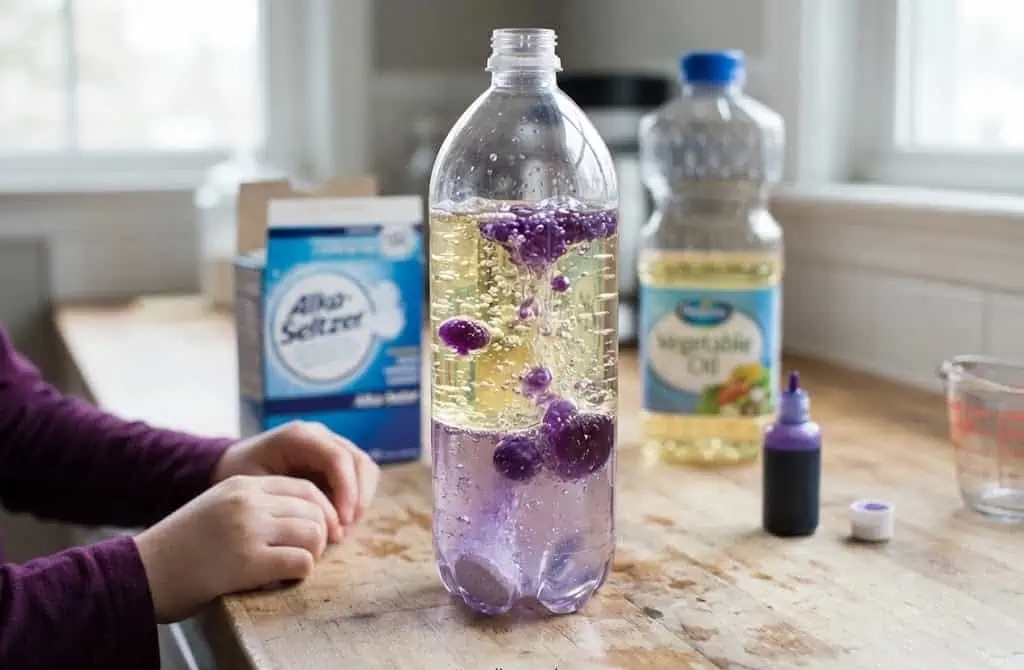
This activity creates moving colored blobs without requiring heat or complicated equipment.
Materials & cost: A clear plastic bottle, water, vegetable oil, food coloring, and an effervescent tablet.
How to do it: Fill roughly one-third of the bottle with water and add vegetable oil, leaving plenty of empty space at the top. Add a few drops of food coloring and allow them to settle into the water. Add a small piece of an effervescent tablet and watch the colored bubbles travel through the oil.
The science: Oil and water have different densities and do not mix under ordinary conditions. The tablet reacts in the water and releases carbon dioxide gas. The gas bubbles carry small amounts of colored water upward before the bubbles disappear and the droplets fall back down.
Best for: Ages 5–12 with supervision.
Safety: Use a sturdy plastic bottle rather than glass. This is an observation activity, not a pressure experiment, so never seal a container while a gas-producing reaction is taking place.
Pro Tip: Leaving extra space at the top helps prevent overflow when the reaction begins.
8. Invisible Ghost Ink
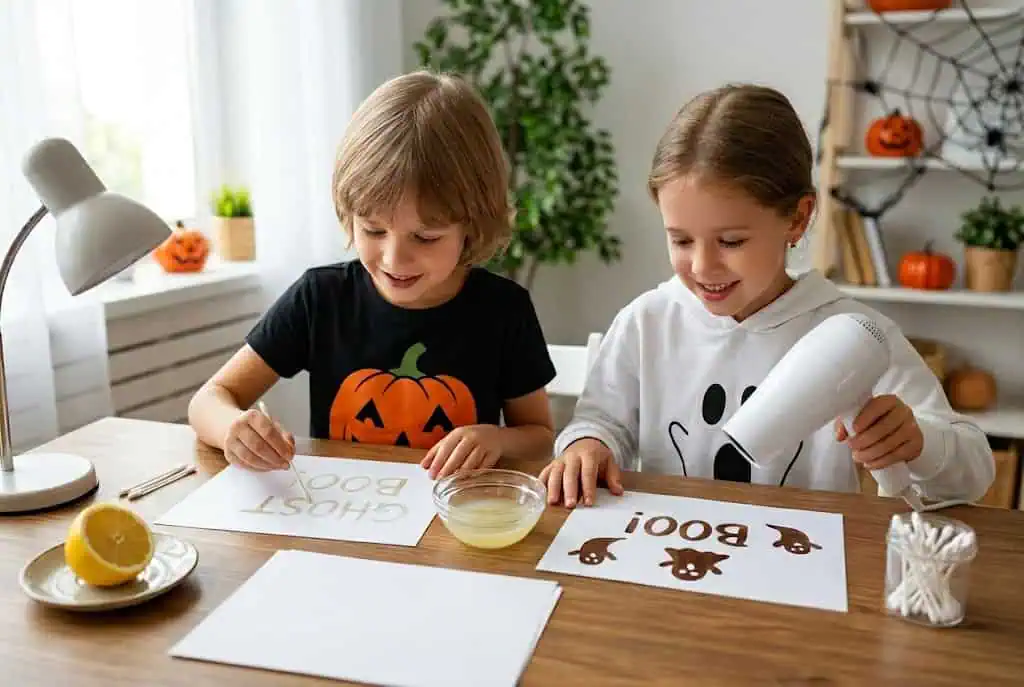
Invisible ink can turn a simple message into a small Halloween mystery. Lemon juice is one traditional household option, although it is not the only material that can be used for invisible writing.
Materials & cost: Lemon juice, a cotton swab, white paper, and an adult-controlled hair dryer.
How to do it: Dip the cotton swab into lemon juice and write a message on white paper. Let the paper dry completely. An adult can then gently warm the paper with a hair dryer until the writing becomes darker and easier to see.
The science: Heating the areas treated with lemon juice can cause organic compounds in those areas to oxidize and darken more quickly than untreated paper.
Best for: Ages 6–10 with adult assistance.
Safety: An adult should operate the hair dryer. Never use an open flame, stove, candle, or very hot surface to reveal the message. Keep the paper away from direct high heat.
9. Color-Changing Magic Potion

Red cabbage provides a natural acid-base indicator that can create several dramatic color changes. It is one of my favorite options when the goal is to connect a Halloween activity with a clear chemistry concept.
Materials & cost: Red cabbage, water, vinegar, baking soda, and clear containers.
How to do it: Simmer chopped red cabbage in water and allow the liquid to cool before straining it. Divide the purple liquid among clear containers. Add vinegar to one and a baking soda solution to another, then compare the colors.
The science: Red cabbage contains anthocyanin pigments that respond to changes in acidity and alkalinity. The exact color depends on the pH and concentration of the mixture, so results can vary from one setup to another.
Best for: Ages 7–12 with supervision.
Safety: Although the ingredients may come from the kitchen, the resulting mixtures are experimental solutions, not drinks. Children should not taste them.
Pro Tip: Label each container with what was added so children can compare the changes without having to remember which solution is which.
10. Black Halloween Oobleck
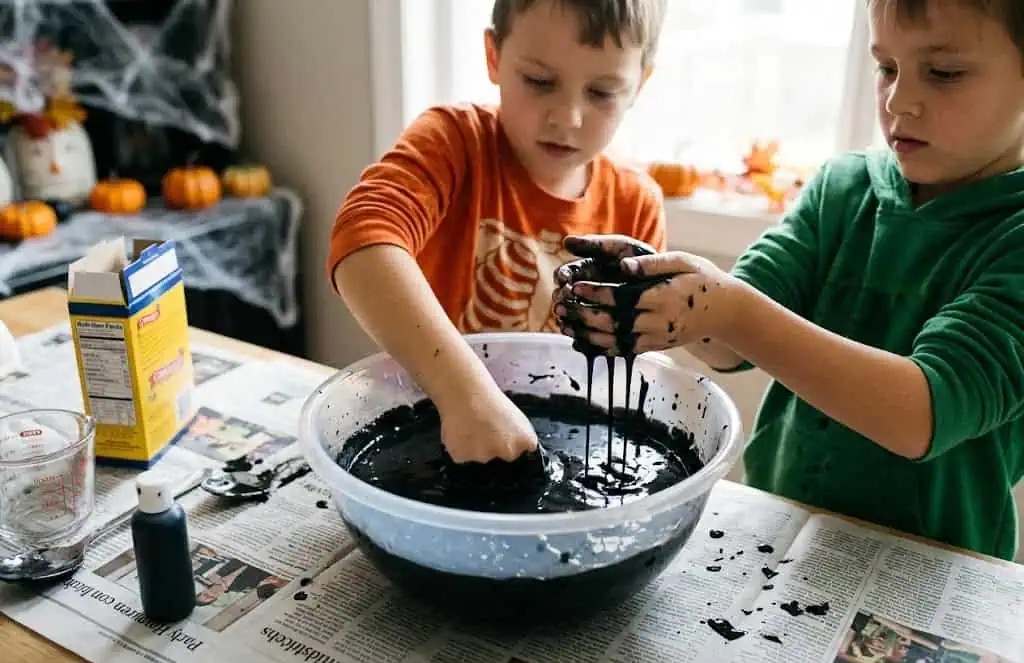
Oobleck is a fun example of a non-Newtonian material because its behavior changes depending on how force is applied.
Materials & cost: About 2 cups cornstarch, approximately 1 cup water, and black food coloring. The water amount may need adjustment to reach the desired consistency.
How to do it: Slowly add water to the cornstarch while stirring. Adjust the mixture until it feels firmer when pressed quickly but flows when handled gently. Add a small amount of food coloring for the Halloween effect.
The science: Oobleck is a suspension whose resistance to movement changes under force. A quick squeeze or tap can make it feel temporarily more solid, while gentle handling allows it to flow.
Best for: Ages 4–10 with close supervision.
Safety: Use a washable tray or outdoor surface. Oobleck should not be poured down a drain in large quantities because the cornstarch can contribute to plumbing problems. Dispose of larger amounts in household waste according to local disposal guidance.
Pro Tip: An old tablecloth or washable mat underneath the tray makes cleanup much easier.
11. Mini Pumpkin Volcano Station
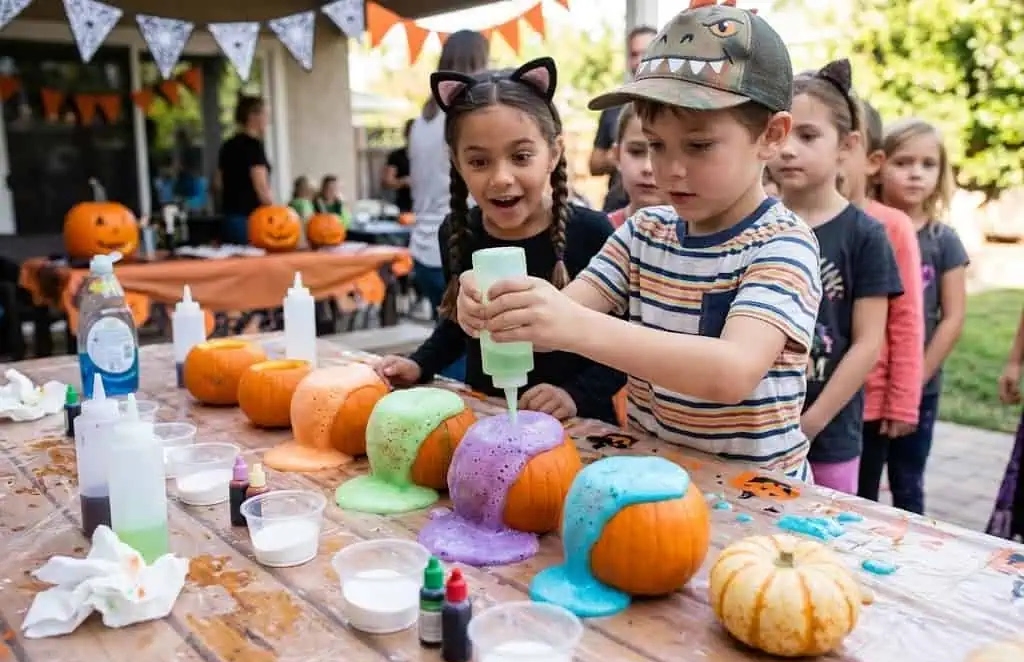
Individual mini pumpkins turn the classic volcano into a party station where children can participate in smaller groups.
Materials & cost: Mini pumpkins, baking soda, vinegar, dish soap, food coloring, individual cups, and trays.
How to do it: Prepare a small opening in each pumpkin. Add a measured amount of baking soda, a little dish soap, and food coloring. Give each child or pair an individual cup of vinegar to add when it is their turn.
Best for: Ages 4–10 with close adult supervision.
Pro Tip: Pre-measure the ingredients before guests arrive. Individual cups keep children from reaching across the table and make the station easier to reset between groups.
Safety: Keep each pumpkin on its own tray and make sure children have enough room to participate without bumping into one another.
Also read: 35 Halloween Party Food Ideas for Kids (Easy, Spooky and Fun)
12. Frankenstein Static Hair
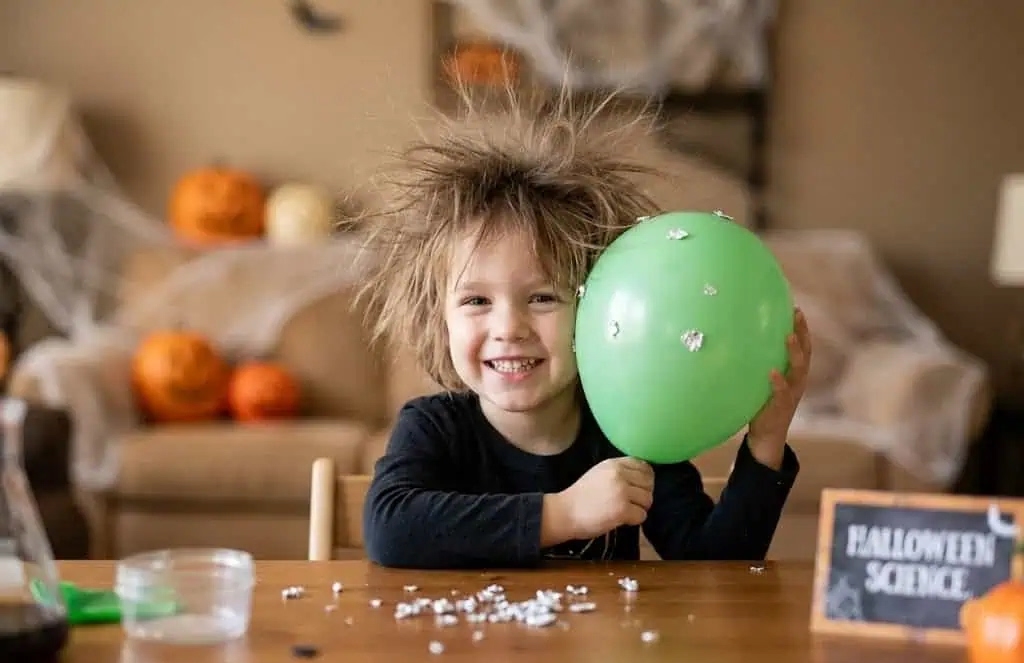
This quick demonstration needs only a few materials and can be used as a short activity between longer experiments.
Materials & cost: An inflated balloon, dry hair, and a few lightweight pieces of aluminum foil.
How to do it: Rub the balloon against dry hair for several seconds. Hold the balloon close to the hair and observe whether the hair moves toward it or rises. Bring the balloon near the small foil pieces and watch how they respond.
The science: Rubbing can transfer electrical charge between the hair and balloon. Individual hair strands can repel one another when they carry similar charges, causing them to spread apart.
Best for: Ages 3–7 with close adult supervision.
Safety: Results can vary with humidity, hair type, and materials, so I treat the movement as an observation rather than something that is guaranteed every time. Dispose of damaged balloons promptly, and keep balloon fragments away from young children.
13. Dry Ice Witch’s Cauldron (Adult-Led)

Dry ice can create a dramatic Halloween effect, but this activity should remain completely adult-led. Children can observe the result without handling the dry ice.
Materials & cost: Dry ice, warm water, a suitable open container, and dish soap. Costs depend on local availability and the amount purchased.
How to do it: An adult wearing appropriate protective gloves places dry ice into warm water in a suitable container. A small amount of dish soap can produce foamy bubbles that contain the visible fog.
The science: Dry ice is solid carbon dioxide. At ordinary atmospheric pressure, it changes directly from a solid into carbon dioxide gas. The visible fog is associated with the cold gas and tiny condensed water droplets that form when the cold carbon dioxide mixes with moist air.
Safety: Children must not touch, carry, break, or place dry ice into the container. An adult should handle it using appropriate insulated protective equipment. Use the demonstration only in a well-ventilated area. Never put dry ice in a sealed container because pressure can build dangerously as the solid changes to gas. Follow the supplier’s handling and storage instructions, and do not keep dry ice in an inappropriate airtight enclosure.
Best for: Adult-led observation for older children.
14. Spider Web Wax Resist Art

This activity sits between art and simple materials science. It gives children an easy way to see how a wax surface interacts differently with water-based paint.
Materials & cost: White crayons, watercolor paper, black watercolor paint, brushes, and water.
How to do it: Draw spider webs or other Halloween shapes with a white crayon on white paper. The drawing will be difficult to see at first. Brush black watercolor over the page and watch the crayon design become visible.
The science: Wax resists water-based paint, so the watercolor behaves differently over the crayon marks than it does on untreated paper.
Best for: Ages 4–10 with supervision.
Pro Tip: I encourage children to experiment with different lines and shapes instead of trying to make every web identical. It keeps the activity focused on observation and creativity.
15. Floating Spider Eggs
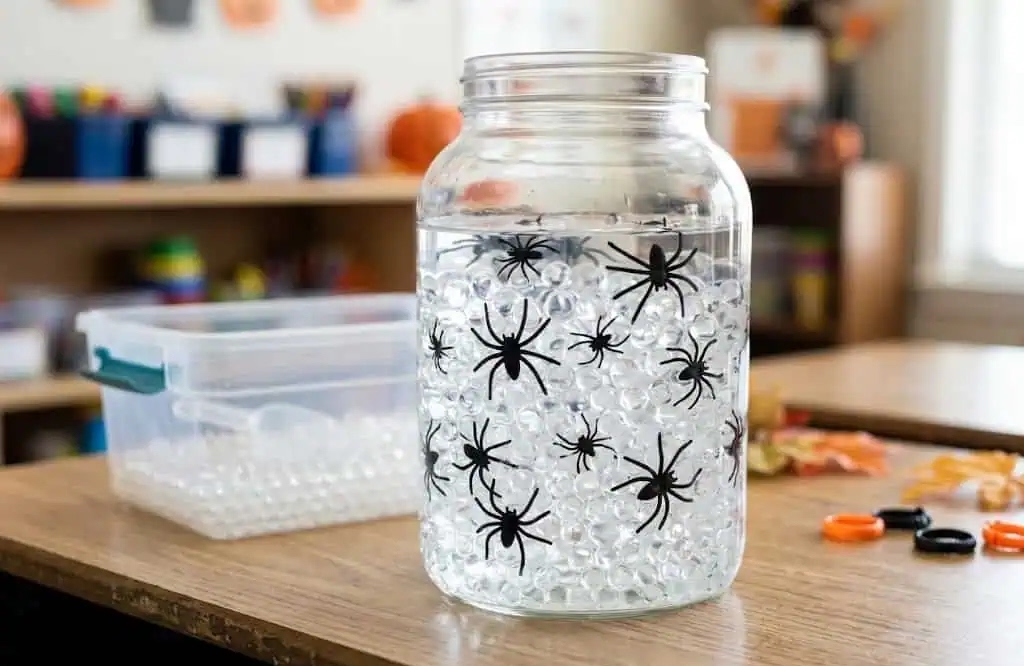
This activity can create an unusual optical effect, but water beads require much more caution than ordinary craft materials.
Materials & cost: Water beads, a clear container, water, and plastic spiders.
How to do it: An adult should hydrate the water beads according to the manufacturer’s directions and prepare the display in a clear container. Add appropriately sized plastic spiders and observe how difficult the hydrated beads can be to distinguish from the surrounding water.
The science: Hydrated water beads contain a large amount of water and can have optical properties that make them difficult to see when submerged in water. This can create the appearance that the objects are suspended.
Best for: Older children as an adult-prepared observation rather than a free-play sensory activity.
Safety: Water beads are not edible and should never be used around children who may put objects in their mouths. Do not allow young children to handle loose beads. Collect every bead after the activity and keep them away from pets as well. Never flush water beads down a toilet or pour them into drains.
Pro Tip: I would choose a sealed or closely controlled display rather than giving individual children loose water beads to handle.
16. Halloween Density Tower
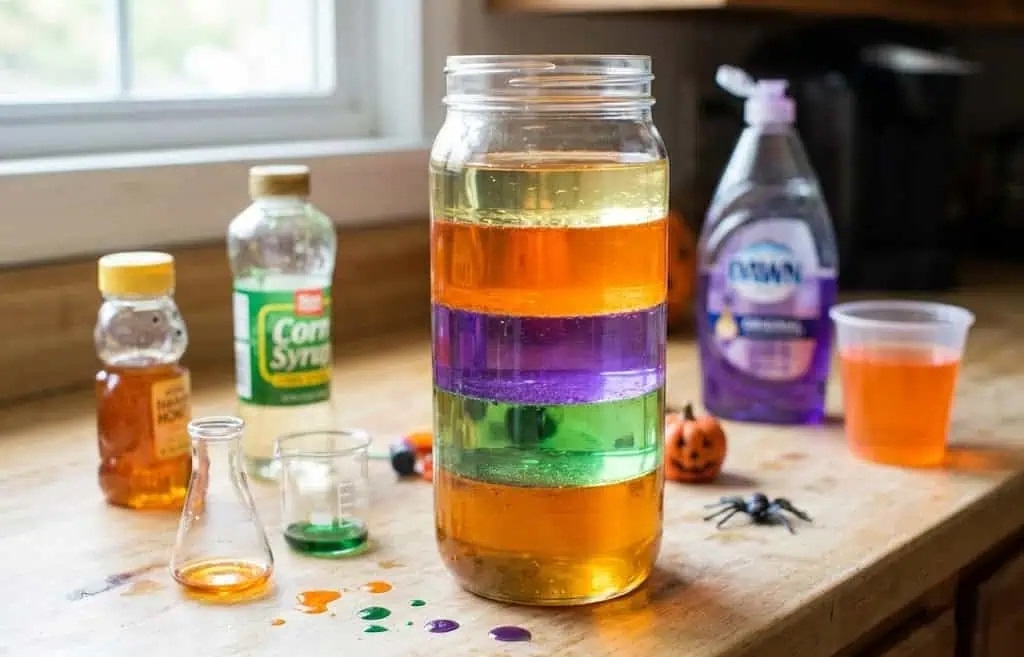
A density tower lets children see how liquids with different densities can form layers when poured carefully.
Materials & cost: Honey, corn syrup, dish soap, water, vegetable oil, food coloring, and a clear container.
How to do it: Add the liquids slowly, using a spoon or the side of the container to reduce turbulence. Color selected layers before adding them if desired. Allow each layer to settle before adding the next.
The science: Density describes how much mass is contained in a given volume. Liquids with different densities can form separate layers when they do not readily mix and are added carefully.
The exact layering order can vary depending on the products being used, so I treat the recipe as a starting point rather than a universal formula.
Best for: Ages 8–12 with supervision.
Pro Tip: Pour slowly. Rushing the layers is one of the easiest ways to turn a clear density demonstration into a mixed-up jar.
17. Exploding Ghost Canisters
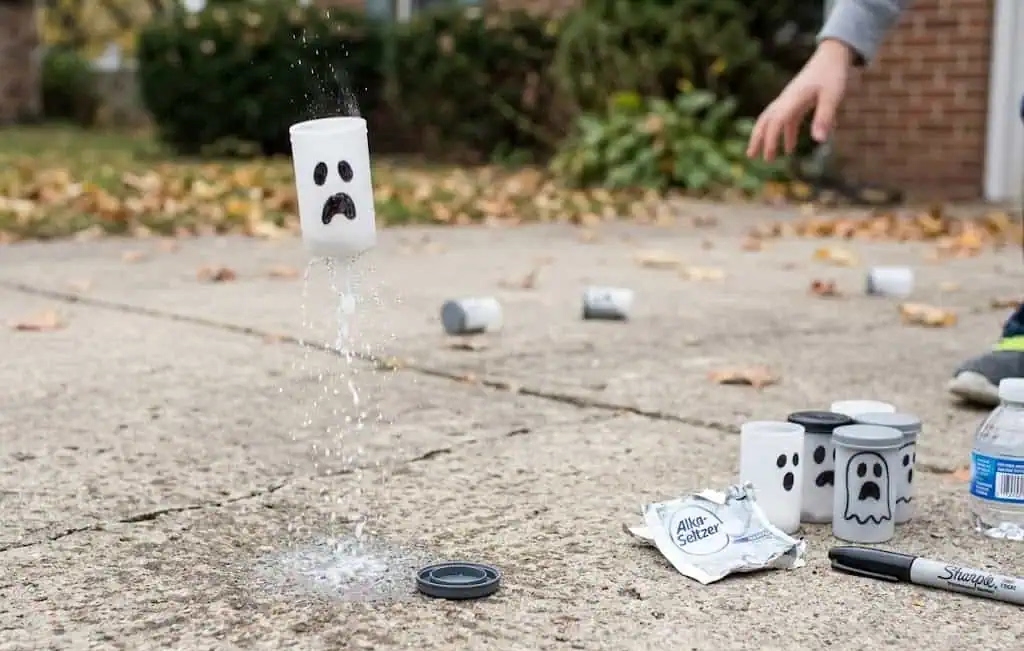
This activity demonstrates gas generation and pressure, but because a sealed container can move suddenly when pressure builds, I treat it as an adult-controlled outdoor demonstration only.
Materials & cost: A suitable snap-lid demonstration container, water, an effervescent tablet, and optional Halloween decorations.
How to do it: An adult prepares the demonstration outdoors in a clear, controlled area using only a container appropriate for the activity. The reaction is set up and then left alone while everyone moves to the designated observation area. The purpose is to observe gas generation and the resulting pressure response, not to create a powerful launch.
The science: When an effervescent tablet reacts with water, it releases carbon dioxide gas. In a closed container, pressure can increase until the lid releases.
Safety: Children should never assemble, hold, shake, stand over, or point a reacting container. Do not use glass, improvised high-pressure containers, or larger quantities of reactants to increase the effect. Keep the demonstration away from children, animals, vehicles, windows, and breakable objects. An adult should control the setup and follow the manufacturer’s guidance for any container used.
Best for: Adult-controlled outdoor observation only.
Pro Tip: If I cannot create a clearly controlled outdoor area, I skip this activity and choose a non-projectile demonstration instead.
18. Pumpkin Guts Slime

Pumpkin carving produces a surprising amount of pulp, so turning a small amount into a Halloween slime experiment can be a practical way to reuse some of it.
Materials & cost: Fresh pumpkin pulp, clear school glue, baking soda, an appropriate slime activator, and optional orange food coloring.
How to do it: Remove excess liquid and large pieces from a small amount of fresh pumpkin pulp. Prepare the slime using the specific glue and activator instructions, then add a small amount of pumpkin material and adjust the consistency as needed.
Best for: Ages 6–12 with supervision.
Safety: Treat this as a craft material, not food. Use clean, fresh ingredients, supervise hand contact, and wash hands after the activity. Make small batches and discard the slime rather than storing it for an extended period. If it develops an unusual odor, visible mold, or other signs of spoilage, discard it immediately.
Pro Tip: I place the slime on a washable tray and keep it away from food, serving areas, and eating utensils.
19. Glowing Tonic Water Eyeball Ice
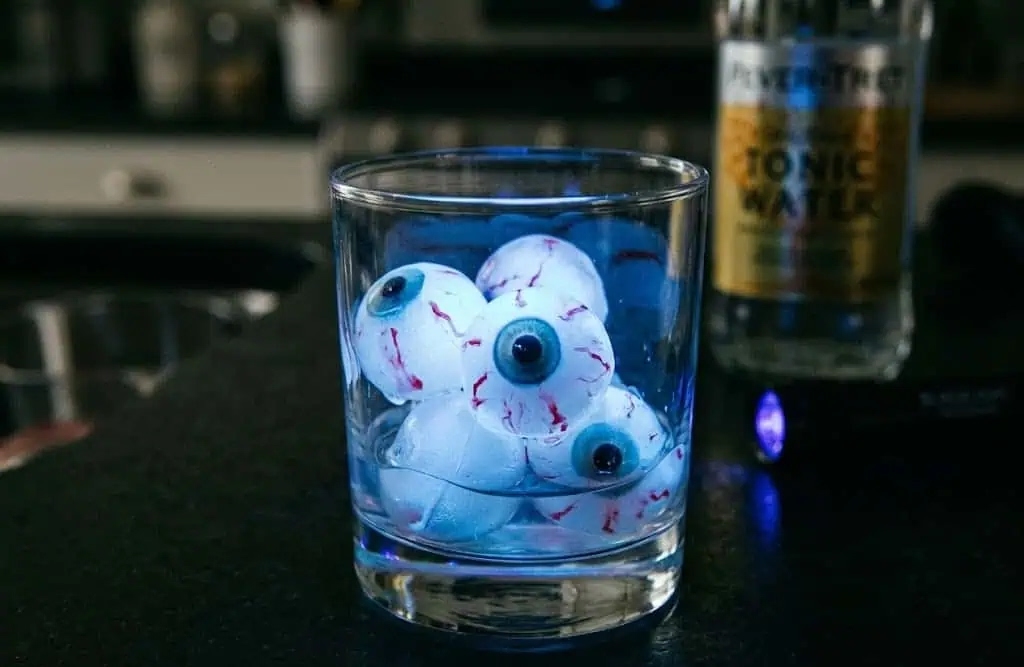
Tonic water can create a fun Halloween fluorescence effect under an appropriate ultraviolet light source.
Materials & cost: Tonic water, freezer-safe eyeball or other Halloween-shaped molds, and optional food coloring.
How to do it: Pour tonic water into the molds and freeze it. If using food coloring, choose a food-safe product intended for consumption. Place the finished ice in a suitable drink or display and observe it under an appropriate blacklight.
The science: Some tonic water contains quinine, which fluoresces under ultraviolet light. The fluorescence appears as a blue-white glow under a suitable UV source; the ice will not normally glow in ordinary darkness.
Best for: Older children with adult supervision.
Safety: Check the tonic water label before using it as a beverage ingredient. Use clean, food-safe molds and food-safe coloring when the ice will be consumed. Keep electrical equipment away from spills, and children should not stare directly into a UV light source.
Pro Tip: Test the tonic water under the intended light before the party because fluorescence depends on the product and light source.
20. Spooky Shadow Theater

Shadow theater gives children a quieter Halloween activity while still demonstrating a clear science concept.
Materials & cost: A cardboard frame or box, white tissue paper, a flashlight, black cardstock, and craft sticks.
How to do it: Cut an opening in the cardboard and attach tissue paper across it to make a screen. Cut bats, ghosts, witches, or monsters from cardstock and attach them to craft sticks. Shine the flashlight from behind while children move the shapes between the light and screen.
The science: Shadows form when an opaque object blocks light. Changing the distance between the light source, object, and screen can change the apparent size and sharpness of the shadow.
Best for: Ages 4–10 with supervision.
Safety: Use a stable flashlight and keep cords, if any, out of walking areas. Never use a candle or other open flame as the light source.
Pro Tip: I let children create their own monster story rather than requiring a scripted performance. The storytelling gives the activity another creative layer without changing the science demonstration.
21. Crystal Skeleton Bones
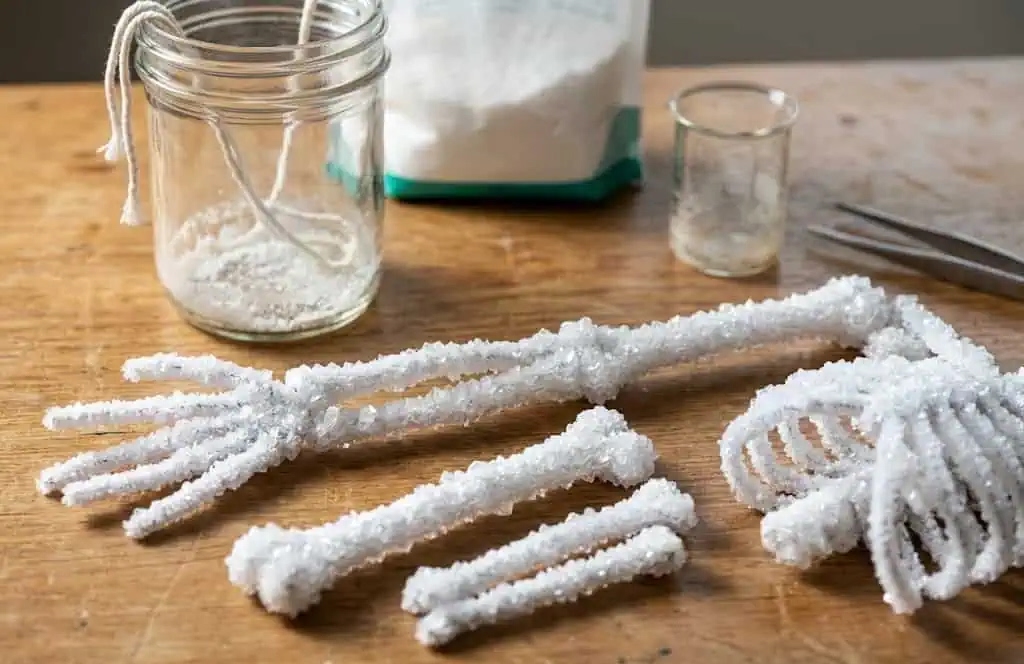
This overnight experiment introduces children to crystallization, but the preparation should remain adult-managed because it involves boiling water and borax.
Materials & cost: White pipe cleaners, borax, boiling water, a heat-safe container, and string.
How to do it: Shape the pipe cleaners into simple skeleton or bone forms. An adult prepares the borax solution using the product’s current instructions and boiling water. Suspend the pipe-cleaner shapes in the solution without letting them rest against the container. Leave them undisturbed while crystals form.
The science: A concentrated solution can hold dissolved material while it is hot. As the solution cools, some of that material can come out of solution and form crystals on the suspended pipe cleaners.
Best for: Older children as an adult-managed overnight project.
Safety: An adult should handle the boiling water and prepare the solution. Children should not handle concentrated borax solution or put the materials near their mouths. Clearly label the container, keep it away from food, and wash hands after the activity. Follow the current product instructions for handling and disposal. Treat the finished crystal skeleton as a science project rather than a toy or food-related object.
What Are the Cheapest Halloween Science Experiments for Kids?
The dancing tissue-paper ghosts are one of my favorite low-cost options because the activity needs only lightweight paper, a balloon, and dry conditions. Frankenstein static hair is similarly simple if balloons are already available.
Oobleck is another practical choice because cornstarch and water create a very different texture without specialty equipment.
Rather than focusing on the absolute lowest price, I look at how many activities can use the same supplies. A small collection of versatile ingredients can be more useful than buying several single-purpose kits.
How Do You Set Up a Halloween Science Experiment Station for Kids?
For a party, I find that a manageable number of stations works better than trying to run every experiment in one afternoon.
For example, with eight children, four stations with two children at each table can be a practical arrangement. That is not a universal formula, but it gives each child room to participate without crowding the supplies.
For a 40–60 minute activity block, I might allow roughly 8–10 minutes per station with short transitions. Longer experiments can remain on display while the children move to another activity.
At each station, I prepare:
- A tray or washable work surface
- Pre-measured ingredients
- Simple instructions
- Paper towels or washable cloths
- A waste container
- Aprons or old clothing when needed
- Easy access to hand washing
- Appropriate adult supervision
For dry ice, boiling water, borax solutions, and pressure-producing demonstrations, children should remain observers while a responsible adult handles the activity.
Common Mistakes to Avoid
I find that the biggest hosting problems usually come from preparation rather than the science itself. Trying to run too many experiments at once can make even simple activities difficult to supervise.
Common mistakes include:
- Choosing more experiments than the group can realistically complete
- Not testing an activity beforehand
- Skipping trays or protective coverings
- Allowing children access to materials intended for adult handling
- Using permanent markers on unprotected surfaces
- Expecting static-electricity experiments to work the same way in humid conditions
- Measuring ingredients while children are waiting
- Forgetting towels, waste containers, or hand-washing supplies
- Ignoring known food or material allergies and sensitivities
- Assuming one age range makes an activity automatically safe
- Leaving broken balloon pieces or other small materials within reach of young children
Pro Tip: Test Every Experiment Ahead of Time
I test each activity early enough to understand what it actually looks like in my setting. That timing can vary considerably: a static experiment can be tested minutes beforehand, while crystal formation or a softened bone needs much longer.
During the test, I check:
- Whether the reaction is visible
- Whether the quantities need adjustment
- How long the activity really takes
- How messy the cleanup is
- Whether specialty materials work as expected
- Whether the activity is appropriate for the intended age group
- Whether the planned supervision is realistic
A short trial run can catch problems before a room full of excited children is waiting at the table.
Frequently Asked Questions
1. Are Halloween Science Experiments Safe for Preschoolers?
Some are suitable with close adult supervision, but I would not treat all 21 activities as preschool activities. Simple choices include dancing tissue-paper ghosts, basic static-hair demonstrations, oobleck, and an adult-led pumpkin eruption.
For younger children, I avoid dry ice, borax, pressure-producing demonstrations, boiling water, and loose small materials that could create a choking risk.
2. What Are the Easiest Halloween Science Experiments for Kids?
For a quick setup, I would choose dancing tissue-paper ghosts, Frankenstein static hair, oobleck, invisible ink, or the erupting pumpkin.
The easiest option also depends on the setting. A classroom may benefit from a cleaner activity such as chromatography, while an outdoor party can accommodate a messier pumpkin reaction.
3. Can I Do These Experiments in a Classroom?
Yes, but I would select activities based on the classroom’s space, cleanup facilities, school rules, and supervision available.
Chromatography, the red-cabbage indicator, density towers, wax-resist art, and shadow theater can work well when the teacher prepares the materials and explains the safety expectations first.
4. How Do I Set Up a Halloween Science Experiment Station for Kids?
For a small group, I would divide children into pairs or other manageable groups and give each station its own tray and pre-measured supplies.
A 40–60 minute session with approximately 8–10 minutes per station can work as a starting point, but the timing should be adjusted according to the experiments and children’s ages.
5. Which Halloween Science Experiments Require Adult Handling?
Dry ice, boiling water, concentrated borax solutions, the softened-bone preparation, and pressure-producing canister demonstrations should remain adult-controlled.
I also use adult assistance for activities involving heat or materials that should not be touched, tasted, or handled casually by children.
6. What Is the Science Behind Static-Electricity Ghosts?
Rubbing a balloon against hair or wool can transfer electrical charge. The charged balloon can then attract lightweight tissue paper or other small objects through electrostatic forces.
Humidity and the materials being used affect the result, so the effect can be stronger on some days than others.
7. How Long Should I Plan for a Halloween Science Party?
For a small party, I would allow roughly 40–60 minutes for a station-based science activity, with several short experiments rather than trying to complete all 21.
I also leave extra time for transitions, hand washing, and cleanup. Longer projects such as crystal formation can be started during the event and observed later.
8. How Do You Make Halloween Slime?
A basic slime setup often combines school glue with an appropriate activator, but the exact quantities depend on the products being used.
I follow the specific glue and activator instructions, add coloring or glow pigment if desired, and add the activator gradually. Children should not taste slime, and hands and surfaces should be cleaned afterward.
Read this next: 21 Halloween Table Decoration Ideas (Elegant to Spooky, From $10)
🎉 Quick Summary
✅ Best for: Halloween parties, classrooms, homeschool activities, family science, and rainy-day play
👧 Age range: Many activities suit ages 4–12, but supervision and material safety matter more than the age number alone
💰 Budget: Many experiments can use inexpensive pantry and craft supplies; exact costs vary by products and location
⏱ Setup: Some take only a few minutes, while softened bones and crystal projects require several hours or days
🌟 Beginner picks: Erupting pumpkin, dancing ghosts, oobleck, color-changing potion, and shadow theater
📌 Biggest tip: Test every activity early enough to understand its timing, cleanup, materials, and supervision needs
Conclusion
Halloween science does not need expensive equipment to be interesting. A balloon, paper towel, cornstarch, vinegar, baking soda, red cabbage, or a little oil can give children something meaningful to observe and question.
For parties, I would rather run four well-prepared stations than squeeze all 21 experiments into one afternoon. Age, space, cleanup, and supervision should guide the choices, while dry ice, boiling water, borax, and pressure-producing activities remain under adult control.
The goal is not to make every reaction perfect. It is to give children a safe opportunity to ask, “Why did that happen?” and then investigate the answer.



2 Comments