21 Kids Friendship Bracelet Ideas That Make Every Wrist Feel Special
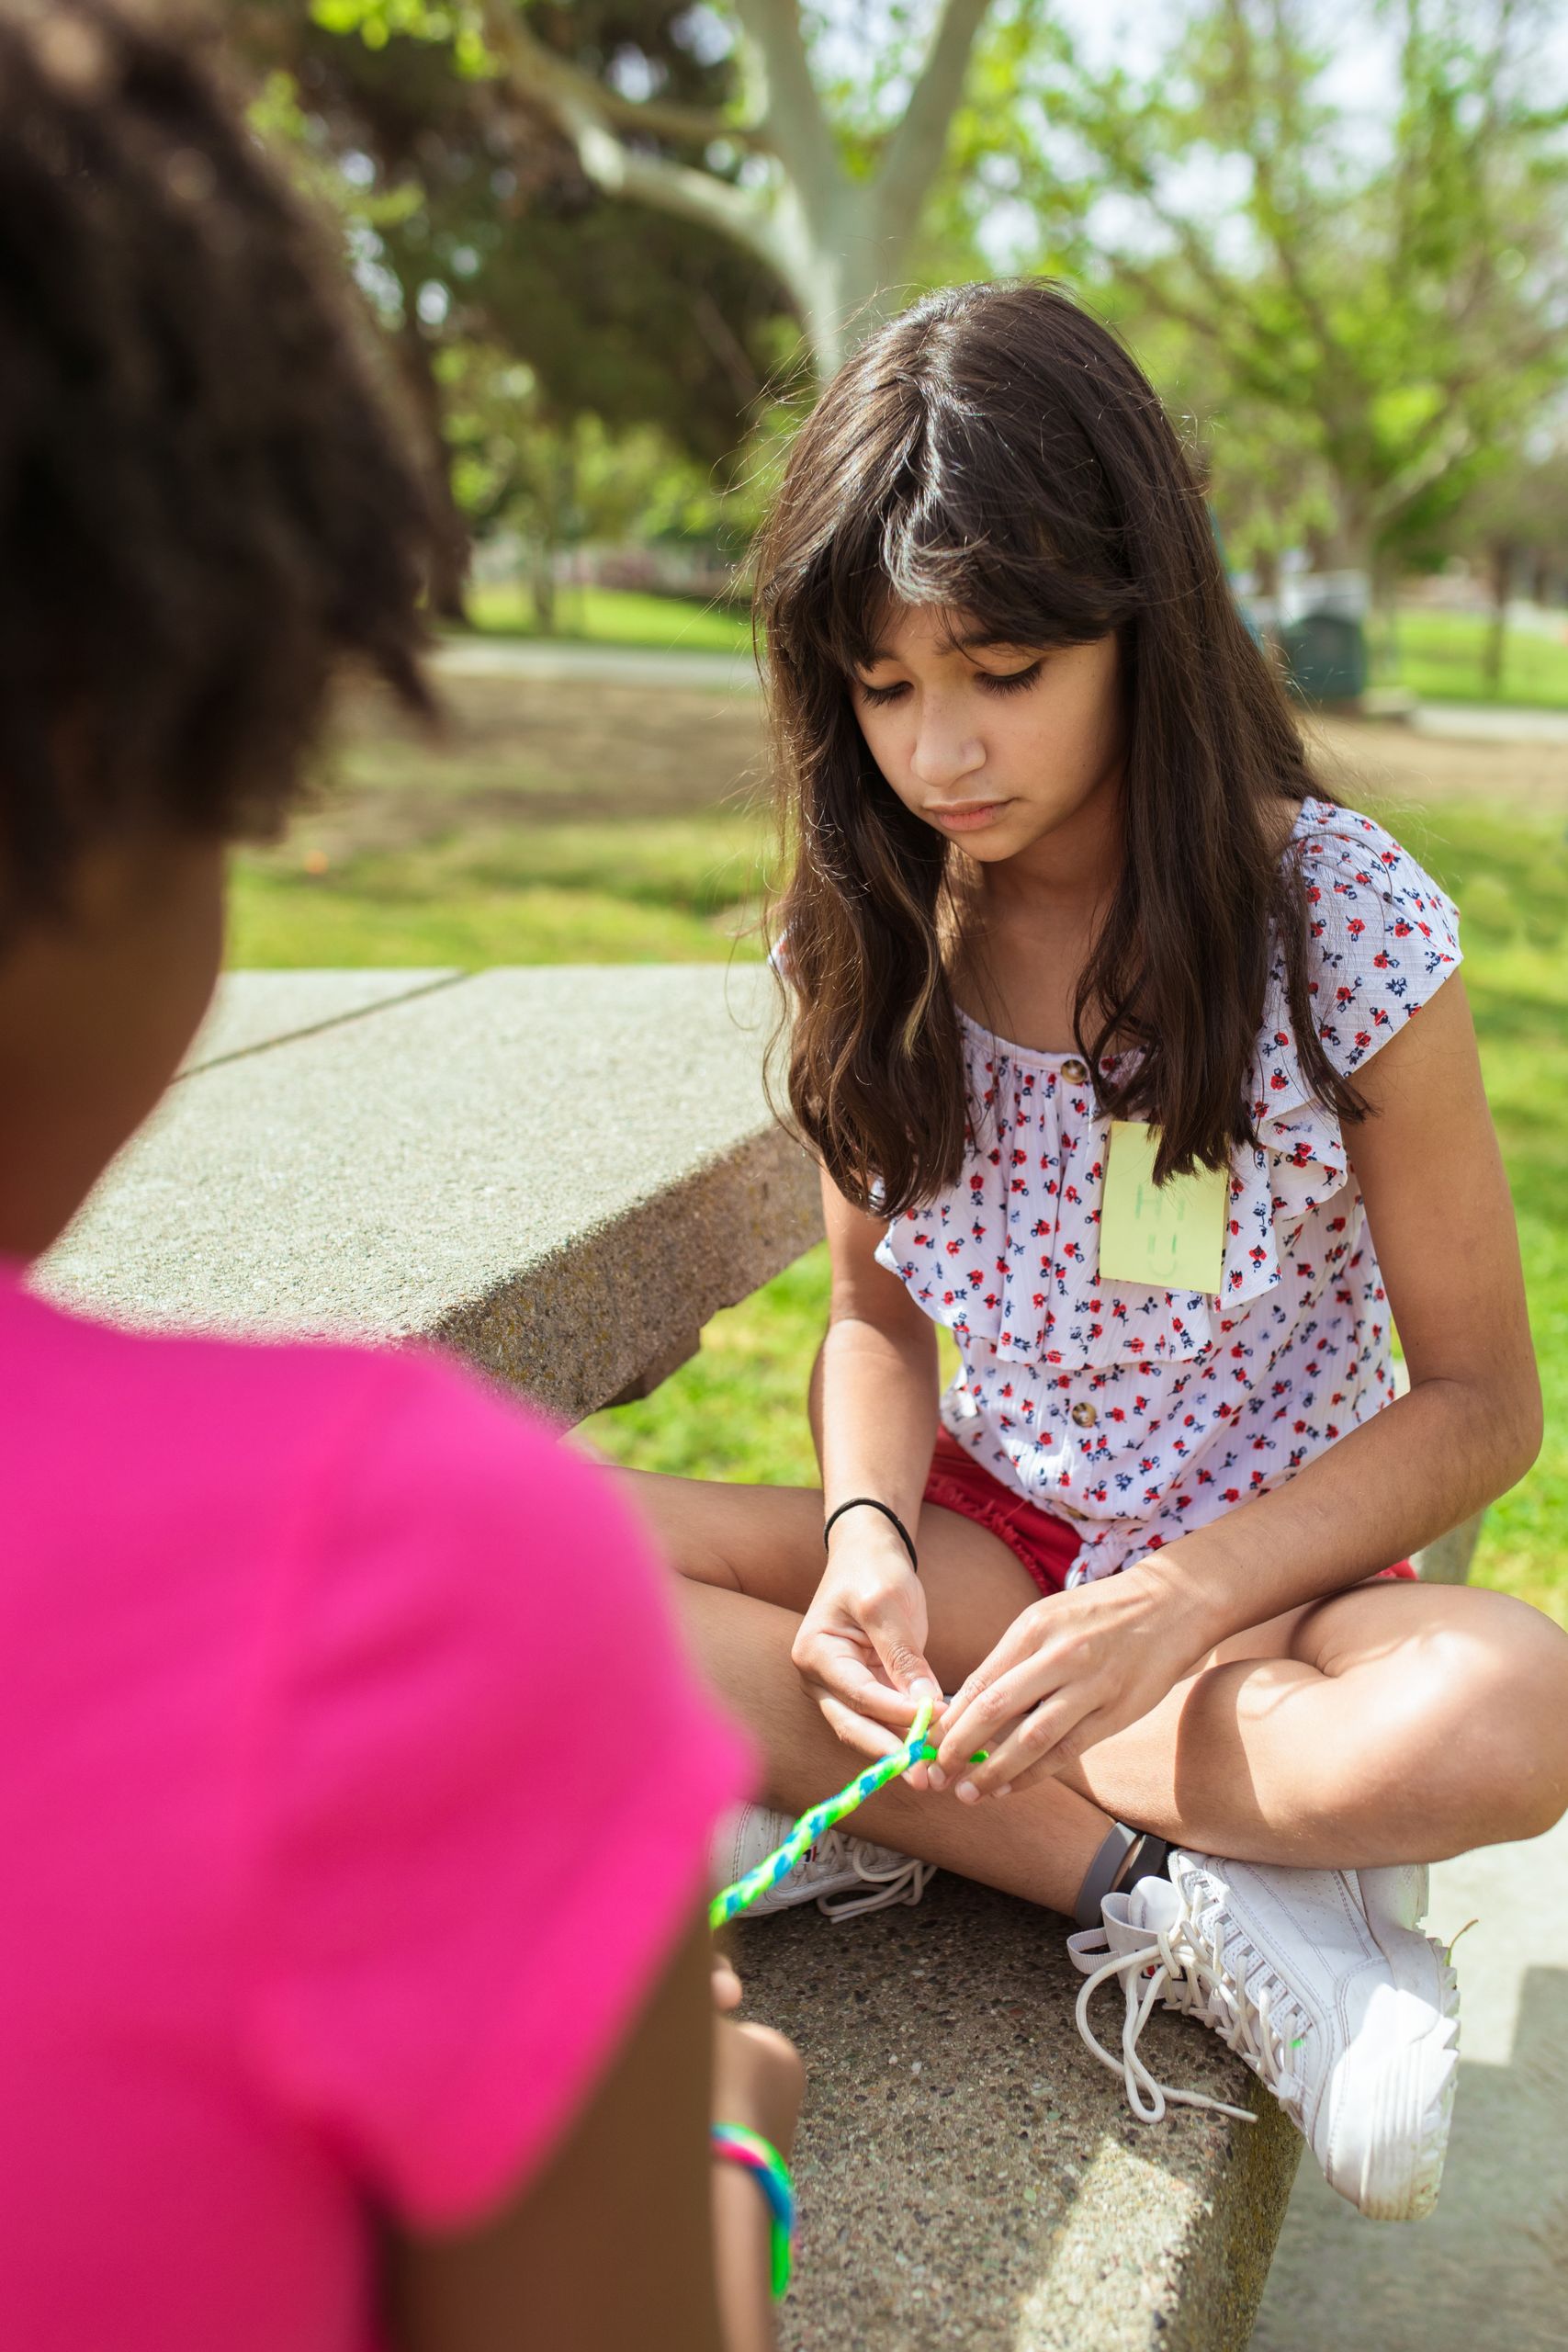
Some crafts keep kids busy for an afternoon, but kids friendship bracelet ideas keep friendships going for months. I have watched my children trade bracelets at school gates, birthday parties, and summer camps, and the bracelets that get worn longest are always the ones a friend helped make. I tested every idea below at home with my own kids, using basic embroidery floss, beads, and elastic cord.
I picked these twenty-one ideas because they cover true beginners through confident knotters, use supplies I could find locally without ordering anything fancy, and produce bracelets kids actually wear. Each idea includes the real cost, time, and difficulty, plus the honest downside I noticed while making it, so you can match the project to your child.
You do not need a special kit to start. A few skeins of embroidery floss, a ball of elastic cord, and a bead jar will cover most of this list. Related article: if your kids love working with yarn, my yarn craft ideas without knitting pair beautifully with the braiding and wrapping projects below.
Key Takeaways
- Start with the three-strand braid before attempting chevrons or hearts; knot skills build in order.
- Measure the wrist before cutting anything, because bracelets that are too tight never get worn.
- Double every elastic knot and seal it, since slipped knots are the top reason bracelets fall apart.
- Keep a small craft bag with floss, beads, and scissors ready; bracelet making is the perfect car-trip and waiting-room craft.
- Let kids choose their own colors and patterns; a bracelet they designed is a bracelet they will wear.
21 Kids Friendship Bracelet Ideas to Try
Here are my twenty-one favorite kids friendship bracelet ideas, from first braids to patterns worth showing off.
1. The Classic Three-Strand Braid

This is where every friendship bracelet journey should start. Cut three strands of embroidery floss about 45 centimeters long, knot them together, and braid right over center, left over center, until the bracelet fits around a wrist. Tie it off with a knot and trim the ends.
My daughter learned this braid in one afternoon when she was six, and she still makes one whenever a friend visits. The honest downside is that the braid loosens if the tension is uneven, so I teach kids to pull each strand snugly and check the length halfway through.
Cost / Time / Difficulty: Cost: under $3 | Time: 20 minutes | Difficulty: Easy
Pro Tip: Tape the knotted end to a table so little hands can braid without the whole thing sliding away.
2. Chevron Stripes

Chevron bracelets look impressive but use a simple repeating knot. Arrange six strands in mirror-image color order, then knot outward from the center on each side to form V shapes. Two colors make the pattern clearest for beginners, and four colors make it look wonderfully busy.
My ten-year-old made her first chevron in two sittings and wore it for a month straight. The downside is that losing your place in the pattern is easy, so we clip a small paper arrow to the working strand as a bookmark.
Cost / Time / Difficulty: Cost: $2-$4 | Time: 45-60 minutes | Difficulty: Medium
Pro Tip: Write the color order on a sticky note before starting; restarting a chevron halfway through is the fastest way to lose a young crafter.
3. Rainbow Friendship Bracelets

Rainbow bracelets are pure color joy. Thread pony beads in rainbow order onto elastic cord, or braid six strands of floss in rainbow sequence, and finish with a simple knot. Kids choose their own rainbow, which means no two bracelets ever match, and that is the point.
We made a batch of these for a birthday party, and every child left wearing at least one. The downside is that elastic cord stretches over time, so I measure bracelets slightly snug and warn kids they may need restringing after a few months.
Cost / Time / Difficulty: Cost: $3-$5 | Time: 25 minutes | Difficulty: Easy
Pro Tip: Lay beads out in rainbow order on a plate first; threading straight from a mixed pile leads to color chaos.
4. Rainbow Loom Band Bracelets

Loom bands need no needle and no knots to start. Loop small rubber bands over a mini loom or two fingers in a fishtail pattern, then hook them together with a small clip. The fishtail is the easiest pattern, and single-chain bracelets are even simpler for very young kids.
My youngest made five fishtails in one weekend and handed them out like trading cards. The downside is that thin bands snap if stretched too hard, so I buy slightly thicker bands and teach kids to pull gently when sliding bracelets on and off.
Cost / Time / Difficulty: Cost: $3-$6 for a band kit | Time: 15-30 minutes | Difficulty: Easy
Pro Tip: Keep a small clip bag for finished bracelets; loose loom bracelets tangle into a rubber-band nest within days.
5. Charm Dangle Bracelets

Start with a simple braided or cord bracelet, then add two or three small charms: a star, a heart, a tiny animal. Thread charms onto the braid as you work, or attach them with jump rings once the bracelet is done. Fewer charms look better than a crowded wrist.
My daughter’s charm bracelet has a star for our camping trip and a heart from her best friend, and she can tell you the story of each one. The downside is that cheap charms can tarnish or catch on sleeves, so I check the clasp rings and remove dangly charms for sports days.
Cost / Time / Difficulty: Cost: $4-$8 | Time: 30 minutes | Difficulty: Easy
Pro Tip: Let kids pick just three charms; a bracelet with ten charms jangles, snags, and rarely gets worn.
6. Daisy Chain Bracelets

Daisy chains are made by threading seed beads into flower shapes along a cord: five petal beads around one center bead, repeated along the length. It takes patience, but the finished bracelet looks like a tiny flower garland and suits spring outfits perfectly.
My daughter made her first daisy chain at nine, and it took two evenings, but she still wears it to family gatherings. The downside is that seed beads are tiny and roll everywhere, so we work on a felt tray and count beads into a small dish before starting.
Cost / Time / Difficulty: Cost: $3-$6 | Time: 60-90 minutes | Difficulty: Medium
Pro Tip: Use a beading needle and a tray with raised edges; seed beads without a needle frustrate even patient kids.
7. Candy Stripe Bracelets
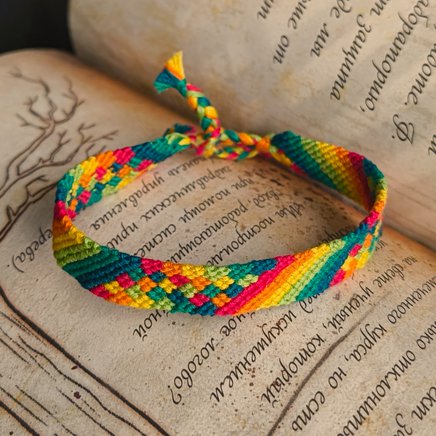
Candy stripes are the diagonal cousin of the chevron. Knot all strands in the same direction, row after row, and diagonal stripes appear like magic. Two bold colors make the stripes pop, and the rhythm of knotting the same way becomes meditative after a few rows.
This is the bracelet my kids make on car trips because the pattern needs almost no thinking once it starts. The downside is that the bracelet twists into a spiral if the tension is uneven, so I remind kids to keep the working strand flat.
Cost / Time / Difficulty: Cost: $2-$4 | Time: 30-45 minutes | Difficulty: Easy
Pro Tip: Knot with the bracelet hanging from a clipboard; the weight keeps tension even and stops the spiral twist.
8. Heart Pattern Bracelets

Heart bracelets use the same forward and backward knots as chevrons, arranged so the color changes form small hearts down the center. Start with a simple two-color heart pattern and a printed chart; following the chart row by row matters more than speed.
My daughter made one for her best friend’s birthday, and the look on her friend’s face was worth every tangled thread. The downside is that heart patterns are the hardest idea on this list, so I only suggest them for kids who have already finished a chevron.
Cost / Time / Difficulty: Cost: $2-$4 | Time: 60-90 minutes | Difficulty: Hard
Pro Tip: Print the pattern chart big and cross off each row as you finish it; losing your row is the number one heart-bracelet problem.
9. Name Bead Bracelets
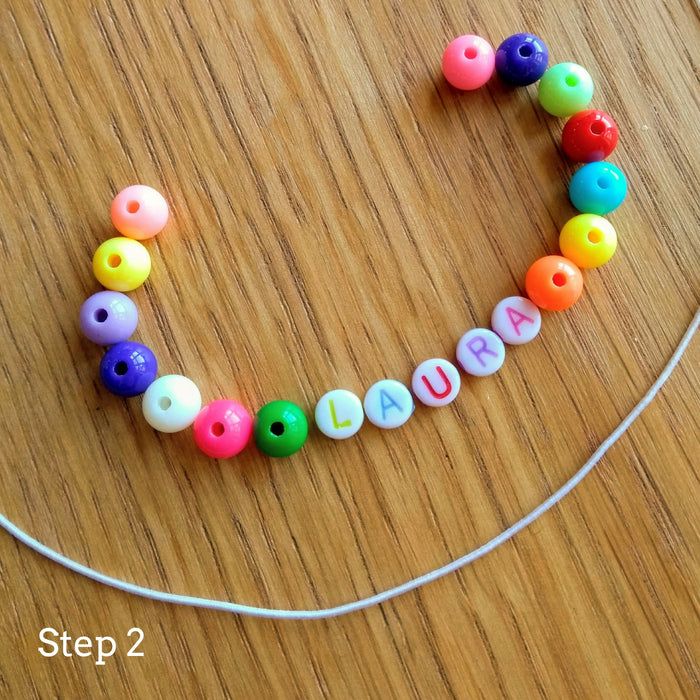
Thread letter beads spelling a name onto elastic cord, with colored spacer beads on either side, then knot the elastic securely. Measure the wrist first and add about two centimeters for comfort, because a bracelet that is too tight never gets worn.
My kids made name bracelets for their cousins last Christmas, and the cousins wore them all through the holidays. The downside is that elastic knots slip if they are not doubled and glued, so I add a tiny dot of clear nail polish on every knot before trimming.
Cost / Time / Difficulty: Cost: $4-$7 | Time: 20 minutes | Difficulty: Easy
Pro Tip: Buy letter beads with the letters printed on both sides; one-sided beads flip around and spell nonsense.
10. Mini Loom Woven Bracelets

A small cardboard or plastic loom turns weaving into a bracelet craft. Wrap warp threads around the loom, then weave colored weft threads over and under, row by row. The finished band slides off the loom and gets a simple braided closure at each end.
I made a cardboard loom from a cereal box for my son, and he wove his first bracelet during a single movie. The downside is that the edges pull in if the weft is tugged too tight, so I teach kids to lay each row down gently instead of yanking it.
Cost / Time / Difficulty: Cost: $2-$5 | Time: 40 minutes | Difficulty: Medium
Pro Tip: Use a fork to push each woven row down evenly; fingers alone leave gaps and bumps in the weave.
11. Simple Macrame Bracelets

Macrame bracelets use just two knots: the square knot and the spiral knot. Tie a row of square knots around a center cord, add a bead every few knots if you like, and finish with a sliding knot closure that adjusts to any wrist. The texture looks far fancier than the skill required.
I learned macrame alongside my daughter, and we were both surprised how quickly a bracelet appeared from plain cord. The downside is that macrame cord frays at the ends, so I seal cut ends briefly with a lighter myself, never letting kids handle the flame.
Cost / Time / Difficulty: Cost: $3-$6 | Time: 30-45 minutes | Difficulty: Medium
Pro Tip: Practice the square knot on a thick cord first; thin cord makes learning the knot pattern much harder.
12. Button Bracelets

Thread colorful buttons onto elastic cord or pipe cleaners, alternating sizes and colors, then knot the ends. Big buttons with two holes are easiest for small hands, and a mix of bright colors looks cheerful against any outfit. This is a wonderful use for a button jar.
My youngest made a button bracelet in ten minutes flat and wore it to school the next day, which is the fastest success on this whole list. The downside is that buttons slide and bunch on plain elastic, so I add a tiny knot between every third button to space them out evenly.
Cost / Time / Difficulty: Cost: $2-$4 | Time: 10-20 minutes | Difficulty: Easy
Pro Tip: Use buttons with large holes for kids under seven; tiny buttonholes and elastic cord are a frustrating combination.
13. Yarn-Wrapped Slap Bracelets

Wrap a slap bracelet band in colorful yarn, securing the start and end with a dot of glue, then add stripes by switching yarn colors. The slap mechanism makes them fun to wear, and the yarn wrapping turns a plain band into something handmade and soft.
My kids loved these because slapping the bracelet onto a wrist never gets old, even for adults. We made a set in school colors for a spirit day. The downside is that yarn wrapping loosens at the edges with hard play, so I add a thin line of glue along the inner edge as reinforcement.
Cost / Time / Difficulty: Cost: $3-$5 | Time: 25 minutes | Difficulty: Easy
Pro Tip: Wrap the yarn tightly with no gaps; loose wrapping slides around and bunches up within a day.
14. Paper Bead Bracelets
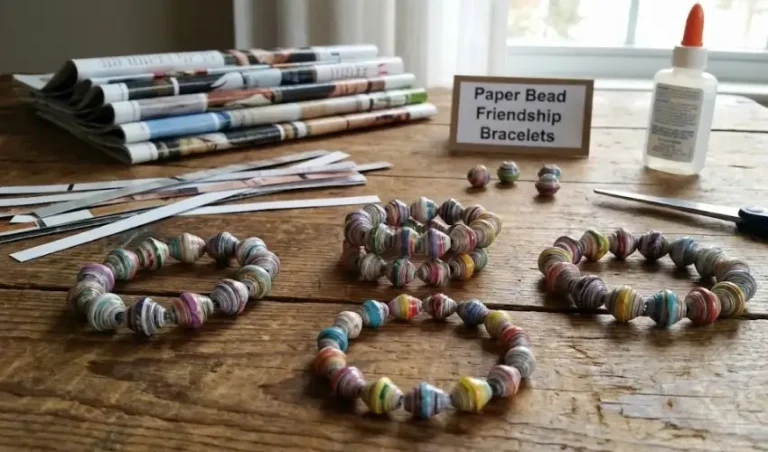
Paper beads are rolled from strips of colorful paper or old magazines, sealed with glue, and threaded onto elastic. Cut triangles about two centimeters wide, roll from the wide end around a toothpick, and seal the tip. The beads look surprisingly like real ones once varnished.
We made paper beads from an old magazine, and my daughter could not believe they started as paper. The downside is that unsealed paper beads go soft in rain or sweat, so I coat finished beads with clear nail polish or varnish before threading.
Cost / Time / Difficulty: Cost: under $2 | Time: 60 minutes including drying | Difficulty: Medium
Pro Tip: Roll beads tightly and evenly; loose rolls look lumpy and make threading a wobbly mess.
15. Neon Bright Bracelets
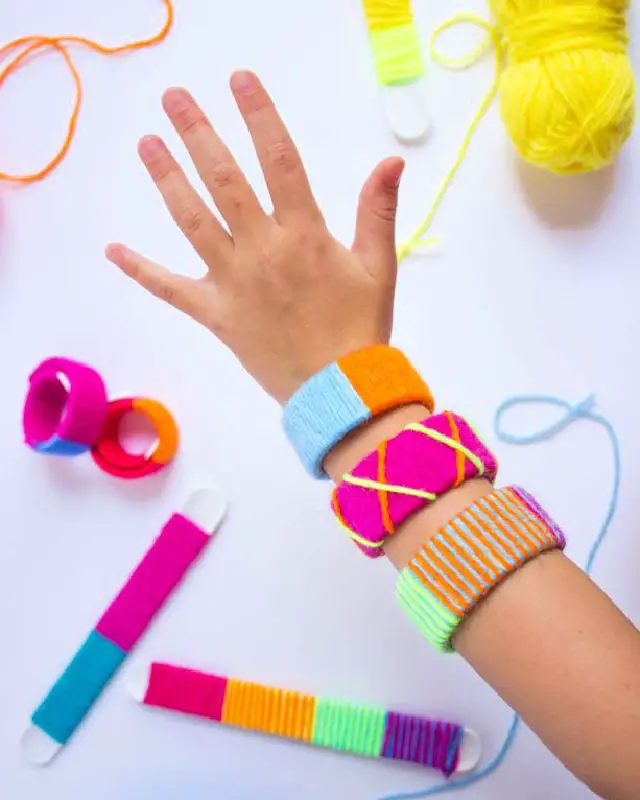
Neon bracelets are simply classic braids and stripes made in fluorescent colors: hot pink, lime, orange, and bright yellow. The patterns are familiar, but the colors make them glow at summer camps, discos, and evening parties. White beads between neon sections make the colors pop even more.
My daughter’s neon braid was the most complimented bracelet she ever made, mostly because it was visible from across the playground. The downside is that neon floss fades faster in strong sun than regular colors, so these are party bracelets, not forever keepsakes, and I say that honestly.
Cost / Time / Difficulty: Cost: $2-$4 | Time: 20-40 minutes | Difficulty: Easy
Pro Tip: Pair neon with one white strand; all-neon bracelets can look muddy, while white gives the eye a resting place.
16. Seashell Bracelets
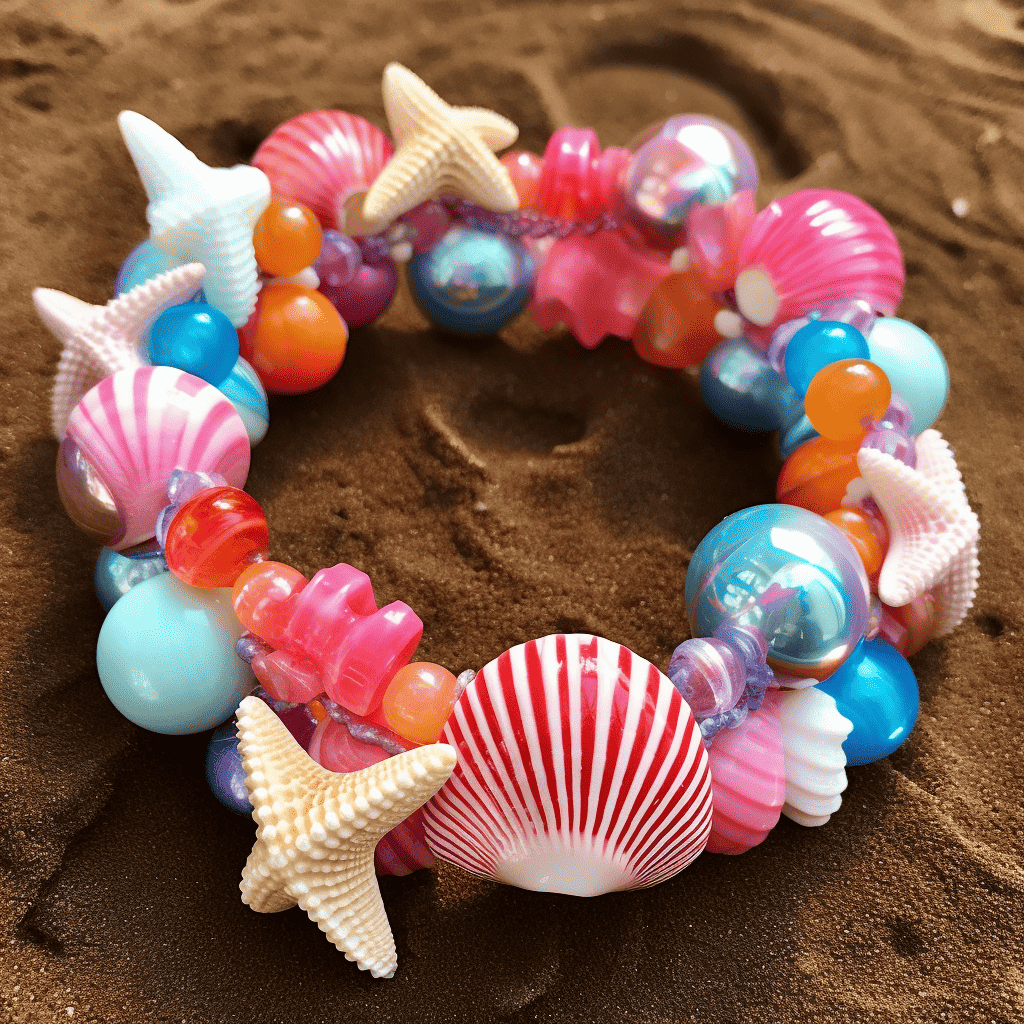
Thread small shells with holes, or shells glued to cord, onto elastic with a few blue and white beads between them. A trip to the beach provides the shells for free, and the bracelet becomes a holiday memory you can wear. Wash and dry shells fully before crafting.
Our seashell bracelets from last summer’s beach trip still smell faintly of the sea, or so my daughter claims. She is probably imagining it, but the memory is real. The downside is that thin shells crack if the elastic is pulled hard, so I choose thicker shells and handle them gently.
Cost / Time / Difficulty: Cost: under $3 | Time: 25 minutes | Difficulty: Easy
Pro Tip: Pick shells with natural holes when possible; drilling shells at home is a job for adults with proper tools, not kids.
17. Friendship Bracelet Party Station

Turn bracelet making into a party activity by setting up a station: a table with floss, beads, looms, and printed pattern cards, plus a sign showing three easy patterns. Kids sit, make, and trade, and everyone leaves with a bracelet and a new friend’s bracelet too.
I set this up for my daughter’s ninth birthday, and it was the calmest, happiest hour of the whole party. Adults ended up making bracelets as well. The downside is that a party station needs an adult helper for knots and tangles, so I never leave the table unsupervised with younger kids.
Cost / Time / Difficulty: Cost: $10-$15 for a group | Time: 60 minutes at a party | Difficulty: Easy
Pro Tip: Pre-cut all floss to length before the party; measuring string for ten excited kids is pure chaos.
18. Bold Striped Bracelets

Bold stripes use thick strands and high-contrast colors: black and yellow, navy and white, red and turquoise. Braid three thick strands or knot wide candy stripes, and the result reads from across a room. These suit kids who prefer strong colors over pastels.
My son, who claims bracelets are not his thing, actually wears his black-and-yellow striped one to every football game. Bold colors changed his mind. The downside is that thick strands make a chunky bracelet that does not fit under tight sleeves, so measure wrists with sleeves in mind.
Cost / Time / Difficulty: Cost: $2-$4 | Time: 20-30 minutes | Difficulty: Easy
Pro Tip: Use six strands of floss per stripe instead of one; thin stripes in bold colors look washed out.
19. Flower Bead Bracelets

Flower bead bracelets mix small flower-shaped beads with round spacer beads on elastic cord. Alternate one flower bead with two plain beads for a balanced look, or cluster flowers at the center with plain beads on the sides. Pastel flowers suit spring, brights suit summer.
My daughter made a flower bead bracelet for her grandmother, who wears it every Sunday. It is delicate, pretty, and surprisingly sturdy. The downside is that flower beads have small holes that snag on elastic, so I use a beading needle and check each bead’s hole before threading.
Cost / Time / Difficulty: Cost: $4-$7 | Time: 25 minutes | Difficulty: Easy
Pro Tip: String the pattern once on the table before threading; flower bracelets look best when the spacing is planned, not random.
20. Twisted Two-Color Bracelets
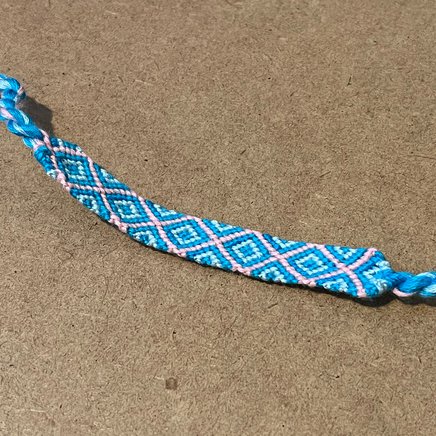
Twist two strands of different colors tightly in opposite directions, then let them wind around each other and knot the ends. This is the simplest bracelet that still looks clever, and it takes about ten minutes, which makes it perfect for beginners and impatient crafters.
This was my son’s first successful bracelet, finished before his patience ran out, and that early win kept him crafting. The downside is that twisted bracelets unwind if the end knots are weak, so I double-knot and add a tiny bead as a stopper on each end.
Cost / Time / Difficulty: Cost: under $2 | Time: 10 minutes | Difficulty: Easy
Pro Tip: Twist each strand until it kinks back on itself, then let go slowly; under-twisted strands make a loose, floppy bracelet.
21. Matching Best-Friend Bracelets
Matching bracelets are the whole point of friendship bracelets: two bracelets in the same pattern and colors, one for each friend. Make them side by side, swapping the working bracelet halfway so each friend knots part of the other’s bracelet. That shared making is the real gift.
My daughter and her best friend made matching braids before moving to different schools, and they still send each other photos wearing them. I get a little emotional about that. The downside is that matching bracelets rarely stay identical, since tension differs, so celebrate the differences instead of chasing perfection.
Cost / Time / Difficulty: Cost: $3-$5 for the pair | Time: 30-45 minutes | Difficulty: Easy
Pro Tip: Make both bracelets from one long set of strands cut in half; identical starting lengths give the closest match.
Which Friendship Bracelet Idea Should You Start With?
| Idea group | Best for | Cost | Effort |
|---|---|---|---|
| Braid, Twist, Button | Ages 4-6 beginners | Under $4 | Easy |
| Candy stripe, Neon, Striped | Ages 6-8 | $2-$5 | Easy |
| Chevron, Macrame, Loom, Paper beads | Ages 8-10 | $3-$7 | Medium |
| Daisy chain, Heart pattern | Ages 10+ patient crafters | $2-$6 | Medium-Hard |
| Party station, Matching pairs | Groups and best friends | $3-$15 | Easy |
Mistakes I Made (So You Don’t Have To)
I cut floss too short. Three bracelets in a row ended up too small because I forgot that knotting eats length. Now I cut strands at least 45 centimeters long for a child-sized bracelet, and longer for chevrons and hearts.
I trusted a single elastic knot. My daughter’s favorite bead bracelet burst on the playground, scattering beads everywhere. Every elastic knot now gets doubled, sealed with clear nail polish, and tugged hard before I call it done.
I started with the hardest pattern. Handing a heart pattern to a beginner ended in tears and a vow never to craft again. We went back to braids, built confidence, and tried hearts a month later with success.
I stored floss loose in a bag. An hour of untangling taught me to wind floss onto small cards or clothespins. Five minutes of organizing saves an afternoon of frustration.
Frequently Asked Questions
What supplies do kids need for friendship bracelets?
Embroidery floss, elastic cord, pony beads, scissors, and tape or a clipboard to hold the work. That basic kit covers most of the ideas on this list, and specialty items like looms or charms can be added later.
How long should friendship bracelet floss be?
I cut strands about 45 centimeters for a simple braid on a child’s wrist, and 60 centimeters or more for chevron and heart patterns, since knotting uses up length quickly. When in doubt, cut longer.
How do I stop friendship bracelets from falling apart?
Double every knot, seal elastic knots with a dot of clear nail polish, and test the bracelet with a firm tug before wearing. For knotted floss bracelets, a tight finishing knot plus a small braid tail works best.
Are friendship bracelets safe for young kids?
Yes, with supervision for small beads, which are a choking hazard for children under three. I keep seed beads and small charms for ages six and up, and use big pony beads and buttons for younger kids.
Can kids wash friendship bracelets?
Light hand washing is fine, but I tell kids to remove bracelets for swimming and baths when possible. Chlorine fades colors and weakens elastic, and paper bead bracelets should never get wet at all.
Final Thoughts
Friendship bracelets are small, cheap, and quietly powerful. They turn an ordinary afternoon into a memory, and a simple braid into proof that someone was thinking of you. My children have drawers full of craft supplies, but the bracelets are what they reach for when a friend needs cheering up.
Start with a braid this weekend, then let your child pick the next pattern from this list. Also read my cardboard box crafts for kids for another low-cost favorite, and read this next: handprint crafts for kids for keepsakes that pair beautifully with a handmade bracelet gift. Happy knotting, and may every bracelet find its friend.