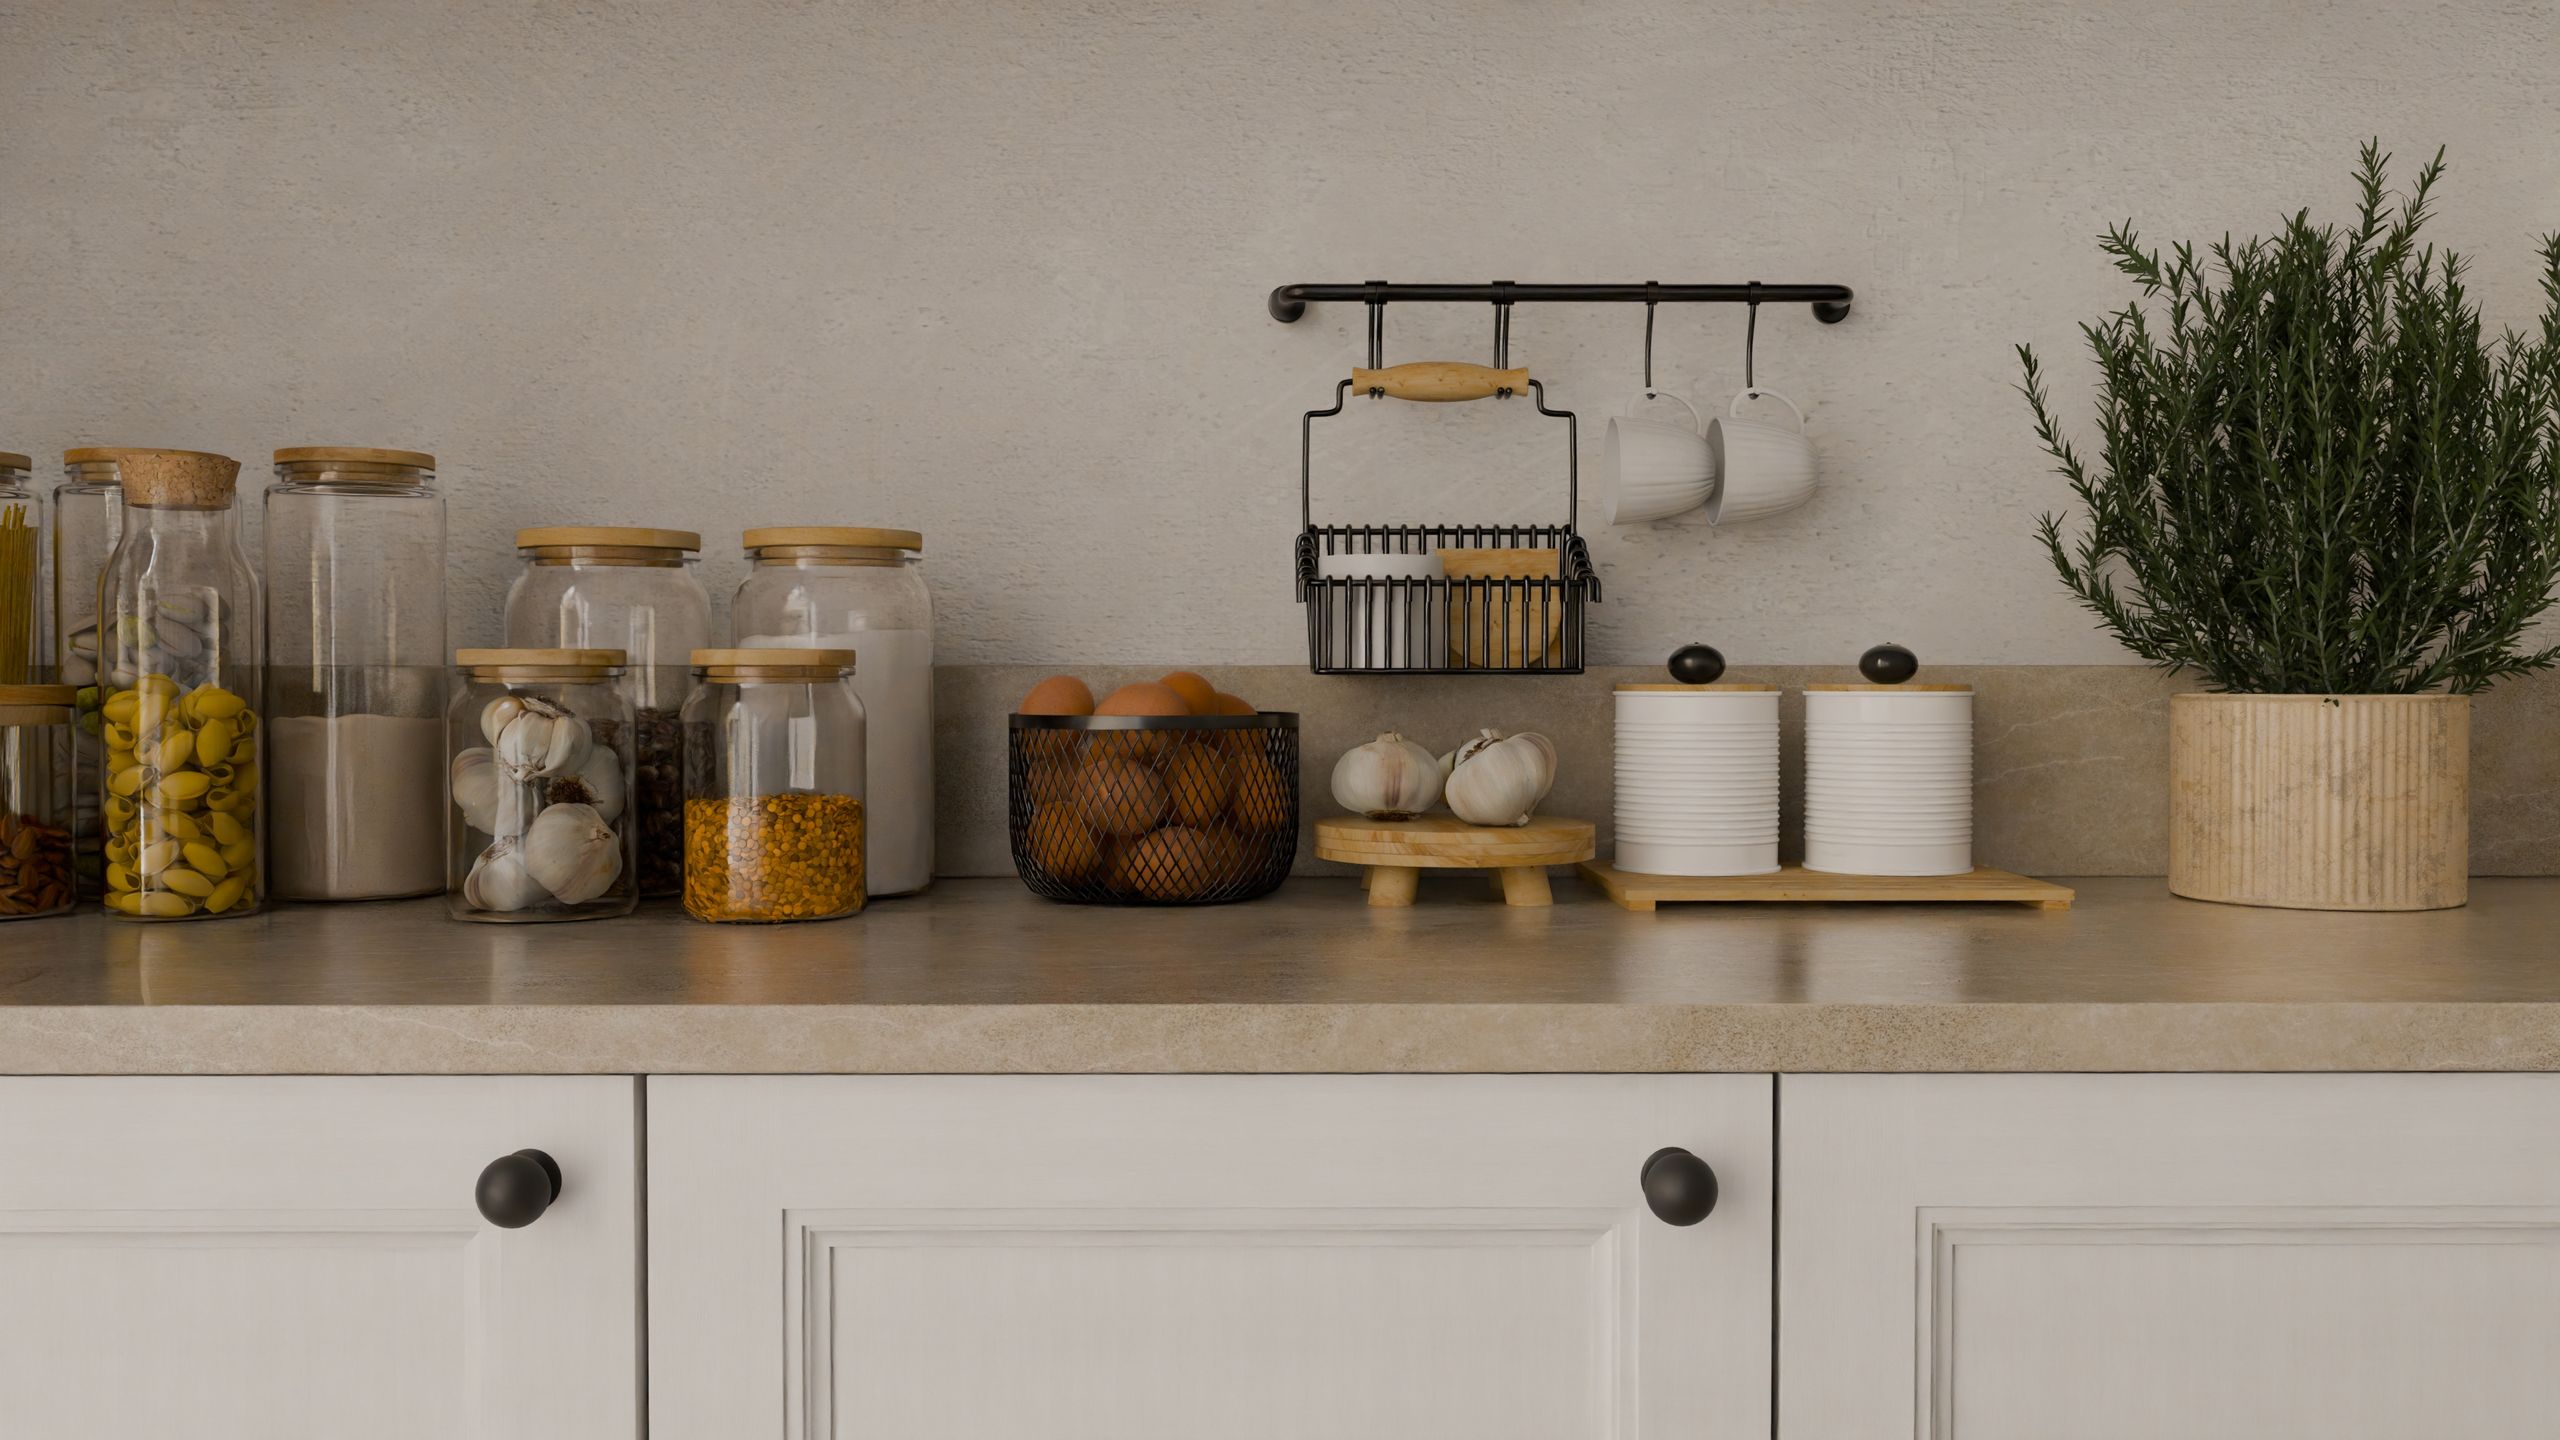
21 Kitchen Counter Organization Ideas That Keep Your Counters Clear
I have lived with a small kitchen for fourteen years, and the prettiest kitchens I have seen were rarely the ones with the most counter space. They were the ones where everything had a place. These kitchen counter organization ideas are the ones I have actually tried in my own kitchen, lived with through busy school mornings and big family dinners, and kept only if they still worked a month later. I picked them by one simple test: I cleared a counter completely, put back only what I use every day, and watched for a week to see what crept back.
If an idea failed that test, it did not make this list, no matter how beautiful it looked in a photo. I tested them zone by zone — prep, cooking, and coffee — because that is how a real kitchen works.
This list covers the whole counter, zone by zone. The prep zone gets the cutting board station and the knife strip. The cooking zone gets the tiered shelf, the spice shelf and the rail. The coffee zone gets its own tray. And the last two ideas are not products at all — they are habits, and they cost nothing.
Most of these ideas cost under $25, and none of them took me more than 30 minutes to set up. I have kept the ones that still worked a month later, and I have been honest about every catch — the tray that collects crumbs, the rail that drips, the shelf that was too tall. If an idea has a downside, you will read it before you buy anything.
Table of Contents
- The One-Tray Rule for Daily Essentials
- A Tiered Shelf by the Cooker
- A Wall-Mounted Rail for Utensils
- A Coffee Station in a Tray
- A Charging Drawer Instead of a Charging Counter
- A Lazy Susan in the Corner
- A Knife Block on the Wall
- A Fruit Bowl That Actually Gets Used
- A Cutting Board Station
- A Spice Shelf at Eye Level
- A Paper Towel Holder Under the Cabinet
- A Small Appliance Garage
- A Sink Caddy That Drains Properly
- A Recipe Stand That Folds Flat
- A Baking Zone in One Basket
- A Breakfast Basket for School Mornings
- A Herb Pot by the Window
- A Soap Dispenser and Brush in One Spot
- A Peg Rail for Mugs
- A Clear Counter at Night Rule
- A Weekly Five-Minute Reset
Key Takeaways
- Work in zones: prep, cooking, and coffee each get their own small area, so nothing drifts across the whole counter.
- Keep only daily-use items on the counter; everything else lives in a cupboard or drawer.
- Trays and baskets are the cheapest way to make a counter look tidy — and to keep it tidy.
- Small kitchen counter organization works best when every item has one home and one home only.
- A clear counter at night is the habit that makes every other idea work.
- Measure before you buy: a basket that is two inches too wide is a basket that lives in a cupboard.
1. The One-Tray Rule for Daily Essentials

My counters used to collect everything: oil, salt, pepper, honey, vitamins, a half-used candle. Now everything I reach for daily lives on one wooden tray, about 12 by 18 inches, at the back of the counter by the cooker.
If it does not fit on the tray, it does not live on the counter. That one rule cut my kitchen countertop clutter in half in a single afternoon. The honest downside is that the tray collects crumbs and drips, so I wipe it every night and line it with a washable mat.
Pro Tip: Keep the tray near where you actually cook, not where it photographs best.
Cost: $10-$25 | Time: 10 minutes | Difficulty: Easy
2. A Tiered Shelf by the Cooker

I bought a small two-tier metal shelf, about 12 inches wide, and put it beside the cooker for oils, vinegars, and salt. It lifts everything off the counter, so I can wipe underneath in seconds, and I can see the back row without moving the front row.
The watch-out is height. My first shelf was too tall for the space under the wall cabinet, so I measured the gap — 14 inches in my kitchen — before ordering the second one.
Pro Tip: Put the tallest bottles on the bottom tier and the shortest on top.
Cost: $12-$20 | Time: 5 minutes | Difficulty: Easy
3. A Wall-Mounted Rail for Utensils
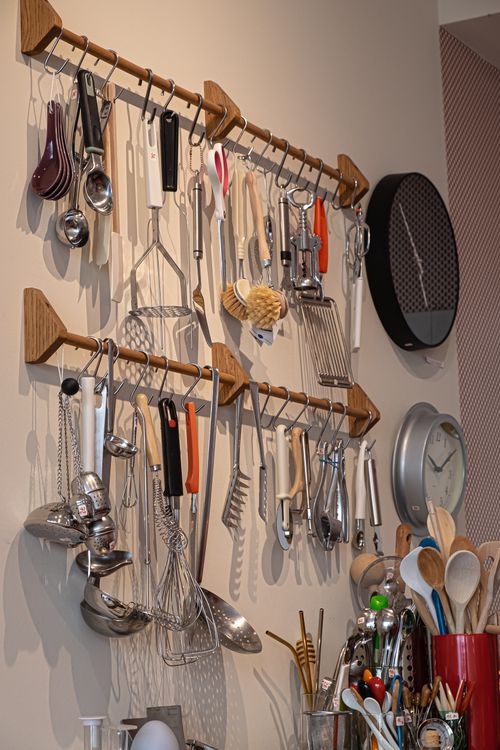
A simple steel rail with hooks, screwed under the wall cabinet, holds my spatulas, ladles, and tongs. It freed a whole drawer and cleared the big utensil pot that used to sit on the counter.
I can grab what I need with one hand while stirring with the other. The downside is real, though: utensils drip. I now hang only clean, dry utensils there, and I keep a small tray underneath for anything still damp.
Pro Tip: Hang the three utensils you use most at the front, nearest the cooker.
Cost: $15-$30 | Time: 20 minutes | Difficulty: Easy
4. A Coffee Station in a Tray
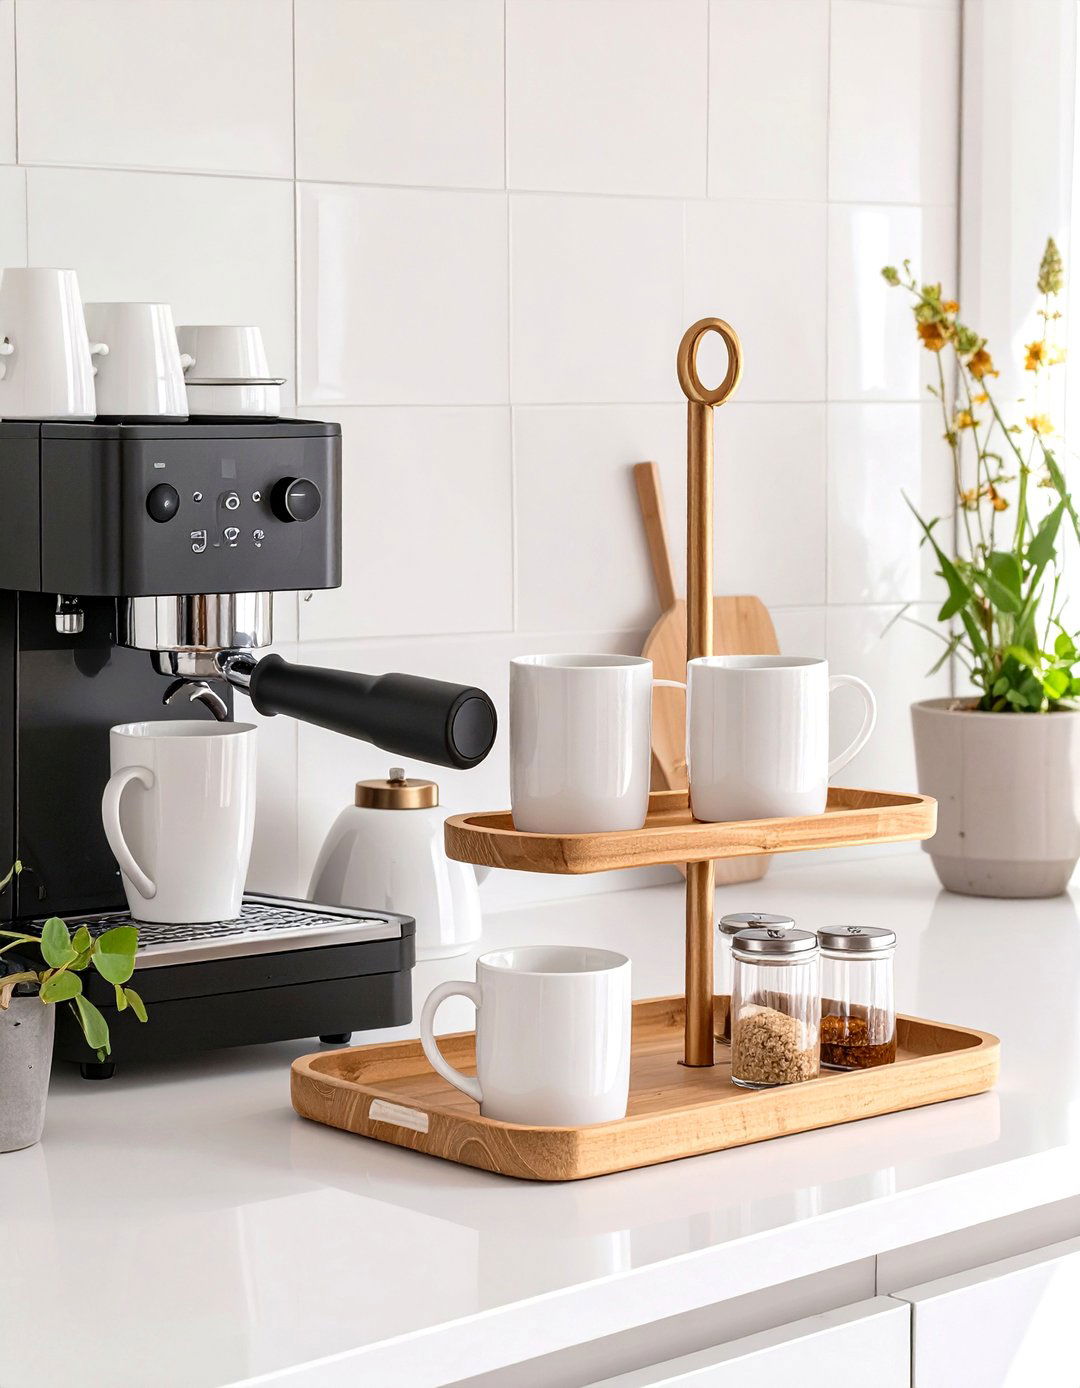
Image credit: We Love Home Blog
Coffee used to spread across my whole counter — machine, mugs, sugar, spoons, filters. Now it all lives on one tray in the corner: machine at the back, two mugs, a small sugar jar, and a spoon holder.
It takes me thirty seconds to make a cup without moving anything else. The honest catch is the cord. My machine cord was too short for the corner I chose, so I moved the station to the socket side of the kitchen, and the problem disappeared.
Pro Tip: Put a small cloth under the tray. Coffee drips happen, and a cloth is easier to wash than a wooden tray is to scrub.
Cost: $8-$20 | Time: 15 minutes | Difficulty: Easy
5. A Charging Drawer Instead of a Charging Counter

Image credit: Modern and Mellow
Phones and tablets used to charge on my kitchen counter, cables everywhere, right where I chop vegetables. I moved a small power strip into the top drawer beside the fridge and drilled a neat hole in the back of the drawer for the cable.
Now devices charge out of sight, and the counter stays clear. The downside is heat. I only charge two devices at a time in that drawer, and I never leave a device charging overnight in a closed drawer.
Pro Tip: Label the cables. One black cable looks like every other black cable at 7 a.m.
Cost: $10-$25 | Time: 30 minutes | Difficulty: Moderate
6. A Lazy Susan in the Corner

Image credit: Coohom
The back corner of my counter was a dead zone — things went in and never came out. A 10-inch turntable changed that. I keep oils, sauces, and honey on it now, and one spin brings anything to the front.
The watch-out is overloading it. I once piled it so high that a bottle fell off the back and smashed. Now I keep it to one layer, with nothing taller than the wall behind it.
Pro Tip: Choose a turntable with a rim. Without a rim, bottles slide off when you spin it too fast.
Cost: $8-$18 | Time: 5 minutes | Difficulty: Easy
7. A Knife Block on the Wall
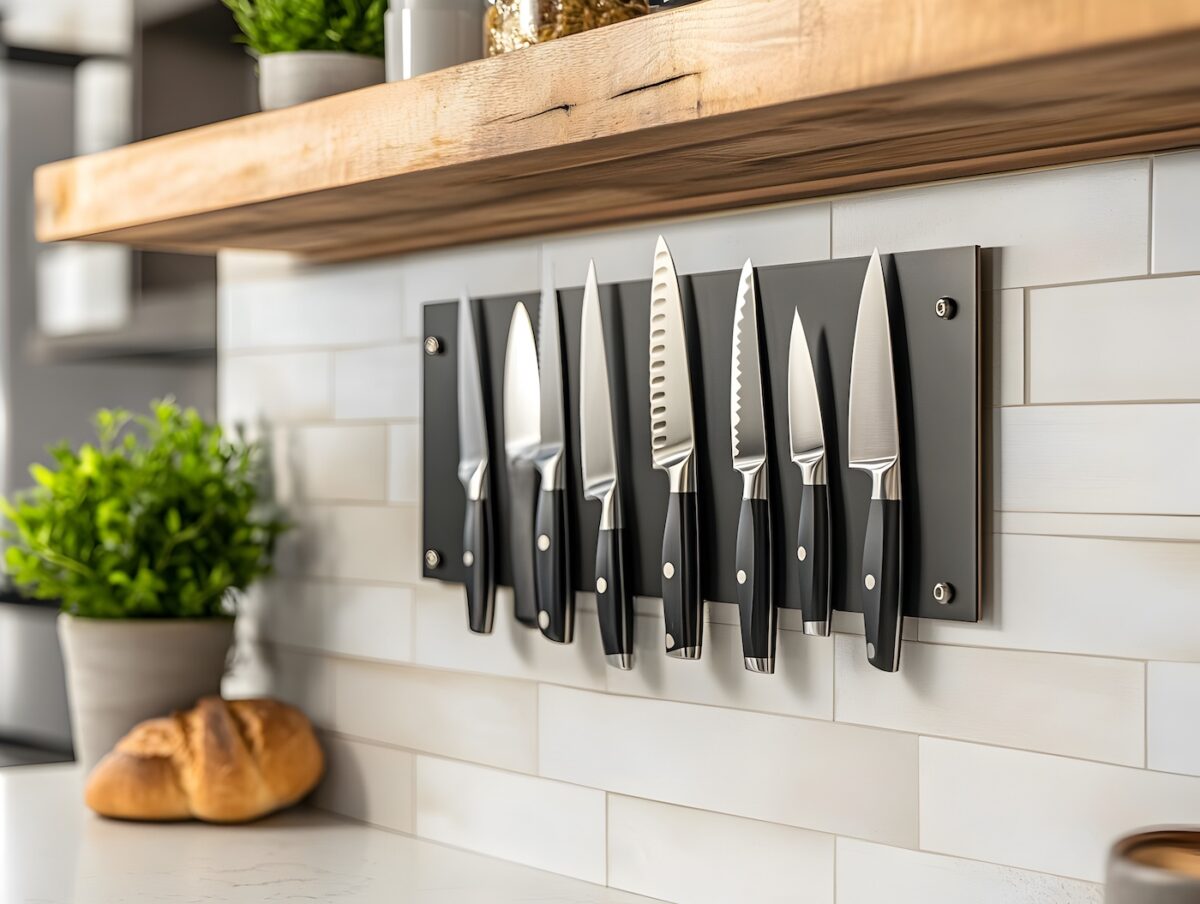
Image credit: TaskRabbit
A magnetic knife strip on the wall freed the big wooden knife block that used to take up a corner of my counter. My knives are visible, easy to grab, and I actually use more of them now because I can see them.
The honest downside is safety with children. My strip is mounted high, above the counter and out of reach of small hands. If you have toddlers who climb, a knife drawer insert is the better choice for now.
Pro Tip: Mount the strip where you chop, not where it looks best. Mine is right above the cutting board.
Cost: $15-$35 | Time: 20 minutes | Difficulty: Easy
8. A Fruit Bowl That Actually Gets Used

I used to keep fruit in the fridge, where we forgot it. Now a wide, shallow bowl lives on the counter by the door, and we eat twice as much fruit. Apples, bananas, and oranges only — nothing that bruises easily or attracts fruit flies in summer.
The downside is the fruit flies. In July, bananas on the counter brought them in within two days. I now keep bananas in the bowl for two days only, then move them to the fridge.
Pro Tip: A shallow bowl beats a deep one. In a deep bowl, the bottom fruit rots while the top fruit looks fine.
Cost: $5-$20 | Time: 5 minutes | Difficulty: Easy
9. A Cutting Board Station

Image credit: Kitchen Curates
Three cutting boards used to lean against the wall and fall over every time I opened a cupboard. Now they stand upright in a small file holder — the kind made for office papers — tucked at the end of the counter. It cost less than ten dollars and it has never tipped over.
The catch is size. My biggest board is 18 inches long and did not fit the first holder I bought. I measured the boards before buying the second holder, and now they all fit.
Pro Tip: Put the board you use most at the front. The first month I had them in the wrong order and pulled the wrong one out every time.
Cost: $5-$12 | Time: 5 minutes | Difficulty: Easy
10. A Spice Shelf at Eye Level

Spices used to live in a cupboard, where I could never find the cumin. Now the ten spices I use weekly sit on a small two-tier shelf at eye level beside the cooker.
I cook faster, and I actually use the spices I own instead of buying duplicates. The honest downside is dust and steam. Spices near the cooker get sticky, so I keep the lids tight and wipe the shelf every week.
Pro Tip: Label the lids, not just the jars. When you look down at a shelf from above, you see lids, not labels.
Cost: $10-$22 | Time: 20 minutes | Difficulty: Easy
11. A Paper Towel Holder Under the Cabinet
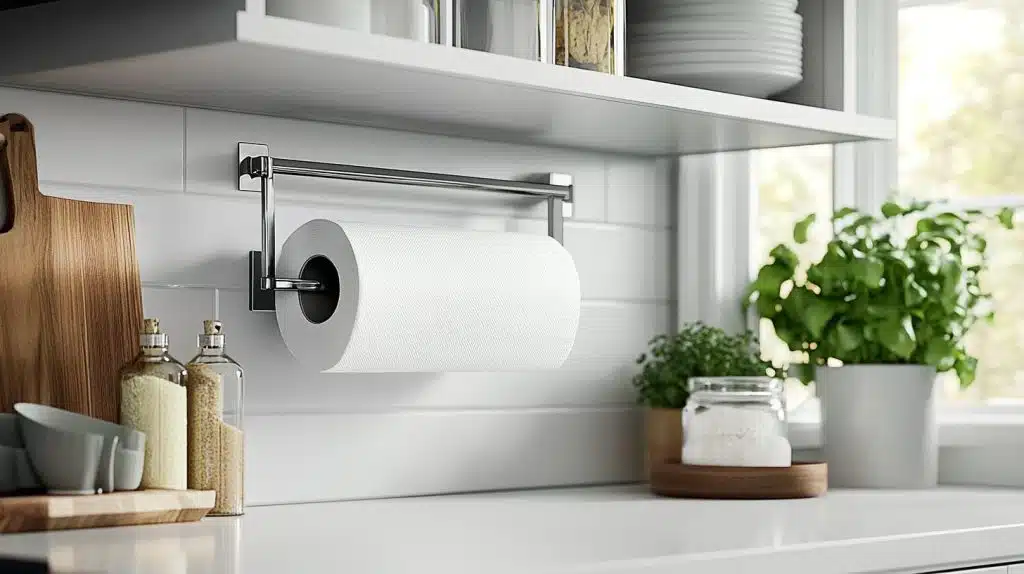
Image credit: A Little Delightful
A paper towel roll used to stand on the counter and fall over whenever the back door opened. A simple under-cabinet holder fixed it in ten minutes, with two small screws. The roll is always within reach when I spill something, and the counter space it freed is now my prep space.
The watch-out is the cabinet above. My holder was too low at first, and the roll scraped the counter. I moved it half an inch higher, and now the roll spins freely.
Pro Tip: Buy the holder that fits your roll size. Jumbo rolls do not fit standard holders.
Cost: $8-$15 | Time: 10 minutes | Difficulty: Easy
12. A Small Appliance Garage

Image credit: Kitchen Bath Gallery
My toaster and blender used to sit out all the time, taking up a third of my counter. Now they live in a small appliance garage — a cupboard with a roll-up door at the end of the counter. I open it in the morning, use what I need, and close it again.
The downside is the door. The roll-up door sticks sometimes, especially in humid weather. A simple open shelf with a curtain would be cheaper and easier if your budget is tight.
Pro Tip: Keep only the two appliances you use weekly in the garage. The bread maker you use twice a year belongs in a cupboard.
Cost: $40-$120 | Time: 1 hour | Difficulty: Moderate
13. A Sink Caddy That Drains Properly

The sponge and washing-up liquid used to sit in a puddle by the sink. A small caddy with drainage holes, stuck to the inside of the sink with suction cups, holds both and lets water drain back into the sink. No more puddle, no more smell.
The honest catch is the suction cups. Mine fall off about once a month, usually when the sink is full of hot water. I now check them every Sunday.
Pro Tip: A caddy with a drip tray is better than one without. Without a tray, the soap drips down the front of the sink cabinet.
Cost: $5-$12 | Time: 5 minutes | Difficulty: Easy
14. A Recipe Stand That Folds Flat

Image credit: Serene and Space
I used to prop my phone against the fruit bowl to read a recipe, and it fell in the sink twice. A folding recipe stand holds my phone or a cookbook at eye level, and folds flat into a drawer when I am done. It cost less than a takeaway coffee, and it has saved my phone more than once.
The downside is splashes. The first stand I bought was wood, and it stained the first time tomato sauce splashed on it. My current one is metal, and I wipe it clean in seconds.
Pro Tip: Put the stand at the back of the counter, not the front. At the front, you will knock it over with your elbow while you chop.
Cost: $8-$18 | Time: 2 minutes | Difficulty: Easy
15. A Baking Zone in One Basket

Image credit: Light and Layer
Baking used to mean pulling flour, sugar, baking powder, and vanilla from four different cupboards. Now they live together in one deep basket on the counter by the mixer. When I bake, I lift the basket out, use what I need, and put it back.
The honest downside is weight. A full basket of flour and sugar is heavy, and my first basket had weak handles that tore. I bought a sturdier basket with rope handles, and I never fill it more than three-quarters full.
Pro Tip: Keep the measuring cups in the same basket. If the cups live somewhere else, you will still be hunting for them.
Cost: $10-$20 | Time: 15 minutes | Difficulty: Easy
16. A Breakfast Basket for School Mornings

Image credit: SheFinds
School mornings were chaos until I made a breakfast basket: cereal bowls, spoons, and the small jars of jam and honey, all in one basket on the counter. The children set the table themselves now, and I am not opening three cupboards before my first coffee.
The catch is restocking. If I forget to refill the basket on Sunday night, Monday morning is chaos again. I added it to my Sunday reset list, and it has worked for six months.
Pro Tip: Keep only breakfast things in the breakfast basket. The moment a lunchbox sneaks in, the system breaks.
Cost: $8-$15 | Time: 10 minutes | Difficulty: Easy
17. A Herb Pot by the Window
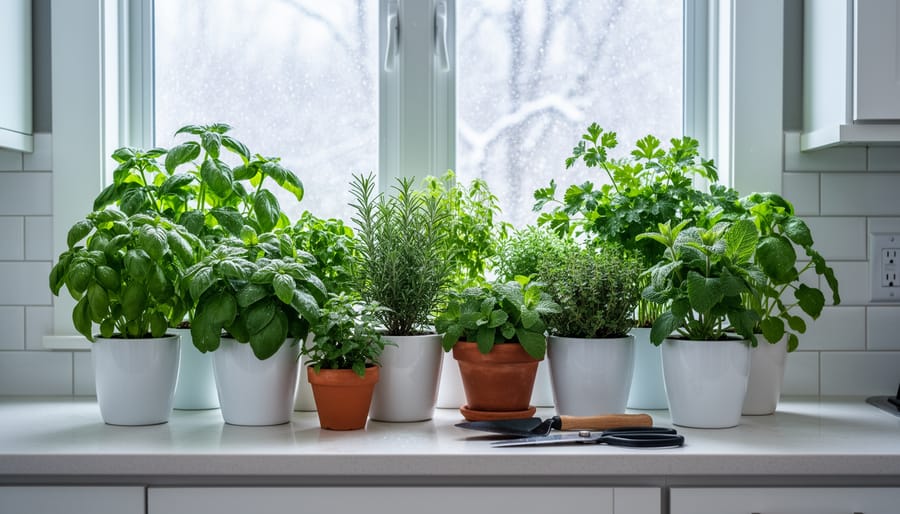
Image credit: Gardenoholic
Fresh basil and parsley used to die in my fridge drawer. Now two small pots live on the windowsill above the counter, where they get light and I can snip what I need while I cook. They cost less than a bunch of cut herbs from the shop, and they last for weeks.
The downside is watering. I forgot them for four days once, and the basil wilted badly. I now water them every morning while the kettle boils.
Pro Tip: Start with basil and parsley. They are the most forgiving herbs, and you will actually use them.
Cost: $5-$15 | Time: 10 minutes | Difficulty: Easy
18. A Soap Dispenser and Brush in One Spot

The washing-up liquid bottle, the hand soap, and the dish brush used to live in three different places around the sink. Now they sit together on a small stone tray beside the tap. It looks tidy, and I never hunt for the brush with wet hands anymore.
The honest catch is the tray. Stone trays stain if soap sits on them, so I rinse the tray every night. A ceramic tray is easier to keep clean, and that is what I would buy if I started again.
Pro Tip: Decant washing-up liquid into a pump bottle. The big shop bottle falls over and takes up twice the space.
Cost: $10-$20 | Time: 10 minutes | Difficulty: Easy
19. A Peg Rail for Mugs

Image credit: Kitchen Curates
Mugs used to fill a whole cupboard, and I could never find my favourite. A short peg rail under the wall cabinet holds six mugs by their handles, right above the coffee station. The cupboard is free for plates now, and the mugs look like part of the kitchen.
The downside is dust. Mugs hanging in the open collect dust, so I rinse them before use. I only hang the six I use weekly — the rest live in the cupboard.
Pro Tip: Hang mugs by size, not by colour. Six similar mugs look intentional; mixed sizes look messy.
Cost: $12-$25 | Time: 20 minutes | Difficulty: Easy
20. A Clear Counter at Night Rule

Image credit: House Digest
This is not a product, it is a habit, and it is the one that makes every other idea on this list work. Every night, before bed, I clear the counters completely. Dishes go in the dishwasher, the tray gets wiped, and the fruit bowl is the only thing left out.
It takes five minutes, and I wake up to a kitchen that feels calm. The honest downside is that it is hard on tired nights. I fixed it by making it part of my evening routine — kettle on, counters cleared, lights off.
Pro Tip: Set a timer for five minutes. You will be surprised how much you can clear in five minutes.
Cost: $0 | Time: 5 minutes a night | Difficulty: Easy
21. A Weekly Five-Minute Reset

Image credit: Vecteezy
Once a week, on Sunday evening, I do a five-minute reset. I take everything off the counters, wipe them down, and put back only what belongs there. Anything that has crept back — the mail, the school forms, the random screwdriver — goes to its real home.
The catch is that it only works if you actually do it weekly. I skipped it for three weeks once, and the counters looked like they did before I started. Now it is on my calendar, Sunday at 7 p.m.
Pro Tip: Keep a small basket by the door for things that do not belong in the kitchen. Drop them in during the reset and deal with them later.
Cost: $0 | Time: 5 minutes a week | Difficulty: Easy
Mistakes I Made (So You Don’t Have To)
Buying containers before measuring. My first set of baskets was beautiful and completely the wrong size. I measured nothing, guessed everything, and returned half of them. Now I measure first, buy second, every single time.
Keeping too much on the counter. I thought a tidy counter meant a pretty counter, so I kept everything out where I could see it. It looked good for a day and was a mess by Friday. If I do not use it every day, it does not live on the counter.
Choosing looks over cleaning. My first tray was unfinished wood, and it stained the first time oil dripped on it. Now I choose materials I can wipe — metal, ceramic, or sealed wood — even if they are less pretty in a photo.
Forgetting the household. I set up a perfect system for me, then realised my husband put the coffee back in the wrong place every morning. I fixed it by labelling the tray and showing everyone where things live.
Which Kitchen Counter Organization Idea Should You Try First?
| Idea | Best For | Cost | Effort |
|---|---|---|---|
| The One-Tray Rule | Any kitchen, today | $10-$25 | Low |
| A Lazy Susan in the Corner | Dead corners | $8-$18 | Low |
| A Coffee Station in a Tray | Coffee lovers | $8-$20 | Low |
| A Wall-Mounted Rail | Small kitchens, no drawer space | $15-$30 | Low |
| A Clear Counter at Night Rule | Everyone, free | $0 | Low |
| A Small Appliance Garage | Cluttered counters | $40-$120 | Medium |
| A Charging Drawer | Cable chaos | $10-$25 | Medium |
Frequently Asked Questions
How do I organize kitchen counters with very little space?
Start with small kitchen counter organization, not a big buy. Clear everything off, keep only what you use daily, and use one tray to contain it. A wall rail and a turntable add storage without taking counter space, and a clear-at-night rule keeps the gain.
What should stay on the kitchen counter?
Only daily-use items: the kettle or coffee machine, one tray of cooking essentials, a fruit bowl, and the soap by the sink. Everything else — the blender you use weekly, the baking gear, the extra mugs — belongs in a cupboard.
How do I organize kitchen countertop clutter for good?
Kitchen countertop clutter comes back because things have no home.
Give every item one home, use trays and baskets to contain groups, and do a five-minute reset every Sunday. The weekly reset is the part most people skip, and it is the part that makes the system last.
What are the best kitchen counter storage ideas on a budget?
A tray, a turntable, and a file holder for cutting boards cost under $40 together and solve most kitchen counter storage problems. Buy one, live with it for a week, then buy the next. Buying everything at once is how you end up with the wrong sizes.
How do I keep my counters clear with kids in the house?
Give the children one basket of their own — a breakfast basket works well — and a rule that everything else goes away at night. Keep knives and cleaning products high and out of reach, and keep the counters clear at night so mornings start calm.
Final Thoughts
My kitchen is not bigger than it was fourteen years ago, but it feels bigger, because the counters are clear and everything has a place. That is what good kitchen counter organization ideas do — they do not add space, they give you back the space you already had.
Start with one tray and the clear-at-night rule. Live with them for a week. Then add one more idea from this list, the one that fixes your biggest daily annoyance. Small, tested changes beat a big expensive makeover every time.