20 Kitchen Drawer Organization Ideas That Make Cooking Easier
I used to dread opening my kitchen drawers. The cutlery drawer jammed, the spice drawer was a graveyard of duplicate paprika, and finding the vegetable peeler took longer than peeling the vegetables. These 20 kitchen drawer organization ideas are the systems I actually installed in my own kitchen, drawer by drawer, and they are the ones that survived six months of daily family cooking.
I picked these kitchen drawer organization ideas by testing them with real drawers, real utensils, and a family that never puts things back quite right. Every idea below includes what it cost me, how long it took, and the honest downside I found, so you can skip my mistakes.
Key Takeaways
- Measure every drawer before buying anything — one test insert saves a return trip.
- Group by task (prep, cooking, baking, coffee) instead of by item type.
- Deep drawers need vertical dividers; shallow drawers need trays and grids.
- Label the zones, not just the bins, so the whole family maintains the system.
1. Custom Bamboo Cutlery Organizer

I replaced my rattling plastic tray with a bamboo cutlery organizer, and the drawer finally closes without a fight. I measured the drawer first, then chose an organizer with deep slots for forks, knives, and spoons plus a narrow slot for steak knives. Bamboo wipes clean, resists moisture, and looks far more expensive than it was.
The downside is that bamboo organizers come in fixed sizes, so if your drawer is an odd width you will have a gap. I filled mine with a slim knife sharpener, which turned a flaw into a feature.
Pro Tip: Put everyday flatware in the front slots and serving pieces at the back, where you reach less often.
Cost: $20–$40 | Time: 15 minutes | Difficulty: Easy
2. Adjustable Wood Drawer Dividers

Fixed trays never fit my wide utensil drawer, so I switched to spring-loaded wood dividers that expand to fit. I can slide them to make a wide zone for spatulas and a narrow one for corn holders, and when I bought a new set of tongs, I just moved a divider instead of buying a new tray. They feel built-in and cost a fraction of custom inserts.
They can slide if you yank the drawer open hard, so I added small rubber feet underneath. That solved it completely, and they have not budged since.
Pro Tip: Use two dividers to create three zones: daily tools, occasional tools, and one “overflow” zone for new gadgets.
Cost: $15–$30 | Time: 10 minutes | Difficulty: Easy
3. Clear Acrylic Utensil Bins
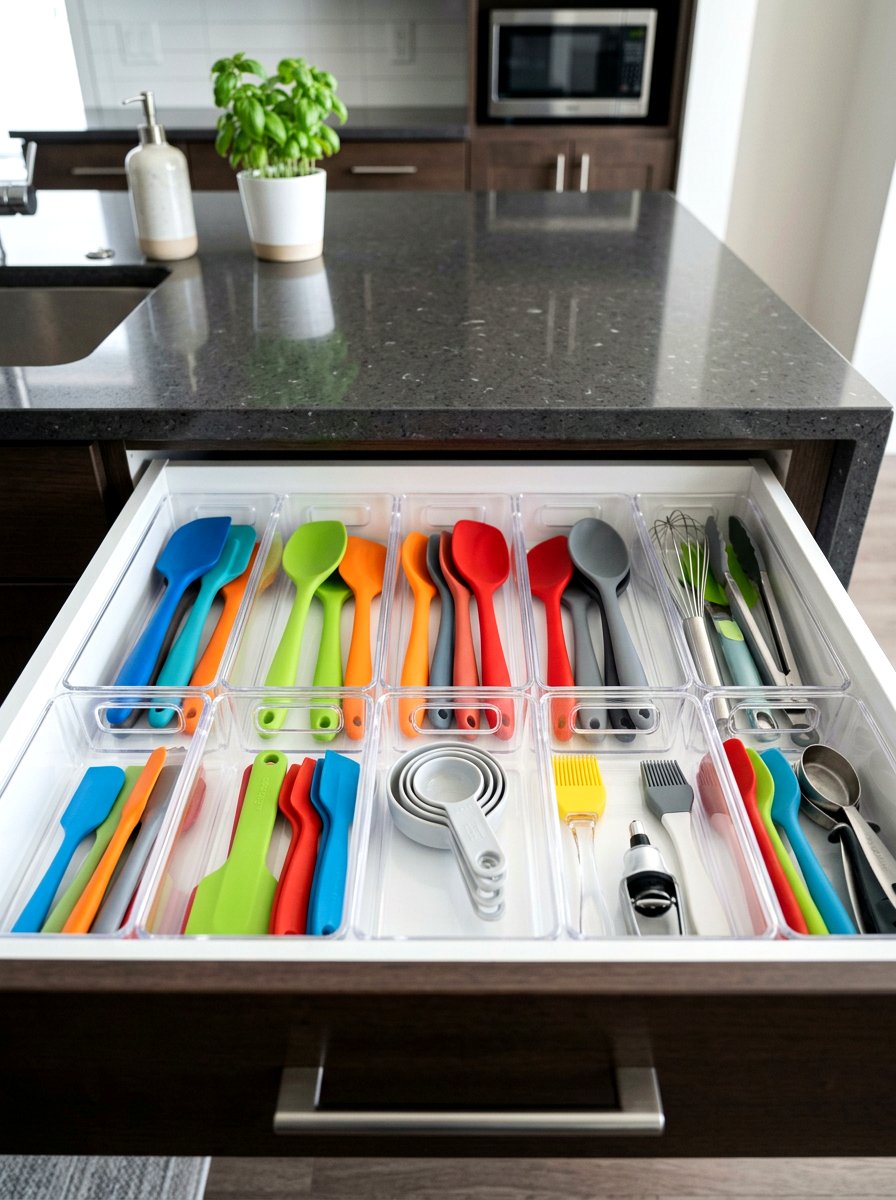
Clear acrylic bins turned my utensil drawer into a display I can read at a glance. I bought a set of different sizes and played Tetris until the drawer was full with no wasted gaps, then assigned each bin a job: spatulas, whisks, peelers, and one for random gadgets. Because I can see everything, I stopped buying duplicates of tools I already owned.
Acrylic scratches over time, especially with metal tools, so I keep sharp items in a separate felt-lined section. They also show crumbs, which honestly motivates me to wipe the drawer more often.
Pro Tip: Wash acrylic bins in warm soapy water, never in the dishwasher, or they cloud up.
Cost: $18–$35 | Time: 20 minutes | Difficulty: Easy
4. Deep Pot and Pan Organizer

My deep drawer used to be a stack of pans I dreaded unstacking, so I installed a pot organizer with adjustable dividers that keeps each pan upright like a file. Now I pull out exactly the skillet I need without lifting three others, and my non-stick coatings stopped getting scratched. I keep lids in a separate vertical slot at the back of the same drawer.
Heavy cast iron needs a sturdier divider than lightweight ones, so I bought a steel version for that drawer and kept the plastic one for lighter pans. Measure your tallest pan with its lid before ordering.
Pro Tip: Store the pan you use most at the front of the drawer so weeknight cooking stays fast.
Cost: $25–$50 | Time: 20 minutes | Difficulty: Easy
5. Pegboard Drawer System for Dishes

I borrowed this idea from commercial kitchens: a pegboard base with movable pegs that holds plates, bowls, and even small appliances in place inside a deep drawer. I arranged pegs around my everyday dishes, and nothing slides or chips when the drawer opens anymore. When I changed dish sets, I just moved the pegs instead of buying new organizers.
The system works best in deep drawers — in a shallow drawer the pegs are too tall to close. I also learned to leave one peg-free corner for odd-shaped items like my mortar and pestle.
Pro Tip: Place heavier items near the drawer slides, where the drawer supports the most weight.
Cost: $30–$60 | Time: 30 minutes | Difficulty: Easy
6. Expandable Silverware Tray

When our household grew, our silverware outgrew its tray, and crumbs collected in the gaps around it. An expandable tray solved both problems: the sides slide out to fill the entire drawer width, giving me extra compartments for serving spoons and steak knives. It looks custom-fit and cost less than a takeaway dinner.
Expandable trays can feel wobbly if extended to their maximum, so I keep the heaviest items in the fixed center section. Bamboo versions look better; plastic versions wipe cleaner — I chose bamboo and wipe it weekly.
Pro Tip: If your drawer is very wide, use two expandable trays side by side instead of one overstretched tray.
Cost: $18–$35 | Time: 10 minutes | Difficulty: Easy
7. Diagonal Dividers for Long Tools

Long spatulas, rolling pins, and whisks never fit straight in my drawers, so I tried diagonal dividers that run corner to corner. The angled layout creates extra-long compartments, and suddenly every oversized tool had a home. It also looks surprisingly stylish when you open the drawer, like a proper chef’s setup.
The triangular corners left over are small, so I use them for corn holders and clips rather than wasting them. This layout works best in square-ish drawers; in a very narrow drawer, straight dividers are better.
Pro Tip: Put your longest tool in first when planning the layout, then build the other compartments around it.
Cost: $20–$40 | Time: 20 minutes | Difficulty: Easy
8. Vertical Plate Storage Insert

Stacking plates meant lifting the whole pile to reach the bottom one, so I switched to a vertical insert that files plates like books. I can grab a single plate without moving anything else, and my stoneware stopped chipping at the edges. It sits in the deep drawer beside the dishwasher, which makes unloading almost enjoyable.
Very large charger plates may not fit standard inserts, so measure your biggest plate’s diameter first. I keep oversized platters in a separate cabinet and only file everyday plates here.
Pro Tip: File plates by size, largest at the back, so the drawer reads like a tidy bookshelf.
Cost: $22–$45 | Time: 15 minutes | Difficulty: Easy
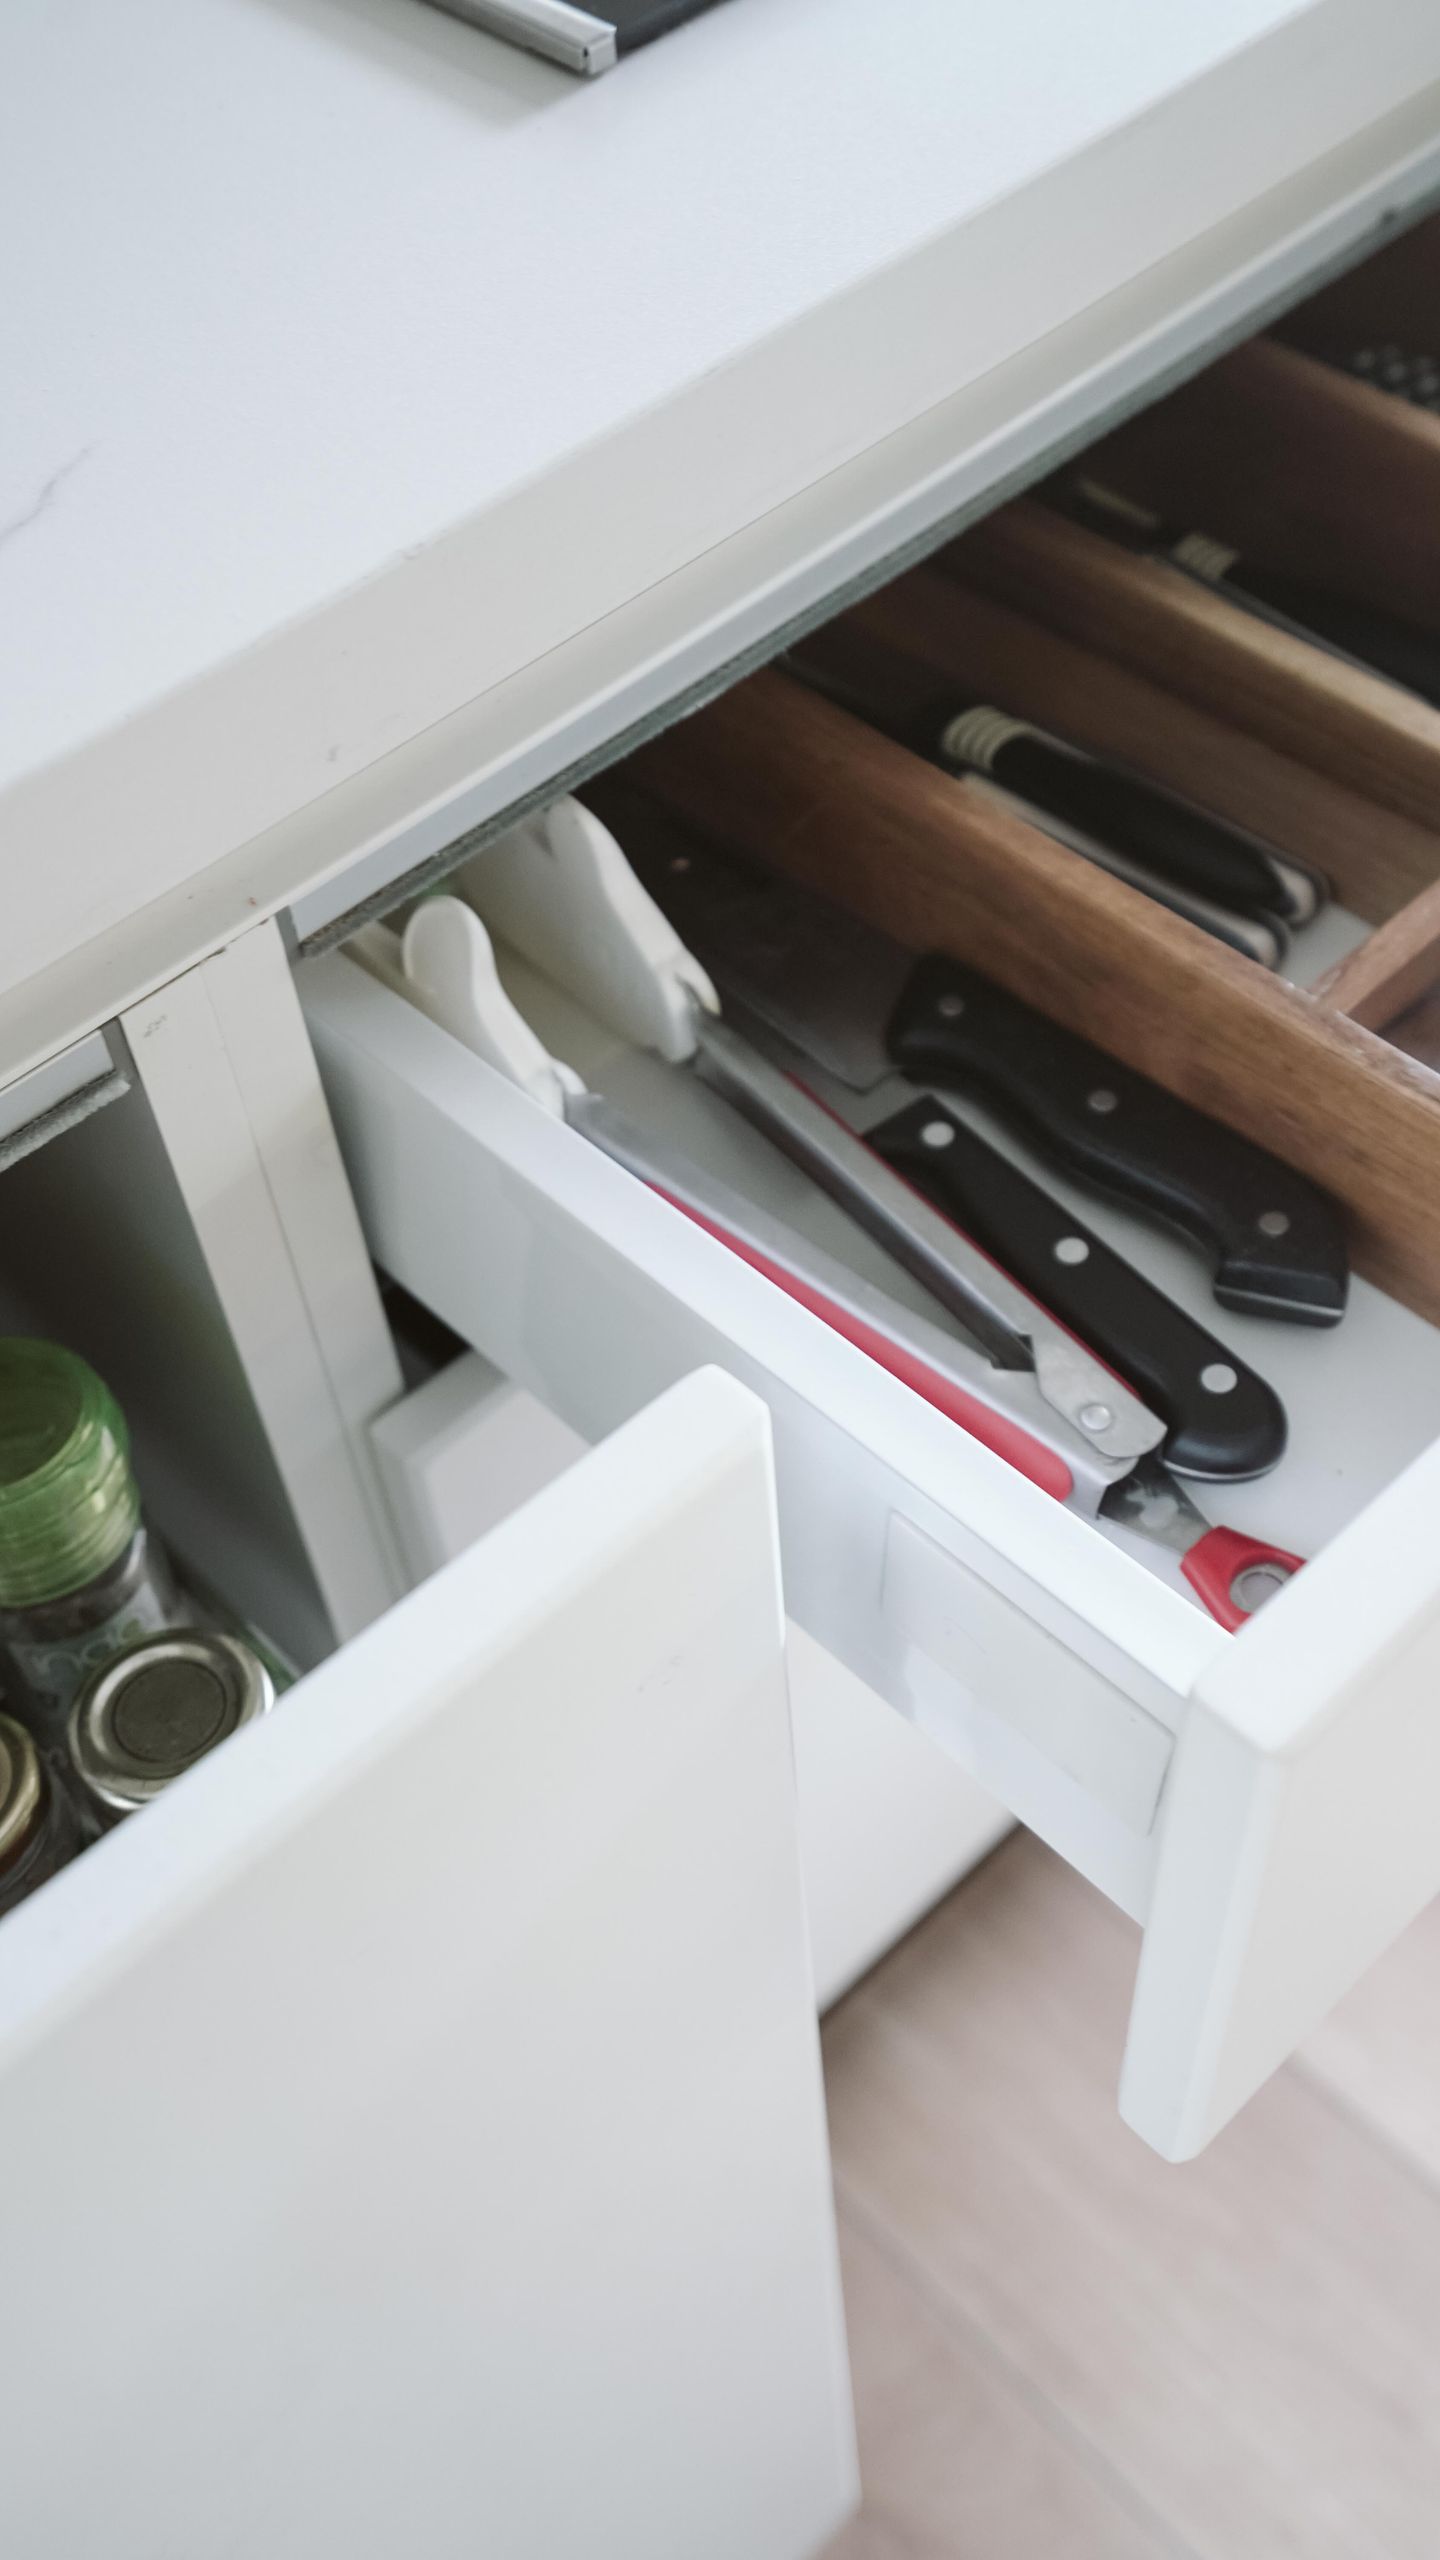
9. Knife Block Drawer Insert

Moving my knives from a countertop block into a drawer insert freed a full square foot of counter space and made the kitchen safer for my kids. The insert has individual slots that keep blades separate, so edges stay sharp and nobody reaches into a drawer of loose knives. I chose a cork-lined version that is gentle on blades.
Wide cleavers and serrated bread knives may not fit standard slots, so count your knives and check slot widths before buying. I keep my cleaver on a magnetic strip instead, which works perfectly alongside this system.
Pro Tip: Store knives with blades facing the same direction so you always grab the handle first.
Cost: $25–$55 | Time: 15 minutes | Difficulty: Easy
10. Spice Jar Drawer Rack

My spice drawer was the worst offender in the kitchen until I laid the jars flat in a tiered rack with labels facing up. Now I find any spice in seconds, even mid-recipe with messy hands, and I discovered I owned three jars of cumin. I switched to matching jars with uniform labels, which looks wonderful and makes refills obvious.
Flat spice racks take a whole drawer, so I gave up a shallow drawer near the stove that previously held junk. That trade was worth it every single day. Keep spices away from the oven’s heat if your drawer sits right beside it.
Pro Tip: Alphabetize spices once, then keep a small “new spice” zone at the end for recent additions.
Cost: $20–$40 | Time: 1 hour including decanting | Difficulty: Easy
11. Baking Sheet Divider Rack

Cookie sheets and muffin tins used to avalanche every time I opened the cabinet, so I put a vertical divider rack in the narrow drawer beside the oven. Trays now stand upright like files, and I pull out exactly the one I need without the whole stack clattering to the floor. Cutting boards fit in the same rack, which freed another shelf entirely.
Very large half-sheet pans may be too tall for shallow drawers, so measure your tallest tray before buying. I keep my biggest roasting pan in the oven itself, which is a trick my grandmother used.
Pro Tip: Sort trays by size, smallest at the front, so you never have to read labels to find the right one.
Cost: $18–$35 | Time: 10 minutes | Difficulty: Easy
12. Food Container Lid Organizer

Finding the right lid used to take longer than packing the leftovers, so I added a lid organizer with thin vertical slots inside the container drawer. Lids now stand upright sorted by shape, and the “tupperware avalanche” stopped overnight. I paired it with one large bin for the container bases, and matching sets finally stay together.
The honest downside is that odd-shaped lids still do not fit well, so I keep a small basket for those strays. Every few months I match lids to bases and donate the orphans — it takes ten minutes and keeps the drawer honest.
Pro Tip: Store lids in the same drawer as their containers, never in a separate cabinet, or matching becomes a chore.
Cost: $15–$30 | Time: 20 minutes to sort | Difficulty: Easy
13. Kitchen Gadget Grid System

Small gadgets like garlic presses, zesters, and corn holders tangled into one knot in my drawer, so I installed an interlocking grid that makes a tiny cubby for each tool. It is the highest-density system I tried, and it finally gave every gadget a visible home. When a tool has no cubby, I know it is time to declutter instead of cramming.
Grids work best for small items — a bulky avocado tool will not fit a standard square, so I keep oversized gadgets in a separate bin. The grid also needs a wipe-down monthly, since crumbs collect in the corners.
Pro Tip: Leave one empty cubby on purpose; it becomes the landing spot for the next gadget instead of chaos.
Cost: $20–$40 | Time: 25 minutes | Difficulty: Easy
14. Rolling Pin and Whisk Dividers

As a keen baker, my rolling pins and whisks were always the items that stopped the drawer closing. Long, narrow dividers that run the full depth of the drawer keep them straight and separated, and the drawer finally glides shut every time. I use one channel for rolling pins, one for whisks, and one for silicone mats rolled up.
This only works in a drawer that is actually long enough, so measure your longest rolling pin first — mine needed a 20-inch drawer. If your drawers are short, store rolling pins vertically in a tall cabinet instead.
Pro Tip: Slip a rubber band around whisk loops to stop them snagging on neighboring tools.
Cost: $15–$30 | Time: 15 minutes | Difficulty: Easy
15. Coffee Pod Drawer Insert

Coffee pods in boxes made my mornings slower, so I put a pod insert in the shallow drawer under the coffee machine. Each pod sits in its own slot, sorted by strength, and I can see at a glance when my favorite is running low. It turned a daily rummage into a two-second grab, and guests love choosing their own pod from the open drawer.
Pod inserts are brand-specific in size, so check that yours fits your machine’s pods before ordering. I keep decaf in a separate back row so nobody grabs it by mistake at 6 a.m.
Pro Tip: Refill the insert the moment you open a new box, not when it runs out, to avoid bare mornings.
Cost: $18–$35 | Time: 10 minutes | Difficulty: Easy
16. Tea Bag Organizer Tray

Half-empty tea boxes took over my pantry until I moved the bags into a shallow drawer tray with compartments for herbal, green, and black teas. Opening the drawer to offer a guest their choice feels oddly elegant, and the bags stay flat and uncrushed instead of rattling around in torn boxes. I toss the boxes and keep a small label for each section.
Loose-leaf tea does not belong here — I keep that in sealed tins on a shelf, since drawer trays are only for bagged tea. The tray needs a wipe every few weeks, as tea dust collects in the corners.
Pro Tip: Put your most-drunk tea in the front compartment so your morning routine is one motion.
Cost: $12–$25 | Time: 20 minutes to decant | Difficulty: Easy
17. Junk Drawer Sorting Bins

Every home has a junk drawer, and mine was a source of daily stress until I gave it small modular bins: one for batteries, one for pens, one for rubber bands and clips, one for tape and scissors. Suddenly the flashlight was findable, and the drawer stopped being a place where things went to disappear. The rule that saved it: if something has no bin, it does not live in this drawer.
Junk drawers refill themselves, so I do a five-minute purge on the first Sunday of each month and toss anything unidentifiable. That tiny habit is the whole secret — bins alone are not enough without it.
Pro Tip: Keep one bin labeled “return to owner” for items that belong elsewhere in the house.
Cost: $10–$25 | Time: 30 minutes to sort | Difficulty: Easy
18. Dish Towel Folded Dividers

My dish towels used to be a wrinkled heap, so I started filing them vertically in a deep drawer with narrow dividers, like clothes in a dresser. I can see every towel at once, pull one without disturbing the rest, and the drawer smells fresher because air moves between the folds. It looks like a boutique linen drawer, which makes an ordinary chore feel oddly satisfying.
This only works if you fold towels the same way every time, so I taught the family one simple fold and stuck to it. Bulky oven mitts do not file well, so those live in a separate basket by the stove.
Pro Tip: Roll instead of fold for very thin flour-sack towels — they file even tighter and never crease.
Cost: $12–$25 | Time: 20 minutes | Difficulty: Easy
19. Double-Tiered Cutlery Drawer

When one layer of cutlery was not enough, I added a sliding second tier to the drawer, which nearly doubled its capacity without any renovation. Everyday forks and spoons live on top, while serving pieces and specialty knives ride underneath. The top tray slides smoothly, and I reach the lower tier only when I need it, which is exactly the right frequency.
Double tiers add height, so check that your drawer still closes with taller items below — my soup ladles had to move out. The sliding mechanism also needs an occasional wipe, or crumbs make it stick.
Pro Tip: Put items you use weekly, not daily, on the lower tier so the top layer does most of the work.
Cost: $25–$50 | Time: 15 minutes | Difficulty: Easy
20. Hidden Charging Station Divider

Phone chargers and cables migrated across my counters until I converted one shallow drawer into a hidden charging station, with a power strip mounted at the back and dividers keeping each device’s cable separate. Phones charge out of sight, counters stay clear, and nobody trips over a cable anymore. I drilled a small hole in the back of the drawer for the power cord, which took ten careful minutes.
Check your local electrical safety rules before modifying a drawer, and never charge damaged cables inside a closed drawer — heat needs somewhere to go. I leave the drawer cracked open a finger’s width while charging, just in case.
Pro Tip: Label each cable with a small tag so family members stop unplugging each other’s devices.
Cost: $25–$45 | Time: 30 minutes | Difficulty: Moderate
Quick Comparison: Which Kitchen Drawer Organization Ideas Fit Your Kitchen?
If your drawers are shallow, start with trays, grids, and flat racks. If they are deep, go vertical with dividers and file-style storage. Also read this related guide on pantry organization ideas for small kitchens — the same zone system works beautifully when your drawers overflow into the pantry.
| Drawer Type | Best System | Typical Cost | Effort |
|---|---|---|---|
| Shallow cutlery drawer | Bamboo tray or expandable tray | $18–$40 | Low |
| Deep pot drawer | Vertical dividers or pegboard | $25–$60 | Low |
| Spice drawer | Flat tiered rack, labeled jars | $20–$40 | Medium |
| Junk drawer | Small modular bins + monthly purge | $10–$25 | Low |
| Baking drawer | Vertical sheet rack + long dividers | $15–$35 | Low |
Mistakes I Made (So You Don’t Have To)
I made each of these mistakes while testing these kitchen drawer organization ideas, and every one cost me a reorder or a re-sort. A related article on how to organize kitchen cabinets helped me extend the same system beyond the drawers.
Mistake 1: Buying before measuring
I ordered a beautiful bamboo tray that was half an inch too wide for the drawer. Now I measure width, depth, and height — and buy one test piece first.
Mistake 2: One giant organizer for everything
A single big tray with no zones became a junk drawer with walls. Small, dedicated zones always beat one large compartment.
Mistake 3: Forgetting the junk drawer
I organized every “real” drawer and ignored the junk drawer, which then swallowed the overflow. Give the junk drawer bins too, or it will eat your system.
Mistake 4: No maintenance habit
Drawers drift back to chaos without a reset. My five-minute monthly purge keeps every drawer working, and skipping it for two months proved why.
Frequently Asked Questions
How do I organize kitchen drawers on a budget?
Start with one drawer and a $15 set of adjustable dividers or small bins. Expand drawer by drawer instead of buying a full matching set at once — it is cheaper and you learn what actually fits.
What is the best divider material for kitchen drawers?
Bamboo looks warm and resists moisture, plastic wipes cleanest, and metal handles heavy pans best. I use bamboo for cutlery, plastic for gadgets, and steel for pots.
How do I keep drawers organized with kids in the house?
Label zones with pictures for young kids, keep their snacks and dishes in one low drawer they own, and accept that a monthly reset is part of the system, not a failure of it.
Should spices go in a drawer or on a rack?
A drawer near the stove is best if you cook daily, because labels face up and jars stay dust-free. Wall racks suit large collections, but they collect cooking grease over time.
Final Thoughts
My kitchen drawers went from daily frustration to quiet efficiency, and the change cost less than one restaurant dinner per drawer. Start with the drawer that annoys you most, measure it tonight, and order one organizer — momentum does the rest. Read this next: spice storage ideas if your spice collection has outgrown even a well-organized drawer.
If you try just one of these kitchen drawer organization ideas, make it the spice drawer rack. It is the single change my whole family noticed within a day.