16 Cast Iron Wall Storage Ideas for 2026
Cast iron cookware is built to last, but storing it can be surprisingly difficult. I’ve found that the biggest issue is not just the weight of the pans. It’s also finding a storage spot where they stay dry, remain easy to reach, and do not crowd the kitchen.
For a collection of skillets, Dutch ovens, griddles, or small cast iron molds, I like using the wall as extra storage space. A properly anchored rack or hook system can free up cabinets while turning the cookware into a useful part of the kitchen display.
In this guide, I’m sharing 16 cast iron wall storage ideas that work with different kitchen layouts, from narrow walls and cabinet sides to pegboards and full-height storage panels.
I use wall storage for cast iron when cabinets are already crowded or when I want frequently used pans within easy reach. The key is choosing hardware that can handle the load and attaching it to a suitable structural surface.
These ideas include simple hook arrangements, wooden rails, pegboards, pipe racks, floating shelves, ladder-style racks, and combinations of shelves with hanging rails. I’ve also included options for small kitchens where every inch of wall space matters.
Save this for later
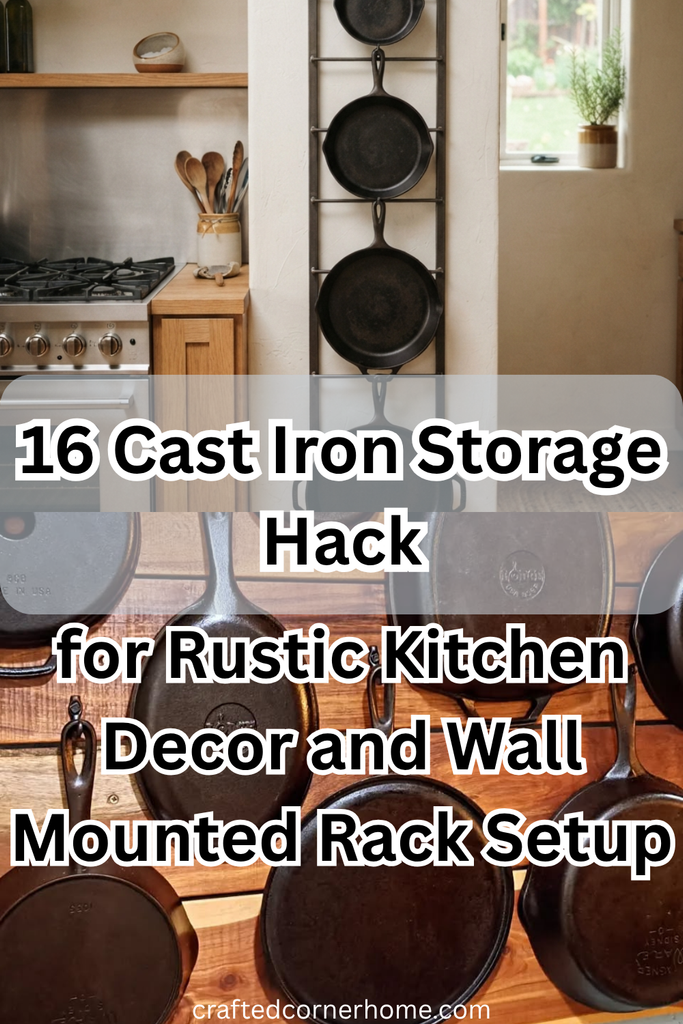
Table of Contents
Before installing anything, I check the weight of the cookware, the wall construction, the mounting location, and the clearance around each pan. Cast iron can be heavy enough that ordinary drywall anchors may not be suitable for larger pieces.
Key Takeaways
- I keep cast iron dry and avoid storing damp pans against one another.
- I prefer wall hooks and rails that are securely fastened to studs, masonry, or another properly supported surface.
- I leave enough space between pans so they are easy to remove without hitting neighboring cookware.
- I use vertical wall space when cabinets and drawers are already full.
- I choose storage based on the size, weight, and frequency of use of my cookware.
- I make sure hanging pans do not interfere with cooking areas, walkways, doors, or appliance controls.
Related article: 18 Pillow Storage Ideas for 2026
What is the Best Way to Store Cast Iron?
For me, the best cast iron storage method is one that keeps each piece dry, supported, and accessible. Cast iron can develop rust when moisture remains on the surface, so I avoid storage arrangements that trap dampness.
Weight is another major consideration. A single skillet can be surprisingly heavy, and a wall rack holding several pieces can place a significant load on its mounting points. I therefore pay more attention to the wall structure and hardware than I would for lightweight kitchen decor.
I also prefer storing pans separately rather than creating tall stacks whenever possible. Individual hanging positions make it easier to grab the pan I need without moving several heavy pieces first.
Pro Tip: Before installing a wall rack, weigh your heaviest cookware and estimate the combined load. Then choose hardware with an appropriate safety margin rather than selecting hooks based only on appearance.
Vertical Hook Grid
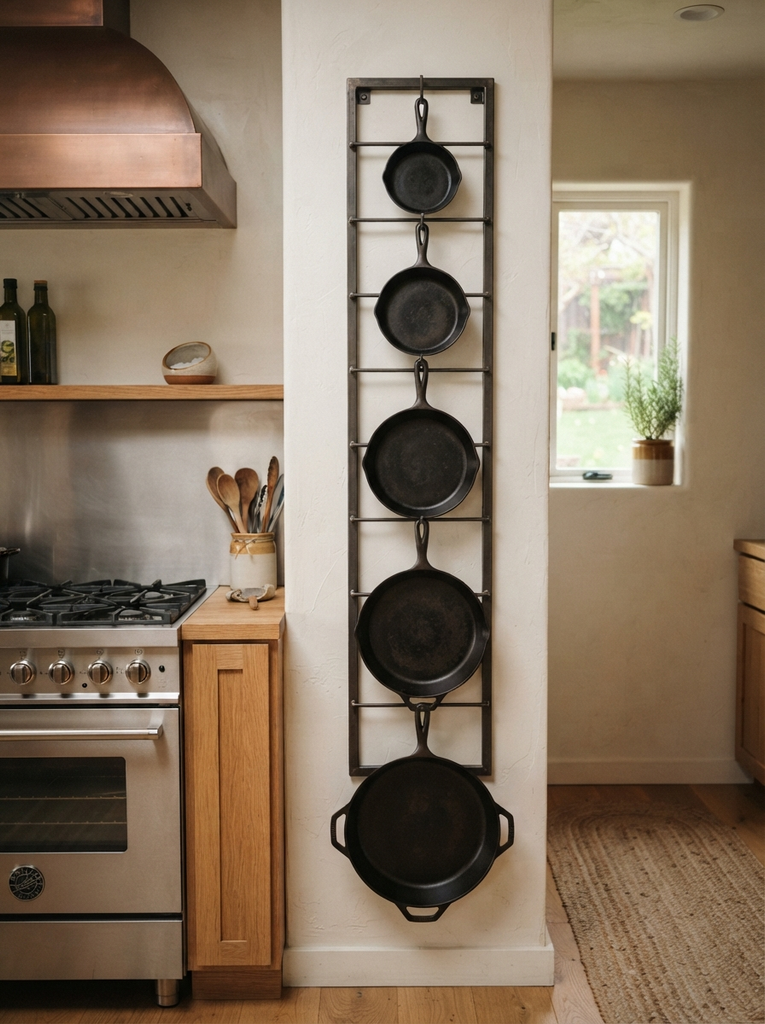
A vertical hook grid gives every skillet its own hanging position while making use of a relatively small section of wall. I like this approach for kitchens with an empty wall that is close to the cooking area.
I would mount a strong wood panel or properly supported rail and arrange the hooks according to pan diameter. Larger skillets need more clearance so their handles and bodies do not interfere with neighboring pieces.
Leaving a few inches between cookware pieces makes the rack easier to use and improves access. I also keep the lowest pan high enough that it will not become an obstacle in a busy walkway.
Wood Backer Rail
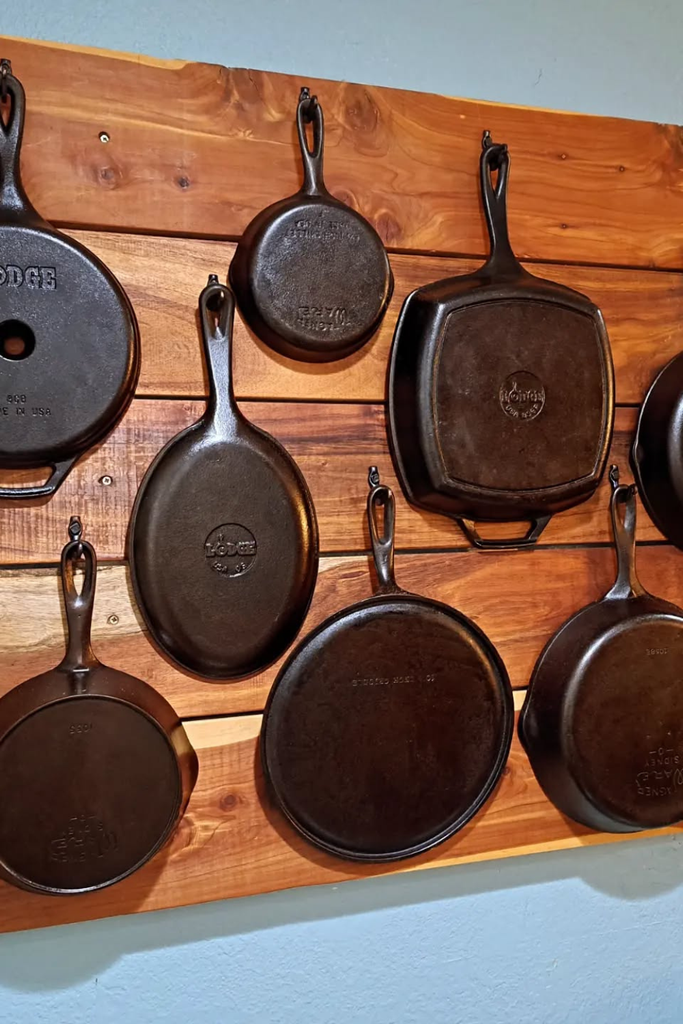
A solid wood backer rail gives me a practical way to distribute the load across several mounting points. It also adds warmth to a kitchen that has stainless steel appliances or other hard surfaces.
I would choose a sturdy board wide enough to accommodate the hooks and secure it firmly to wall studs where possible. The hooks can then be positioned along the rail instead of attaching every hook separately to drywall.
This arrangement works particularly well when I want a simple storage feature that looks intentional rather than like temporary cookware storage.
Pro Tip: If the wall finish is important, use a backer board to create a controlled mounting surface. It can make future hook adjustments easier without repeatedly drilling into the wall itself.
Live-Edge Beam
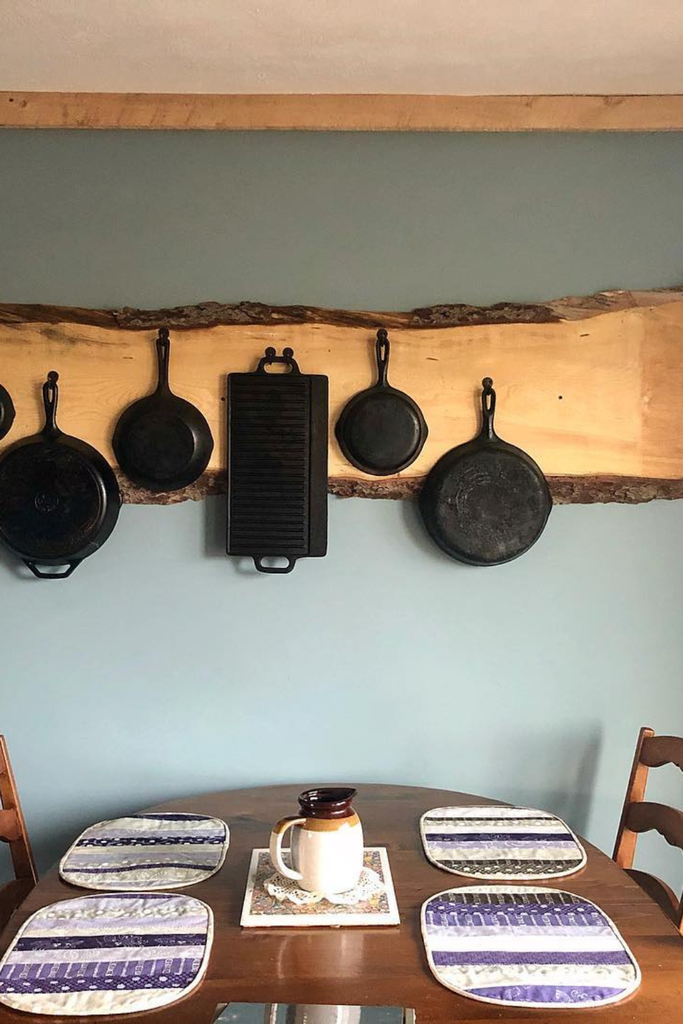
A live-edge wood beam can turn cast iron storage into a noticeable kitchen feature. I especially like this idea in rustic, farmhouse, cabin, or warm modern spaces where natural wood already plays a role.
I would use a thick, structurally sound piece of timber and attach it securely to the wall framing. Heavy-duty hooks can then be distributed along the beam according to the cookware sizes.
Because the wood itself becomes part of the display, I would keep the arrangement fairly simple. A few well-spaced pans usually look more organized than filling every available section.
Color Coded Wall
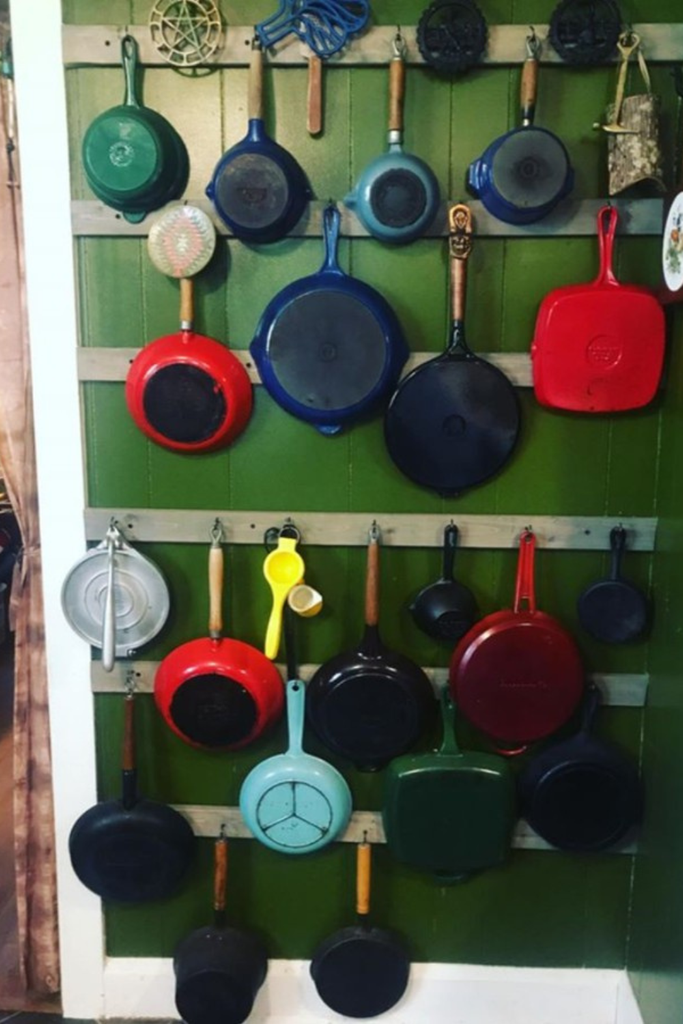
Colorful enameled cast iron can become part of the kitchen’s decor instead of being hidden inside a cabinet. I like arranging pieces by color or using contrasting cookware against a neutral wall.
For this setup, I would use a horizontal rail or several securely mounted hooks and arrange the cookware so the heavier pieces have strong support. A consistent spacing pattern keeps different colors from making the wall look cluttered.
This is also useful in a small kitchen because the cookware becomes both storage and decoration without requiring another piece of furniture.
Pegboard System
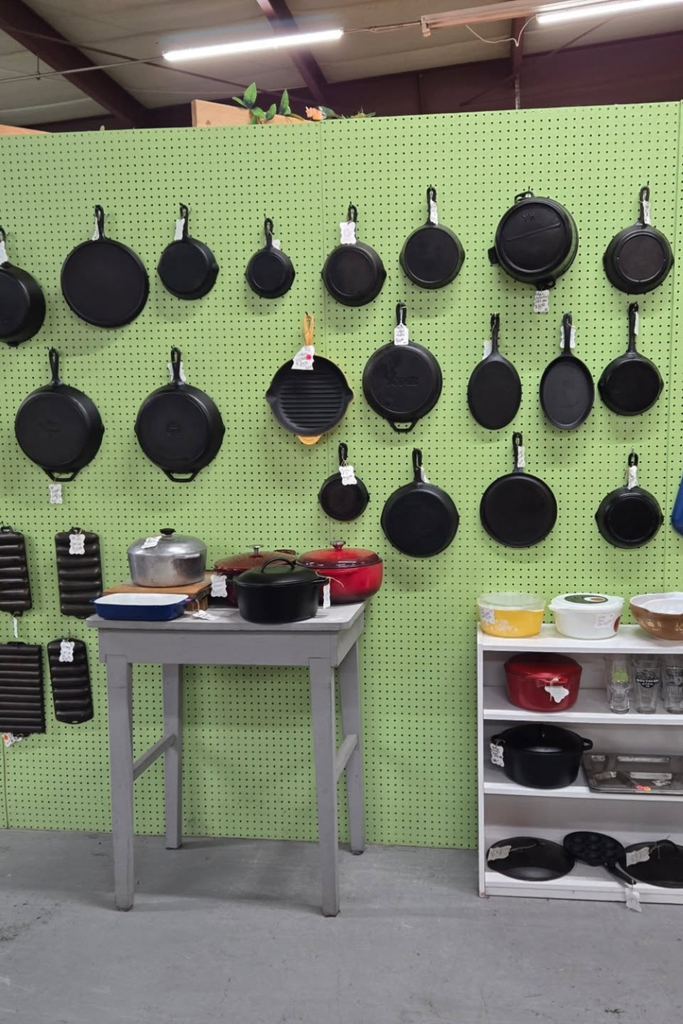
A pegboard provides flexibility when my cookware collection changes frequently. Instead of permanently committing to one hook arrangement, I can move compatible hooks as I add or remove pans.
For heavier cast iron, I would choose a robust pegboard system designed for substantial loads rather than a lightweight craft-room pegboard. The board itself also needs secure wall mounting.
I find this particularly useful in a pantry, utility kitchen, workshop, or garage where function matters more than creating a formal decorative display.
Pro Tip: Arrange the largest and heaviest pieces first. Once those positions are fixed, place smaller pans around them rather than trying to reorganize the entire wall later.
Full Height Panel
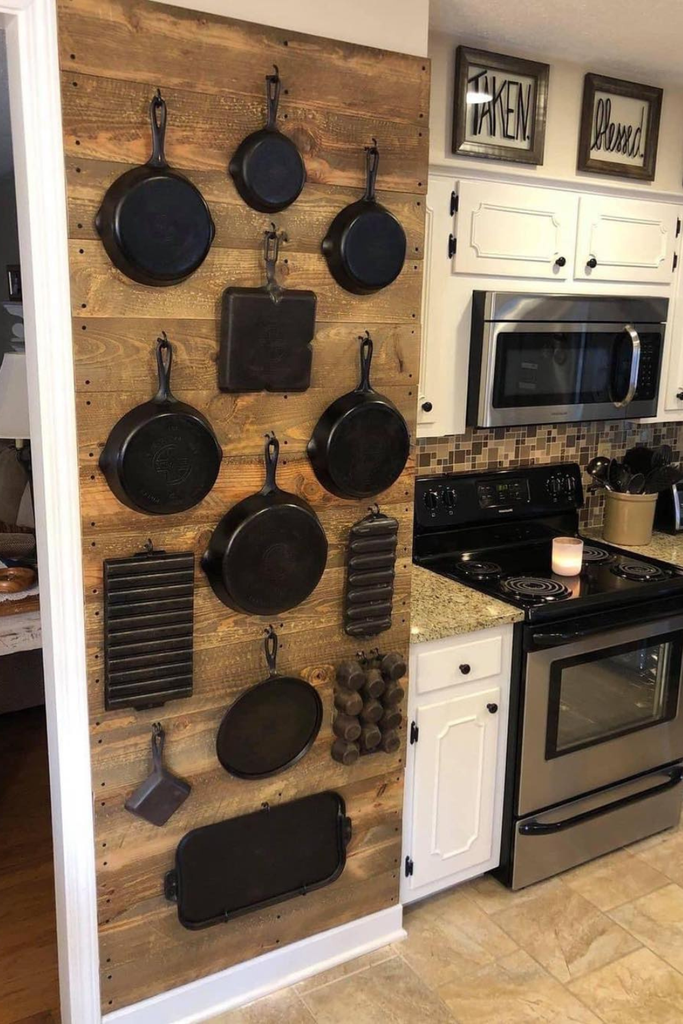
A full-height storage panel makes good use of a tall, narrow wall. I like this option beside a refrigerator, pantry, range area, or other location where horizontal space is limited.
I would install a sturdy wood panel from a suitable mounting point and distribute hooks vertically. The goal is to use height without placing the cookware so high that it becomes difficult or unsafe to reach.
Keeping the most frequently used pans around waist-to-chest level makes the arrangement much more practical for everyday cooking.
Mixed Mold Display
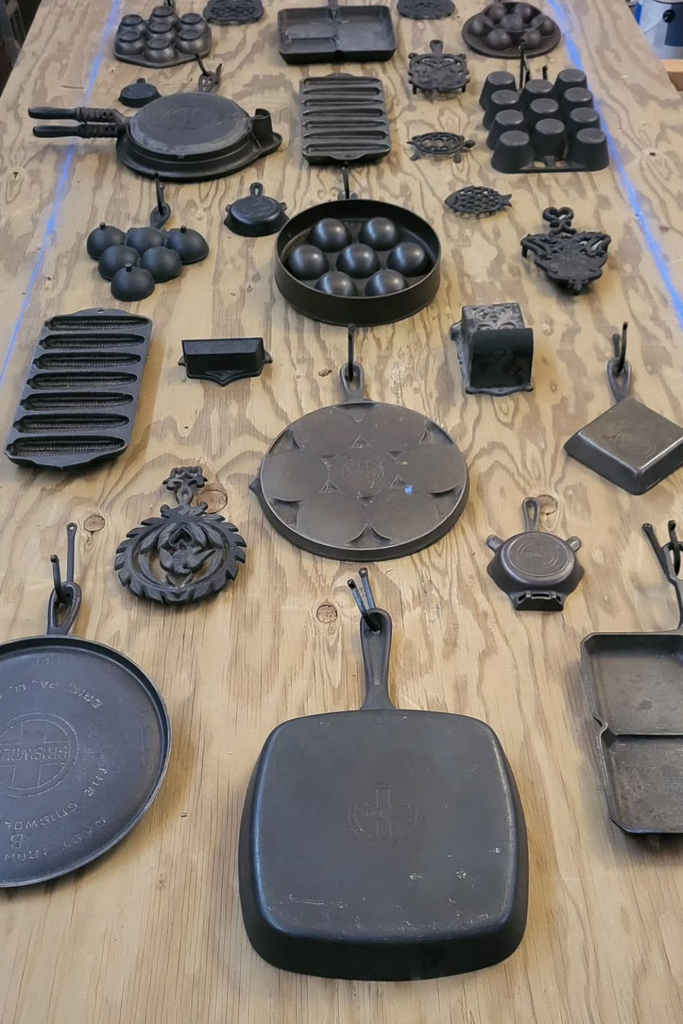
Cast iron cookware is not limited to standard skillets. I’ve seen collections that include baking molds, small pans, specialty pieces, and decorative cookware, and these can be difficult to stack neatly.
A mixed display lets each unusual piece have its own position. I would use hooks or suitable mounting hardware sized for the shape and weight of each item.
Rather than arranging everything in perfect rows, I would first consider how each piece can be removed safely. Function should determine the layout, with appearance coming second.
Also read: 22 Fabric Storage Ideas for 2026
Framed Pipe Rack
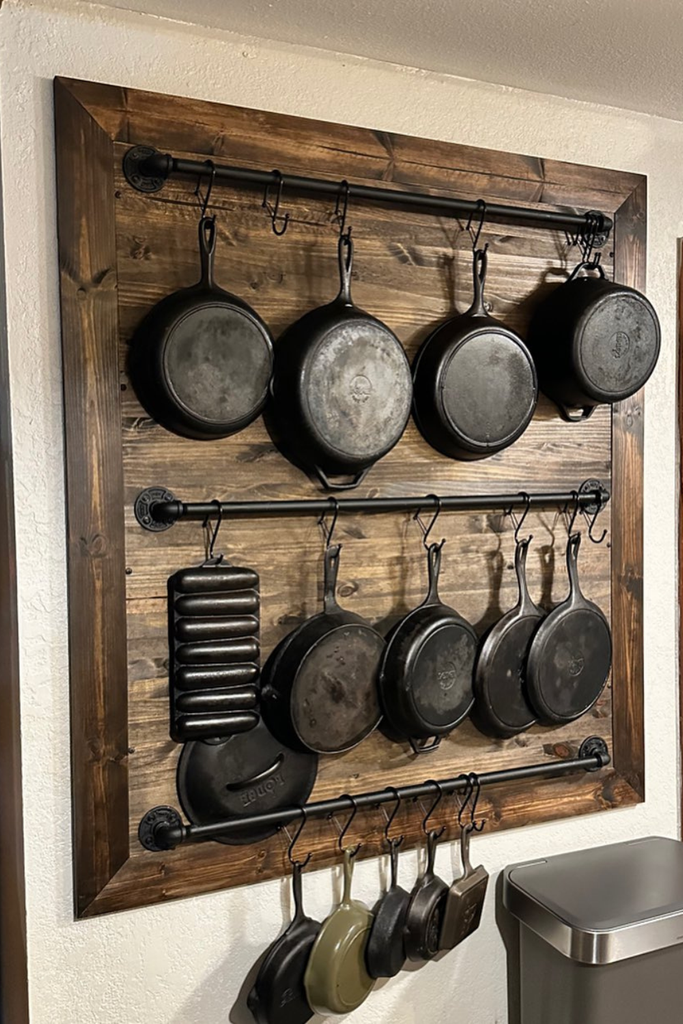
A framed pipe rack gives the kitchen an industrial look while creating several hanging positions. I like this approach when wood, metal, and exposed hardware already fit the room’s style.
I would create a sturdy frame and anchor it properly before adding the pipe rails and hooks. Multiple rails can separate cookware by size and reduce overlapping.
This style works particularly well on a relatively narrow wall because the rack can use vertical height without requiring a deep cabinet.
Appliance Side Wall
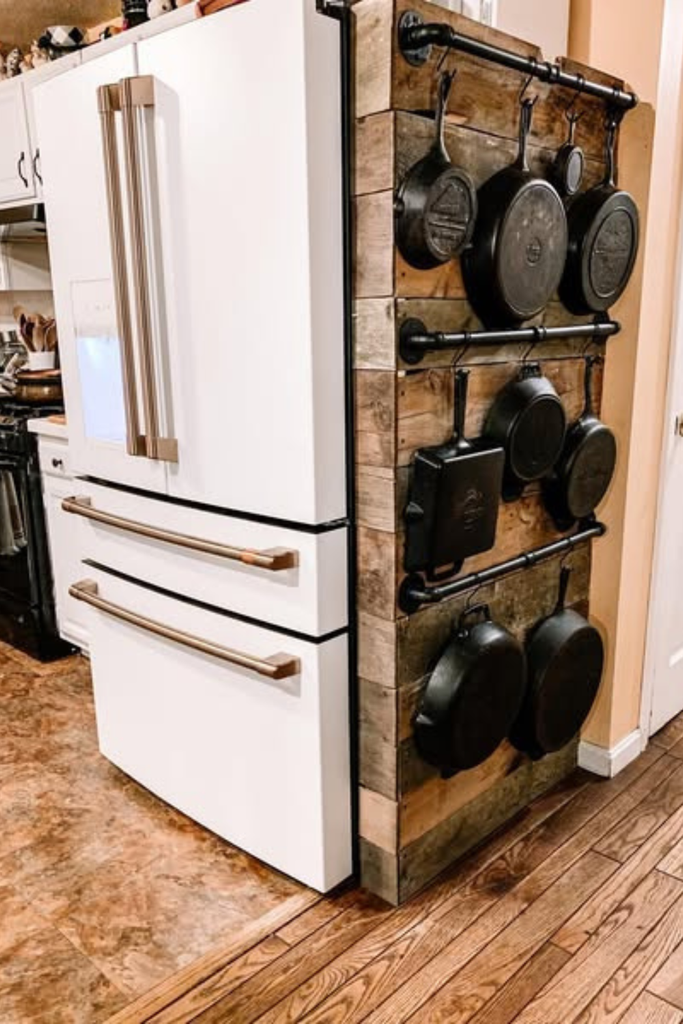
The wall beside a refrigerator, range, or other large appliance can become useful storage instead of remaining unused. I would use this location only if the cookware will not interfere with appliance doors, ventilation, controls, or normal movement.
A narrow wood backer with vertically arranged hooks can hold several pans without taking much floor space. It also keeps commonly used cookware close to the kitchen work zone.
Before drilling, I would check what is behind the wall and make sure the mounting position is appropriate. I never assume that an empty-looking wall is safe to drill into.
Slim Rail Stack
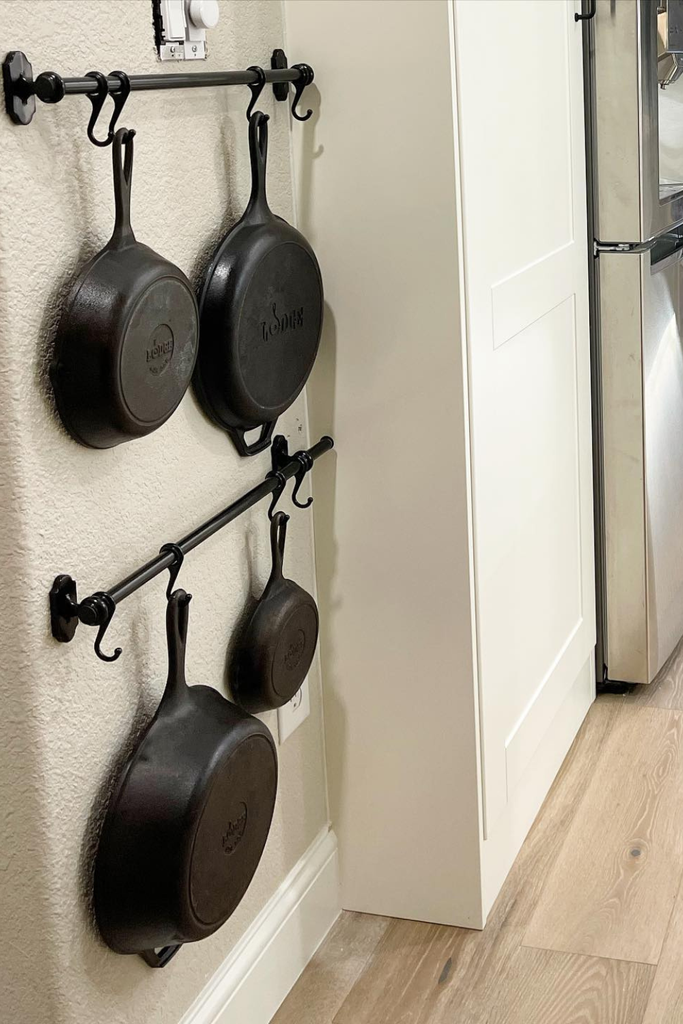
A slim rail arrangement works well when I have a narrow section of wall that cannot accommodate a deep storage unit. Several short hooks can keep pans close to the wall and reduce how far they project into the room.
I would mount parallel rails securely and stagger the cookware so the handles do not collide. Keeping the arrangement shallow is especially helpful near walkways.
This approach is a good fit for compact kitchens where preserving movement space is just as important as adding storage.
Floating Shelf Hooks
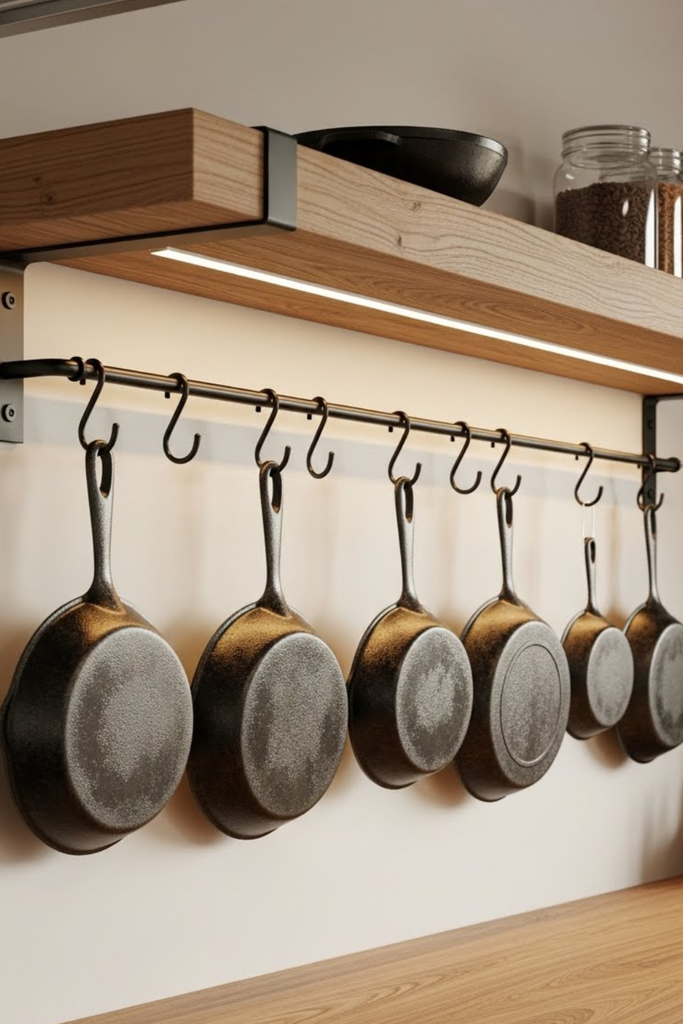
A floating shelf with hooks underneath combines two storage functions in one area. I can use the shelf for smaller kitchen items while hanging skillets beneath it.
I would choose a shelf designed for meaningful weight and secure its mounting system appropriately. The hooks underneath should also be positioned so the hanging pans do not obstruct objects placed on the shelf.
This works especially well above a countertop when there is enough vertical clearance and the cookware remains easy to reach.
Pro Tip: Measure the full height of the hanging pan, including its handle, before installing the shelf. This prevents the cookware from sitting too close to the countertop or interfering with nearby work areas.
Ladder Style Rack
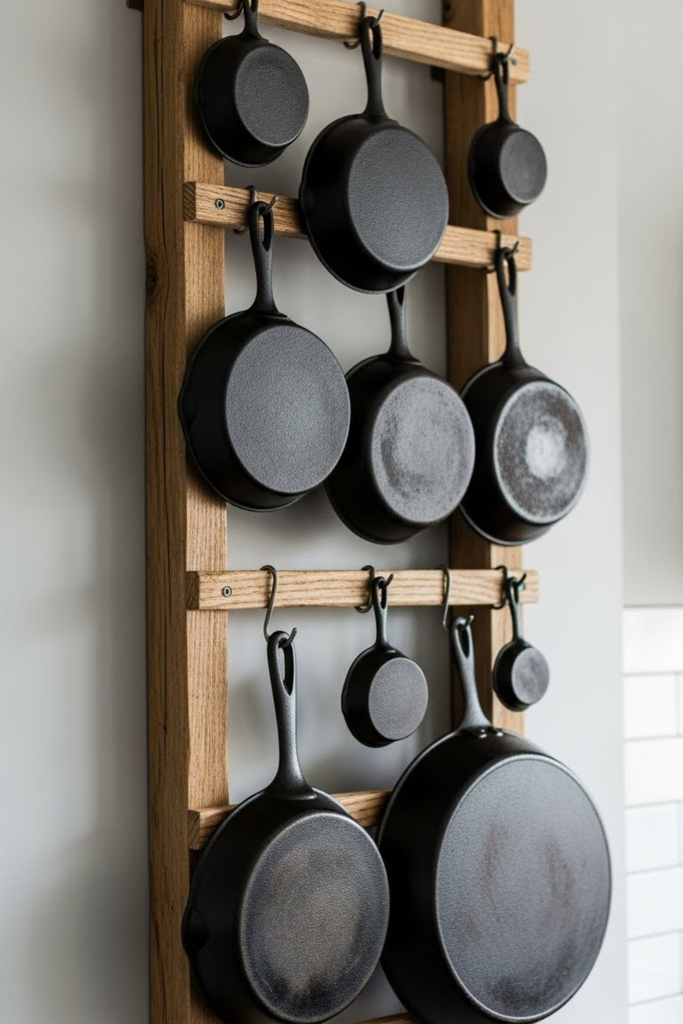
A ladder-style rack uses vertical height instead of spreading cookware across a wide wall. I like it for slim kitchens, pantry walls, and other spaces where width is limited.
I would use a sturdy wooden ladder frame and add hooks or hanging points along the vertical structure. The heaviest cookware should have the most secure mounting positions.
I also leave enough room around each piece to remove it without catching another pan. That small detail makes a big difference when the cookware is heavy.
Cabinet Side Face
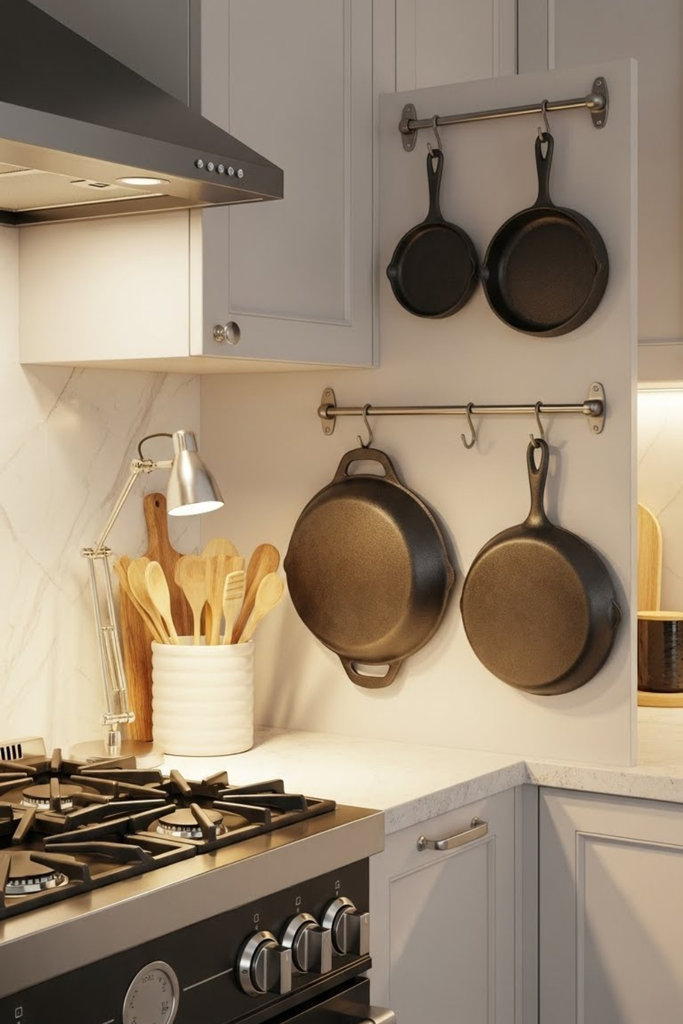
The side of a cabinet can provide useful storage when it is exposed and structurally suitable for mounting. This can be especially helpful when the kitchen has little open wall space.
I would avoid attaching heavy cookware to a thin decorative cabinet panel without checking its construction first. Instead, I would locate a strong section or use an appropriate reinforcement method.
Hooks should be positioned so handles and pans do not obstruct cabinet doors, drawers, or nearby appliances.
Under Stair Wall
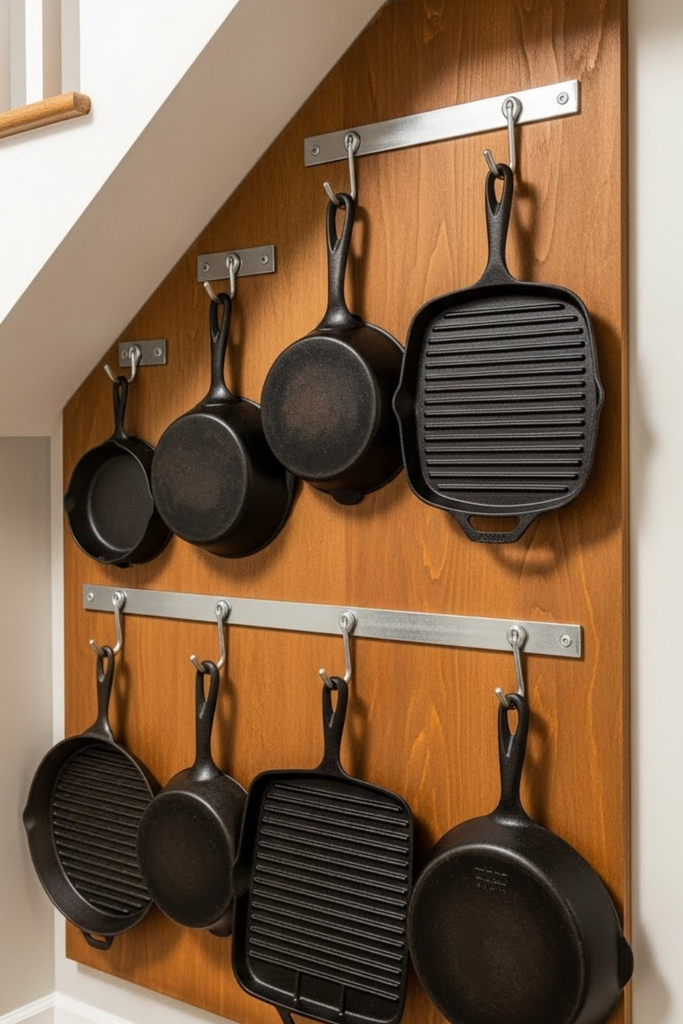
An under-stair wall can provide an unexpected storage zone for cast iron, particularly in open-plan homes or kitchens located near a staircase.
I would keep the cookware away from the main walking path and mount the hooks to a structurally sound surface. A wooden backer can help create an organized hanging area when the wall itself is not ideal for direct hook installation.
This location is best for cookware that is easy to reach without requiring someone to stand directly beneath a staircase or stretch awkwardly.
Brick Wall Mount
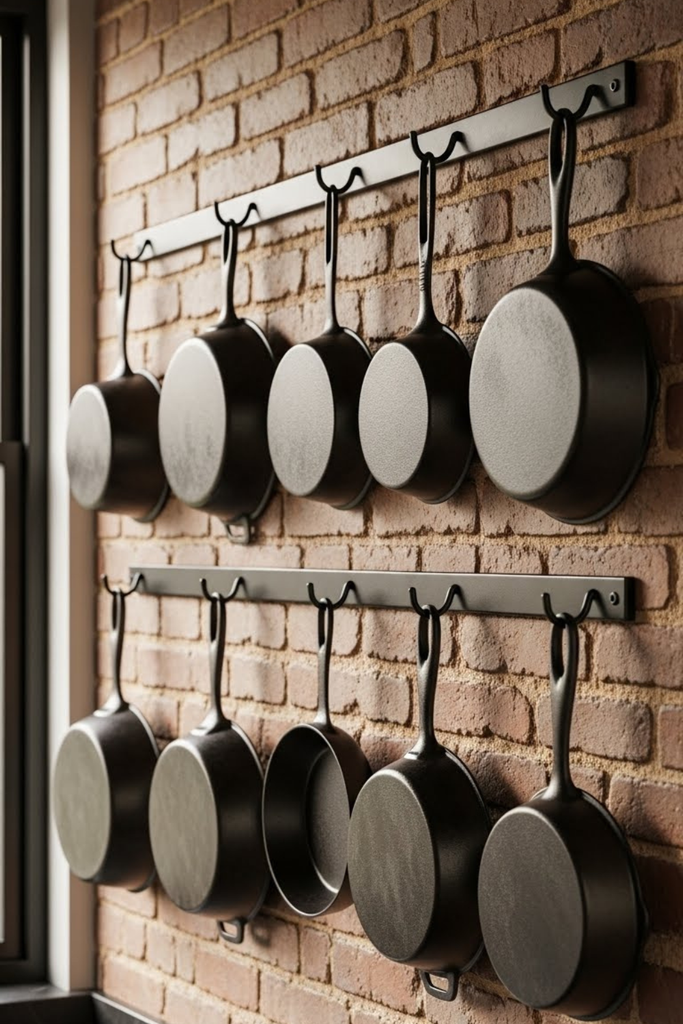
Brick provides a strong and visually interesting background for cast iron storage. I like the combination because the dark cookware and textured masonry naturally create a substantial, rustic display.
For installation, I would use masonry-appropriate anchors and hardware rather than standard drywall fasteners. The mounting system needs to match the condition and type of brick.
I would also check that the brick and mortar are sound before installation. A strong-looking wall still needs suitable attachment points for a collection of heavy cookware.
Rail With Shelves
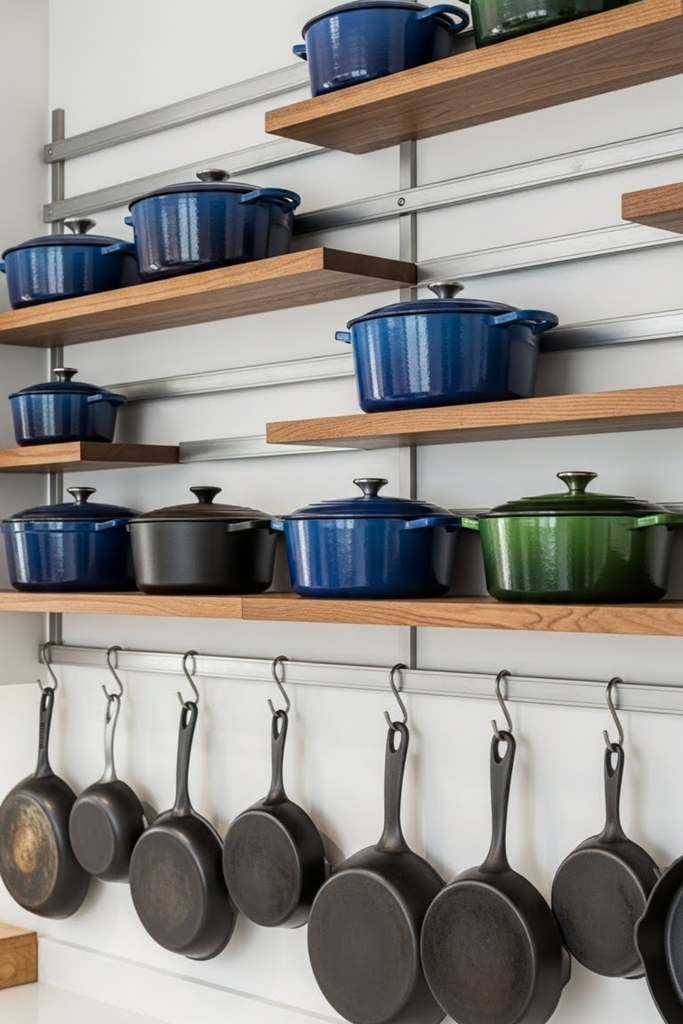
A rail-and-shelf combination gives me more flexibility than using hooks alone. Shelves can hold Dutch ovens, lids, or smaller cookware, while rails keep skillets hanging underneath.
I would use narrow shelves so the storage area does not become unnecessarily deep. Keeping the shelves and rails visually aligned helps the entire wall feel organized.
This setup works especially well for larger cast iron collections because I can separate cookware according to its size and shape rather than forcing everything onto one rack.
Read this next: 25 Mop And Broom Storage Ideas for 2026
FAQs
Can cast iron be stored on a wall safely?
Yes, wall storage can be safe when the mounting system is properly matched to the wall and the cookware weight. I would prefer studs, suitable masonry anchors, or a properly secured structural backer over relying on ordinary drywall alone.
I also check the hook’s weight rating and the combined load of all the cookware. A rack that holds one pan may not be appropriate for six or eight heavy pieces.
Do cast-iron pans damage walls over time?
They can if the storage system allows the pans to swing, scrape, or pull against a weak mounting point. I reduce this risk by using short, sturdy hooks, leaving adequate spacing, and securing the rack properly.
I also position the cookware where people are unlikely to bump into it. Good placement matters just as much as the hardware because repeated movement can damage both the wall and the cookware.
Conclusion
I’ve found that cast iron wall storage works best when I treat it as both a storage problem and a weight-management problem. The right setup keeps heavy cookware accessible without sacrificing valuable cabinet or countertop space.
Whether I choose a simple wooden rail, a flexible pegboard, a full-height panel, or a shelf-and-rail combination, I always start with the wall structure and cookware weight. Once those basics are handled, I can focus on spacing, appearance, and convenience.
For everyday use, I prefer a setup where my most-used pans are easy to grab, properly separated, and stored in a dry location. That makes the kitchen easier to work in while keeping my cast iron collection visible and organized.

2 Comments