
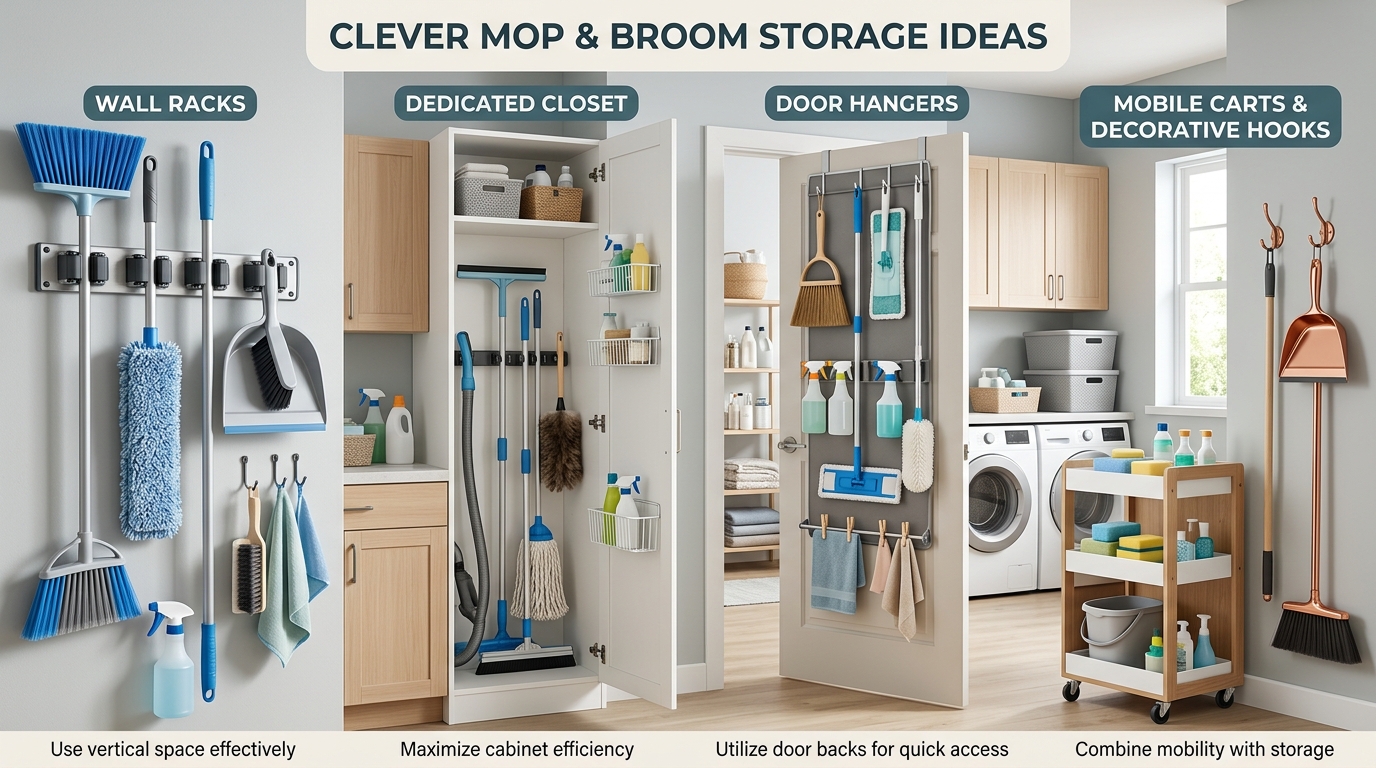
25 Mop And Broom Storage Ideas for 2026
I used to think brooms and mops were simply items that had to be tolerated in a corner somewhere. The trouble is that long cleaning tools are awkward to store. They fall over, get tangled together, take up floor space, and a damp mop can quickly make a small storage area smell unpleasant.
I’ve found that the best solution is usually not a bigger closet. It is finding unused vertical or narrow space and giving each cleaning tool a proper place.
In this guide, I’m sharing 25 mop and broom storage ideas that can work in laundry rooms, kitchens, garages, mudrooms, bathrooms, utility closets, and other small spaces. Some require only a few adhesive clips, while others make sense as part of a larger cabinet or pull-out system.
When I organize brooms and mops, I focus on three things: keeping handles secure, allowing wet mop heads to dry, and making the tools easy to reach. Wall-mounted clips, cabinet-door organizers, narrow storage bays, utility rails, and pull-out cabinets can all solve different space problems.
For a small home, I usually look for unused wall height or narrow gaps before adding another piece of furniture. A space only a few inches wide can sometimes hold several long-handled tools when they are stored vertically.
Save this for later
Table of Contents
I also avoid trapping a wet mop inside a sealed cabinet. Proper airflow matters because moisture left around cleaning tools can contribute to mildew and unpleasant odors.
Key Takeaways
- I prefer hanging brooms and mops instead of leaving them balanced on the floor.
- Vertical storage makes better use of narrow walls, cabinet sides, doors, and unused gaps.
- Wet mop heads need airflow so they can dry properly between uses.
- Adhesive clips are useful for lightweight tools, while heavier tools need stronger wall-mounted hardware.
- Cabinet-door storage is especially helpful when I want cleaning supplies hidden from view.
- A pull-out organizer can make deep cabinets much easier to use.
- I keep frequently used cleaning tools somewhere I can grab them without moving several other items first.
Related article: 30 Bathroom Storage Ideas to Keep Your Space Organized
Where Do People Store Their Brooms and Mops?
I’ve seen cleaning tools end up in almost every available corner of a home. Common locations include laundry rooms, utility closets, garages, behind doors, beside washing machines, and inside kitchen or pantry cabinets.
The problem is that simply finding a place for a broom does not necessarily create good storage. If the broom falls every time someone opens the door or the mop stays wet against a wall, the arrangement becomes frustrating.
I like to consider how often I use each tool, how much vertical space is available, and whether anything needs to dry before choosing a storage method.
For homes with limited storage, vertical organization is particularly useful because it keeps long handles off the floor while taking advantage of wall height that might otherwise remain empty.
Pro Tip: Before buying an organizer, measure the full height and width of the intended area. Also check whether doors, drawers, shelves, or appliances will still open comfortably after the storage is installed.
Cabinet Door Storage
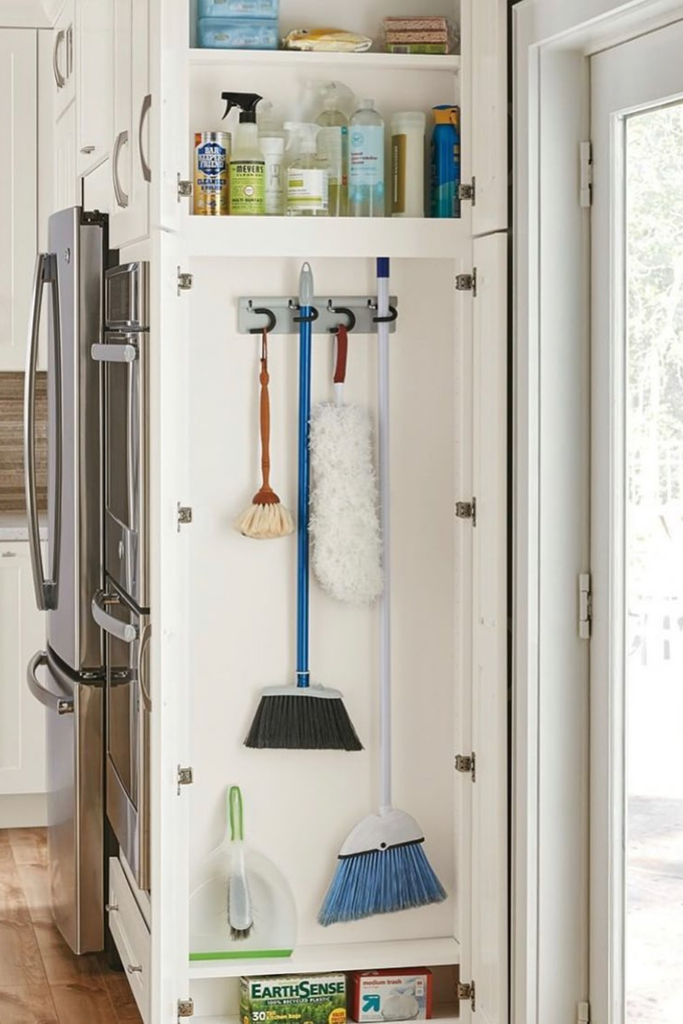
I can turn the inside of a cabinet door into useful storage with small clips or holders. This works especially well for lightweight brooms, dusters, brushes, and mop handles.
I like this option because the cleaning tools disappear when the cabinet is closed. It is particularly practical in a laundry room or utility cabinet where I want the room to look tidy.
For wet cleaning tools, I would leave enough space around the mop head for air to circulate rather than placing a damp mop into a tightly enclosed cabinet.
Pro Tip: Check the cabinet door clearance before installing clips. A holder that is too bulky can prevent the door from closing properly.
Wall Grip Rack
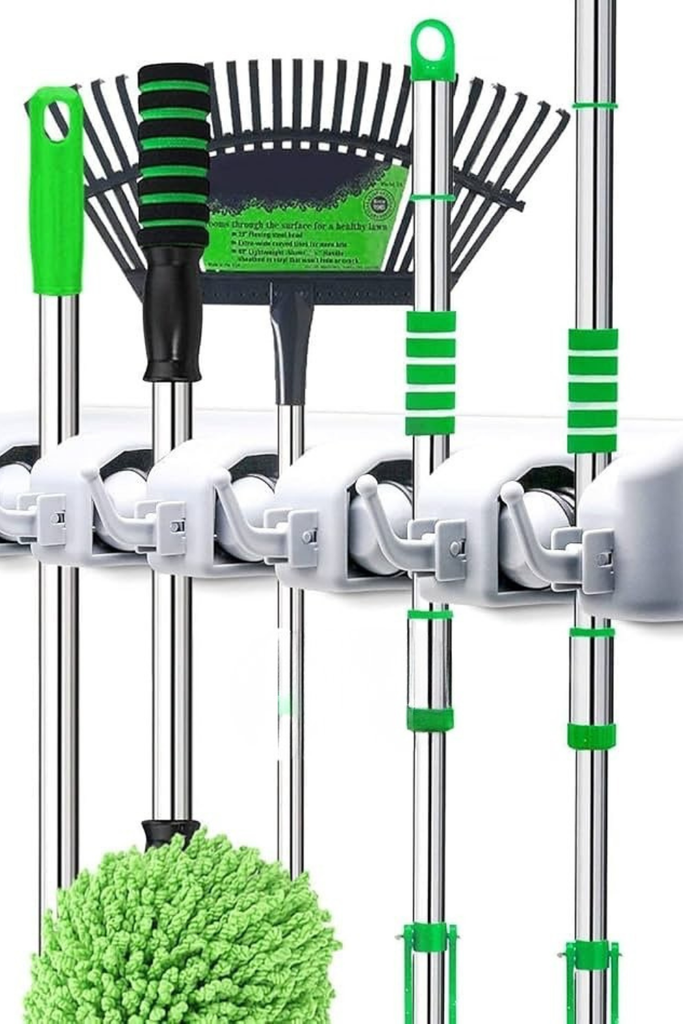
A wall-mounted grip rack gives each long-handled tool its own holding point. Instead of leaning several items together, I can separate the broom, mop, duster, and other tools along one wall.
I find this especially useful in garages, laundry rooms, and utility areas where appearance is less important than quick access.
Mounting the rack at a comfortable height also makes cleaning tools easier to remove without bending down and sorting through a pile.
Pro Tip: Choose a holder based on the handle diameter and weight of your tools. A lightweight adhesive holder is not the same as a heavy-duty mounting system.
Laundry Wall Slot
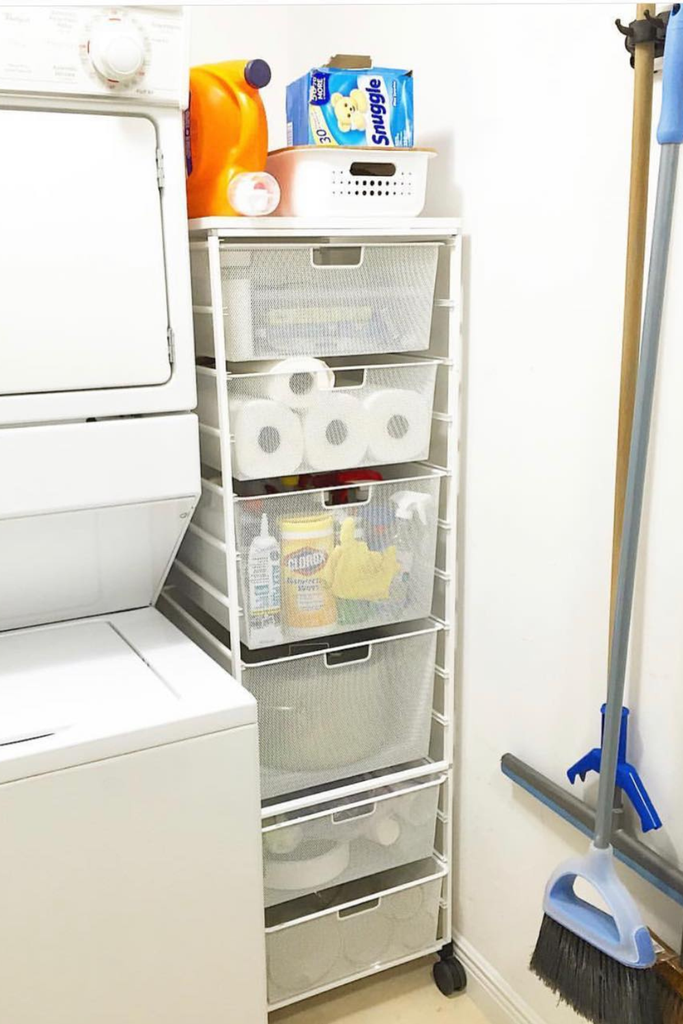
The narrow space beside a washer or dryer is easy to overlook. I can use that small vertical area for a slim mop and broom holder instead of letting the handles occupy the floor.
This arrangement keeps long tools upright and makes good use of otherwise wasted wall space.
Because laundry rooms can be humid, I prefer to keep wet mop heads positioned where air can reach them instead of pressing them into a closed corner.
Pro Tip: Leave enough clearance around appliances so the storage does not interfere with ventilation, maintenance, or opening doors.
Utility Closet Wall
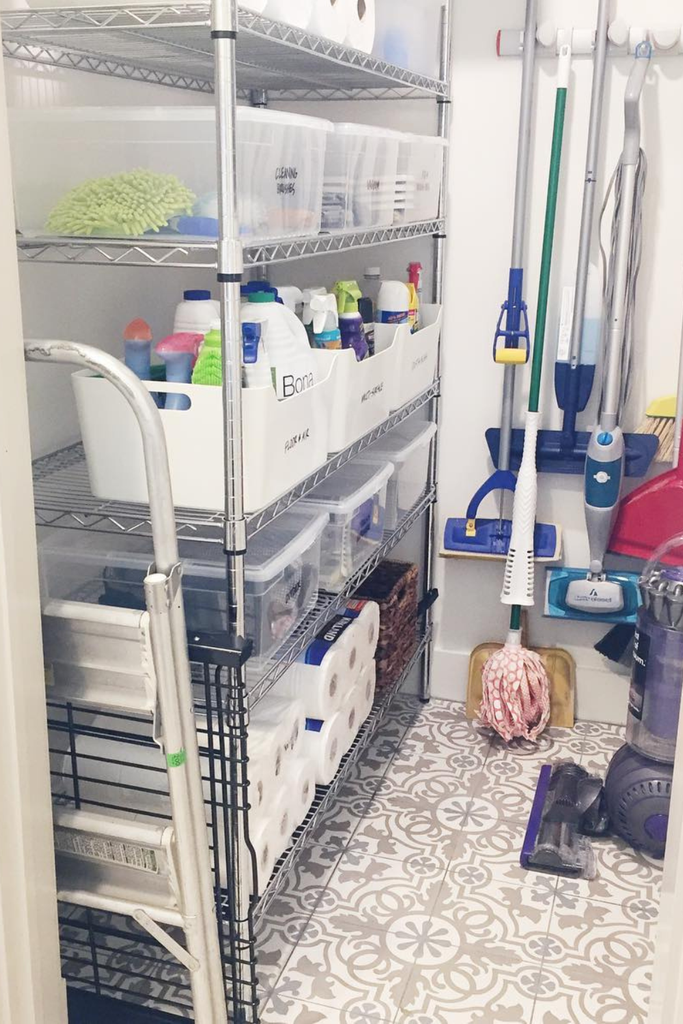
A utility closet becomes much easier to manage when I move long-handled tools away from the floor. A horizontal grip rail along the back or side wall can keep several tools organized.
This also frees lower areas for buckets, cleaning products, and small storage bins.
I like placing the most frequently used tools toward the front or at an easy-to-reach height so I do not have to rearrange the closet every time I clean.
Pro Tip: Keep cleaning chemicals and tools organized separately when possible, particularly if children or pets can access the storage area.
Tall Cabinet Hideaway
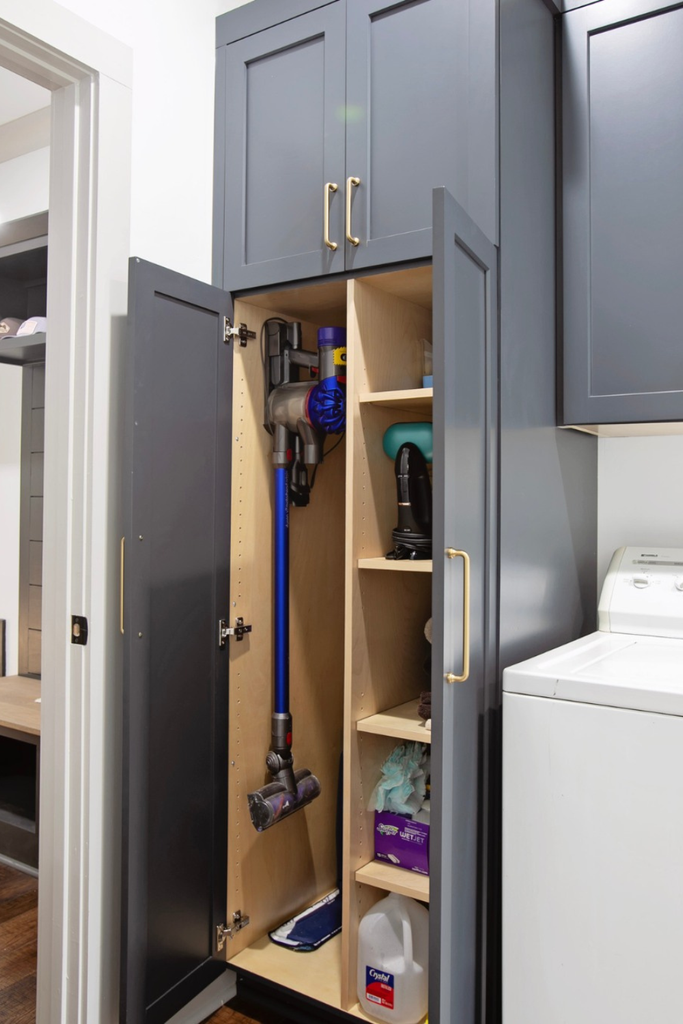
A tall cabinet gives me a simple way to hide cleaning equipment while taking advantage of vertical space.
I can install hooks or clips inside the cabinet and reserve the lower portion for buckets, brushes, and other supplies. This creates separate zones instead of throwing everything into one pile.
This idea works particularly well when I want the room to look clean and uncluttered whenever the cabinet doors are closed.
Pro Tip: If you store a damp mop in a cabinet, choose a ventilated setup or allow the mop to dry completely before closing the door.
Shelved Closet Center
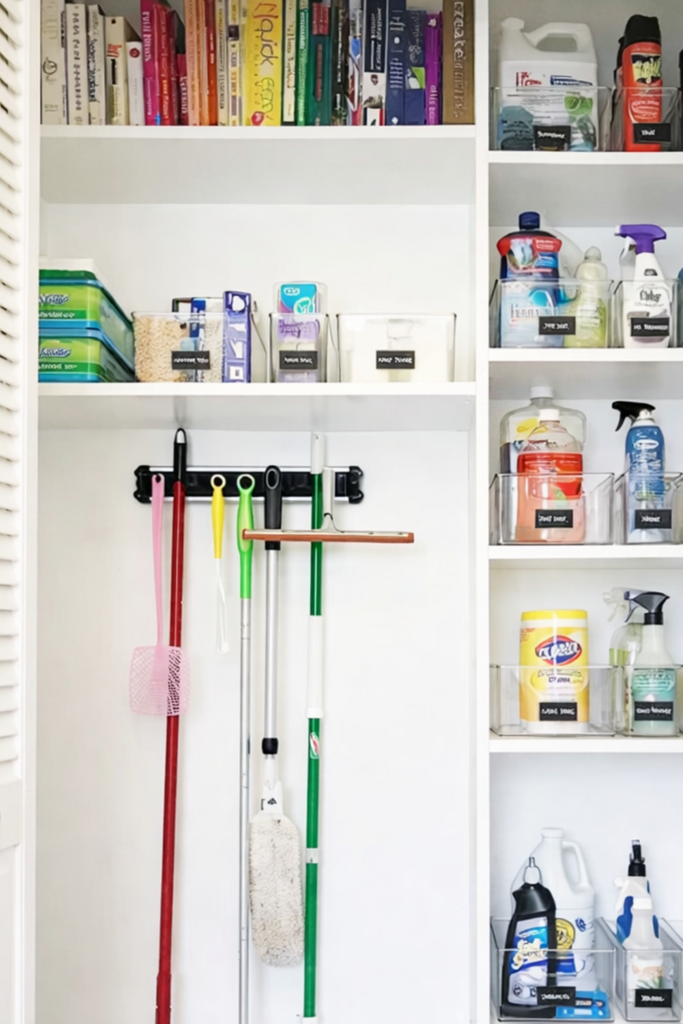
When a closet already has shelves, I can use the open vertical section between or beside them for long cleaning tools.
A short rail or a few individual holders can create a dedicated cleaning-tool zone without removing the existing shelving.
I find this approach useful because it lets me keep bottles and smaller supplies on shelves while long handles stay upright and out of the way.
Pro Tip: Group similar supplies together. For example, keep floor-cleaning tools near buckets and floor cleaners instead of scattering them throughout the closet.
Small Closet Zone
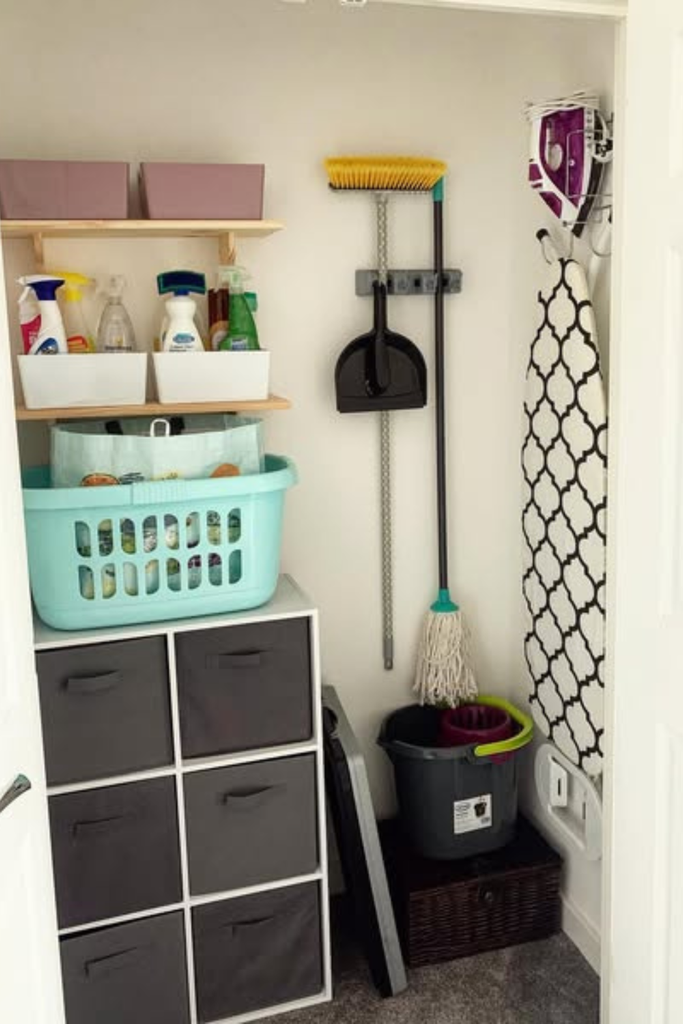
Even a small closet can hold cleaning tools if I assign one narrow section to them.
I can place a compact holder on a side wall and use the floor underneath for a bucket or small cleaning caddy. This prevents long handles from spreading across the entire closet.
The key is to use the narrowest practical area rather than allowing the tools to consume the center of the closet.
Pro Tip: Side-wall storage is often more useful than floor storage in a tight closet because it preserves walking and access space.
Pull-Out Pantry
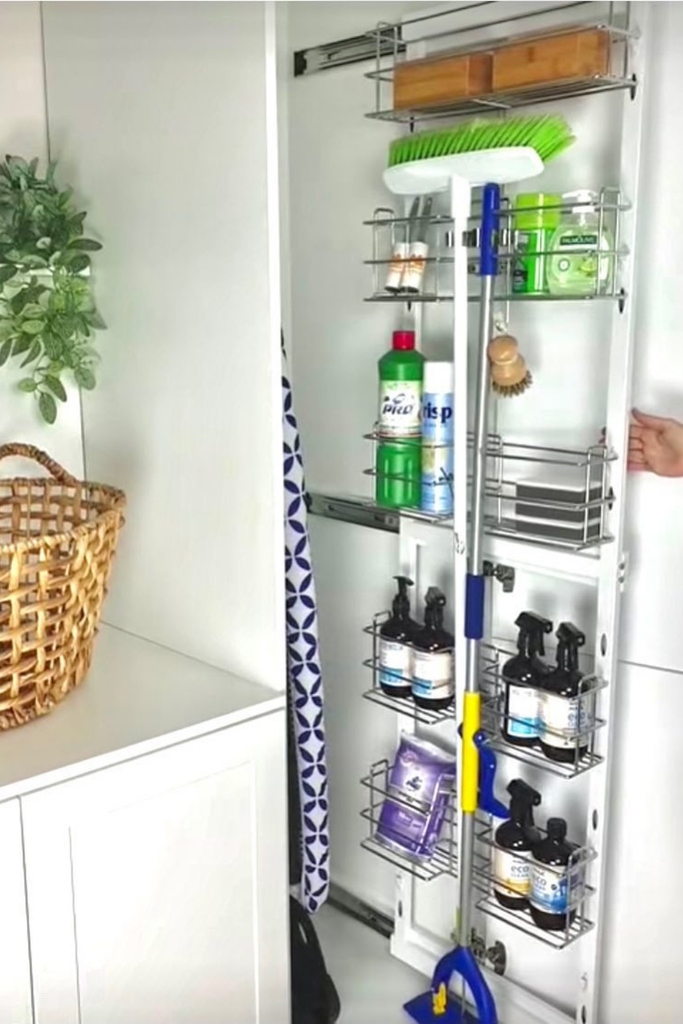
A deep cabinet can be difficult to organize because items at the back are easily forgotten. A pull-out frame solves this by bringing the stored items toward me.
I can use a tall pull-out section for mops, brooms, dusters, and other long tools while keeping cleaning products in baskets or separate compartments.
This is especially useful beside a kitchen or laundry area where a narrow cabinet already exists.
Pro Tip: Check the cabinet’s usable interior width, not just its outside dimensions, before purchasing a pull-out organizer.
Multi-Tool Rail
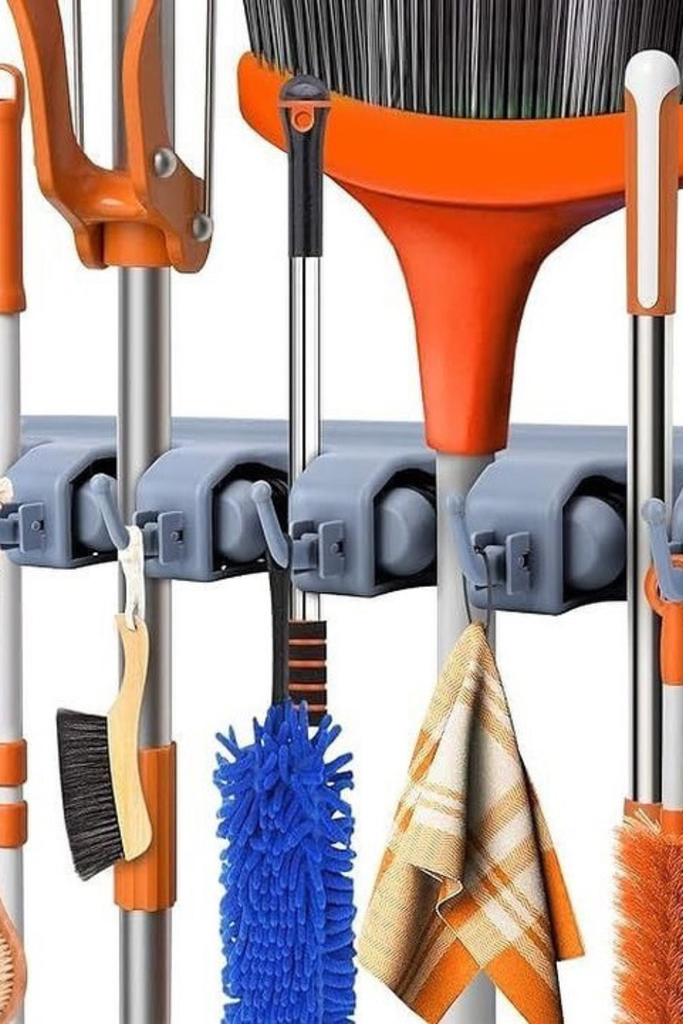
A single storage rail can organize several cleaning tools in one compact line.
I like this approach when I have multiple long-handled items but very little floor space. Each tool gets its own position, which makes it easier to see what I need.
A rail also makes returning tools after cleaning much simpler because there is an obvious place for every handle.
Pro Tip: Leave enough space between holders so handles do not knock against each other when one tool is removed.
Pantry Cabinet Slot
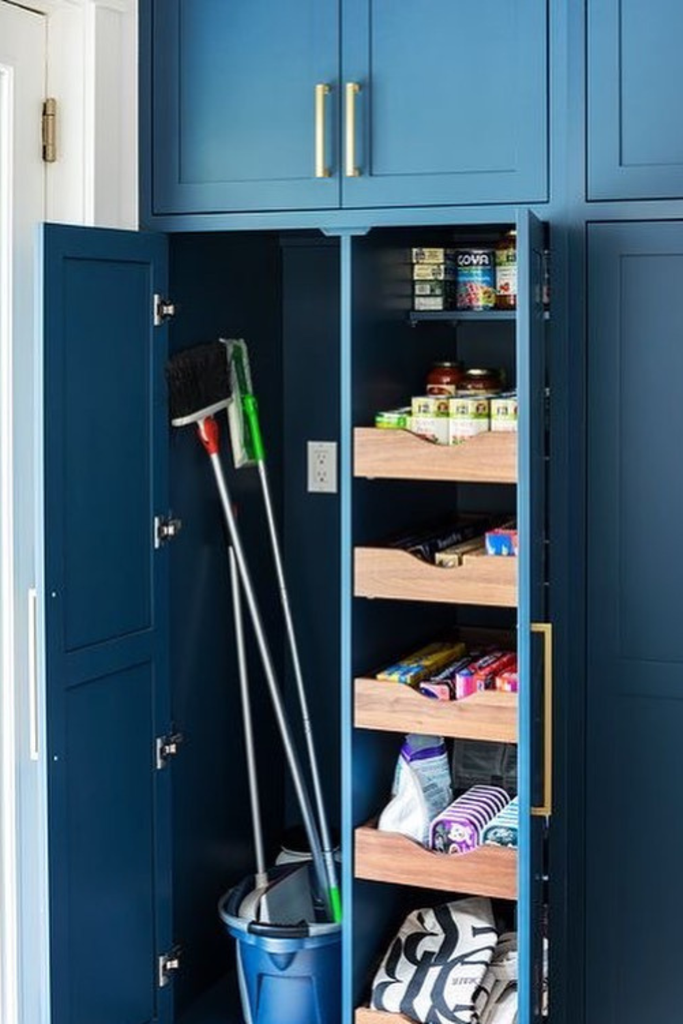
A narrow section inside a tall pantry cabinet can become an unexpected cleaning-tool station.
Instead of allowing mop and broom handles to lean against shelves, I can reserve one vertical slot for them. Small hooks or clips help keep everything upright.
This works particularly well when the pantry is close to the kitchen and I regularly need a broom or dustpan after meals.
Pro Tip: Keep cleaning products away from food-storage areas. A separate closed cabinet or clearly divided compartment is a safer arrangement.
Garage Tool Strip

A garage gives me more flexibility for heavier cleaning and outdoor tools. A sturdy wall-mounted strip can hold brooms, mops, brushes, rakes, and similar equipment.
I like this option when several long-handled tools need to share one storage area without leaning against one another.
Because garages can be exposed to temperature and humidity changes, I also prefer hardware designed for the weight and environment rather than relying on weak adhesive hooks.
Pro Tip: Fasten heavy-duty organizers into appropriate wall material according to the manufacturer’s installation instructions.
Slim Cabinet Side
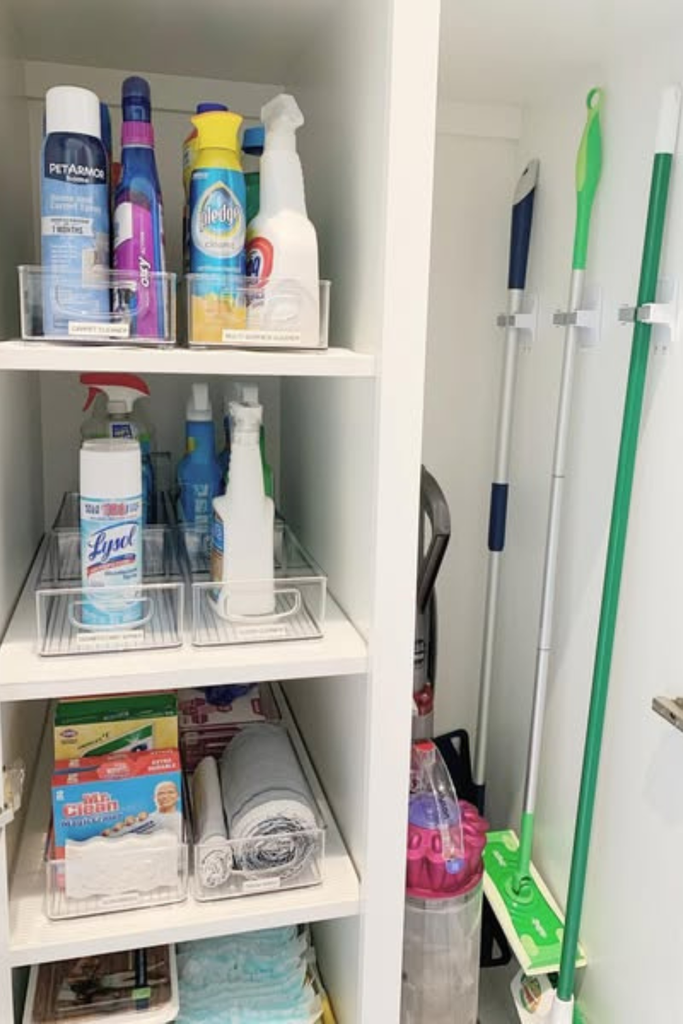
The side of a cabinet can provide valuable vertical storage when the main shelves are already full.
I can attach narrow clips along the interior side and keep handles standing straight without sacrificing shelf space.
This is one of my favorite approaches for awkward utility cabinets because it turns an otherwise unused strip into dedicated storage.
Pro Tip: Look for cabinet areas that are at least as deep as the tool handles need, while making sure the clips do not interfere with shelves or hinges.
Bathroom Wall Line
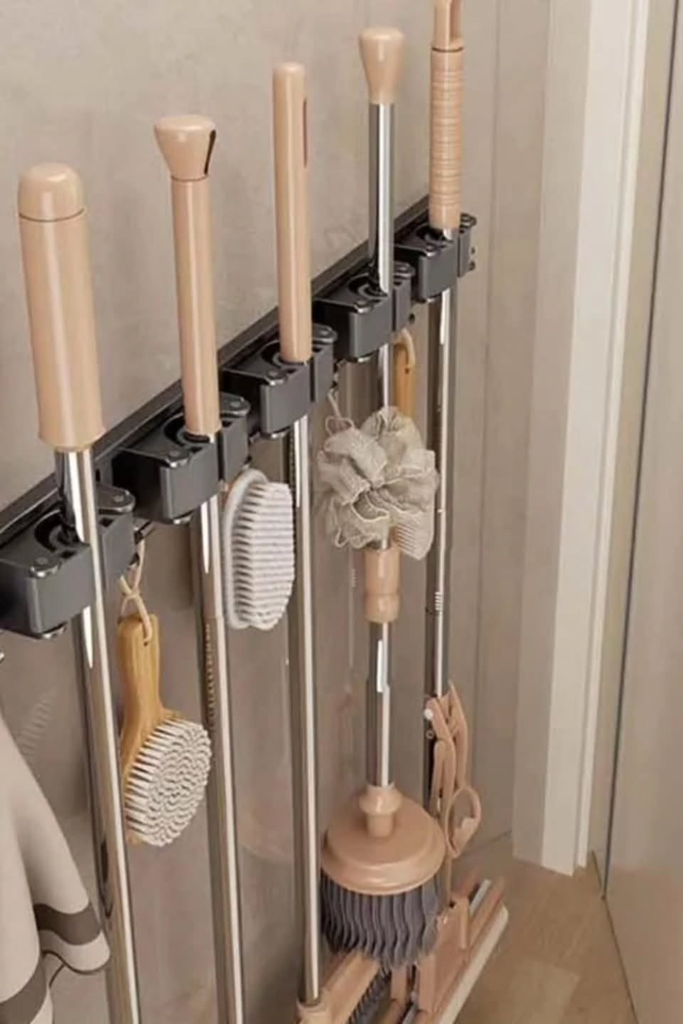
For homes where a bathroom is cleaned frequently, keeping a small cleaning tool nearby can make sense.
A slim holder mounted on an appropriate wall can keep a mop or cleaning brush off the floor and ready to use.
I would choose the location carefully, though. Wet areas need materials and mounting hardware that can handle the room’s moisture level.
Pro Tip: Avoid positioning storage where it will regularly be splashed with water. Keeping the tools dry when they are not being used helps reduce odor and buildup.
Also read: 13 Affordable Outdoor Seating Options For Small Spaces
Shiplap Wall Mount
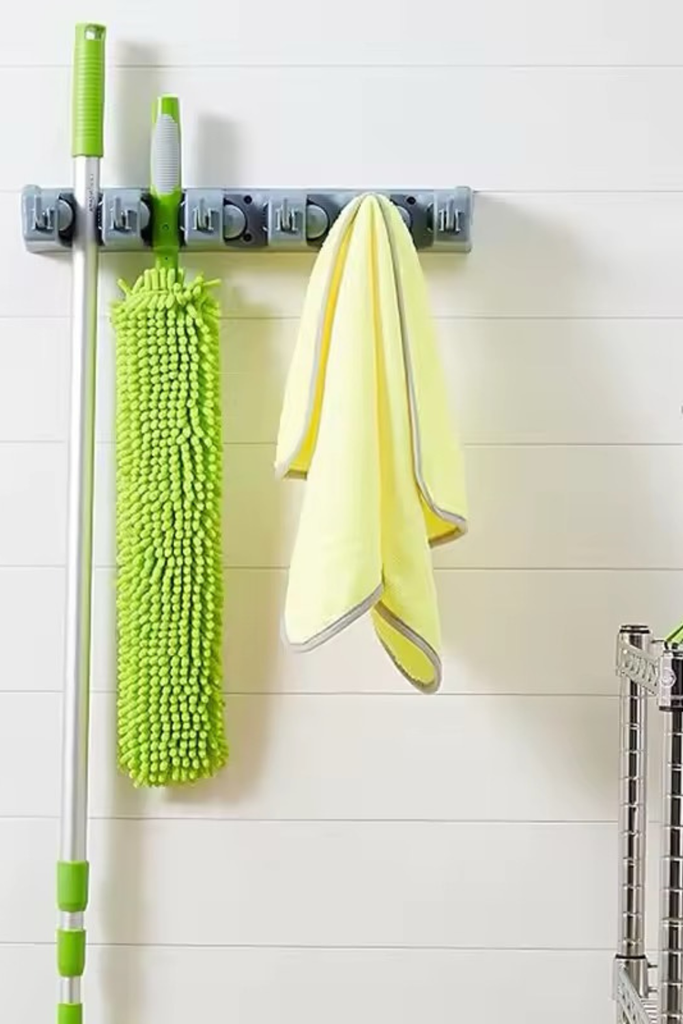
A paneled or shiplap wall can provide a practical place for a simple row of cleaning-tool holders.
I can mount the holders at a comfortable height and keep long handles neatly aligned instead of leaning them against the wall.
This approach works nicely in a laundry room or mudroom because the storage becomes part of the wall rather than another bulky item on the floor.
Pro Tip: When mounting into decorative wall panels, make sure the fasteners are anchored appropriately instead of relying only on the surface material.
Closet Wall Stack
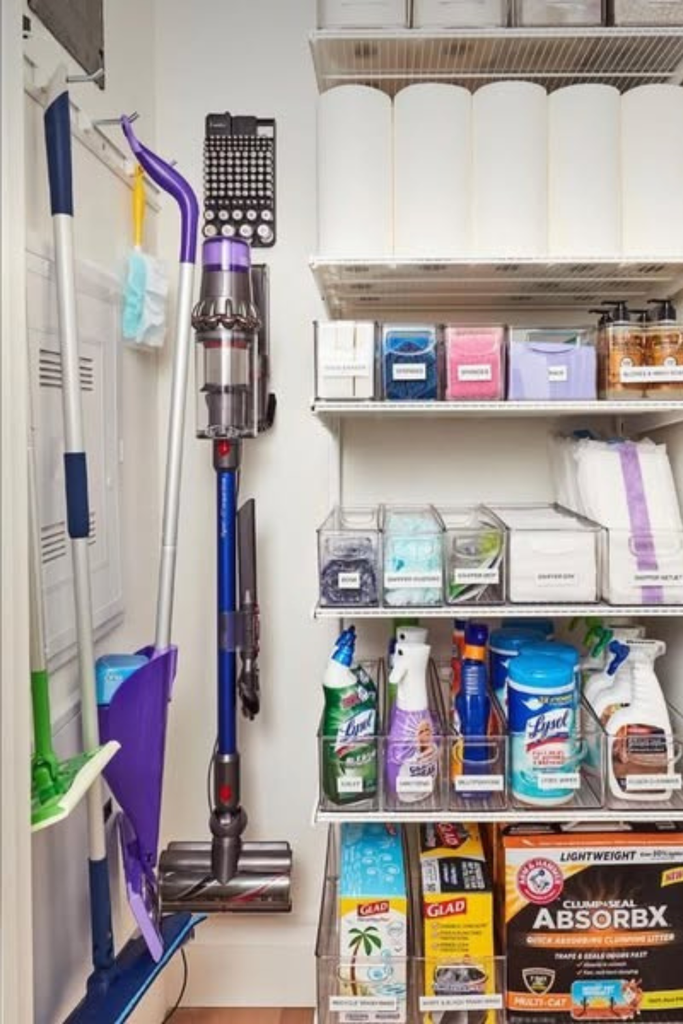
Wire shelves are great for maximizing vertical storage, but they can leave awkward side gaps. I can use those gaps for brooms, mops, and other long-handled tools.
Slim clips attached to the side wall keep everything straight and prevent handles from falling across the shelves.
This creates a useful separation between cleaning tools and smaller supplies.
Pro Tip: Store the tallest items first when planning a closet. Their height usually determines which section of the closet can be used most effectively.
Built-In Utility Bay
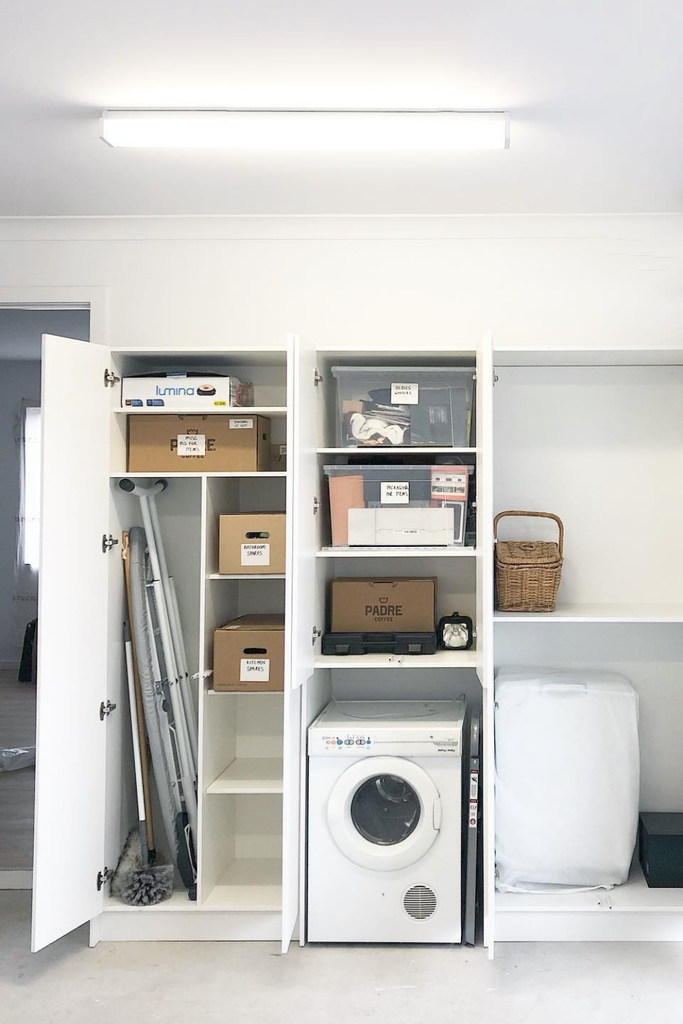
If I have a larger utility area, I can create a dedicated vertical bay for cleaning tools.
This might be part of a built-in cabinet system, a laundry-room storage wall, or a garage organization setup.
The advantage is that every tool has a defined area, while buckets and cleaning supplies can occupy nearby shelves or drawers.
Pro Tip: If you are planning new cabinetry, measure your tallest cleaning tool before finalizing the interior dimensions. It is much easier to design around the tools than to discover later that they do not fit.
Pantry Door Tower
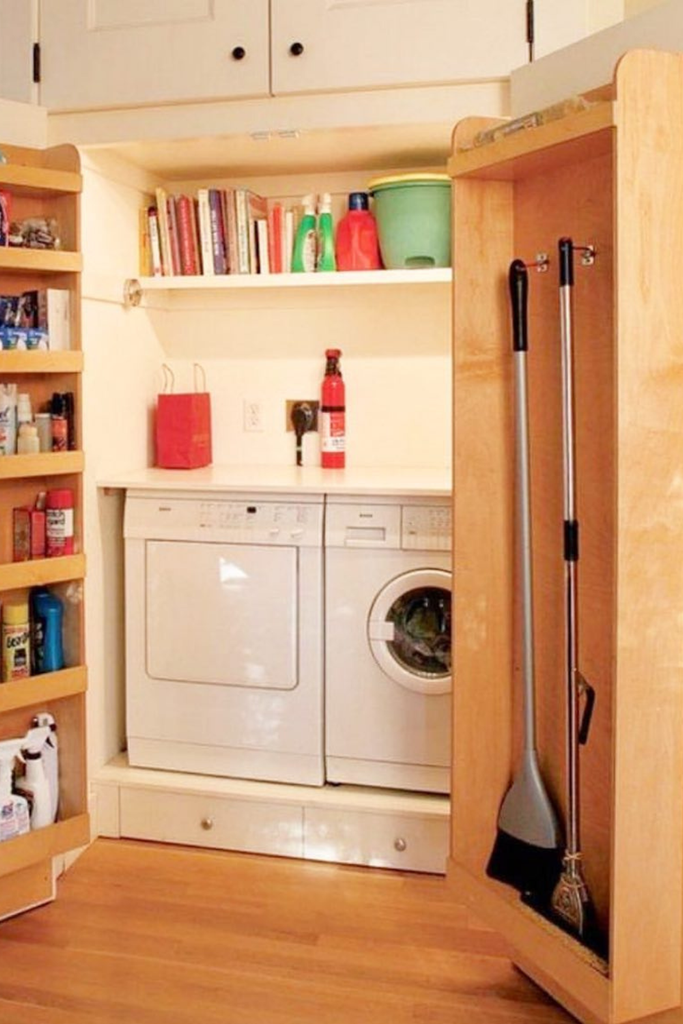
The inside of a tall door can provide surprisingly useful vertical storage.
I can install a narrow series of holders to secure long handles without using the cabinet floor. This is especially helpful when the cabinet itself is already filled with shelves.
I prefer this arrangement when I want the cleaning tools hidden but still close to the area where they are used.
Pro Tip: Test the loaded door before adding more items. Too much weight can put unnecessary strain on hinges.
Pantry Wall Hooks
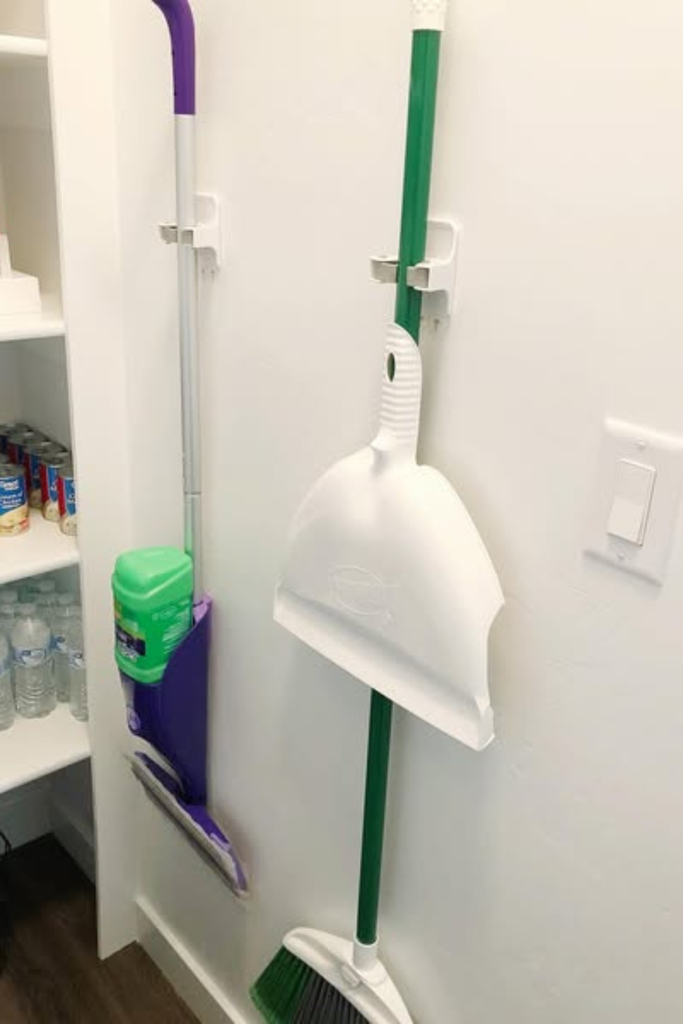
Individual hooks or clips allow me to customize storage around the tools I actually own.
Instead of installing a large organizer, I can position several holders at different heights or spaces to accommodate different handle sizes.
This makes the system easy to adjust if I replace a mop or add another cleaning tool later.
Pro Tip: Keep the most frequently used tool at the easiest-to-reach position. Storage should save time, not add another step to cleaning.
Narrow Cabinet Slot
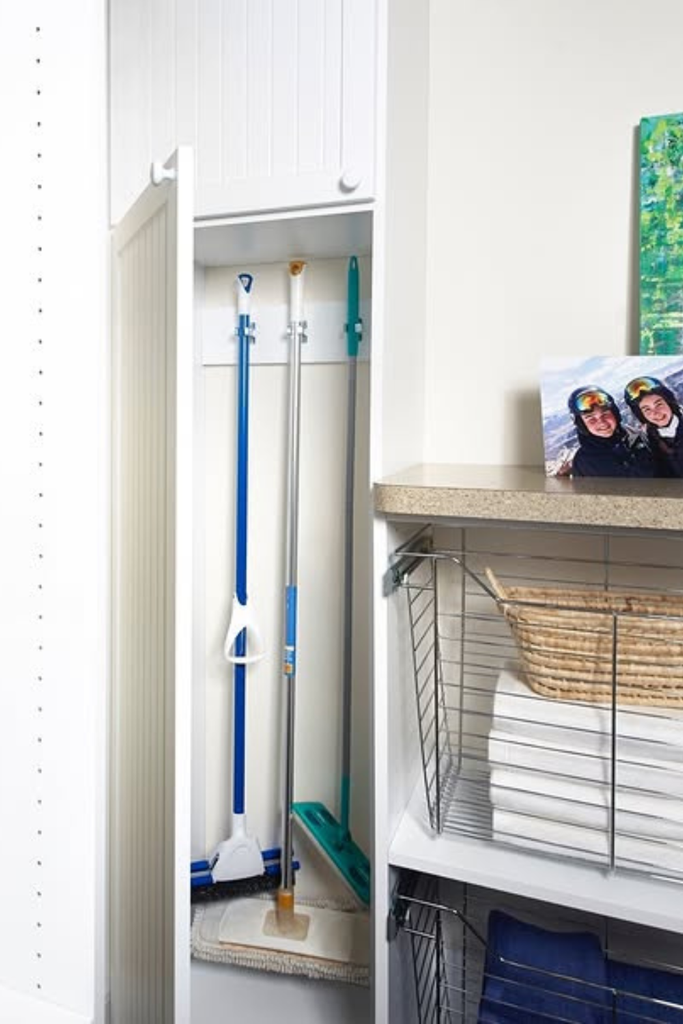
A tiny cabinet gap can become useful storage for long-handled tools.
I can add a slim rail or a few clips so the handles stand vertically rather than lying across shelves or leaning into a corner.
This is particularly useful in kitchens and laundry rooms where every inch of cabinet space matters.
Pro Tip: Measure the narrowest point of the cabinet carefully. Hinges, shelf supports, and door frames can reduce usable space more than expected.
Entryway Clip Rail
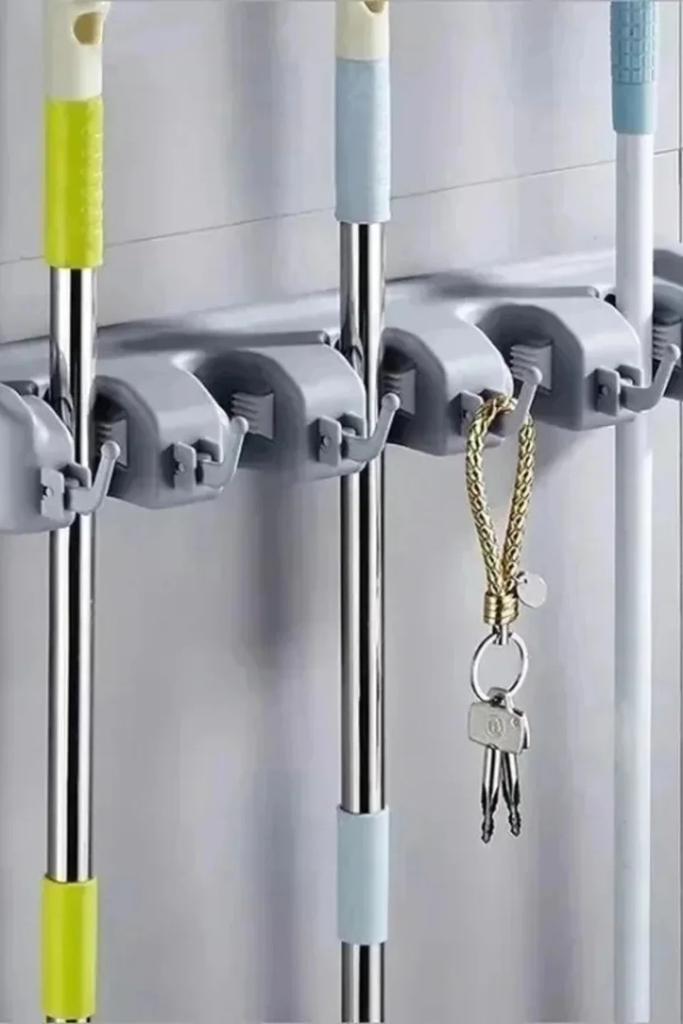
A mudroom or entryway can work well for cleaning tools when there is no dedicated utility closet.
A clip rail keeps long handles together and prevents them from becoming part of the general entryway clutter.
I would use this method only when the location is convenient and the tools can be stored without interfering with coats, shoes, bags, or walking paths.
Pro Tip: Position the rail high enough to protect the handles from being knocked over but low enough that the tools can be removed comfortably.
Modular Clip System
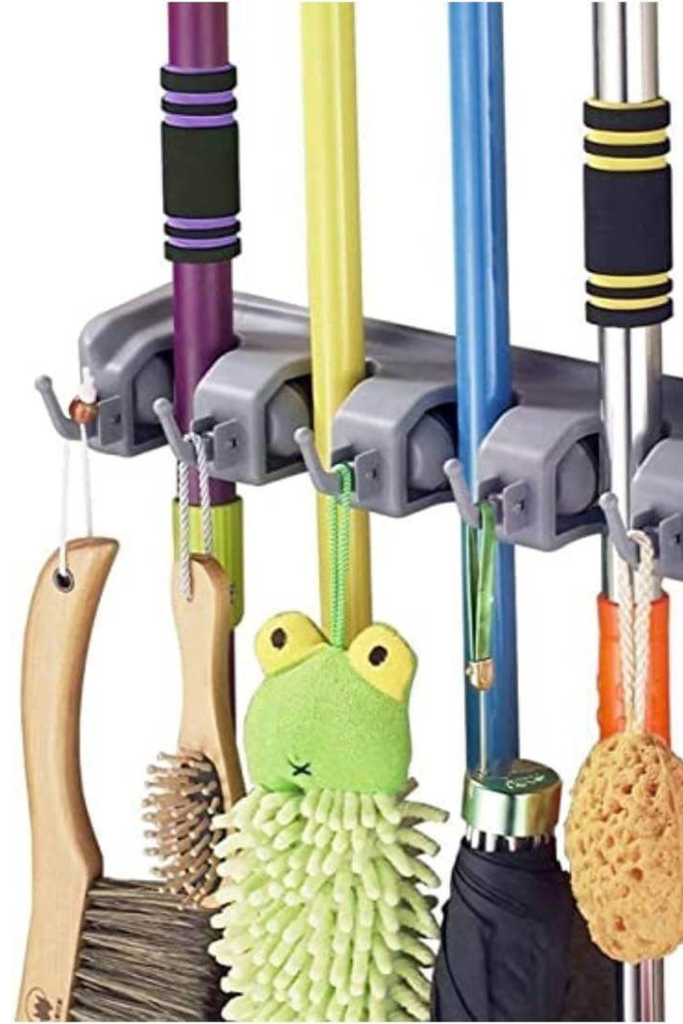
I like modular clip systems because I can change the spacing as my storage needs change.
Instead of committing to one large rack, I can install separate holders and adjust the distance between them for different tools.
This works especially well in garages, laundry rooms, and utility spaces that tend to change over time.
Pro Tip: Leave a little room for future additions. A storage system that is completely full on day one can quickly become difficult to maintain.
Full Utility Cabinet
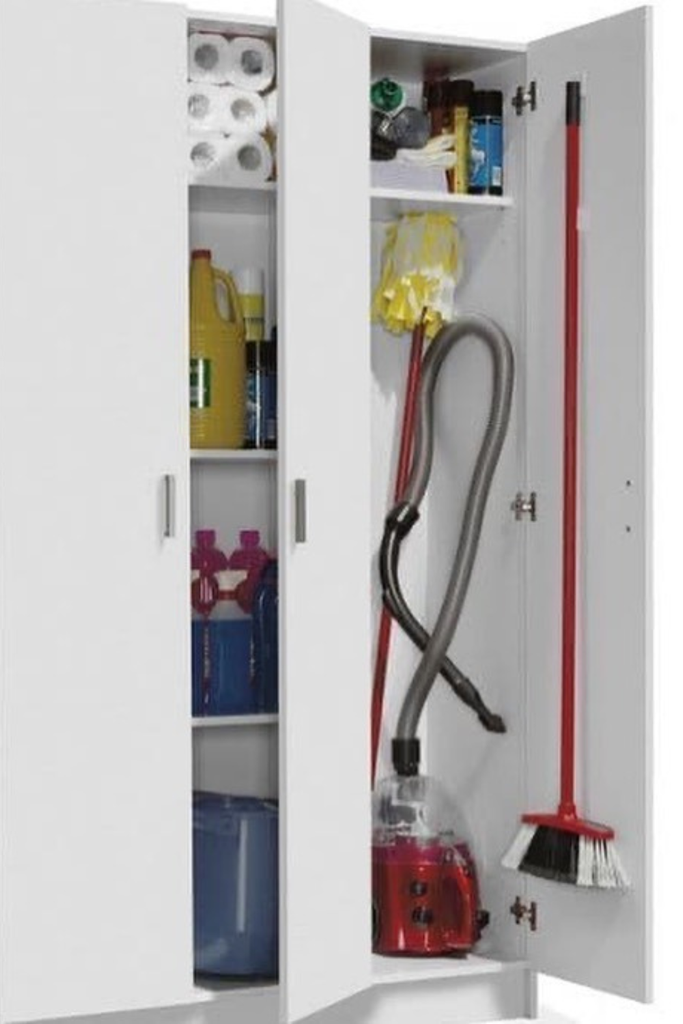
A full-height utility cabinet gives me the option to hide almost all of my cleaning equipment behind closed doors.
I can use hooks on the doors, vertical holders on the interior walls, and shelves or baskets for smaller supplies.
This is a practical choice when I want the room to have a cleaner appearance without giving up access to the tools I use regularly.
Pro Tip: Divide the cabinet into zones instead of putting everything together. Long tools, bottles, cloths, and buckets are easier to manage when each category has a defined area.
Open Utility Tower
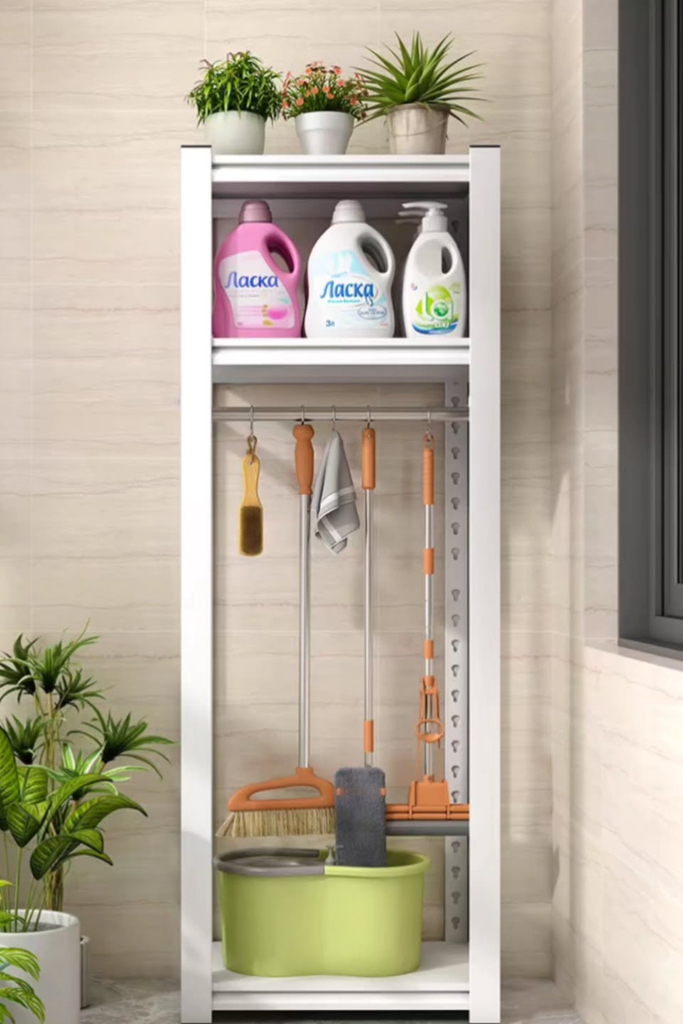
An open storage tower keeps cleaning tools visible and accessible without requiring cabinet doors.
I can hang long-handled tools from the upper section and place buckets or baskets underneath.
This can work particularly well in a laundry room, covered utility area, or other location where airflow is helpful.
Pro Tip: Open storage works best when I keep the number of visible items under control. Grouping tools neatly can make an open system look intentional rather than cluttered.
Slim Pull-Out Cabinet
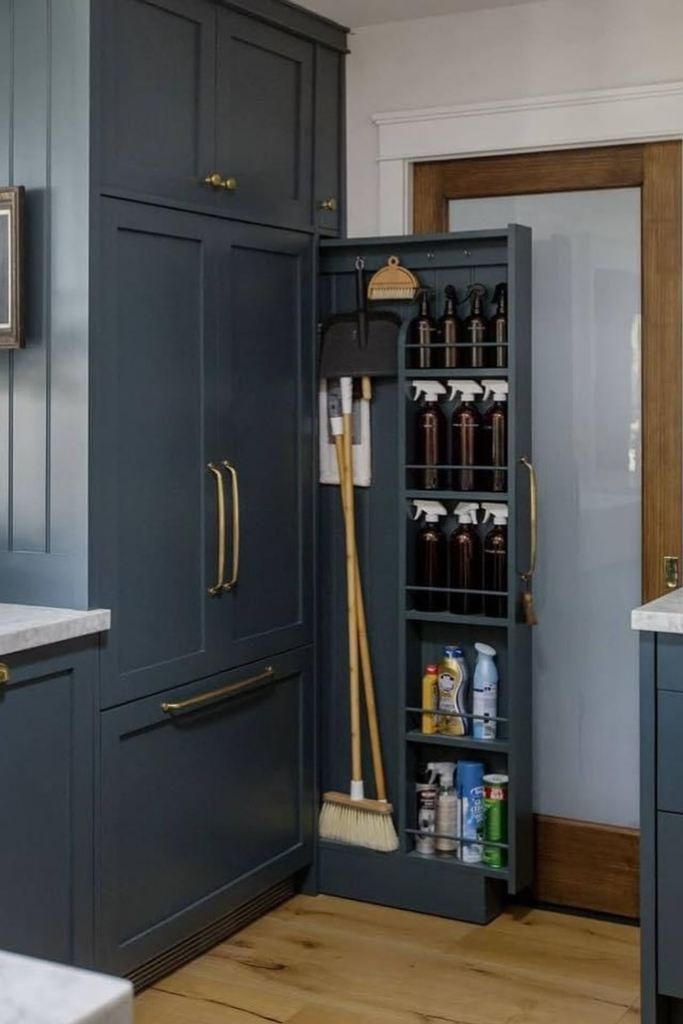
A very narrow cabinet can become useful when I add a pull-out storage frame.
Instead of reaching into a deep gap, I can pull the entire organizer forward and see the cleaning tools immediately.
This makes narrow spaces much easier to use and can be especially helpful in kitchens or laundry areas with unused cabinet gaps.
Pro Tip: Check the pull-out hardware’s weight capacity before loading it with multiple tools and cleaning products.
Deep Closet Bay
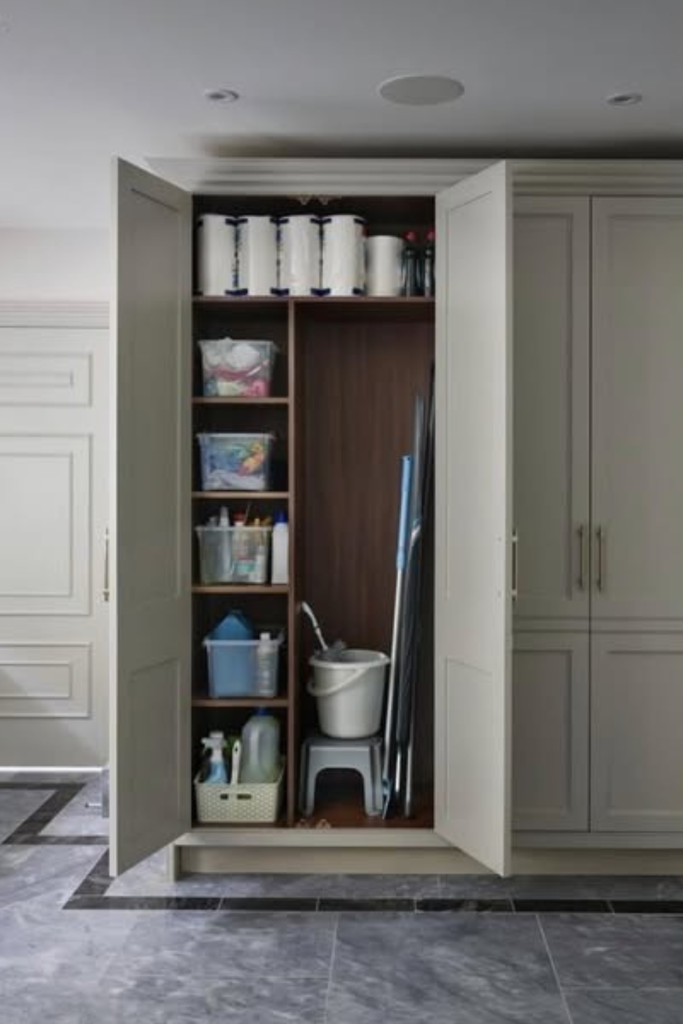
A deep closet can handle a large collection of cleaning equipment when I dedicate one tall section to long-handled tools.
I can use dividers or clips to keep handles separated and reserve lower space for buckets and larger cleaning containers.
This prevents tools from tipping forward every time I remove one item.
Pro Tip: Store the tallest tools toward the back or in their own vertical lane, depending on the closet layout. The goal is to prevent one handle from blocking access to everything else.
Read this next: Creative Ways to Utilize Vertical Spaces on Your Balcony or Patio
FAQs
How do you store a mop so it doesn’t smell?
I always let the mop dry as much as possible before putting it away. After cleaning, I rinse it properly, squeeze or wring out excess water, and hang it somewhere air can move around the mop head.
I avoid leaving a wet mop sitting inside a bucket or pressed against a closed wall or cabinet. Warm, damp conditions can encourage unpleasant odors and microbial growth.
A wall-mounted holder or ventilated storage area is usually more practical than a sealed container for a mop that has not completely dried.
Is it better to store brooms standing or hanging?
I prefer hanging a broom when possible because it keeps the bristles from carrying the weight of the broom while it sits on the floor.
Over time, constant pressure can deform the bristles, which can make the broom less effective. A clip, hook, or wall-mounted holder keeps the handle secure and the cleaning head protected.
If I have to store a broom standing, I make sure the bristles are not being crushed or bent and that the broom cannot easily fall over.
Conclusion
I’ve found that broom and mop storage becomes much easier once I stop treating these tools as items that simply need to disappear.
The best storage location depends on the space I already have. A narrow wall, cabinet door, pantry gap, laundry-room corner, garage wall, or closet side can all become useful storage with the right holder.
My main priorities are keeping handles secure, protecting broom bristles, giving wet mop heads enough airflow to dry, and placing frequently used tools somewhere convenient.
Even a very small storage improvement can make a noticeable difference. When every cleaning tool has a clear home, I spend less time picking up fallen handles and more time actually getting the cleaning done.






5 Comments