
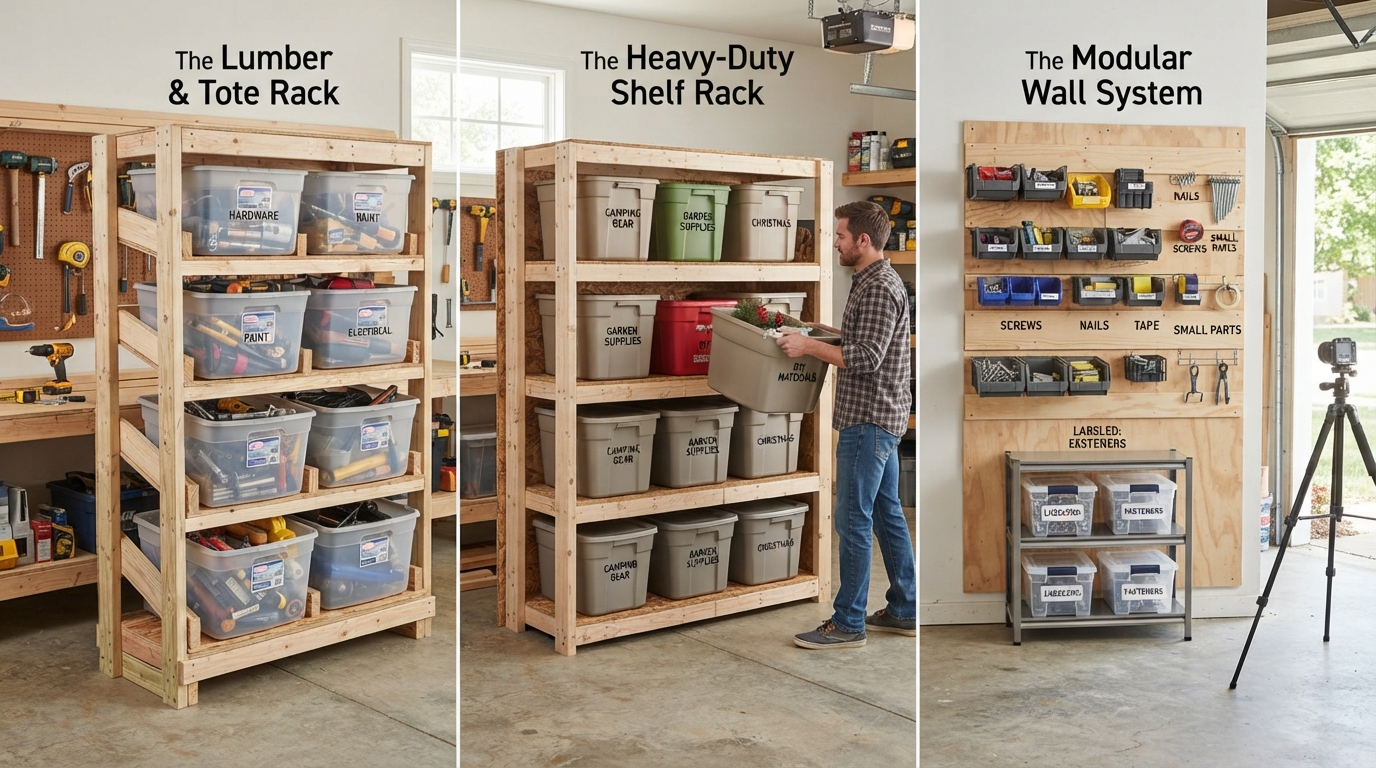
18 Storage Bin Rack DIY Ideas for 2026
If you have ever tried to reach one storage tote from the bottom of a stack, you already know how quickly a garage, basement, or utility room can become frustrating. I find that the real problem is not owning too many bins—it is storing them in a way that keeps every container accessible.
A well-planned rack can keep totes off the floor, reduce unstable stacks, and make it much easier to see what you actually have. I focus on strong framing, sensible spacing, good weight distribution, and easy access when planning storage like this.
In this guide, I’m sharing 18 DIY storage bin rack ideas for different spaces and needs. Some designs use simple 2×4 framing, while others add wheels, work surfaces, outdoor protection, or wall-mounted storage.
Save this for later
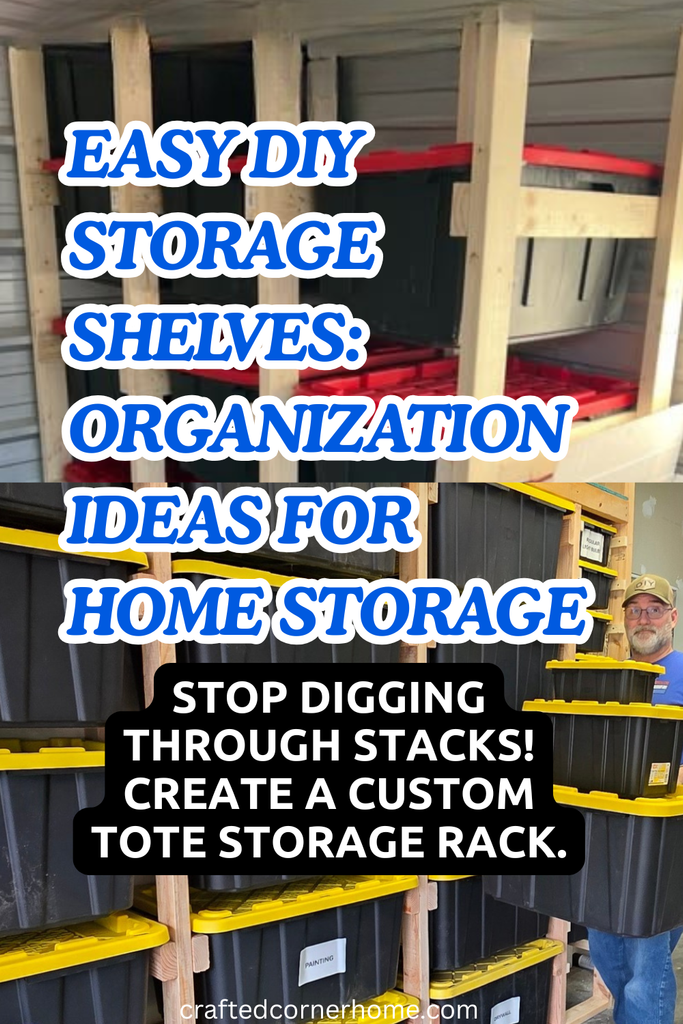
Table of Contents
I’ll also cover the basic construction principles I use for heavy bins, including measuring the tote lip, supporting the load properly, limiting long unsupported spans, and anchoring tall racks where needed.
Key Takeaways
- I use sturdy framing when storing heavy totes filled with tools, books, or seasonal decorations.
- I measure the actual storage bins before cutting any lumber or installing rails.
- I keep the heaviest containers toward the bottom whenever possible.
- I anchor tall racks to suitable wall framing to reduce the risk of tipping.
- I use casters only when the floor, frame, and wheels are rated for the combined load.
- For outdoor storage, I raise containers off the ground and protect them from direct rain.
- Good lighting makes labels and contents much easier to find.
Related article: 16 Cast Iron Wall Storage Ideas for 2026
How Do I Build a DIY Storage Bin Rack That Can Hold Heavy Loads?
When I build storage for heavy totes, I treat the rack as a structural project rather than simply putting shelves together. A sturdy frame, properly supported spans, and secure connections matter much more than making the rack look complicated.
For many garage-style projects, 2×4 lumber is a practical starting point. I still check the expected load, lumber condition, span, and connection method rather than assuming every 2×4 rack has the same capacity.
Before cutting anything, I measure the actual bins. I check their width, depth, height, and the shape of the rim because even a small clearance mistake can make a slide-in rack frustrating to use.
I like leaving enough room for the bin to move freely without creating a large unsupported gap. Structural screws or appropriate construction fasteners are preferable to ordinary drywall screws for load-bearing connections.
I also pay close attention to side-to-side movement. A back panel, diagonal bracing, or secure wall attachment can make a major difference in how stable a tall rack feels.
For a tall unit, I anchor it to suitable wall framing whenever practical. I also place heavier containers lower down, which helps keep the center of mass closer to the floor.
Pro Tip: Before loading the finished rack, test it gradually. Check for bowing, loose joints, rocking, or unusual movement before putting your heaviest containers on the upper levels.
Rolling Grid Tower
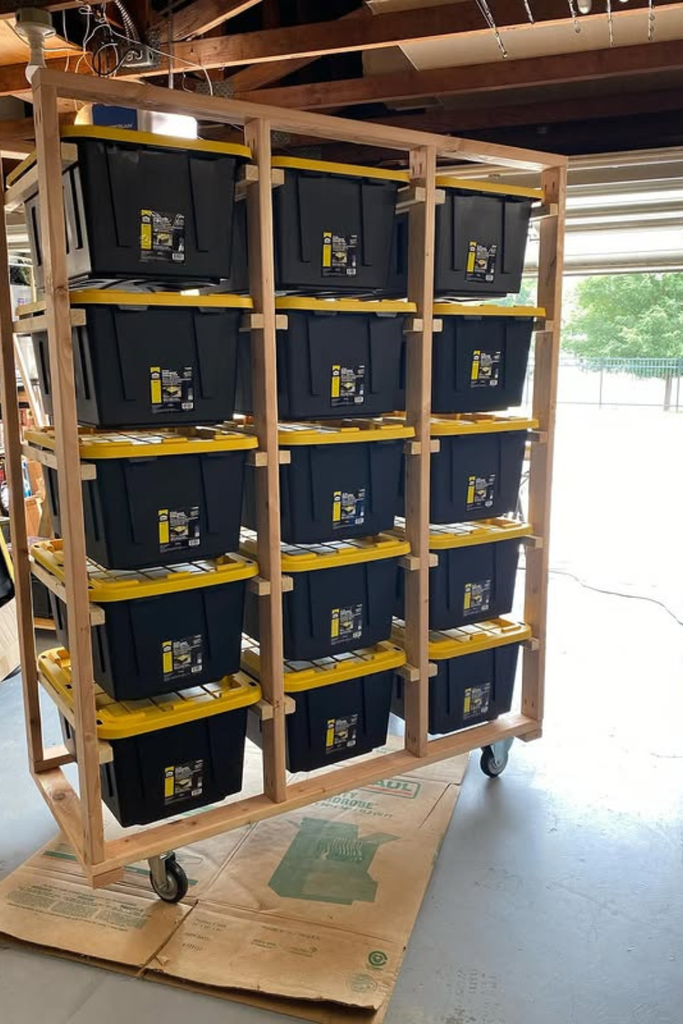
I like a rolling grid tower when I need a lot of storage but still want the ability to move the rack around the garage. The individual openings keep each tote separated instead of creating one unstable vertical pile.
For this design, I would build a rigid 2×4 frame and divide the interior into dedicated cubbies. Each opening should be sized around the actual tote so the container can slide in without catching on the frame.
Heavy-duty locking casters are important because the wheels carry the entire loaded structure. I would choose casters according to the combined weight of the rack and its contents, not simply by appearance.
I keep the heavier totes low and avoid making the tower unnecessarily narrow. A broad, stable base helps reduce rocking when the unit is moved.
Good overhead lighting is particularly useful in a garage because labels can be difficult to read when the rack is tucked into a darker corner.
Heavy Shelf Frame
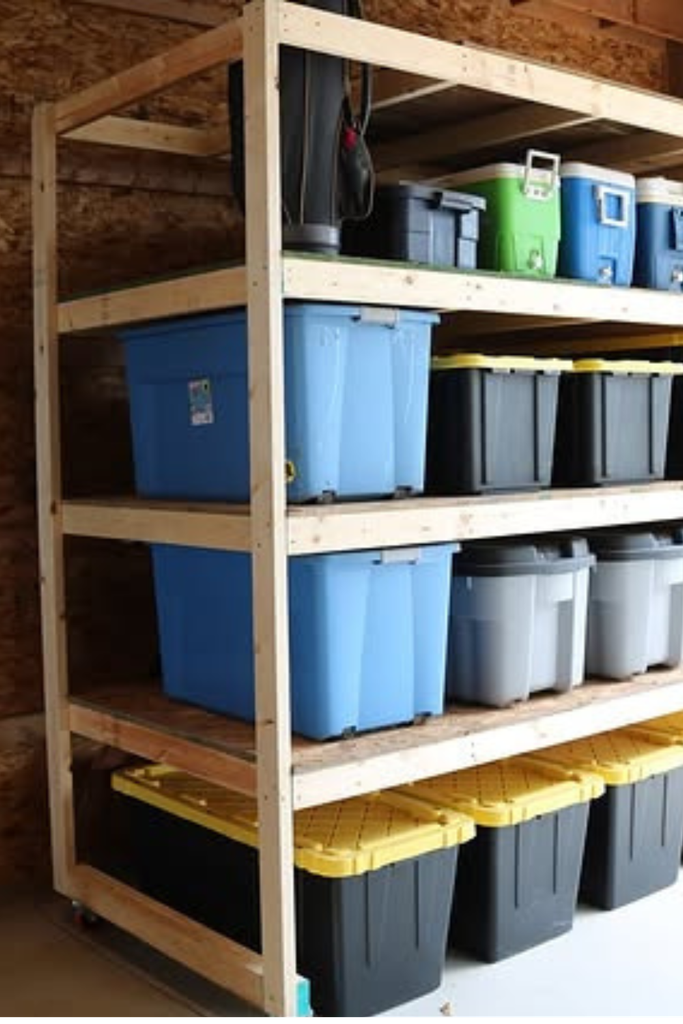
A conventional shelf frame can be a better fit when my storage containers are different sizes. Unlike dedicated rails, open shelves give me more freedom to change the arrangement later.
I would use substantial framing and support each shelf appropriately, especially when the bins will contain dense items such as tools, hardware, or books.
Placing the rack against a wall gives me a convenient opportunity to add an anti-tip connection. I would locate the attachment points in suitable structural framing rather than relying on drywall alone.
This style also works well in unfinished garages and sheds where appearance is less important than flexibility.
Pro Tip: If I expect the bin sizes to change, I leave some adjustability between shelves instead of designing every level around one container.
Compact Rail System
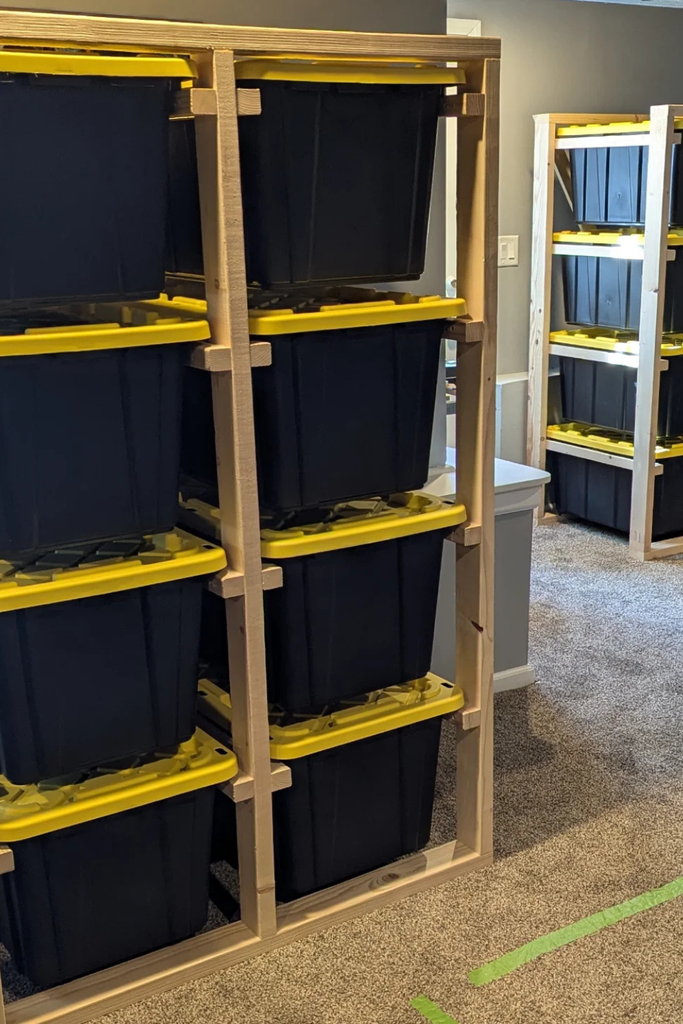
I find narrow rail systems useful when wall depth is limited. Instead of supporting each tote on a large shelf, the rails support the reinforced lip of the container.
I start by measuring the tote rim and then position the horizontal supports at consistent heights. I leave enough side clearance so a loaded bin does not scrape against the uprights.
The back of a narrow rack deserves special attention because a tall, shallow structure can be easier to tip. I secure it appropriately to the wall whenever the construction and wall type allow.
This approach works particularly well in small sheds, utility areas, and narrow garage walls where every inch of floor space matters.
Double Row Units
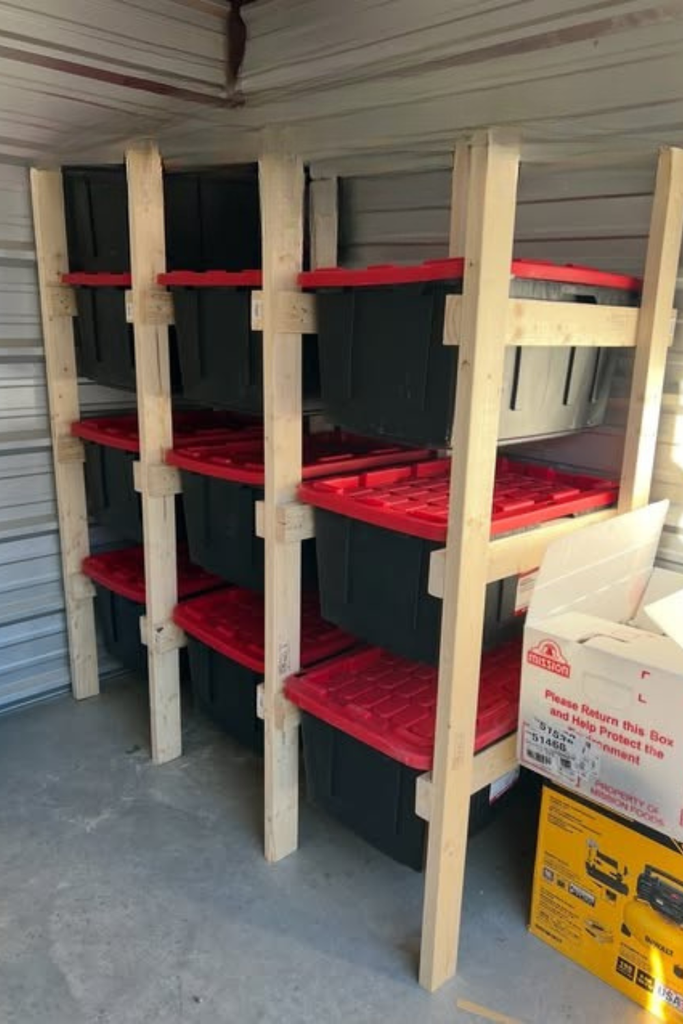
When one storage rack is not enough, I like repeating the same design across two units. Matching frames make a large storage wall look more organized while giving me more individual storage positions.
I would build each rack as a sturdy independent structure and then secure the units appropriately once they are positioned side by side.
A small gap between separate units can make installation easier and gives me access to the sides if maintenance is ever required.
This arrangement is especially practical in larger basements, garages, or dedicated storage rooms where floor space is limited but wall space is available.
Keeping the lower levels for heavier containers also makes the entire storage zone easier to manage.
Full Wall Storage
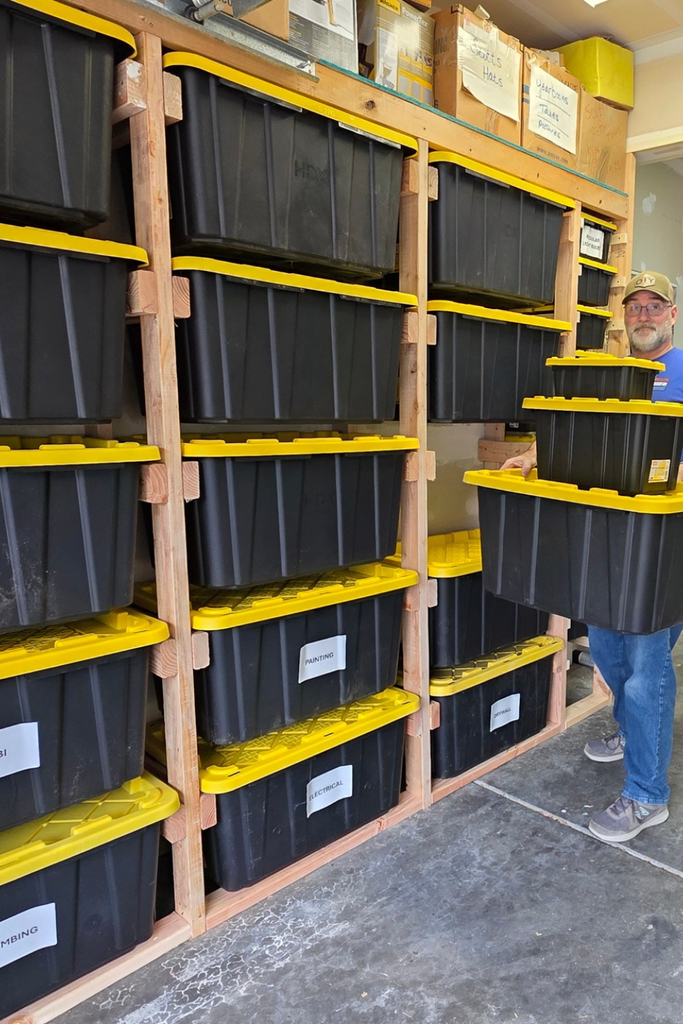
A full-wall rack makes sense when I have a large number of totes and very little spare floor area. Instead of allowing containers to spread across the garage, I can use one organized vertical storage zone.
I would first establish the location of the wall studs and design the frame around secure attachment points. Horizontal rails or shelves can then be spaced according to the dimensions of the containers.
I prefer placing the heaviest bins toward the bottom. Seasonal decorations, lightweight linens, and similar items can occupy higher positions if they are still comfortable to retrieve.
I also keep the rows consistent. Uneven spacing can make some levels difficult to use and may create unnecessary stress on certain sections.
Pro Tip: Label each storage level or bin with large, readable text. A well-built rack saves little time if I still have to open five containers to find one item.
Workbench Base Storage
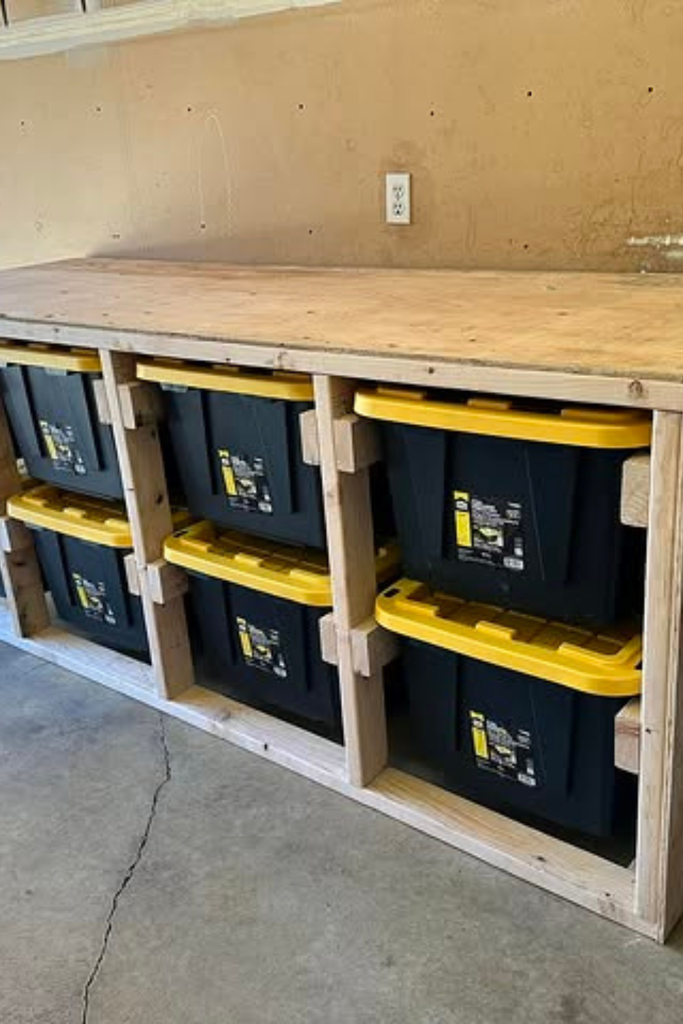
Combining a workbench with bin storage is one of my favorite ways to save floor space. The lower portion handles storage while the upper surface becomes useful workspace.
I would build a strong rectangular base and divide the bottom into openings sized for my totes. Rails or reinforced supports can keep the containers raised from the floor.
A thick, properly supported worktop gives me a useful place for repairs, crafts, gardening projects, or garage tasks without requiring another table.
I keep heavy bins at a comfortable lifting height whenever possible. Extremely heavy containers stored close to the floor may be structurally convenient but can be harder on my back to move.
Task lighting above the workbench can illuminate both the work surface and the storage underneath.
Wire Shelf Upgrade
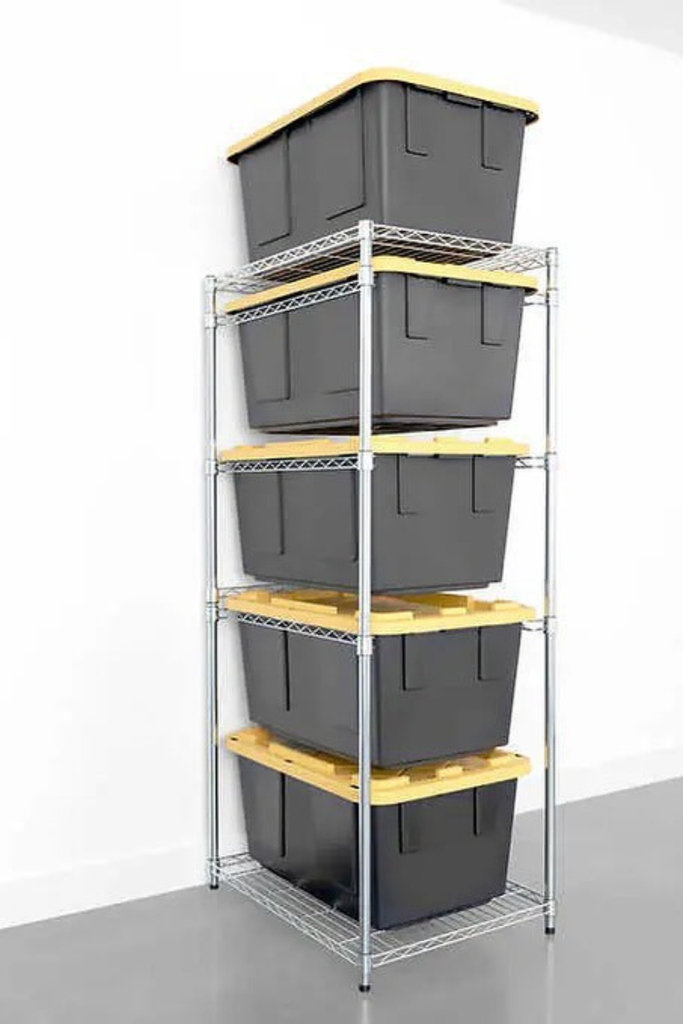
Wire shelving is convenient, but the gaps between wires are not always ideal for plastic storage totes. I like adding appropriately sized plywood panels when I need a more continuous support surface.
The panels spread the load over a larger area and prevent small tote feet or uneven bottoms from sitting directly across wire gaps.
Before making this upgrade, I check that the existing shelving frame, posts, connectors, and feet are suitable for the additional weight. Adding plywood does not increase the rated capacity of a weak shelf.
I place heavier containers on lower levels and make sure the shelving feet sit firmly on a level surface.
This setup works well in utility rooms, basements, and garages where I want a relatively narrow storage footprint.
Vertical Corner Stack
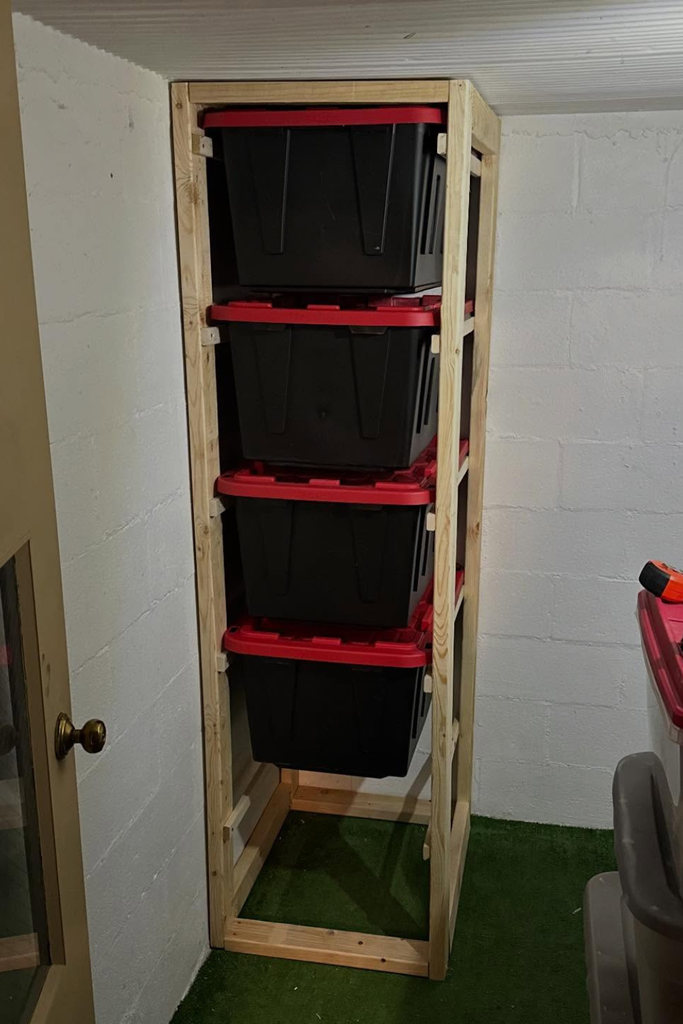
Corners are easy to overlook, but I can turn one into useful storage with a tall, narrow rack. This is particularly helpful when the room has very little uninterrupted wall space.
I would keep the footprint compact while giving the frame enough depth for the bins to sit securely. The rails should be positioned from actual tote measurements rather than estimates.
Because a narrow rack can become top-heavy, I pay extra attention to anchoring and bracing. The taller the structure, the more important stability becomes.
I reserve the lower positions for heavier containers and use the upper levels for lighter items that I do not need every week.
Mobile Work Island
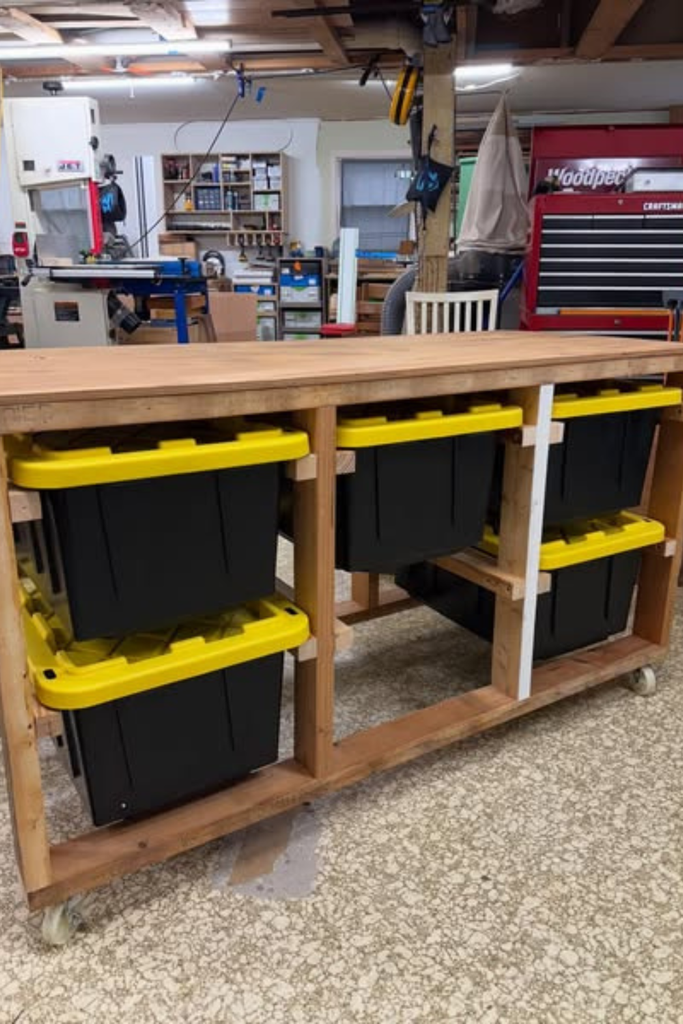
A mobile work island combines storage with a movable work surface. I find this useful in garages where my workspace changes depending on the project.
The base needs strong cross-supports because it carries both the storage load and the countertop. I would divide the lower section into tote-sized compartments and provide smooth, secure support underneath each container.
Heavy-duty locking casters allow the island to move when necessary and stay put while I am working.
I would also make sure the top is adequately supported before using it for tools or projects. A thick-looking countertop alone does not make a structure strong; the frame underneath carries much of the load.
Also read: 18 Pillow Storage Ideas for 2026
Ceiling Height Wall
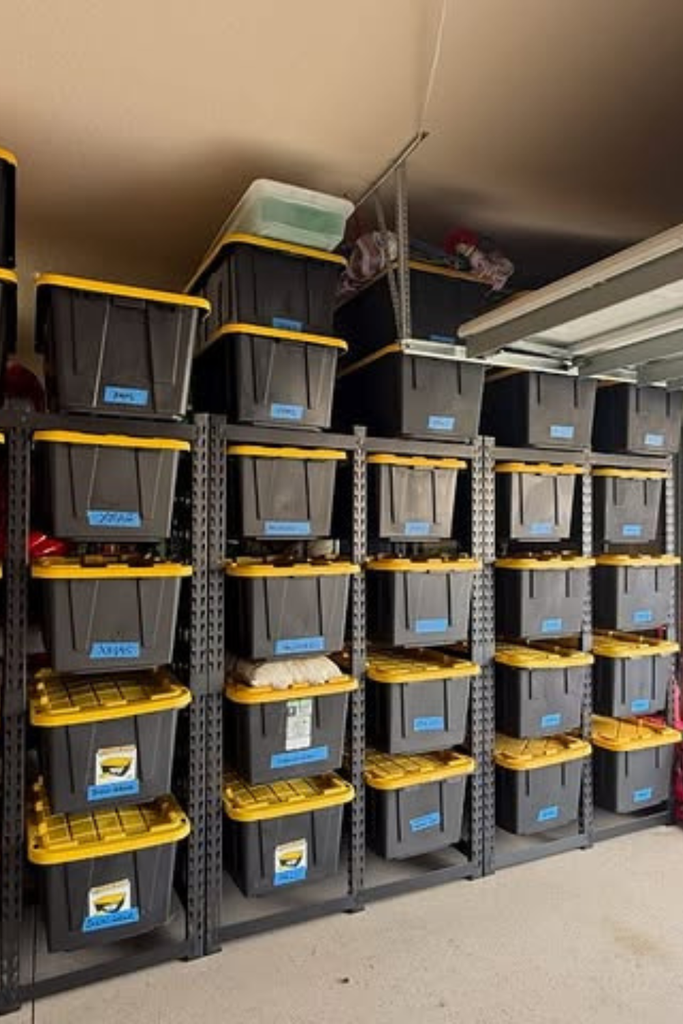
If I have unused vertical space, extending storage higher can dramatically increase capacity without taking more floor area. I still leave enough clearance above each bin so I can remove it safely.
Tall uprights should be firmly secured, with horizontal supports positioned consistently from one level to the next.
I keep lightweight seasonal items toward the top because reaching a high shelf already requires more effort. Heavy containers are better kept at lower, easier-to-access levels.
For very high racks, I consider how I will safely retrieve the upper bins. A stable step ladder and clear access area are just as important as the rack itself.
Pro Tip: I avoid storing frequently used items on the highest level. Reserve those positions for things I only need a few times each year.
Slim Wall Columns
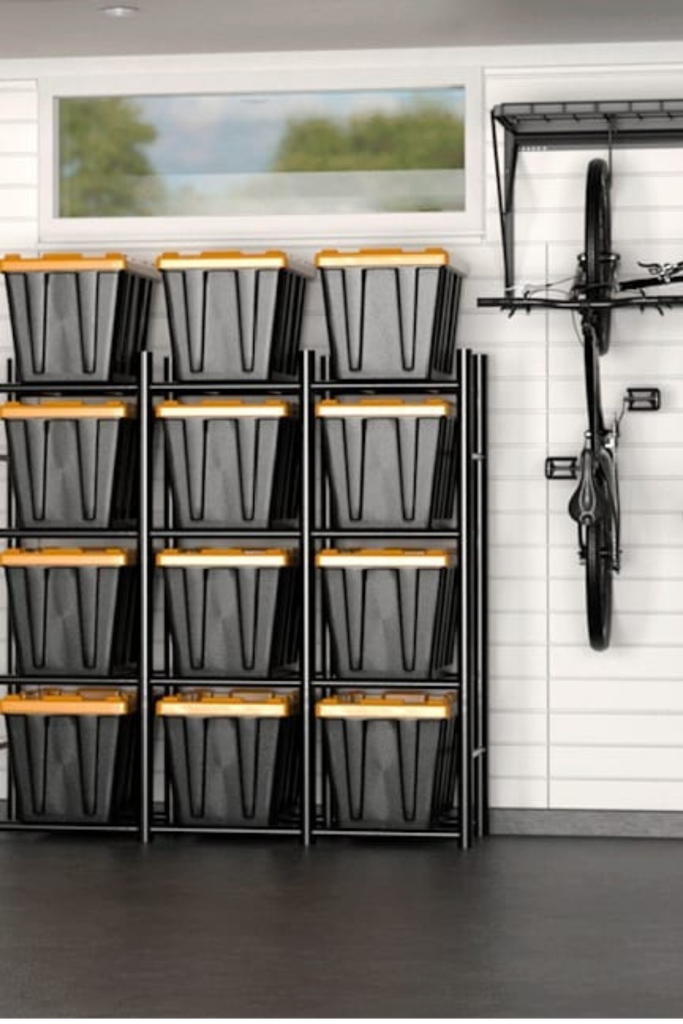
Slim metal storage columns can provide a cleaner alternative to a large homemade wood frame. I like this approach when the garage already has finished walls and I want several narrow storage sections.
I choose shelving designed for the intended load and make sure the tote dimensions work with the shelf openings. A rack that is technically strong is still inconvenient if the bins barely fit.
Several narrow columns can be positioned together to create a larger storage wall while keeping each section manageable.
I also secure tall metal shelving according to the manufacturer’s instructions and the type of wall available.
Raised Platform Rack
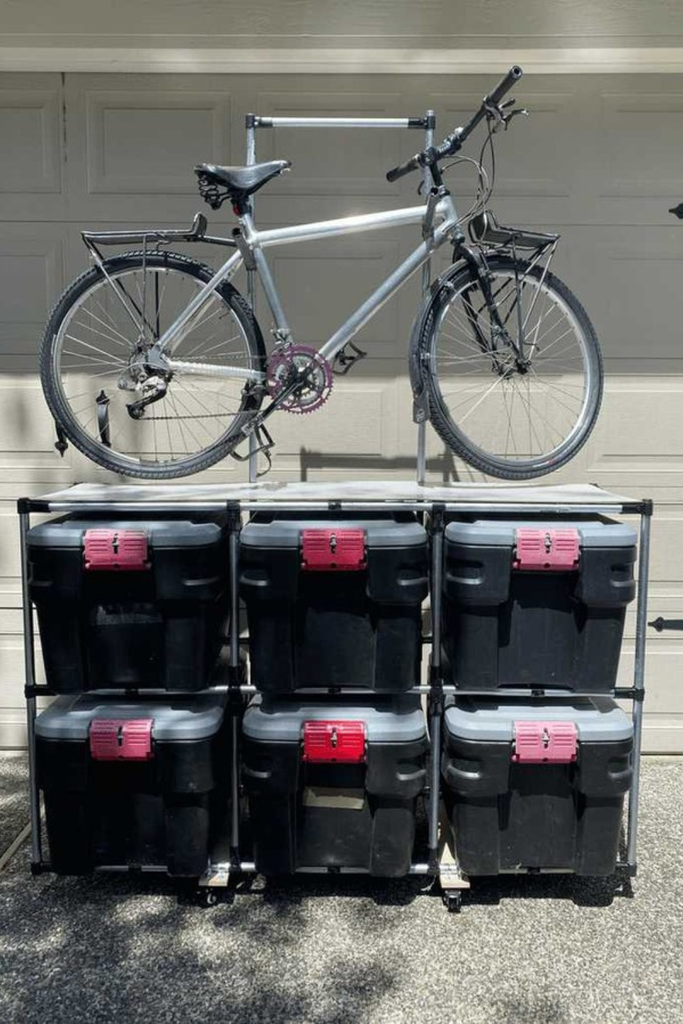
A raised platform rack gives me storage underneath and a useful surface above. This can be especially valuable when garage floor space is already occupied by bikes, tools, or outdoor equipment.
I would build the lower frame around the expected tote dimensions and reinforce the areas supporting the upper platform.
A properly supported plywood top can create a useful secondary surface for gear, supplies, or other storage.
Keeping the platform at a practical height matters. If it is too high, it can become difficult to use safely; if it is too low, it may interfere with the containers underneath.
For an area used after dark, a motion-activated light can make retrieving items easier without requiring the whole garage to be brightly lit.
Angled Slide Frame
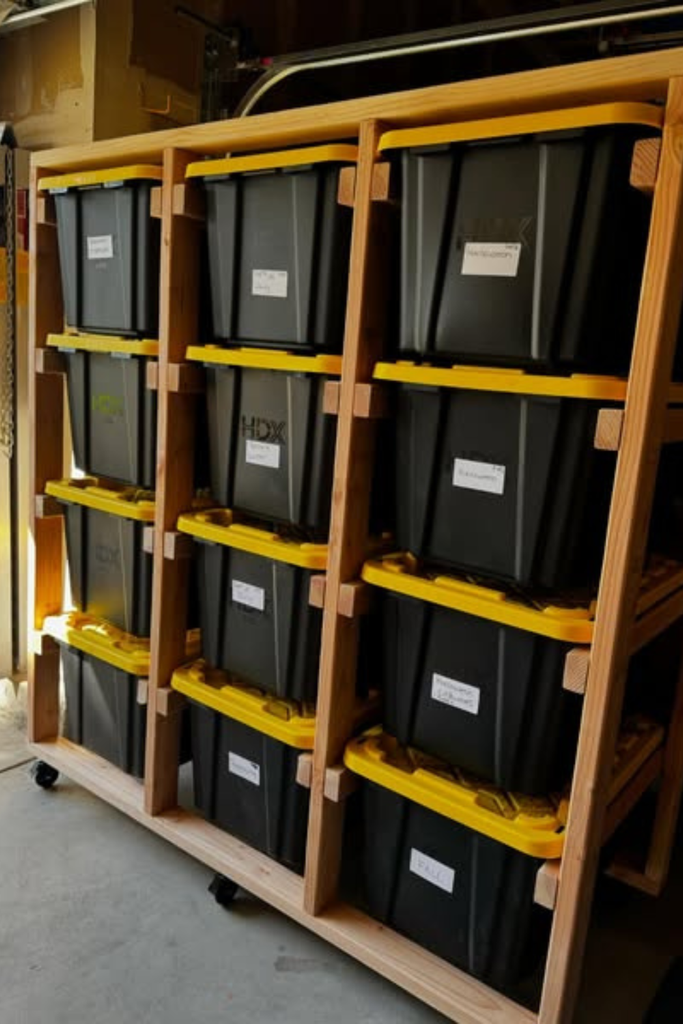
A slightly angled slide frame can make it easier to access containers because the design encourages the tote to move toward the front.
I would keep the slope modest rather than creating a steep angle. The goal is controlled movement, not allowing a loaded bin to slide unexpectedly.
The uprights and rails still need to be rigid, and any movable version needs appropriately rated locking casters.
I would test the rack with an empty tote first and then gradually increase the load. That lets me check whether the container stays where I expect it to.
Open Rail Frame
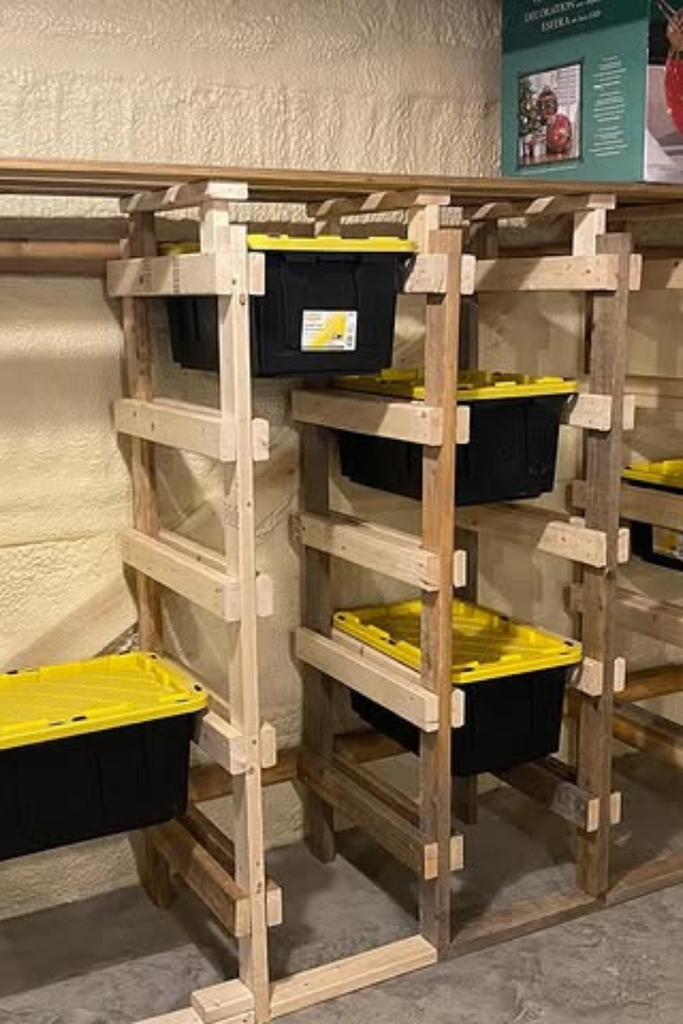
An open rail frame uses fewer materials than a fully enclosed cubby system. I like it when I want a simple structure that can be modified later.
The rails support the tote edges while the open center keeps the design accessible. This can also make it easier to change the spacing if I eventually switch to different storage containers.
I make the base wide enough for good stability and keep the heavier totes low.
For an unfinished basement or garage with an uneven floor, I pay attention to leveling before loading the rack. A strong frame can still feel unstable if its base is not sitting correctly.
Reinforced Cubby Frame
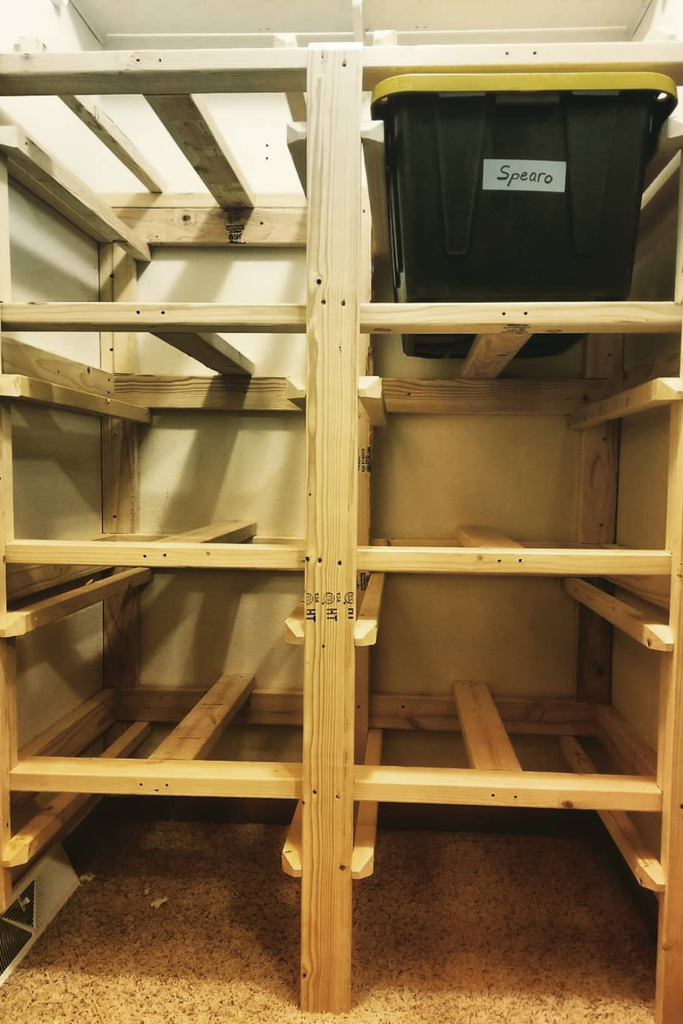
A reinforced cubby frame is useful when I want each storage position to have its own defined space. The individual compartments help prevent bins from leaning into one another.
I would construct the sections as rigid assemblies and connect them securely so the finished rack behaves like one unified structure.
Additional support beneath the tote edges can be useful when the containers are heavily loaded. I also avoid excessive unsupported spans.
Consistent measurements are important here. If one cubby is noticeably different from the others, the rack can become harder to use and the storage layout less efficient.
Outdoor Concealment Cabinet
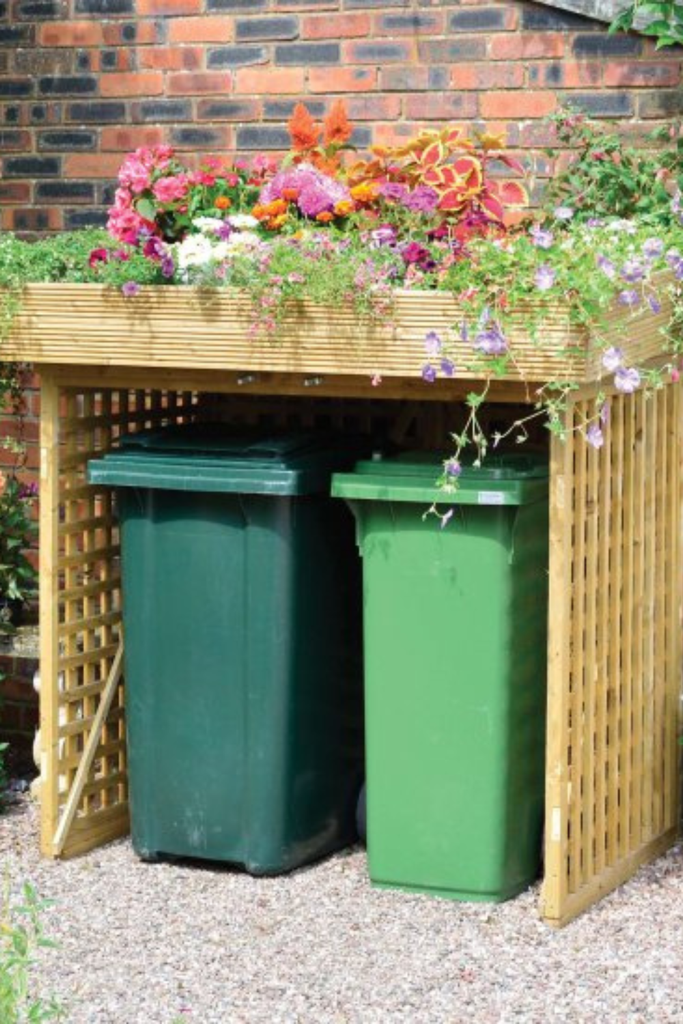
For outdoor storage, I like enclosing the bins so they are protected from direct weather while keeping the area looking tidy.
I would use materials appropriate for outdoor exposure and provide ventilation so moisture does not become trapped inside. A sealed box without proper airflow can create its own storage problems.
Raising the cabinet slightly above the ground helps reduce exposure to standing water and splashback.
A solid top can also make the structure look more intentional. Depending on the design, it could provide space for outdoor accessories or decorative items.
I would still use weather-resistant storage totes with secure lids because an outdoor cabinet is not a substitute for waterproof containers.
Fence Line Storage
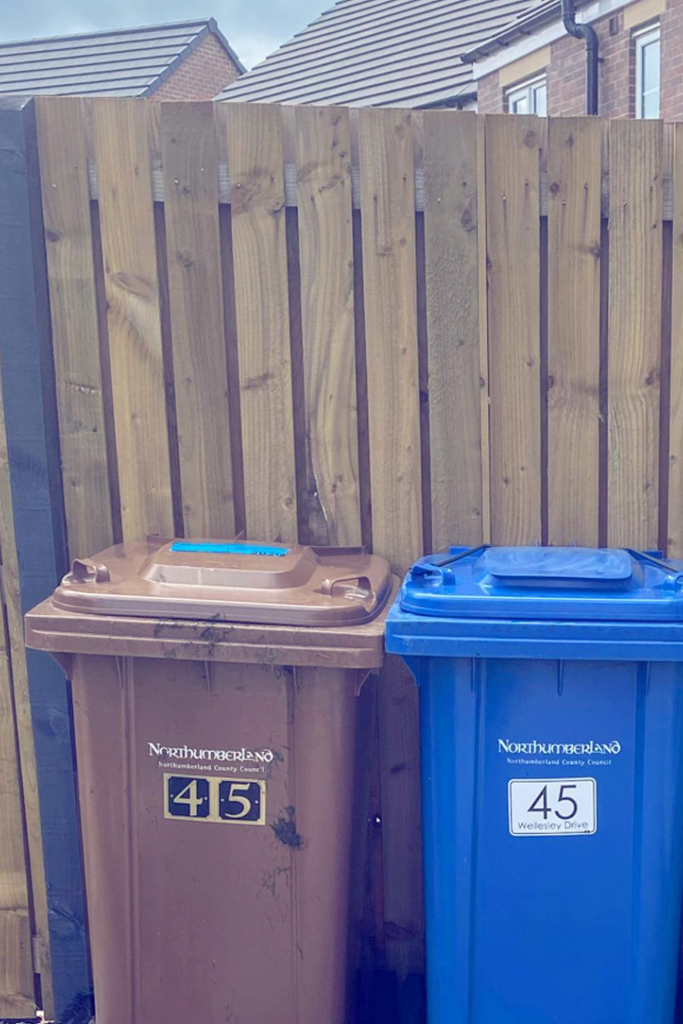
If I have several outdoor bins, arranging them along a suitable fence can keep them from spreading across the yard or driveway.
I would first make sure the ground is reasonably level and that the fence itself is structurally capable of supporting any brackets or attachments I plan to use.
Leaving modest space around the containers makes lid access easier and gives me room to inspect the area for moisture, pests, or debris.
For windy locations, I would use an appropriate restraint system rather than assuming the fence alone will prevent movement.
A nearby motion-activated light can make nighttime access easier while keeping the storage area relatively discreet.
Roofed Utility Station
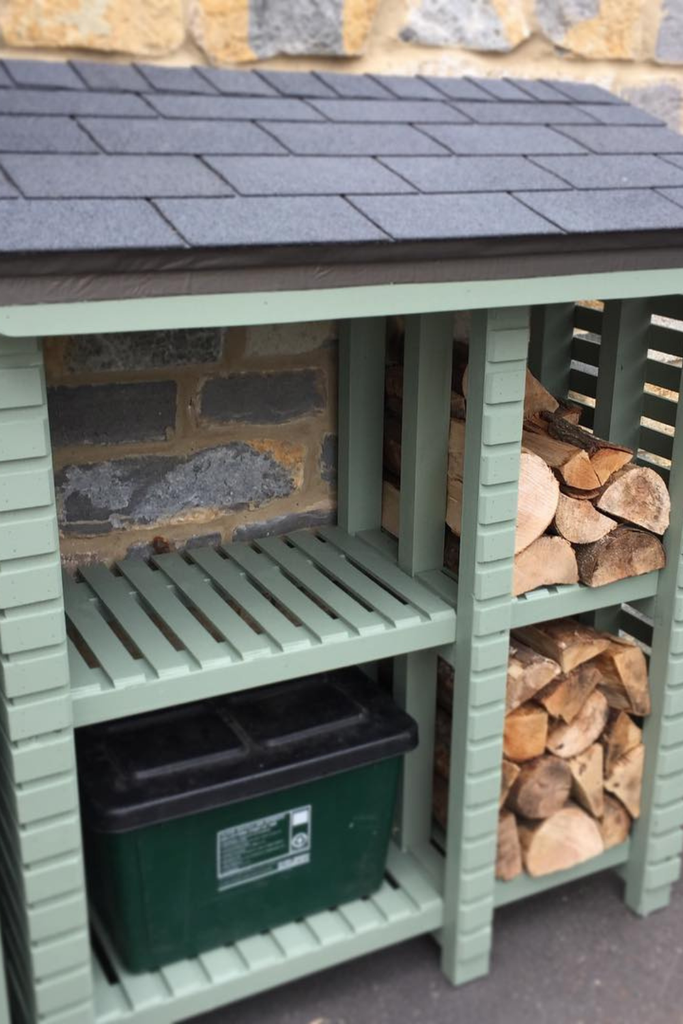
A small roofed station provides more protection than leaving bins completely exposed. I find this useful for outdoor supplies, firewood, gardening equipment, or containers that need a dedicated spot.
I would build the frame from materials rated for outdoor use and keep the lower section raised enough to reduce contact with wet ground.
Slatted sides or shelves can improve airflow, while a properly designed roof directs rain away from the storage area.
A slight roof pitch is useful because water can run off instead of collecting on top.
I would still avoid treating an open utility station as completely waterproof. For items that must remain dry, sealed containers provide another layer of protection.
Read this next: 30 Bathroom Storage Ideas to Keep Your Space Organized
FAQS
How Much Weight Can a DIY Bin Rack Hold?
There is no single weight limit that applies to every DIY storage rack. Capacity depends on the lumber or metal used, the length of each unsupported span, connection strength, bracing, shelf construction, and how the load is distributed.
I never assume that a rack made from 2×4s automatically has a specific safe capacity. For unusually heavy loads, I use shorter spans, stronger supports, appropriate fasteners, and additional bracing rather than relying on a generic weight estimate.
I also keep heavy containers lower and avoid concentrating too much weight in one section. If a rack is showing noticeable sagging, movement, or loose connections, I stop loading it and correct the structure first.
Should I Anchor My Storage Rack to the Wall?
For tall storage racks, I strongly consider anchoring because it reduces the chance of the structure tipping forward when a loaded bin is pulled out.
The attachment method should match the wall. For wood-framed walls, I use suitable structural framing points rather than relying on drywall anchors for a heavy load. Masonry walls require appropriate masonry fasteners.
Even a rolling rack can benefit from a secure parked position if it will remain loaded in one location for long periods.
Pro Tip: Before anchoring, identify exactly what is behind the wall surface and use hardware appropriate for that material. A strong rack is only as secure as its weakest connection.
Conclusion
I find that the best storage bin rack is not necessarily the largest or most complicated one. It is the design that matches the containers, available space, expected load, and way I actually use my storage.
For a garage, I might choose a full-wall or rolling rack. For a small utility room, a compact rail system or vertical corner rack can make better use of limited space. Outdoors, I would focus more on weather protection, ventilation, and keeping containers elevated.
Whatever style I choose, I always start with accurate measurements, a stable frame, sensible weight distribution, and secure connections. Those basic decisions make a storage rack safer, easier to use, and much more useful over time.



2 Comments