21 Trash Can Storage Kitchen Ideas for 2026
A kitchen trash can is one of those things I use constantly but do not necessarily want to see all day. When it sits in the middle of a walkway, beside an island, or in front of a cabinet, even a tidy kitchen can start to feel crowded.
I’ve found that the best trash storage solution is not always the one that hides the bin completely. It needs to be easy to reach while cooking, large enough for the household, and positioned where food scraps and packaging naturally collect.
In a small kitchen, I pay even more attention to the footprint. A narrow bin, a cabinet pull-out, or an unused corner can often solve the problem without requiring a kitchen remodel.
The goal is simple: keep the trash close enough to make cleanup easy while protecting the floor space and walking paths that make the kitchen comfortable to use.
I start with the location rather than the trash can itself. The sink, food-preparation area, and working side of an island are usually logical places to consider because waste is created there during everyday cooking.
For small kitchens, I look at space that is already available before adding furniture. Slim bins, cabinet pull-outs, corner storage, and over-the-door containers can use narrow or otherwise overlooked areas.
A visible bin does not automatically make a kitchen look messy. Choosing a simple shape, appropriate size, and finish that works with the surrounding cabinets or walls can make the placement look intentional.
Save this for later
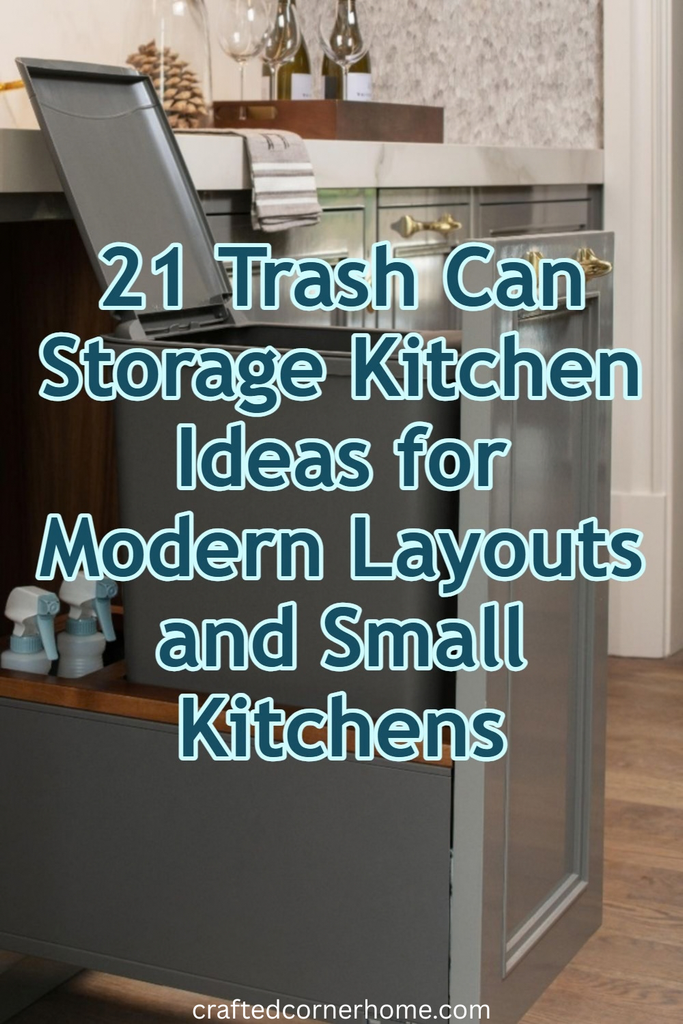
Table of Contents
When trash and recycling both need a home, stacked or dual-compartment systems can reduce the number of containers taking up floor space. Before buying or installing anything, I check the actual usable dimensions, door and lid clearance, and access needed to remove a full liner.
Key Takeaways
- Keep trash close to food preparation and cleanup without blocking a main walking route.
- Pull-out and tilt-out cabinets are useful when concealed storage is a priority.
- Slim rectangular bins can make narrow gaps beside refrigerators, islands, or cabinets useful.
- Stacked and dual-compartment systems can combine trash and recycling in a smaller footprint.
- Corner cabinets and unused island areas can provide storage without sacrificing the center of the kitchen.
- Measure the cabinet opening, interior width, depth, bin height, lid-open height, and hardware clearance before installation.
- Visible bins can still look intentional when their size, shape, and finish fit the kitchen.
Related article: 17 Foyer Storage Ideas for Entryway 2026
How Can You Hide a Trash Can in Your Kitchen Without Losing Space?
When I’m trying to make a kitchen feel less crowded, I first look at storage that already exists instead of bringing in another piece of furniture.
A base cabinet, the area beside an island, a corner cabinet, or a narrow gap next to an appliance may be enough. Under-sink storage can also work, but plumbing often reduces the usable space, so I never assume a standard bin will fit.
The measurements that matter are more than the cabinet’s outside dimensions. I check the interior width and depth, the height available for the bin, and the size of the cabinet opening. Hinges, drawer slides, plumbing, and other hardware can take away usable space.
For a pull-out system, I also check how far the frame extends. For a tilt-out cabinet, I make sure the front has enough room to open without hitting an island, appliance, or nearby cabinet.
Walking space matters just as much. A trash can that fits physically can still be a poor choice if an open door or pulled-out bin interrupts the normal path through the kitchen.
Pro Tip: Before ordering a storage system, use the measurements of the actual space rather than the advertised cabinet size. I also leave enough room to lift out the bin and change the liner without dismantling the setup.
How to Choose the Right Kitchen Trash Can Storage
I find it easier to choose among these ideas by starting with the kitchen’s limitations rather than the appearance of the bin.
If I own the home and am remodeling, built-in cabinet or island storage can make sense. If I rent, a slim freestanding bin, cabinet hook, small mounted container, or carefully positioned corner bin may be more practical.
Next, I consider whether I need one waste container or separate trash and recycling. A side-by-side pair needs more width, while a stacked system makes better use of vertical space.
The location should also fit the way the kitchen is used. I want the bin accessible from the prep area but not directly in a busy walking path. Lid-open clearance, liner-removal access, and the weight a cabinet system will carry all deserve a check before installation.
Tilt Cabinet
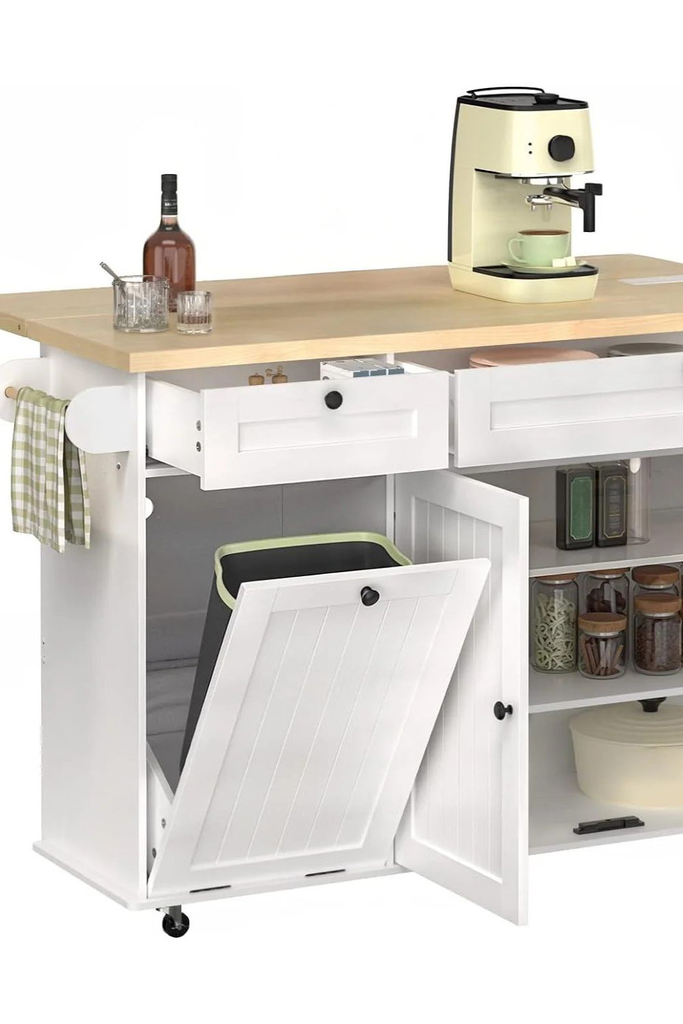
A tilt-out cabinet gives the trash its own concealed compartment while keeping access fairly quick. The front panel moves outward with the bin, so I do not have to reach deep into a traditional cabinet.
I like this arrangement near a sink or food-preparation area where scraps need to be discarded frequently. It also gives a visible kitchen a cleaner appearance when the cabinet is closed.
This can be built into suitable cabinetry or created with a freestanding tilt-out unit. If I’m adapting an existing cabinet, the bin dimensions and hinge hardware need to match.
Front clearance is important here. The panel needs enough room to tilt forward without hitting the island, another cabinet, or someone standing nearby.
Pro Tip: Check the loaded weight of the bin against the hardware specifications. Food waste makes a full container considerably heavier than it is when empty.
Slim Placement
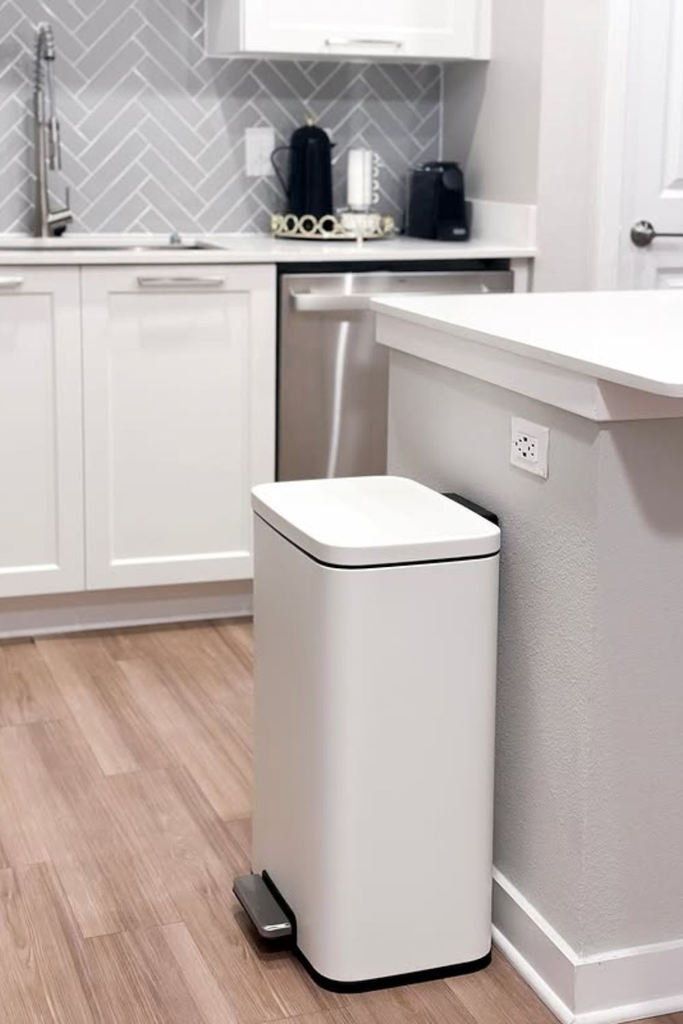
A narrow gap beside a refrigerator, pantry cabinet, island, or base cabinet can be surprisingly useful when a standard trash can is too wide.
This is one of the easiest options for a renter or anyone who does not want to modify cabinetry. The bin remains visible, but its smaller footprint keeps the main floor area open.
Before choosing a container, I measure both the width and depth of the gap. I also check the lid-open height because a tall narrow bin may fit beneath a counter but still have trouble opening.
Rectangular bins can make better use of straight gaps than round containers because their sides sit closer to neighboring surfaces.
Pro Tip: Do not measure only the empty gap. Account for baseboards, cabinet handles, refrigerator doors, and enough clearance to remove the liner.
Pull Drawer
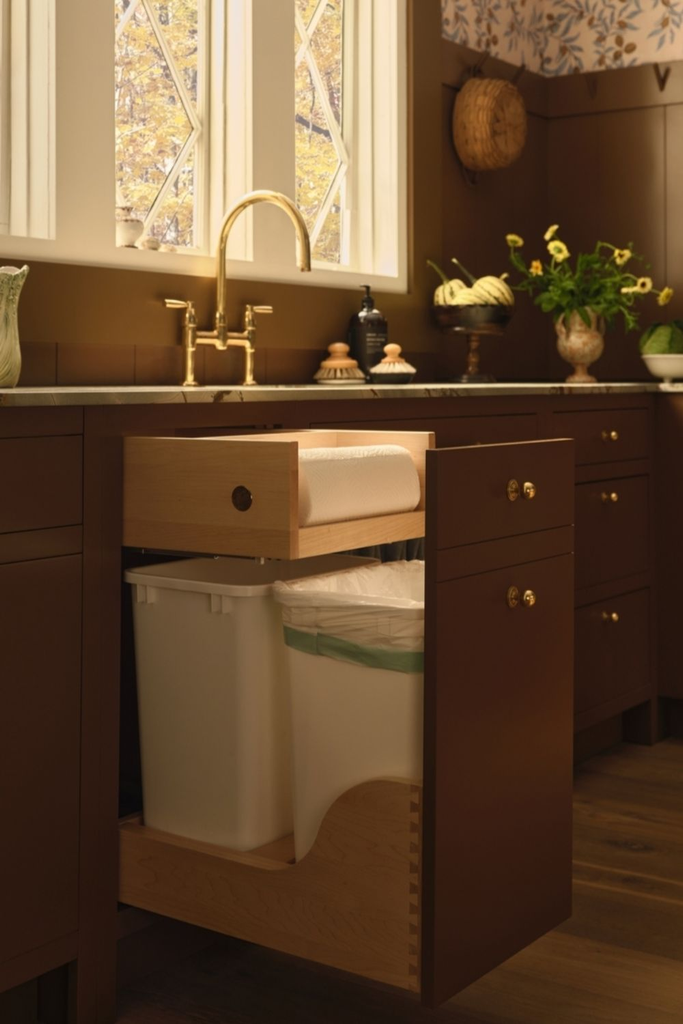
A pull-out drawer system places the trash inside a base cabinet and brings it forward on sliding hardware.
This feels more like opening a drawer than accessing a wastebasket, which makes it convenient when I am working at the counter. When closed, the bin disappears behind the cabinet front.
The best location is usually close to the sink or food-preparation area, but the exact spot depends on the cabinet layout.
An additional shallow drawer above the bins can hold liners, paper towels, or other frequently used cleanup supplies without mixing them into the trash compartment.
Pro Tip: Check the slide hardware’s weight rating and the cabinet’s construction before installation. The system needs to support the loaded bins, not just their empty weight.
Dual Stack
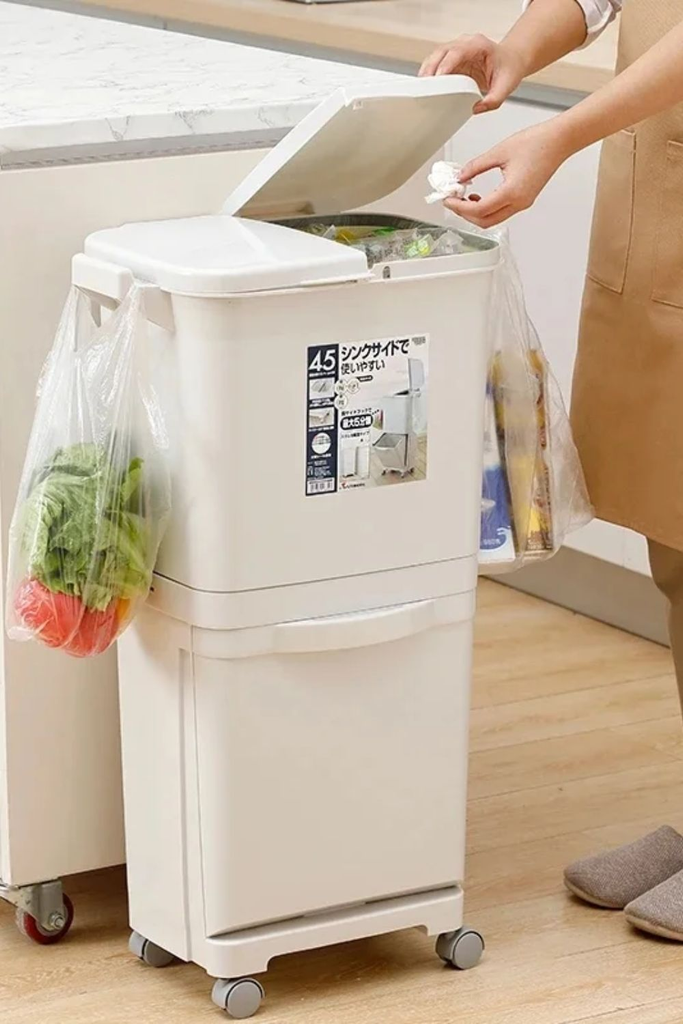
A dual-stack system combines two waste compartments vertically rather than placing them beside each other.
I would consider this when trash and recycling both need to stay in the kitchen but floor width is limited. The integrated arrangement uses approximately one main floor footprint while giving each category its own compartment.
This differs from a simple tall trash can because the purpose is to separate two waste streams rather than simply maximize one container’s capacity.
A wheeled version can be useful if the entire unit needs to move for cleaning.
Pro Tip: Think about access height as well as footprint. If one compartment will be used much more often, its position can make everyday use easier.
Double Bin

A double bin keeps two waste compartments together in one side-by-side container.
Unlike a stacked system, this arrangement uses more horizontal width but keeps both compartments at a similar height. That can make sorting straightforward for households that regularly separate trash and recycling.
Pedal-operated lids are useful when I am cooking because I can open them without putting food-covered hands on the lid.
This setup needs a wider floor area, so I would measure the full unit and its lid clearance before deciding where it belongs.
Pro Tip: Make sure both compartments are easy to remove and line individually. Separate liners make cleanup much simpler than trying to manage one oversized bag.
Hidden Combo

A hidden combo station combines waste storage with the supplies I use to clean up.
The bins can sit in the lower cabinet while a shallow drawer above holds liners, paper towels, cloths, or other everyday cleanup items. Instead of opening several cabinets, I can handle several small tasks in one location.
I like this approach when cabinet space is limited because it makes one section work harder without adding another freestanding organizer.
The upper drawer does not need to be deep. A shallow, divided space is often enough for rolls and small supplies.
Pro Tip: Keep this station focused on frequently used cleanup items. Storing unrelated kitchen equipment there can turn a convenient trash station into another cluttered cabinet.
Island Edge
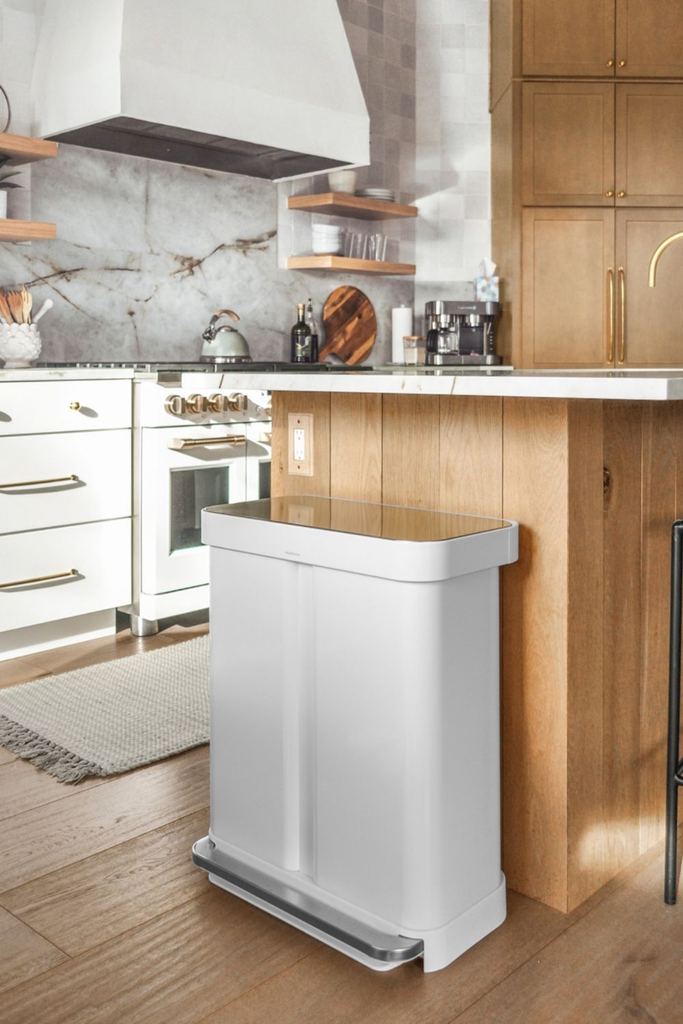
The working edge of a kitchen island can provide a useful place for a visible freestanding trash can.
Here, the bin is not built into the island. Instead, it sits close to the side where food preparation takes place, giving me quick access without using the center of the room.
I would keep it away from island seating and make sure the container does not narrow the walking route around the island.
A finish that relates to the cabinets or other kitchen surfaces can make the freestanding bin look like a deliberate part of the layout.
Pro Tip: Test the location during normal kitchen movement. Walk around the island with a plate or pan before committing to the spot.
Corner Tuck
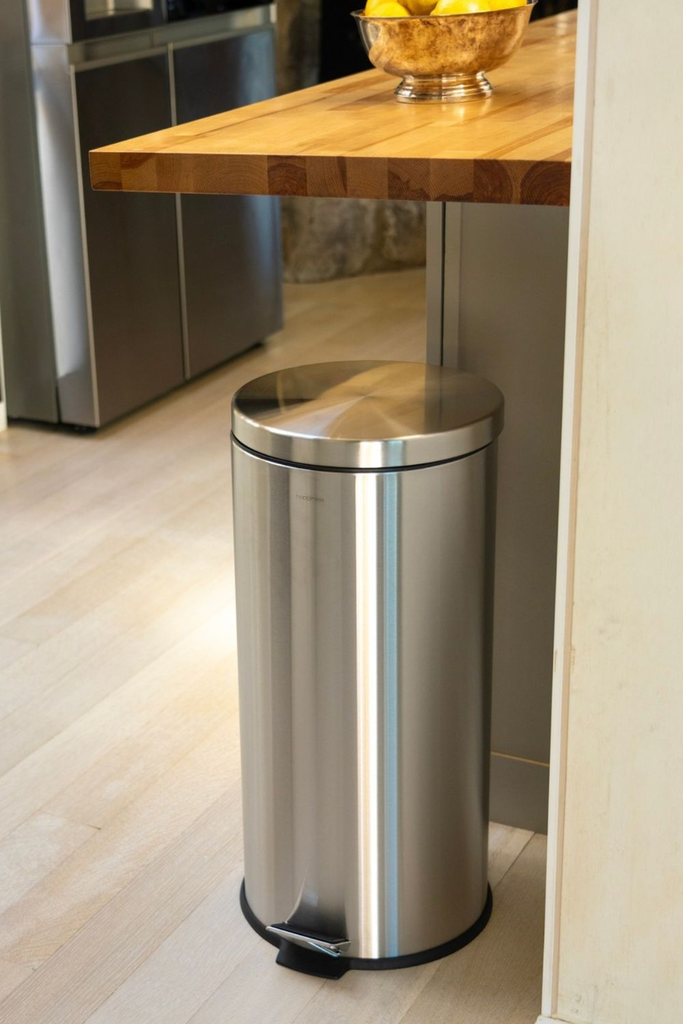
A corner tuck is the simplest of the corner solutions: the trash can remains freestanding but is positioned neatly inside an otherwise unused corner.
This works when I have no suitable cabinet for a built-in system but want to keep the bin out of the central floor area.
The right shape makes a difference. A slim rectangular or appropriately rounded container can sit close to two surfaces without extending too far into the room.
Unlike a corner pull-out, nothing needs to be installed. That makes this option particularly useful for renters.
Pro Tip: Keep enough space around the bin to remove the liner and clean the floor. Pushing it tightly into an inaccessible corner can make routine maintenance harder.
Wall Mount
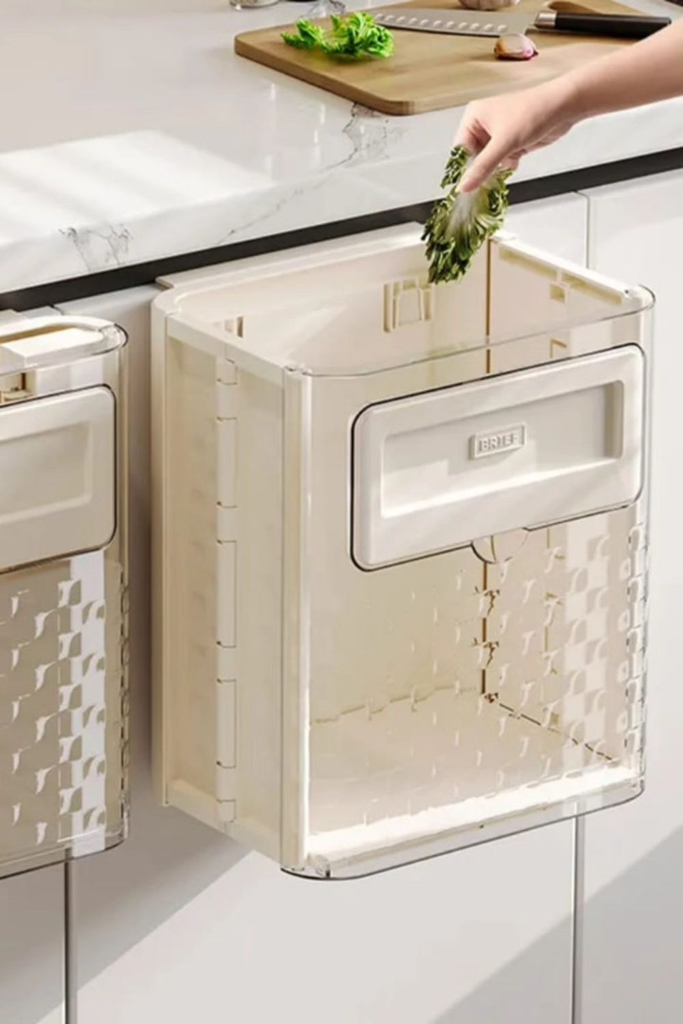
A small mounted container can handle food-preparation scraps without taking up floor space.
I see this as a supplement to the main household trash can rather than a replacement for it. It can sit near a cutting area and collect small amounts of vegetable trimmings or other prep waste before being emptied.
This can be useful in a very compact kitchen where even a narrow floor bin creates an obstruction.
The mounting method needs to suit the wall or cabinet surface and the expected load. I would also choose a location where the container can be removed easily for emptying and cleaning.
Pro Tip: Keep the container size appropriate for quick prep scraps. A small mounted bin should not become an overloaded storage point.
Cabinet Hook

An over-the-door container provides temporary trash storage without permanently changing the cabinet.
I like this for short food-preparation sessions because I can place it directly beside the cutting board and toss scraps in as I work.
The main difference from a mounted container is that this one hangs from the cabinet door or its edge. That makes it easy to remove, which can be helpful in rental kitchens.
Before using one, I check that the cabinet door still closes correctly and that the added load is appropriate for the hinges.
Pro Tip: Empty it regularly and avoid filling it with heavy waste. The cabinet door is supporting the container, so keeping the load reasonable is important.
Cabinet Slide
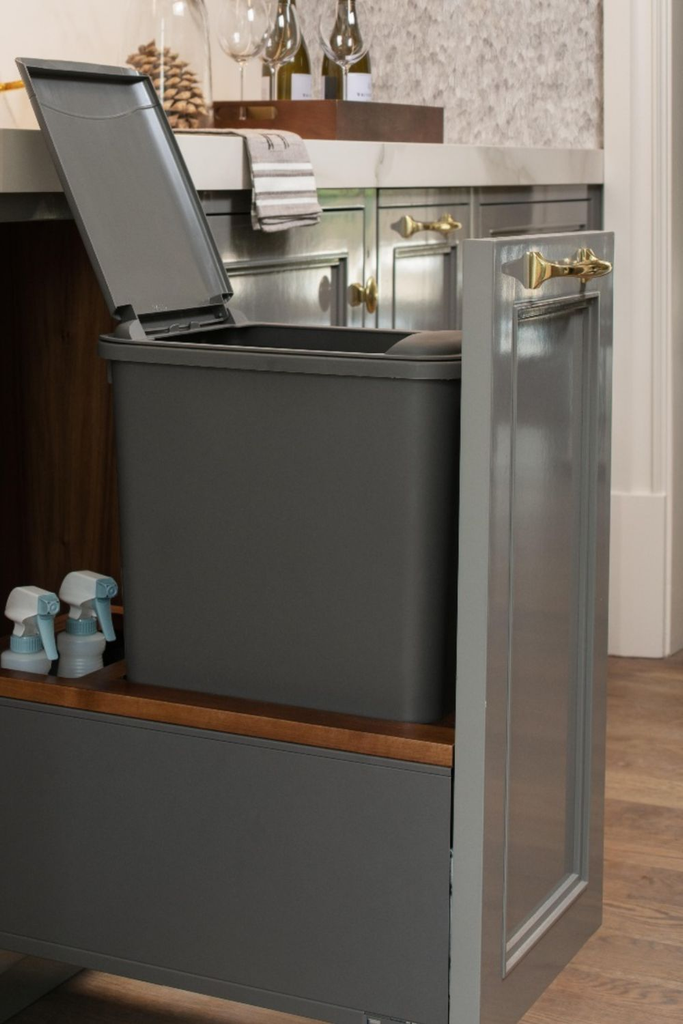
A cabinet slide is a retrofit approach for turning an ordinary base cabinet into concealed trash storage.
The bin sits on a sliding frame inside the cabinet and comes forward when needed. When pushed back, the cabinet front restores the clean exterior.
The important measurements include the cabinet opening, usable interior depth, interior width, bin height, and the space required by the slide hardware.
I also want enough room to lift the container out when changing the liner. A setup that slides smoothly but leaves no room to remove the bin is not very practical.
Pro Tip: Look inside the cabinet before choosing the hardware. Hinges, plumbing, fixed shelves, or other obstructions can reduce the space available for the sliding frame.
Sorting Drawer

A sorting drawer is designed around separating several types of waste rather than simply hiding one trash can.
I can use removable compartments for general trash, recycling, or compost, with the compartment sizes adjusted to the amount each category actually produces.
This is particularly useful when I want the sorting process to happen at the same point where food preparation and cleanup take place.
Because the containers are removable, I can take out an individual compartment instead of handling the entire system whenever one section needs emptying.
Pro Tip: Do not divide the space evenly unless your household produces equal amounts of each type of waste. Adjustable inserts make better use of the cabinet.
Also read: 12 Pot Lid Storage Ideas for 2026
Color Blend

A visible trash can does not always need to be hidden. Sometimes its appearance can simply be made quieter.
Choosing a container in a color or finish that relates to the cabinets, walls, or other kitchen surfaces helps it feel intentional rather than randomly placed.
I also pay attention to its shape. A simple, clean-lined container can be less visually distracting than an oversized model with unnecessary bulk.
This is a particularly practical option when cabinet space is already full or when I do not want to modify a rental kitchen.
Pro Tip: Match the bin to an existing finish instead of adding another strong color. The goal is to make the storage solution fit the room, not turn it into a decorative focal point.
Island Hide
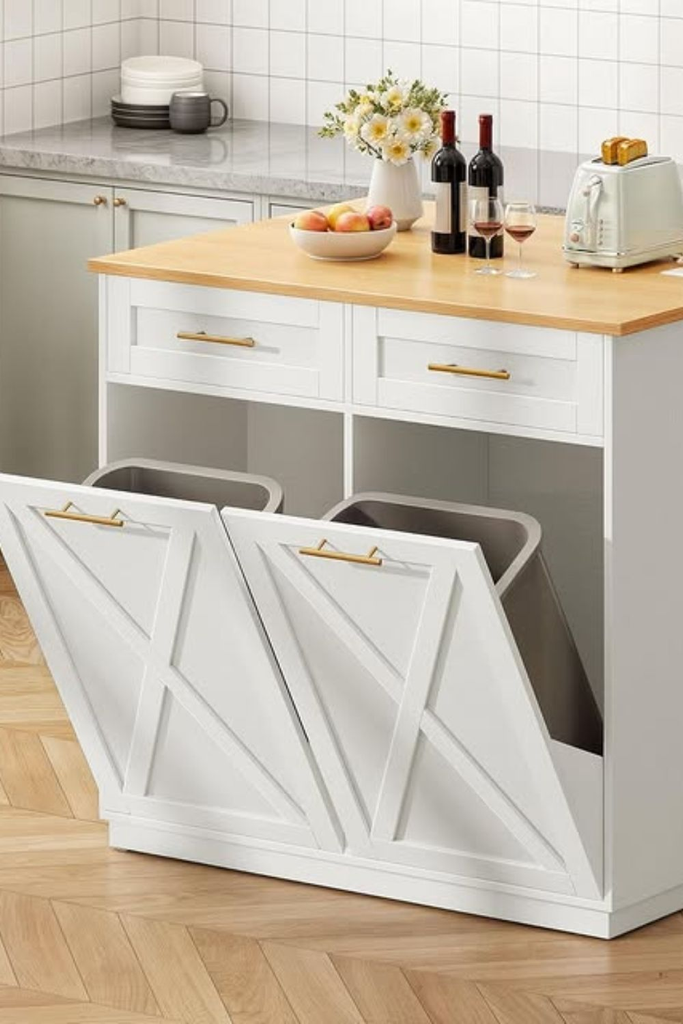
Island hide is different from Island Edge because the trash is actually built into the island cabinetry.
A tilt-out or cabinet-mounted system can place the bins behind an island panel so they are concealed when not in use.
This can be especially useful in an open-plan kitchen where the island is visible from the dining or living area. The waste containers remain close to food preparation while staying out of sight.
Before modifying an existing island, I would check for plumbing, electrical components, structural supports, and the cabinet construction.
If I were planning a new kitchen, this is something I would decide before the cabinets are ordered rather than trying to create the space afterward.
Pro Tip: Plan for the complete bin movement, not just the closed position. The door, pull-out frame, and loaded bins all need usable clearance.
Vertical Stack
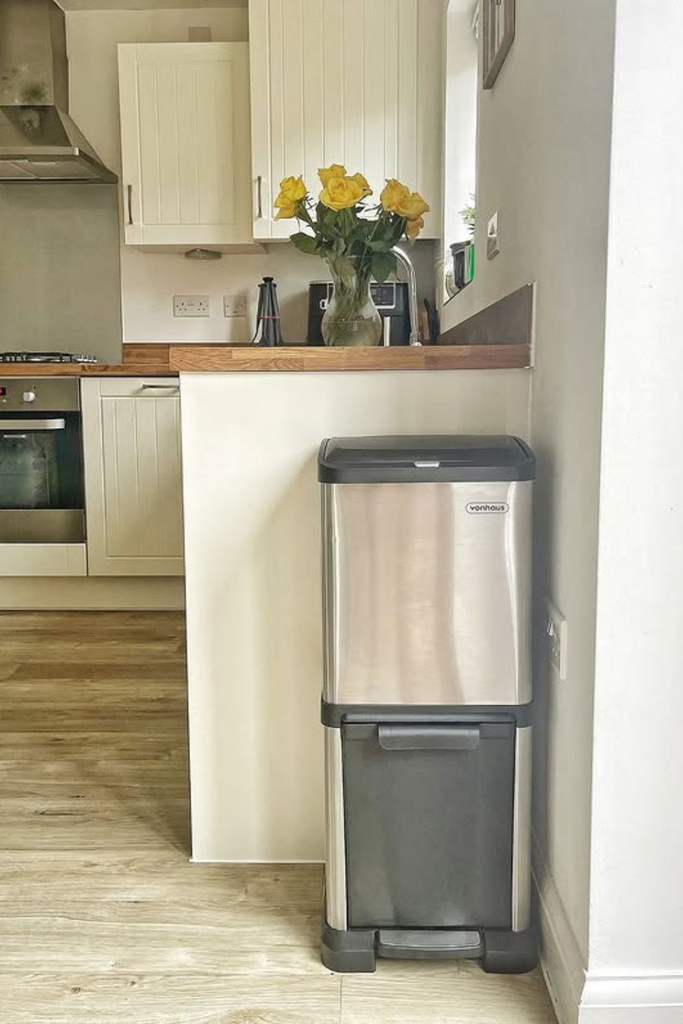
A vertical stack focuses primarily on saving floor width by arranging waste containers one above another.
This can be useful when I have a narrow section of floor but enough height for a stable storage unit. It differs from Dual Stack in purpose: here the main advantage is the tall, narrow footprint rather than a particular integrated trash-and-recycling configuration.
I would place a tall unit against a stable wall or another appropriate surface and make sure it does not interfere with nearby cabinets or walking paths.
The lid-open height deserves special attention because a container can fit when closed but become unusable when the lid is raised.
Pro Tip: Check stability before loading a tall unit. A narrow container should remain secure and easy to access when its compartments are full.
Side Pair

A side pair uses two separate matching bins positioned next to each other.
This differs from a Double Bin because the containers are independent. I can move, replace, or resize one without changing the other.
That flexibility can be useful when the amount of trash and recycling varies significantly or when I want the option to separate the containers later.
The trade-off is floor width. I need enough room for both containers while still allowing cabinet doors and nearby appliances to open.
Pro Tip: Leaving a small working gap around each bin makes liner changes and floor cleaning easier than packing the two containers tightly together.
Island Side
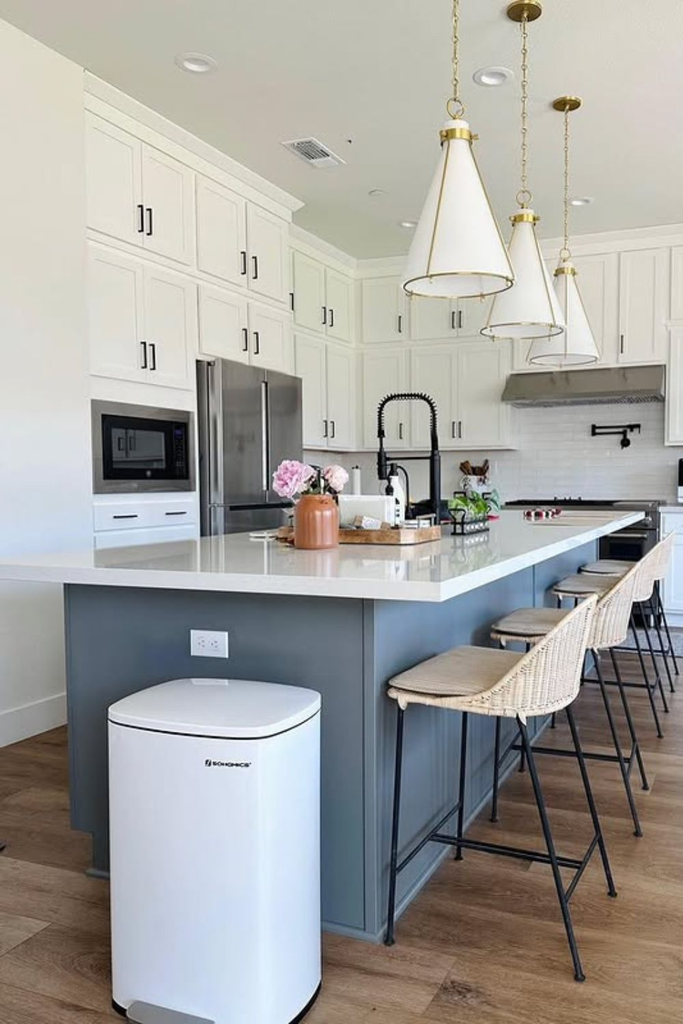
Island Side uses the space beside or behind an island when built-in storage is not available.
The bin remains freestanding, but its position takes advantage of the island’s existing footprint. This can keep it close to the cooking area without placing it directly in front of the cabinets.
I would avoid placing it where island stools need to move or where people regularly walk between the kitchen and another room.
This is a useful compromise when I want the convenience of island-adjacent trash storage without cutting into the cabinetry.
Pro Tip: Aligning the bin with the island’s edge can make a freestanding placement look much more intentional.
Prep Station

A prep station treats trash storage as part of the food-preparation zone.
The bin sits directly below or beside the counter where chopping, trimming, opening packages, and other messy tasks happen. That means I can dispose of waste without leaving the work area.
A shallow drawer above the bin can hold liners, paper towels, or other supplies needed during preparation.
This setup is particularly useful on a longer counter where one section can be dedicated to preparation and cleanup.
Pro Tip: Keep the area limited to supplies that support food preparation and cleanup. A dedicated station works best when it stays easy to reach.
Corner Pull

A corner pull turns an awkward corner cabinet into a specialized storage area using sliding or pivoting hardware.
Unlike Corner Tuck, the trash containers are concealed inside the cabinetry. Unlike Corner Bin, the system is designed to bring the containers forward for easier access.
This can be useful in an L-shaped kitchen where a corner cabinet already exists but reaching the back of it is difficult.
The cabinet dimensions and door opening determine which hardware will fit, so this is a project where careful measurement matters.
Pro Tip: Check the complete movement of the mechanism before installing the bins. The containers need to come forward far enough for liner changes and cleaning.
Corner Bin
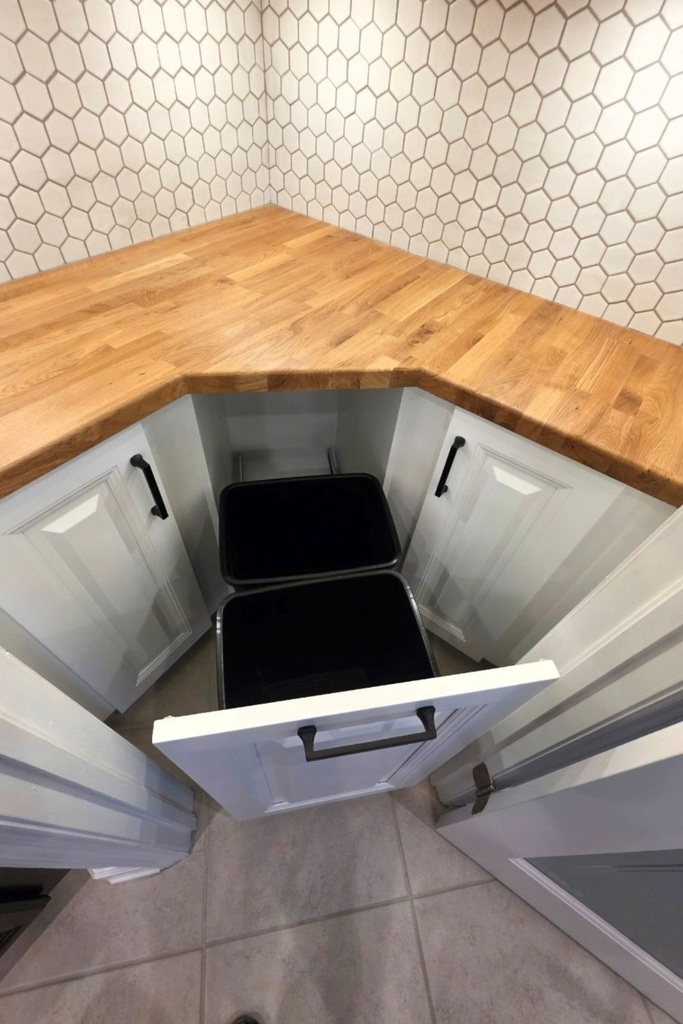
A corner bin uses an existing corner cabinet without requiring a specialized pull-out system.
This is a simpler alternative when I already have an accessible cabinet and want concealed trash storage without adding mechanical hardware.
The containers can remain inside the cabinet and be reached by opening the door. The trade-off is that access may not be as convenient as a pull-out mechanism.
I would choose lightweight, removable bins that are easy to lift out when full and protect the cabinet base from small leaks or spills.
Pro Tip: A washable tray or cabinet liner can protect the cabinet floor and make cleanup easier, especially when food waste is stored there.
Drawer Base
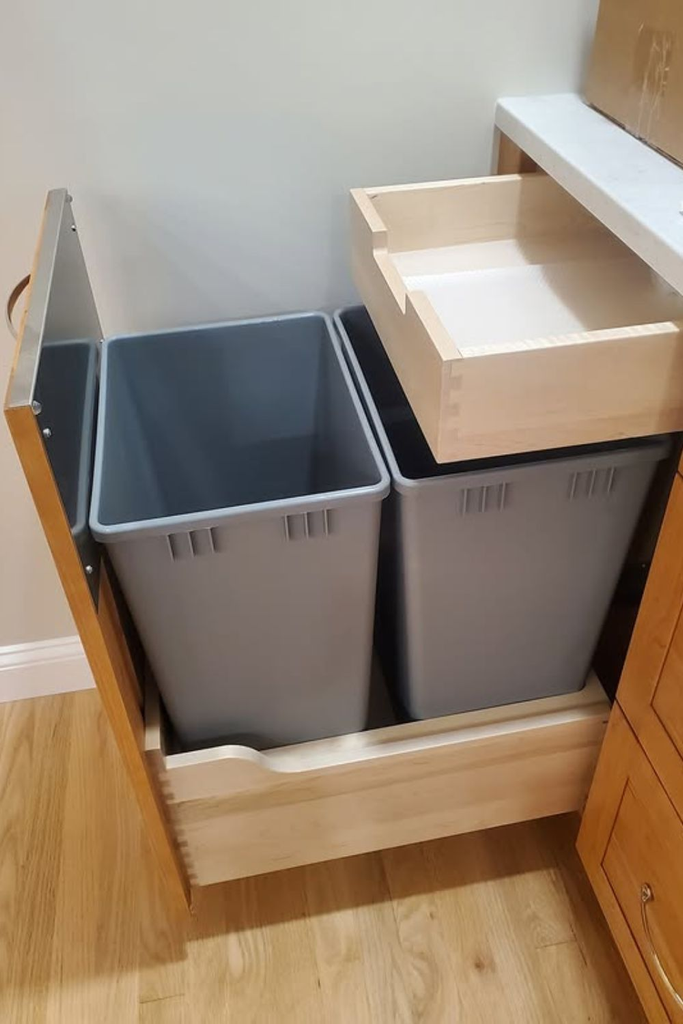
A drawer base creates a more complete cleanup station by combining pull-out trash storage with a shallow storage drawer above.
The lower section can hold one or more bins, while the upper drawer keeps liners, gloves, cleaning cloths, or small cleanup tools within reach.
I like this arrangement when I want one cabinet to handle both waste disposal and the supplies that go with it.
Because the cabinet is doing several jobs, organization matters. I would avoid overcrowding the upper drawer and keep cleaning products appropriately separated from food-preparation items.
Pro Tip: Check the cabinet’s construction and the hardware’s load rating before installation. The combined weight of the bins, waste, and supplies should be appropriate for the system.
FAQs
Where should a trash can go in a kitchen for the best workflow?
I generally look first at the sink, food-preparation counter, or working side of the island. These areas tend to be where food scraps, packaging, and used paper towels are created.
The closest possible location is not always the right one. The bin should be accessible without blocking cabinet doors, appliances, seating, or a main walking path.
For a built-in solution, a pull-out cabinet near the preparation area can be convenient. For a rental or finished kitchen, a slim freestanding bin may achieve the same workflow benefit without installation.
What is the best trash can solution for a small kitchen?
For a small kitchen, I would start with solutions that protect floor width: slim bins, cabinet pull-outs, tilt-out storage, vertical systems, or a carefully positioned corner container.
The best choice depends on what space is actually available. A slim freestanding bin may be easier for a renter, while an existing base cabinet may be better suited to a concealed pull-out.
Measure the available space first, including lid clearance and the room needed to remove the liner. A smaller footprint is only helpful if the container remains practical to use.
Can I put a trash can under the kitchen sink?
A trash can can work under a sink in some kitchens, but I would check the cabinet carefully before choosing this location.
The sink plumbing, disposal equipment, shelves, and cabinet supports can reduce the usable space. I also want enough room to remove the bin and change its liner without hitting the plumbing.
A removable container or suitable pull-out frame can make access easier. I would also consider using a washable tray or liner to protect the cabinet base from small leaks.
What size trash can works best in a small kitchen?
There is no single size that works for every small kitchen. I choose based on the available footprint, household waste volume, and how frequently the bin can realistically be emptied.
The container needs to fit the space without blocking movement, but making it too small can mean constantly changing liners.
I measure the available width, depth, and height first, then check the lid-open clearance. For a narrow gap, a taller rectangular bin may use the space more efficiently than a short, wide container.
Is a pull-out kitchen trash can worth it?
For me, a pull-out system is worth considering when I want the bin concealed and already have a suitable base cabinet.
It provides easy access while cooking and keeps the floor clear when the cabinet is closed. The trade-off is installation effort, usable cabinet space, and the need for hardware that can support a loaded bin.
If the cabinet is already crowded or the kitchen is rented, a freestanding or temporary solution may be more practical.
Where should I put trash and recycling in a small kitchen?
When width is limited, I consider a stacked or integrated dual-compartment system first because both categories can occupy a compact footprint.
If I have more horizontal space, two separate matching bins can be easier to customize and replace independently. A side-by-side double bin provides another option when I want both compartments together in one unit.
Whichever arrangement I choose, I keep the containers accessible from the preparation area while making sure they do not interfere with walking paths, cabinet doors, or appliance access.
Read this next: 21 Cutting Board Storage Ideas For 2026
Conclusion
Good kitchen trash storage is not about hiding the bin at all costs. For me, it is about putting it where the kitchen already works well while keeping the floor clear and everyday cleanup convenient.
A homeowner planning a remodel might benefit from a built-in cabinet or island system, while a renter may be better served by a slim freestanding bin, cabinet hook, wall-mounted prep container, or carefully chosen corner location.
There are also several ways to handle trash and recycling without scattering containers around the kitchen. Stacked, dual-compartment, and separate side-by-side systems each have different space requirements.
Before settling on a solution, I would measure the actual usable space, think through my normal cooking route, check lid and door clearance, and make sure I can remove a full liner easily. The right setup is the one that fits the kitchen’s layout and the way the household actually uses it.